Before going on a hunt, you can eat Dango that’ll give you various skills and buffs that’ll make the hunt a bit easier in Monster Hunter Rise: Sunbreak. You can choose three Dango flavors when you eat, but some Dango favor different weapons. This page will show you some of the best combinations to take depending on your weapon. For the most part, these are universal, but some other weapons like the ranged weapons will have different Dango’s.
This is an ideal damage combination. You could add a Spud-Luck or Blastslash instead of Shifter.
Best Dango’s for Damage
This set of Dango’s will offer you the highest amount of damage increase. As it focuses on purely damage, you may only want to use this set if you’re comfortable with the fight.
| Icon | Dango | Activation Chance | Effects |
|---|---|---|---|
 |
Mint-iature | 70% | Dango Booster: Temporarily increases attack and defense after consumption, once. Grants 9 attack and 15 defense for 10 minutes at the start of the quest. The Level 4 effect increases this to 15 attack and 30 defense while using Hopping Skewers. |
 |
Invigorating | 50% | Dango Fighter: Reduces stamina depletion when evading, blocking, or doing certain other actions. |
 |
Spud-luck | 90% | Dango Weakener: Large monsters encountered on quests have an increased chance of being weaker than normal. At level 4, it changes to “Far more likely”. |
 |
Easy-Breezy | 50% | Dango Shifter: Performing a Switch Skill Swap slightly recovers health. This skill is on here for when it’s paired with the armor skill Dereliction. Dereliction drains your health to increase your attack when using a Switch Skill Swap. This helps nullify the cons of Dereliction. At level 4, it reduces initial stamina consumption too. |
 |
Blastslash | 70% | Dango Polisher: Speeds up weapon sharpening. Dango Pyro: Upgrades Large Barrel Bombs to Mega Barrel Bombs. Quicker weapon sharpening means more time to fight which equals quicker hunts. Having more Mega Barrel Bombs to place when a monster is down or asleep equals more damage. |
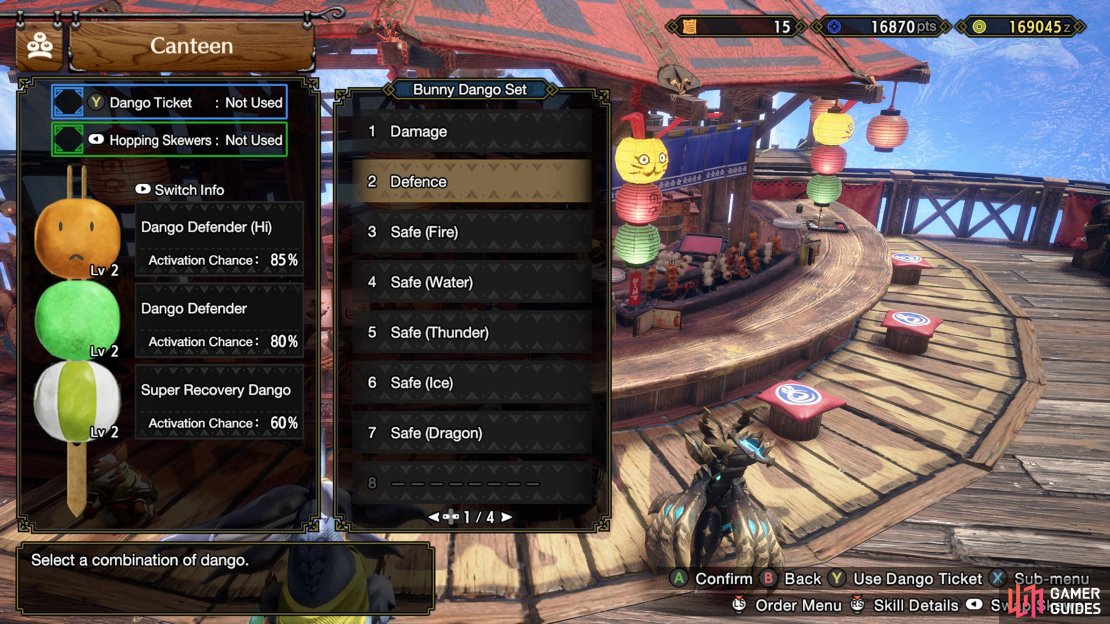
This is an ideal defensive combination. You could add an Easy-Breezy instead of Hide-and-Seek.
Best Dango’s for Defense
This set of Dango’s will offer you the highest amount of defense. This is ideally used on tougher monsters like the Afflicted or monsters with attacks that you’re not familiar with.
| Icon | Dango | Activation Chance | Effects |
|---|---|---|---|
 |
Super Bestnut | 85% | Dango Defender (Hi) High possibility that damage taken will be decreased. The Level 4 effect greatly decreases the damage taken while using Hopping Skewers. |
 |
Self-Kelp | 80% | Dango Defender: Whenever you take a set amount of damage, damage from the next hit is slightly reduced. The Level 4 effect greatly decreases the damage taken while using Hopping Skewers. |
 |
Hide-and-Seek | 60% | Super Recovery Dango: Gradually recovers health over time when discovered by a large monster. This is a great skill to have as it’ll slowly regenerate your health. What makes this great is you can leave it to heal chip damage which saves you wasting potions on them which can put yourself in a compromising position when you use said potions. |
 |
Easy-Breezy | 50% | Dango Shifter: Performing a Switch Skill Swap slightly recovers health. Another nice way to heal chip damage. |
Best Dango’s for Hammer, Hunting Horn, and Sword and Shield (Shield Build)
The blunt weapons can use the damage Dango combination mentioned above, or you could make use of the Dizzybloom Dango to take advantage of their stunning capabilities. The Sword and Shield is only put here for the raw shield builds.
| Icon | Dango | Activation Chance | Effects |
|---|---|---|---|
 |
Dizzybloom | 50% | Dango Slugger: Makes it easier to stun monsters. |
 |
Mint-iature | 70% | Dango Booster: Temporarily increases attack and defense after consumption, once. Grants 9 attack and 15 defense for 10 minutes at the start of the quest. The Level 4 effect increases this to 15 attack and 30 defense while using Hopping Skewers. |
 |
Invigorating | 50% | Dango Fighter: Reduces stamina depletion when evading, blocking, or doing certain other actions. |
 |
Spud-luck | 90% | Dango Weakener: Large monsters encountered on quests have an increased chance of being weaker than normal. At level 4, it changes to “Far more likely”. |
 |
Easy-Breezy | 50% | Dango Shifter: Performing a Switch Skill Swap slightly recovers health. This skill is on here for when it’s paired with the armor skill Dereliction. Dereliction drains your health to increase your attack when using a Switch Skill Swap. This helps nullify the cons of Dereliction. At level 4, it reduces initial stamina consumption too. |
 |
Blastslash | 70% | Dango Polisher: Speeds up weapon sharpening. Dango Pyro: Upgrades Large Barrel Bombs to Mega Barrel Bombs. Quicker weapon sharpening means more time to fight which equals quicker hunts. Having more Mega Barrel Bombs to place when a monster is down or asleep equals more damage. |
Best Dango Combinations for Gunlance
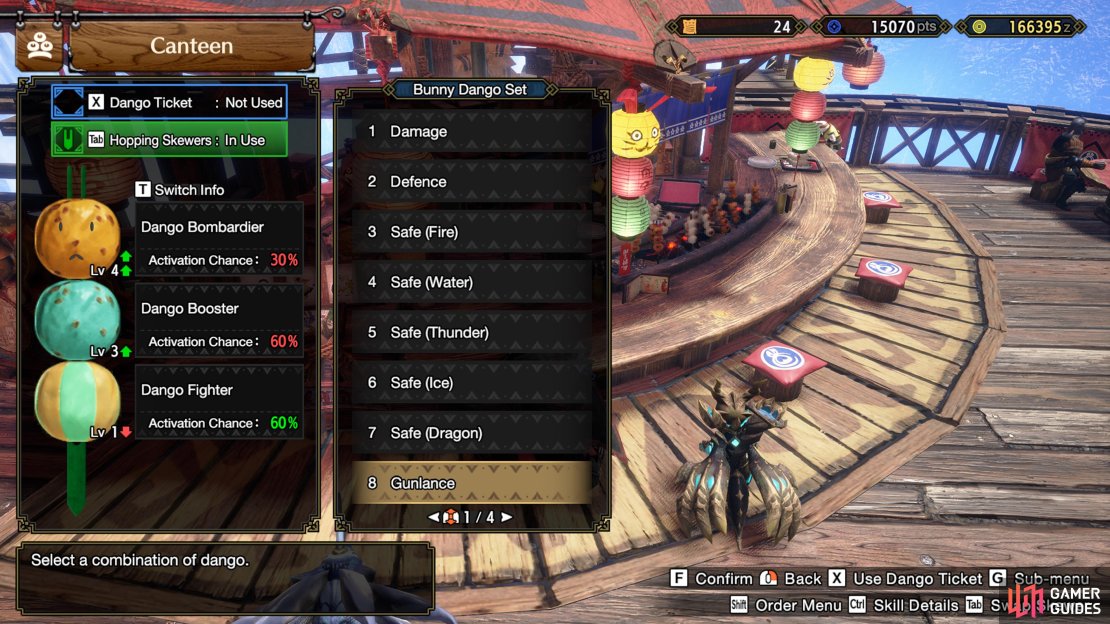
The Fruitflash Dango is fantastic for a shelling Gunlance playstyle.
The Gunlance is put on its own as it can make use of some other Dango’ that a normal melee build won’t get much use of other than specific builds. If you’re playing a predominant poke style build, you can stick with the normal damage combination. If you’re using a wide-shelling type style, use this combination.
| Icon | Dango | Activation Chance | Effects |
|---|---|---|---|
 |
Fruitflash | 50% | Dango Bombardier: Increases damage to Sticky Ammo and gunlance shells. A must-have for Gunlance shelling builds, this will increase the damage to your shells by approximately 10% when using hopping skewers for the level 4 effect. |
 |
Mint-iature | 70% | Dango Booster: Temporarily increases attack and defense after consumption, once. Grants 9 attack and 15 defense for 10 minutes at the start of the quest. The Level 4 effect increases this to 15 attack and 30 defense while using Hopping Skewers. |
 |
Spud-luck | 90% | Dango Weakener: Large monsters encountered on quests have an increased chance of being weaker than normal. At level 4, it changes to “Far more likely”. |
 |
Easy-Breezy | 50% | Dango Shifter: Performing a Switch Skill Swap slightly recovers health. This skill is on here for when it’s paired with the armor skill Dereliction. Dereliction drains your health to increase your attack when using a Switch Skill Swap. This helps nullify the cons of Dereliction. At level 4, it reduces initial stamina consumption too. |
Best Dango Combinations for Dual Swords
Dual_Swords are reliant on their stamina, this is where the Invigorating, and Pinea-Full Dango’s shine.
As Dual Swords are a lot more Stamina reliant these are also put on their own. Ideally you should choose Mint-iature, one of Pinea-full or Invigorating, and any of Spud-Luck, Blastslash, or Easy-Breezy depending on your build.
| Icon | Dango | Activation Chance | Effects |
|---|---|---|---|
 |
Mint-iature | 70% | Dango Booster: Temporarily increases attack and defense after consumption, once. Grants 9 attack and 15 defense for 10 minutes at the start of the quest. The Level 4 effect increases this to 15 attack and 30 defense while using Hopping Skewers. |
 |
Pinea-full | 80% | Dango Glutton: Reduces stamina consumption for a certain period after eating. This is great at level 4 with the hopping skewers as it’ll stop your stamina cap from reducing too. |
 |
Invigorating | 50% | Dango Fighter: Reduces stamina depletion when evading, blocking, or doing certain other actions. |
 |
Spud-luck | 90% | Dango Weakener: Large monsters encountered on quests have an increased chance of being weaker than normal. At level 4, it changes to “Far more likely”. |
 |
Easy-Breezy | 50% | Dango Shifter: Performing a Switch Skill Swap slightly recovers health. This skill is on here for when it’s paired with the armor skill Dereliction. Dereliction drains your health to increase your attack when using a Switch Skill Swap. This helps nullify the cons of Dereliction. At level 4, it reduces initial stamina consumption too. |
 |
Blastslash | 70% | Dango Polisher: Speeds up weapon sharpening. Dango Pyro: Upgrades Large Barrel Bombs to Mega Barrel Bombs. Quicker weapon sharpening means more time to fight which equals quicker hunts. Having more Mega Barrel Bombs to place when a monster is down or asleep equals more damage. |
Best Dango Combinations for Ranged
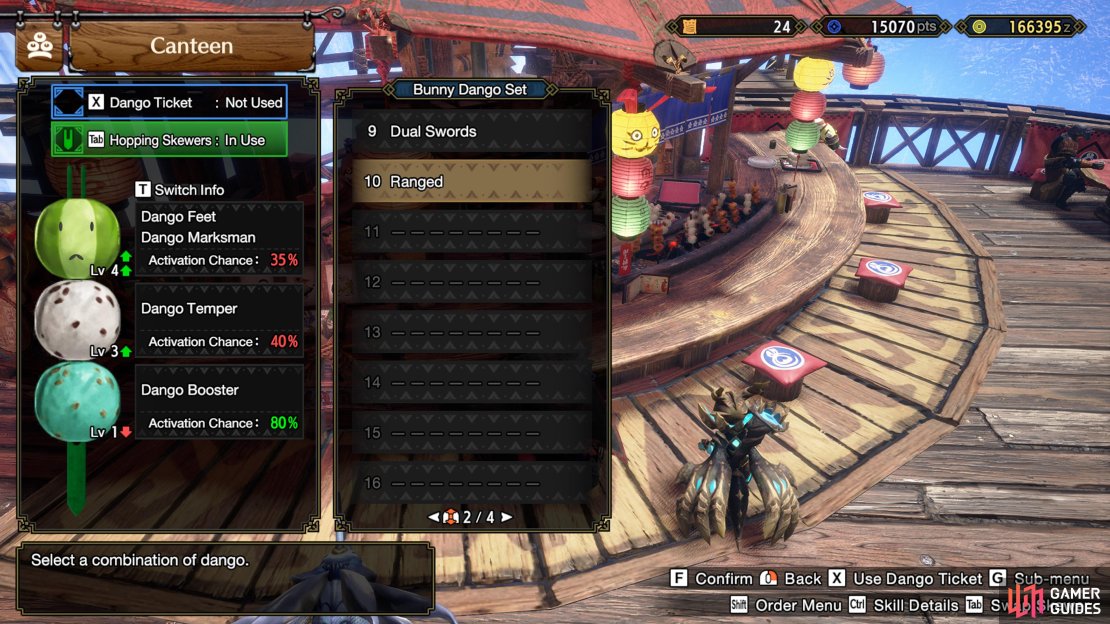
The ranged sets change depending on build, and type of weapon.
This varies slightly depending on what ranged weapon you’re using.
| Icon | Dango | Activation Chance | Effects |
|---|---|---|---|
 |
Mint-iature | 70% | Dango Booster: Temporarily increases attack and defense after consumption, once. Grants 9 attack and 15 defense for 10 minutes at the start of the quest. The Level 4 effect increases this to 15 attack and 30 defense while using Hopping Skewers. |
 |
Centering | 55% | Dango Feet: Prevents you from getting knocked on your butt. Dango Marksman: Increases the power of shots and arrows. Great for all the ranged weapons when it procs. The knockdown prevention is nice too. |
 |
Beansplosion | 50% | Dango Temper Increases ammo damage, but also increases deviation. This is best used with the Bowguns. |
 |
Fruitflash | 50% | Dango Bombardier: Increases damage of Sticky Ammo and gunlance shells. This is only worth using if you’re using a sticky ammo build. |
 |
Pinea-full | 80% | Dango Glutton: Reduces stamina consumption for a certain period after eating. This is great at level 4 with the hopping skewers as it’ll stop your stamina cap from reducing too. Decent for all ranged, although better for Bow. |
 |
Invigorating | 50% | Dango Fighter: Reduces stamina depletion when evading, blocking, or doing certain other actions. Decent for all ranged, although better for Bow. |
 |
Spud-luck | 90% | Dango Weakener: Large monsters encountered on quests have an increased chance of being weaker than normal. At level 4, it changes to “Far more likely”. |
 |
Easy-Breezy | 50% | Dango Shifter: Performing a Switch Skill Swap slightly recovers health. This skill is on here for when it’s paired with the armor skill Dereliction. Dereliction drains your health to increase your attack when using a Switch Skill Swap. This helps nullify the cons of Dereliction. At level 4, it reduces initial stamina consumption too. |
Best Safe Dango’s for Multiplayer
This set is more for newer players who don’t want to cause the team to wipe due to carting. Berry Safe is a daily special. If it isn’t available, choose Balancing instead. Make sure to use a resistance Dango as one of the three choices.
Make sure you change the resistance Dango to match the monster you’re fighting.
| Icon | Dango | Activation Chance | Effects |
|---|---|---|---|
 |
Berry Safe | 85% | Dango Insurance: Prevents your group from being penalized the first time a member faints. This will nullify your death counting towards the three cart limit for failing the quest. This only works once though. |
 |
Magnaboar | 60% | Dango Moxie: Prevents fainting one time when damage taken exceeds your remaining health. This allows you to survive one attack that would normally cart you. |
 |
Balancing | 55% | Dango Feet: Prevents you from getting knocked on your butt. This is helpful as most newer players will get knocked down, and get hit by a follow-up attack that will cart you. |
Resistance Dango’s
Choose the Resistance Dango that the monster mainly uses for its attacks. For example, Thunder for Zinogre, and Fire for Rathalos.
| Icon | Dango | Activation Chance | Effects |
|---|---|---|---|
 |
Dragonsbane | 90% | Dango Dragon Res (Hi): Significantly increases dragon resistance. Dragon resistance + 10, +20 at Level 4. |
 |
Lava-hot Egg | 90% | Dango Fire Res (Hi): Significantly increases fire resistance. Fire resistance + 10, +20 at Level 4. |
 |
Spicejolt | 90% | Dango Thunder Res (Hi): Significantly increases thunder resistance. Thunder resistance + 10, +20 at Level 4. |
 |
Sub-zero | 90% | Dango Ice Res (Hi): Significantly increases ice resistance. Ice resistance + 10, +20 at Level 4. |
 |
Waterfall | 90% | Dango Water Res (Hi): Significantly increases water resistance. Water resistance + 10, +20 at Level 4. |
Best Gathering Dango’s
This set should be used when going to expeditions for gathering purposes. The three below are on a rotation as a Daily Special. Always choose them if they’re available, including their lower level variant.
| Icon | Dango | Activation Chance | Effects |
|---|---|---|---|
 |
Raisin d’être | 90% | Dango Harvester: Reduces the time between gathering point respawns. This can reduce the time the gathering points respawn by approximately 20%. |
 |
Very Hap-peanut | 70% | Dango Miracle Worker: Often increases the number of reward items received at the end of a quest. |
 |
The Kamura | 90% | Dango Calculator: Increases the number of Kamura Points you receive at the end of a quest. |
Best Hunt Expedition Dango’s
Used purely for hunting multiple monsters in Expeditions.
| Icon | Dango | Activation Chance | Effects |
|---|---|---|---|
 |
Triple Rose | 80% | Dango Carver (Hi): Often increases the number of times you can carve. Being able to carve an extra one or two times can make farming a lot less tedious. |
 |
Very Hap-peanut | 70% | Dango Miracle Worker: Often increases the number of reward items received at the end of a quest. Getting more materials also makes farming a lot less tedious. |
 |
Chirp Chirp | 80% | Dango Bird Caller: Makes Spiribirds more likely to approach you. This can speed up your hunts by getting Spiribug buffs. |



No Comments