Primary Objectives
First Courtyard
Get info from the MCB Leader, who also has the following items for sale:
o Special Upgrade for Tranq. Rifle/Crossbow = [TARGET LEADING SYSTEM] (1500 C)
o Grenade Pack = [1 GAS GRENADE + 1 EMP GRENADE] (400 C)
o Tranq Rifle Ammo x5 (250 C)
o Shotgun Ammo x8 (280 C)
o Crossbow Ammo x5 (175 C)
The target leading system is very useful if you’re into using the tranquilizerrifle (or crossbow), and the grenade pack (especially the EMP grenade) might just come in handy soon, so stock up. There’s a door nearby the burning barrel you can go through.
(There’s a door on the other side of the area, too, but you can’t go through it. I always want to go through doors that one cannot. That might just be me, though. It probably is.)
Head through the building until a cutscene rolls. They’re here; the mercs you were looking for [750 XP]. You can find [55 CREDITS] on one of the boxes here. Continue and head outside; wait for the mercs to finish their conversation first.
Highland Park Courtyard
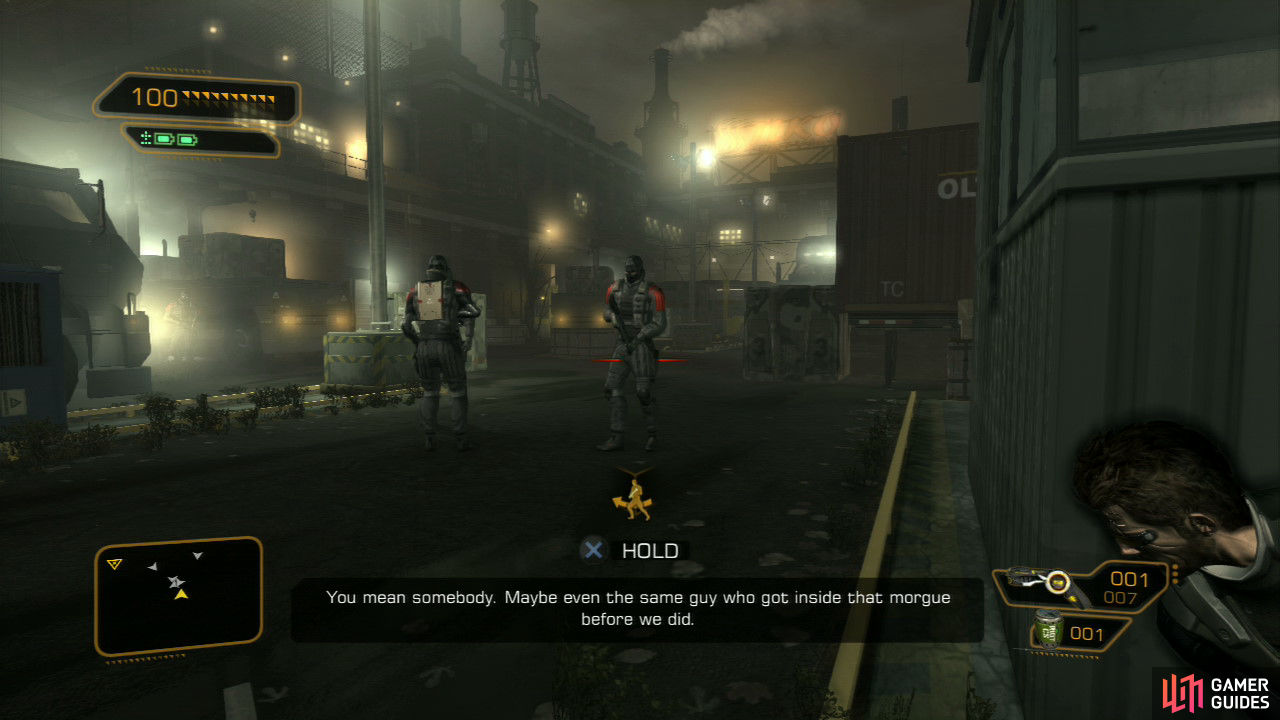
Always remember to be wary of guards checing behind them!
Sneak around the area by hugging the left wall, hiding behind the large container and taking out the nearby guard from behind when all other guards are looking away. This requires precise timing. You can find a [STUN GUN DART] and [100 CREDITS] inside this container. Move to the truck on the other side of the field and hide against its back. Take down the merc as he turns away - once again, be quick. There is a pack of [COMBAT RIFLE AMMO x5] on your left hand, but you’ll need to move the two heavy crates first. If you can’t, don’t worry - this is only a sneak route. Head around the corner, take out the guard, and you’ll still be able to access the ammo.
There’s also a [CONCUSSION GRENADE] and [COMBAT AMMO x4] lying on a nearby crate. Head behind the large containers to find a closed off area (level 3 security) [75 XP] . If you got the code from Zeke, well, you get the code anyway since I’m writing it down: 7984. You can find [SHOTGUN SHELLS x3] here, along with a [FRAG GRENADE] and a [SHOTGUN] . The ladder leads to the roof of the building; we’ll get there in a minute. The nearby door around the corner gets you inside the same building, just by ground level. These essentially indicate path #1 & #2.
Backtrack to your starting position (the very first building) and move under- neath the truck (inside which you can find a [STUN GUN] and [STUN GUN DART] if you’re interested). Hide behind the crates and take out the nearby guard, dragging his body into the shadows. Hug the wall and continue until you’ll have to move a container to pass. Just beyond these containers is a floor with electric current running through the watery surface.
First check out the nearby cabin around the corner for a [POCKET SECRETARY] , [75 CREDITS] , [COMBAT RIFLE AMMO x3] , and a [LASER TARGETTING SYSTEM] . It’s not a bad idea to take out the nearby guard, as well as the other guard patrolling the container area nearby; both are relatively easy targets.
The boxes can be used to build a moving bridge over the area with electric current blocking the path, although it’s a rather cumbersome method and you also need to be careful you don’t push yourself off the crates. Use the breaker box halfway through to turn the current off. Your reward are [PAINKILLERS] and [200 CREDITS] . Also look for [REVOLVER AMMO x3] , and [COMBAT RIFLE AMMO x5] on a crate in the area with the large metal, military crates. It is in this corner where you can find path #3 into the next area.
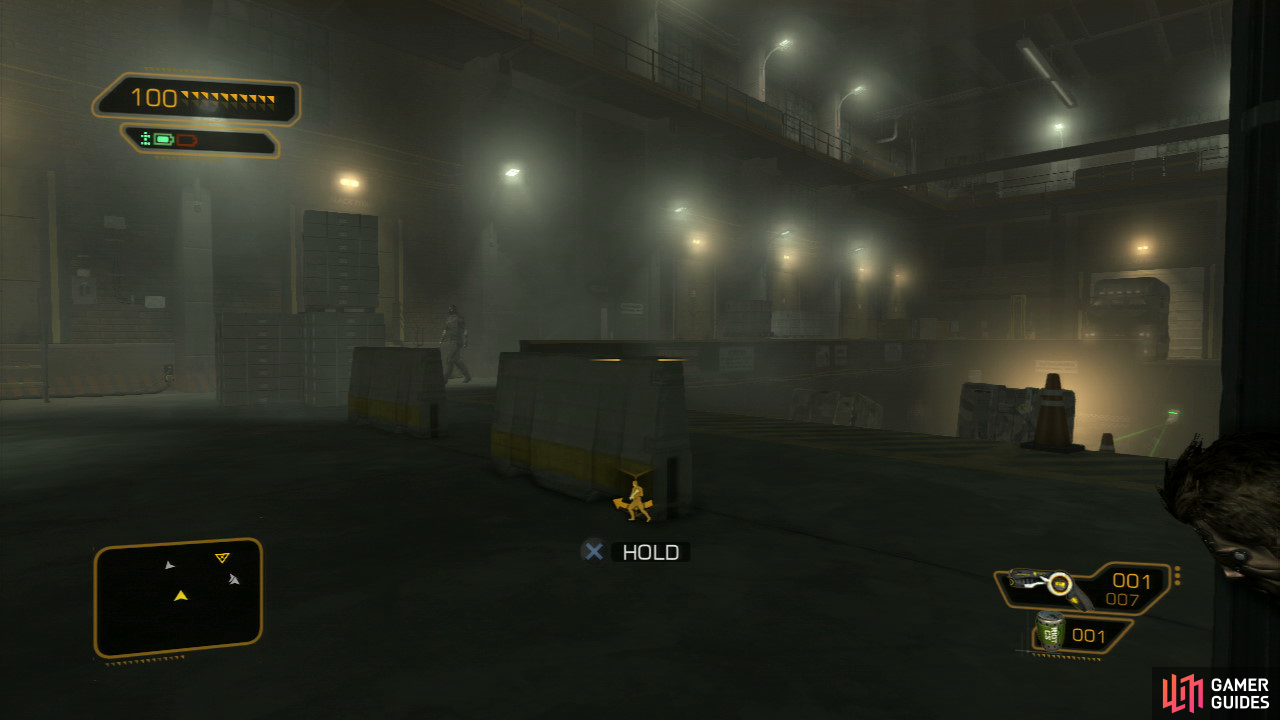
Ground Level Facility
Let’s go over all possible paths for the next area.
Path #1: Head back to the ladder (or the door on the ground level, although these paths soon merge anyway). Once you’re on the roof, make your way through the hall and go up the small steps; you’re now at an overview area and in the far distance you should be able to spot a sniper. Check the crate on your right for [50 CREDITS] and continue. The door leads to the main area you’re trying to infiltrate. It helps significantly to take out this sniper by carefully crouching towards him. This essentially puts you in the same position where path #2 ends (except in path #2, you’ll have taken out more guards, making things easier from here on out).
In any case, there are still several other paths that combine well with path #1. You can, first of all, use this sniping position to take out various guards, although it’s more rewarding to take them out with melee takedowns.
You’ll have crouched past a vent system on your way to the sniper. Heading inside nets you [TRAVELER 100XP] . Better yet, this shortcut immediately connects to your destination if you head all the way down. The vent shaft on the intermediate level connects to a storage depot on the ground floor with [REVOLVER AMMO x3] and [SNIPER RIFLE AMMO x3] inside. Your destination - an elevator that brings you to the lower levels of the facility - is on the lowest floor of the current area.
Feel free to continue, if you wish, but there are several things to explore by trying the other paths.
Path #2: Going through the door leads you into a garage-like environment. The stairs connect to path #1, but you can find [COMBAT RIFLE AMMO x3] on a crate here. Don’t go upstairs - instead head through the door and explore this office for a [CYBERBOOST PROENERGY BAR] , [TRANQ DARTS x2] and a level 3 PC for which you should also have the login: spaxxor/neuralhub. It only grants access to doors/cameras, however. It’s still worth your while to deactivate the cameras though - simply click on the little screens to do this; a red indicator tells you you’ve shut them down.
Just outside the office, wait for the nearby guard to turn his back towards you and take him down. The laser beams on your right can be hacked (or you can use the code 7984). This merges path #2 and #3.
Alternatively, you can just head left and sneak down; this is where your destination is. Of course, you’re free to take down the remaining guards too. This allows you to do some exploring that is covered mainly in path #3, and some of it in #1. The long ladder also leads to the elevator
Path #3: Move the metal crates and read the Ebook (IPC Procedures and You). You can also find [SNIPER RIFLE AMMO x2] and [REVOLVER AMMO x1] on a crate here.
A laser system has been set up to your left, although you can either use the code 7984 (which, come to think of it, is probably a reference to George Orwell’s 1984 too - seven looks quite a lot like the number 1) or hack it (level 2). In either case, be careful as there is a guard on patrol who will look this direction every now and then.
You can also continue onward without deactivating the laser system and overhear a conversation between two mercs. When they split up, wait for the other to approach you as you hide behind the crates, then take him down - the camera can’t spot this - and hide his body.
You can find [REVOLVER AMMO x4] on one of the crates to the left, just behind the fence. As you proceed, do take notice of the sniper patrolling on the catwalk high above. If you have a long-range weapon (tranq/sniper rifle), it’s a good idea to take him out from here so he can’t spot you. Alternatively you can hug the wall to the right, sneak past the camera and climb the two ladders (but only go up when the guard is walking away from you. Swiftly take him out. This is where paths #1 and #2 merge. You can find [125 CREDITS] at the far end of the catwalk (past the ladder you just climbed).
This is also an excellent position to take down two of the guards below although you can also head back down and take them out for maximum experience.
There’s also a guard in the cabin below, and opening the door will arouse him. You can either take him down immediately as he goes outside, or alternatively sneak inside by one of the windows. Inside this cabin you can find a [POCKET SECRETARY] with a computer login (WKS0012/NTLSEC59), a [PEPS ENERGY PACK] , [AMMO CAPACITY UPGRADE] and [35 CREDITS] . The Level 2 PC can be hacked [GREY HAT 50XP] or unlocked with the login you just found and contains background info.
The long ladder nearby (after taking down the guard(s)) also leads to your destination.
Whichever path, or combination of paths you choose, ride the elevator down; just be wary of the camera (if active). As you ride down, the conspiracy begins to unravel [2500 XP], [GHOST 500XP] , [SMOOTH OPERATOR 250XP] .
As long as the sniper is moving between positions you’ve actually got a clear path to just stroll down the main walkway.
F.E.M.A Facility
Hide behind the nearby crates and grab the [EMP GRENADE] and [COMBAT RIFLE AMMO x2] . Unfortunately for you, one of the mercs activates the Security Bot (a Box Guard). Ah well, just look at the bright side; in the courtyard there were dozens of these bots; all of them inactive! Just imagine if you’d have to fight all those..
While a good toss of the EMP grenade instantly toasts the bot, it also alarms the nearby guards. You might want to take a slightly more..stealthier approach. There are several options here:
Path #1: Head left and grab the [COMBAT RIFLE AMMO x3] from the crate. In order to proceed, grab one of the small wooden crates nearby and place it at the iron bars to hop over. Sneak through this area and grab the [REVOLVER AMMO x3] and [SNIPER RIFLE AMMO x2] from one of the crates. There is also a [ROCKET LAUNCHER] and a [ROCKET] here.. It’s up to you whether or not to do something with this obvious wink.
Sneak out of this area and, when no one’s looking, grab the [COMBATRIFLE AMMO x5] from the crate and head through the door nearby.
Two guards are conversing just around the corner. Grab the [10MM AMMO x2] and wait for them to finish, then take out the single guard.
Path #2: Head right and sneak to the door on the far right, which leads to a staircase monitored by cameras. Sneak past them to reach the upper level (which can alternatively be reached by sneaking up by the other stairwell). Three guards patrol these catwalks, each of whom patrols their own little catwalk. The guard in the middle is easiest to take down first. Sneak towards him and stay out of sight - hug the right wall of the catwalk and hide behind the first block of steel. Wait for him to turn his back towards you and swiftly go in for the takedown and move his body out of sight.
The second guard we’ll take down is the one on the right. Backtrack the way you came and approach the catwalk he’s patrolling. Hide behind the steel bars and head in for the takedown after he starts moving away from you and he first has looked behind him once. By then the other guard won’t be looking in your direction any longer, and the merc you’re about to take down will bend over the catwalk, giving you some time to go in for the takedown. Quickly hide his body on the catwalk he was facing - the other guard normally won’t look there. With these two out of the way, the last guard should be a breeze. It’s still a good idea to stay crouched with the bot downstairs.
Alternatively, if you have the “Move Heavy Objects” augmentation, you can move the two large crates on the right side of the area to sneak past all three guards.
You can now snipe/tranquilize the remaining guards below (or head back down to take them out, which is trickier). Better yet, accurately hurling an EMP grenade at the bot grants you [HUNK OF JUNK 250XP] , and if there are no mercs around when it explodes, the alarm doesn’t sound either. Alternatively, you can play with the rocket launcher below, saving you an EMP grenade. The only thing of interest on the lower level that currently remains is an [AMMUNITION BOX] on one of the crates, which you’re free to loot after exploring the upper level first.
Look for [SNIPER RIFLE AMMO] and [COMBAT RIFLE AMMO x2] in the far left corner, then head inside the control cabin. Look around for a [NUKE VIRUS SOFTWARE] , then proceed to the next room in which you can find [COMBAT RIFLE AMMO x5] . Head downstairs and you’ll reach the point where paths #1 and #2 merge. There’s a ladder leading down to a hallway with a patrolling guard here; the ladder is on your immediate right.
You can now either continue by the lower level (path #1) or upper level (#2).
Path #1: Take down the guard if you hadn’t already done so and head through the door around the corner. The office to your left contains a [TRANQ DART], [125 CREDIT CHIPS] and a [POCKET SECRETARY] with a computer login: wks0010/usprotkt. You have the access codes to both level 2 computers; the one in the corner contains background info, the other PC controls the cameras; it’s a good idea to shut these down in advance.
The next area is under heavy surveillance by various mercs and a turret, but you can uncover a large vent system to your immediate left by removing the cardboard boxes. We can certainly make good use out of the vent system, which leads to various rooms:
Room A3 holds [COMBAT RIFLE AMMO x4] , Room C3 houses [175 CREDITS], you can find a [CYBERBOOST PROENERGY BAR] in room C1, and C2 holds an Ebook (REX-84 Operational Field Notes). Beware of the camera above the C3 vent (which you should’ve shut down). There’s also a camera between C3 and A3 which has quite a wide range, so be careful.
Sneaking past the guard(s) is tricky, but it’s a good idea to keep in mind that your destination is on the far left side. There are other rooms to explore though, which contain the following things: {B3} contains an Ebook (A Coalition For Liberty), {B2} contains a [POCKET SECRETARY] with a computer login (lbarrett/BULLSKULL), {B1} contains [COMBAT RIFLE AMMO x4] , {A1} contains a [POCKET SECRETARY] with background info, and {A2} contains [REVOLVER AMMO x3] . A decent strategy to take down the guard is to hide in one of the rooms he passes by, make some noise by running around, hiding behind the door and *immediately take him down as he enters the room, without him being able to make a sound.
Make your way over to left and go through the door. Depending on whether you entered through middle door or not you’ll first need to deactivate the laser beams; code 7984 (or remove the large crate from the vent, although you can also get the [EXPLORER 200XP] by going through it via the other end after deactivating the laser beams.
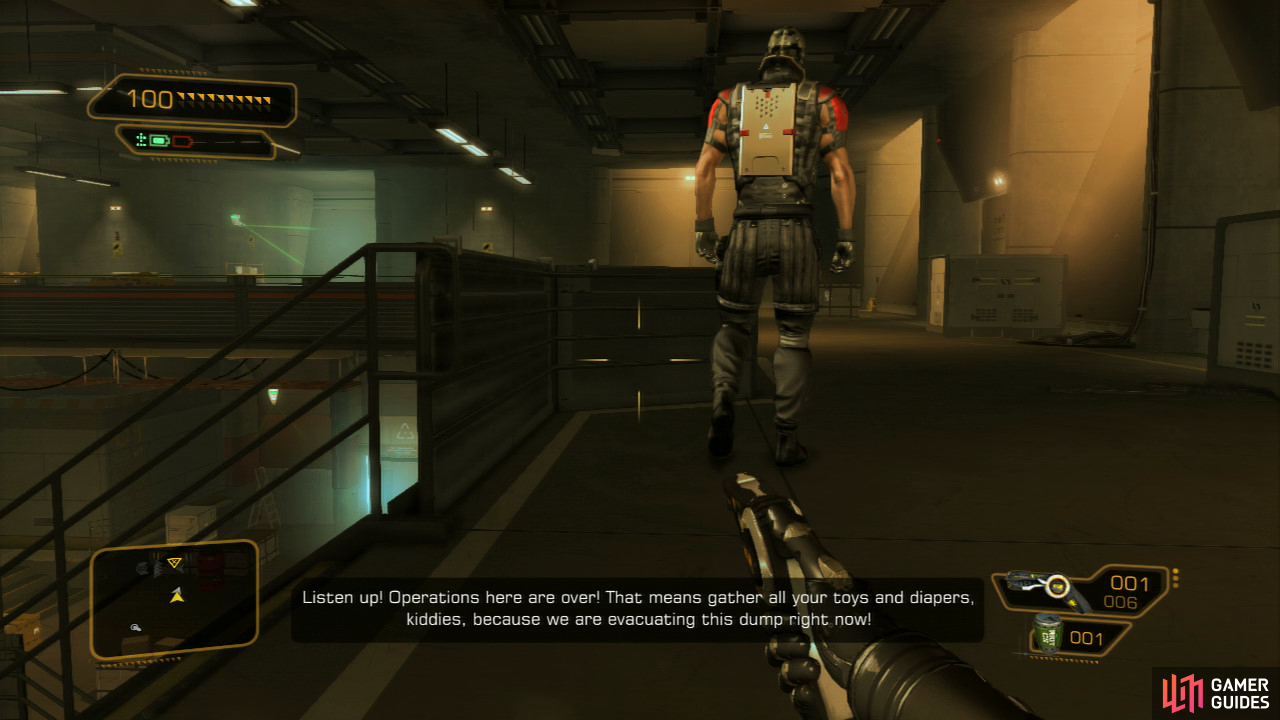
You can find [SNIPER RIFLE AMMO x3] on the crates in the far corner at the end of the hallway. Go through the door and two FEMA officials will ask you what the hell you’re doing here. You can either bluff (which works well if you got the access code from Zeke) or fight. Choosing Bluff, Bluff, and Intimidate also works if you don’t have the codes. If you choose to fight, it helps to take both of them down in one swift melee attack by rushing towards them.
Hack the level 1 doors (SCRIPT KIDDIE 25XP) and start exploring the area. The locker room contains [200 CREDITS] , [3x COMBAT RIFLE AMMO] , and [2x SNIPER RIFLE AMMO] . You can find [80 CREDITS] on a table in the cafeteria, and the office behind the cafeteria (locked by a level 2 security device, although you also have the code: 7984) grants [EXPLORER 200XP] and contains a **** [Hugh Darrow eBook 13: Blurring The Boundaries between Man and Machine] , a [CYBERBOOST PROENERGY PACK] , [150 CREDITS] , and Lawrence Barrett’s PC with background information.
Continue through door on the left side of the cafeteria. This is where paths #1 and #2 merge. You can backtrack and follow the other to find more items, or you can continue.
Either head upstairs in the box guard room or take the ladder after te conversing guards then, as long as you have strength, you can fllow the right wall around and only have to dal with one guard up here.
Path #2: Head inside the next room in which you’ll find a level 3 PC (password neuralhub) that unlocks the nearby storage room. Make sure you also disable the camera.
The storage room is just around the corner [PATHFINDER 300XP] . Inside you’ll find a [SHOTGUN], [SHOTGUN CARTRIDGES x5] , [TYPHOON AMMO x1] , a [ROCKET] , and a [CONCUSSION GRENADE] .
Continue and hack the level 2 PC in the control room for background info [GREY HAT 50XP] . It’s possible to move the large crates to your right (with the “Move Heavy Objects” aug, but you can also break either of them by shooting them a couple of times with a silenced weapon.
We’ll first head through the other, non-barricaded door. Sneak to the far corner of the area, avoiding contact with any merc or camera. Enter the office and look for a [POCKET SECRETARY] with a pc login (WKS3021/hmldsec), [50 CREDITS] , a [STUN GUN DART] and [170 CREDITS] hidden in the corner nearby the stun gun darts. The PC contains background info and can be accessed with the login you just found.
Use the vent shaft to access the adjacent office and look around for [120 CREDITS], a [TRANQ DART], another [30 CREDITS] , and a [STOP WORM SOFTWARE] . You’ll probably want to stay crouched while exploring. Don’t hack the level 3 PC yet or you’ll probably be spotted.
Go through the door and hide behind the catwalk - then behind the steel bars near the wall. Wait for the guard up ahead to move towards an alarm panel and quickly crouch your way towards him, then take him out and hide his body behind the crates.
Enter the control room nearby and look for a [NUKE VIRUS SOFTWARE] and an [EMP GRENADE] (nice!). The level 3 PC here (neuralhub) can deactivate the two cameras on this level, saving you the trouble of being extra careful.
First take out the sniper, when he’s standing on a platform in the middle of the area (and when his buddy isn’t looking his direction). The other merc shouldn’t be too hard to take down now, although you’ll want to avoid being seen by any mercs or turret downstairs.
From the alarm panel where you took down the first guard, head through the double doors a few meters further and make your way downstairs. This connects to a hallway which links to your destination; just be careful the camera doesn’t spot you.
Paths #1 and #2 have now merged. Feel free to backtrack for more experience or goodies now (or later, although all enemies will be gone after facing the boss, which means no more opportunities for youto get experience points from them).
Pritchard will tell you where to go. First head inside the small office, avoiding the nearby camera. Inside you can find [COMBAT RIFLE AMMO] and a [RELOAD SPEED UPGRADE] if you remove the boxes from the wall. The level 2 PC shuts down the camera, and you also have the code (neuralhub).
The medical bay around the corner contains a [HYPOSTIM] and [220 CREDITS] , the second room contains [PAINKILLERS] and a [POCKET SECRETARY] with background info.
Make your way through the hangar up ahead. There are no items in this area, so proceed until you reach the double doors that lead to your destination, and save your game. It’s a good idea to buff your health as high as possible with painkillers and the hypostim you found earlier. It certainly won’t hurt to have 200 health. Enter the next room [1750XP] , [SMOOTH OPERATOR 250XP] , [GHOST 500 XP] .
Boss Battle: Lawrence Barrett
Barrett’s a tough boss if you expect to down him with bullets alone. He’ll never hesitate to pump you full of lead with his powerful gatling gun-arm, and he’ll also hurl up to three grenades at you if you manage to piss him off - which is bound to happen. How to deal with Barrett? Below you’ll find a few tips that ought to increase your chances of survival.
o To start off, quickly hurl an EMP (or Gas) Grenade at Barrett (and make sure you hit him). This’ll stagger him long enough for you to hide behind the pillar on the right. Quickly look behind you and spot the two gas canisters; grab one, strafe to the right and hurl it (with the “fire” button) at Barrett. If you hit him with it, it’ll automatically explode, further staggering and injuring Barrett.
o If you manage to pull off the above, quickly rush over to the other corner of this side of the room and grab the explosive barrel. Accurately hurling this at Barrett will cause major damage to him, so give it your best shot.
o There are more explosive barrels and gas cylinders spread throughout the area, so it’s best to continue with the above strategy while hiding behind the pillars, staying out of sight as much as possible. If Barrett hurls grenades at you, immediately sprint to another pillar and look for a gas cylinder. After staggering him, hurl something explosive at him.
o Besides gas canisters and explosive barrels, there are a lot of weapons, mines and grenades to be found in this area. It helps significantly to hit Barrett several times with well-thrown grenades or strategically placed mines. If you still have detonatable explosives, you can hurl these at Barrett or a place you’ll know he pass by and time the explosion for maximum efficiency.
o Watch your health and don’t come to close to Barrett or he’ll show you how nasty his melee attack is, which easily causes 80 points of damage. If you have any painkillers left, use them when hurt.
o If you have Typhoon, now’s the time to make good use of it.
o It’s important to realize that Barrett can’t be tranquilized. He is of the mandatory targets you must actually kill.
o When you start to run out of options, grab a decent weapon and shoot Barrett repeatedly until he dies. If you’ve successfully hit him with explosives, EMP and gas before, this shouldn’t be impossible.
o It’s worth your while trying to stun Barrett with the Stun Gun, if you have it. Successfully doing so will stagger Barrett for a long time.
o An alternative way to kill Barrett very easily is to get the Recoil Compensation augmentations 1 & 2. Only do this if you can’t beat Barrett, because otherwise these augmentations aren’t on par with some others. In any case, start the battle by throwing a Gas Grenade at Barrett, then hide behind the concrete block. As he chokes, pull out a Machine Pistol or Combat Rifle and aim at his head; unload a clip or two and he’ll be toast.


Watch the cutscene, after which the way will be cleared. You can now exit the facility completely; it looks like your next objective is going to be Shanghai, Hengsha Court Gardens [2500XP] .
No Comments