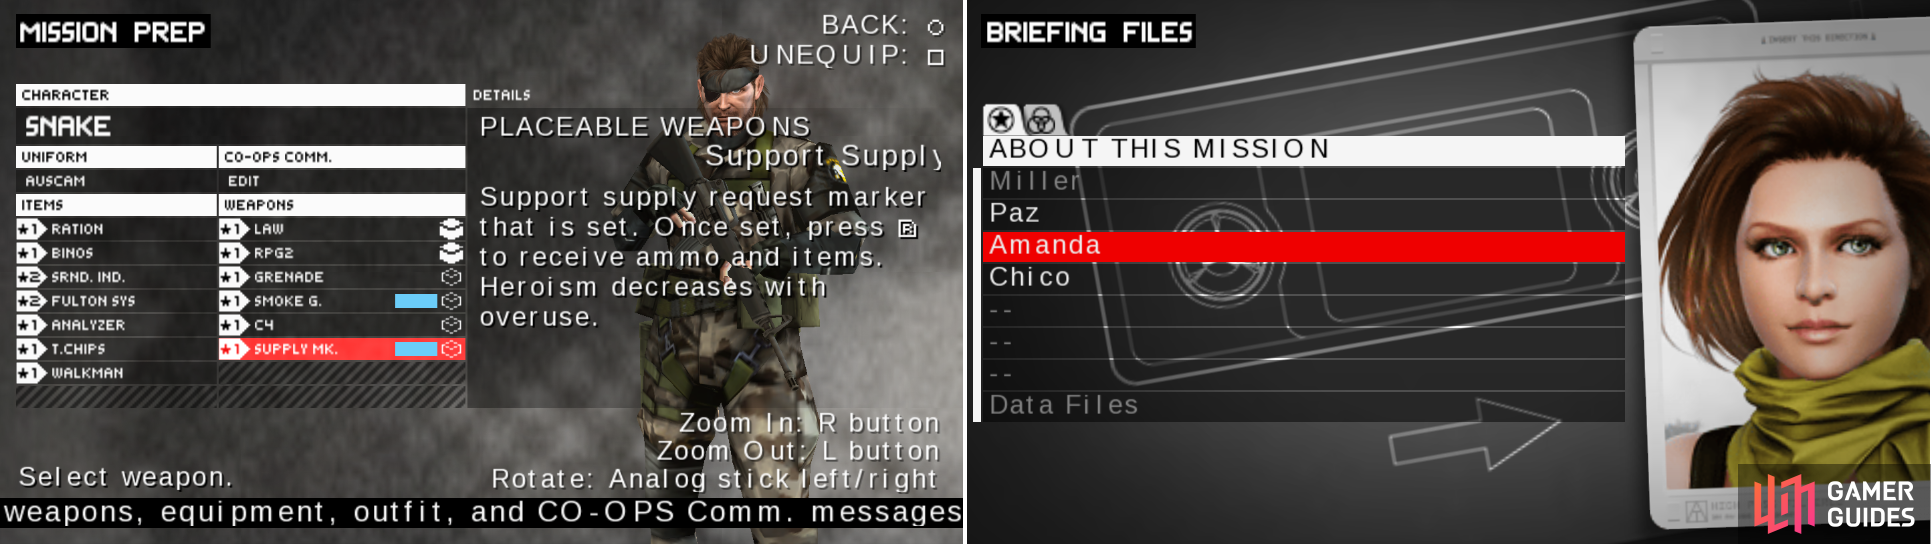
Make sure to bring that Supply Mark. You’ll need it. Also make sure to listen to what Amanda has to say before starting the OPS.
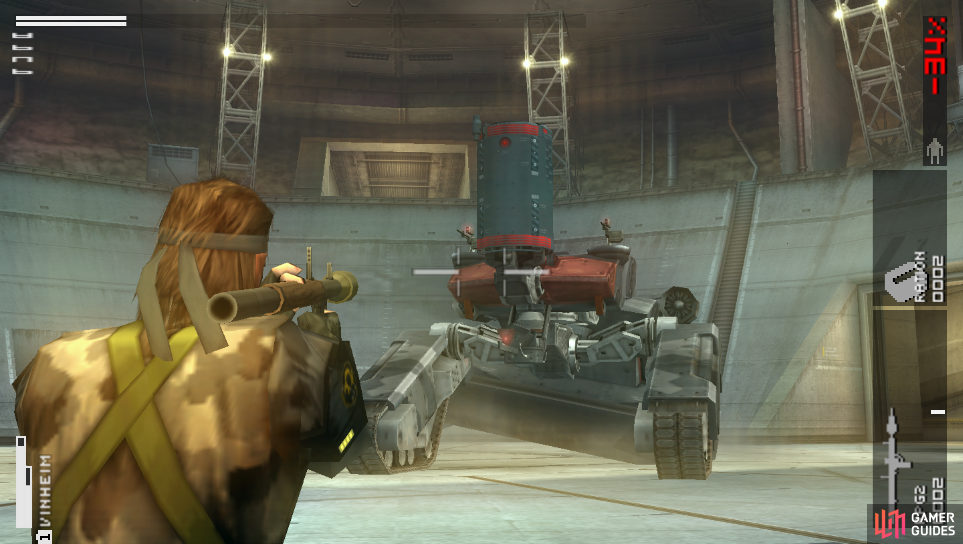
Ok this is probably the hardest boss yet and man did I have difficulties trying to take it out. If you see Amanda’s Briefing Files, she tells you to take out the rockets on the sides of PUPA, as well as the machine guns on the back of it. This is actually what I recommend you to do mainly because PUPA uses 2 of its 3 attacks with the rockets and the machine guns.
PUPA’s main weak spot, the large pod on its “head”.
PUPA uses the rockets impulse itself into you, running over you and dealing quite a large amount of damage. The other attack: it starts running across the wall and using the machine guns to hurt you. These are quite easy to dodge if you keep running to the sides. After this attack, it charges at you using the first attack I mentioned.
Similar to machine guns, PUPA shoots laserbeams from its front. These are quite fast so try moving to PUPA’s sides to avoid it. The third attack: PUPA throws small lightning rod pods to the floor all across the field. Once done that, it discharges an electric shock that passes through all the lightning rod pods dealing massive damage. This is PUPA’s most dangerous attack due to the damage but its quite easy to avoid (took me many months to figure this out). Move to one of the corridors, throw a C4 near one of the rods and blow it, then lay flat on the ground.
If you run out of ammo, use the Supply Marker I told you to bring and you’ll receive 3 ammo for the LAW and 3 for the RPG2, as well as 2 Rations.
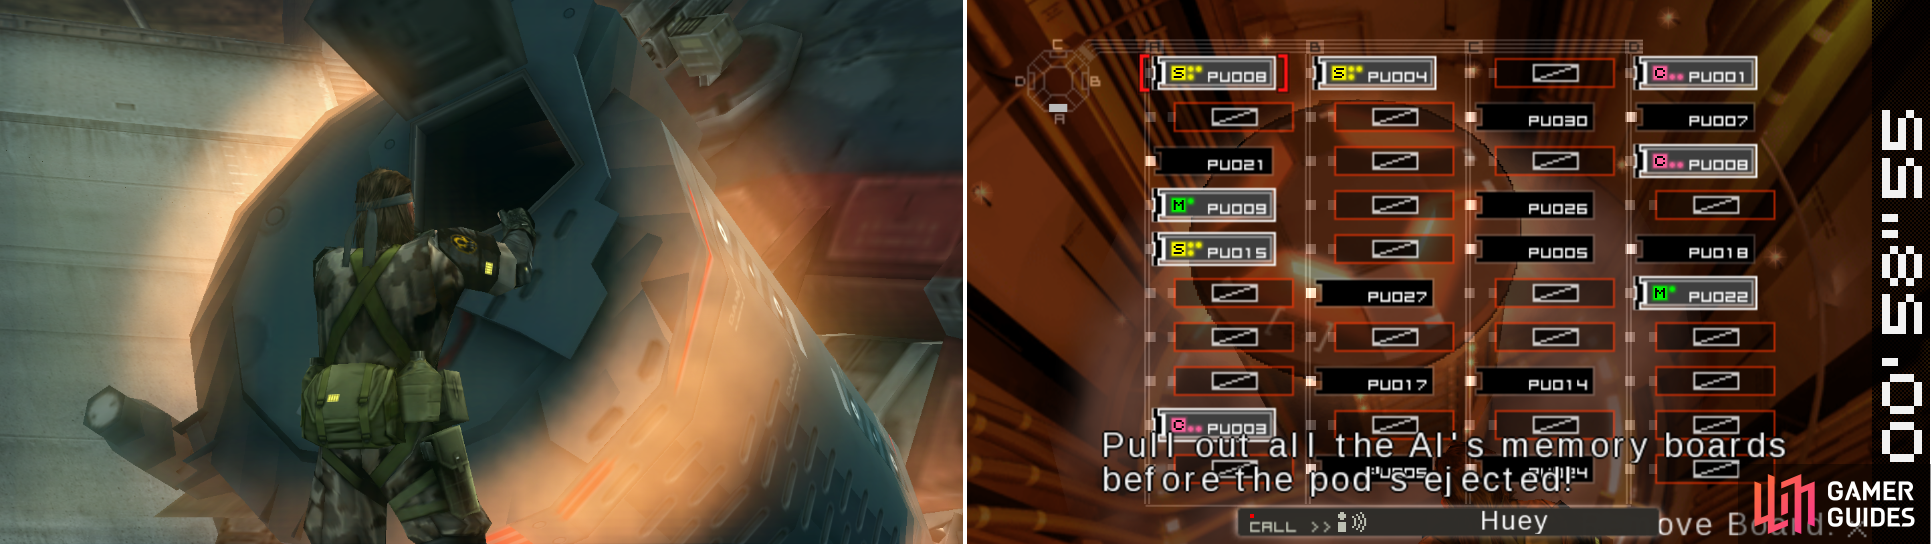
Climb inside the pod once you defeat it (left picture). Inside you have to remove the memory boards (right picture).
When you deplete all the health bars, you’ll need to open the hatch (shoot it) and enter. The hatch is on top of the cylinder on the head, so go inside and you now need to remove the memory boards. Take out the ones with the S symbol on them then take out the ones with a C and lastly the ones with an M. Since you have a time limit, you’ll most probably miss one M plate but that’s ok since you’ll destroy it. Now watch the scene and Huey joins Outer Heaven. You’ll also be able to create Support Supply Marker (Thrown), Chaff Grenades and Night Vision Goggles . You can also use Outer OPS to send your soldiers to other countries.
No Comments