
Haunting The Mill
Leave the Country Inn and head along the western path to town. Along the way, stop and talk to the Royal Huntsman. He’ll tell you about two unique monsters-a Drowned Dead near the old Mill, and an Alghoul that haunts the crypts. This doesn’t offically start any quests, but it should give you a good idea what we’ll be doing tonight… Anyways, you can also talk to him about his trade… and find out that Witchers get screwed on bounties.
Continue to town and talk to the Reverend (if it’s still early, you may have to go into his house to find him). Feel free to talk to him about everything now-we’re not grinding, we’re questing. The most important thing to do here is give him the Drowner Brain Tissue we have to complete the quest “The Drowner Contract” .
| Objective | Reward |
|---|---|
| For bringing the Reverend three Drowner Brain Tissues | 2000 XP 100 Orens |
Return to Haren Brogg’s House. Talk to him and accept another quest, this time he wants you to deliver a question to a man named Coleman in Vizima-no questions asked. Accepting starts the quest “Hot Potato” , which is nice, but we also came here to rest for free. Click on the Alchemy tab and create two Cat potions and a Swallow potion. Don’t bother worrying about secondary ingredients at this point, as we just don’t have a versatile enough selection of ingredients to try and make ingredient-dominant potions. If you brought some grease, consider making some Specter Oil. Finally, if you really want to be ahead of the game and to play things as safe as possible, make a Wive’s Tears Potion, consisting of one measure of Rebic, Quebrith, and Aether (Cadaverine, Balisse Fruit, and Hellebore Petals are common ingredients that work fine for this potion). When that’s done, meditate until dusk.
Once you wake up, leave Haren’s House and cross the Maribor Gate Bridge (the bridge opposite the town) and go down the stairs at the far end of the bridge to reach the Mill. Outside you should find Vesna Hood. Give her the wine and watch a very amusing cutscene, after which you’ll obtain the “Vesna” Sex Card .
Lighting the Holy Flame
When you’re done frolicking, return to the Maribor Gate Bridge and go down some stairs on the opposite side of the bridge (to the west) and continue along the river bank until you find a “Cave Entrance”. Geralt comments on the bones outside of the cave, and he’s right-nothing friendly waits for us within. You don’t really need a Cat potion to navigate the cave, but it’ll help. Inside you’ll find Echinops-plant monsters that emerge from the ground and attack. They’re strong at this point in the game, and can attack at a range, but we’re not weak Witchers anymore. Use the Strong Style and Igni whenever possible. If you’re lucky, you’ll manage to incinerate them, which will deal a great deal of damage. Take it slow, and try to fight as few Echinops as possible. They have one weakness-they can’t move. If you’re getting beaten up try to find some cover and allow yourself to heal. At the far western end of the cavern you’ll find a Sated Echinops, which is stronger than normal, but by no means unbeatable. Use Igni on it and smite it-hopefully with as few Echinops fighting you as possible. When all Echinops are dead, search some remains near the Sated Echinops to find some Human Remains. This is what’s left of Leuvaarden’s friend.
| Objective | Reward |
|---|---|
| For recovering the remains of Leuvaarden’s friend | 500 XP |
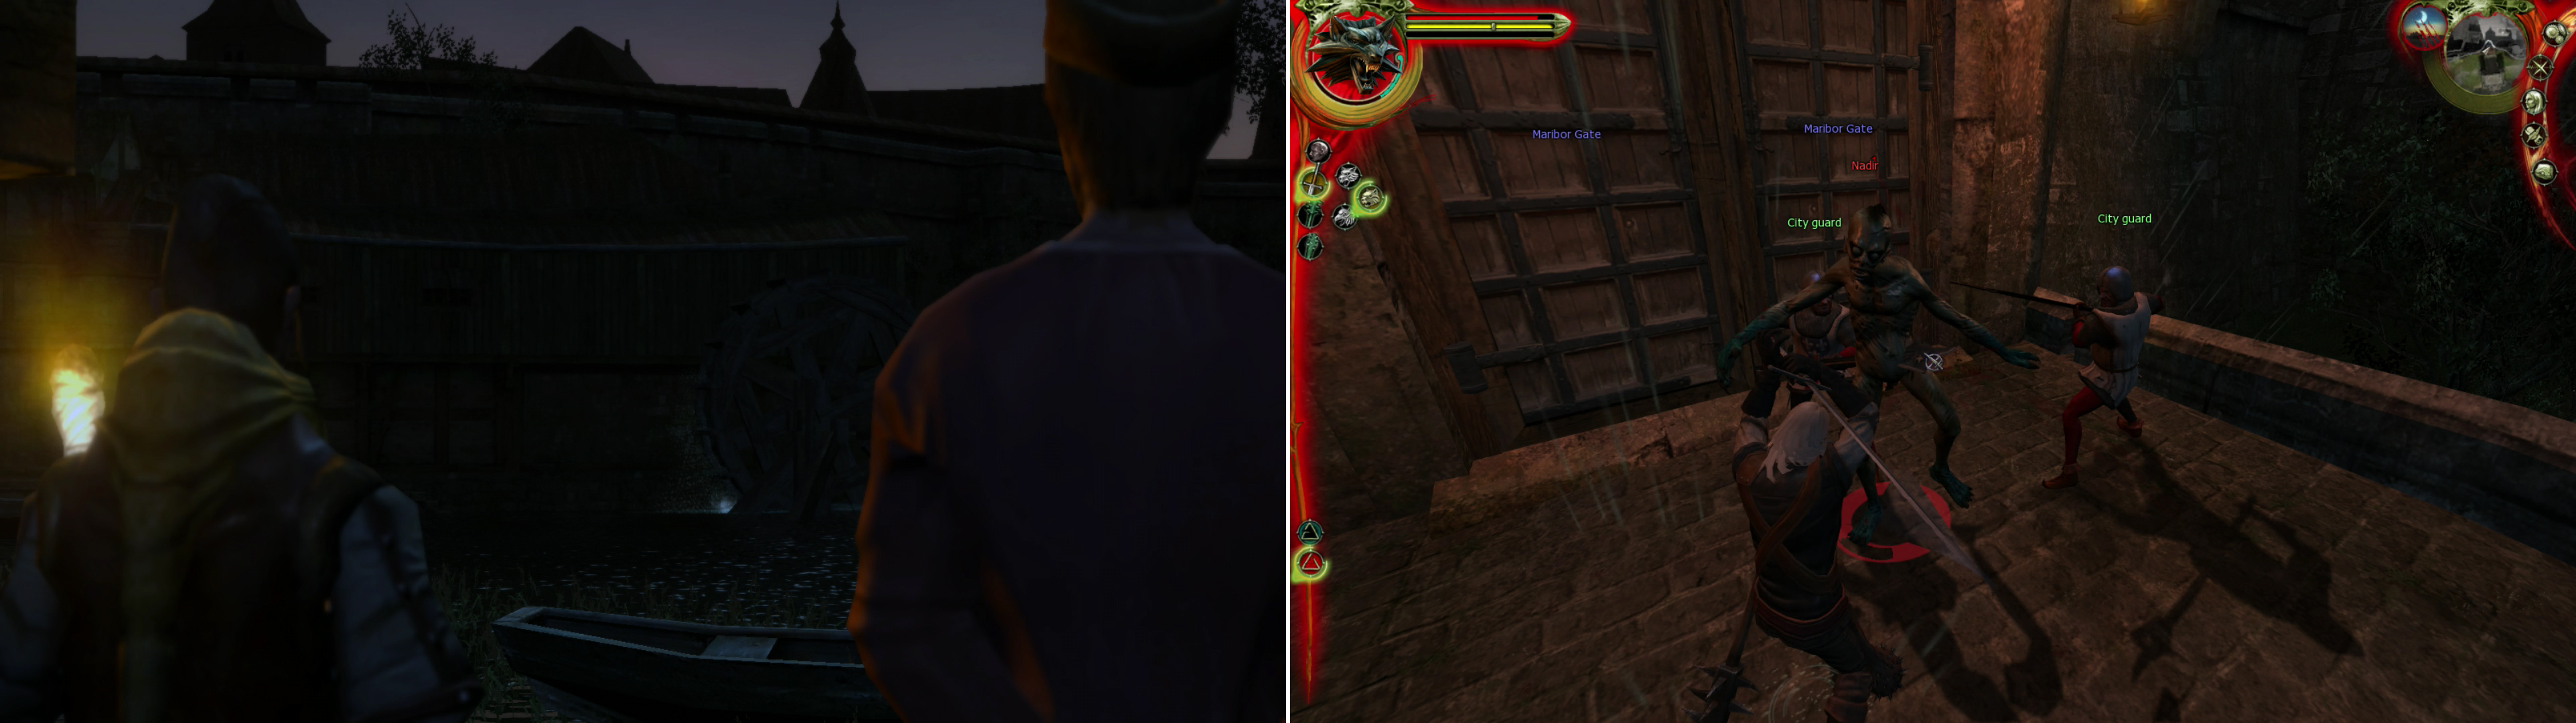
If you saved her from the rapists, escorted her home, and asked for a date, you can help Vesna keep the myth of the haunted mill alive (left). Nearby lurks the unique Drowned Dead, Nadir (right). Kill it and claim its trophy (help from the guard, as pictured, is unusual.)
When you have the remains leave the cave and head east past the Mill. It should now be night-time, and ahead of you should be a group of Drowners led by a unique Drowned Dead named “Nadir” . Try to avoid engaging too many enemies at once, as Nadir is honestly pretty strong. It can do upwards of fifty damage per hit, which is no joke. If you’re lucky, however, one good Aard can knock Nadir prone and leave it open for a coup-de-grace. If that’s not working, whittle it down with the Fast Style. Once it’s dead, search Nadir’s remains for the Drowned Dead’s Head trophy.
Now, lets kill two birds with several candles. We have the remains of Leuvaarden’s friend, but in order to continue with the quest we’ll need to light the flames of each of the five Eternal Fire Shrines. Since we also need to head back to the Royal Huntsman to cash in on Nadir’s head, we might as well light as many of the shrines as we can. Go back through the village and light the shrine opposite the Chapel, then light the two along the path leading to the Royal Huntsman. Finally light the fourth Shrine near the Royal Huntsman before turning the trophy in. Note that after placing the first “Holy Flame” in an Eternal Fire Shrine, a Barghest will appear to challenge you at the second shrine you approach. At the third shrine you’ll have to fight two Barghests, and so on. This is why we didn’t bother with this quest while we were escorting Vesna-we surely didn’t need more trouble while escorting her.
| Objective | Reward |
|---|---|
| For giving Nadir’s Head to the Royal Huntsman | 1000 XP 200 Orens |
Once you’ve lit the four shrines and have turned in Nadir’s head to the Royal Huntsman, take the northern road away from the Country Inn (past Abigail’s Hut) until you reach the fifth and final Eternal Fire Shrine. Once here you’ll be challenged by a pair of Barghests, and a few more will spawn after placing the “Holy Flame”, but it’s nothing you can’t handle. Once done, return to the Crypt where we found Ilsa’s body.
Clearing the Crypt
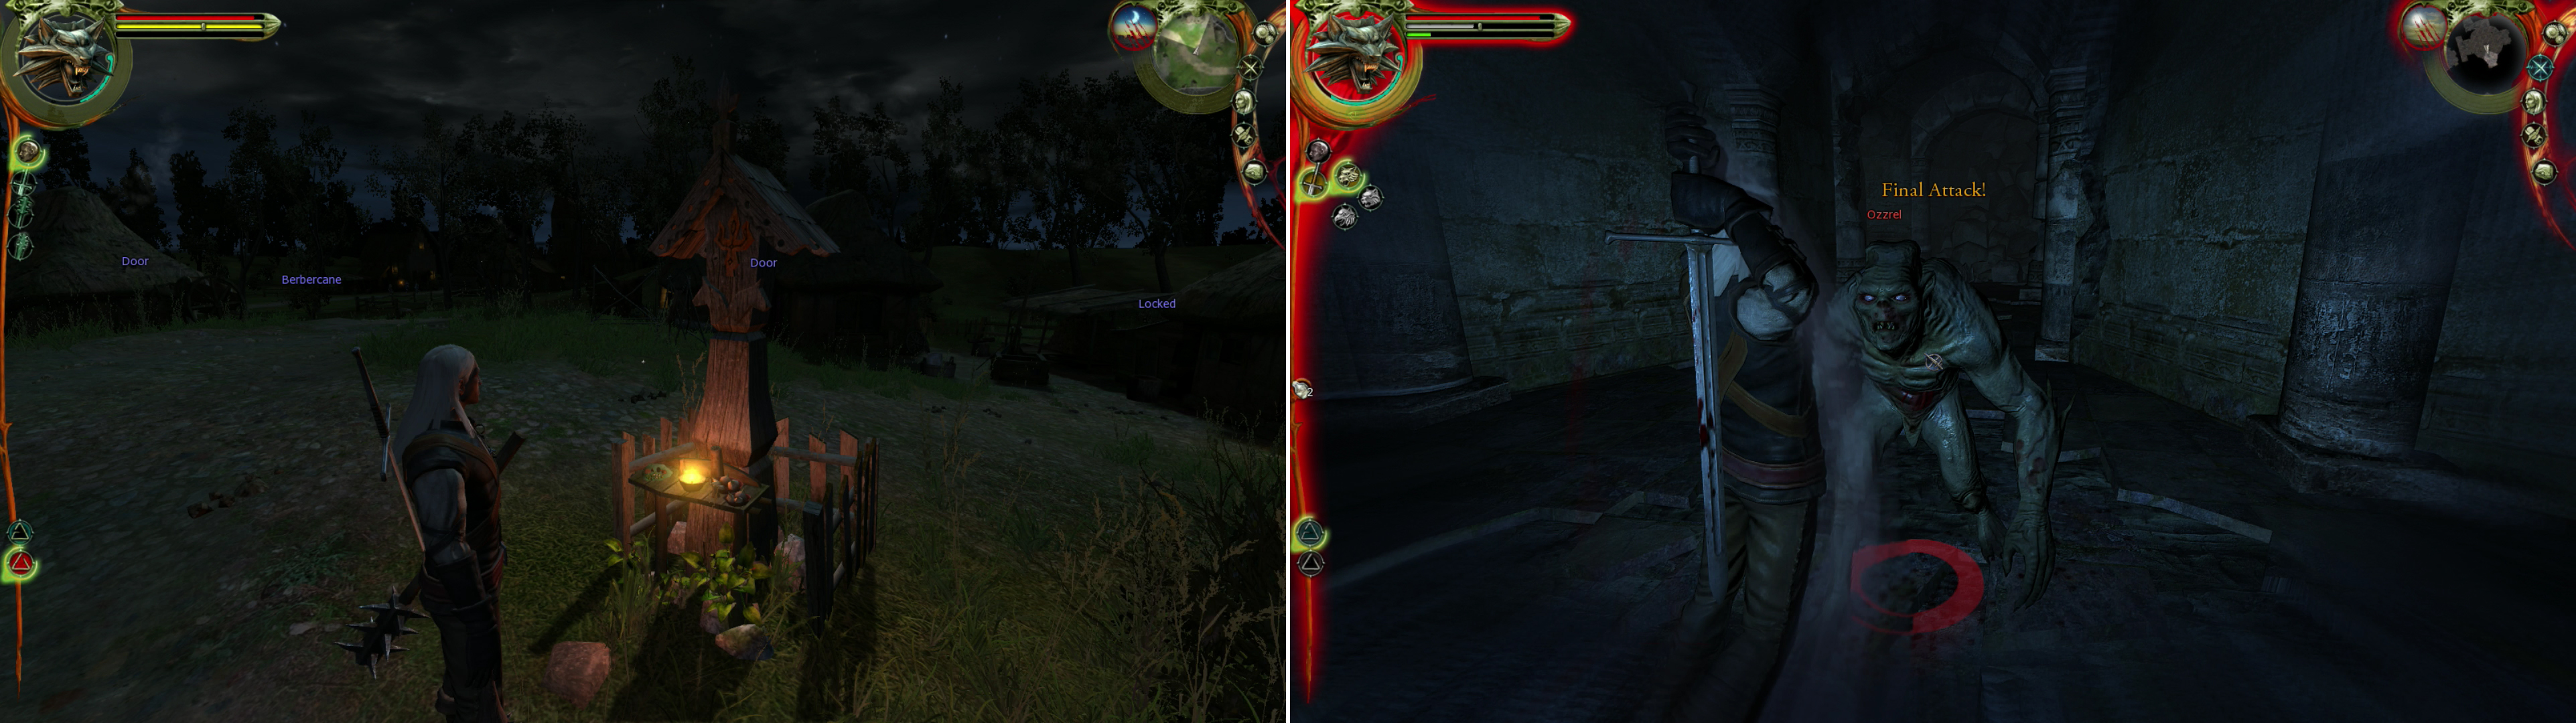
Light the Eternal Fire Shrines to appease the Reverend (left)… if nothing else. Once done, hunt down the unique Alghoul, Ozzrel, in the crypt.
No turning up the gamma this time, you need a Cat potion to safely explore the depths of this crypt. So chug a potion and continue east from the entrance, past the bodies of two dead guards and into some new tunnels. On the way, it might be a good idea to use the Place of Power before the dead guards. Perform the “Ritual of Magic” and enjoy a 100% boost to sign intensity for five hours, which is more than long enough to clear this Crypt.
Take the first left and use the Aard sign to destroy the wall to the north west to access a room with a trunk that contains fourty Orens, Stammelford’s Dust, Goose Fat, and Quicksilver Solution. In the first room on the right you’ll find a body with twelve Orens on it. Continue down the main tunnel until it forks again, and once again take a left, use Aard to knock down a wall to the north west. Beyond are a pair of Ghouls who can be easily dispatched with our boosted Aard sign.
Wait for your Endurance to replenish and head back to the main tunnel and continue until you find another wall that needs to be knocked down. Beyond this last wall is the unique Alghoul, Ozzrel , which like Nadir is pretty damn strong. Not only does it do a fair amount of melee damage, but it can knock you down. On our side, however, we have an empowered Aard, which can likely stun Ozzrel and give us the cheap win via a coup-de-grace. When Ozzrel is dead, loot its body for the Alghoul Head trophy, then loot the room it was guarding. There’s a trunk with thirty Orens inside, and another trunk containing a Ham Sandwich, Suet, Stammelford’s Dust, a Chicken Leg, a piece of Flint, a Torch, a chunk of Red Meteorite , and seventy Orens. There’s nothing shabby about that loot.
The Garden of Horrors
Return to the Royal Huntsman and claim your due reward for disposing of Ozzrel . Now we’re done with most of the side quests in this chapter, but there’s still one more thing we should do before returning to the Country Inn and resting.
| Objective | Reward |
|---|---|
| For giving Ozzrel’s Head to the Royal Huntsman | 1000 XP 200 Orens |
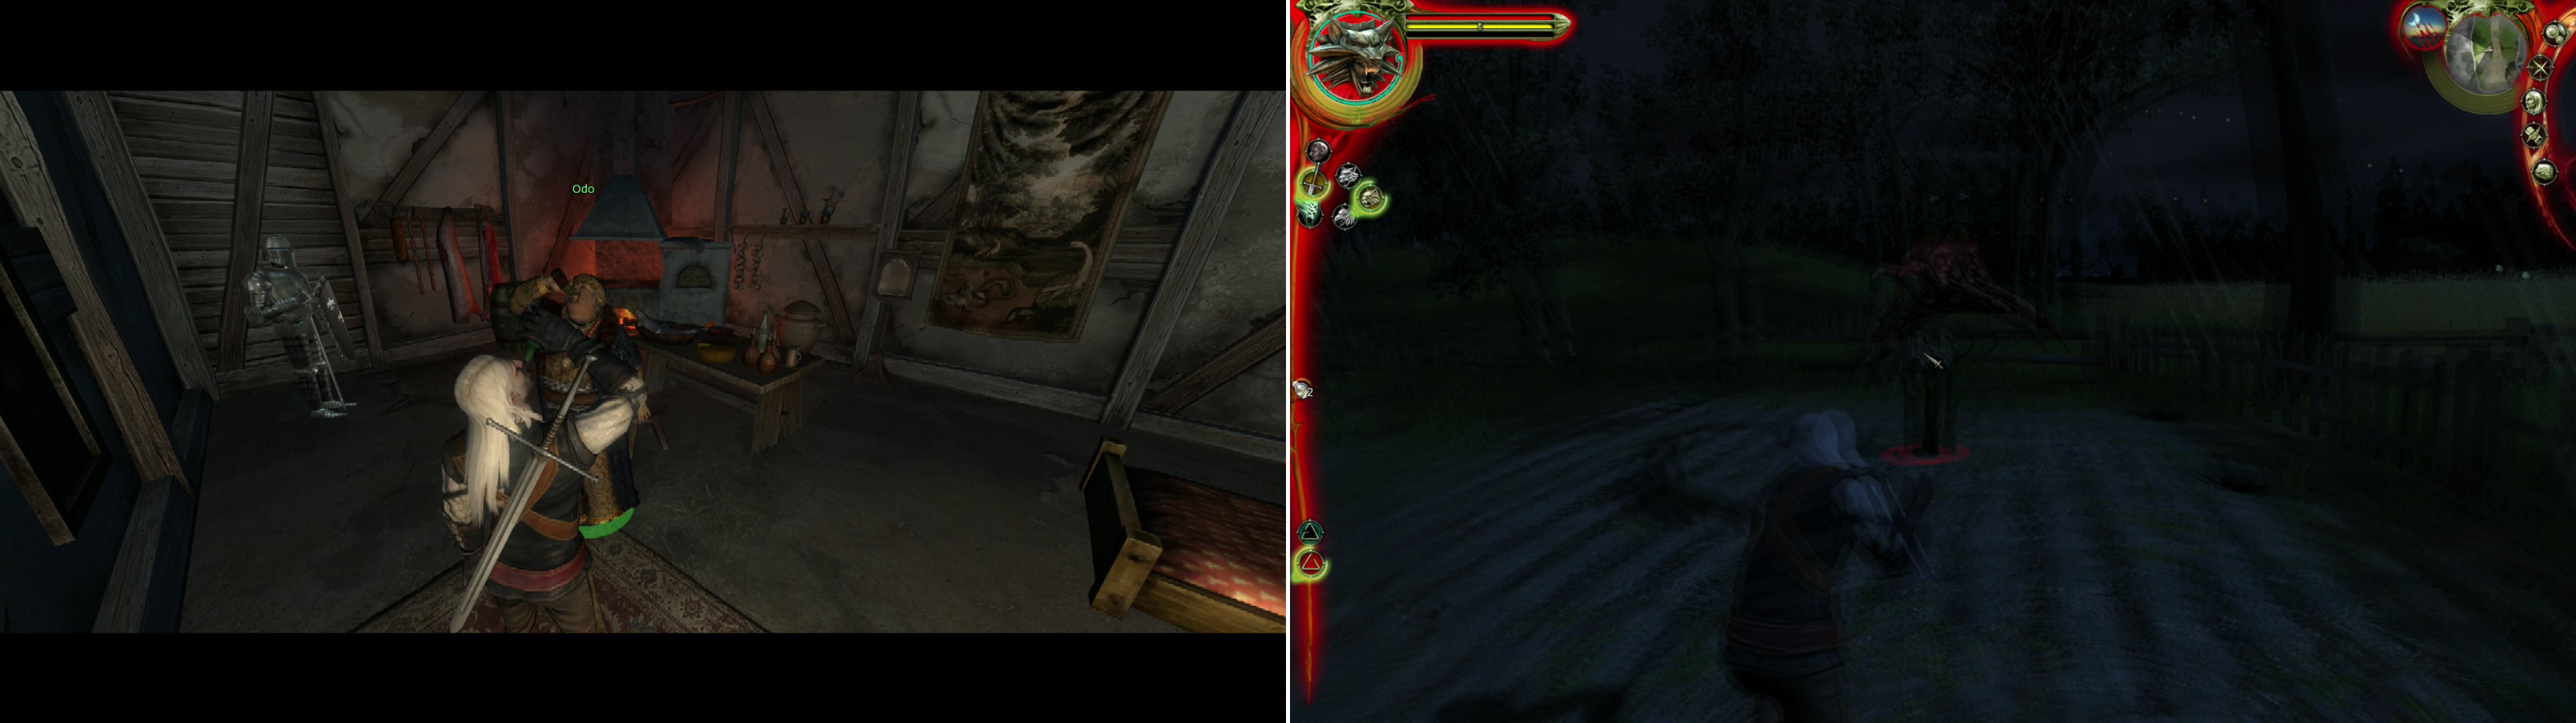
Negotiating over a drink isn’t a good idea in general (left), but when you have to fight blood-thirsty monsters afterwards, it’s downright dangerous! (right)
Head down the road as if you were returning to the Country Inn, but instead of entering the palisade, head south to reach Odo’s House. Talk to Odo and in addition to making you show him the Reverend’s ring, he’ll make you drink with him… since spies don’t drink, you see. At least he’s kind enough to provide the liquor. He’ll also play Dice Poker with you, if you haven’t defeated three opponents yet.
Ask him what task he needs done and he’ll tell you that some blood-thirsty vegetation has grown from his garden. We’ve faced Echinops before, so this shouldn’t be a problem… except for the fact that Odo forces you to drink while you negotiate prices. Once you settle on 100 Orens he’ll send you outside-quite drunk-to deal with the plants.
If you made a Wive’s Tears Potion earlier, drink it now and cure your drunkenness so you can fight safely… if not, you’ll just have to tough it out. Immediately grab your sword and run to the gate of his property so only one of the Echinops can strike at you. When it’s a one-on-one fight, use the Igni sign and the Fast Style (usually you’d use the Strong Style, but being drunk you’re more likely to hit with the Fast Style). Once the first plant is dead, wait until your Endurance recovers before attacking the second, and repeat the same process.
Note that the Echinops earlier spawned due to the presence of a corpse (Leuvaarden’s friend), and also note that Geralt comments on the armor in Odo’s house-armor that apparently belonged to Odo’s brother, who is nowhere to be seen. Why would Odo’s brother have left his armor-his livelihood as a soldier-in a house occupied by his brother? It doesn’t really matter at this point. Return to Odo and collect your reward.
| Objective | Reward |
|---|---|
| For killing the Echinops in Odo’s garden | 4000 XP 100 Orens |
A Decent Burial
Return to the Country Inn and tell Leuvaarden about his friend. In a rare case of sloppiness on Geralt’s part, he forgets that the deal was to rescue Leuvaarden’s friend or provide for a “decent” burial. Instead of getting our pay, he insists that we accomplish the latter, first. In this case “decent” means we need to inter his remains in the crypt underneath the chapel in town. Seems all signs are pointing to the Reverend.
Go and speak to the old nutter and tell him about your successful candle-lighting. He’ll naturally blame the ineffecacy of his ritual on the potency of the Beast-not the inadequacy of his god, and blame Abigail for the existence of the Beast. Geralt plays the more neutral angle and suggests that they speak to the witch before assuming anything sinister. The Reverend will agree and offer to pay you 200 Orens, should you discover the Beast’s origins. You can also tell the Reverend about your other successes, namely those of dealing with Haren, Mikul, and Odo’s problems. He seems genuinely impressed, but before he’ll tell you anything about Salamandra he insists you exterminate the Beast.
| Objective | Reward |
|---|---|
| For returning to the Reverend after lighting all five shrines | 500 XP |
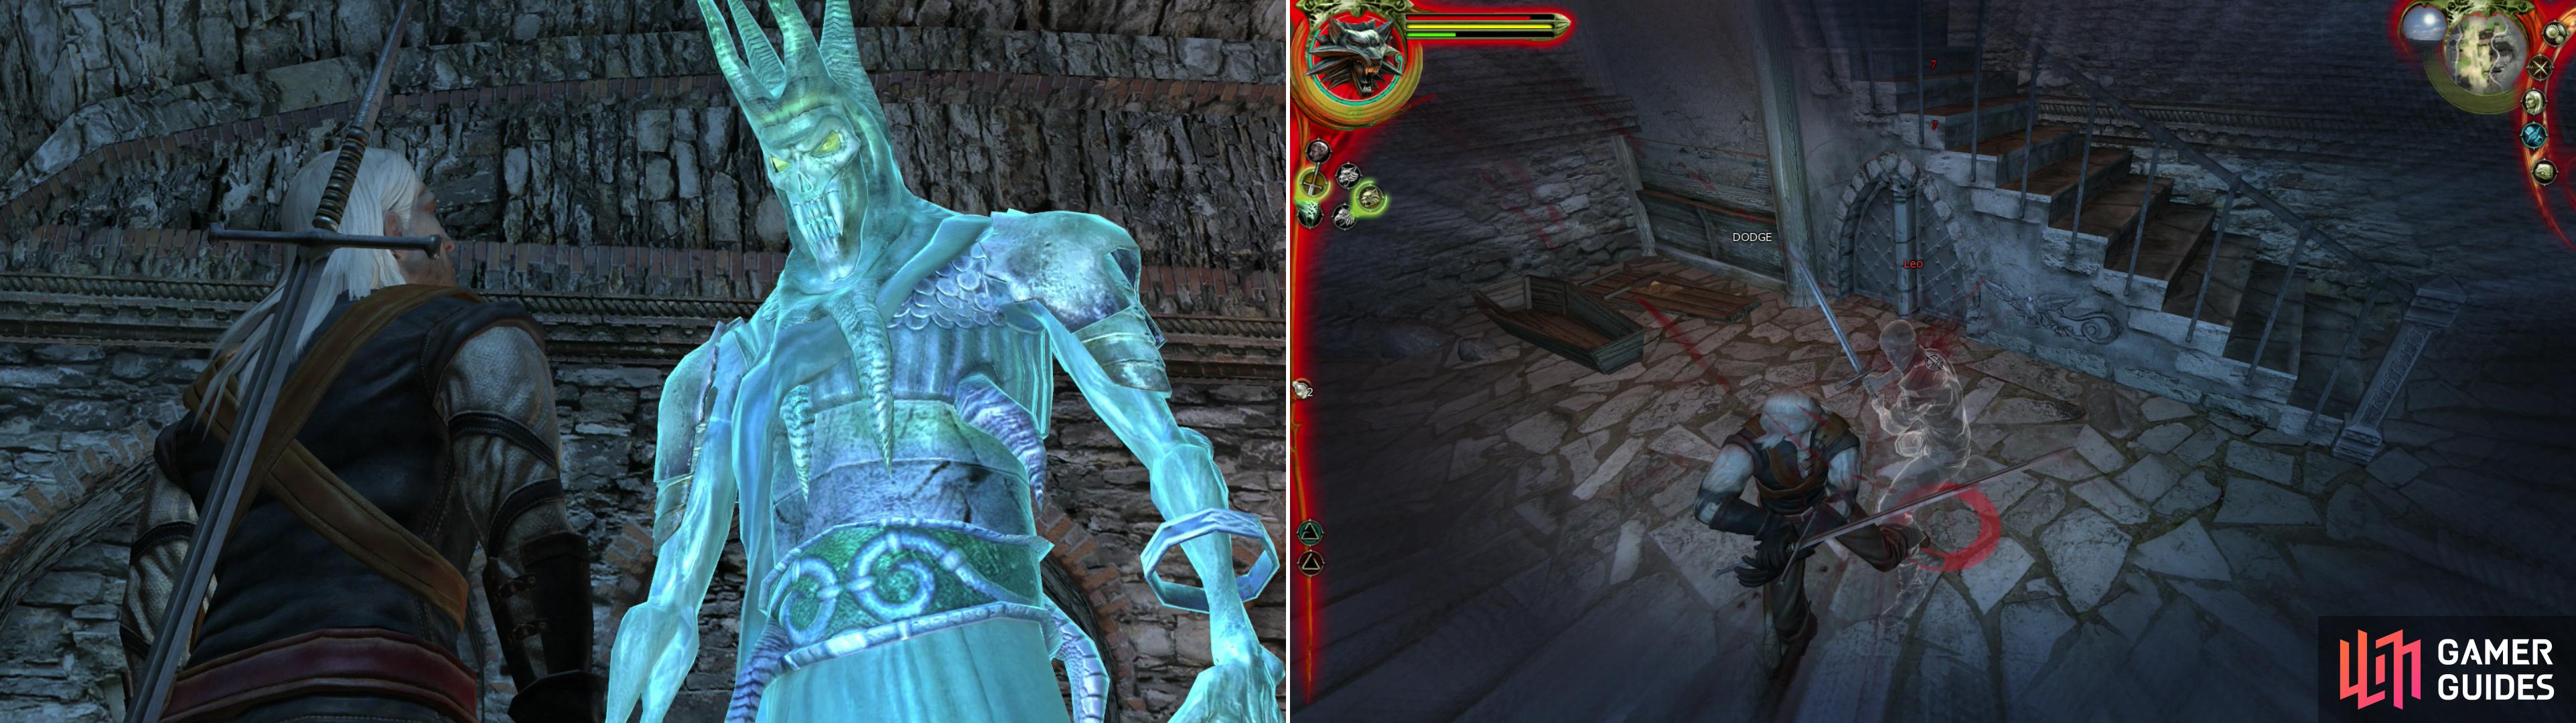
After you place the remains of Leuvaarden’s friend, you’ll be accosted by the King of the Wild Hunt (left) who waxes fatalistically before summoning the ghost of Leo to battle you (right).
Now talk to the Reverend again and ask to bury Leuvaarden’s friend in the Chapel. He’ll offer you a crumbling sarcophagus, since you were nice enough to light the Eternal Fires. Given the state of Leuvaarden’s friend, it doesn’t really matter that the accommodations are shabby. Head into-and loot-the Chapel before going downstairs.
Put the remains into the sarcophagus and you’ll be bothered by the “King of the Wild Hunt” a rather corny-looking wraith that has been hounded Geralt. He’ll speak of prophecies unfulfilled, and other typicial nonesense. The only way to avoid a fight here is to deny that destiny exists, and call the wraith’s bluff by promising to “give him what I have, but do not expect.”
Of course, everybody knows better than to make impetuous promises to a crafty specter, and we don’t really want to avoid a fight, in any case. With any other response the ghost will conjure up the apparation of Leo, who accuses us causing the death of others-since death cannot catch us, it satiates itself on those around us. After speaking, Leo’s ghost attacks. Use the Strong Style and Leo will prove easy to dispatch-he might have been promising, but he was no Witcher. When he dies, loot him for a piece of Red Meteorite .
| Objective | Reward |
|---|---|
| For interring the remains of Leuvaarden’s friend in the Chapel | 500 XP |
Once that’s done, return to the Country Inn and report to Declan. Again, remember that he wakes late and goes to bed earlier, so try to find him around noon. Talk to him and get your well-deserved reward. Now we’re ready to head into the final phases of this Chapter, so we’d best prepare while we can. If you want to play it safe, make some more Swallow Potions… but as long as you have one you should be fine. To be really well prepared, create a Willow Potion-it’s easy to make, and can be created out of cheap Temerian Rye (or some similar quality alcohol). Mix one measure of Quebrith and two measures of Aether together (use Balisse Fruit and two Hellebore Petals to make a Potion that is Rubedo-dominant.) In fact, make two while you’re at it.
| Objective | Reward |
|---|---|
| For reporting to Leuvaarden after buring his friend | 1000 XP 200 Orens |
No Comments