
Our next goal in the Swamp Forest is to explore the Swamp Cave, which lies to the west of the Docks, along the southern edge of the area. Before we explore, however, ensure you have a Cat Potion ready. You can buy alcohol from Vaska, and if you return there during the day you’ll find her leading prayer services to the “Water Lords”. Regardless of their troglodyte worship, talk to Vaska and ask her about a job to start the quest “A Lost Lamb” . Oh, and of course, be sure to buy some alcohol if you desire. We now have all sorts of reasons to venture to the Druid Grove… in time.
Scouring the Swamp Cave
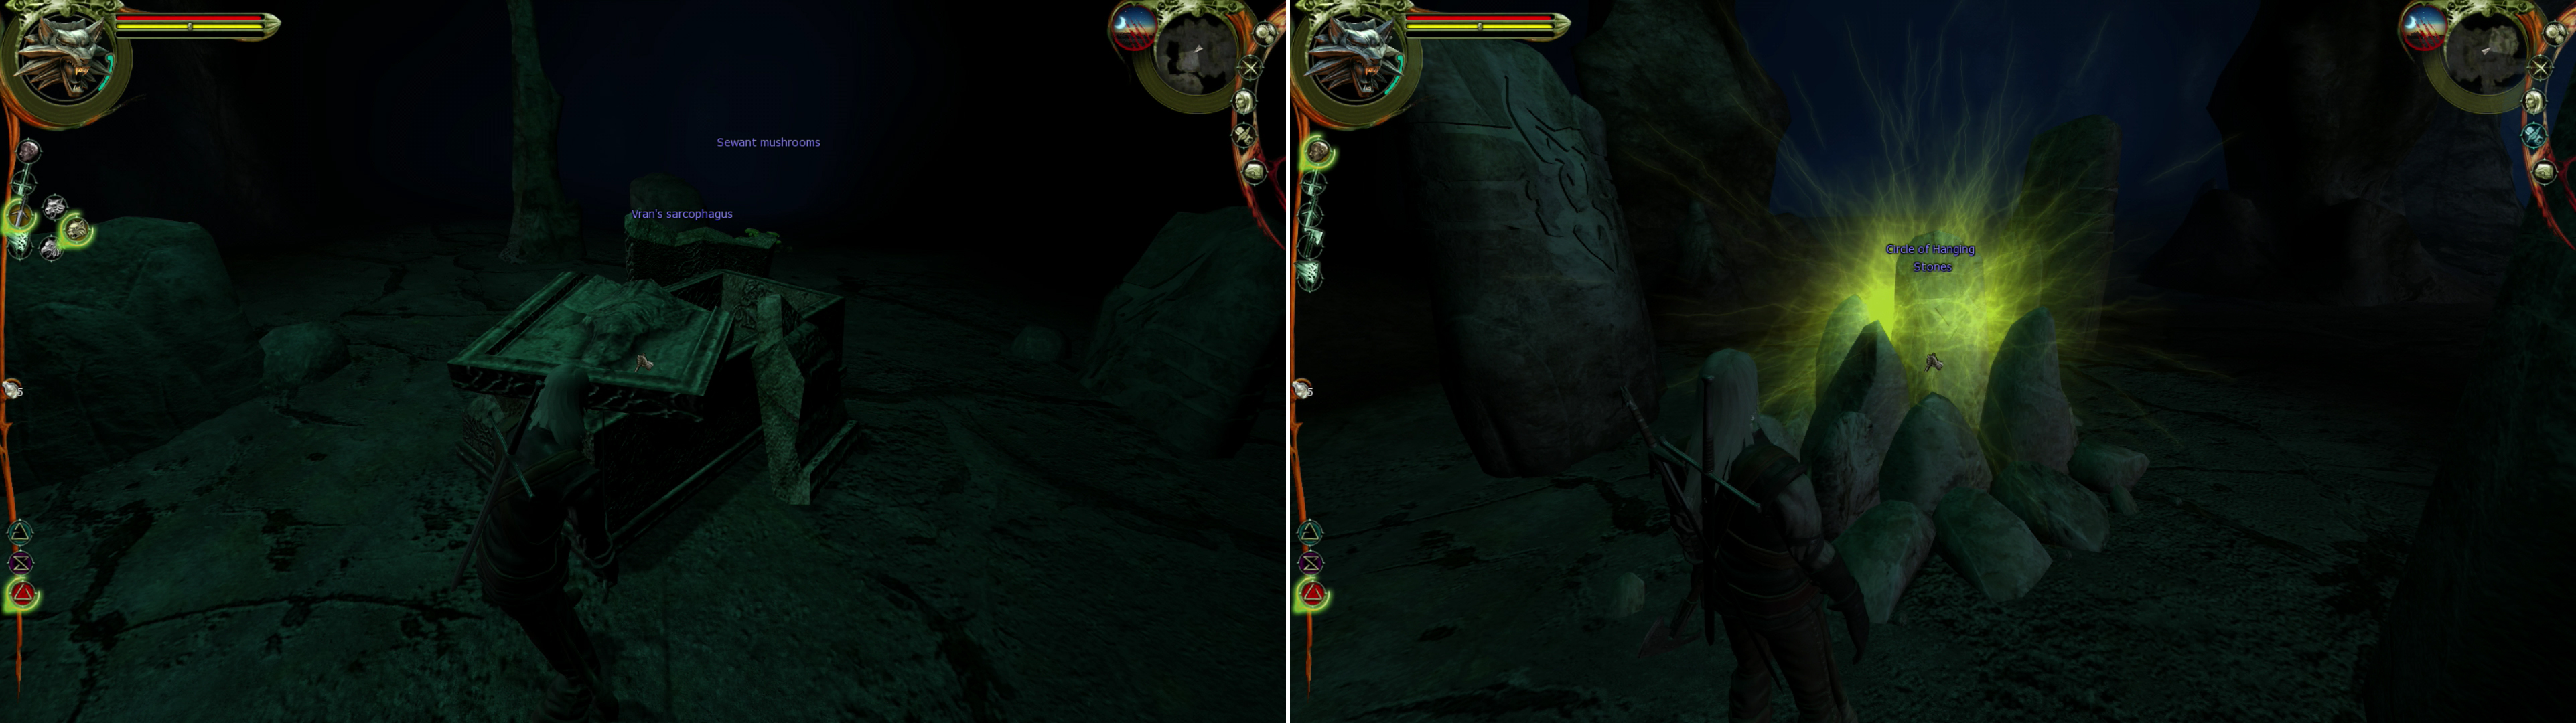
Inside the Swamp Cave, loot Vran’s Sarcophagus (left) and tap into the Circle of Hanging Stones (right) to learn the Quen SIgn.
Now head over to the Swamp Cave, west of the Clay Pits-Geralt will comment on it to let you know that it’s there. It’s along the southern path that leads to the Clay Pits, up, over, and around the Oth Obelisk, past the Shrine of Melitele, and finally south to reach our Cave. You may encounter Echinops near the Swamp Cave or along the way-they seem to enjoy lurking along this southern path. If so, all the better, as it completes another quest for us.
Drink a Cat Potion or turn up the gamma and head inside. Within, you’ll find plenty of Wolves-which we can skin to complete “The Wolf Contract” . Also, in the northern chamber you’ll find a Wraith which is guarding “Vran’s Sarcophagus”. Dispatch it (Fast Silver Style) and loot the corpse for some loot including the “Y’Esath Sephirah” . Nearby is a “Circle of Hanging Stones” which you can activate to obtain the Quen Sign.
| Objective | Reward |
|---|---|
| For collecting three Echinops Rootstocks | 500 XP |
| For giving the Gardener the Echinops’ Rootstocks | 2000 XP 100 Orens |
The Lumberjack Camp
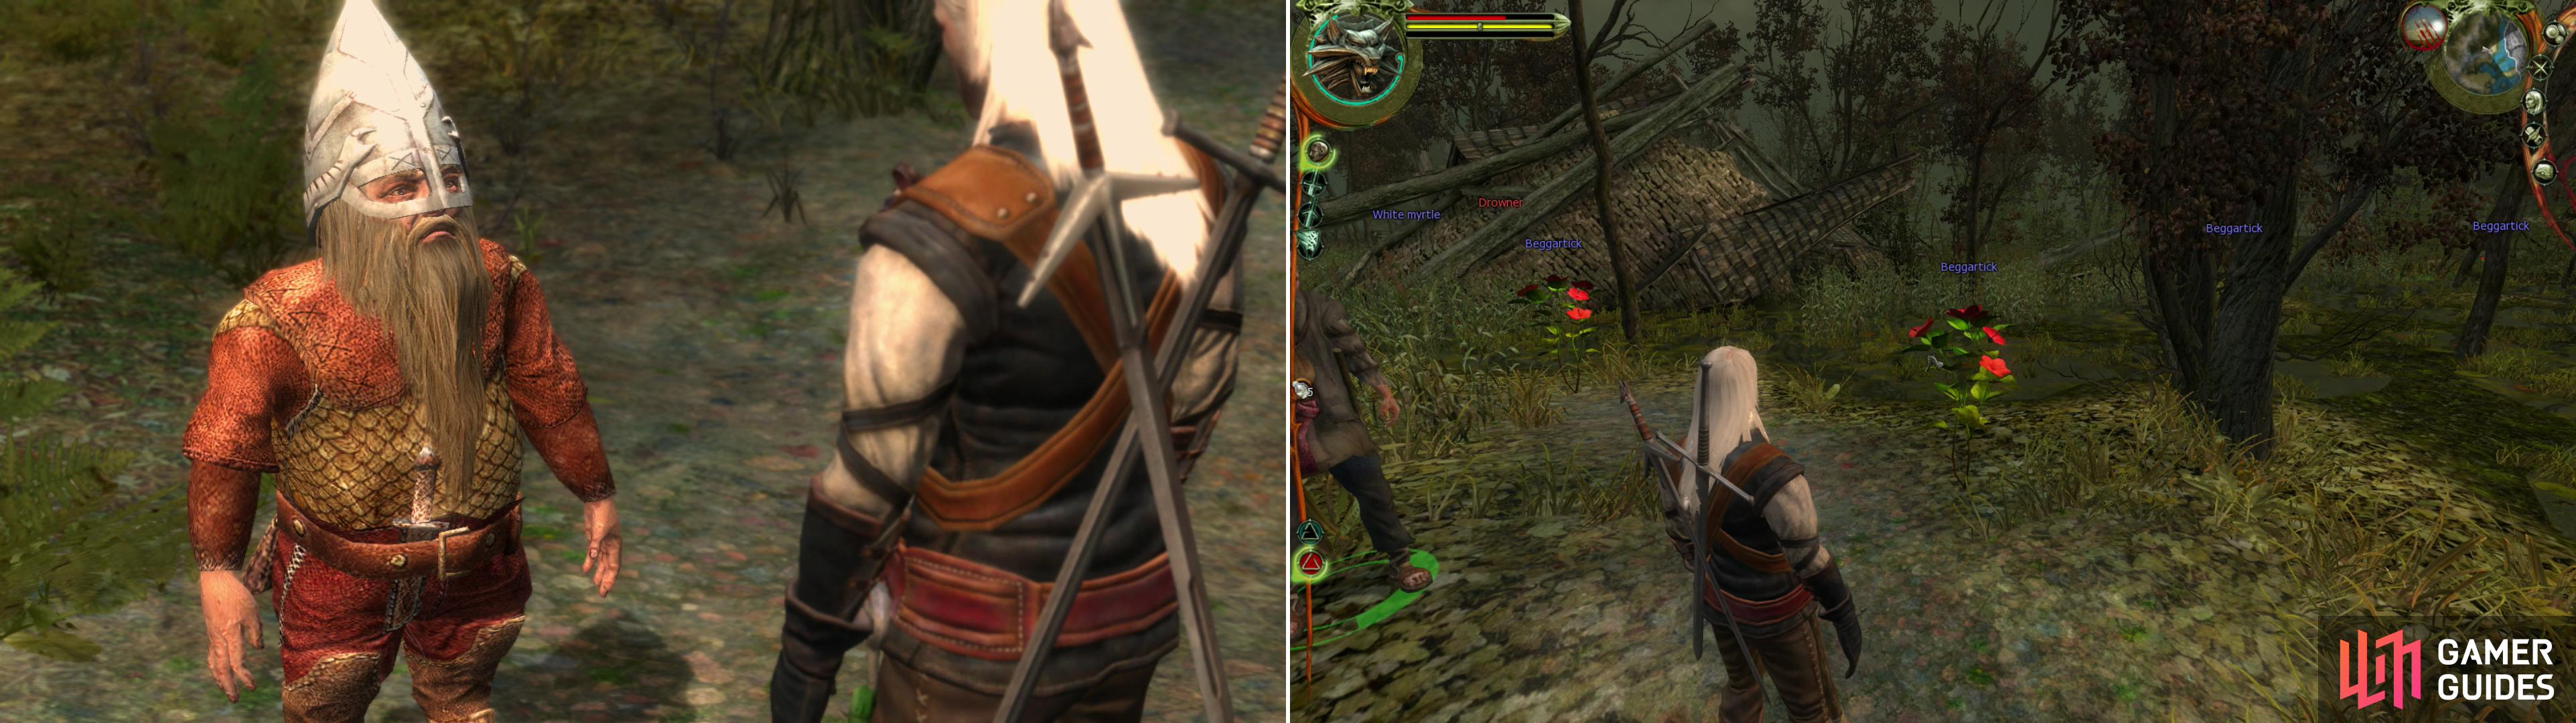
Meet with the head Lumberjack-a Dwarf named Yaren Bolt (left), and strike a deal to harvest Beggartick (right), which can primarily be found near the Mage’s Tower.
When you’re done exploring the cave, leave and head to the north-west… or you could just follow the trail. Either way, you should reach the Lumberjack Camp, marked on your map as merely a “Clearing”. Talk to one of the Lumberjacks and he’ll tell you his kids have fallen sick, but if he doesn’t secure enough money from the logging season, they’ll starve.
His solution? You buy some crap off of him, and he gets to go home to stay with his kids. Even if you’re a materialist, this is a good trade. He originally wants 200 Orens, but you can talk him down to 150. In return, you’ll get a piece of Red Meteorite (worth 300 Orens), a jug of Sodden Mead (10 Orens), and a Silver Ring (80 Orens). He’ll also throw in a recipe for Wive’s Tears.. which is invaluable, unless you have a super awesome guide that tells you how to make it anyways.
Talk to Yaren Bolt and ask about the various activities of the lumberjacks. Best of all, ask him for work and he’ll give you the quest “Flowers and Gold” , which requires you to pick five Beggartick flowers, located primarily in the north-eastern corner of the Swamp Forest, near the Nonhuman Camp. You can learn more about the Beggartick plant by talking to folks around the swamp, which you might as well do, seeing as how it gets you experience.
The Druid Grove
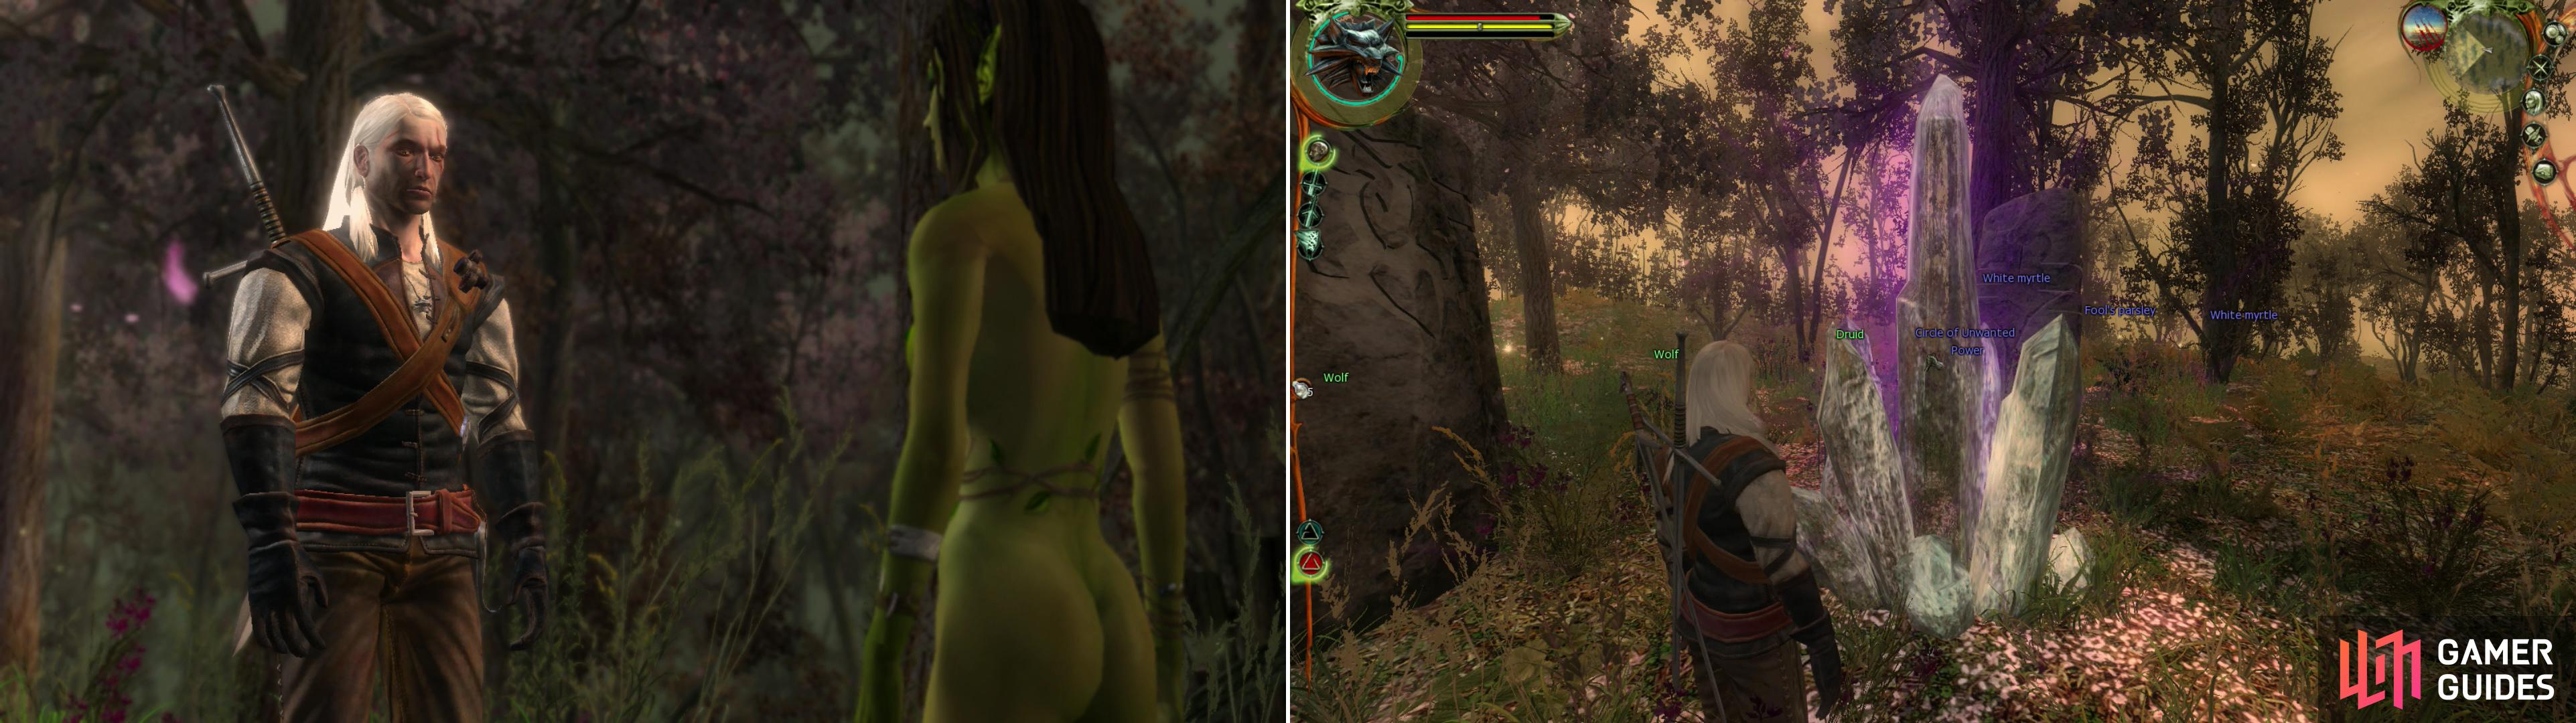
Nothing validates a Druid Grove like having your own tenant Dryad (left). Morenn fancies hunters, and requests you bring a Wolf Pelt to show off your prowess. The Druid Grove is also home to the Circle of Unwanted Power (right) from which you can learn the Yrden Sign.
Rest until morning-if it’s night out-and head to the Druid Grove. The lazy Druids won’t talk to you at night. Talk to the random Druids wandering around to talk to them about various things, including Beggartick Blossoms and the missing Brickmaker boy. They deny that any boy was abducted, saying that a child would get in the way. To the ludicrous claim that the Druids are trying to turn the child into a Dryad… the Druid will invite you to ask the Dryad about it in person. All in good time.
You can purchase some books from the Elder Druid, and he’s the guy we need to talk to in order to get a storm started, but we’ll start that up later. Before we deal with any of the named characters go touch the Circle of Unwanted Power to obtain the Yrden Sign. Despite the name, it;s hard to imagine why anybody wouldn’t want the power.
| Objective | Reward |
|---|---|
| For asking the Druids about Beggartick Blossom | 100 XP |
Now that we’ve talked to the unnamed folk, lets talk to Morenn. What is it with people here and double nn’s? Anyways, talk to Moren-nuh, who has a lot to say about Dryads. She’d be an expert, right?
Ask her about the missing boy, and Geralt will-as usual-persue the conversation along lines that lead towards perversion. He might be sterile, but that doesn’t mean he’s not frisky. She’ll ask for a Wolf Pelt as proof of Geralt’s prowess. Since we just exterminated a pack of wolves in the Swamp Cave, you should be able to provide her with one. If not, there are several Wolves north of the Druid Grove.
Regardless, furnish her with a pelt and she’ll complicate matters by getting cold feet. Apparently, Dryads are Catholic-no sex without procreation. Geralt, however, is more therapeutic about the whole matter. Pick option #2 to insinuate the intimacy without procreation can be good, then pick option #2 again. Morenn will concede and see your point… and we’ll avoid any crude and vulgar double entendres. Anyhow, spend the day with Morenn to obtain the “Dryads” Sex Card .
| Objective | Reward |
|---|---|
| For asking the Druids about the missing boy | 500 XP |
There’s also an elf named Yaevinn wandering around. Be sure to have completed the quest “The Drowned Dead Contract” before you talk to Yaevinn. He’s one of the local leaders of the Scoia’tael around Vizima, and if you ask him for work you’ll start the quest “Worth its Weight in Gold” . He wants you to deliver a letter to the Dwarf Vivaldi in Vizima, which we’ll get to after we finish our circut of the Swamp Forest.
Wyvern Island
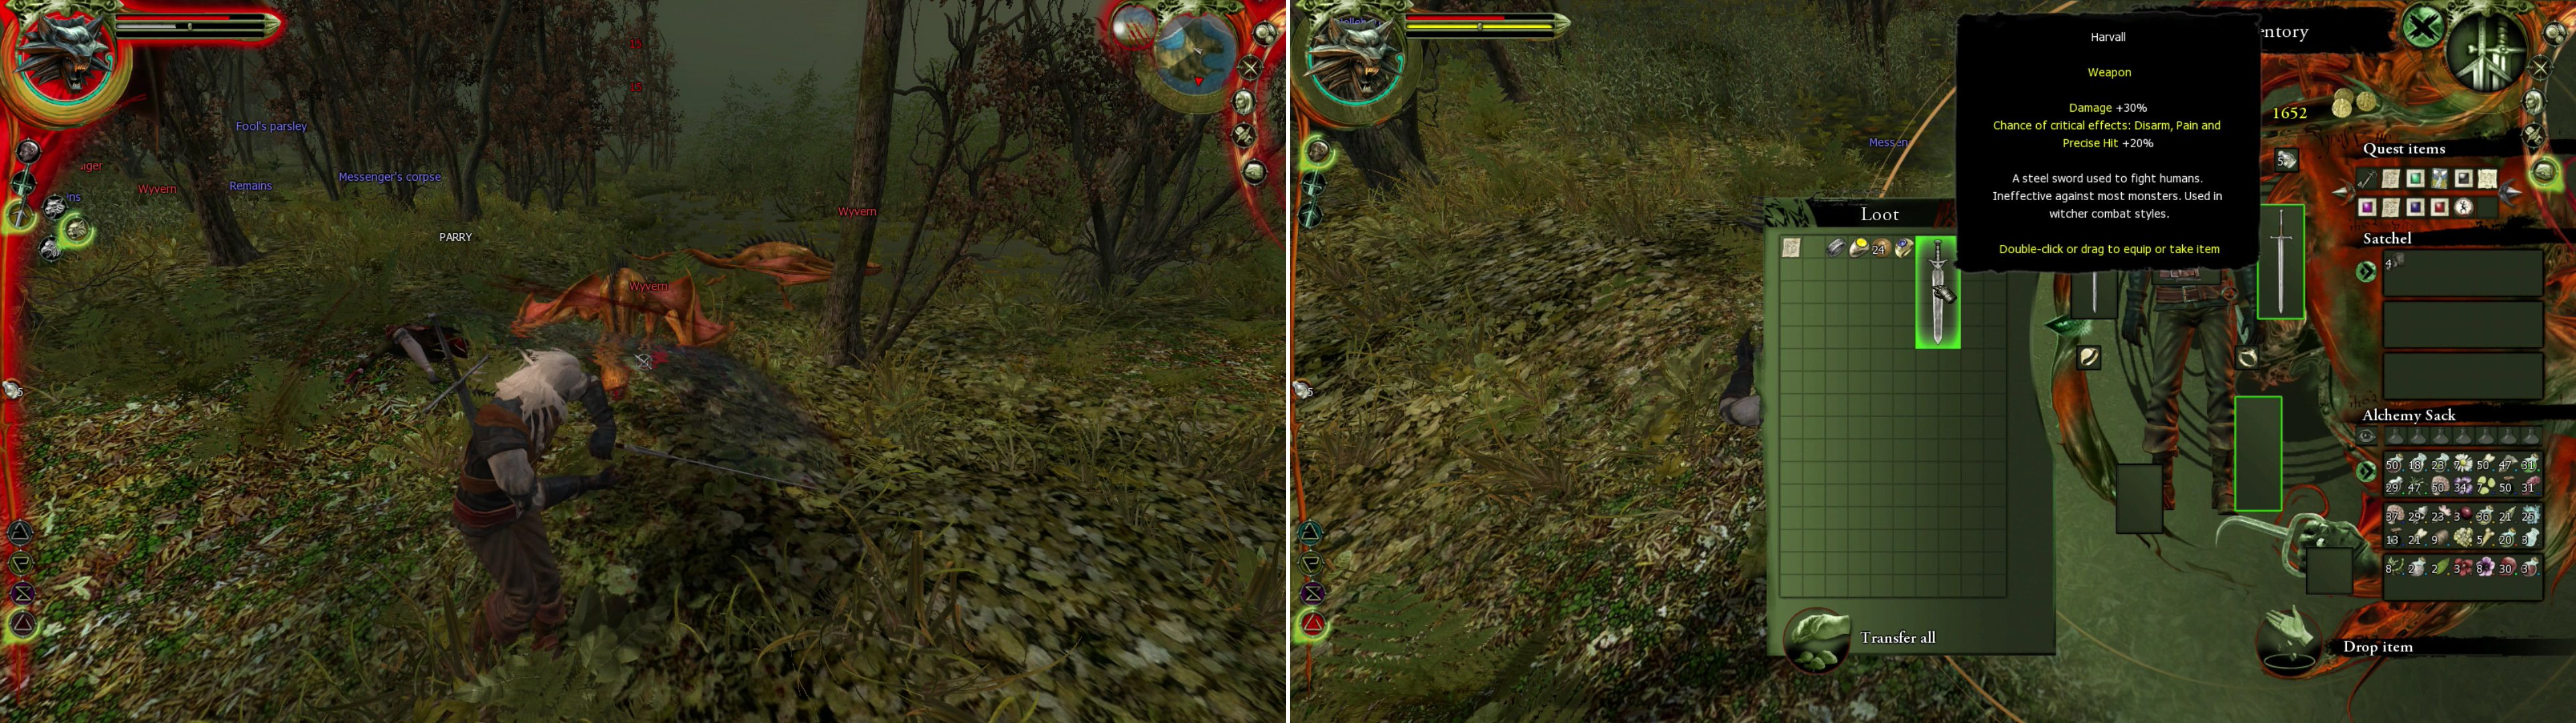
Wyverns are the most dangerous critter you’ll encounter in this chapter (left). Try to avoid engaging more than two at once, and soften them up with the Igni Sign. Your reward for clearing Wyvern Island is the ability to loot the Messenger’s Corpse for the sword Harvall (right).
Head to the north-east until you find an island shaped like a question mark-affectionately known as “Wyvern Island”. Wyverns are probably the most difficult non-unique enemy in this chapter, and you would be wise to approach them with caution. While a level 20 Geralt could probably kill three at once if he had to (with astute use of the Aard Sign and a little luck), it’s better if you don’t force such luck.
Try and lure them away one at a time, and be wary, as more will spawn when you approach the island. Use the Fast Silver Style on them, and if you’re dealing with more than one, use Aard and attempt to score a coup-de-grace. Once they’re all dead, loot the Messenger’s Corpse to find a “Blood-Stained Letter” which sheds some light on Leuvaarden’s allegience as far as Salamandra is concerned. This would matter if the “Suspect” quests were still active, or in particular, if we didn’t advance “Wanted” before coming here.
Best of all, you’ll find the sword Harvall , which is far superior to the standard Witcher’s Steel Sword you’ve been using-it’s even stronger than a Meteorite Sword, hence why we never bought one.
Yaevinns Letter
Now is a good time to head back to town, stash loot, and deliver Yaevinn’s Letter. First stop by the Brickmaker’s Village and talk to Vaska about the missing Brickmaker boy. Tell her that the Druids don’t have him for a small quest reward. Unfortunately, that’s all we can do with this quest for now. Also, if you talk to one of the Brickmakers you can learn more about the Beggartick Blossom-which is always a good thing. Once you’re done around the Brickmaker’s Village, head over to the Docks and pay to go back to Vizima.
| Objective | Reward |
|---|---|
| For asking the Brickmakers about the Beggartick Blossom | 100 XP |
| For telling Vaska that the Druids don’t have the missing boy | 500 XP |
Go pay Vivaldi a visit and hand him Yaevinn’s Letter… Or alternatively you could pay Vincent Meis a visit and turn the letter over to the proper authorities for a meagre reward. Decide which you’d rather do depending on who you wish to side with-if you want to help out the nonhumans, give the letter to Vivaldi. If you want to get on the good side of the authorities, give it to Vincent. If you’re neutral… or you can just deliver the letter as a favor to Yaevinn, without any implicit political goals in mind. Don’t forget to pick up the letter from Vivaldi before going back.
| Objective | Reward |
|---|---|
| For giving Yaevinn’s Letter to Vincent Meis | 500 XP 25 Orens |
| For giving Yaevinn’s Letter to Vivaldi | 500 XP |
Return to the Swamp Forest and head back to the Druid Grove to find Yaevinn… only to realize he’s not there. Talk to a Druid and he’ll inform you that Yaevinn went to go hang out with some other Elves in the area. Although the Druid can’t tell you where he is, your quest marker will, if you bother to have the quest tracked.
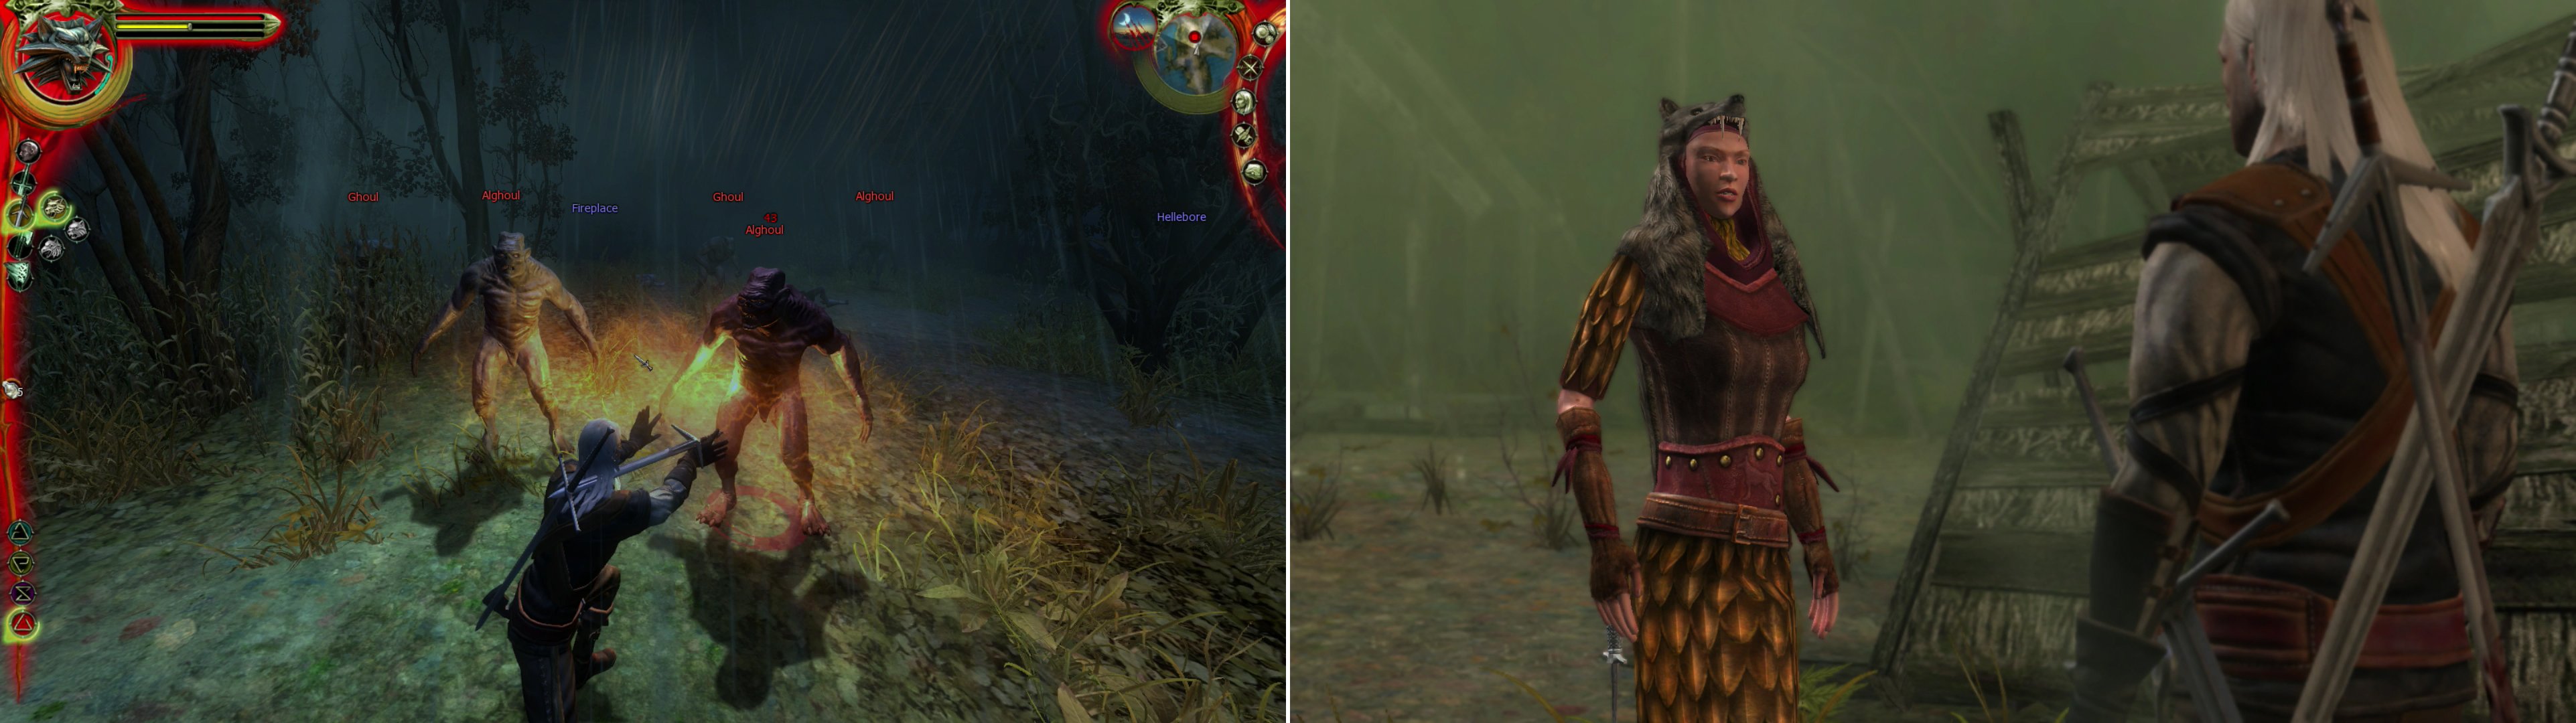
Find Alghouls at night near the Kezath Obelisk (left). This racist Elf can be taught a lesson by proving you can pick Faeinnewedd (right)… for what that’s worth.
In any event, there are a few things left to do in between the Druid Grove and the Nonhuman Camp, so don’t worry too much about getting there just yet. North-east of the Druid Grove you’ll find the “Chocc’Mah Obelisk”, and east and slightly south of that you’ll find the “Kezath Obelisk”. Near this last Obelisk is a Fireplace near two corpses. If it’s night-time, you’ll find several Ghouls and Alghouls-the latter being a stronger form of Ghoul (although not as strong as the Graviers we fought at the beginning of the chapter). If not… rest at the Fireplace until it is. This is a great place to get the Alghoul Marrow you need for “The Alghoul Contract” . Loot the corpses too, for some extra goodies.
| Objective | Reward |
|---|---|
| For collecting the marrow of three Alghouls | 500 XP |
| For giving Kalkstein the Alghoul Marrow | 2000 XP 150 Orens |
To the east of the “Kezath Obelisk” you’ll find a “Collapsed Tower”. Don’t worry, it’s not the one we’re avoiding. The only thing unique about this tower is that plenty of Beggartick grows around it. Harvest the five blossoms and take them to the Ferryman to gain the monetary reward for the quest. Afterwards, you can give Yaren his fair share-which loses you some Orens, but gains you some experience, or you can keep the whole reward, which pisses Yaren off for a while.
Speaking of which, while you’re here rest a bit and talk to Yaren again. By now he’ll have calmed down if you stiffed him, and generally be ready to give you more work. Apparently some monsters and Vodyanoi-the “Water Lords” the Brickmakers worship-are getting in the way of their supplies. Yaren needs you to deal with both. We’ll put this quest on the back-burner for now.
| Objective | Reward |
|---|---|
| For giving five Beggartick Blossoms to the Ferryman | 500 XP 400 Orens |
| For giving Yaren his share of the profits | 1500 XP -200 Orens |
| For refusing to give Yaren his share | 1000 XP |
Now we’re ready to deal with Yaevinn. Continue east past the “Collapsed Tower”, near which you found the Beggartick Blossoms. You’ll also find a Scoia’tael Scout who guards the bridge leading to the island upon which the Nonhuman Camp is situated. Note that there are a few more nonhumans walking around then there were last time…
Talk to Yaevinn and he’ll admit to organizing a training camp, and whatever he’s up to, we can assume it’s not good for the humans of Vizima and its environs. Pick dialogue option #3 and he’ll lay out his goals rather plainly-he plans to attack Vizima, and soon. Continue along this line and Yaevinn will ask which side you choose to be on. Your answer here doesn’t matter, actions will determine you allegience, not words. It will, however, clearly illustrate the three sides Geralt can choose.
He can side with nonhumans-creatures he feels no connection to as a mutant. He can side with the humans (and by extension, the Order of the Flaming Rose) since, as Geralt puts it, his job is to slay monsters-moral monsters, or monsters with “tentacles and scales”. Then there’s the neutral response-Geralt will be on his own side. Hence the three Witcher “alignments” this guide is based around. Just something to consider for the very near future.
Give Yaevinn his letter, or tell him that you failed to deliver to finish up “Worth its Weight in Gold” and Yaevinn will respond accordingly.
| Objective | Reward |
|---|---|
| For telling Yaevinn you failed to deliver the letter | 1000 XP |
| For giving Yaevinn Vivaldi’s reply | 1500 XP |
Before you begin ‘Force Recon’ talk to a female elf simply named “Scoia’tael” at the Nonhuman Camp. Most of the time she’ll just insult you (although at night she’ll just tell you to come back tomorrow). Once in a while, she’ll bother to talk to you, however. She spends the time insulting you, claiming that you can’t identify Faeinnewedd. If you pick option #2, she’ll give you the book “Lara’s Gift” . If you tell that you’ve picked Faeinnewedd, she’ll demand to see some. Show her, and you can change her perspective on humans-albeit slightly.
No Comments