


How to Access Limitcut
Upon completing the Re Mind campaign, you’ll be prompted to create Clear Data and unlock Limitcut on the title screen. You can only begin Limitcut with a Clear Data from Re Mind so be sure to keep the file safe somewhere as to avoid overwriting it.
What is Limitcut?
Limitcut continues the story from the end of the events of Kingdom Hearts III as the Guardians seek a way to find the lost Sora. You’ll be treated to a cutscene in Radiant Garden to kickstart things and then you’ll find yourself in control of Riku in a familiar friend’s house. Access the nearby computer to unlock Data Greeting on the title screen and then head inside to begin Limitcut in earnest.
Limitcut itself is essentially thirteen boss battles against the new Organization XIII that will test your skills to the very limit, regardless of the difficult level you’re playing on. These are nothing like their base game counterparts and have entirely different patterns to learn before you can take them down. Fans of Kingdom Hearts II Final Mix will be familiar to these Data Battles that were available there and this is more of the same.
You’re free to take on the bosses in any order of your choosing.
Starting Preparations
How much preparation you’ll need to do is dependant on your difficulty level. For example, those on Beginner and Standard might get away with lower levels but for Proud and Critical you’ll want to be Level 99 to help you survive a few more hits. Limitcut’s difficulty is such that even at Level 99, a few hits will put you in Critical HP so you’ll want every little bit of help you can get.
Level 99
In order to hit Level 99, you’ll want to create a meal that provides the Exp Incentive Full Course Bonus. There are numerous ways to achieve this but below are two examples:
-
Option 1
- Mushroom Terrine+
- Pumpkin Velouté+
- Eel Matelote
- Beef Sauté
- Chocolate Mousse+
-
Option 2
- Lobster Mousse+
- Crab Bisque+
- Bouillabaisse
- Stuffed Quail+
- Fresh Fruit Compote
Once you have enough for one or two meals (each one lasts 30 minutes), make your way over to Olympus using the Summit Warp Point. From here, make sure you have Thundaga on a shortcut and head forward into the Realm of the Gods courtyard where you’ll find Battlegate 1. This is a simple Battlegate with plenty of enemies that you can defeat in a short time using Thundaga (the Mickey Clasp from collecting Lucky Emblems makes thise easier yet). It’s entirely possible to Level to 99 from around Level 50 in about 30-40 minutes.
Ultima Weapon, Oblivion, Oathkeeper
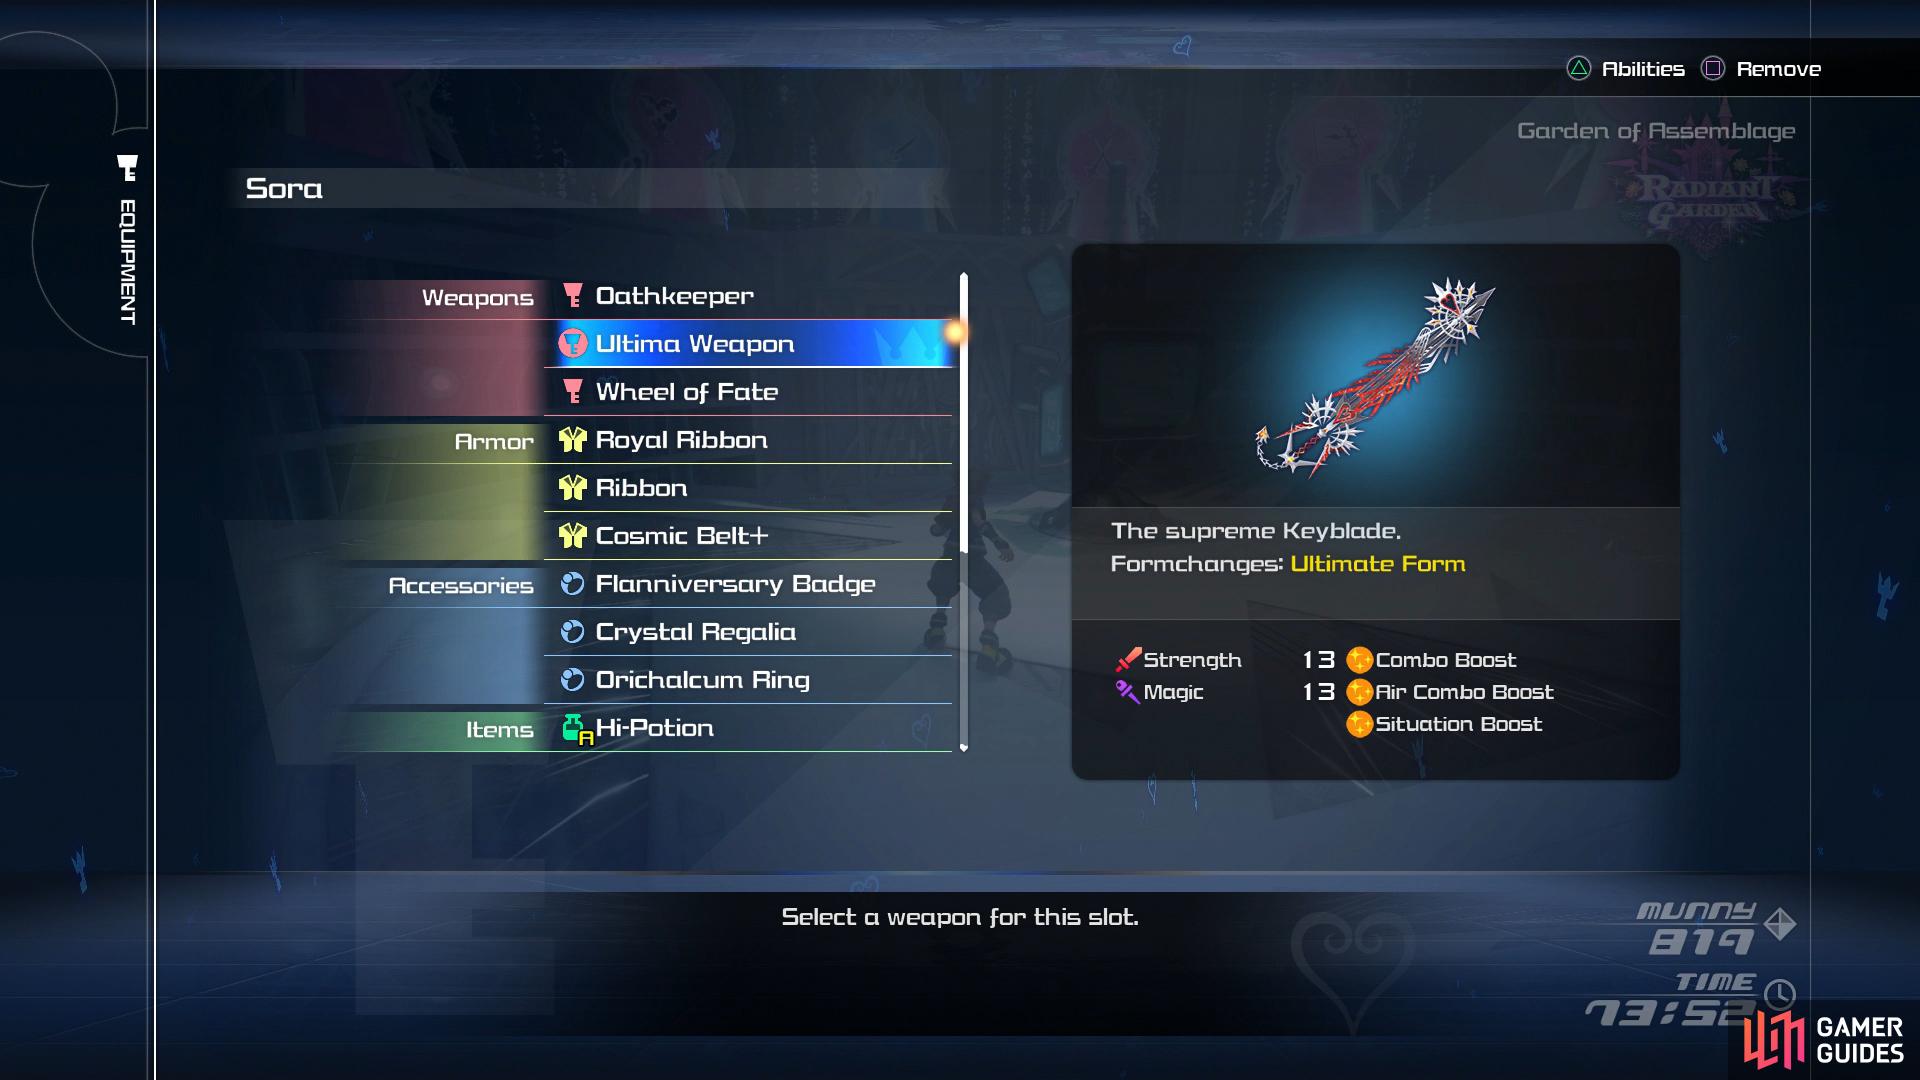
Ultima Weapon, Oathkeeper and Oblivion will give you an upper hand here.
The Ultima Weapon will make life a lot easier for you in terms of dealing damage to your menacing opponents (you’ll still have to find the openings) so if you’ve neglected to obtain it by now, it’s a good time to go back and do it now. It’s a rather lengthy sidequest that involves collecting seven pieces of the rarest material. To summarize it here, you’ll need the following:
-
The Recipe - You can obtain the Recipe itself by turning in 58 different Synthesis materials. Once you turn them in, you’ll unlock it in the Synthesis menu. This is a lot easier with Re Mind as the enemies in Scala Ad Caelum drop the higher tiers of materials.
-
Orichalcum+ - This is the most difficult and time consuming part of the process as there’s only seven available in the game and you’ll need all of them to Synth the weapon:
- Treasure Chest in The Caribbean
- Treasure Chest in The Final World
- Random prize for Moogle Postcard
- Reward from Frozen Slider mini-game (Arendelle)
- Reward for snapping 80 Lucky Emblems
- Reward for obtaining High Score on all Flantastic Seven challenges
- Reward for beating Omega Machina (Gummi Ship battle) in the Eclipse Galaxy
-
Collect the other materials - The final part is simple, you’ll need two Wellspring Gems, Pulsing Crystals and Lucid Crystals. All of these materials can be found easily in Scala Ad Caelum or the Battlegates.
Having the Ultima Weapon will make the battles a little easier, the Form Change into Ultimate Form can be used to bypass some of the mechanics due to the invincibility frames and the Guard while in Ultimate Form lasts longer than the original one.
Should you not wish to go through all of that to get the Ultima Weapon, the two new Keyblades are not far behind in terms of strength and usefulness. Snap all of the Lucky Emblems to obtain the Proof of Promises when finishing the game, take this to a Moogle Shop to obtain Oathkeeper. Likewise, finishing the game on Critical Mode will award you the Proof of Times Past which when taken to the Moogle Shop will allow you to obtain Oblivion. Both of these weapons are the next best weapon to Ultima Weapon when fully upgraded and their Shotlocks and Finishers/Form changes are even more useful than Ultima Weapon at times so it’s well worth your time seeking these out.
Elixir Farming
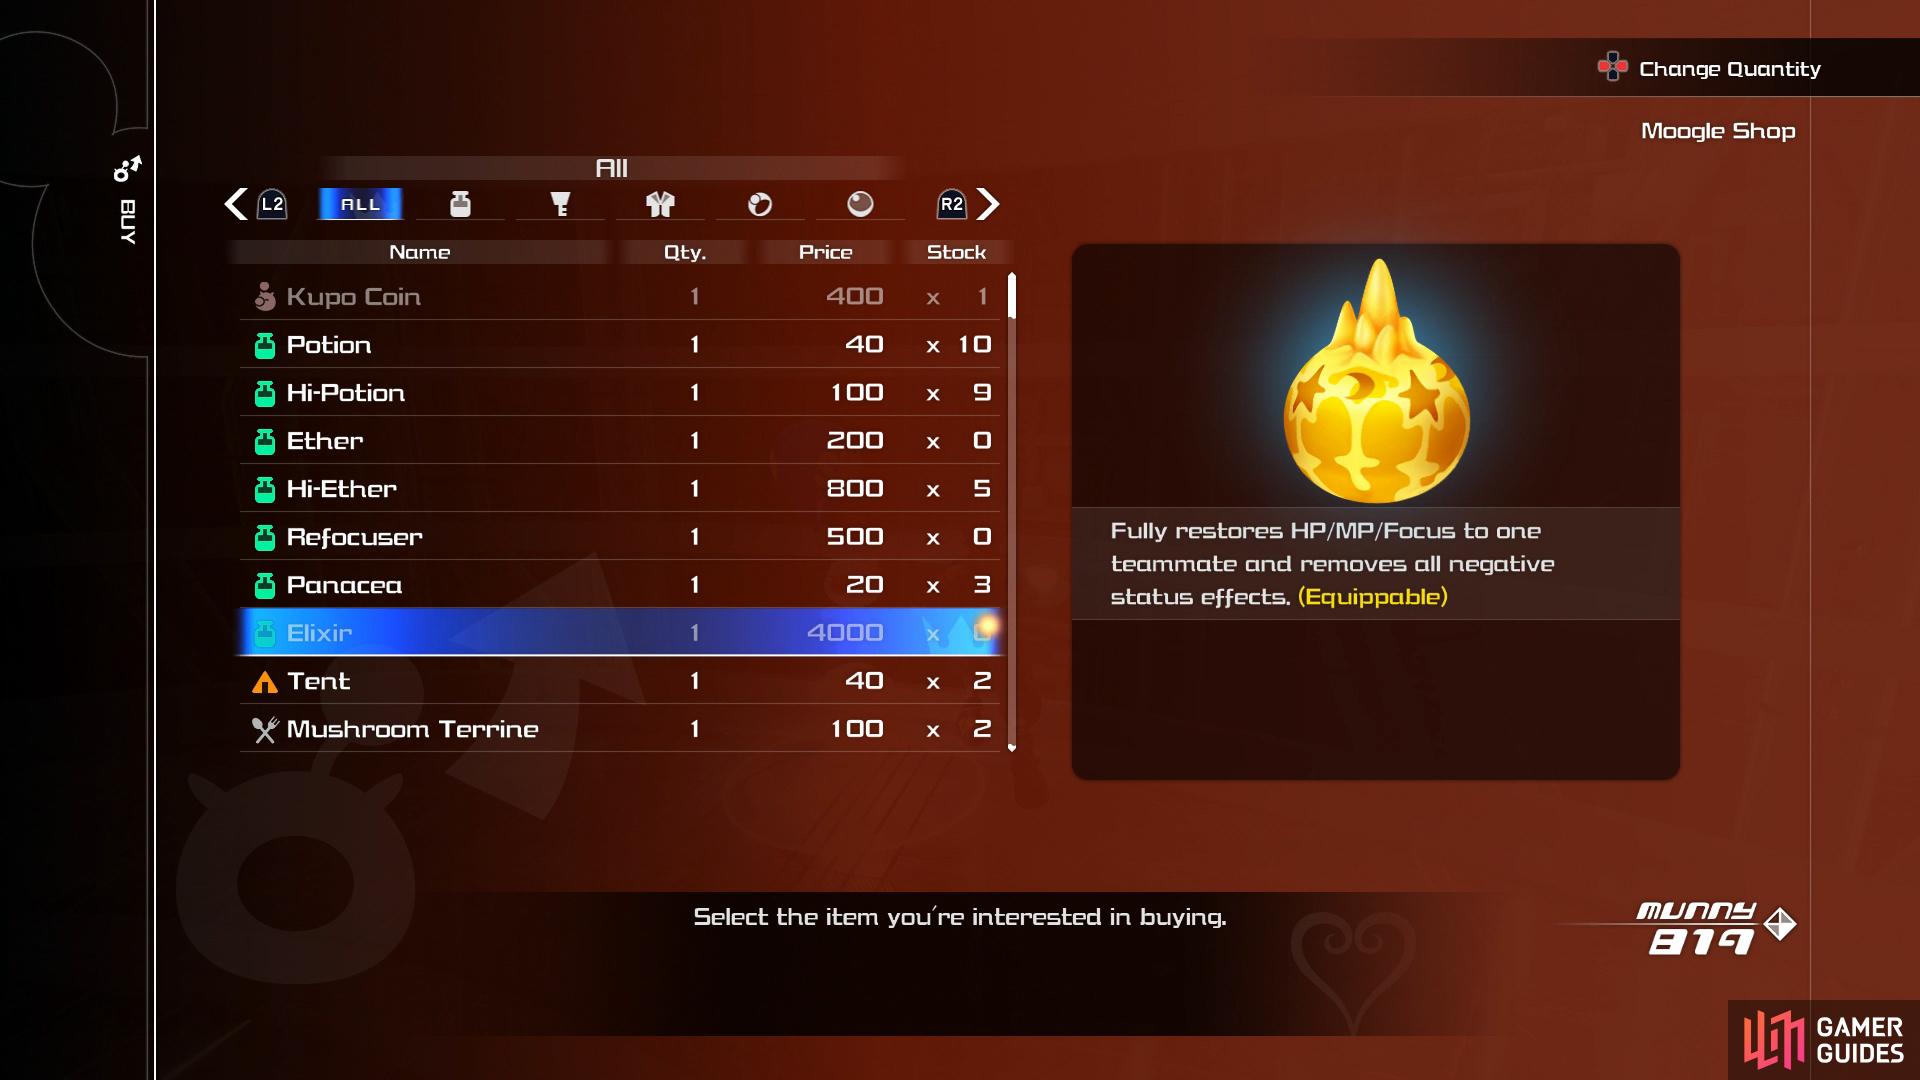
It’s well worth taking the time out to stock up on Elixirs for the battles ahead.
The final preparation to make life a little easier is to consider stocking up on Elixirs. Unless you’re playing a Level 1 playthrough (in which just Potions will suffice), you’ll want to stock up on Elixirs and assign them to a Shortcut. There’s two ways you can go about this, the first is to farm the materials for Elixirs and then to use the Moogle Shop to synth them. You’ll need three Wellspring Crystals and then two Frost Gems, Sinister Stones, Sinister Shards and Hungry Gems.
If that all seems like a bit too much work however, you now have the option of buying Elixirs for 4000 Munny per one at the Moogle Shop in Limitcut. The best way to farm Munny at this stage of the game is to equip the Golden Amulet, a reward from the Toy Box world and create a meal with the Rags to Riches Set Bonus. With all of this on hand, head to Battlegate 0 at the Keyblade Graveyard and farm it for around 2000 Munny per battle.
Final Preparations
All of the above will give you a good head start when facing these battles however note that if you wish to do any other farming on top of this, you can easily do so by pressing the [SQUARE]/[X] button when loading this save file.
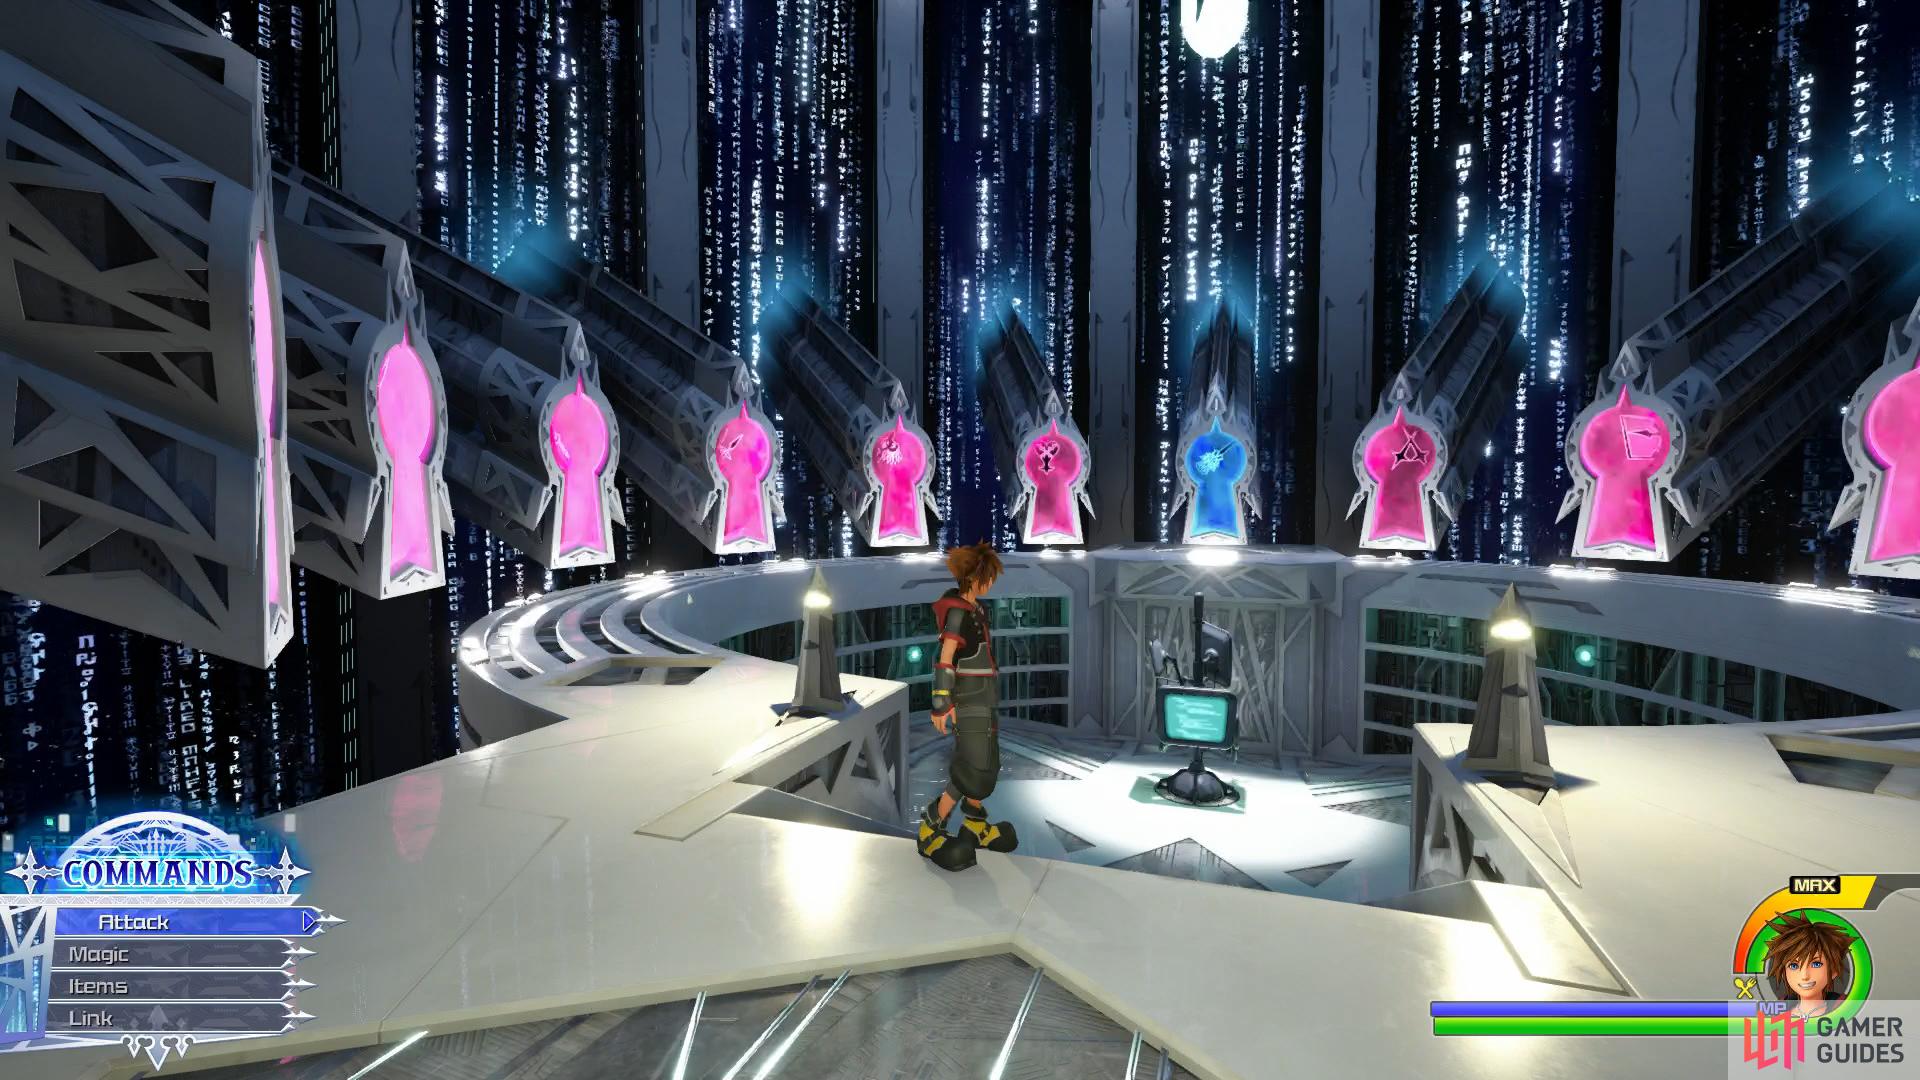
From the center of the arena, you’ll notice there are 11 doors you can access, each referring to a particular boss. There is no set order here and certain players may find certain battles easier than others. For that reason, if you find yourself struggling, consider leaving that door for now and attempting another. You’ll want to ensure you have a Kupo Coin on you at all times (unless you’re playing on Critical Mode) too, this gives you a little bit of a safety net as there’s nothing worse than getting a boss down to it’s final bar of HP and losing.
No Comments