

At World’s End
Finding themselves stranded on the open sea, Sora and the group find their raft heading towards the edge of the world. Upon waking, the group run into the eccentric Jack Sparrow as he chases down the Black Pearl.
You’re in a race against time here as the crabs make off with the ship. Ignore all enemies here and head straight for the Black Pearl itself. A great way to gain ground here is by using casts of Blizzara and then grinding across the path of ice that forms, three casts should be enough.
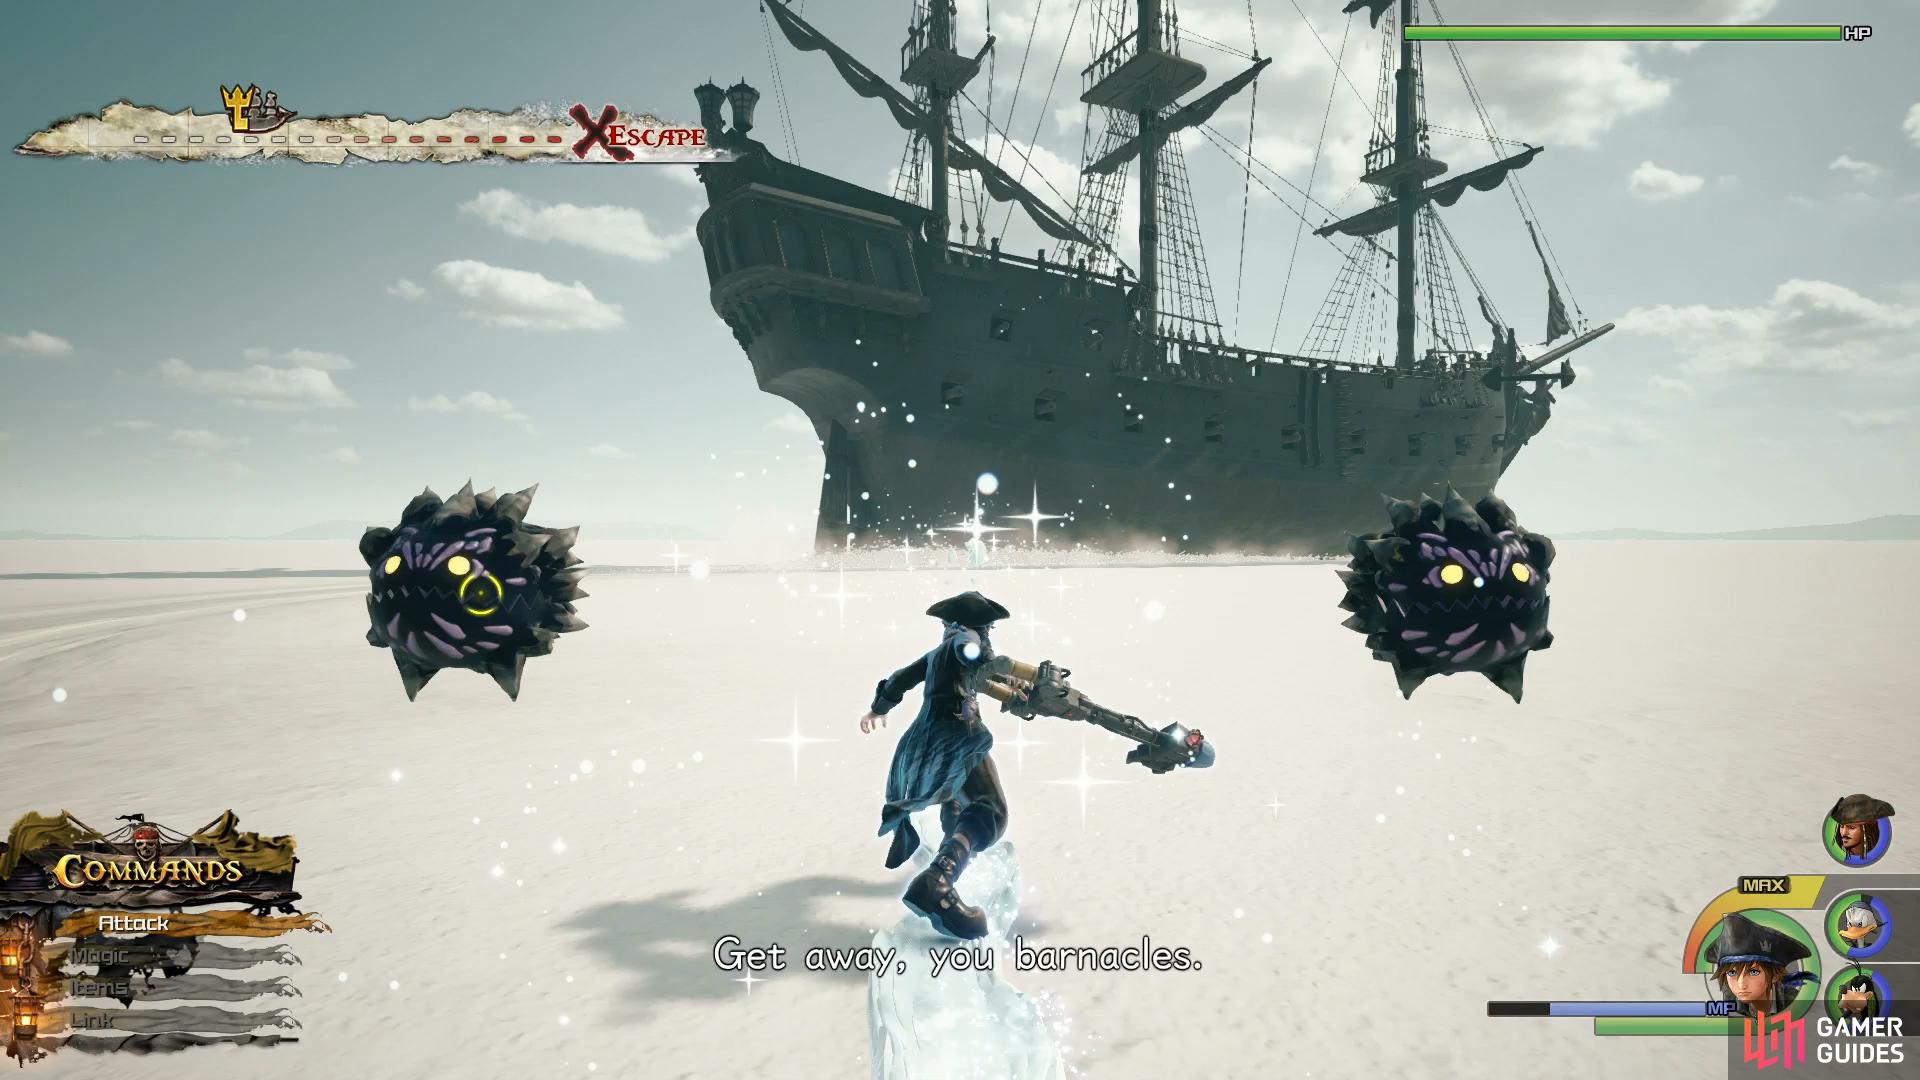
Ignore the Heartless and grind along your casts of Blizzara.
At this point, a group of new Heartless ambush you, the Anchor Raiders. These tricky adversaries will hang from their anchors and strike across at you, make use of Shotlocks from distance and then close the gap with Fira and Air Combos. Don’t take these Heartless for granted, they hit hard and if you find yourself caught in both of their Ground Pounds you could find yourself near death.
| Character | Ability |
|---|---|
| Sora | Counter Kick |
You’ll find yourself on the ocean following the cutscene with a ship at hand. Take note of the tutorial on how to operate the ship, it will become your main form of attack during The Caribbean. For now, pick up the speed and head forward toward the island directly in front of you. As you reach your destination, you’ll be ambushed by a Heartless Fleet and begin your first real taste of combat.
Pay special attention to the glowing green orbs on any Heartless ships, these indicate weak points and your primary target during these battles. When firing the cannons, you’ll see a reticule that will aid you in your aiming. You’ll still be controlling the ship during this time so take care not to manoeuver it into the center of both your attackers.
| Character | Ability |
|---|---|
| Donald | Accessory Slot, More Team Attacks |
Following more cutscenes, the crew will find themselves back in the Caribbean as the Heartless ambush the plucky heroes once again.
Boss: Raging Vulture
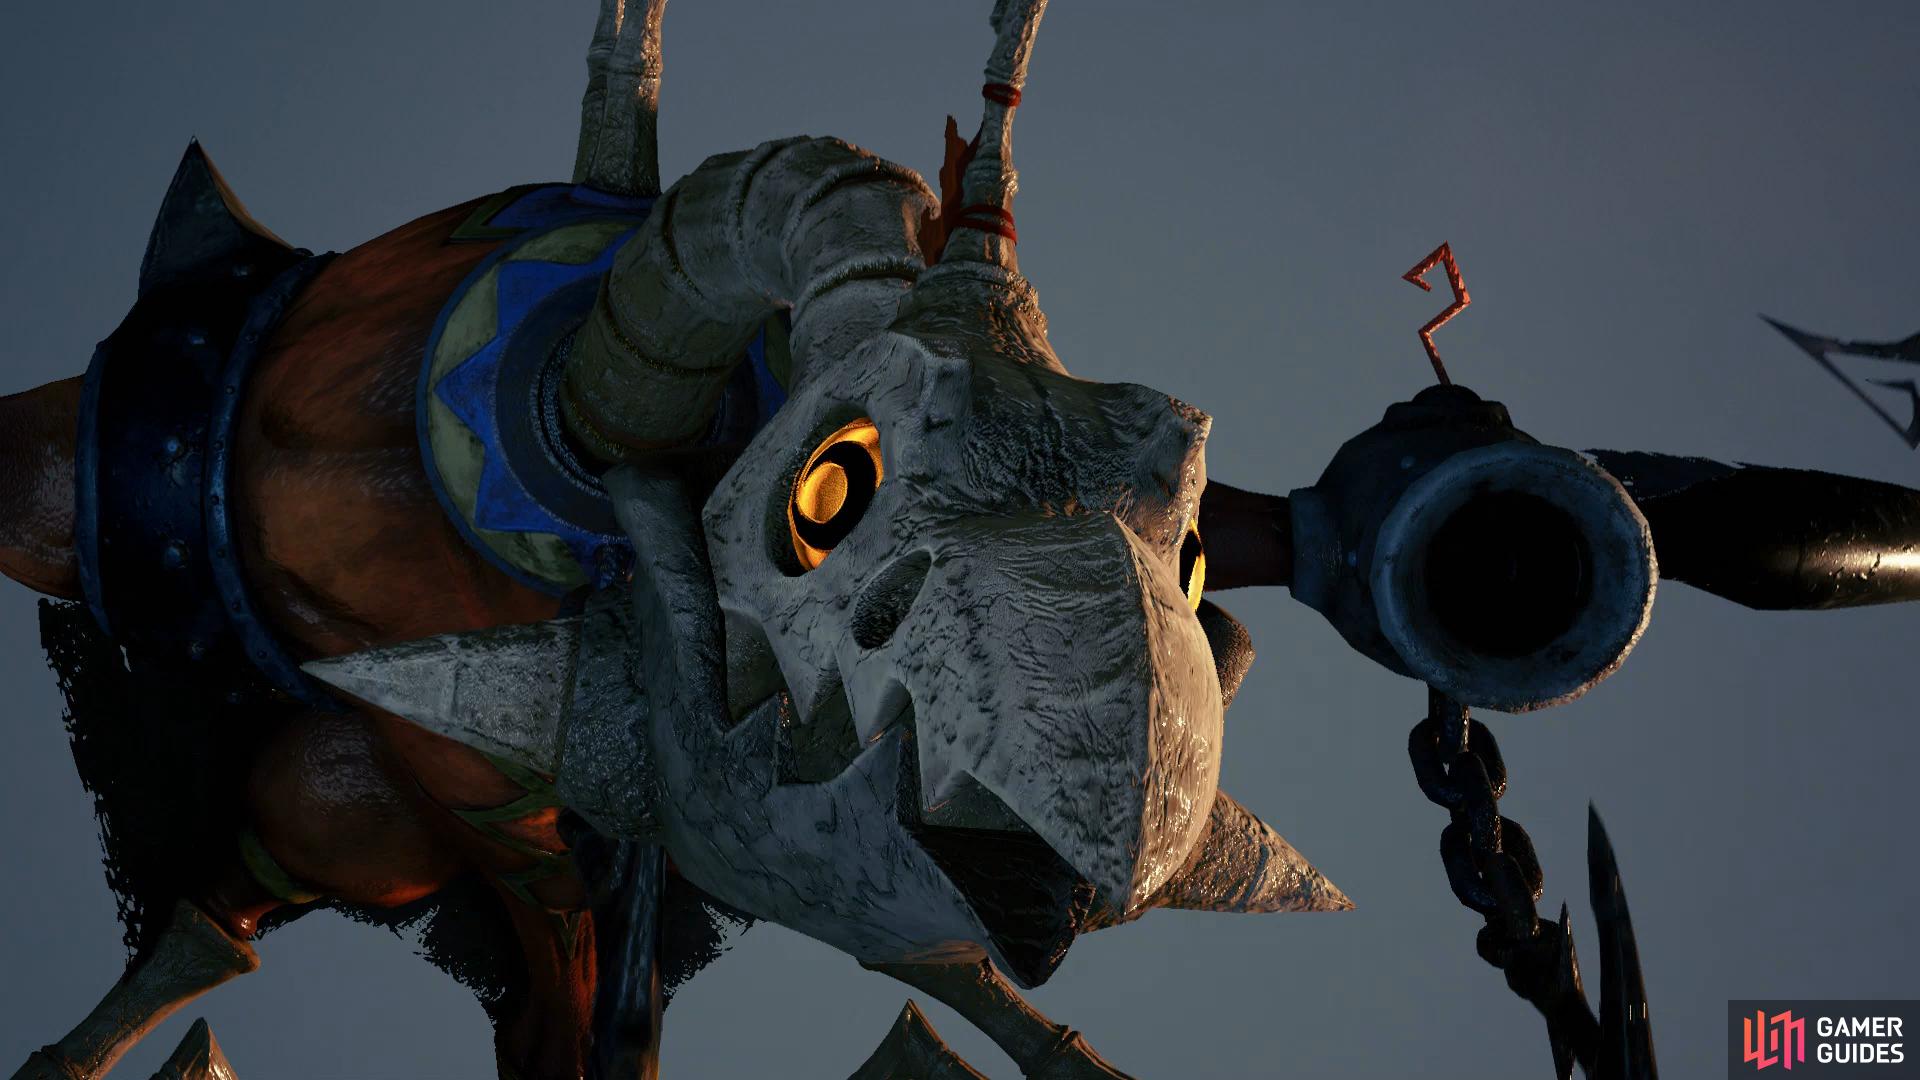
The Raging Vulture is the main threat in this battle, not the smaller Heartless. You’ll begin the battle riding on the back of a flying minion as you chase down the Vulture. You can change altitude with the [LEFT STICK] along with moving side to side. You’ll have to be quick in your assault too, the Black Pearl can only sustain so much damage as referenced by the gauge in the top left corner.
To attack the Raging Vulture, you’ll need to get closer to it and attack with a regular blast. Once you have it square in your sights, unleash the Torpedos to inflict massive damage. Keep an eye on the incoming shots your way too, the barrel roll is a huge aid here as is the ability to Air Step to any other flying minions that may be closer in proximity to the Raging Vulture.
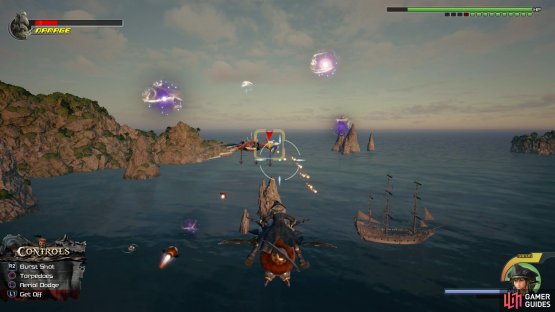
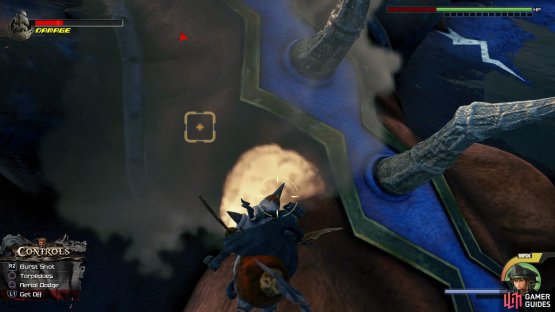
(1 of 2) Use your Torpedoes as much as possible


Use your Torpedoes as much as possible (left), fly to this position to avoid all danger. (right)
When the massive Heartless heads toward you, ignore your assault and prepare to evade. It will shoot a barrage of shots at you which will inflict huge damage should you get caught in it’s blast. The best way to damage the Raging Vulture is to close the distance completely and rest your flying minion either directly undernearth it or nestled on top between the body and wing. This way you can fire a constant barrage of regular bullets and Torpedoes without missing.
| Character | Ability |
|---|---|
| Sora | Air Slide |
The Huddled Isles
The group find themselves stranded on the Huddled Isles somehwere in the Caribbean following the Battle with the Raging Vulture. Without a ship, there’s not much you can do so the objective for now is to explore your surroundings in hopes of tracking one down.
You’ll receive a short tutorial here on how to navigate underwater and note that combat will change while under water. Combos are harder to perform and your magic spells alter in the form of shooting out magical bursts rather than their usual form.
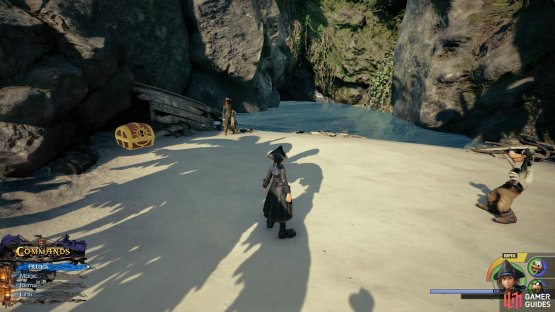
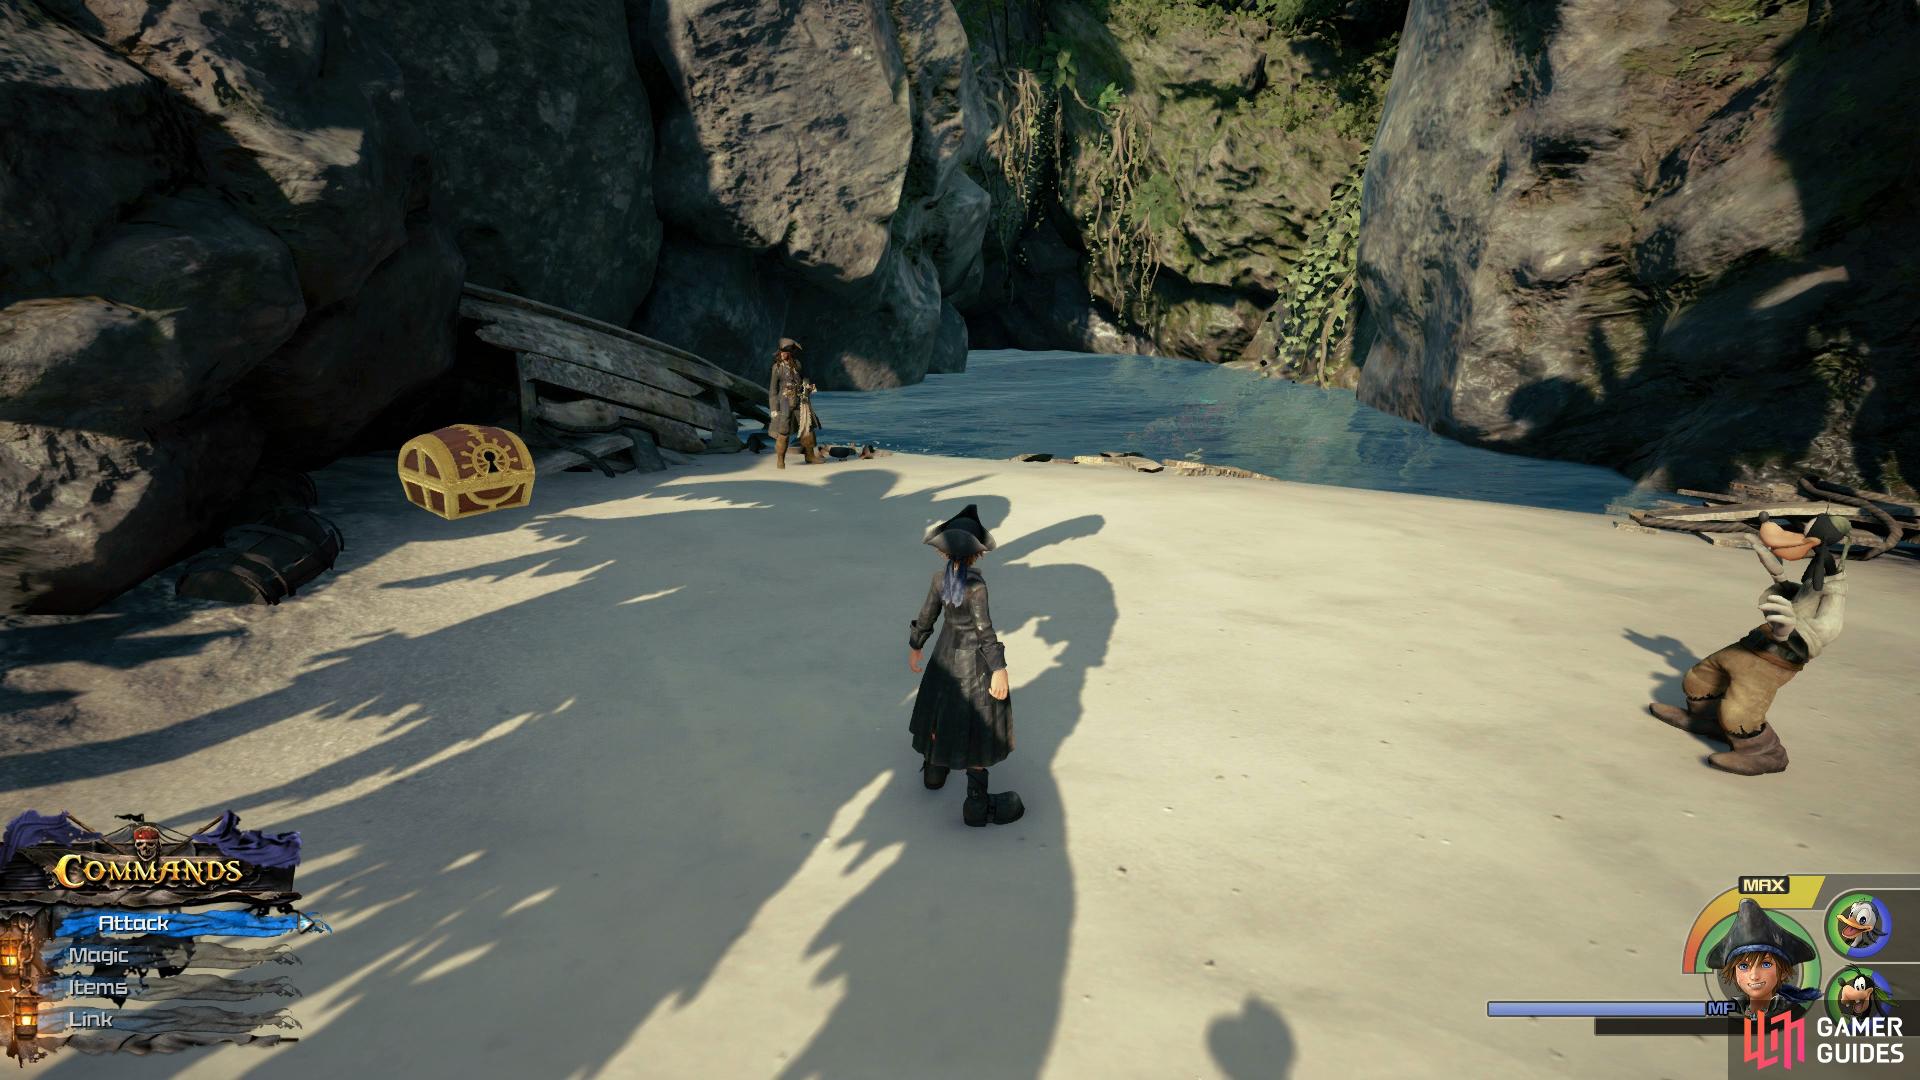
From your starting position, look to your left to find a large chest containing Treasure #20 - Map: Huddled Isles along with a Save Point and Moogle Shop to your right. Once you’re ready, head forward and dive into the water to get your first taste of it. Follow the linear path until it opens up and you run into your first battle against a group of Sea Sprites, Heartless who will constantly shift their elemental weakness so pay attention to their bodies and see what their current affinity is.

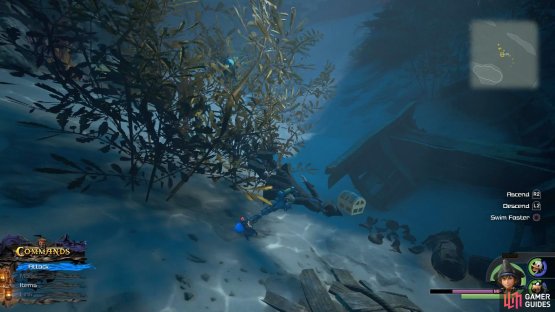
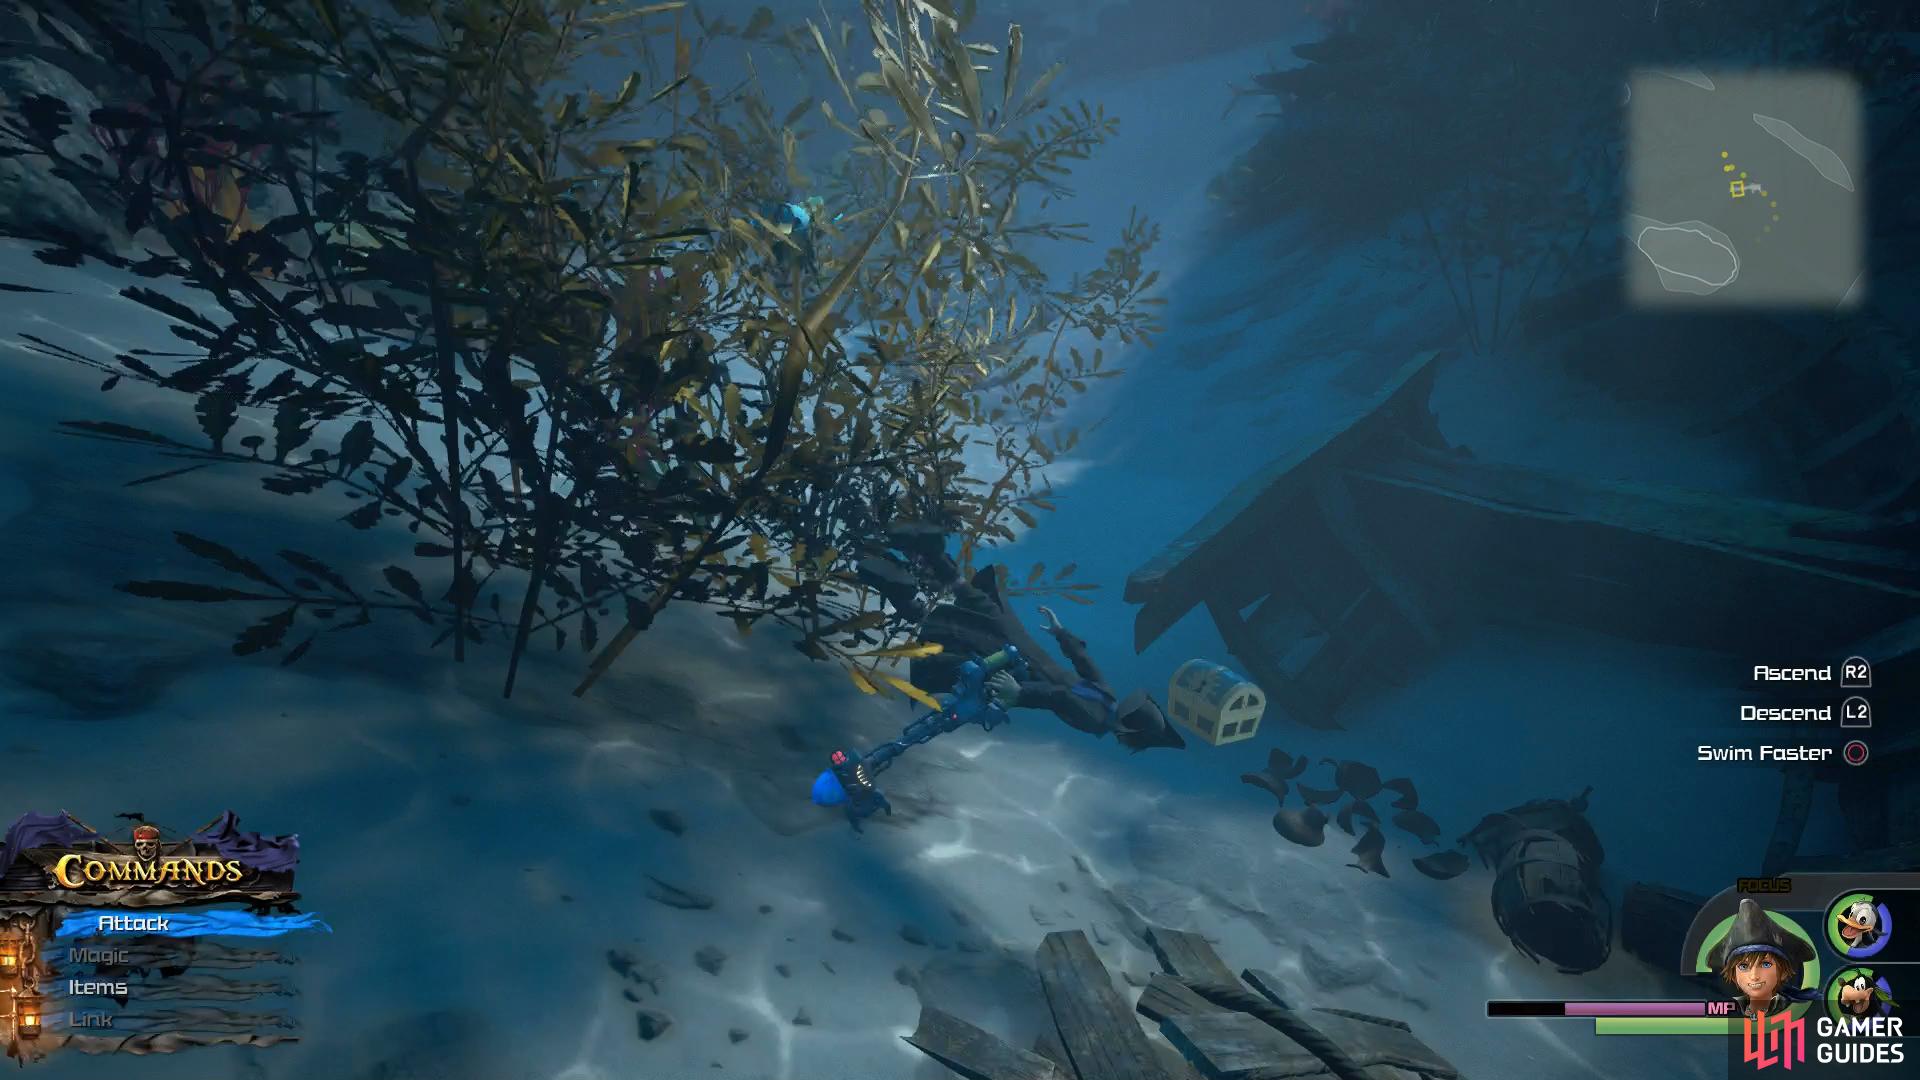
(1 of 2) Maps will be crucial for exploring The Caribbean
Maps will be crucial for exploring The Caribbean (left), check out the shipwreck to discover three chests. (right)
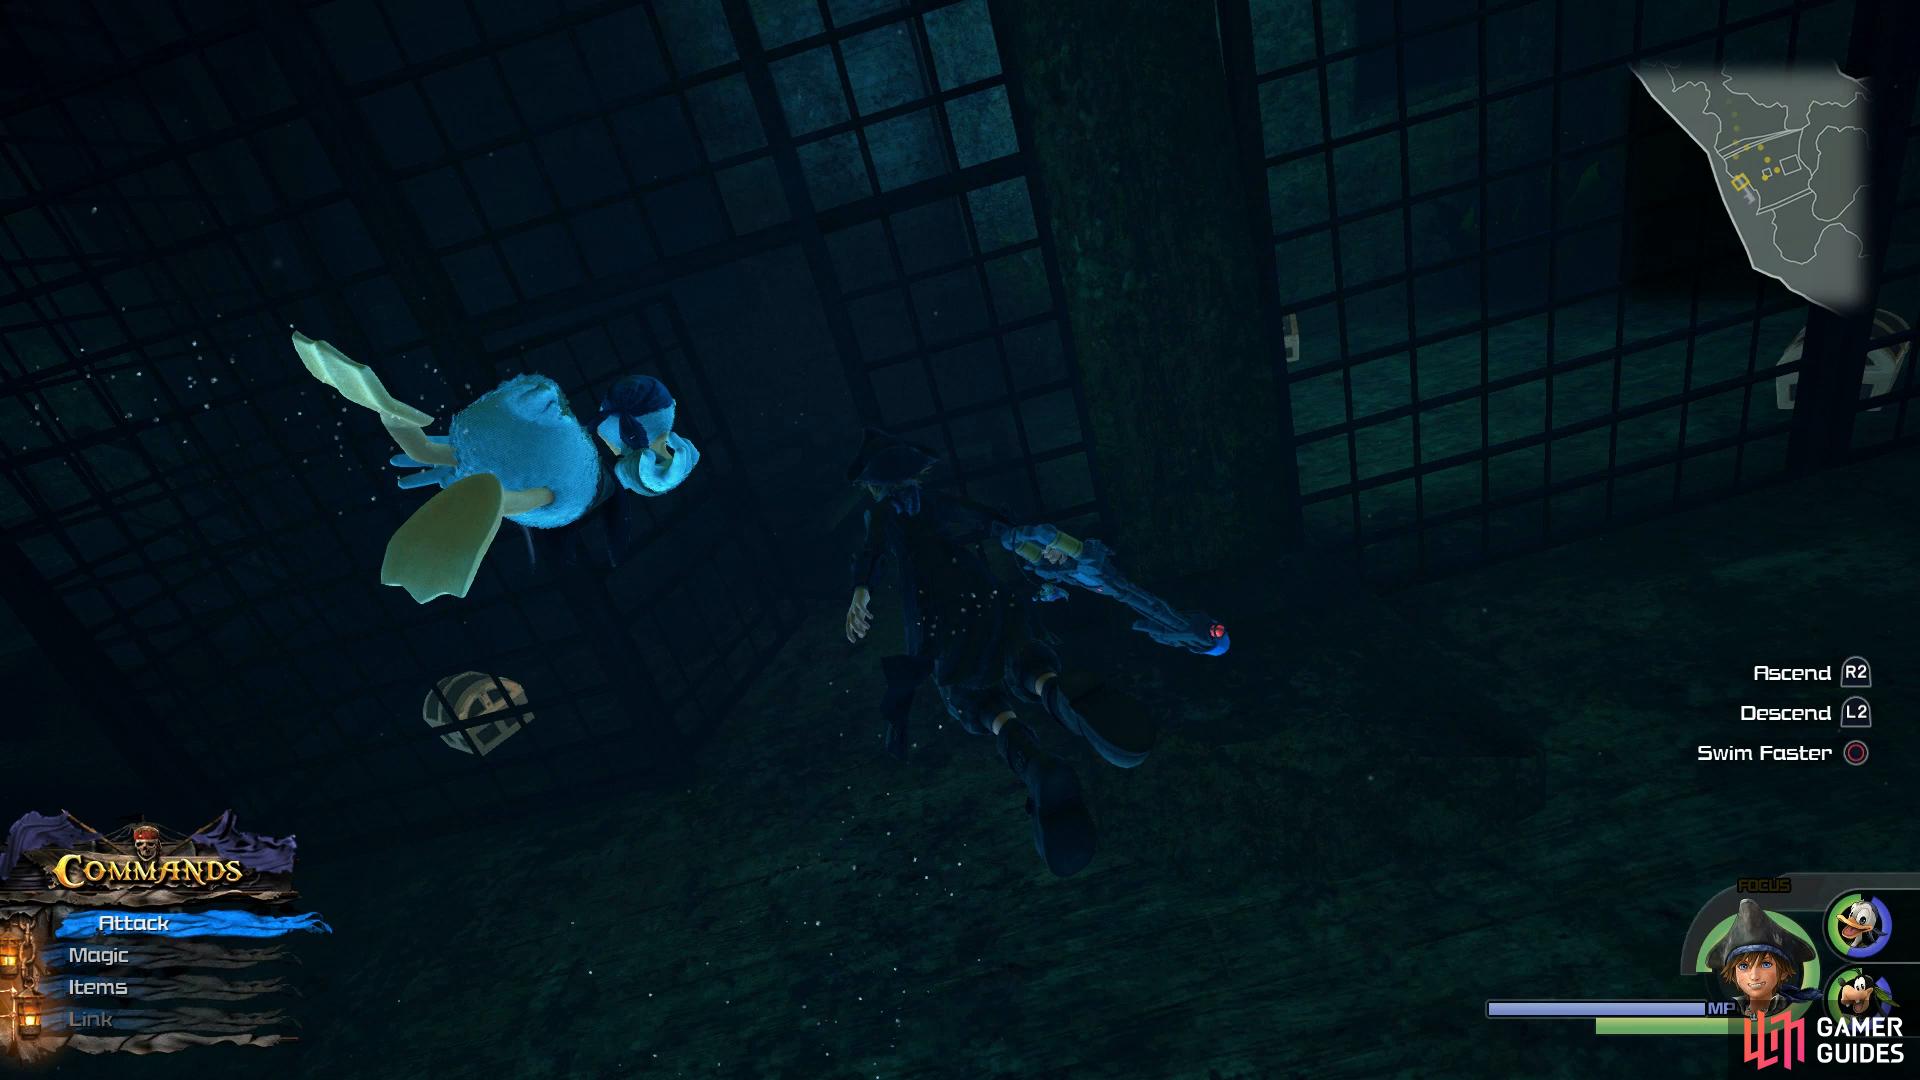
After dispatching them, head past the sunken ship and defeat another large group of Sea Sprites, taking care to avoid the Jellyfish. Although you can’t defeat these permanently, you can shoot Sea-Thunder at them to cause them to retreat for a short time. Following their defeat, descend to the bottom of the second sunken ship and swim through the hole in the hull. Navigate through the tight space while avoiding the Jellyfish to discover three chests containing Treasure #1 - Master’s Ring, Treasure #21 - Panacea and Treasure #22 - Mega-Potion.
Continue underwater to the east and you’ll eventually reach the Undersea Cavern. Continue right at the first intersection and then when you reach the next intersection on the map, break away the boxes to your right to find a hidden chest containing Treasure #2 - Adamantite. Return to the main path and follow it south where you’ll be ambushed by a large group of Sea Sprites. Keep heading south after defeating them and head left at the next intersection. Use Sea-Thunder on the Jellyfish to clear them out of the way and you’ll find a chest at the end containing Treasure #3 - Orichalcum.

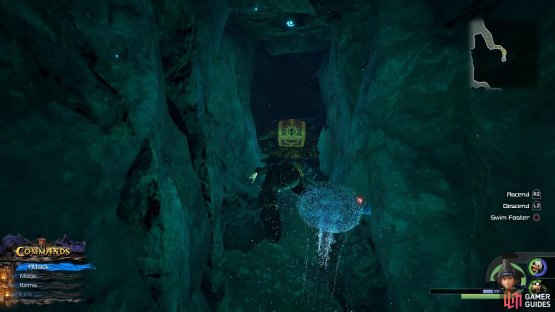
(1 of 2) Search at the end of the Jellyfish path to find this chest

Search at the end of the Jellyfish path to find this chest (left), head north at the intersection to find another. (right)
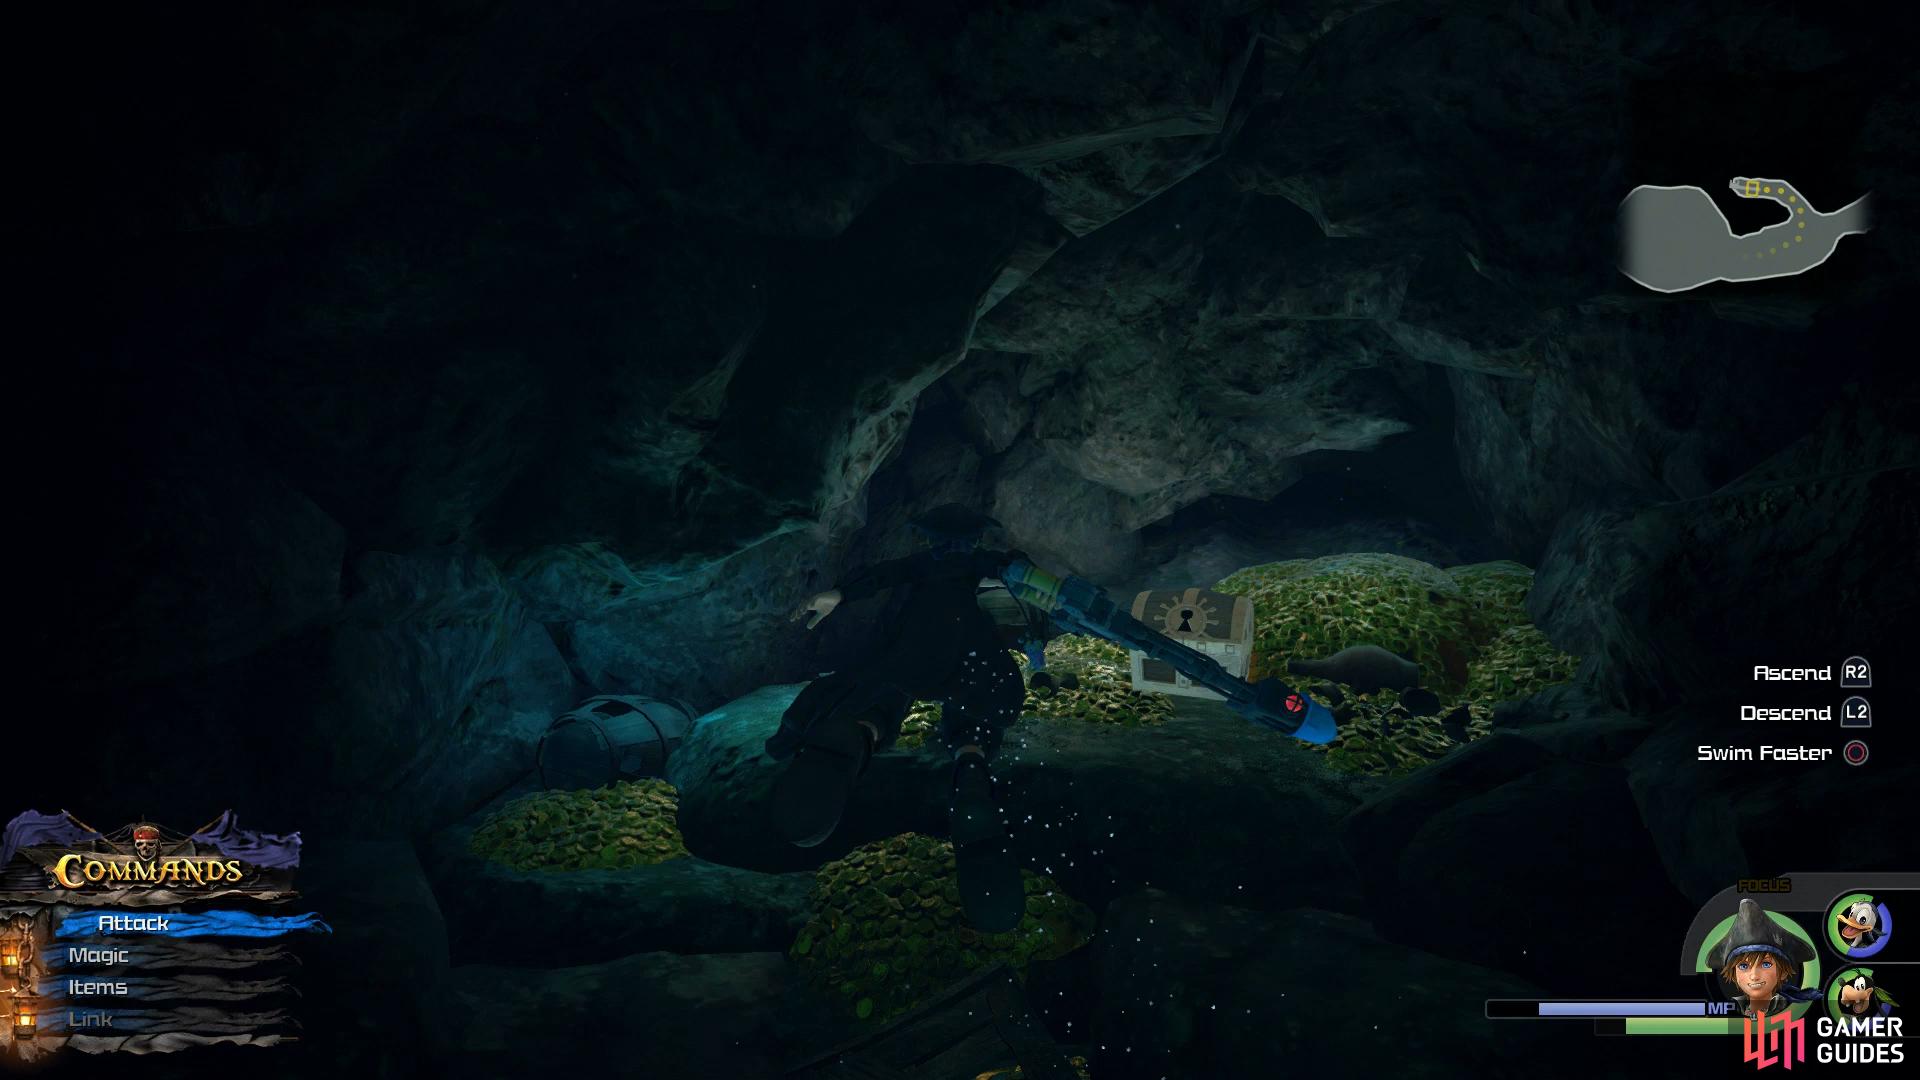
Return to the previous intersection and follow it along to the next, opting to swim north first. Follow this passage all the way to the end to find a large chest containing Treasure #4 - Classic Kingdom: Fishin’ Frenzy. Return to the previous intersection and this time swim south and continue south at the next intersection to find a Save Point. Once you’re ready, head forward into the large open area to find a chest just sitting there waiting for you.
Boss: Lightning Angler
The Lightning Angler is a massive Heartless that will attack Sora by charging at him and attempting to bite him. This is easy to dodge by dodging to the left or right as it shoots towards you. The largest threat is when the Lightning Angler swallows you, this will cause massive damage to Sora so be sure to Cura straight after it.
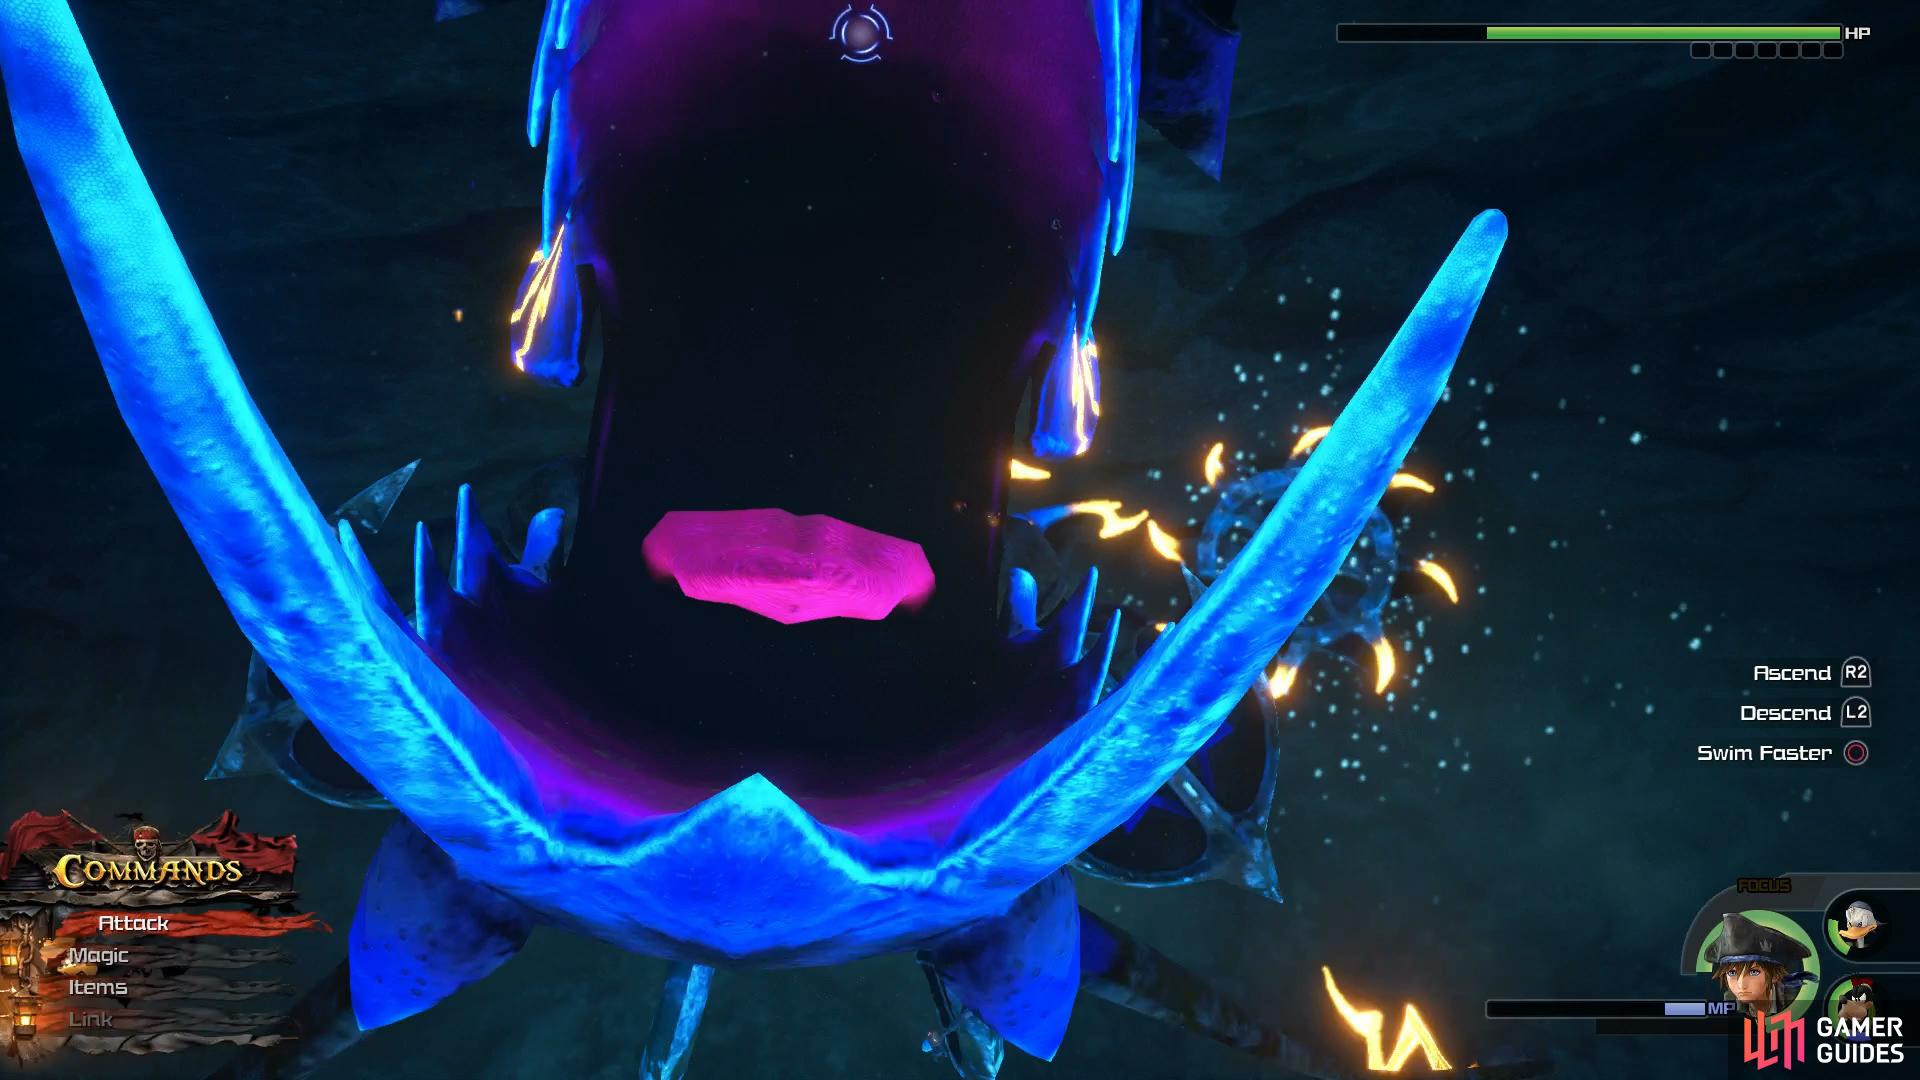
Being swallowed will inflict massive damage to Sora.
Finally, the Lightning Angler, like it’s namesake, will use Lightning based spells on you. Again, like all of this oversized fish’s attacks, is easy to dodge. Focus on using Fire spells from range as you close in on the fish and then aim to stick to it’s side as close as possible.
| Character | Ability |
|---|---|
| Sora | Thundaga |
Be sure to assign Thundaga to your Shortcuts right away, this is the best crowd control spell in the game and will be your go to at the start of any battle with many Heartless. Be sure to nab the chest you attempted to open earlier to obtain Treasure #15 - Ocean Heatbinder. This will allow you to use the Sea Spectacle Link, calling upon the power of Ariel to wash away your foes.
Follow the passage to the south and use the current to take you to the surface. Head through the tunnel and Sora will finally come across the ship they’ve been looking for, The Leviathan. With your new ship, you can now travel across the Caribbean, exploring islands to your heart’s content. You’ll also notice that in battle you now have a gauge you can fill by performing attacks, this will allow you to perform a special attack with the [TRIANGLE]/[Y] button when full.
Additionally, you can now access the Sea Chart whenever you’re at the helm of the ship. This will present you with handy information such as what island’s you’ve visited, your next objective and where you can find a Save Point.
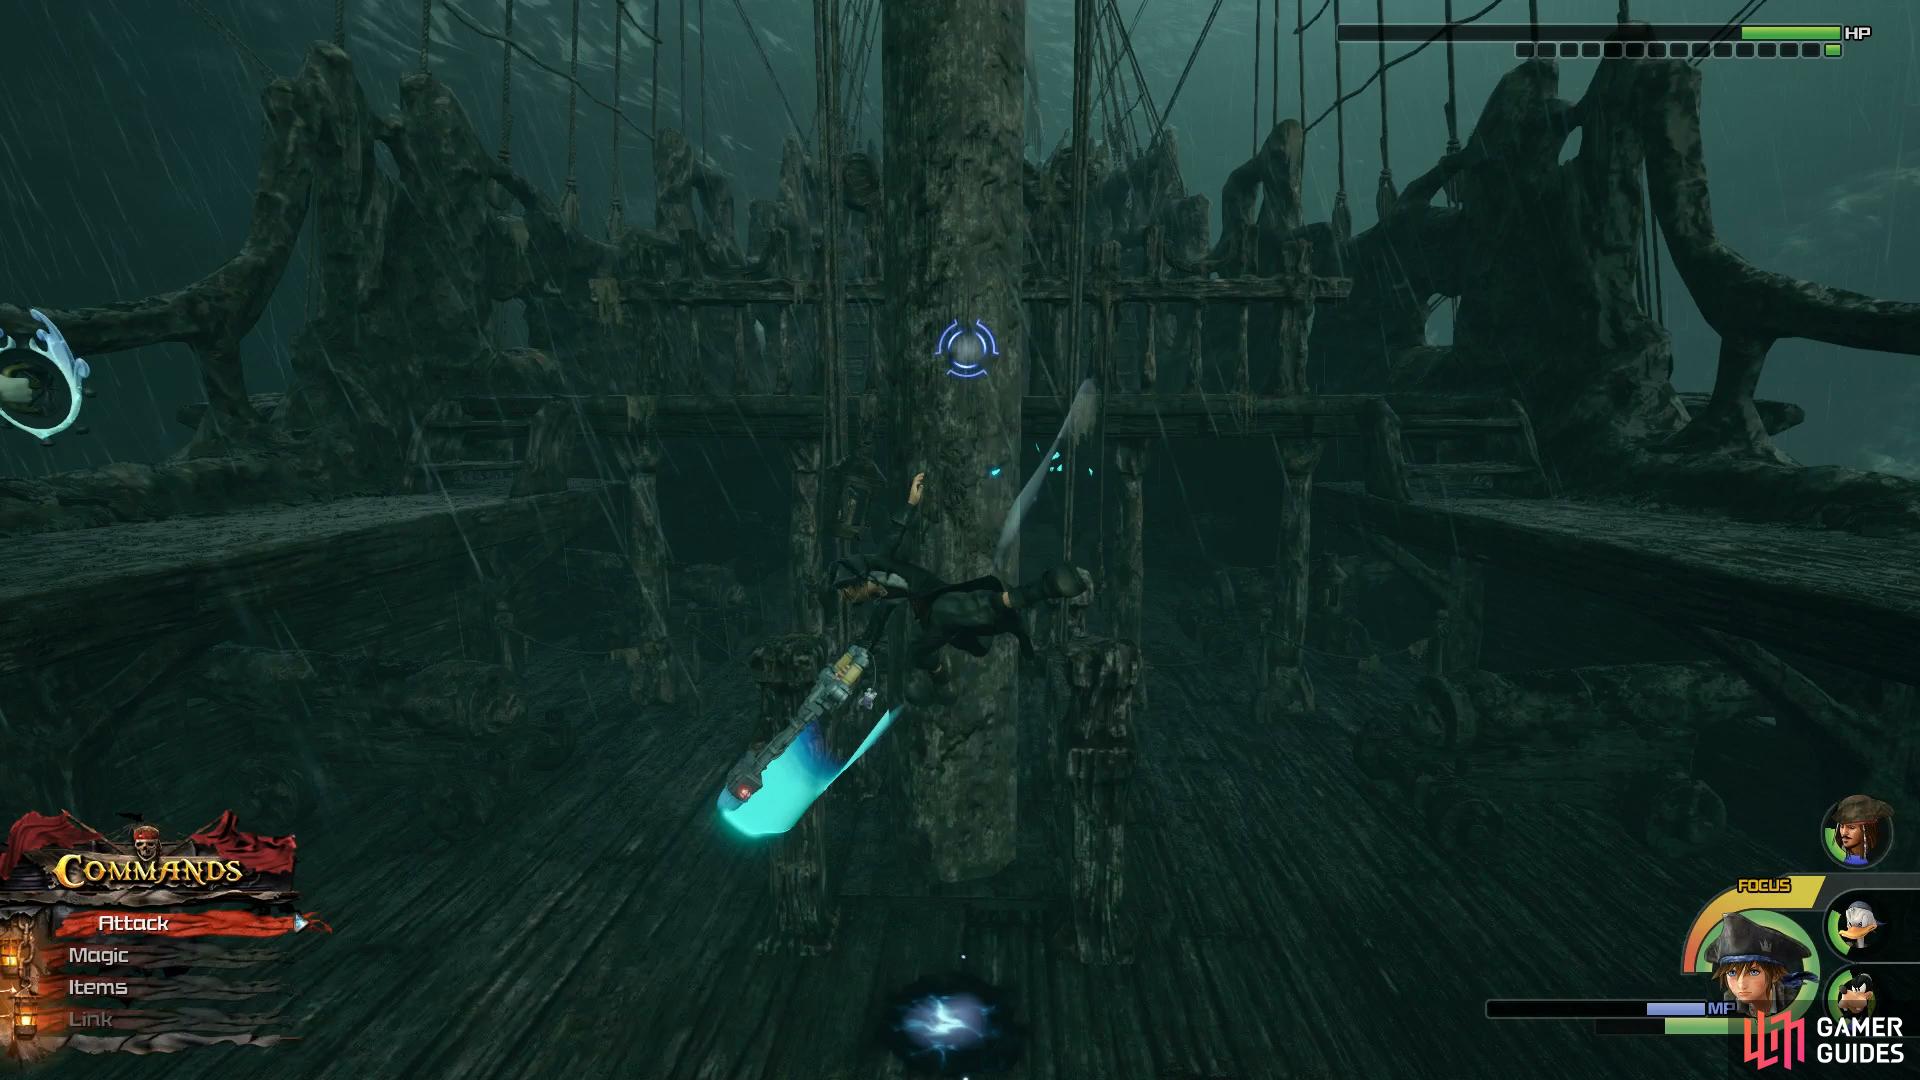
Hold off on exploring for the moment and let go of the wheel. Walk forward on the deck and head over the golden sparkle, using it to reach the Crow’s Nest where a chest awaits containing Treasure #45 - Celestriad. Return to the wheel and begin sailing to the northeast until you reach Exile Island to trigger a cutscene.


(1 of 2) Climb up to the Crow’s Nest to find this chest
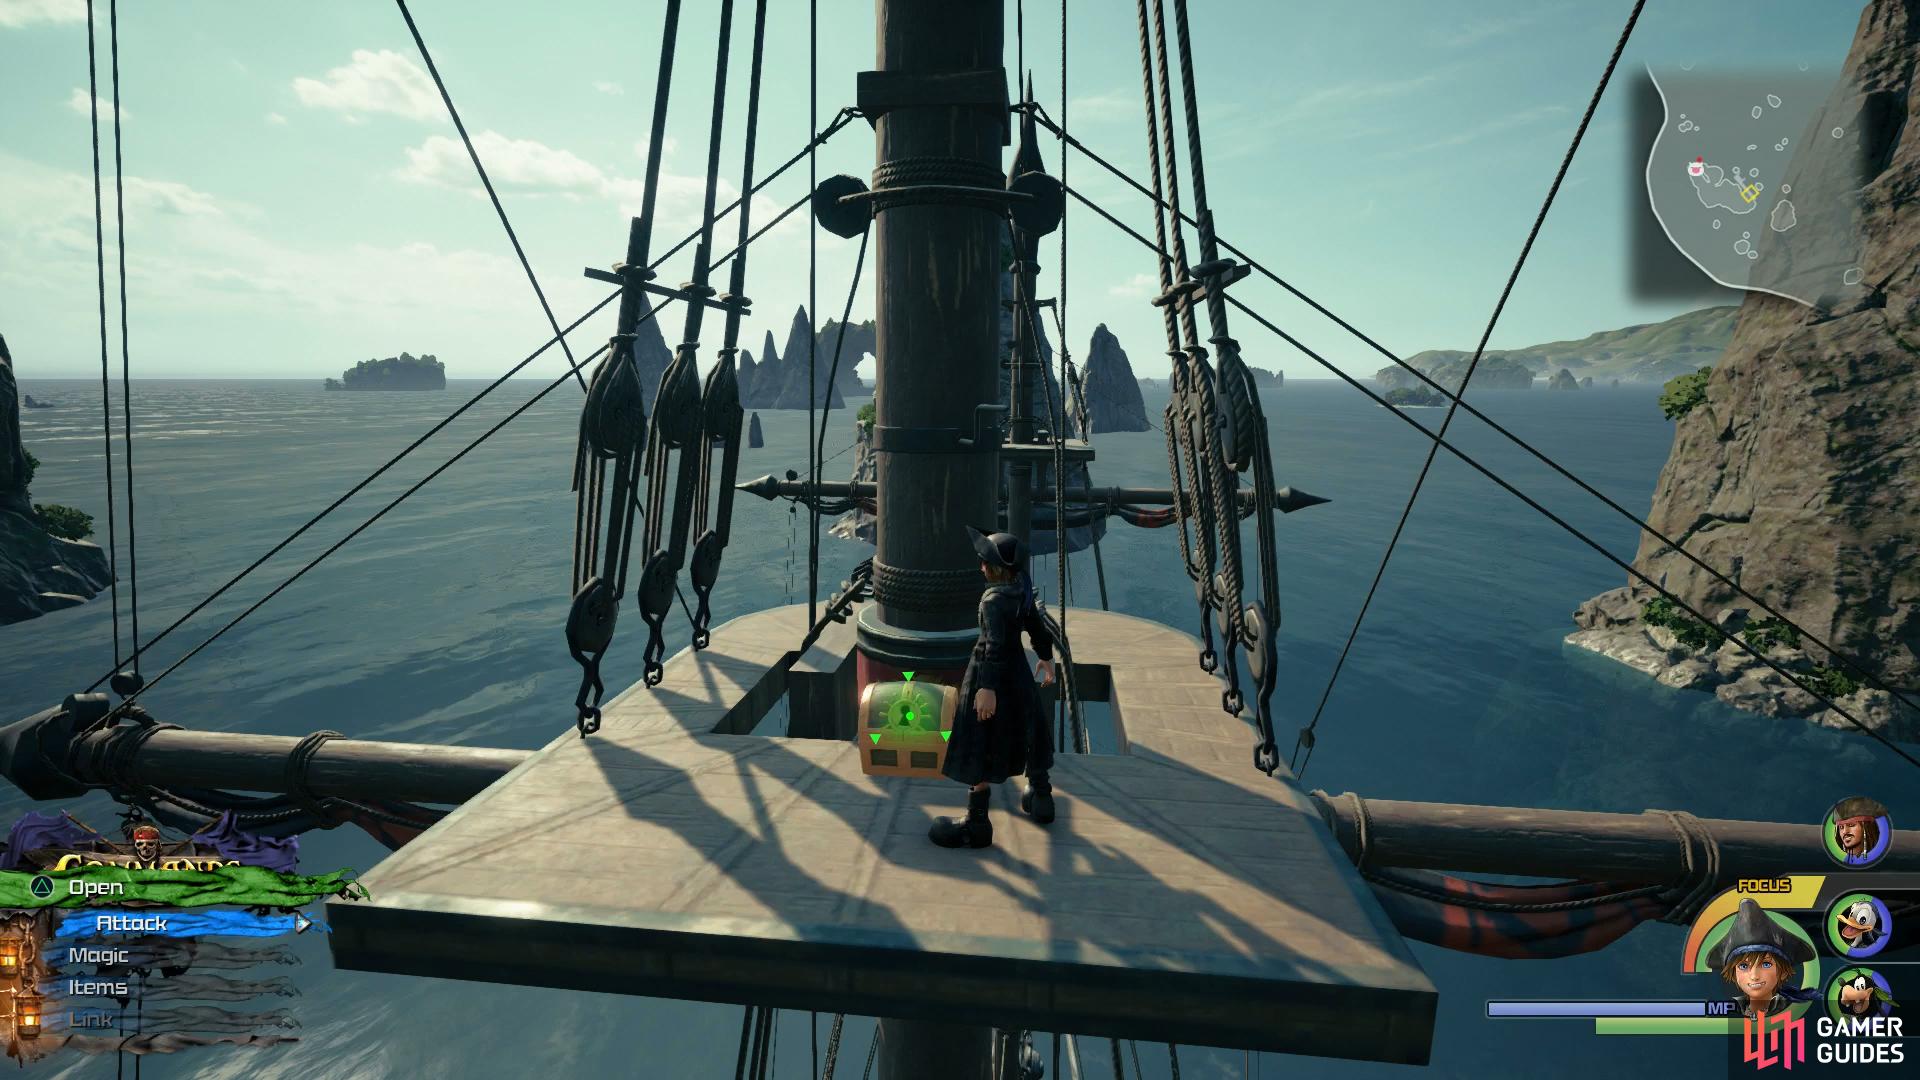
Climb up to the Crow’s Nest to find this chest (left), attack enemy weak points to gain access to the Tailwind ability. (right)
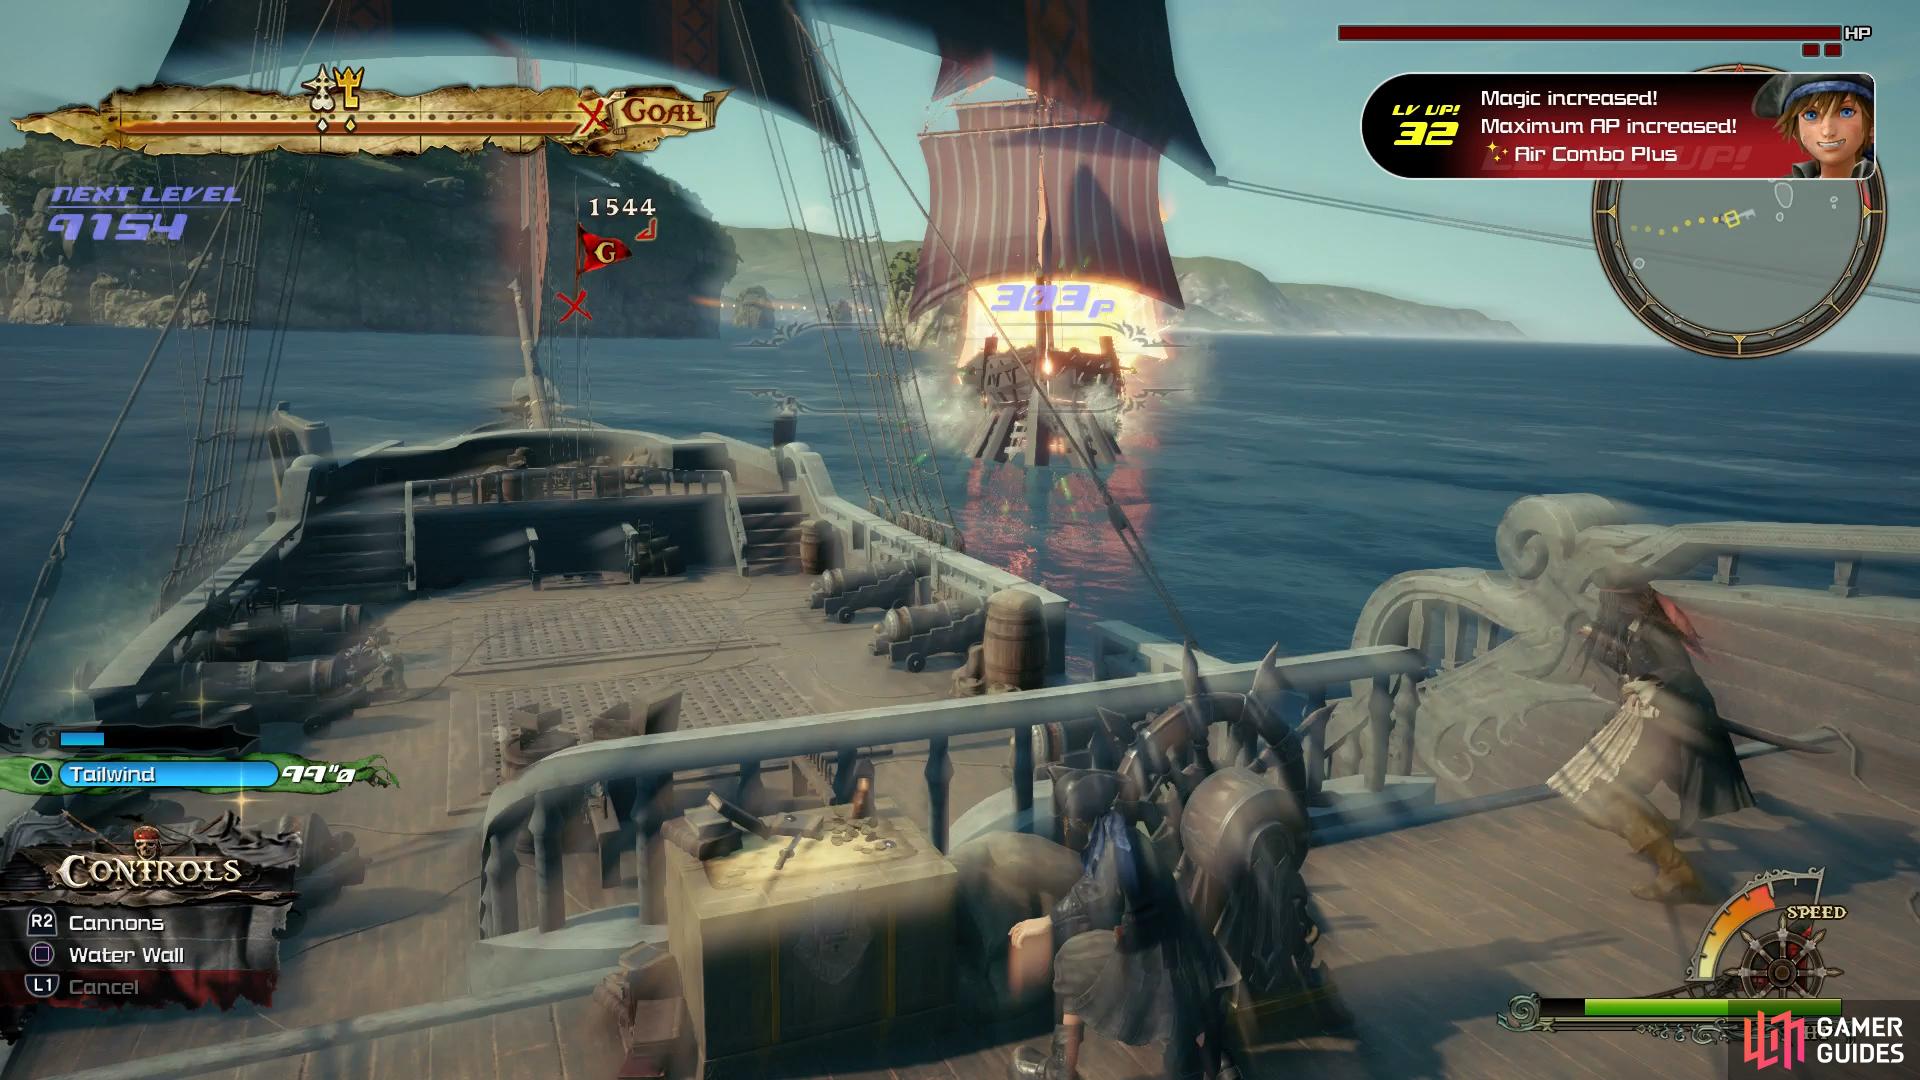
When you regain control, you’ll be pitted up against Luxord in a race to Port Royale. Focus your attention on staying at max speed at all times, avoiding the whirlwinds that appear in your way while taking aim at the weak spots of Luxord’s ship to charge the Tailwind special ability. This will propel you forward and gain advantage over your competitor. Shoot any Heartless that may attack along the way but don’t stop to defeat them, only attack any that stray across your path to charge the Tailwind ability more.
| Character | Ability |
|---|---|
| Sora | Item Slot |
| Goofy | More Team Attacks. |
The fun doesn’t end upon your victory, it turns out Luxord is a poor loser and will surround The Leviathan. The smaller Heartless ships should pose no threat as you’ll down them in a single hit of their weak point, use this to charge your special ability and focus them on Luxord to begin draining it’s huge HP pool. As long as you remember to use Wind Wall whenever any cannons are hurtling towards you, you should have no problems putting Luxord’s ship out of commission.
Once the ship is no longer moving, bring the Leviathan up close to the side of it and board it. You’ll have to deal with a group of Gambler Nobodies assisted by Anchor Raiders so it’s a good time to make use of your new Thundaga spell and hopefully trigger the Thundaza Grand Magic.
| Character | Ability |
|---|---|
| Sora | Magic Flash |
Port Royal
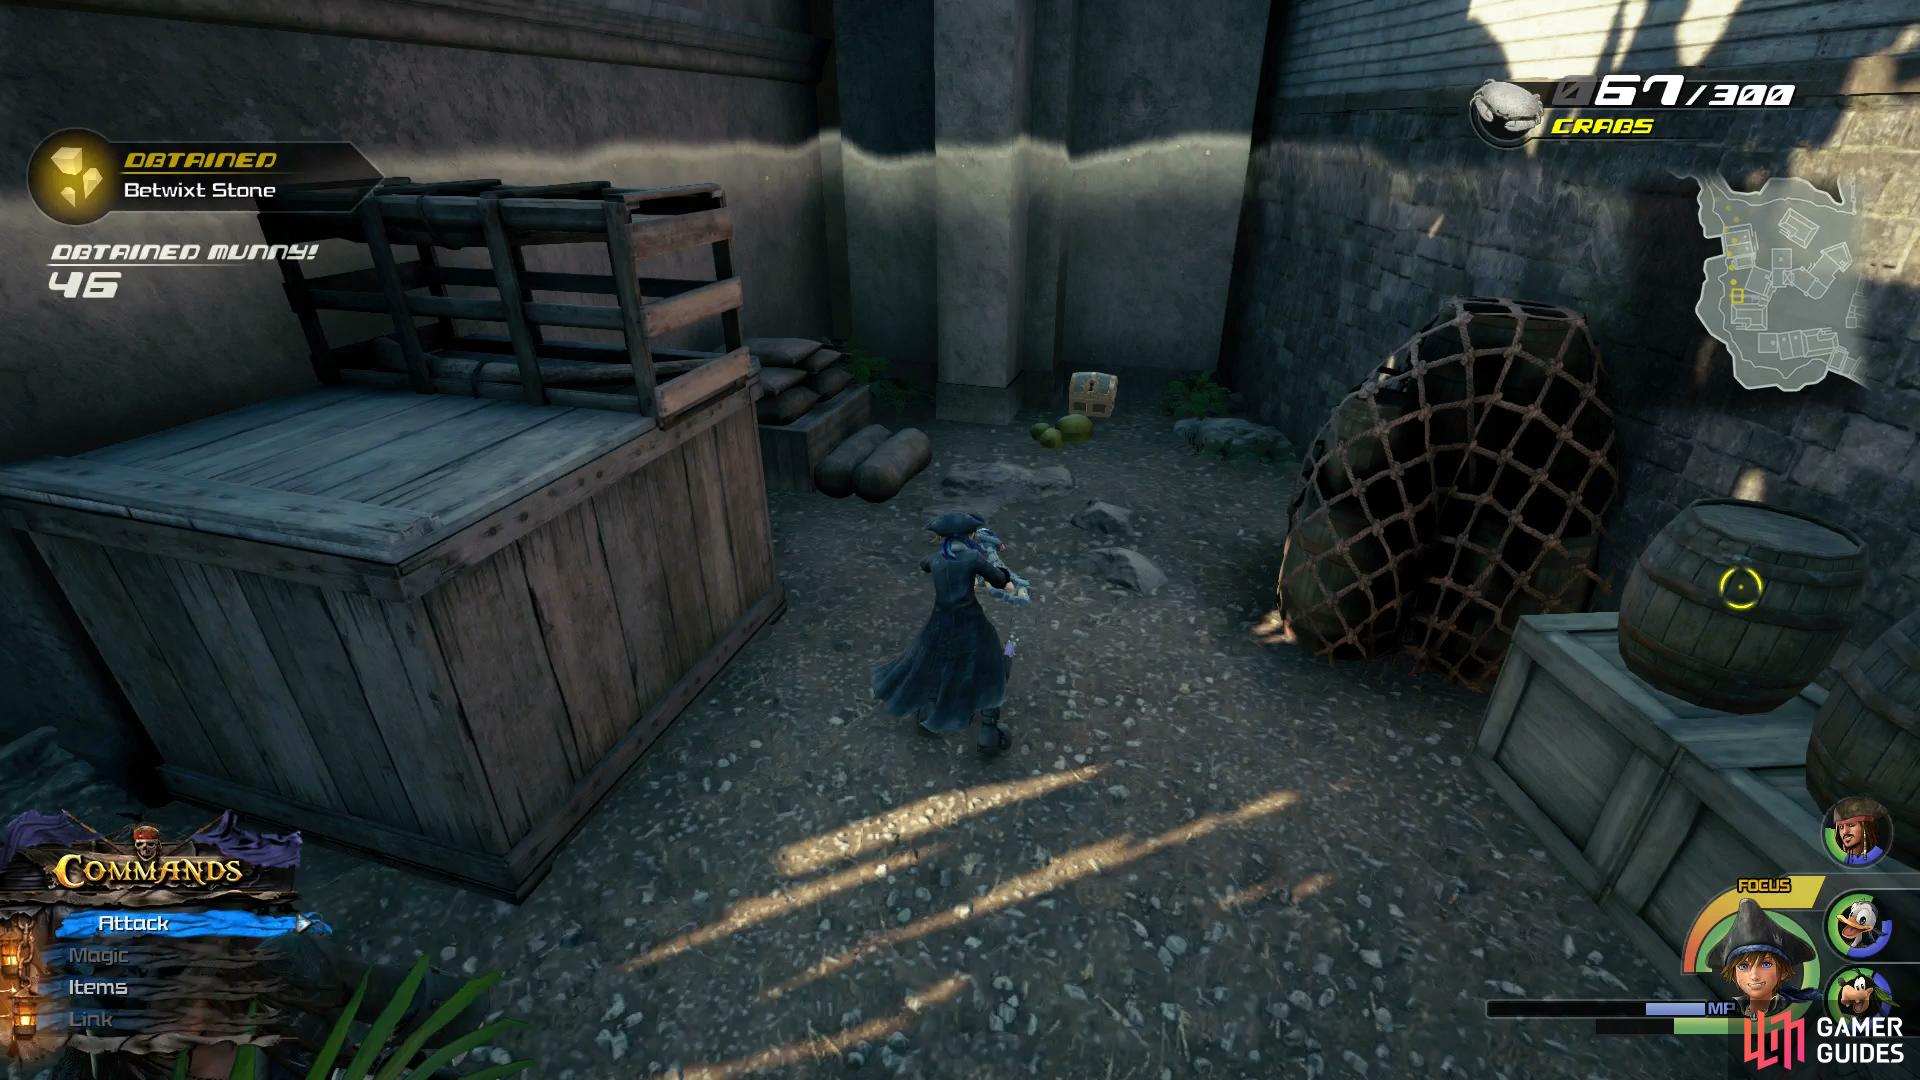
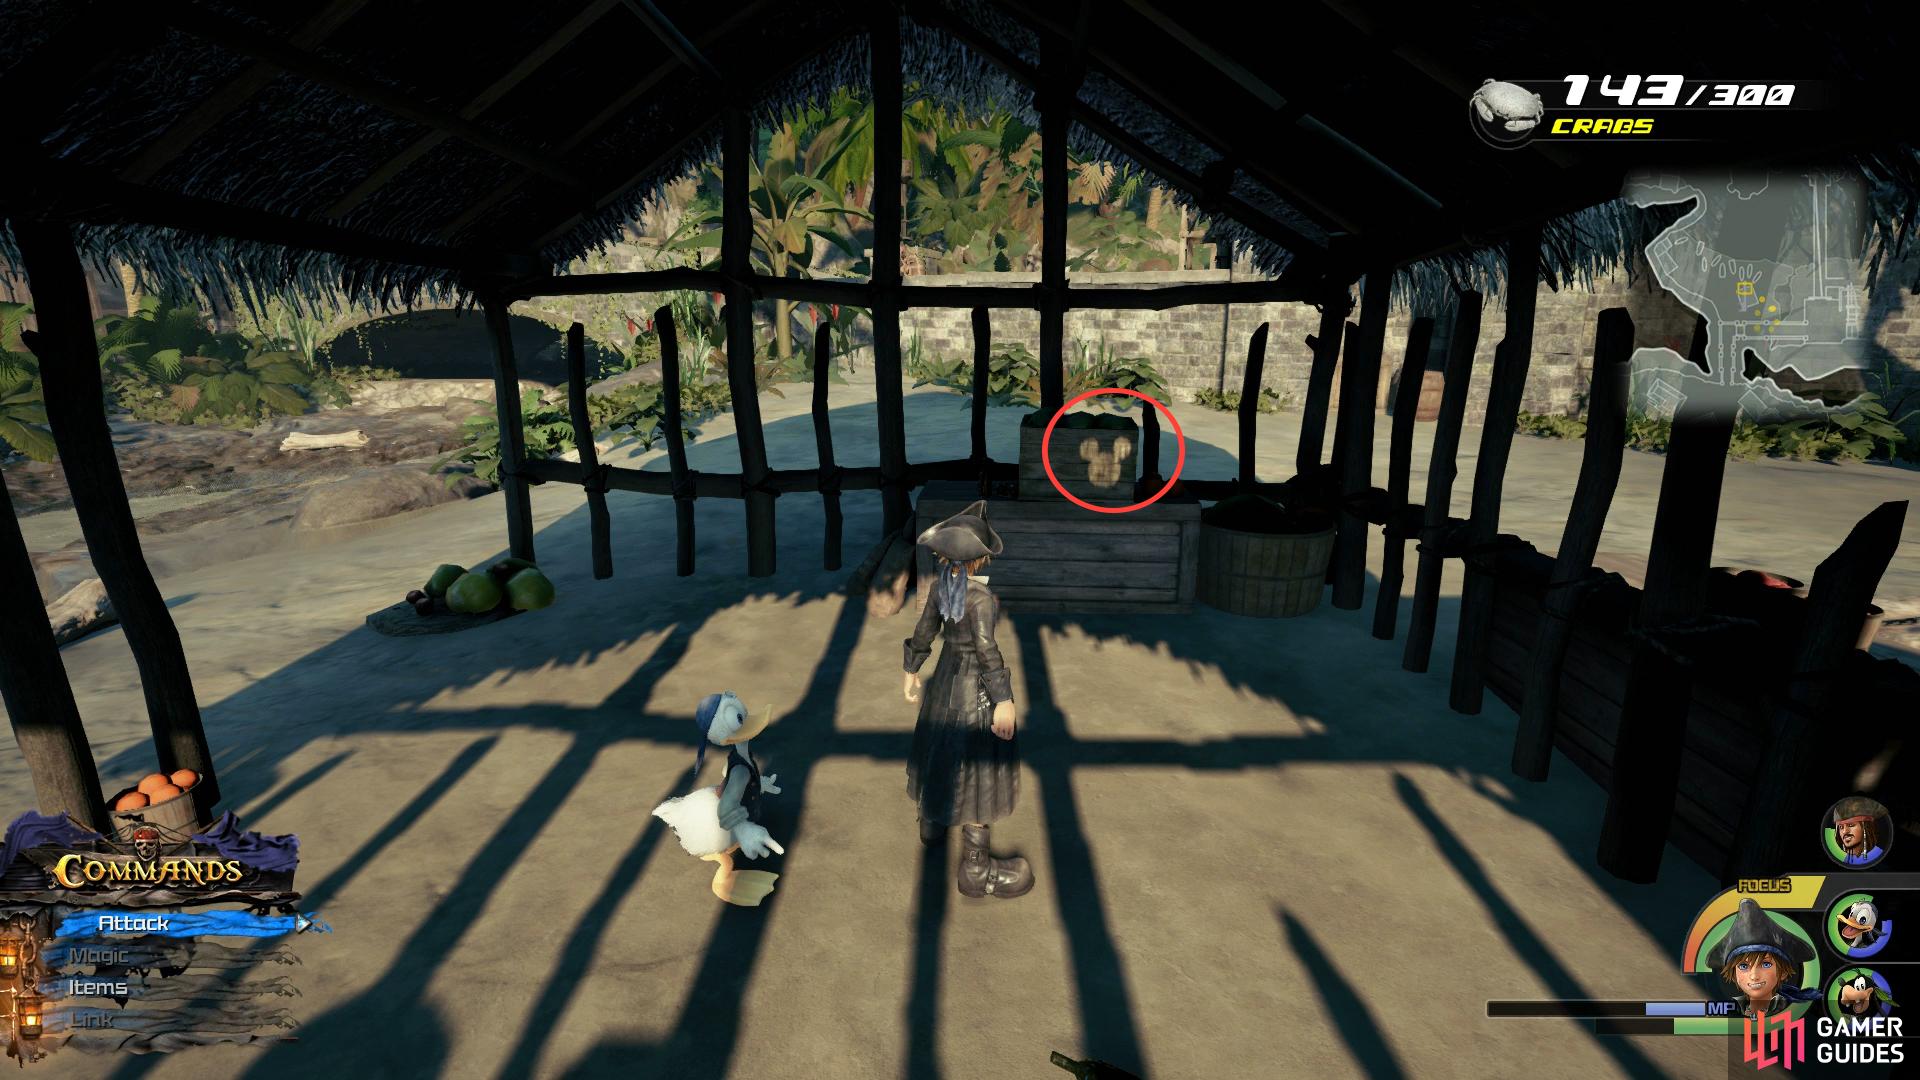
Following the cutscenes, you’ll find yourself in the Docks of Port Royale and be given the tutorial on how to upgrade The Leviathan, using Crabs. Head forward from the where you begin to find a large chest containing Treasure #51 - Map: Port Royal Waters.
The White Crab Hunt
Your task at this point becomes a Crab hunt, these elusive white crabs are your ticket to repairing and upgrading the Leviathan. For the sake of this tutorial, you need only pocket 300 however you’ll need 1700! You can find these crafty Crustaceans all over the Caribbean so you won’t get a step-by-step walkthrough of how to upgrade the Leviathan however pay attention to the tips below:
- Crates, barrels and other breakables contain many White Crabs. As you explore all of the islands, break apart everything you come across to scatter White Crabs everywhere. These will respawn over time.
- Search Underwater. Due to the overwhelming size of the Caribbean, every island will allow you to search the surrounding seas and more of often than not, you’ll find White Crabs on the seabed.
- Search Every Island. You should be doing this as you search for Treasures and Lucky Emblems, but visiting every island in the Caribbean and using the forementioned tips will result in the discovery of many crabs.
- Defeat Heartless Ships. While aboard the Leviathan, you’ll be attacked by Heartless ships, defeating these will reward you White Crabs as a form of EXP. You don’t need to pick these up as they’ll be added automatically to your tally. On top of this, there’s another Trophy/Achievement, True Captain, for sinking 200 Ships so using this method for your White Crabs kills two birds with one stone.
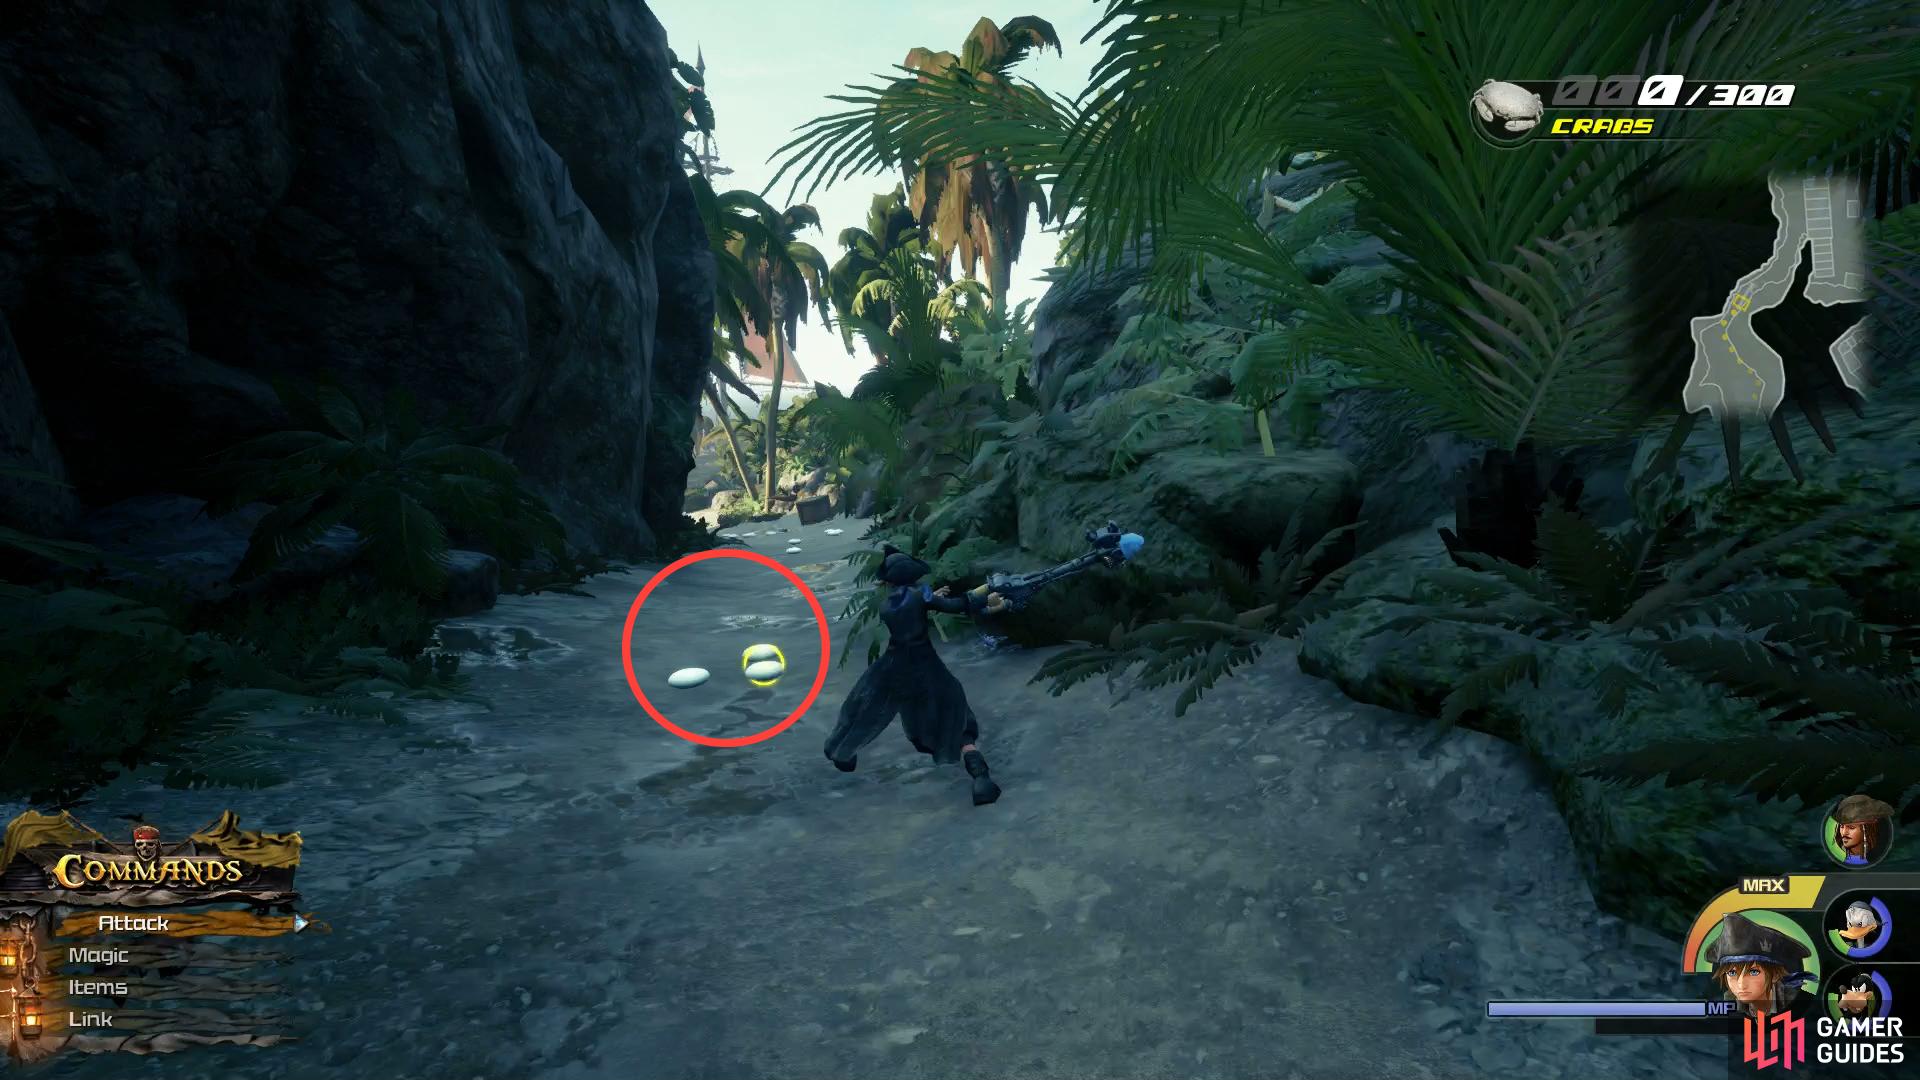
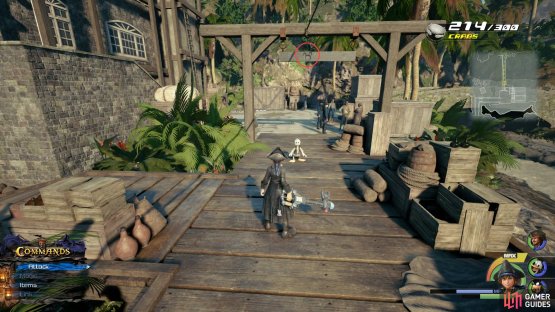
Along pathways is just one of the ways to find these elusive Crabs.
The bonus for upgrading the Leviathan is more HP, higher Attack Power and new abilities. For the Trophy seekers, it’s a sensible idea to use the Heartless Ship battles as your primary source of Crab Hunting, at least until you’ve acquired the Trophy/Achievement.
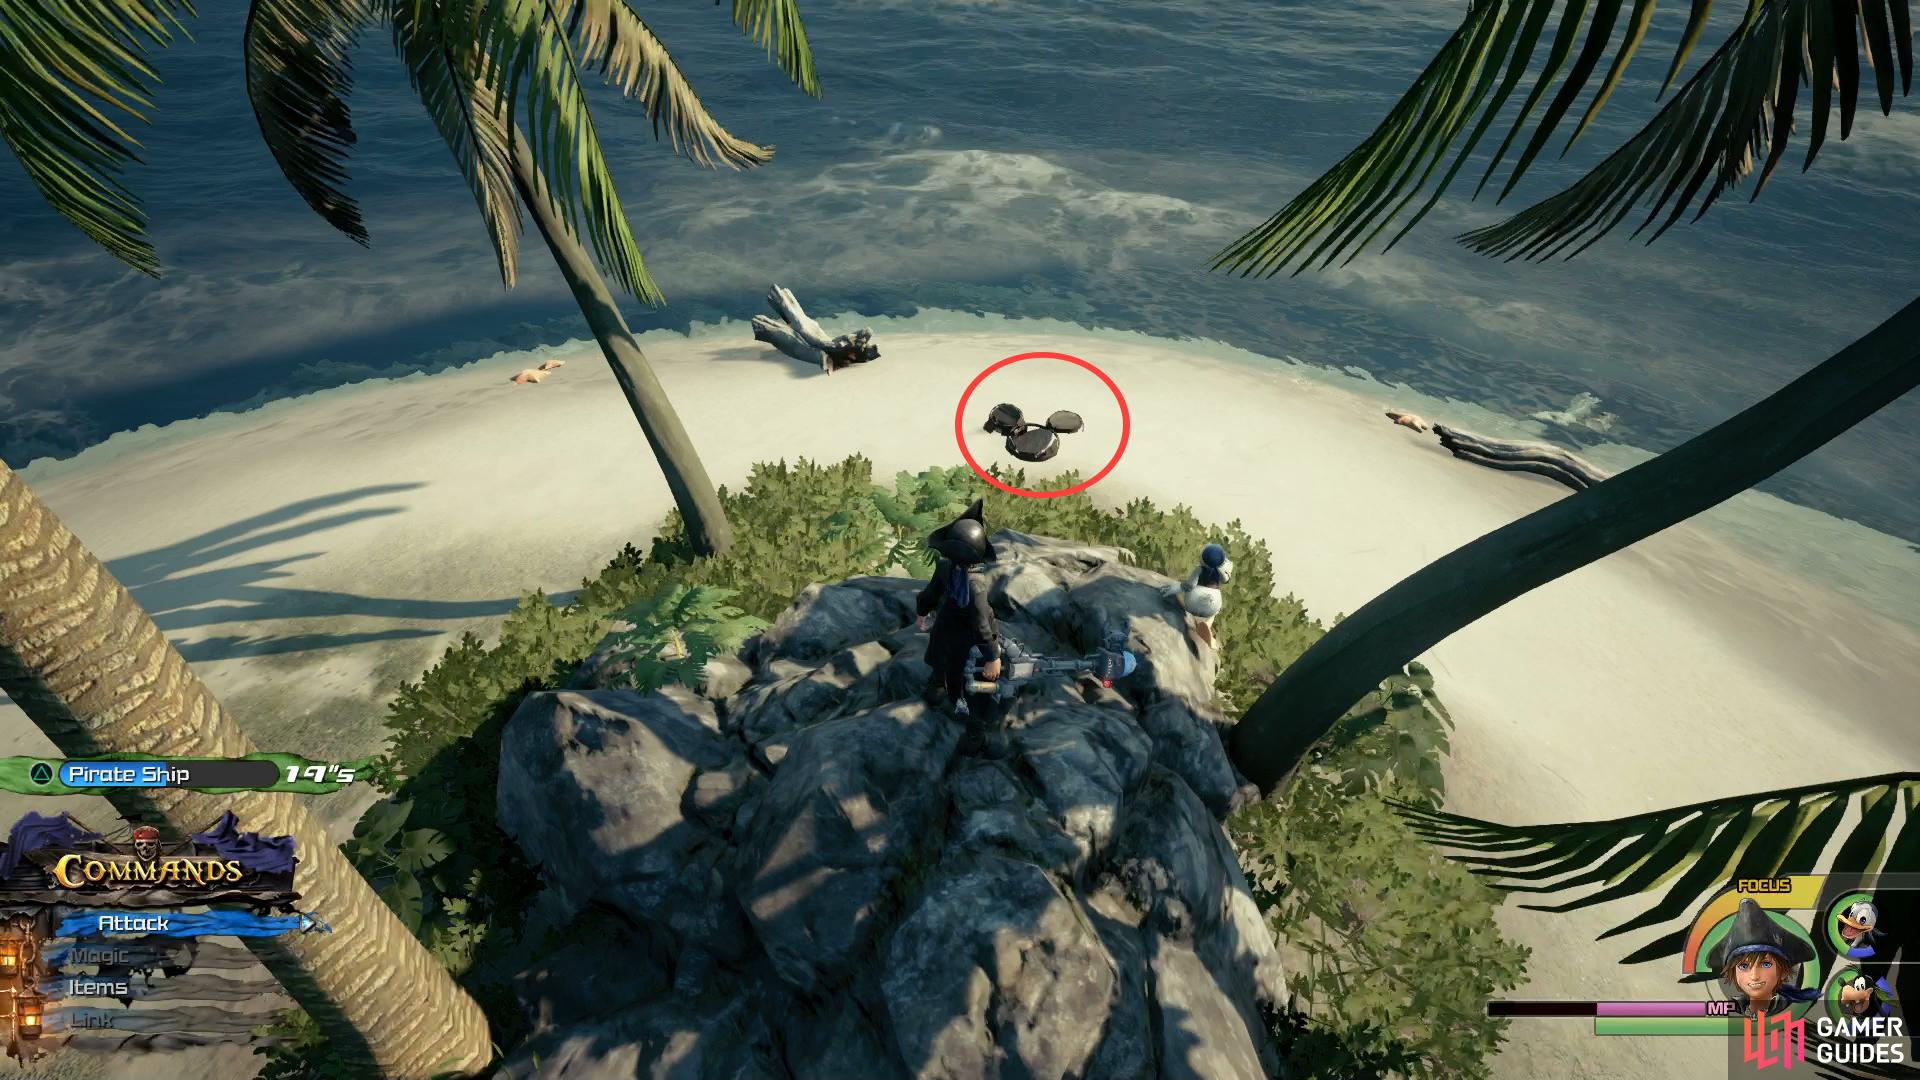
For now, Port Royal offers the chance to loot many more Treasures and snap Lucky Emblems while you search for White Crabs. Begin by heading back toward the Leviathan and as soon as you reach the pier, look to your left to see a single rowboat. Head over to this rowboat and on the eastern end of it you’ll find Lucky Emblem #1.
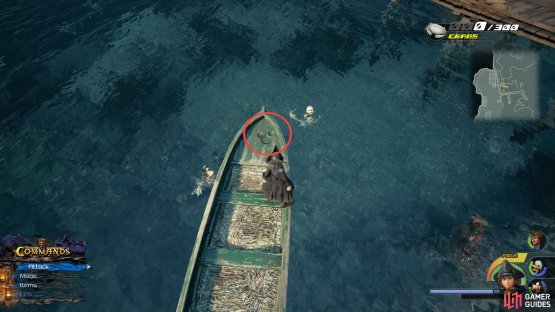
(1 of 2) You’ll find the first Lucky Emblem on the rowboat near the Leviathan
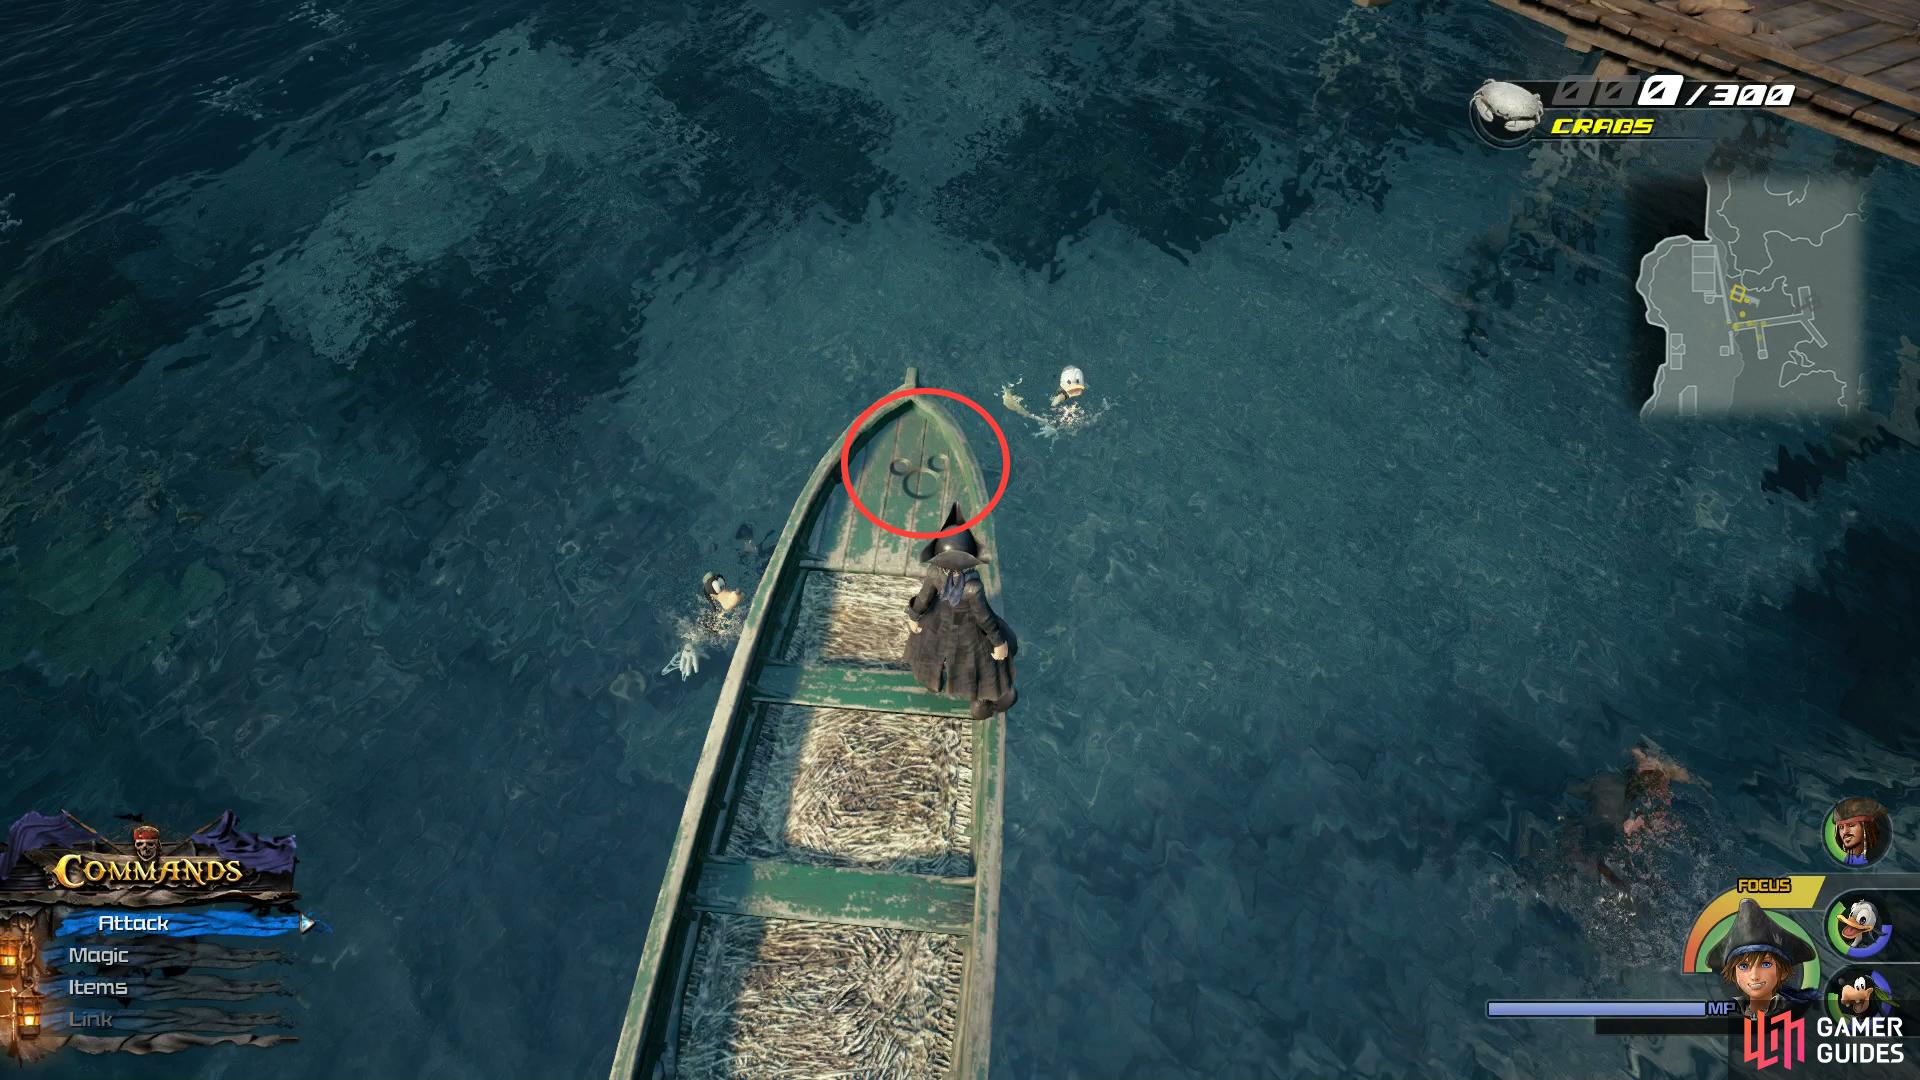

You’ll find the first Lucky Emblem on the rowboat near the Leviathan (left), there’s another down the path to the left on the pillar of the house. (right)
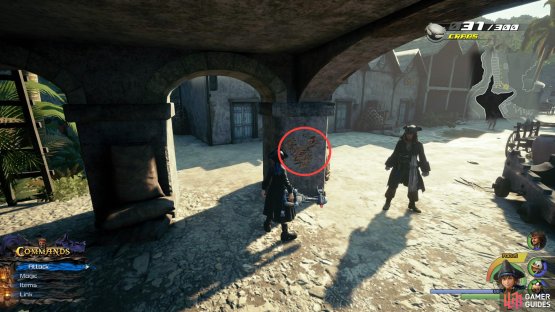
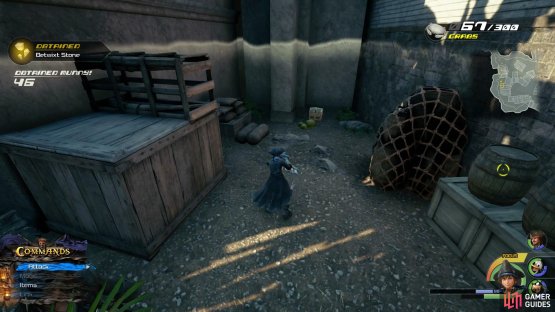
Take a left once you leave the docks themselves and follow the path to the end and take a right to find a well hidden chest containing Treasure #53 - Hi-Ether. Turn around from here and head under the house in front of you, on the northwest pillar is Lucky Emblem #2. Head back the way you came and take the path leading southwest while using Trinity Sled in the process to nab some White Crabs along the way.
You’ll eventually reach The Settlement, run up the wall of the first house you see and drop down the other side, against the western edge of the map. Smash the boxes you see in the corner here to find a chest containing Treasure #55 - Mega-Potion. Make your way into the center of the Settlement and you’ll spot the Couch & Breeches shop, climb to the roof of this shop and head right. Leap over to the next small building to your right and you’ll find a chest containing Treasure #52 - Tent.
Head to the north of the Settlement and you’ll head down some stairs to reach the Seaport. As you head around and on to a bridge, drop down to the side of it and search underneath to find a chest containing Treasure #50 - Mega-Ether. Head over to the shack to the west and face the boxes to the north to find Lucky Emblem #3.
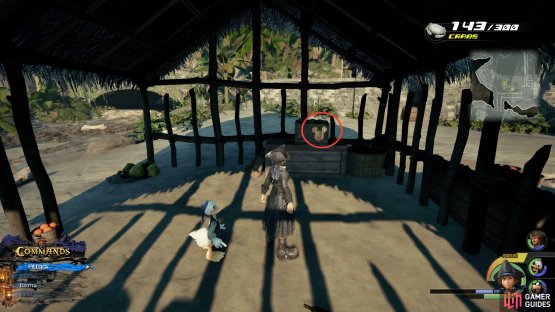
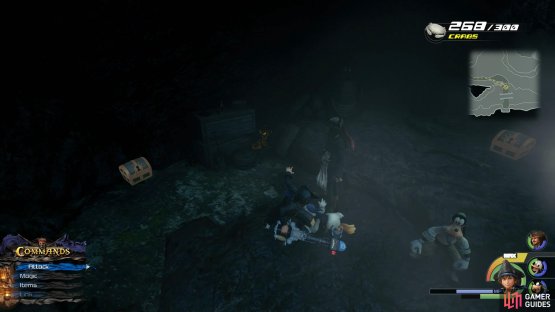
(1 of 2) Smash the crates here to uncover this chest
Smash the crates here to uncover this chest (left), another Lucky Emblem awaits in the Sea Port. (right)
Make your way on to the pier now and follow it down to the end where it will you will head down a ramp. Turn around and face the southern wall to find a chest containing Treasure #49 - Hi-Potion. Dive into the sea from here and swim down towards the Jellyfish to the northeast, you’ll find a shipwreck here with a chest containing Treasure #54 - Elixir.
Return to the dock you just left and head back south across the pier. As you approach the house, you’ll notice the Seaport sign and on it, Lucky Emblem #4. Continue along the path to the east and when you reach the bridge, head southeast up the stream and behind the waterfall to find two hidden chests containing Treasure #56 - Ether and Treasure #48 - Sorcerer’s Ring.
(1 of 2) Look on the back of the Seaport sign to find this Lucky Emblem


Look on the back of the Seaport sign to find this Lucky Emblem (left), behind the waterfall lies two more hidden chests. (right)
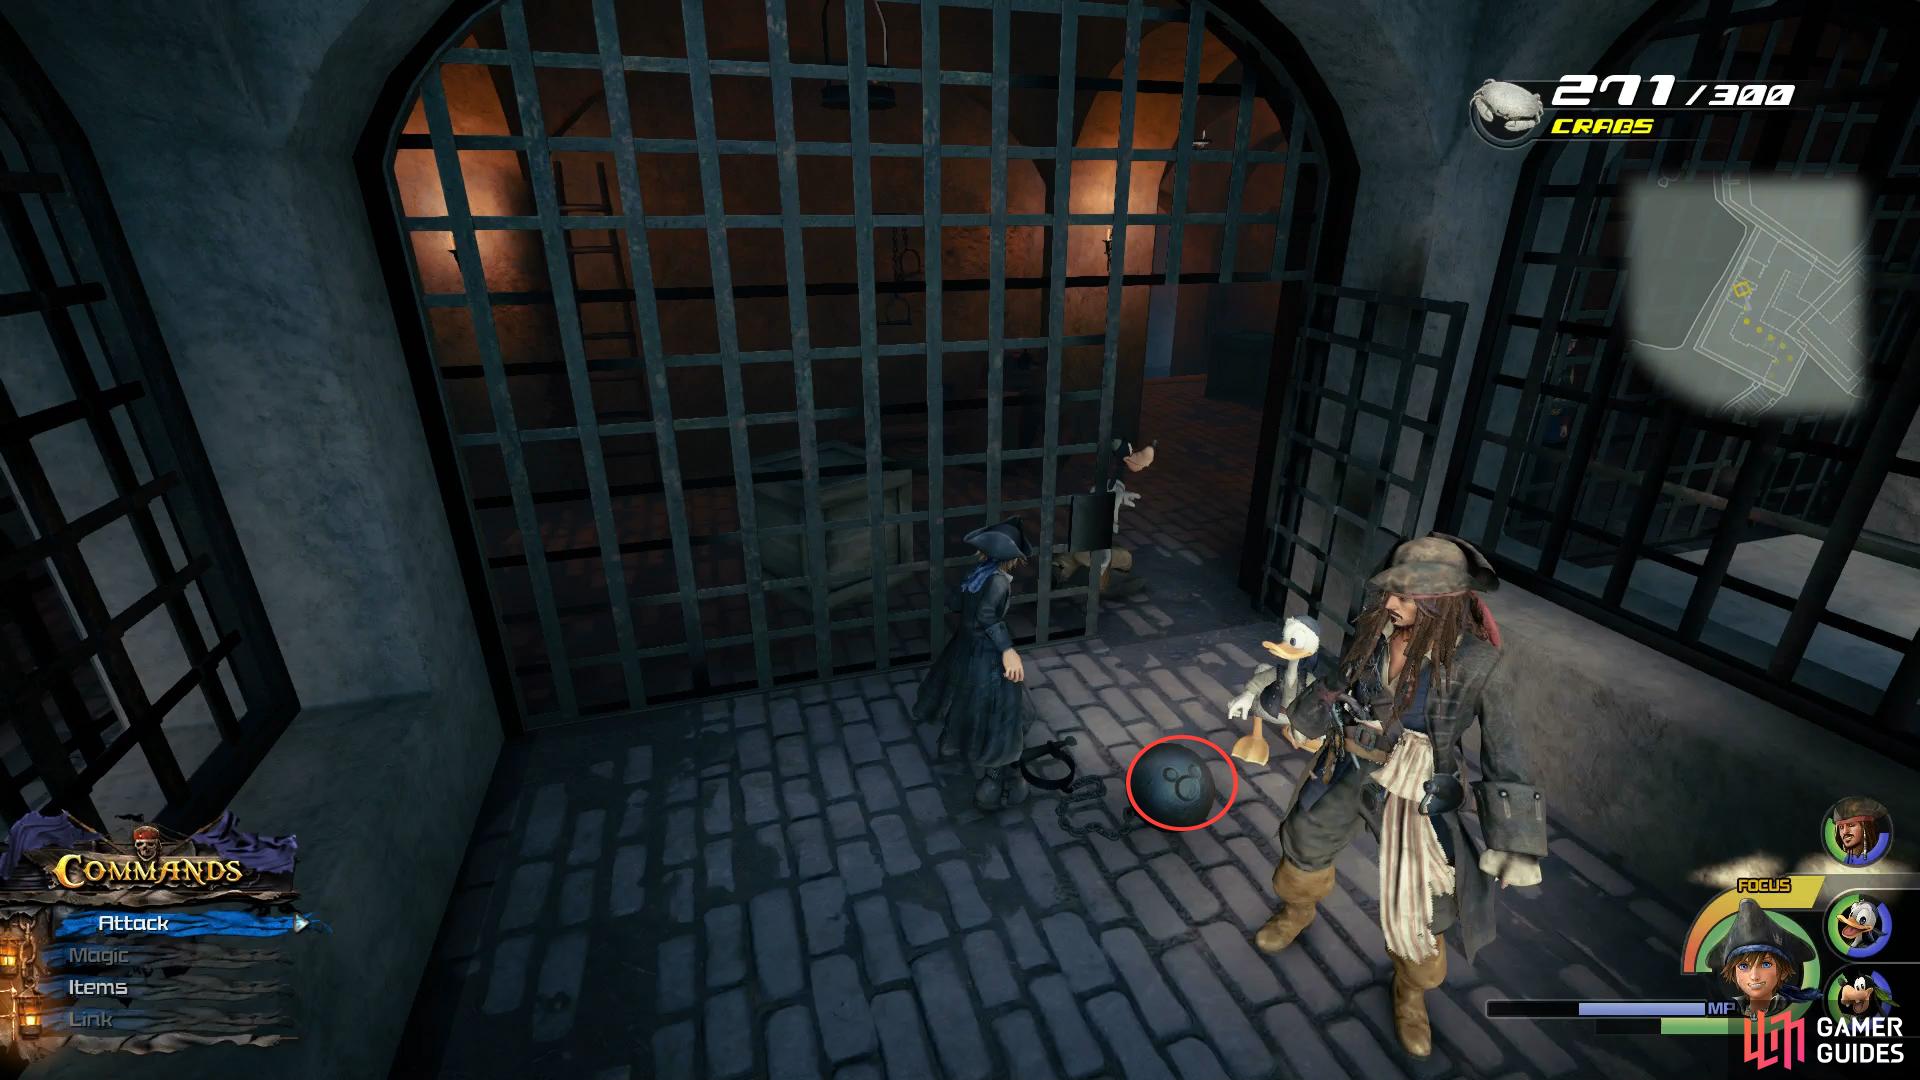
Return from the stream and back on to the bridge, following it to reach the Fort. As you head through, you’ll reach the cells, in the second cell you’ll find a ball and chain with Lucky Emblem #6 on the back of it. Continue on and search the next cell along to find a large chest containing Treasure #47 - Classic Kingdom: Mickey’s Prison Escape.
Continue along and at the next intersection, go left to reach a courtyard where you’ll be ambushed by Heartless. Upon their defeat, loot the White Crabs in the area and then run up the northwest wall where the British flag is. While on this platform, look down to the southeast to spot Lucky Emblem #5. Drop down to where the bell and cannons are and follow the path around to the right, at the end you’ll discover a chest containing Treasure #46 - Hi-Refocuser.
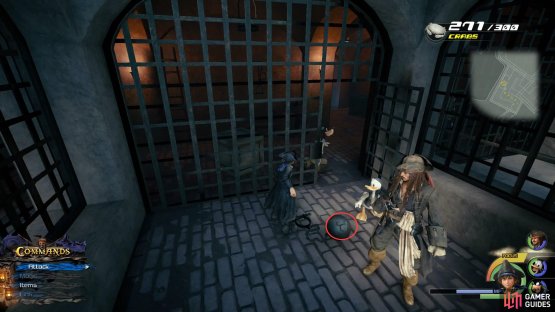

(1 of 2) Look on the back of the ball and chain to find a well hidden Lucky Emblem
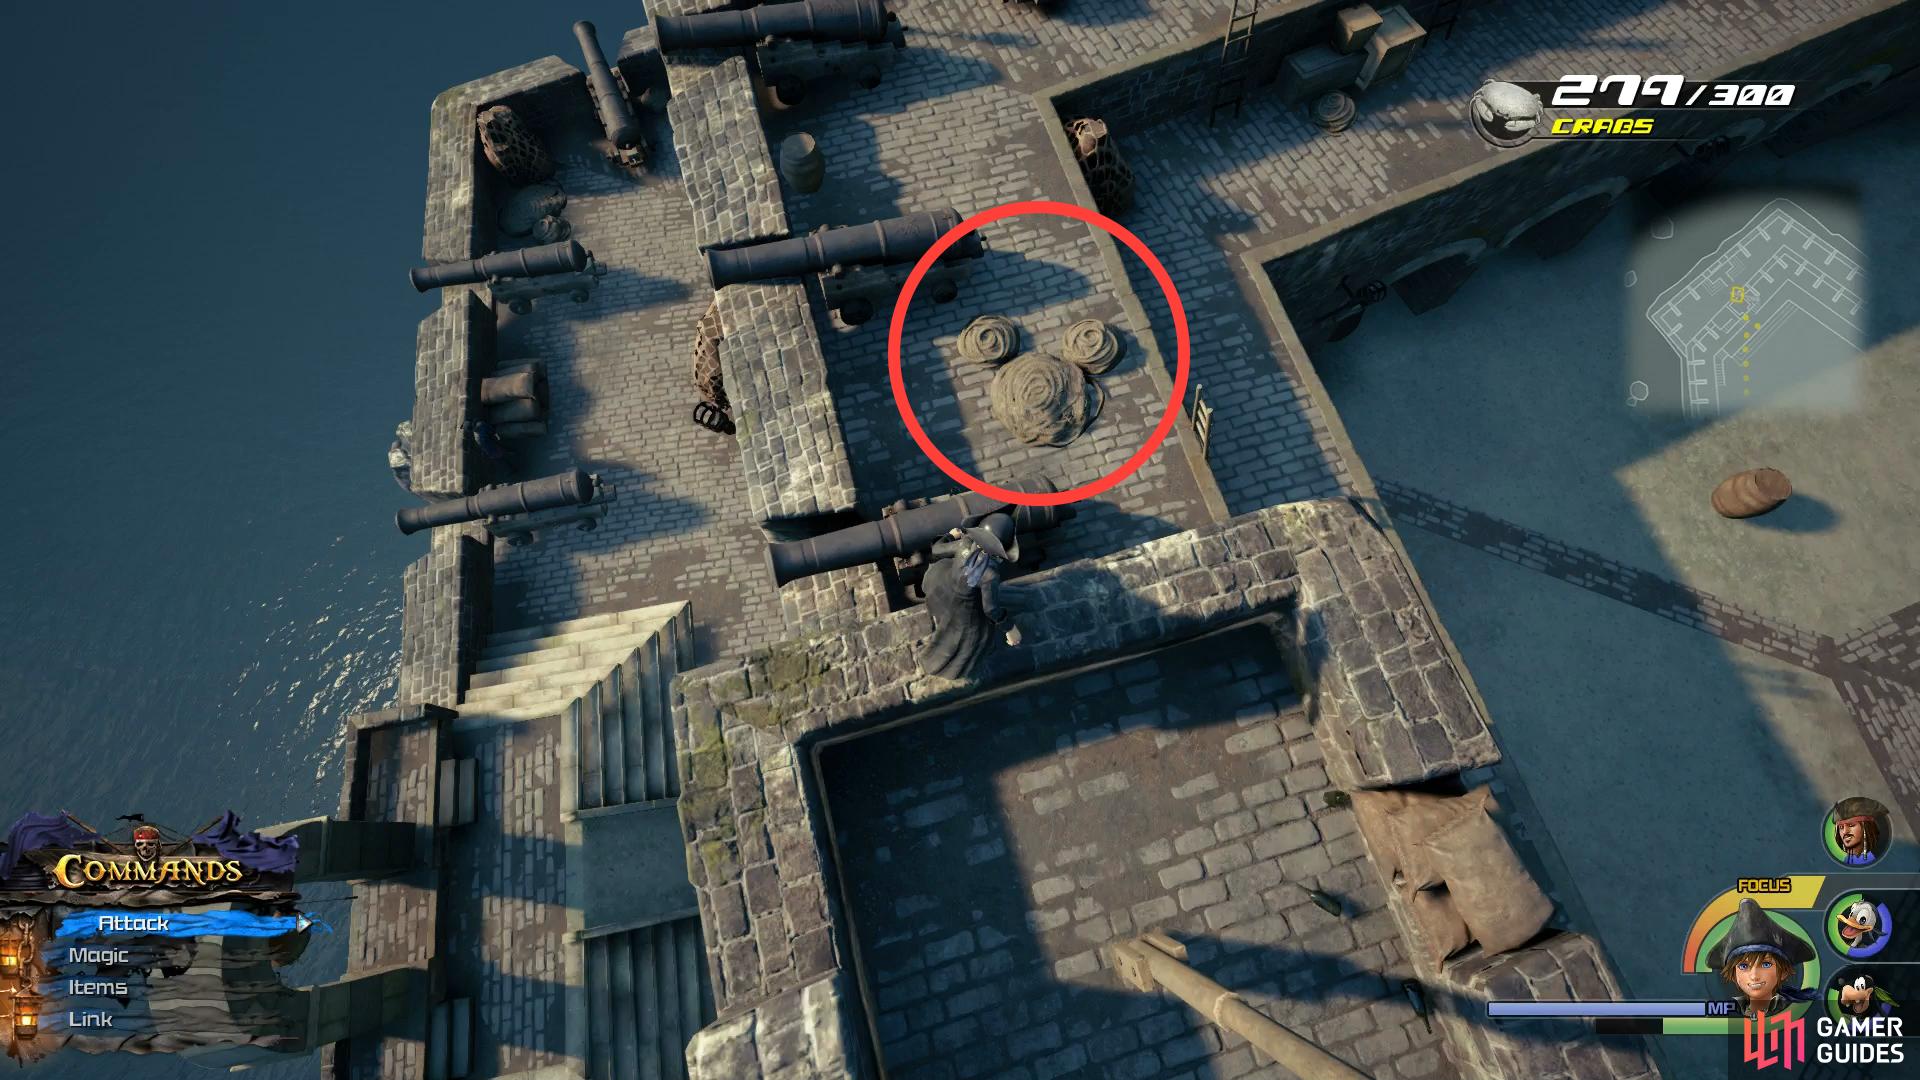
Look on the back of the ball and chain to find a well hidden Lucky Emblem (left), while another can be found atop the Fort. (right)
With all of the Treasures looted and the Lucky Emblems snapped in Port Royal, head around finding the last of the White Crabs and make your way back to the docks where the Leviathan awaits. You’ll get your next objective at this point, to head to Shipwreck Cove and aid the pirates.
At this point, you can choose to follow the main objective and finish the Caribbean World a lot quicker however do note that you now have free reign over the Caribbean and there are many islands to discover and Treasures to loot. The Walkthrough will take you through each of them and uncover all the loot to be had. If you wish to continue with the story, skip the next section.
Plundering the Caribbean
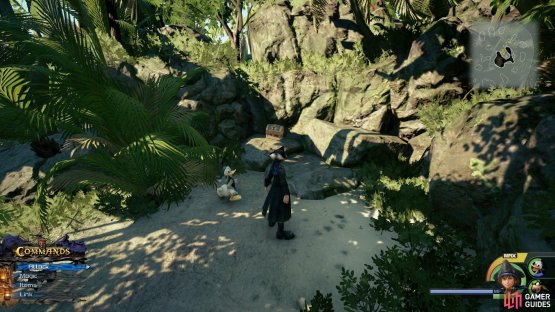
Once you’re out in the Sea, open up your map and take a look at the nearby islands. The one’s that you can visit have a name on the map and the nearest one to you right now is the Gateway of Regret. It’s only a small archway directly in front of you with a sign hanging off it. Disembark and head to the base of this archway where a chest sits on the rock to the north, open this to obtain Treasure #14 - Yin-Yang Cufflink.
This chest is the only thing you’ll find on the Gateway of Regret.
Ignore the northern islands for now (you can fast travel from the Sea Chart to any discovered islands) and sail down south to reach Sandbar Isle.
Sandbar Isle
Head on to this ring shaped island and make use of the Save Point to save your game. Face the rock in front of you and then begin heading along the beach to your left until you reach the water. Turn right again and climb the rock with the barrels on it to find a chest containing Treasure #19 - Map: Sandbar Isle. Drop off this rock to the northeast and dive into the water to find a wrecked rowboat, to the side of this is a chest containing Treasure #26 - Hungry Crystal.
Return to the surface and swim across to the western side of the island, you’ll spot a small rock in the water with a chest sitting on it, open this to obtain Treasure #27 - Adamantite. Head back to the east a little and dive underwater once more, you’ll see some broken boxes and need to deal with some Heartless. After you’ve dispatched them, swim to the bottom and you’ll spot a chest containing Treasure #29 - Orichalcum. While still underwater, swim to the northwest a little and look along the rocks to the south to find a well hidden chest containing Treasure #28 - Damascus. Swim back to the surface one more and position the camera to face the three trees to the southwest of the island. Swim along the top of the water while keeping an eye on the surface of the rocks under you to find a chest containing Treasure #30 - Adamantite. Head over to those three trees now and climb to the top of the rock platform.
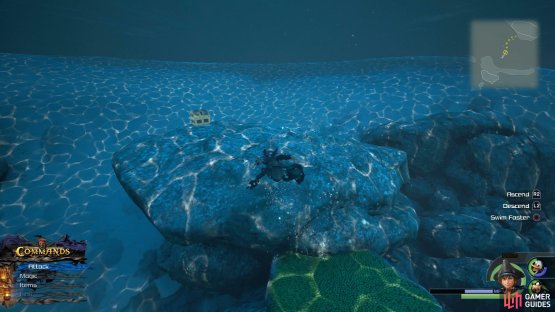
(1 of 2) There are many chests to discover under the water

There are many chests to discover under the water (left), use the mini map in the corner to help find your way to them. (right)
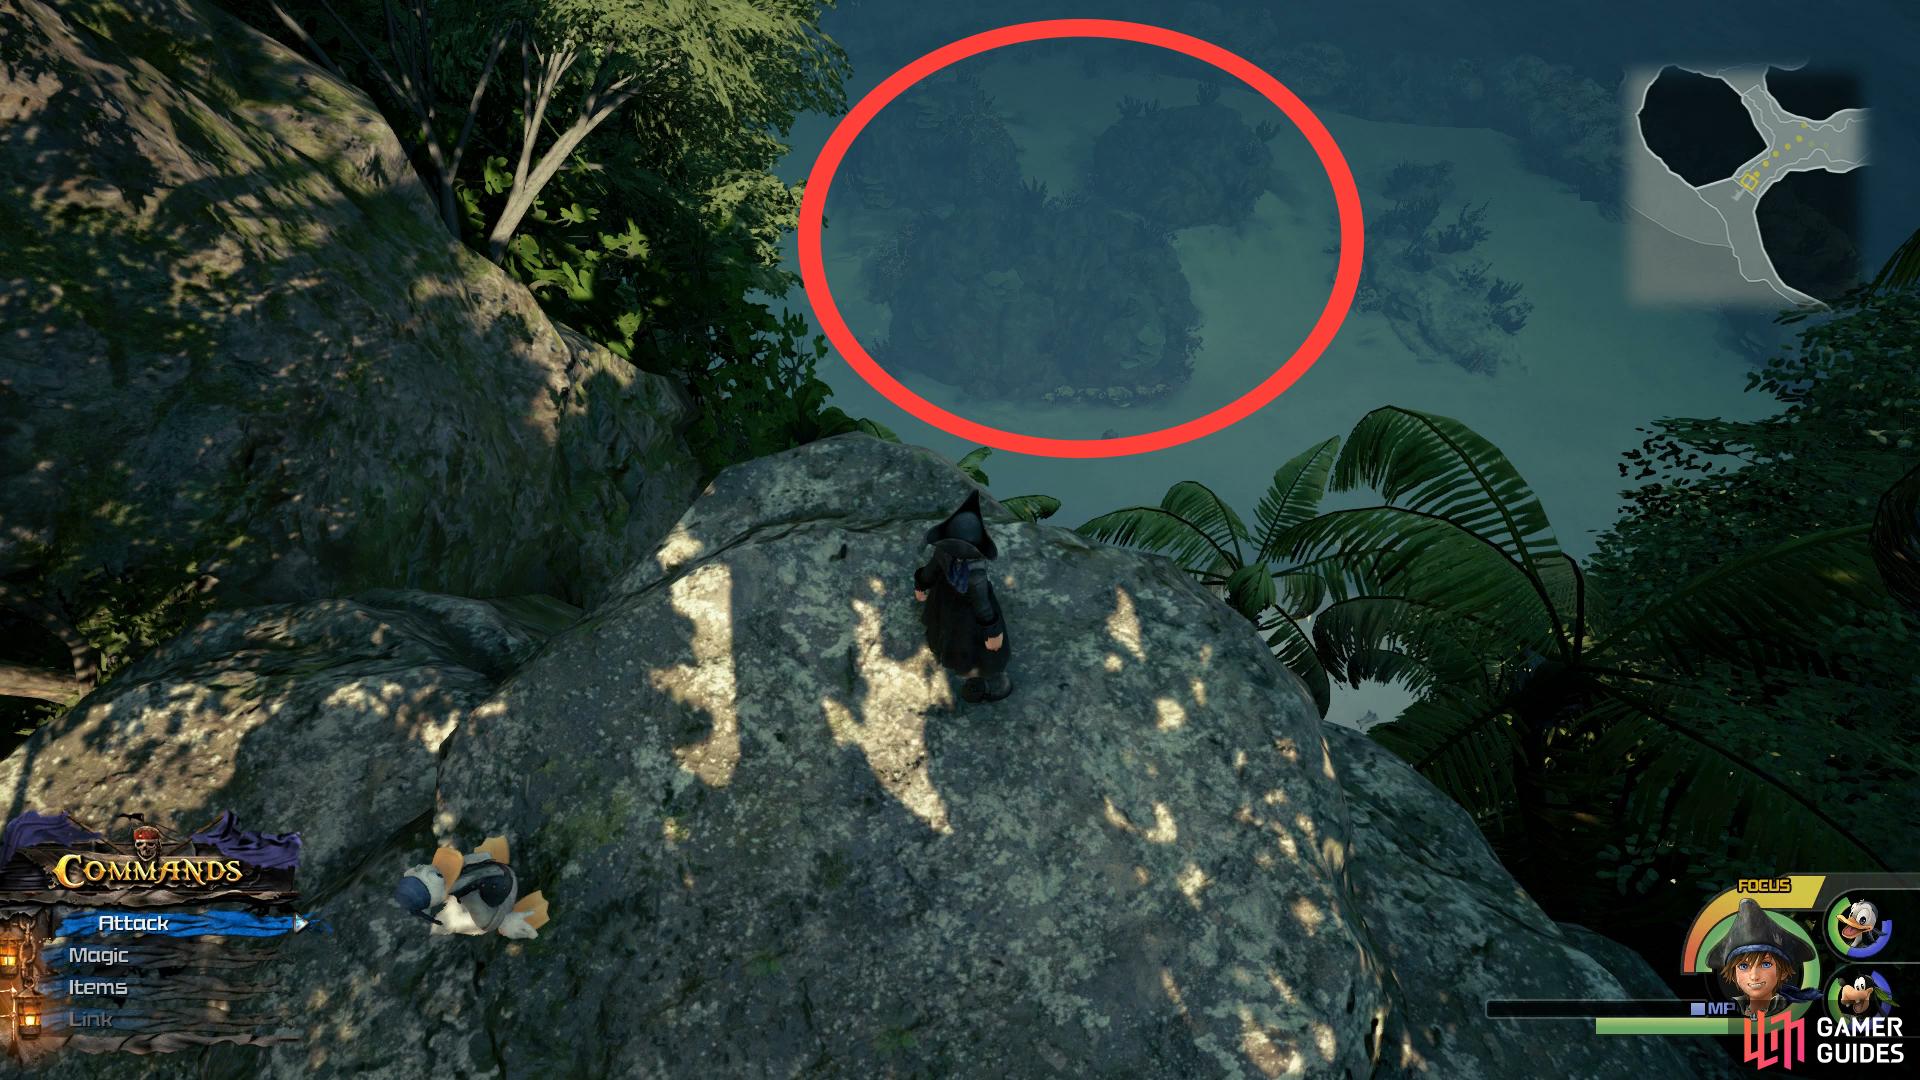
Using Doubleflight and Air Slide, navigate across the rock pillars in the sea to reach the island on the opposite side. You’ll be ambushed by a large group of Heartless here, dispatch them and then head to the east to find a rocky path leading down to more water. Head down the lowest rock that’s still above the water and look down to the southwest to spot Lucky Emblem #13 on the white rock.
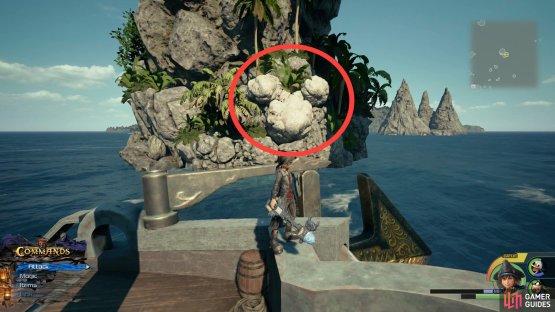
Dive under to defeat the Heartless and snap the photo before looking to the rock below this Lucky Emblem to the southwest to find a chest containing Treasure #11 - Electrum. Swim towards the cavern entrance to the right now and from a distance, you’ll notice that it forms Lucky Emblem #12. Head inside this cavern now to find two chests at the bottom containing Treasure #31 - Electrum and Treasure #32 - Adamantite.

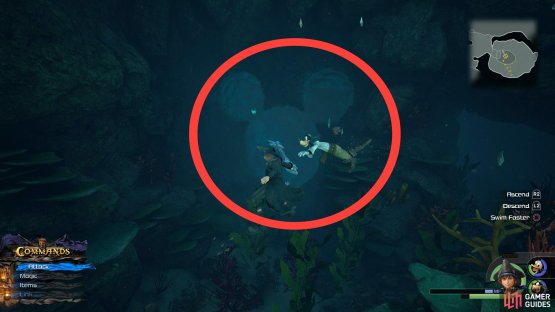
(1 of 2) There’s a Lucky Emblem on the white rock
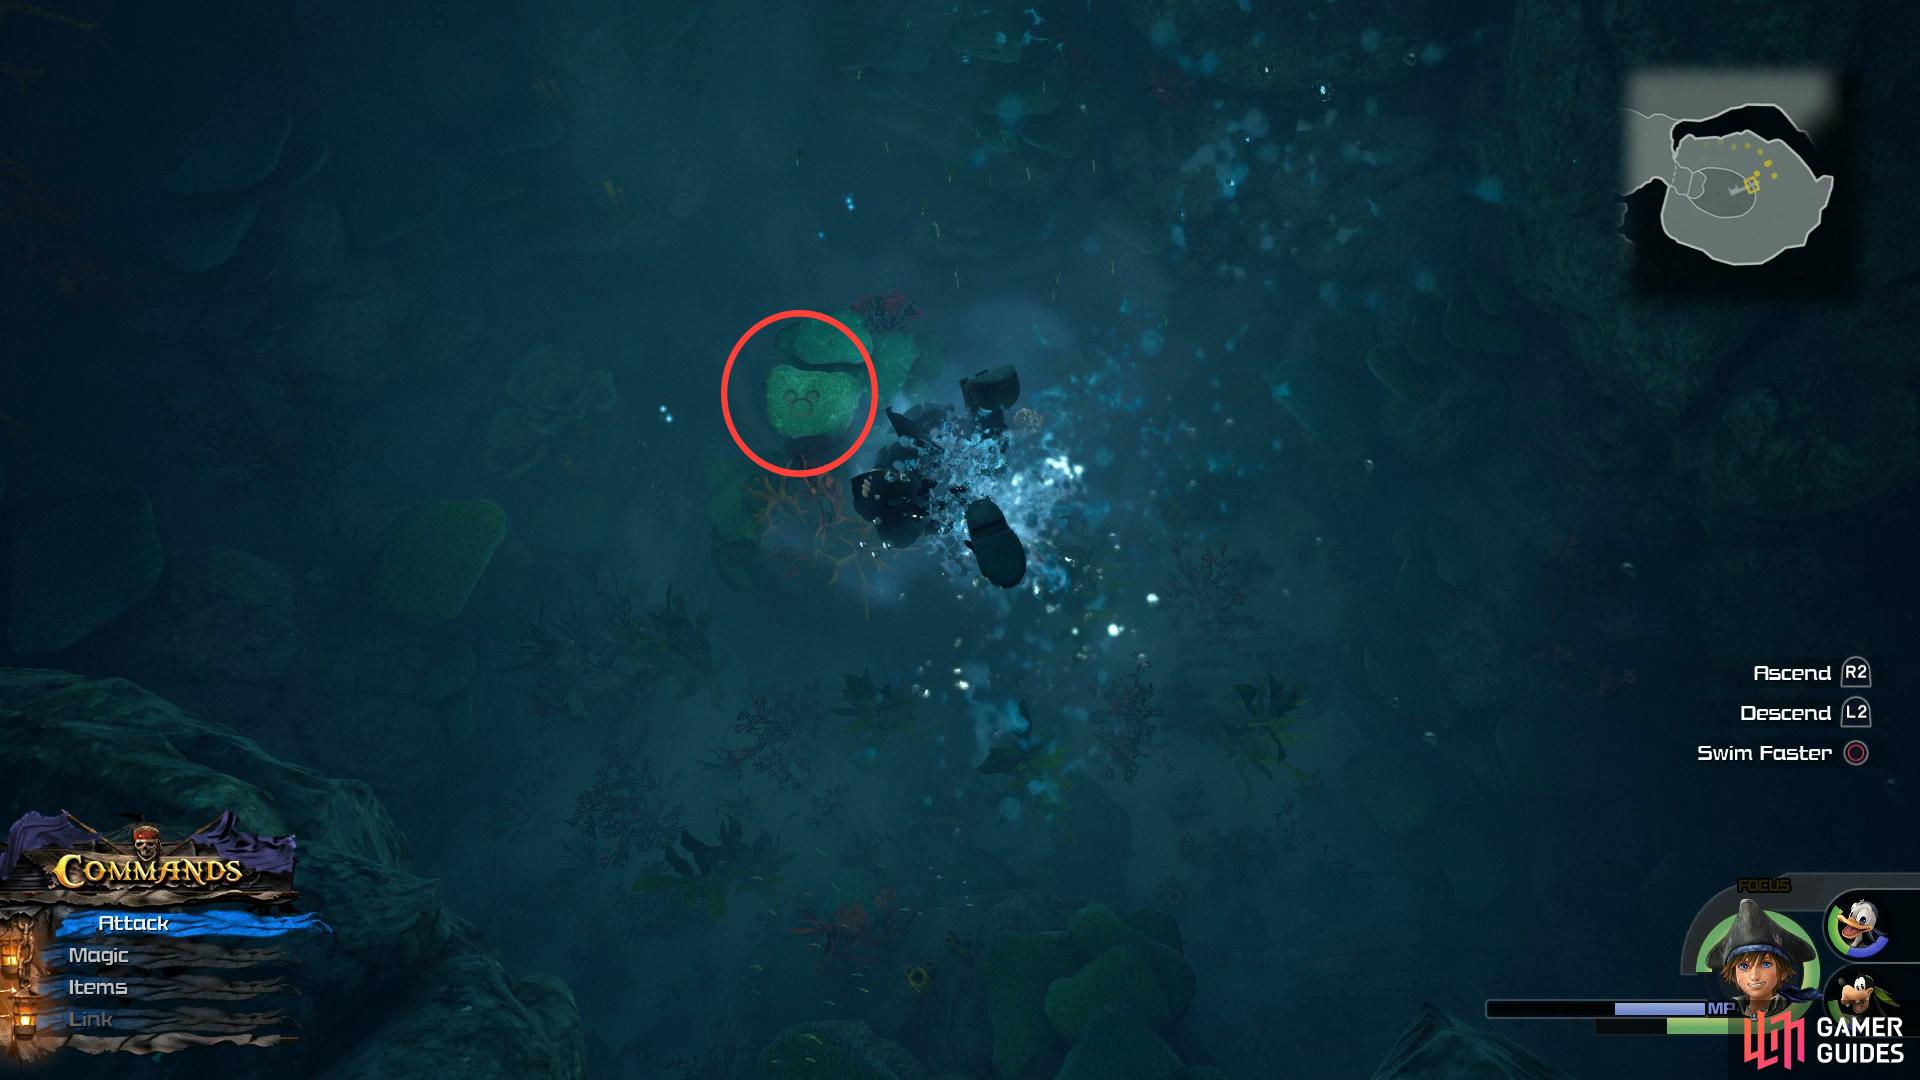

There’s a Lucky Emblem on the white rock (left), while another makes up the entrance of the cavern to the left. (right)
Swim out of this cavern and enter another one to the right of it, inside you’ll find a whopping eight chests containing Treasures #33 - 40. From these chests you’ll obtain a Hungry Crystal, Adamantite x2, Electrum x2, Orichalcum x2 and a Storm Anchor+. Head back to the ship and open up your Sea Chart once more, this time plot a course for Ship’s End to the west.
Ship’s End and Exile Island
Disembark from the ship to the north of the island and head through the passage to find a ship sticking out of the water, on the deck of you’ll find Lucky Emblem #11. Drop into the water here and follow the rocky wall to the right whilst underwater. Eventually, you’ll come across another shipwreck (just past a cavern entrance) and on the deck, a chest containing Treasure #18 - Map: Ship’s End.
Return to the cavern you just passed through and head through it to swim into a shipwreck. Swim through this ship and up into another one where you’ll come across two chests containing Treasure #8 - Mega-Ether and Treasure #7 - Cosmic Arts. Strike the stick in front of the hatch go exit the ship and then return to the Leviathan, sailing northwest to Exile Island.
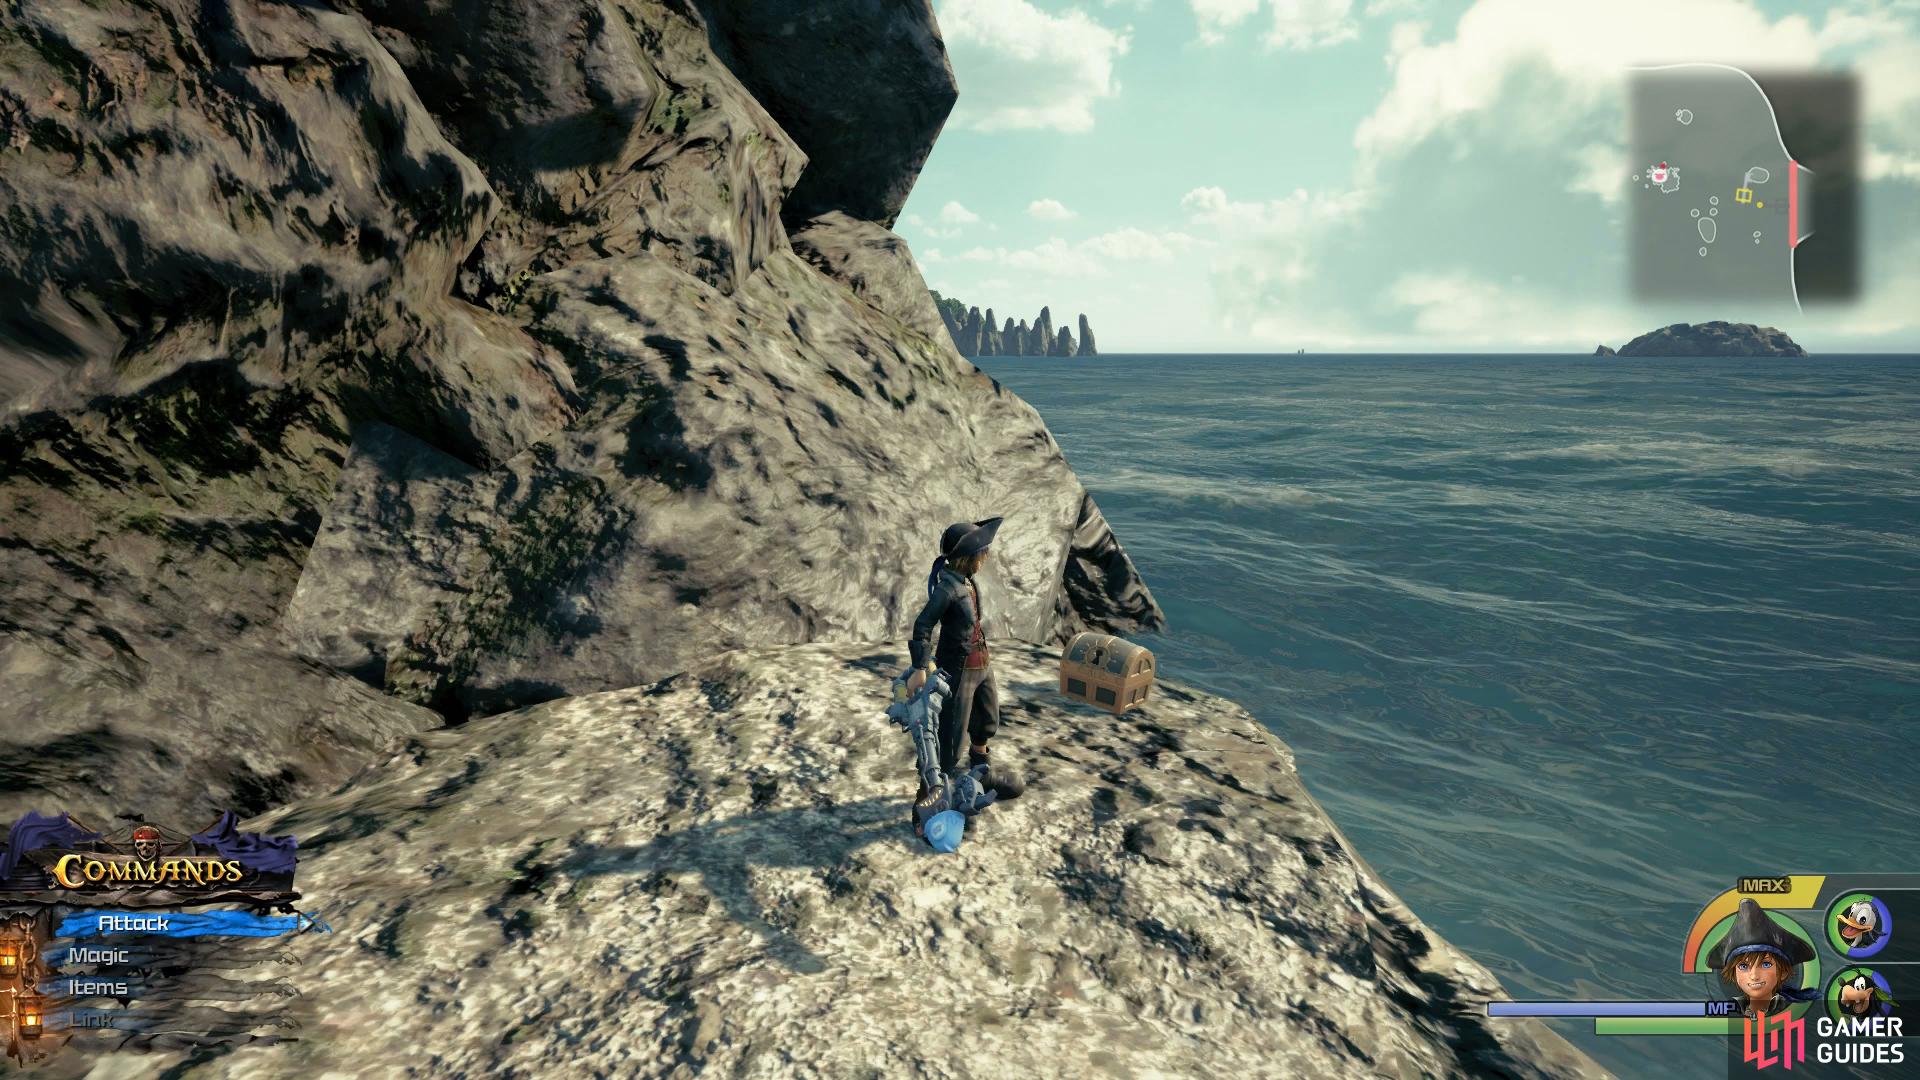
(1 of 2) You’ll find another Lucky Emblem on Ship’s End


You’ll find another Lucky Emblem on Ship’s End (left), while your first Orichalcum+ awaits on Exile Island. (right)
Disembark from the Leviathan and head inland where you’ll be ambushed by a large group of enemies. Consider using a Link ability here to thin some of the horde before heading to the center to open the chest containing the elusive Treasure #12 - Orichalcum+.
Horseshoe Island and Isle of Luck
Return to the Leviathan once more and sail northwest to Horseshoe Island, taking the ship under the archway and stopping. Face the southern wall here to find Lucky Emblem #9 and then sail around to the beach itself. Once again, you’ll have a large group of Heartless to contend with including three Sand Heartless. Following their defeat, search in the center of island to find a collection of five chests containing Treasure #16 - Arcisius, Treasure #41 - Damascus, Treasure #42 - Firaga Bangle, Treasure #43 - Blizzaga Choker and Treasure #44 - Chaos Anklet.
(1 of 2) Sail under the archway of Horeshoe Island to find this Lucky Emblem


Sail under the archway of Horeshoe Island to find this Lucky Emblem (left), while another awaits on the Isle of Luck. (right)
Return to the Leviathan after smashing the crates for White Crabs and set sail for the Isle of Luck to the west. Defeat the Heartless that spawns on the island and then climb the rocks to the north. Face the southeast to find some rocks that make out Lucky Emblem #8 before returning to the Leviathan and making for Isla Verdemontaña to the north.
Isla Verdemontaña
Beginning at the Save Point on the beach, follow the path into the forest and defeat the large amount of Powerwilds that attack. Following their defeat, head to the far east and run up the large wall to find a chest containing Treasure #9 - Electrum. Drop back down and follow the path south and you’ll happen upon another large wall to ascend. At the top, follow the southern wall and defeat more Powerwilds to find a chest containing Treasure #25 - Orichalcum.
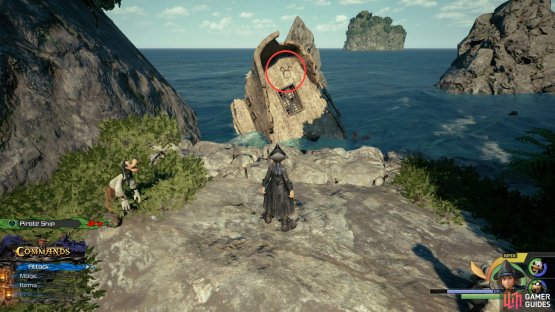
You can make out another Lucky Emblem in the sea from this position.
Continue along the path and you’ll reach an intersection, take the left path first and stand on the rocks at the end. Look down to the sea below and you’ll spot Lucky Emblem #7 waiting to be snapped. Return to the intersection and take the other path to reach a cliff edge. If you peer over the side of this cliff, you’ll notice the large crate with the red cross on it. Leap off the edge and strike the crate to reveal a chest containing Treasure #10 - Classic Kingdom: Cast Out to Sea.
Return to the Leviathan and begin sailing back over to the east until you reach your next destination, Isla de los Mástiles.
Isla de los Mástiles and Confinement Island
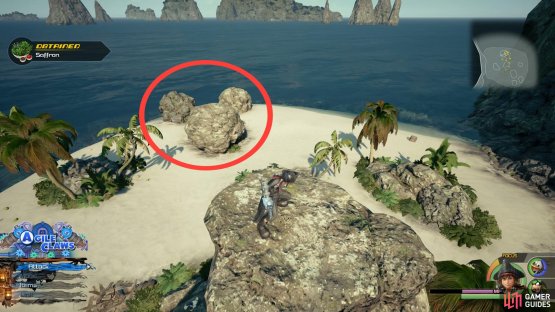
Head from the west, you’ll reach a smaller island first so disembark and head over to it. After defeating the Heartless, climb the small pile of rocks and face out to sea to spot Lucky Emblem #10 before returning to the Leviathan and sailing to the mainland.
Stand on this pile of rocks to snap this Lucky Emblem.
Make use of the Save Point and the Moogle Shop, you’ll notice there’s a new Photo Mission to grab next time you’re in Port Royal. Additionally, with the materials you’ve picked up here in The Caribbean, you should be able to forge your favorite Keyblade to it’s max level and unlock a Trophy in the process.


When you’re ready to begin exploring, follow the beach around to a cave and enter it where you’ll find a chest at the end containing Treasure #17 - Map: Isla de los Mástiles. Return the way you came and follow the left wall until you reach one you can run up along with a second to the right of it. At the top, jump on the rocks to your right and look over the cliff edge to spot another large crate with a red cross. Leap off the side and strike the crate to reveal a chest containing Treasure #6 - Silver Necklace.
Return up the two walls and follow the path, defeating the Heartles that appear along the way. Leap across the rocks to reach the other side of the island before diving into the water at the far end. Swim down to the bottom here and you’ll discover another three chests containing Treasure #5 - Damascus, Treasure #23 - Insulator Rosette and Treasure #24 - Adamantite.
Make your way off this island and back to the Leviathan, plotting a course for Confinement Island to the north. The only way to get into this island is by swimming in from the north where you’ll find a small archway leading to the beach. On this small beach you’ll find a horde of White Crabs in all of the barrels along with the final chest in the Caribbean containing Treasure #13 - Classic Kingdom: Beach Party which will trigger some more Heartless.
With all of the Treasures plundered and the Lucky Emblems snapped, your Leviathan should be sitting around Level 7 or 8 (of a maximum of 9) provided you’ve been diligent in breaking every box and barrel you’ve come across. At this point you can choose to head off to the objective for the final showdown or stick around to reach the max level of the Leviathan and obtain a Trophy/Achievement. At this point, it’s in your best interest to sail around defeating ships to get the last of the White Crabs, at least until you’ve obtained the Trophy/Achievement related to destroying 200.

When you’re ready to proceed, head towards Forsaken Isle to the north of the sea to trigger a large scale battle with the Heartless. You’ll have no trouble here if you’ve been upgrading your ship, make use of your special abilities and always aim for the cores.
| Character | Ability |
|---|---|
| Sora | Waterga |
Head over to Forsaken Isle following the battle and use the Save Point to save your game. Attempt to have the Leviathan at least Level 7 before heading off to Shipwreck Cove, it will make it a lot more manageable. Once you’re ready for the showdown, return to the Leviathan and head north.
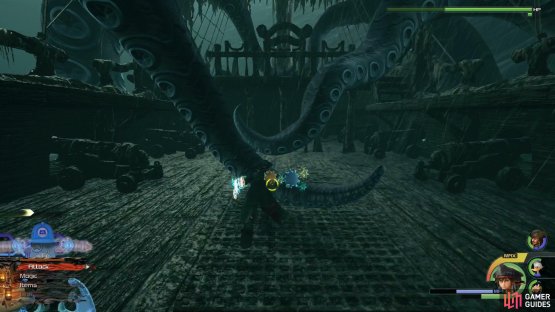
Boss: The Kraken

With the Black Pearl in peril, it’s down to Sora to bombard the Kraken’s tentacles with cannon fire. Your chances here are all directly related to how much time you put into increasing the Leviathan’s Level. With a higher Level, you’ll have more cannons and the useful Tidal Wave ability to make use of.
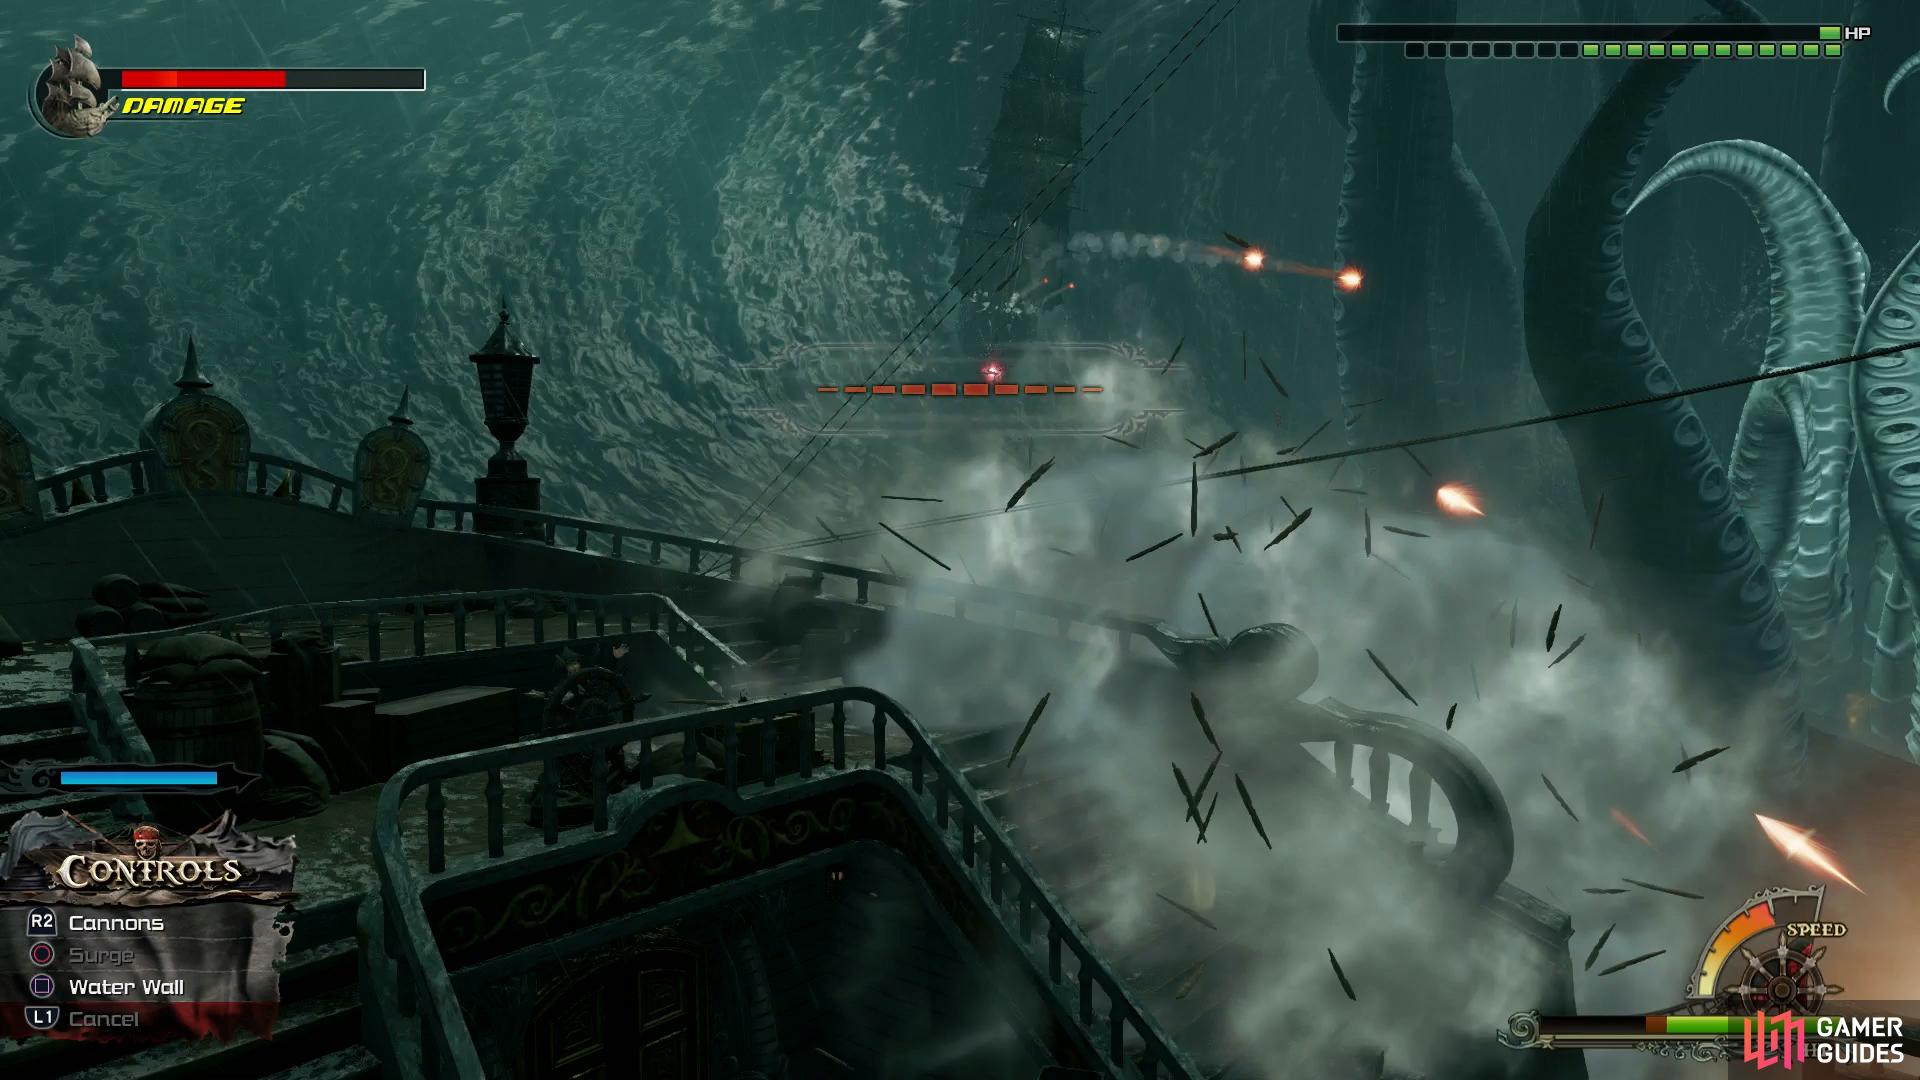
Target The Flying Dutchman to build up the special gauge.
To make the encounter more difficult, you’ll have to contend with the Flying Dutchman’s cannons, be sure to put up Water Wall whenever you see some coming your way. You can target the Flying Dutchman’s weakpoint yourself, using this you can build up your special ability gauge to unleash on the Kraken. The Flying Dutchman will come and go as the battle wages on and begin shooting it’s cannons at the Black Pearl too so make sure you turn your full attention to it whenever it appears.
| Character | Ability |
|---|---|
| Donald | Aero Boost |
| Goofy | Max Hp Increase |
Boss: Davy Jones
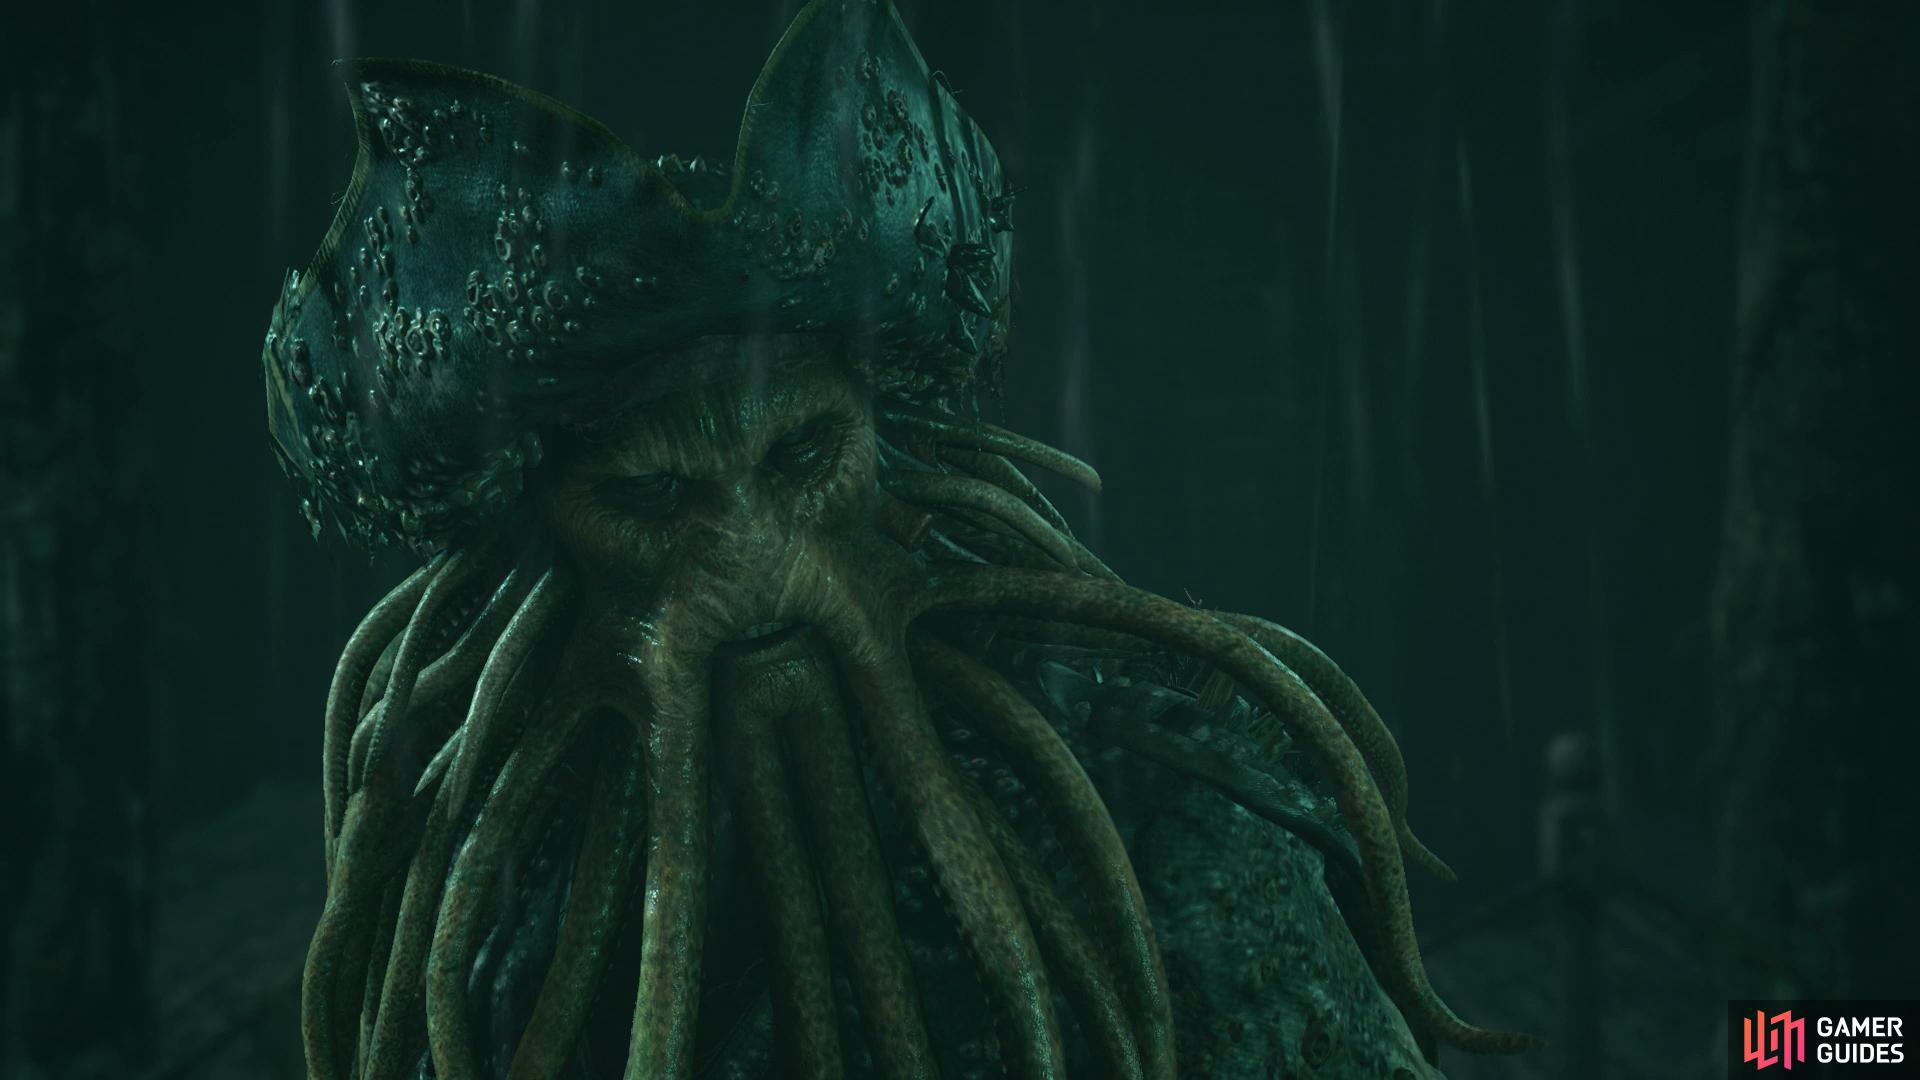
Now aboard The Flying Dutchman itself, Sora and Jack team up to take down Davy Jones himself. Davy Jones is a speedy swordsman that will deflect your attacks and often counter so be sure to dodge roll out of the way if one of your attacks is defelected. Davy Jones will also spend the first phase teleporting around the ship, keep locked on to him and you shouldn’t have too much of a problem during this first phase.
After depleting around half of Davy Jones’ HP, he’ll retreat and call upon the Kraken. Tentacles will cover the ship and begin attacking you so begin bringing out the area of effect spells and abilities. Thundaga/za works incredibly well here as does your Keyblade Transformations. Keep an eye out for black circles that appear under Sora, this indicates a Tentacles is about to strike that location.

(1 of 2) Thundaga/za works well to clear out the Tentacles

Thundaga/za works well to clear out the Tentacles (left), watch out for black circles underneath you, a Tentacle will attack from this. (right)
The third and final phase will take place once you defeat all of the Tentacles on the ship. Davy Jones returns to the battle and will also use the Kraken’s Tentacles from phase two to assault you too. Keep on the move and focus on Davy Jones himself rather than the tentacles, using a few casts of Thundaga if too many surround you. You’ll need to put your aerial recoveries to good use here as the Tentacles will throw you around a lot.
| Character | Ability |
|---|---|
| Sora | Payback Strike, Max HP Increase |
Following the events of the battles that take place, Sora will bid farewell to the Caribbean and you’ll obtain the fantastic Wheel of Fate Keyblade. This is arguably the best Keyblade other than the Ultima Weapon, be sure to equip and upgrade it as soon as possible. You’ll find yourself back in the Gummiship but before you head to the final Disney World, there’s another task to take care of back in the Caribbean.

Watermelon Flan
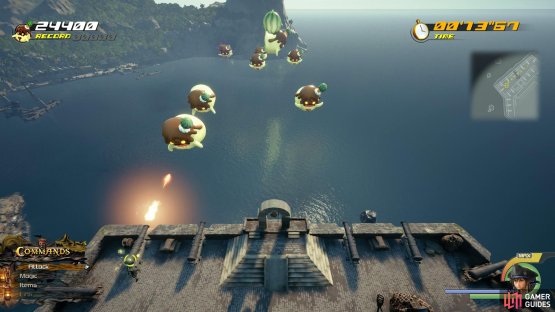
Warp to the Fort in the Port Royal and make your way into the Courtyard where the latest of the Flantastic Seven has taken up refuge. For this challenge, you’ll need to strike the cannons that pertain to the corresponding Flan.
Think of it like Space Invaders, the Flans will start at the back and start slowly approaching you. Note that you can fire the same cannon at the time by continuing to swing at the specific cannon. You’ll notice at times that a larger Flan will fly side to side, these devious Flans will offer a bonus so aim for these at all costs. Finally, to aid you in your task, you have the bell in the center. Striking this when it’s available will cause all cannons to fire at the same time, it’s a good tactic to save this for when there are many Flans accompanied by a bonus Flan. Be sure to use your dodge roll to get between cannons and save time.
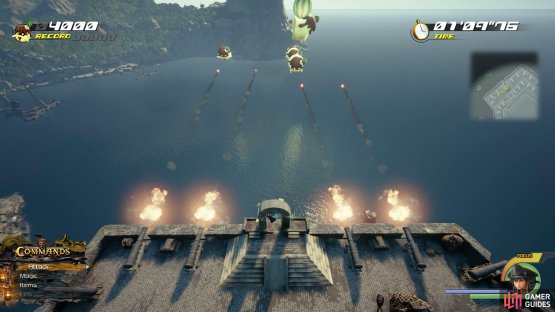
(1 of 2) Strike the bell when lit up to fire all cannons at once


Strike the bell when lit up to fire all cannons at once (left), you can fire the same cannon multiple times at once. (right)
All said and done, this will take practice for you to get the required score of 28,000+. Once you finally hit the score, you’ll obtain the Focus Syphon ability and Watermelon x3. Before you return to the Gummiship, head out of the Fort and head over to the bridge where you’ll find a waterfall. Take a photo of this waterfall to complete Photo Mission #18 and return to the Gummiship once more. One final Disney World remains for you to visit so plot a course for San Fransokyo.
No Comments