

The Hills
The serene vistas that surround the group is over in a heartbeat as you run into the eccentric Flynn Rider and a group of Heartless. You’ll encounter a new adversary here, the Puffball, a relatively harmless Heartless and the common enemy for the Kingdom of Corona. This is a great battle to test out your new Keyblade provided you equipped and leveled it up, it’s one of the better ones for a large period of the game. Midway through the encounter you’ll meet another new Heartless, the Malachite Bolero, a flying Heartless that will shoot Aero magic at you, make use of Thunder to clear large groups of these.
| Character | Ability |
|---|---|
| Sora | Aero |
The group will be puzzled by the disappearance of Flynn and decide to take off and look for him. First things first, open the large chest by the tree nearby to obtain Treasure #7 - Map: The Forest (1/2). As you may have guessed from the naming of that map, the Forest is a rather large area and you’ll be spending a lot of time here. Continue south to trigger a cutscene where Sora will stumble into the secret passage leading to a large tower.
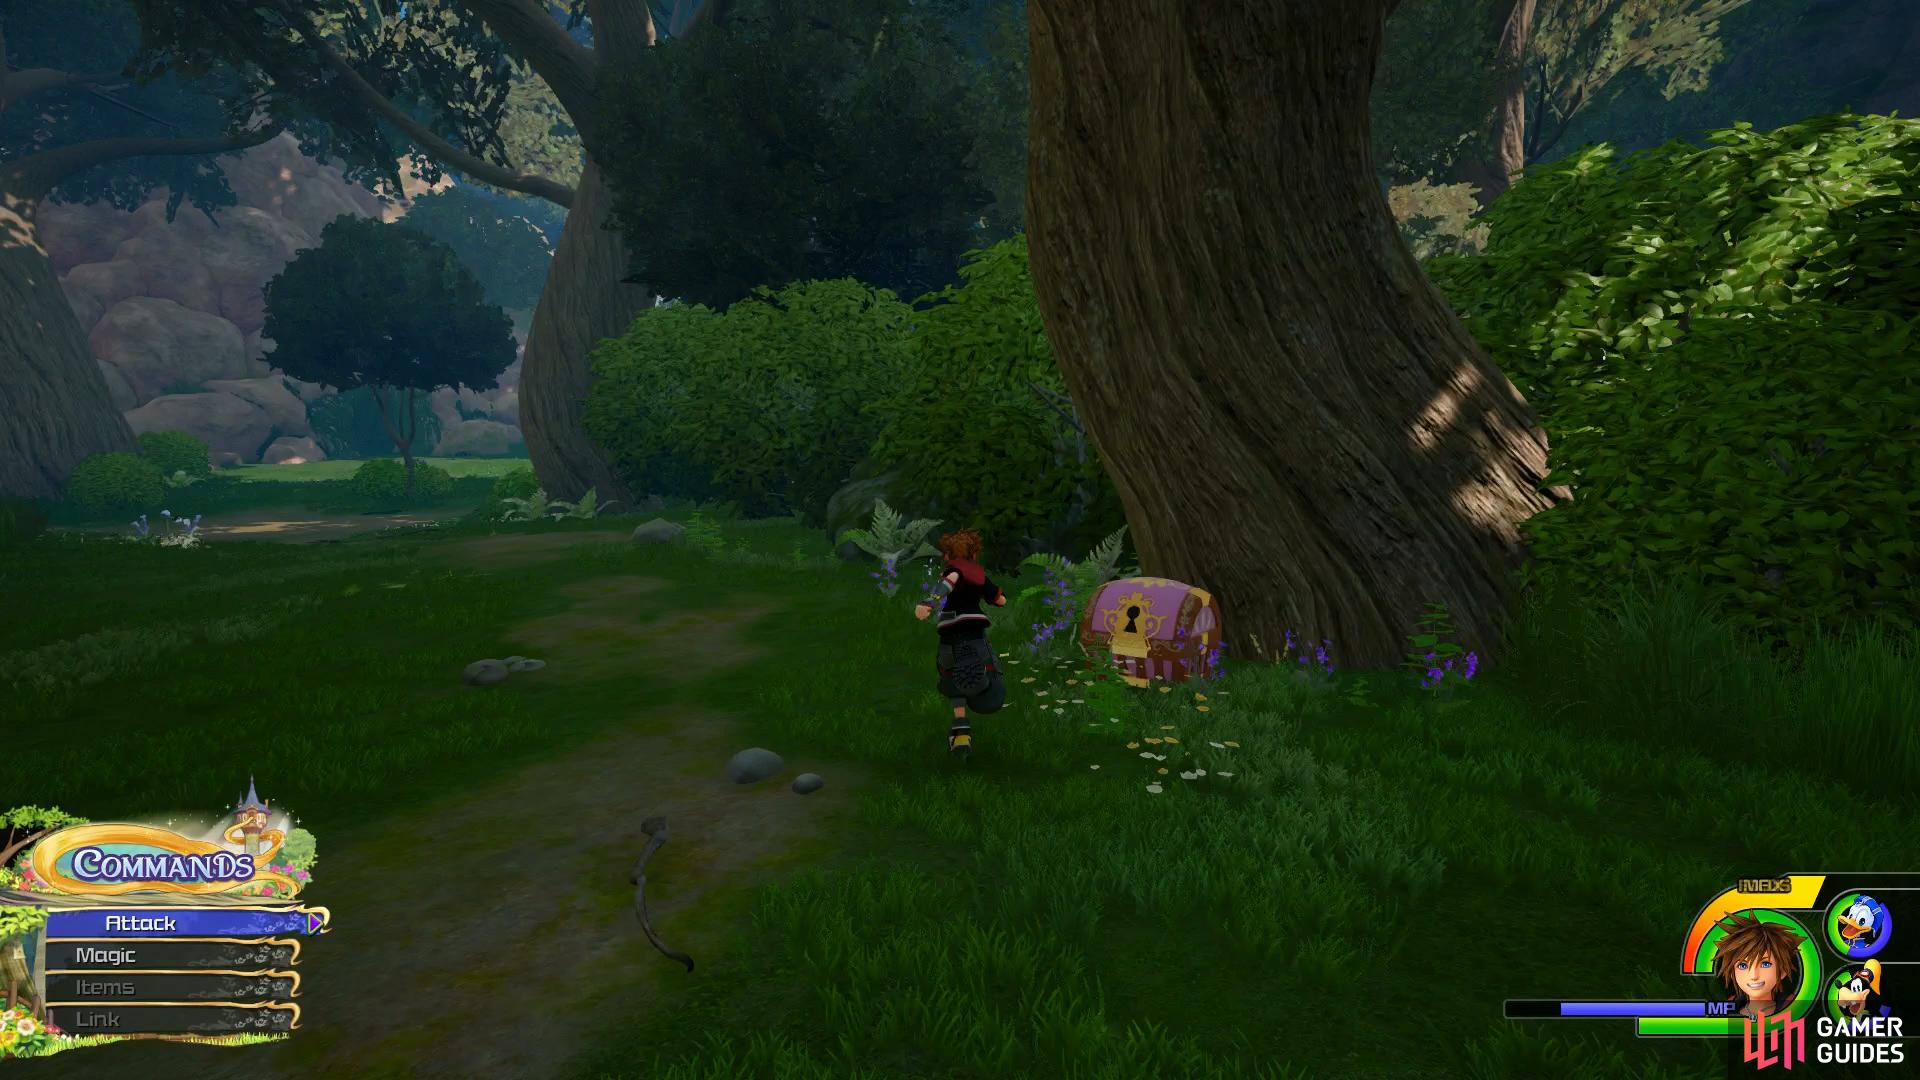
Loot the chest after the battle
then snap a picture of the Tower after checking out the Moogle Shop.
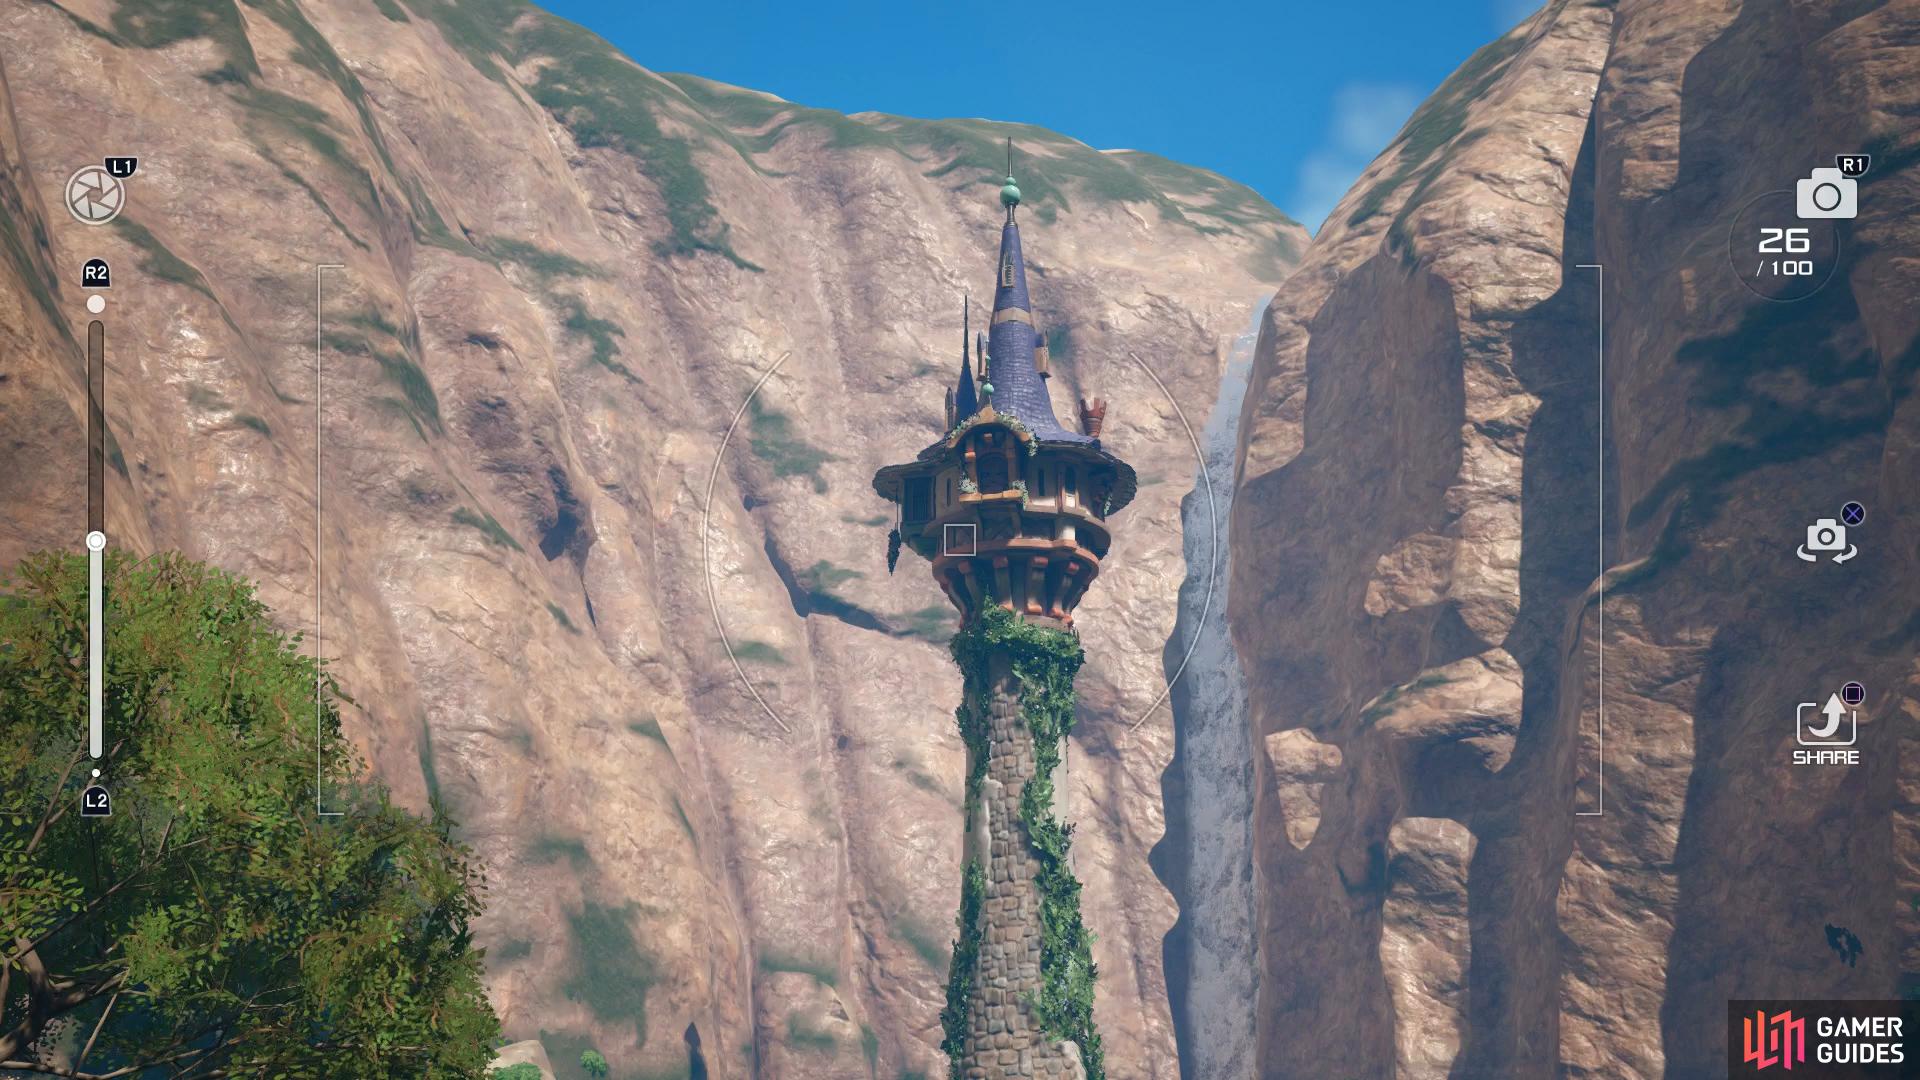
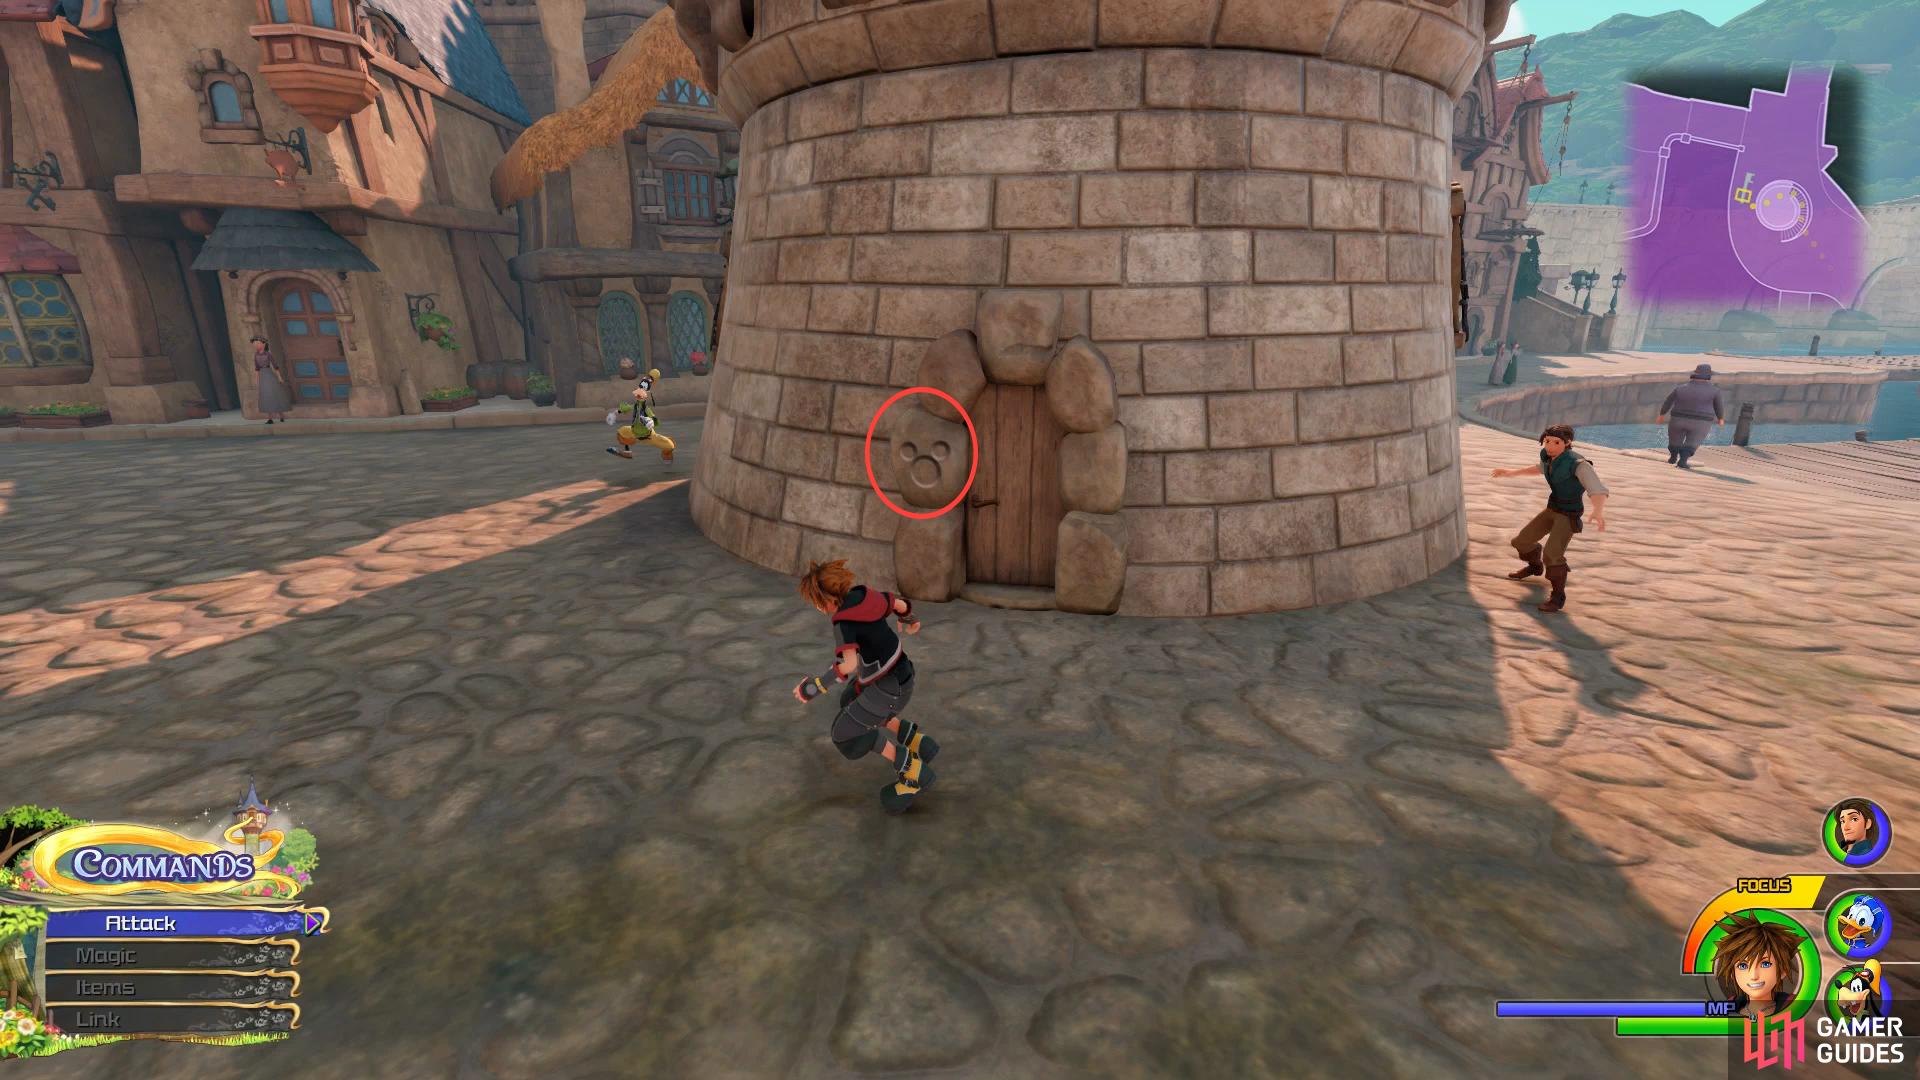
Once you regain control, use the nearby Save Point and access the Moogle Shop to store your materials and forge your new Keyblade as much as you can. If you take a look at the list of the Photo Missions you’ll notice there’s an easy one you can complete right now. Exit the shop and turn to face The Tower and take a photo of it to complete Photo Mission #6 which will allow you to synth the Mage’s Earring.
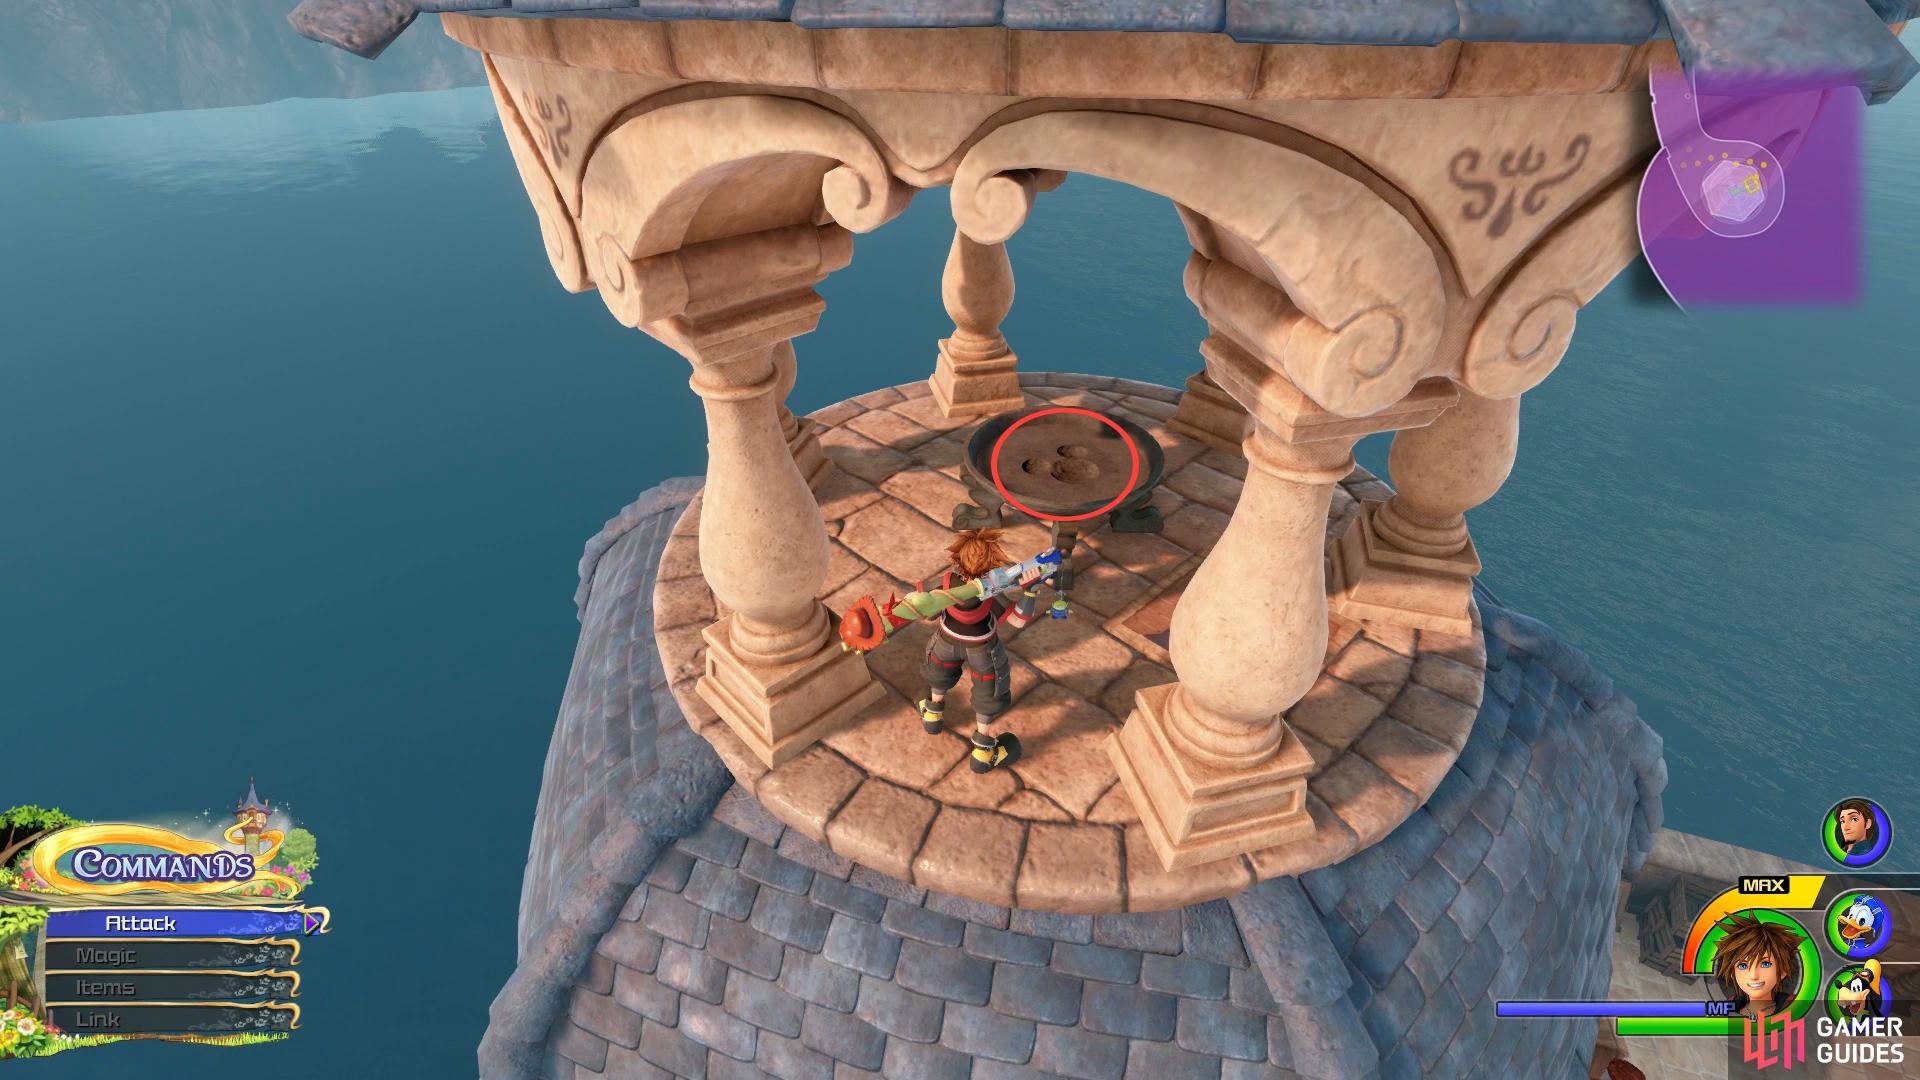
Head forward towards the river and then take a right and follow the river to a chest containing Treasure #1 - Mask Rosette. Make your way to The Tower now to meet up with Flynn Rider and Rapunzel who forces the group into helping them reach the Kingdom. Both Flynn and Rapunzel will join the party giving you an extra two party members in combat. Before you set out for the Kingdom however, turn around and return through the secret passage to The Tower once more. Run all the way up the side of it to reach the very top and then turn to face the ground to your south to spot some rocks forming Lucky Emblem #1.
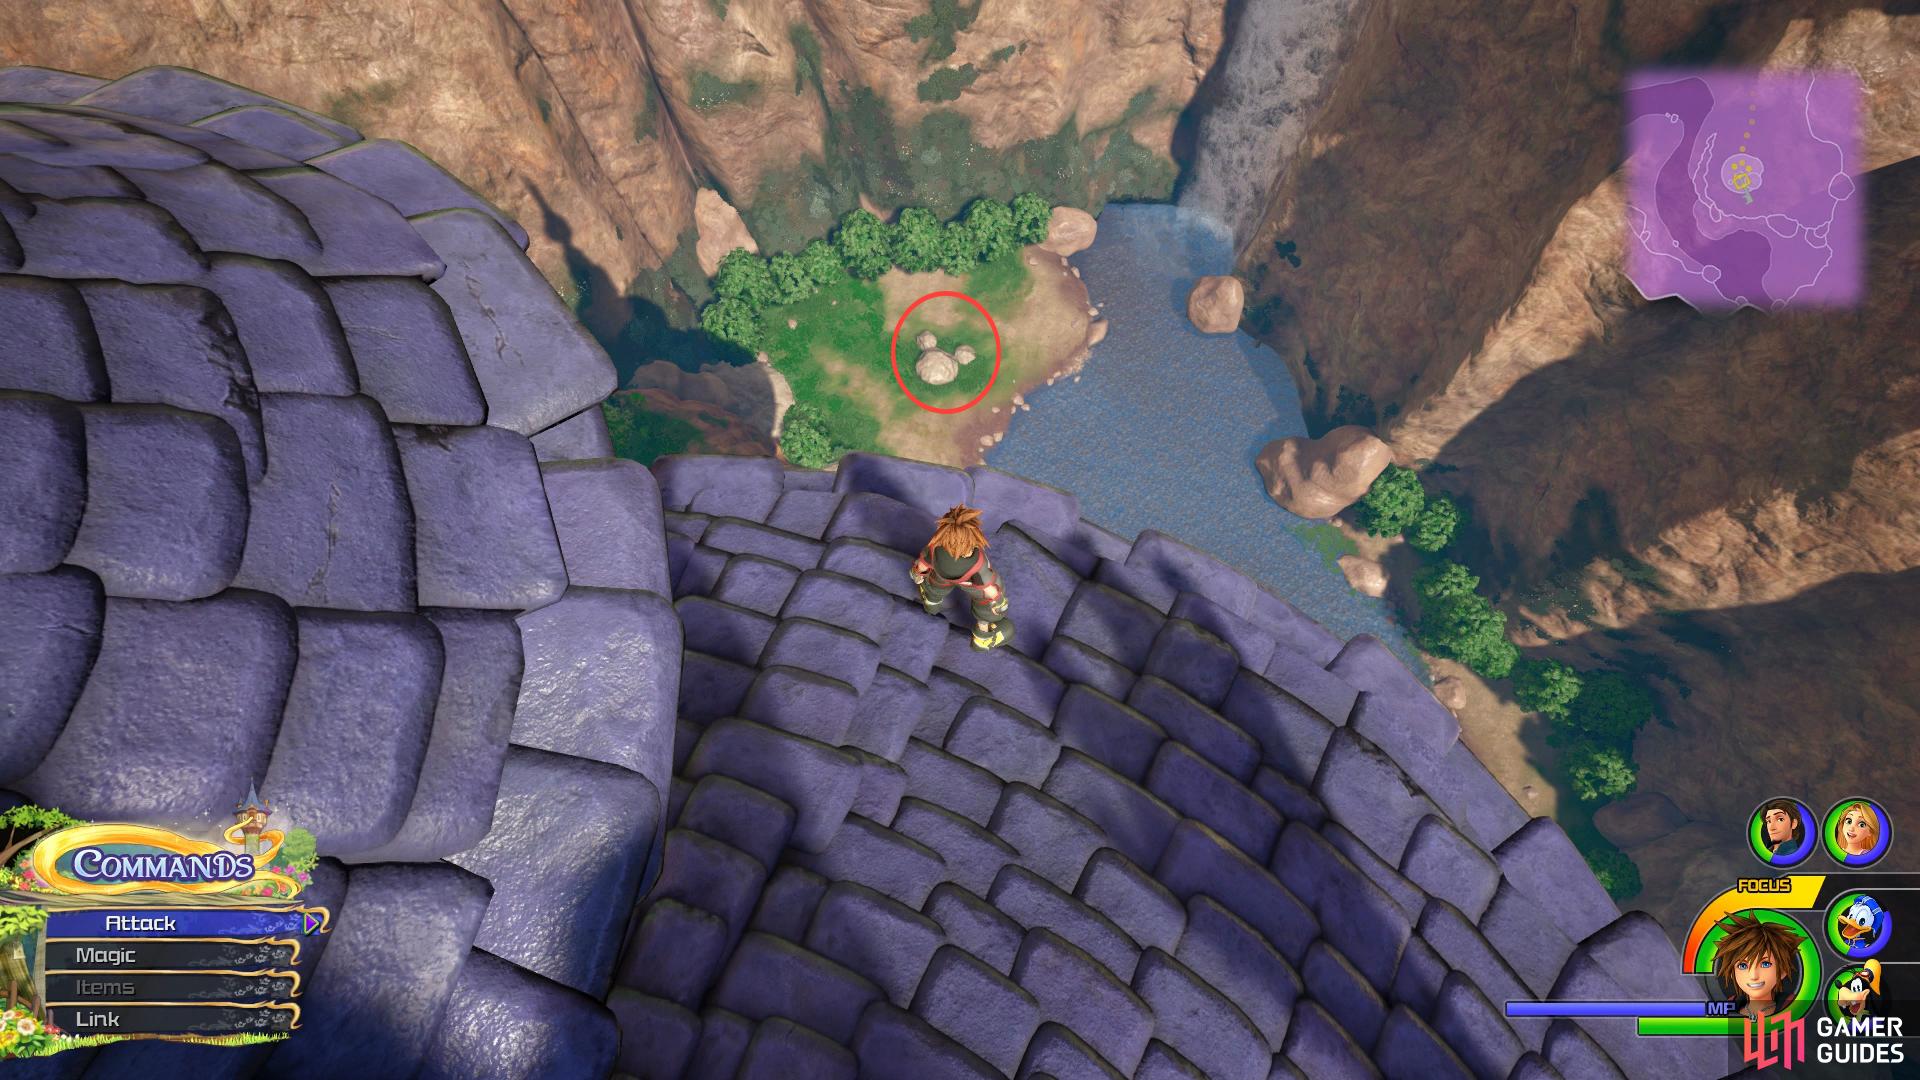
Climb the Tower to spot the Lucky Emblem on the ground.
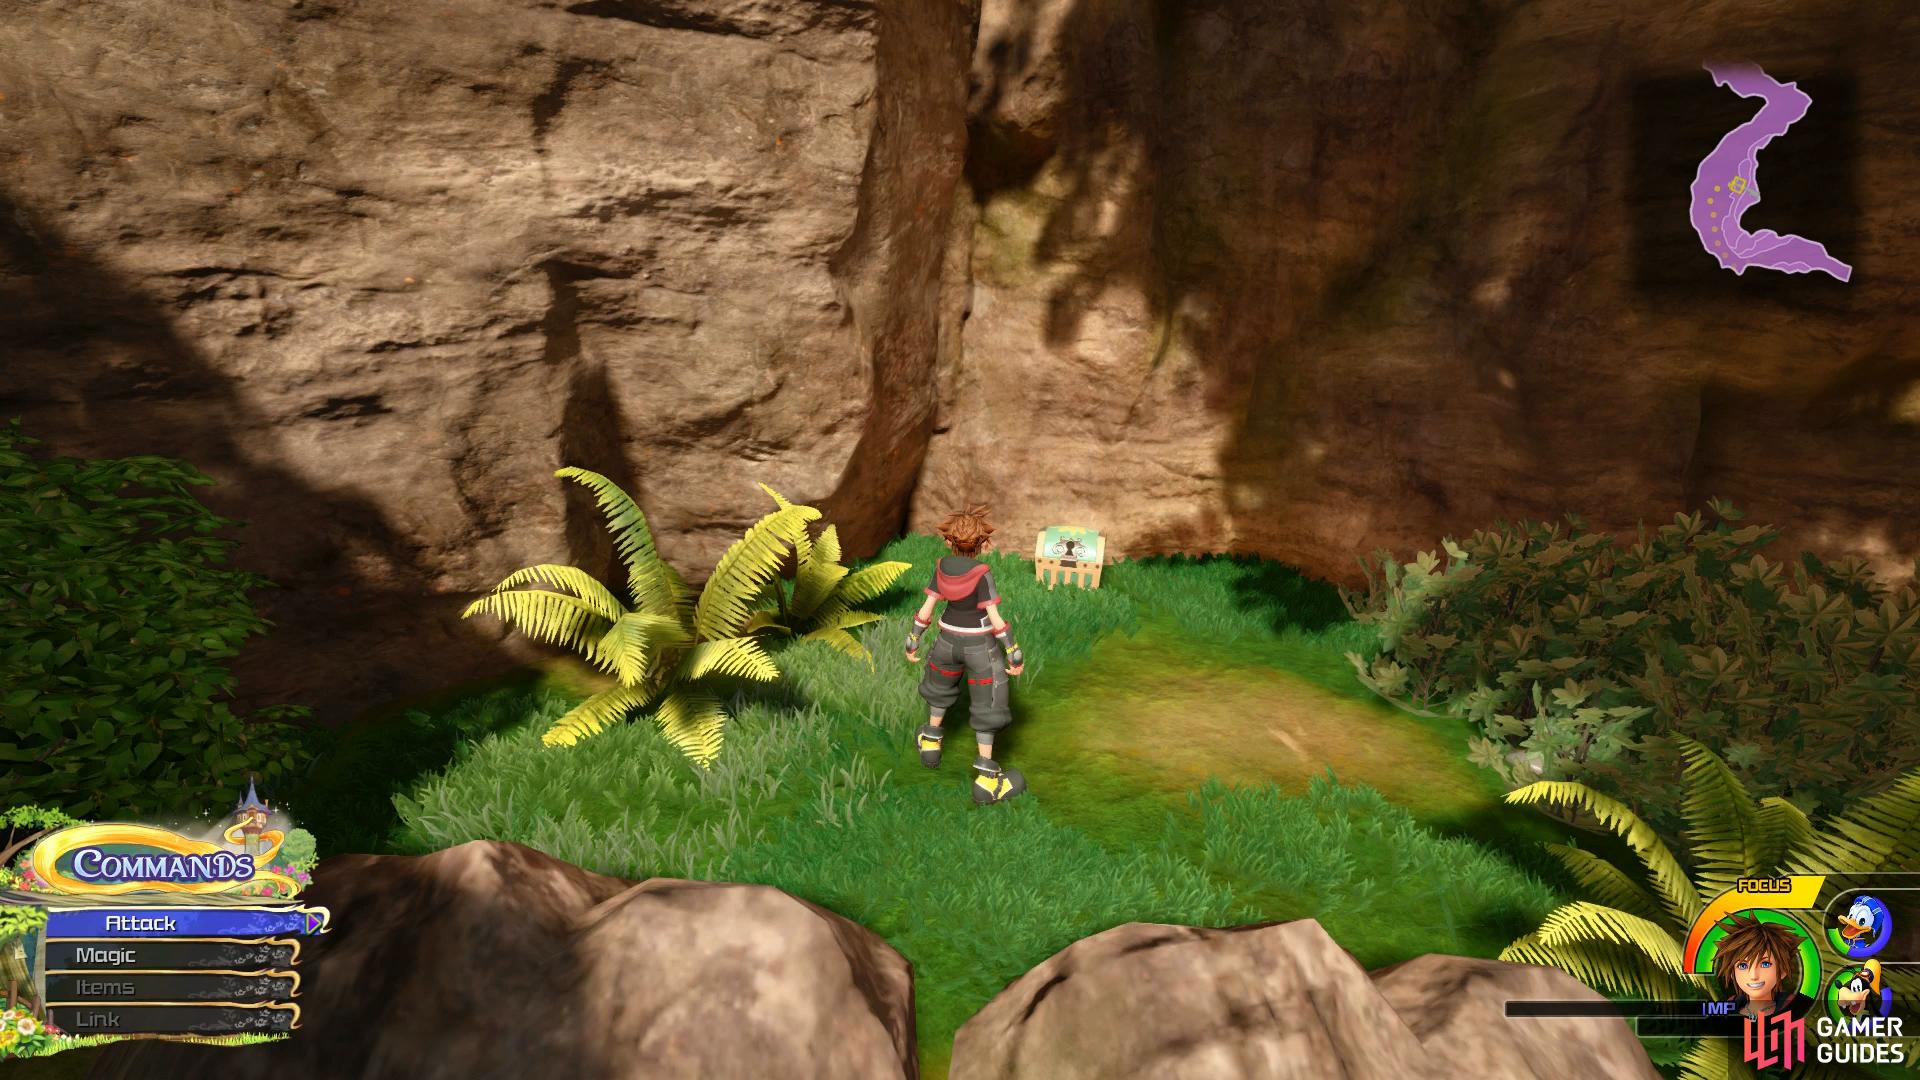
Return through the secret passage to reach The Hills once more and take a right to find another cave you can enter. Follow this to the end to find a large chest containing Treasure #9 - Classic Kingdom: Camping Out. Leave the cave and continue west where you’ll come across a small lake, cross over to the other side of it to find a chest containing Treasure #8 - Refocuser.
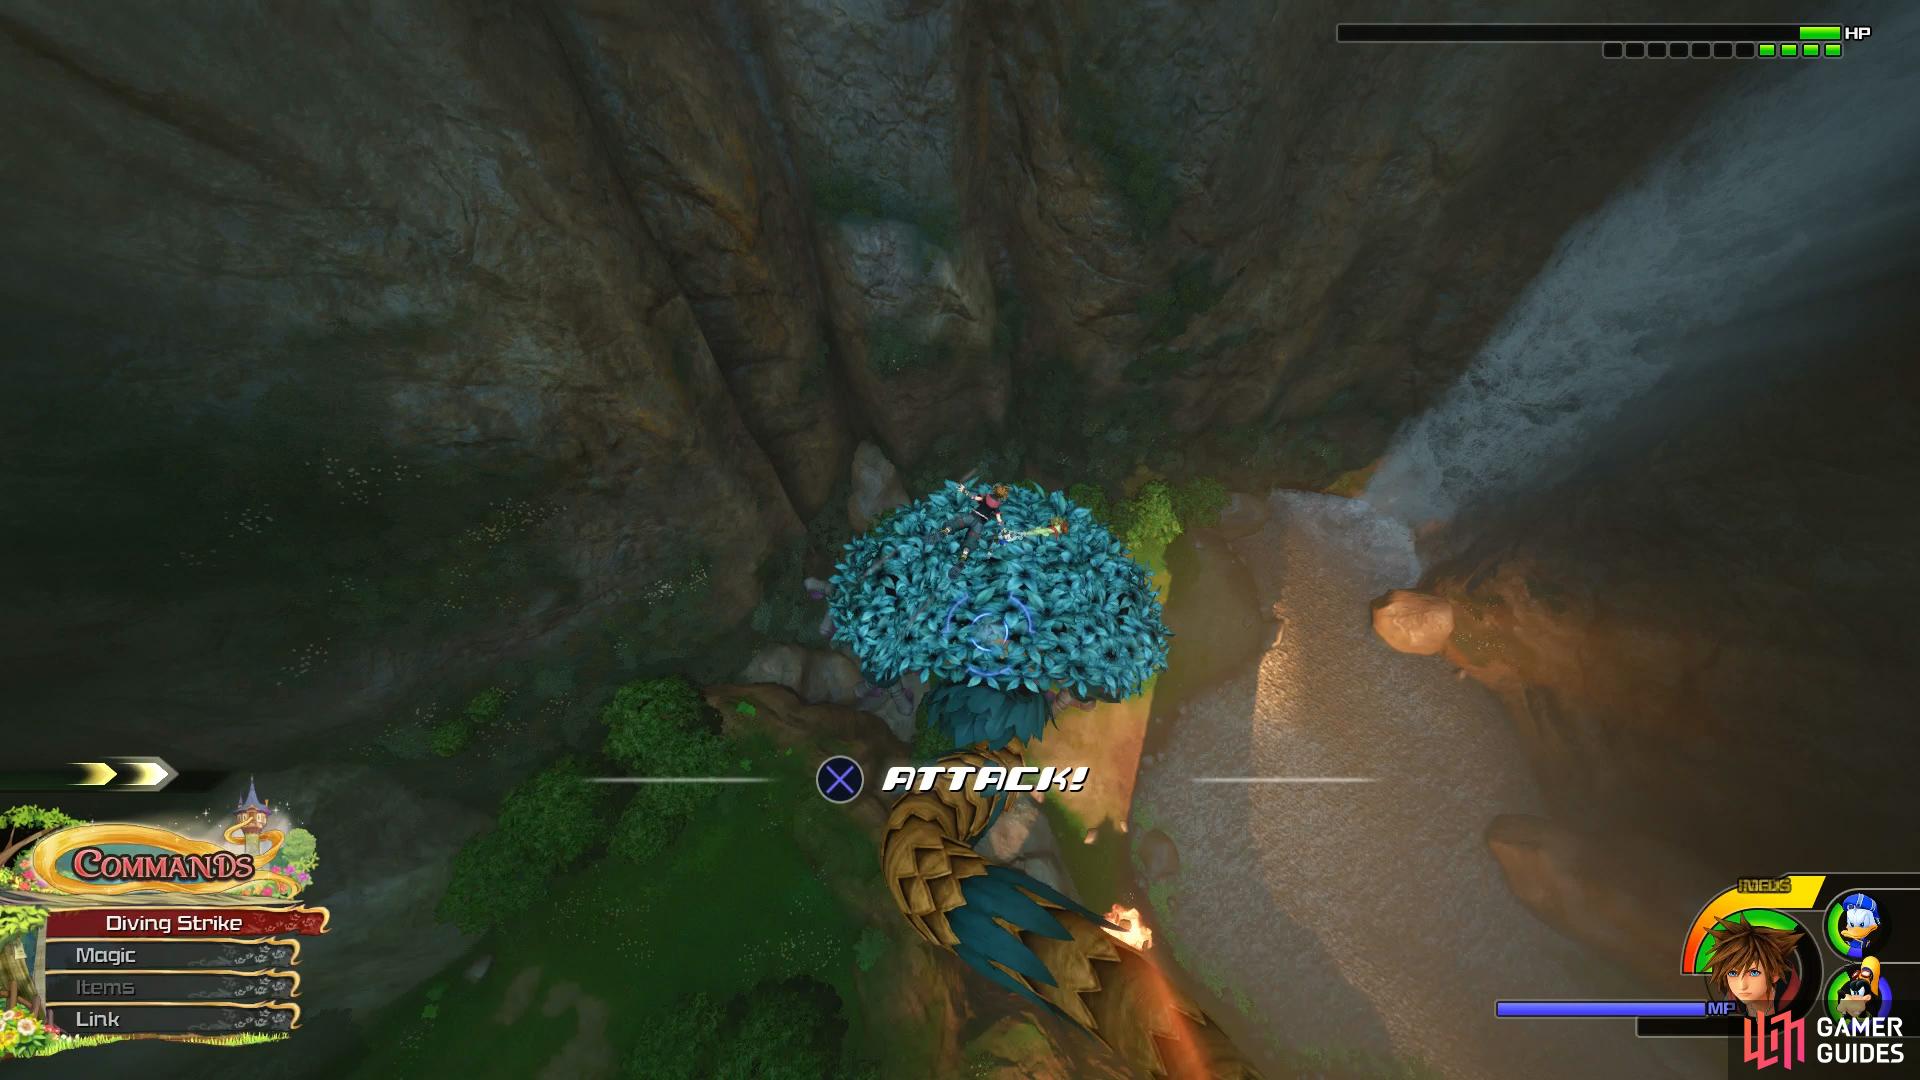
Continue up the path to the northwest and you’ll trigger a battle with a new Heartless, the Chief Puff. Before you do anything, take out the Gummiphone and snap it to complete Photo Mission #3. As for the Chief Puff himself, he will form a large stack with all the other Puffballs so you’ll want to gain some height and attack the top of the stack. Make good use of Thunder to thin out some of the surrounding Puffballs as well, Thunder is a good way to tackle large groups of enemies. Beware of the Chief Puff’s needle attack, if you get caught in it and take multiple hits it can be very deadly. Additionally, it the Chief Puff builds up a layer of fluff then you’ll need to drain it’s Armor bar by using the Aero spell.
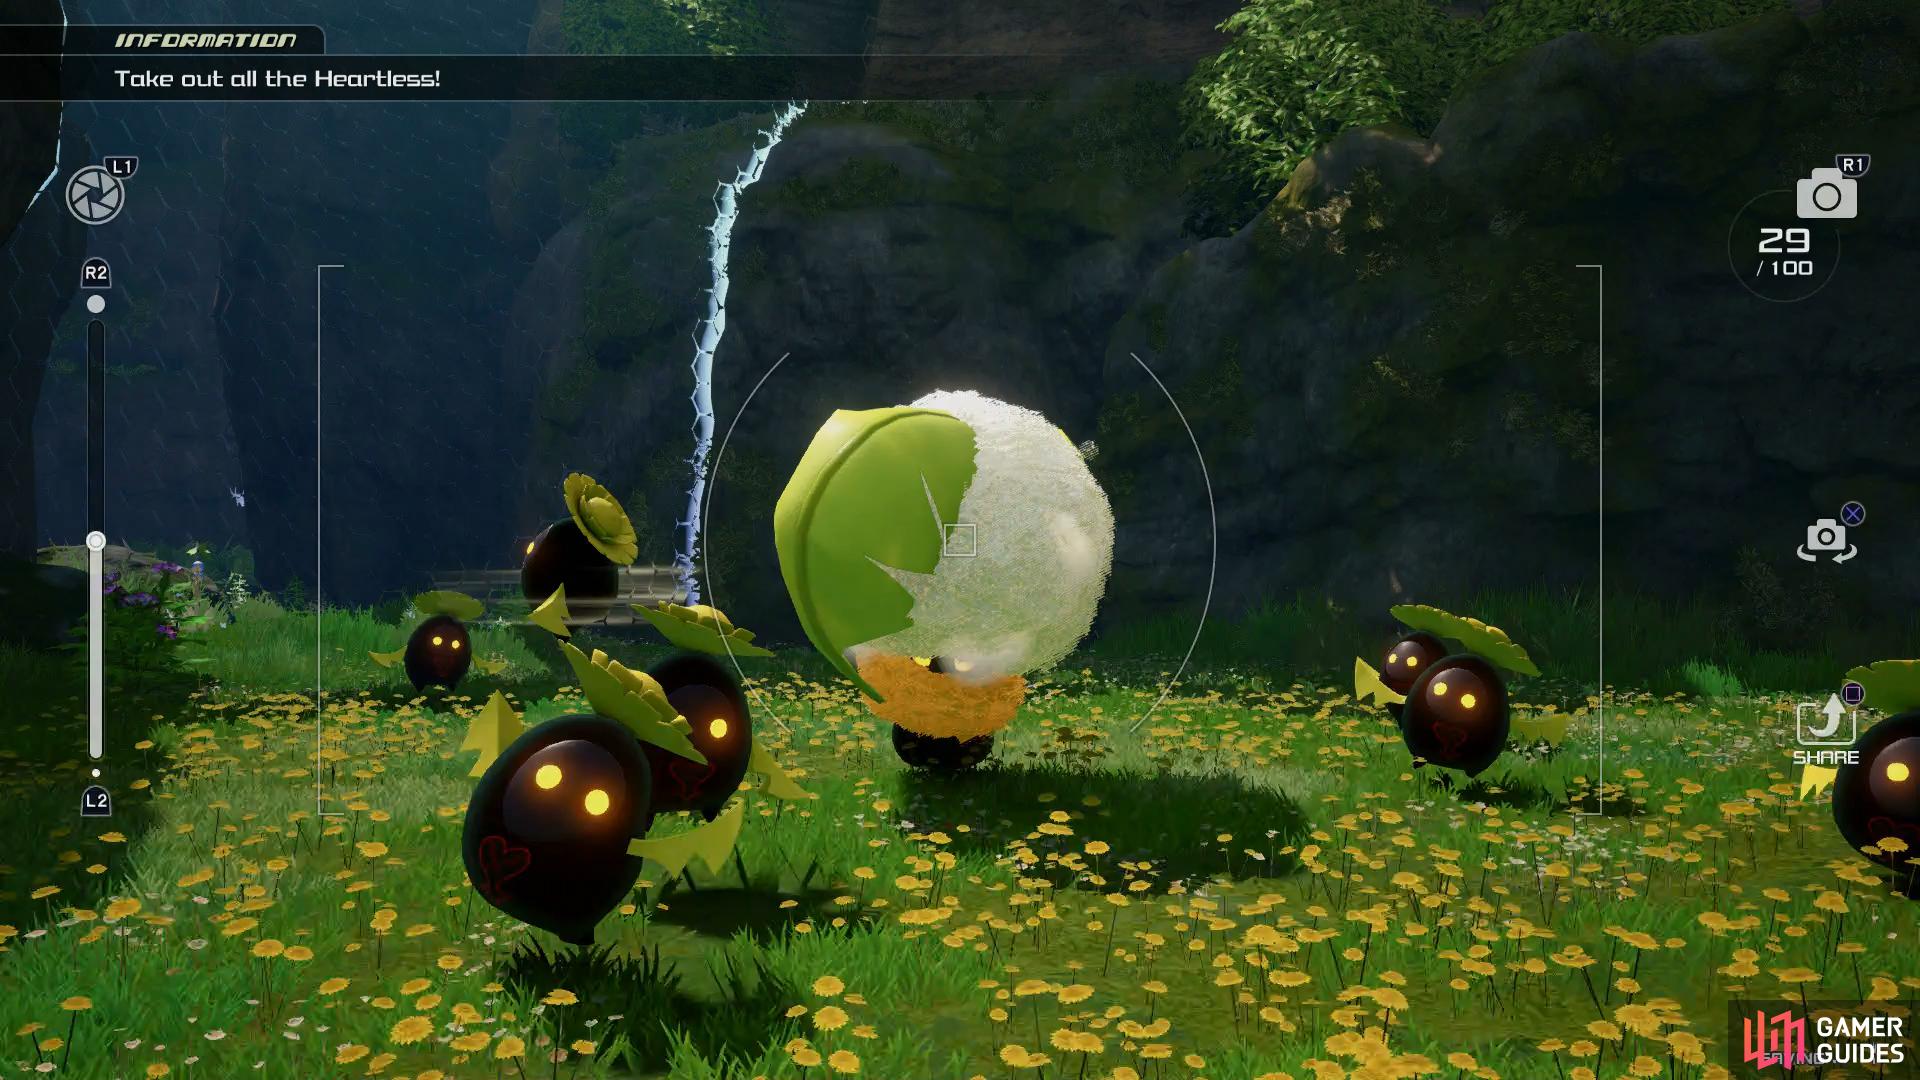
Snap a photo for Photo Mission #3.
| Character | Ability |
|---|---|
| Goofy | Max HP Increase, Second Chance |
Once you regain control, continue following the path to encounter yet another new Heartless, the Parasol Beauty. These tricky Heartless will shoot lasers from a distance and a spin attack up close. If you allow them to begin charging the laser however and attack them during it, you’ll stun them allowing you to take them out with ease.
Continue taking the path north and Rapunzel will be amazed at the sight of dandelions. Give her a hand blowing them by using the Aero spell on a group in front of you that can be targetted. Once you’ve seen the cutscene, return to the Save Point and save your game. Face the southwest from here to find a tree trunk, leap over it to spot a chest containing Treasure #6 - Potion.
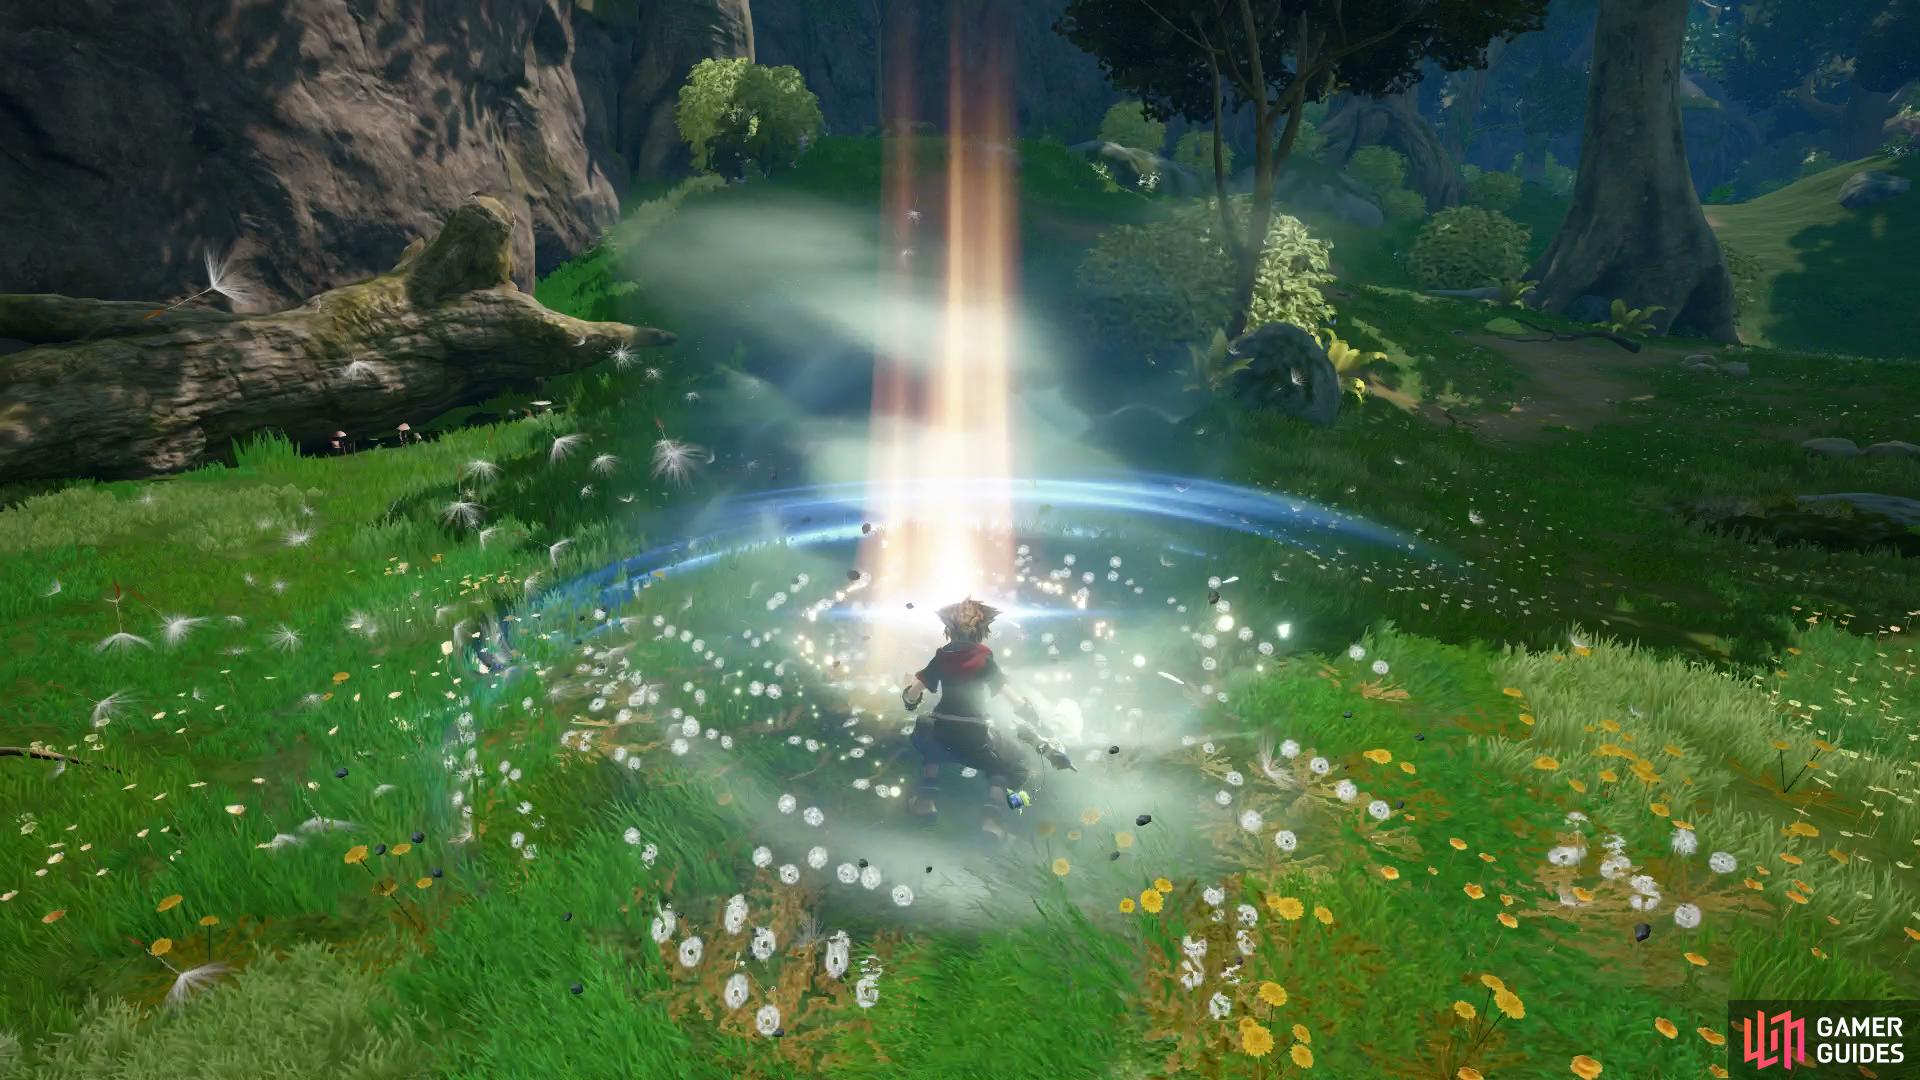
Use Aero on the dandelions for Rapunzel to marvel at.
Make your way up the hill to the northwest now and you’ll encounter a group of Heartless bullying some poor defenseless rabbits. After the battle is won, take up Rapunzel’s advice and follow them through a small in the bushes to find a chest containing Treasure #4 - Bronze Amulet. Return to the central path of this area and take out another group of Heartless, once defeated, head to the nearby tree and search near the bushes for another chest containing Treasure #5 - Panacea.
Continue over to the lake to your right and again take Rapunzel up on her offer and join her in the water. Follow Rapunzel and splash her with the water to trigger a rainbow and improve Rapunzel’s mood once again. With that excursion out of the way, follow the path north and take out another two groups of Heartless. You’ll pass another sign indicating you’re on the right path followed by another group of Heartless to put down and once you reach the next clearing, you’ll run into a group of Nobodies.
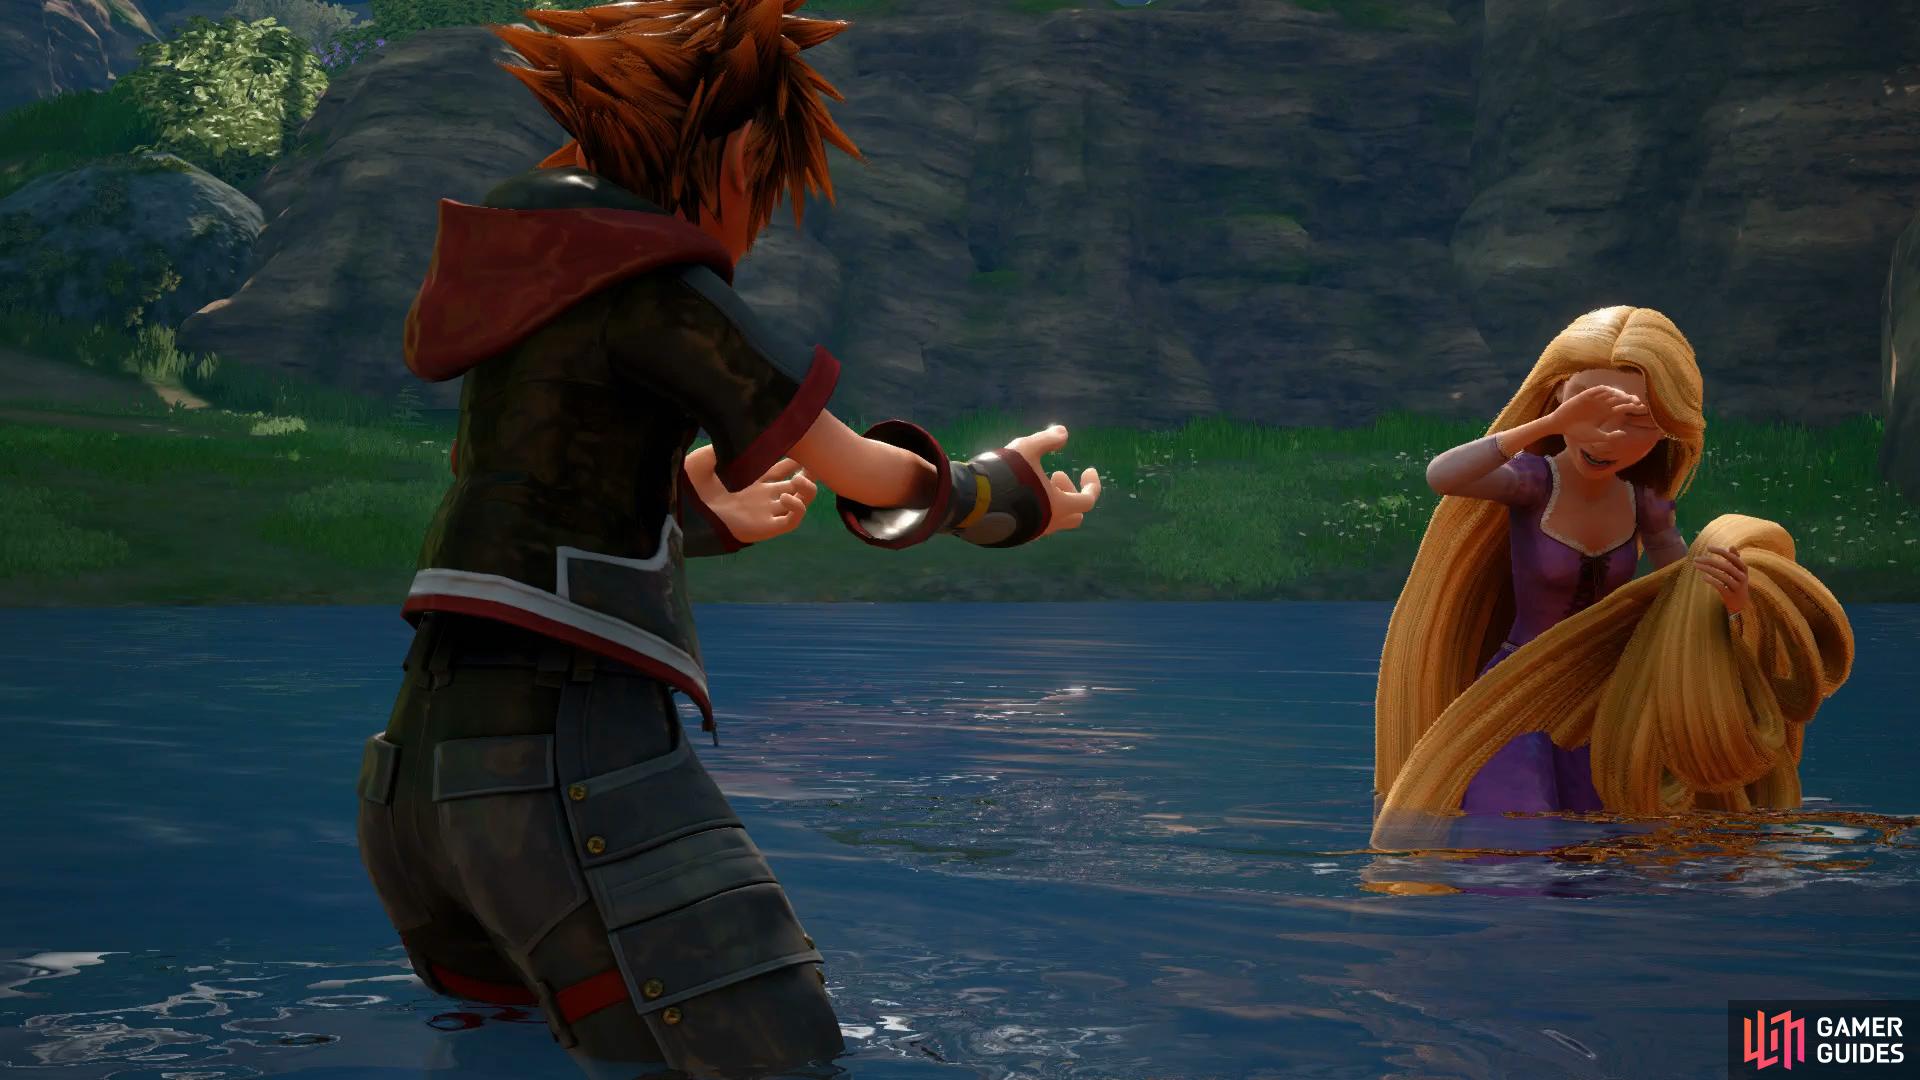
Join Rapunzel in the lake
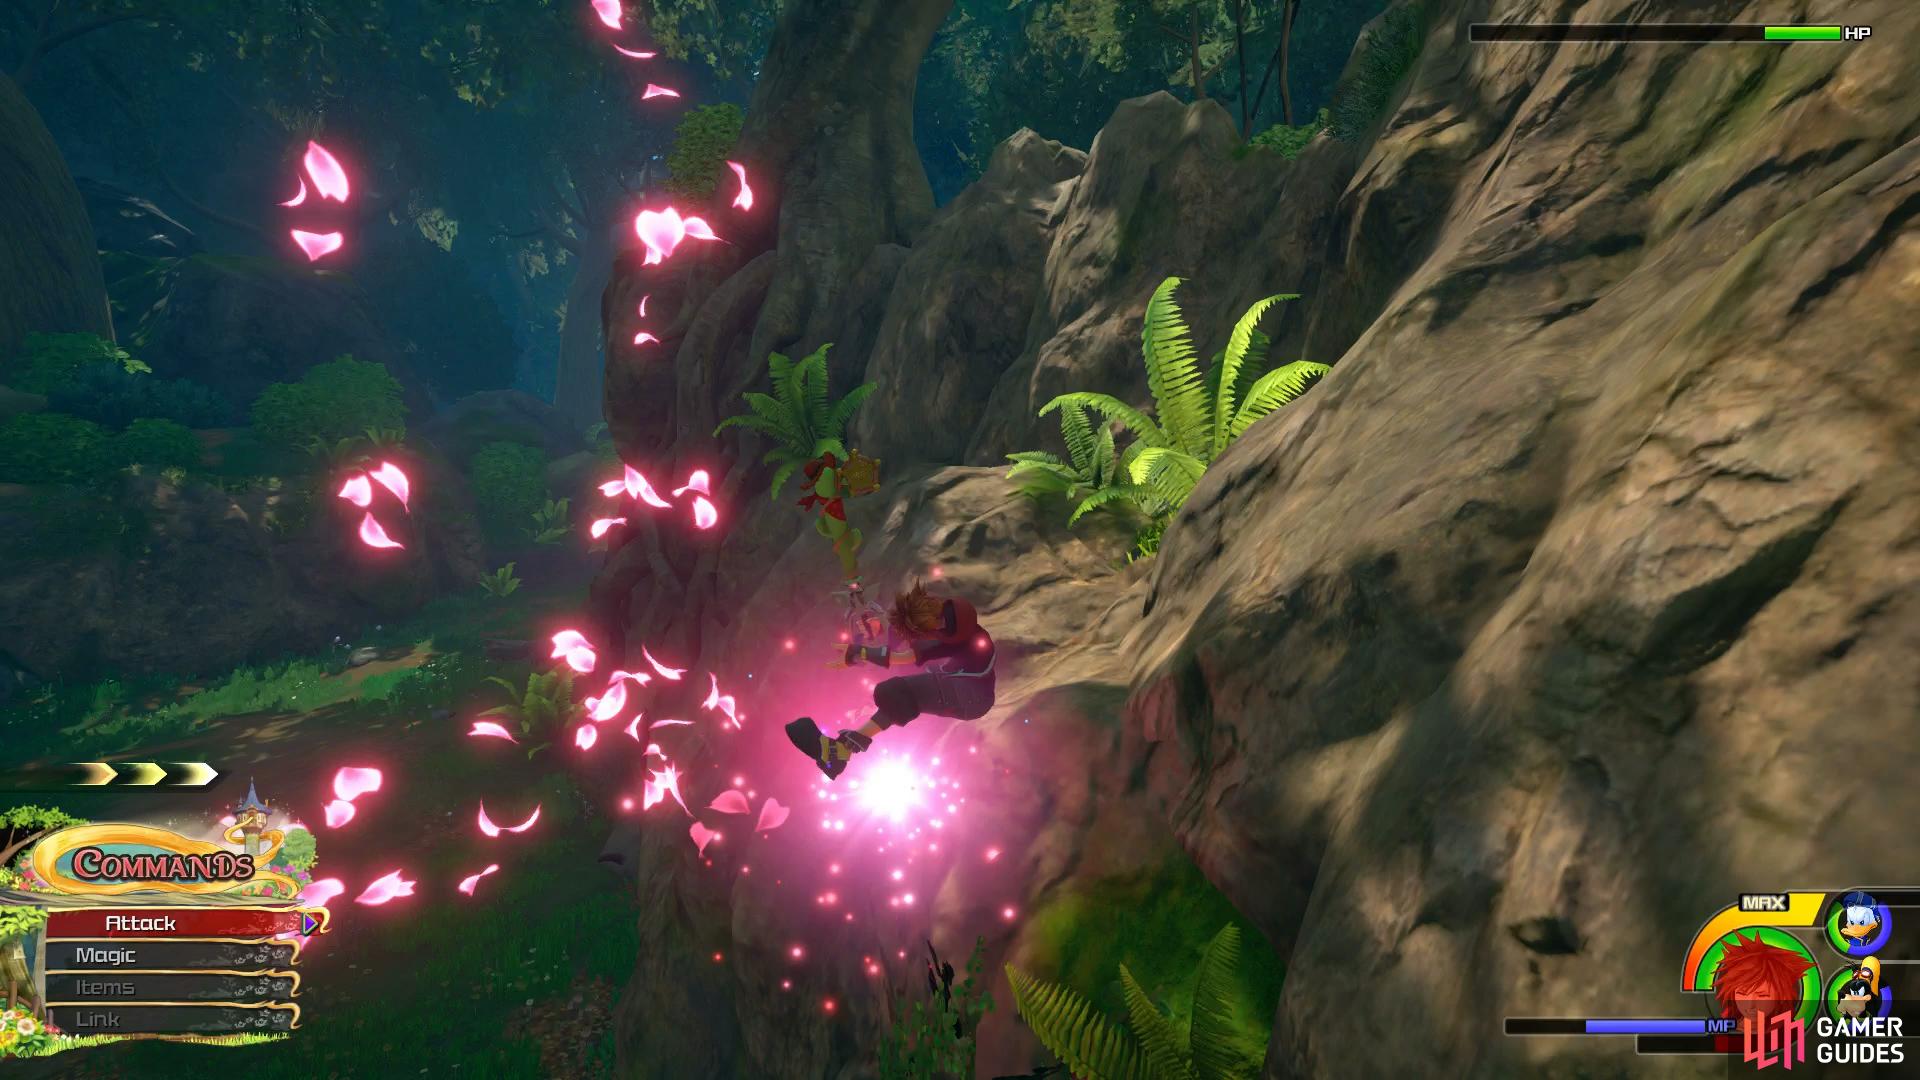
beware of the Reaper’s petal storm attack.
You’ll be up against a new Adversary, Reapers, a scythe wielding Nobody that can be deadly if you’re not careful. They can fly high in the air and release a barrage of petals that will deal damage if they connect with you. During this casting phase of the attack, they’ll be invulnerable to damage so keep away until they’ve finished. They will also perform a spinning scythe attack which you can get caught up in and take multiple hits from, use Air Recovery to dash away if you’re hit to limit the damage you take. Try to focus on one at a time, making use of Aero and Thunder to hit them hard while triggering any Situation Commands that may appear.
| Character | Ability |
|---|---|
| Sora | Counter Slash |
You’ll discover the culprit behind the Nobody ambush following the battle, the Organization. Be sure to equip your new ability and follow the path north and as the path opens, stick to the southern wall as you head east, you’ll find a ledge you can jump up with a chest containing Treasure #3 - Wind Fan. Continue north and drop down a ledge to encounter another group of Heartless that needs dispatching. With the enemies defeated, head along the western wall and use High Jump to leap up too ledges and then drop down to the north to find a chest containing Treasure #2 - Elven Bandanna. Drop down from this ledge and continue north defeating the Heartless as they spawn and you’ll eventually reach a new area, the Marsh.
The Marsh
The area has become dark and gloomy and you’ll notice that it’s a lot more open than The Hills. Use the nearby Save Point once you regain control and then head right and drop off the ledge into the marsh itself. Follow the path and defeat the Nobodies that spawn and you’ll notice a rocky hill to your left, follow this around and you’ll come across a large chest containing Treasure #10 - Map: The Forest (2/2).
The first chest can be tricky to find without the map
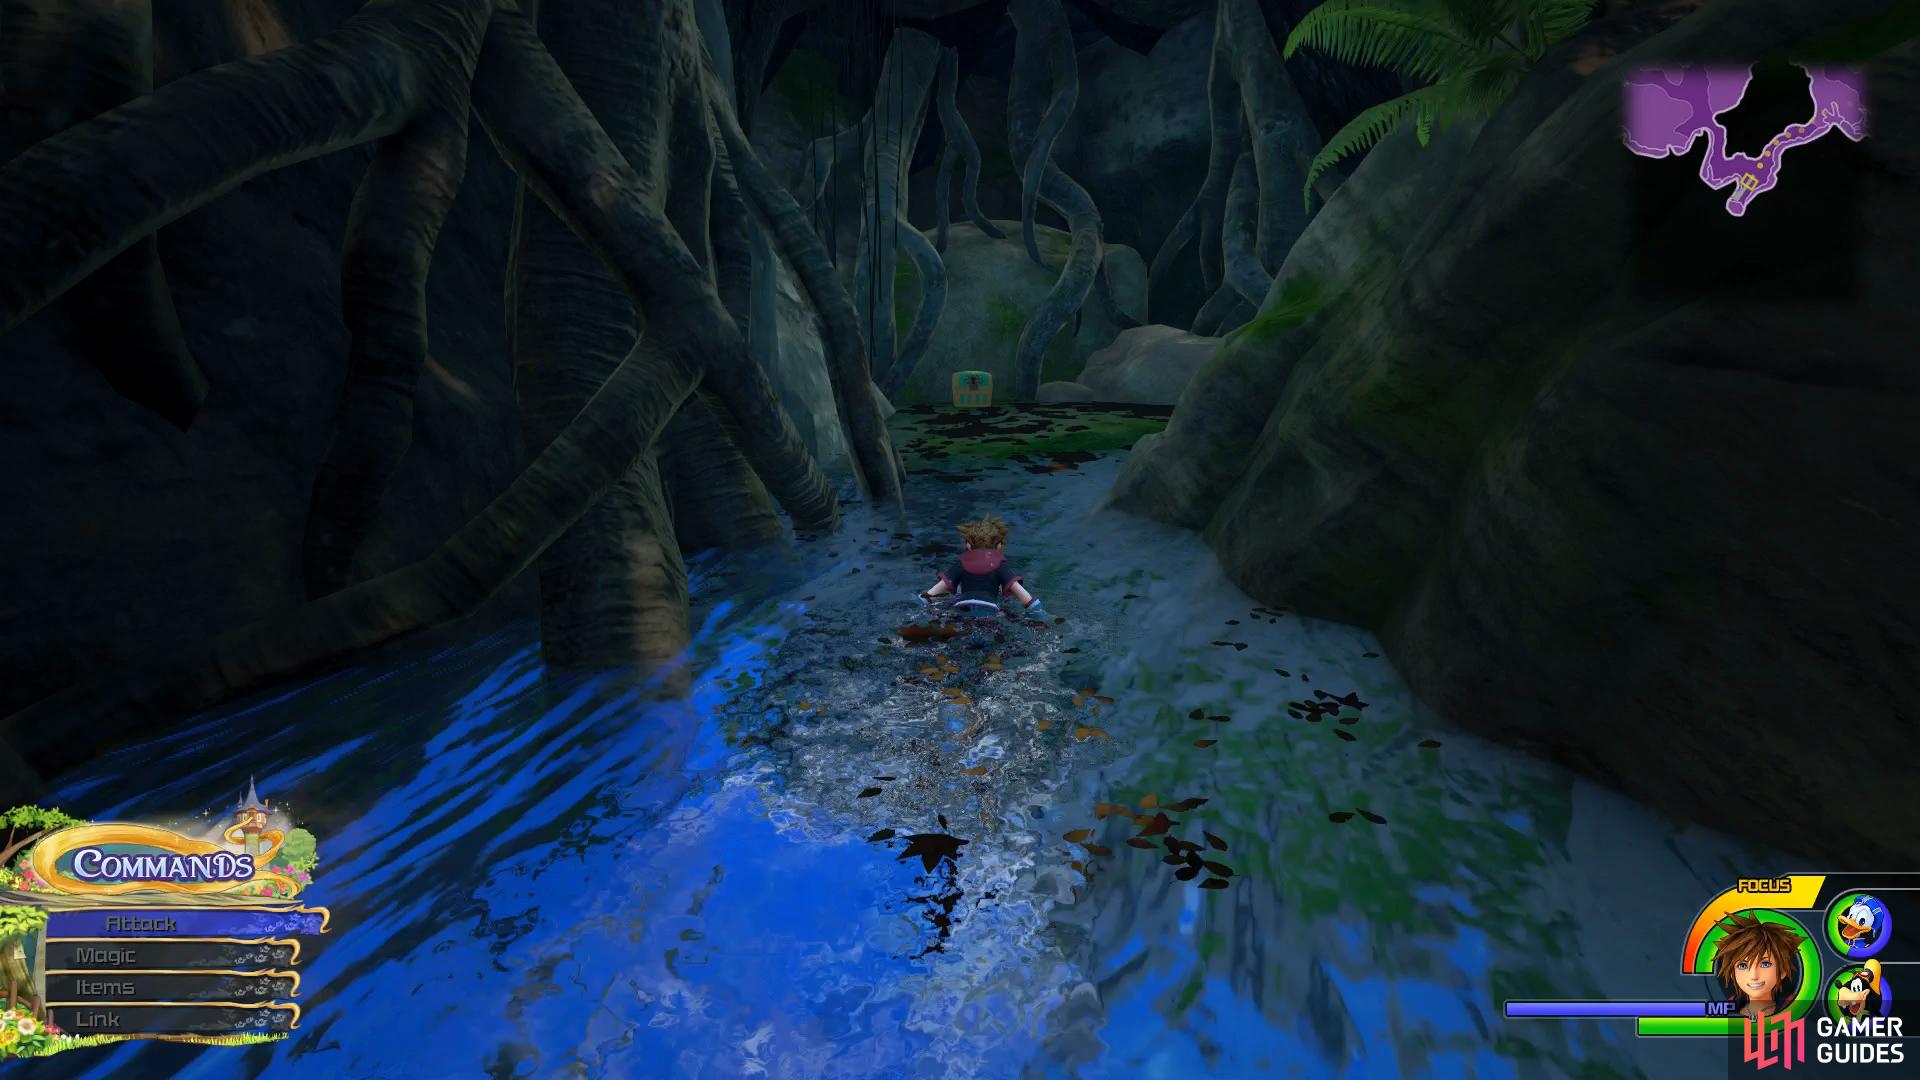
take the western path through the water to discover this chest.
With a map now in your possession, the Marsh just became a lot easier to navigate (and write directions for!). Return to the previous Save Point (to the east) and hug the southeastern wall and you’ll come across a narrow path leading to the southwest. Follow the path south as you begin to swim and you’ll discover a chest at the southern most point of the map containing Treasure #12 - Shadow Anklet.
Leave the narrow path to the northwest and then head directly across the marsh to reach the northern wall. Follow this wall west and take out the large groups of Heartless that spawn around here. Eventually, in the northwest section of this area you’ll start to hit water, head into the nearby corner and turn to face the wall to the northeast to discover Lucky Emblem #2. Head south from here to another rock wall with a small ledge you can leap up to, the chest her contains Treasure #11 - Potion.
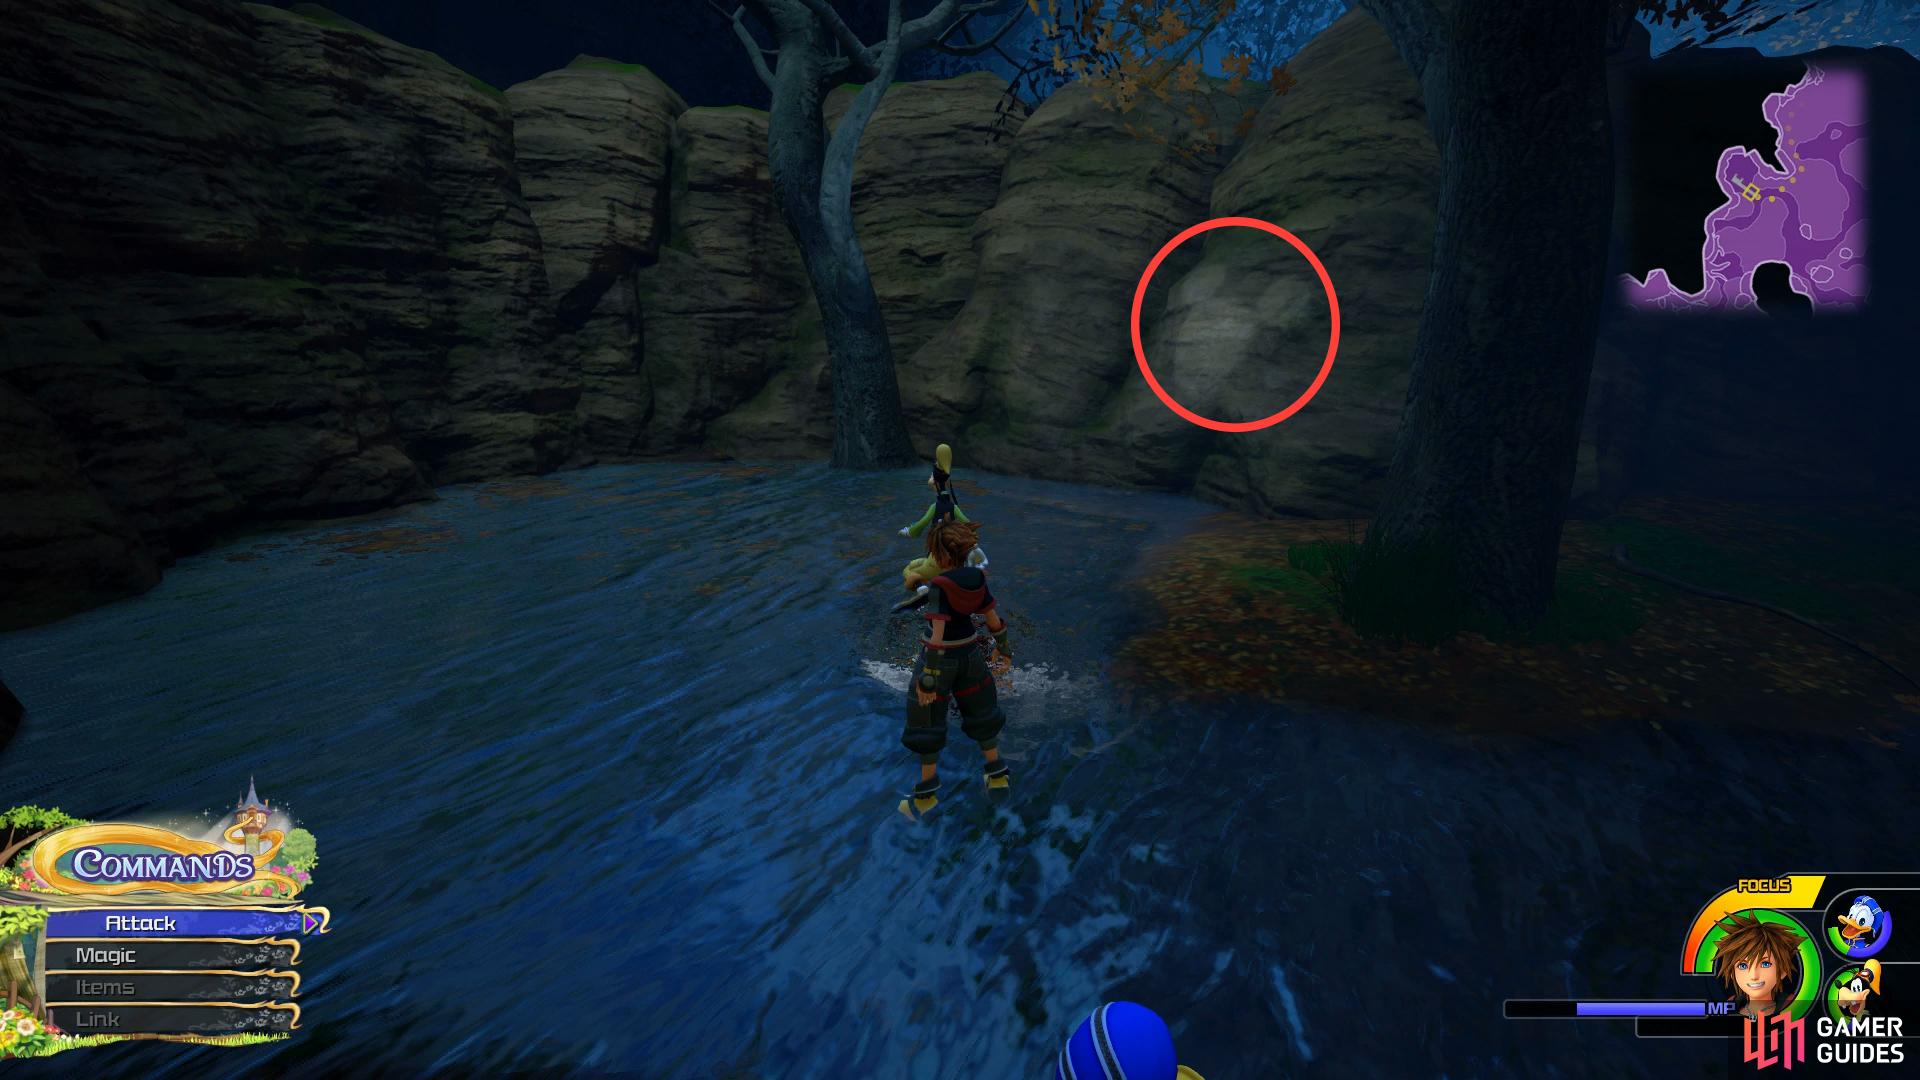
Head to the northwest corner of the Marsh to find this Lucky Emblem
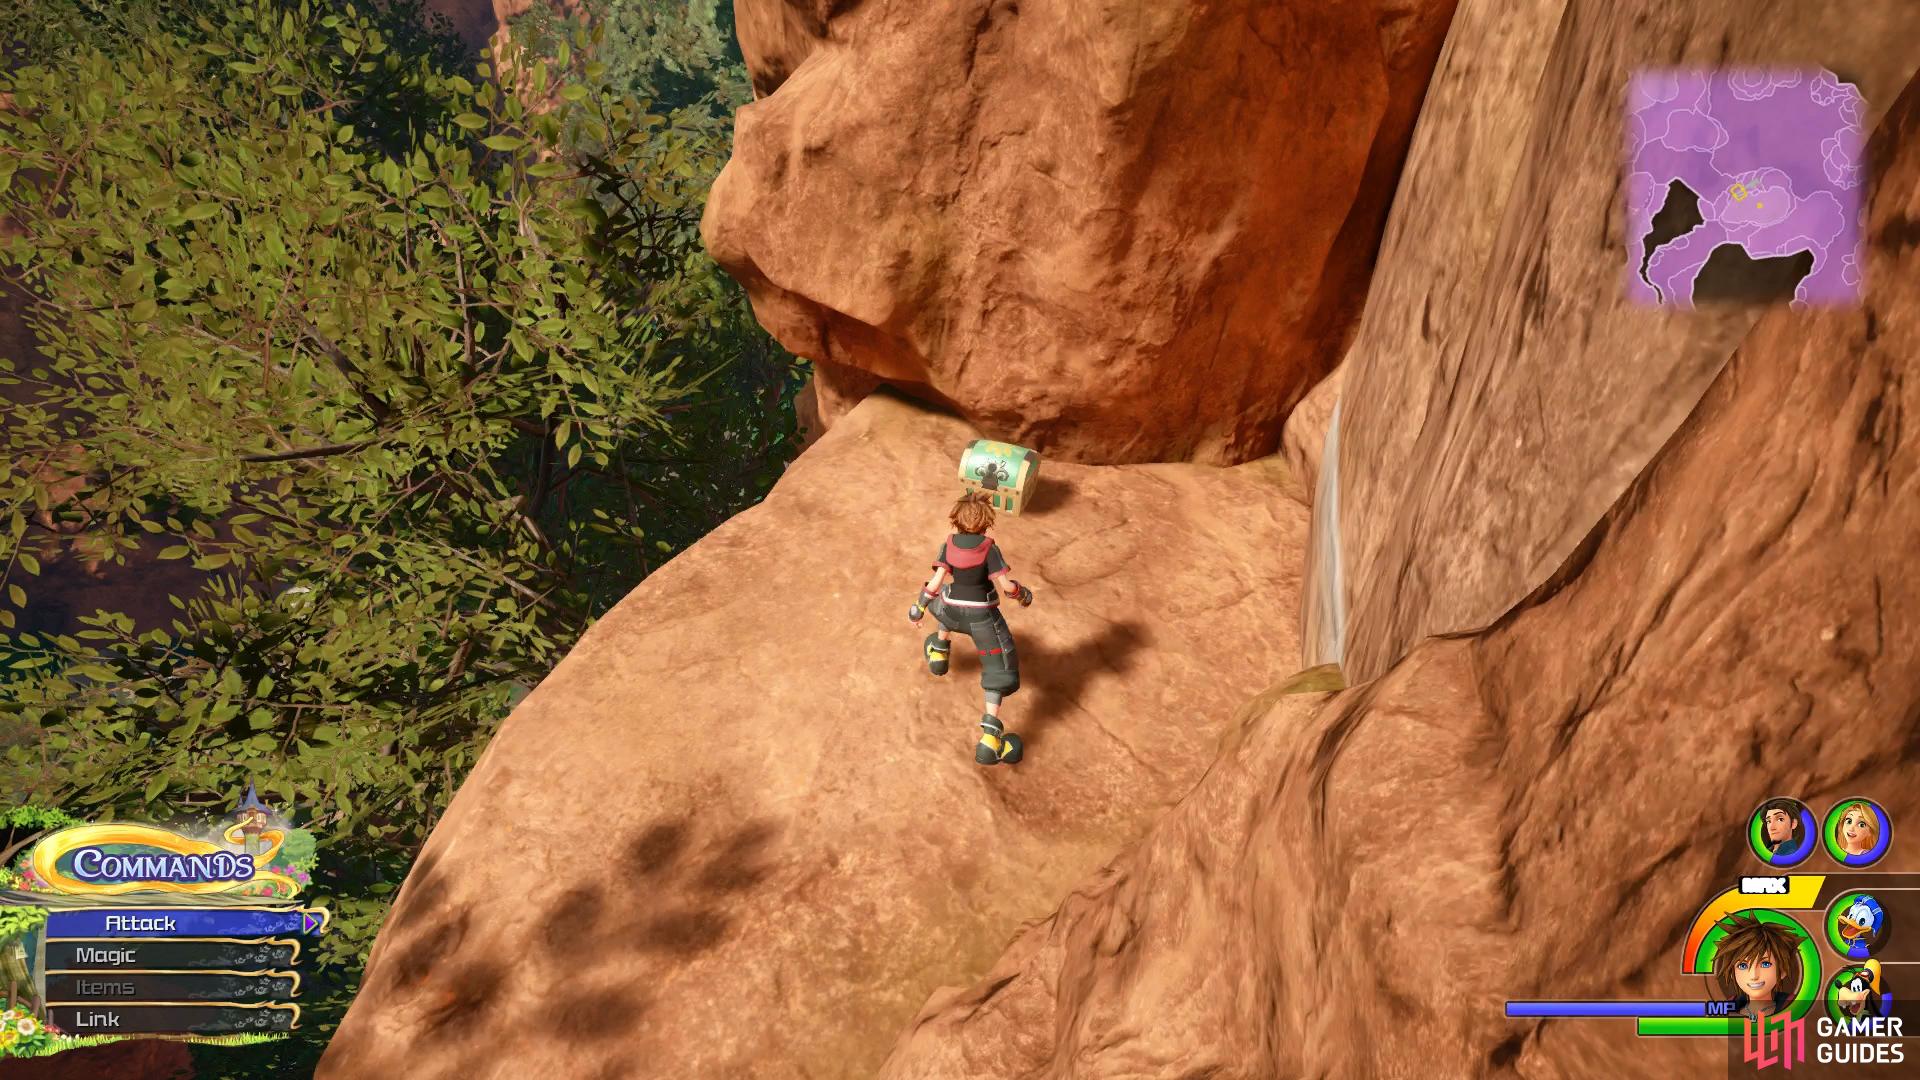
climb the wall to the right of the sign after you exit the Marsh to find this chest.
Continue through the Marsh to the west and you’ll come across a cave that you can run up the wall inside. Run up it and you’ll exit out of the Marsh and have to deal with another group of Heartless in the narrow path ahead, clear the area of Powerwilds and then head over to the nearby sign. Turn to your right here to spot a wall you can run up, do so and at the top you’ll find a chest containing Treasure #19 - Damascus. Continue to follow the path north and you’ll eventually catch up with Rapunzel, Flynn and a rather odd horse.
Campsite
Once you regain control, make use of the nearby Save Point and Moogle Shops (put that Damascus to good use). Follow the path west as you continue your journey towards Corona and as you reach the stone archway, go west to find a chest at the end of the path containing Treasure #18 - Ether. Return to the main path and continue north and you’ll reach a large open area. Follow Rapunzel around the large rock to find a wall you can run up and then follow the path as it winds around to a branch.
By Interacting with Rapunzel here, you can use her hair to swing across to the cliff on the other side. Continue to follow the path around and defeat the Heartless that spawn and you’ll reach another branch. Once again make use of Rapunzel’s hair to make your way across the gap and you’ll be facing a cave when you land. Before heading into the cave, you’ll spot some rocks that glow to your right, leap onto them and then drop to the ledge below to spot a chest containing Treasure #15 - Defense Belt.
leap off the cliff above this rock and break it to reveal a chest.
Climb over the wall to your right when facing the cave
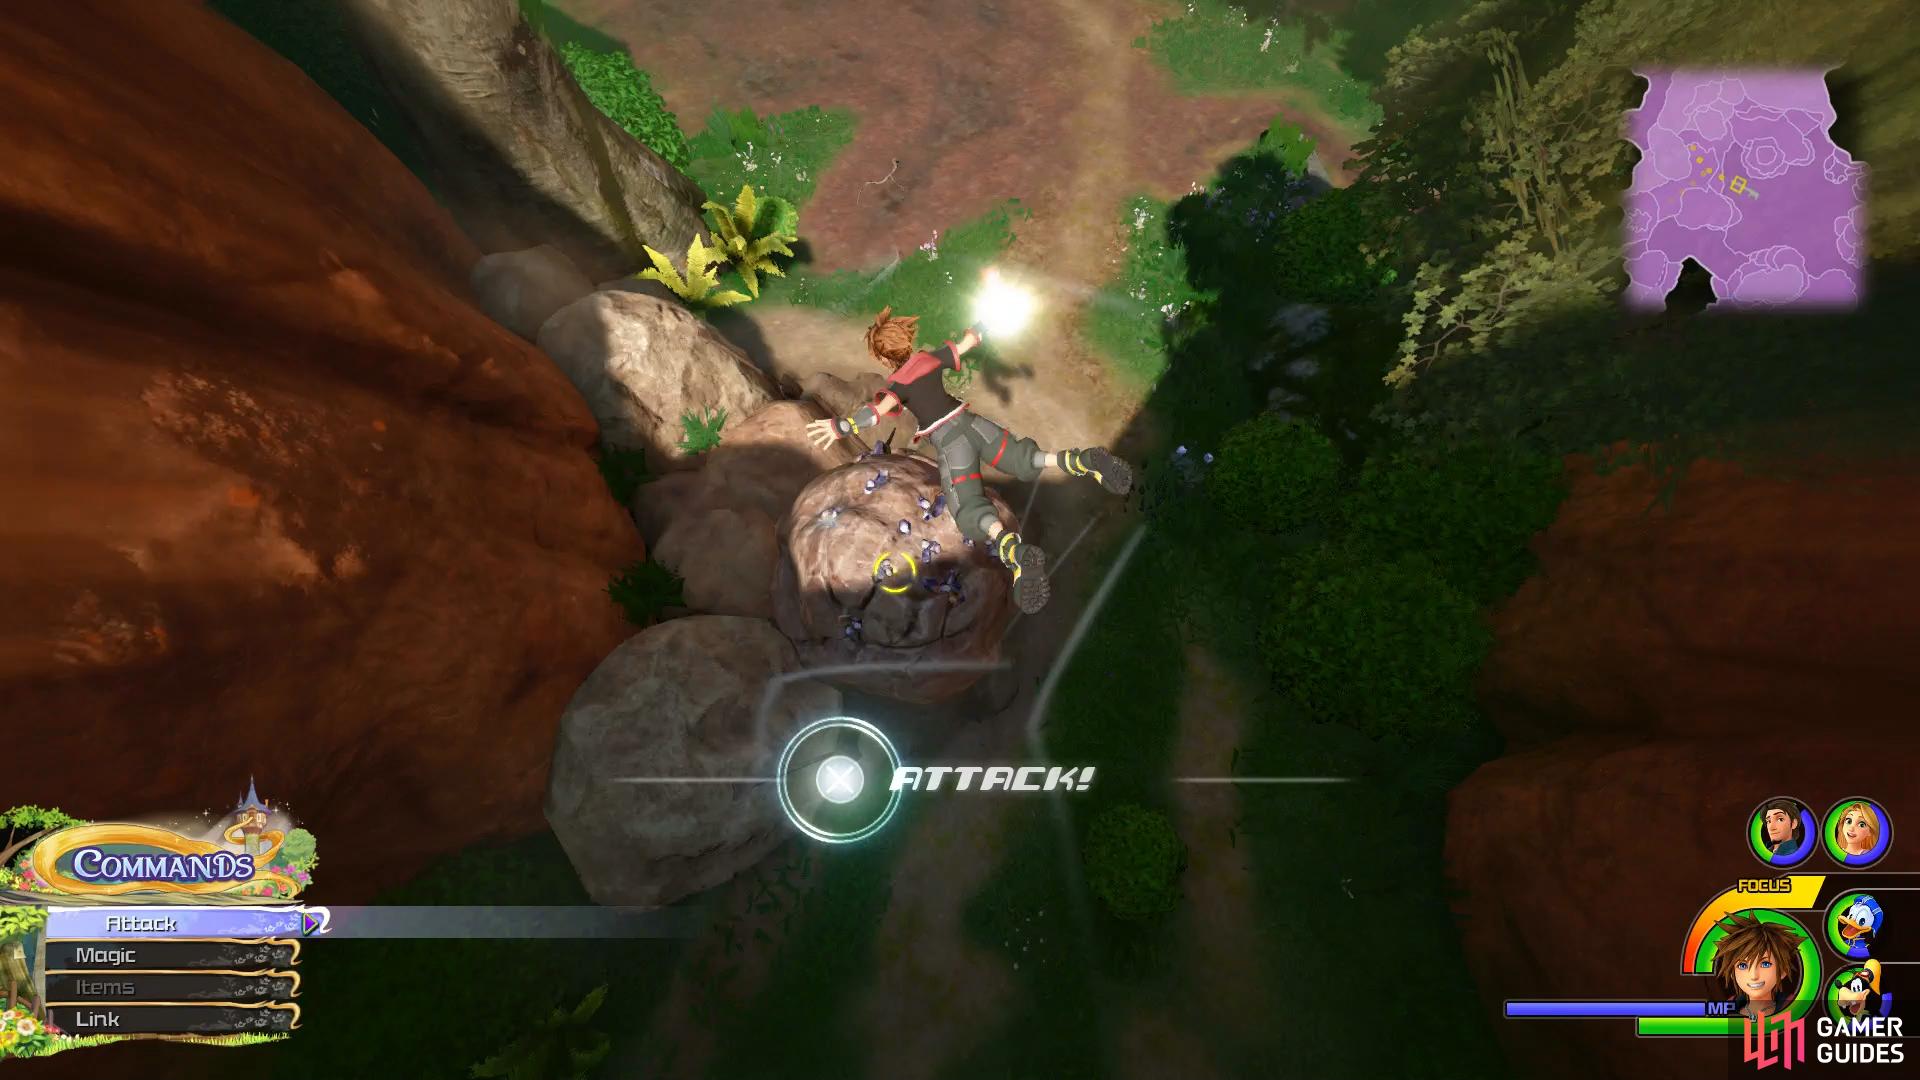
Head back up the wall and then walk towards the cave but don’t enter it. You’ll notice you can drop down to your right to another ledge, do so and follow the path to come across two walls either side of you that you can run up. Take the right wall and then approach the ledge at the end of the path to notice you’re above the large rock from earlier. Leap off the edge here and use the attack button once the prompt appears to destroy it and reveal a chest containing Treasure #14 - Aero Cufflink.
Make your way back across the branches so that you’re facing the cave once more. Drop off to the ledge to your right again but this time take the left wall up to reach the cave. Head forward and the cave will open up and you’ll be ambushed by a group of Heartless. Once they’re defeated, proceed up the wall to the right of the entrance now and at the top turn around to spot a chest containing Treasure #16 - Damascus. Drop back down to the cave and follow the path to your right all the way to the end to spot yet another chest, this one containing Treasure #17 - Mythril Stone.
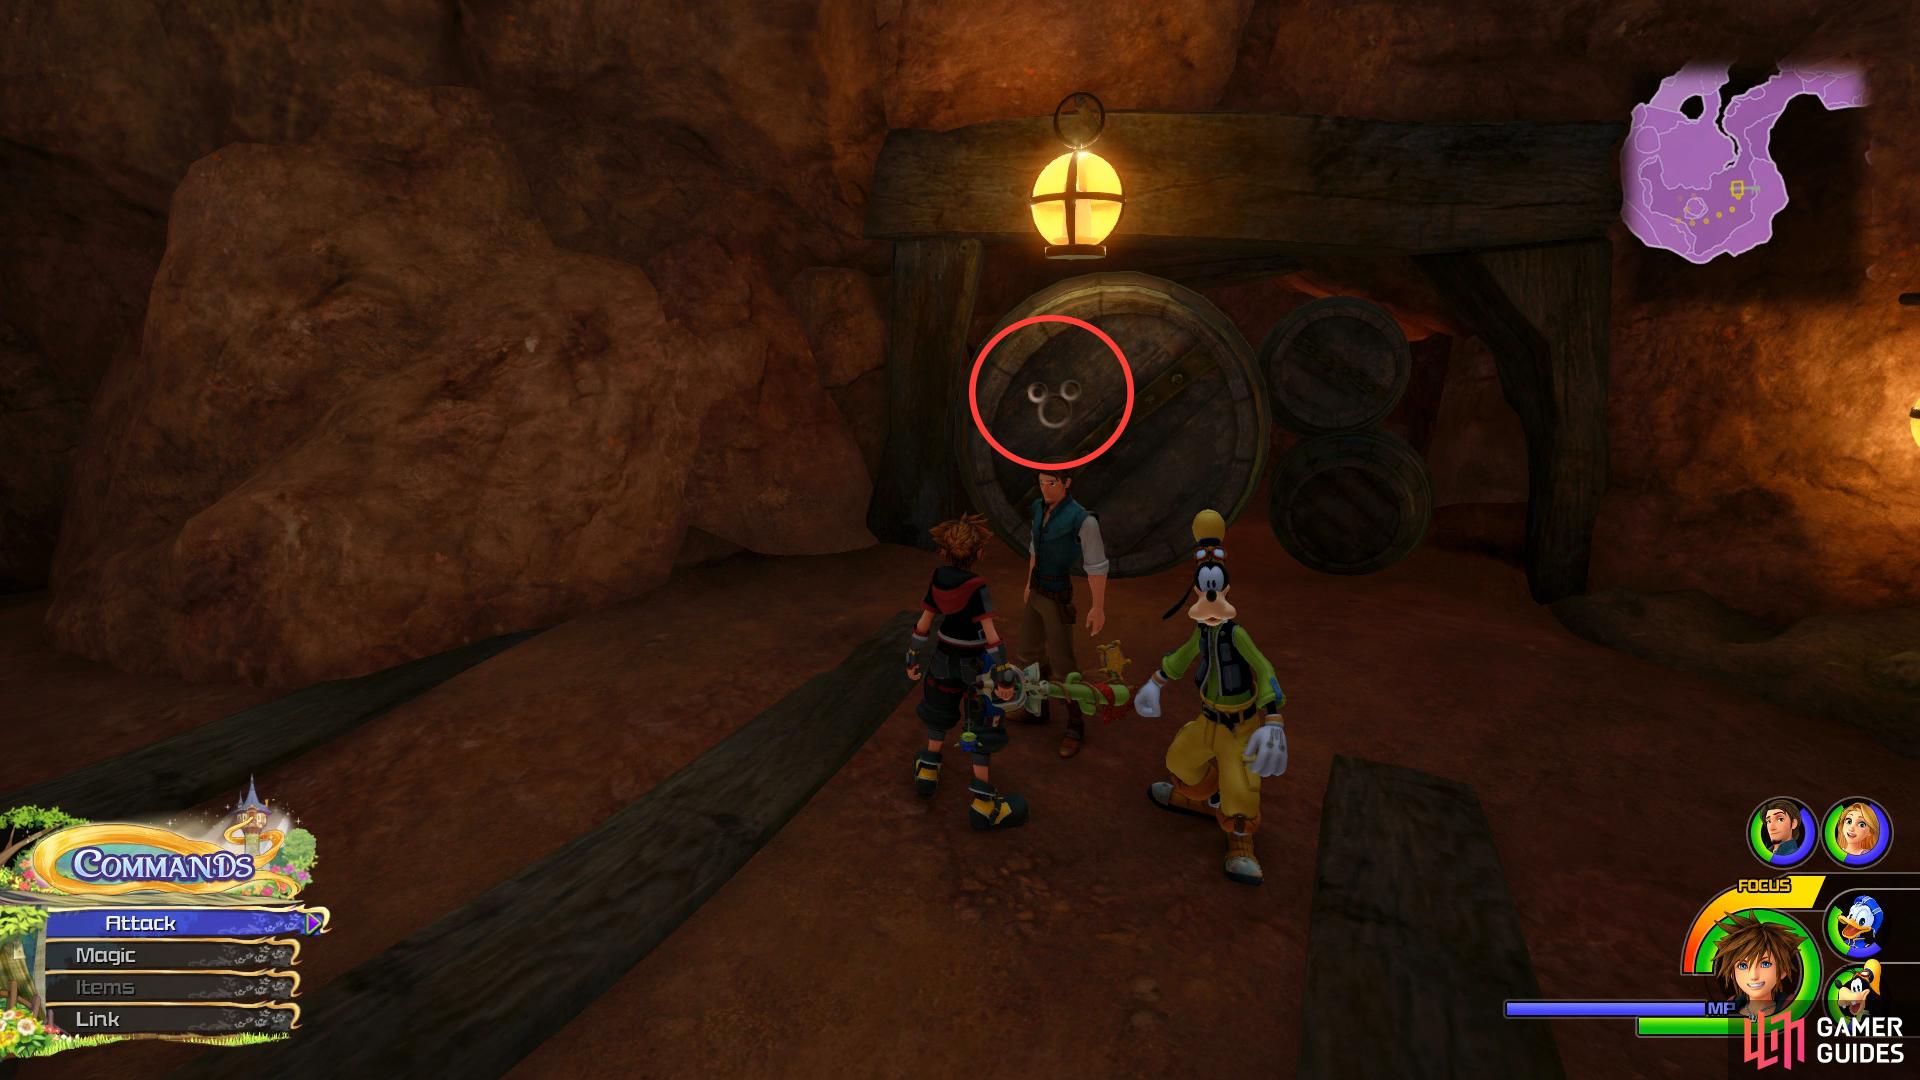
Search the bottom of the cave for this Lucky Emblem.
Drop down to the bottom now and you’ll be ambushed by yet another group of Heartless, make use of Thunder and other area of effect attacks in this limited area you have to battle in. Once the area is clear, head over to the barrels in the southeast corner to spot Lucky Emblem #3 and if you’ve been following this walkthrough, should be your 35th one granting you the Buster Band+ accessory.
Make your way back up the wall to the north and follow the path by dropping down the ledge at the end. This will bring you to yet another branch to swing on with Rapunzel, do so and follow the path to trigger a cutscene and a battle against a large group of Powerwilds and a new adversary, the Chaos Carriage.
Begin the battle by attempting to whittle down all the other Powerwilds so that you’re only left with the Chaos Carriage itself. In it’s first phase it will spin around the arena, inflicting damage upon contact and via the bombs that are shot out of it. Keep on the move and make use of the Splash Run Attraction to clear the area of any other threats.
Once all the Powerwilds have been dealt with, it will enter it’s second phase as it shifts into an appearance more befitting it’s name. During this phase you can only deal damage by attacking the lead carriage that contains the horse. Shotlocks are useful to deal large damage at a distance as is magic such as Thunder and Fire. The Chaos Carriage will deal damage to you by galloping around the arena, causing heavy damage upon contact and by spinning around on the spot. Once you see it begin spinning, dodge away or leap into the air, if you’re caught up in the spin you’ll take heavy damage.
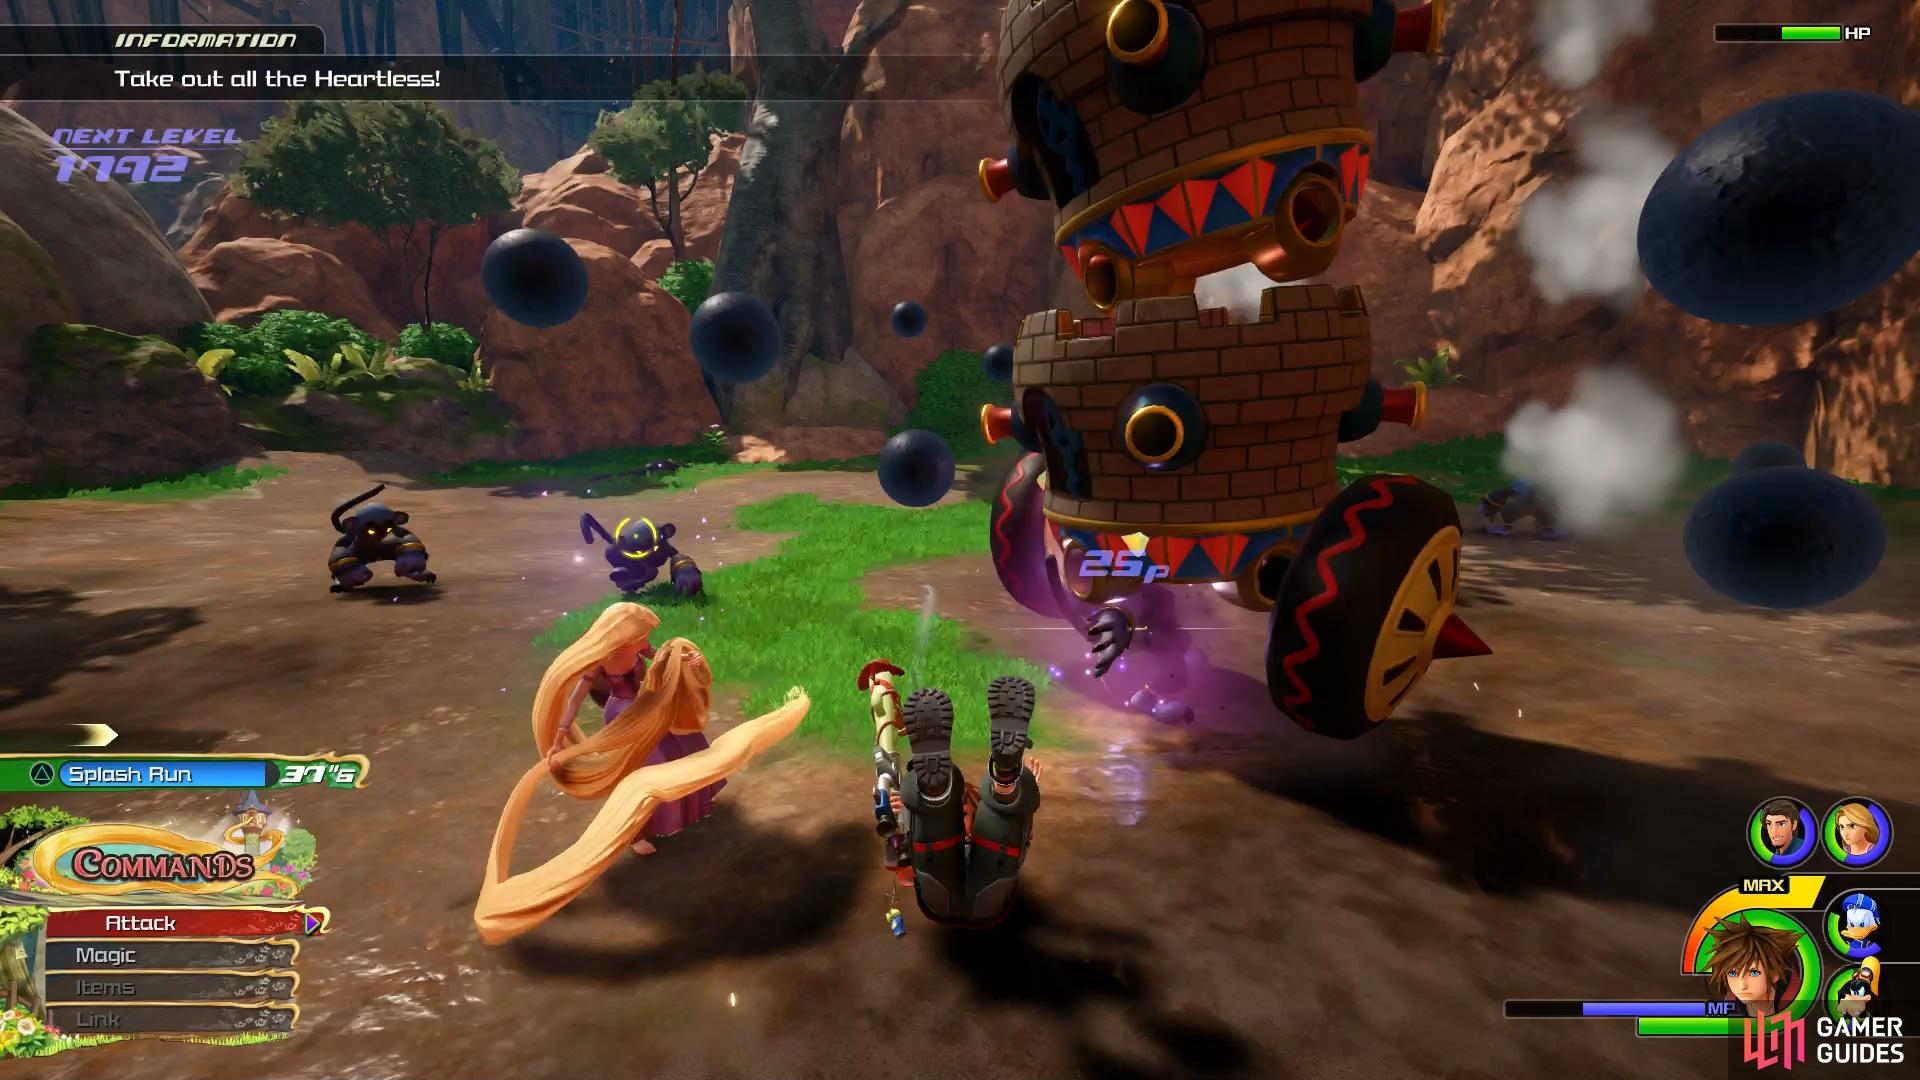
The Chaos Carriage will form a turret while Powerwilds are about
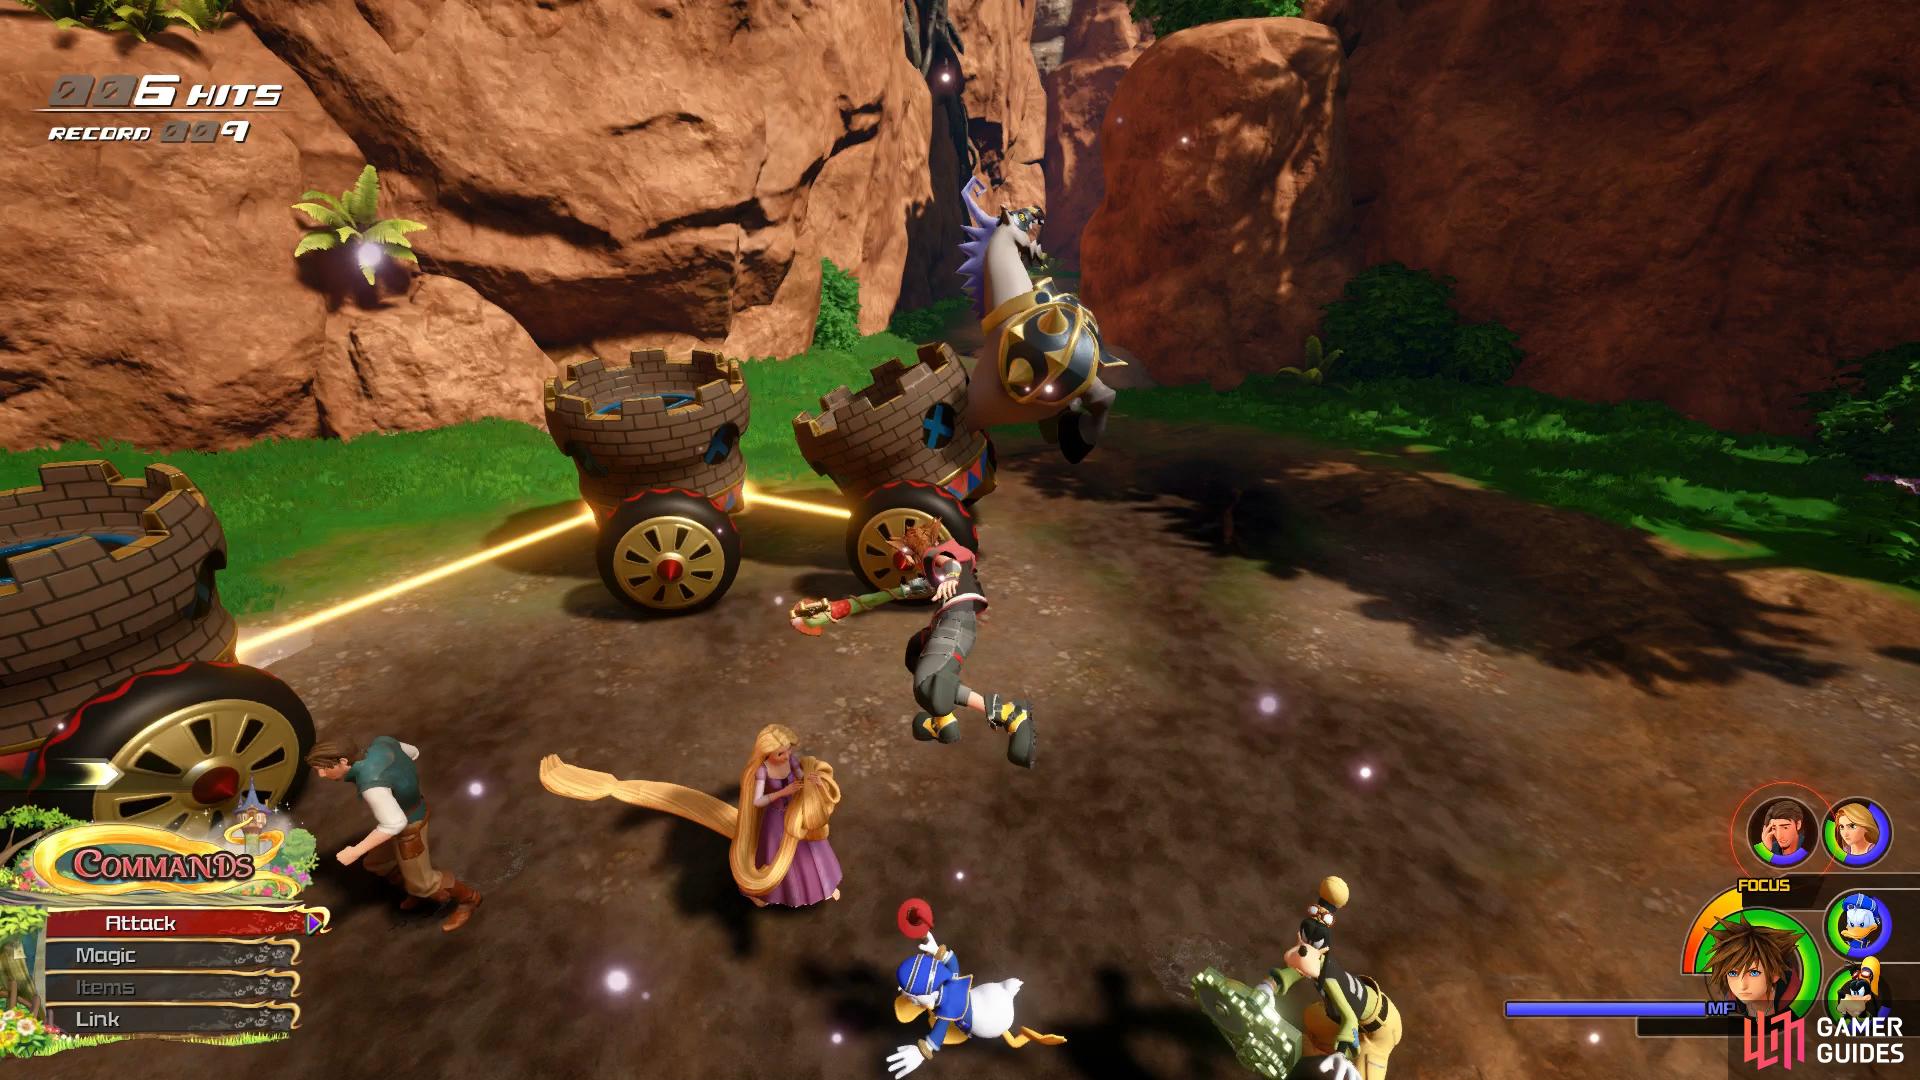
once transformed, attack the horse at the front to inflict damage.
Depleting it’s HP bar will defeat one of the carriages and the horse will gain a new ability. Now it will be able to inflict damage by performing a stomp whenever it gets close, once again Air Dash out of the way to prevent damage. In it’s final carriage the horse becomes less of a threat as it’s exhaustion begins to show, repeat the similar tactics to take it down for good.
| Character | Ability |
|---|---|
| Sora | Max MP Increase, Super Jump |
Following the battle, run up the wall to the east and then turn left to face the wall. Use your new Superjump ability to leap above the wall and discover a chest containing Treasure #13 - Mage’s Earring. Drop back down to the path and follow it northeast to reach Wildflower Clearing.
Wildflower Clearing
As you head forward, Rapunzel will run over to some birds so head over to her and leap across the stepping stones to reach the other side. Go left when you can towards the birds and then walk slowly over to them and interact with them to cause them to circle Sora. You’ll now need to walk slowly as you make your way back across the stepping stones and over to Rapunzel once more, you’ll need to use the stepping stones to avoid scaring them off.
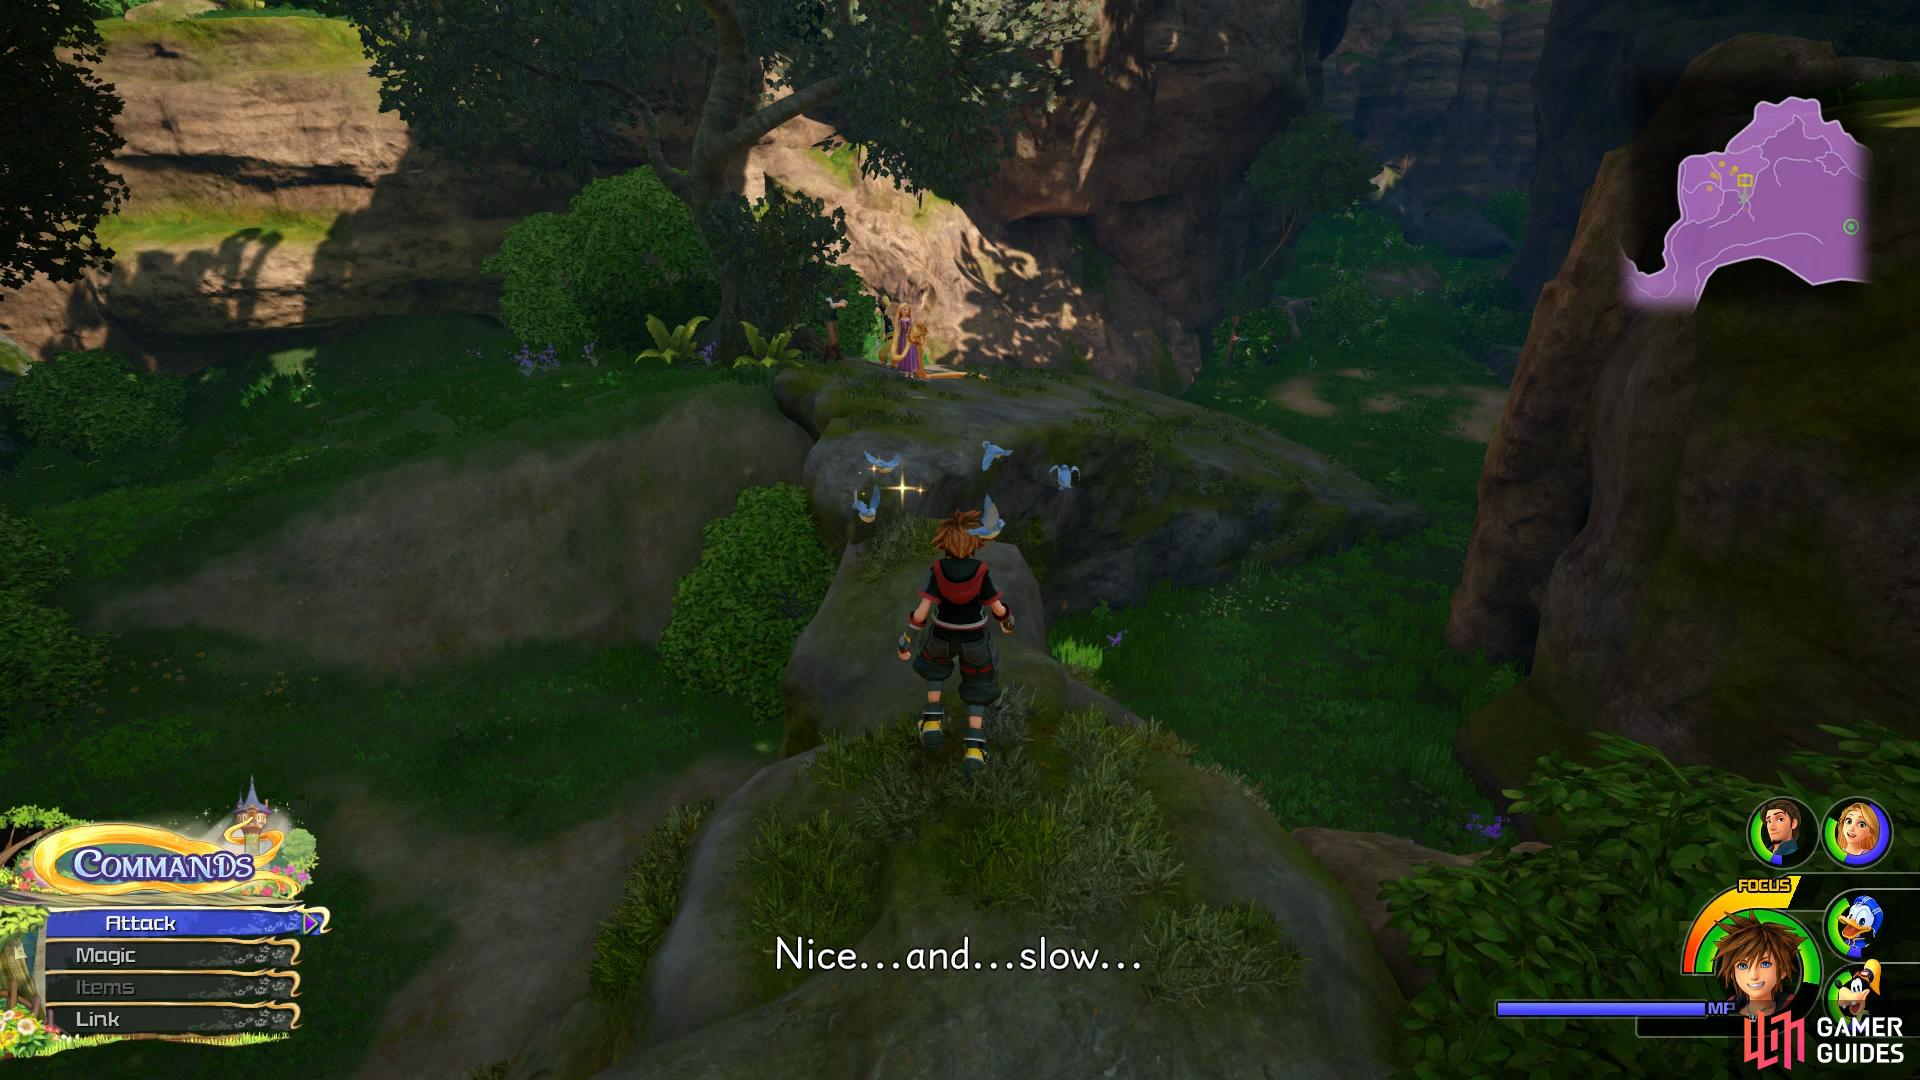
Walk slowly and use the stepping stones to avoid scaring the birds away.
Once you gain control again, head across the stepping stones again to reach the other side and follow the path around to the right to spot a large chest behind the tree containing Treasure #22 - Classic Kingdom: The Wayward Canary. Drop down now and make your way over to the Save Point and save your game. Turn to face the large tree to your south and head up the hill behind it before heading through the bushes to the west to discover another chest containing Treasure #21 - Hi-Ether. Continue east from the Save Point now to find a large hill you can slide down, there’s no chests or Lucky Emblems here so make your way down to the bottom to finally see the Kingdom of Corona at long last. For helping Rapunzel with all the activities during your adventures in the Forest you’ll obtain a Forest Clasp and AP Boost x4.
Thoroughfare
Following the cutscene, Flynn and Rapunzel will leave the party and before you go exploring Corona, turn around and return to The Forest. You’ll find yourself at the Shore from earlier and directly in front of you is a chest containing Treasure #20 - AP Boost. Make your way back towards the Thoroughfare but before you enter, look on the structure to your right to spot Lucky Emblem #4.
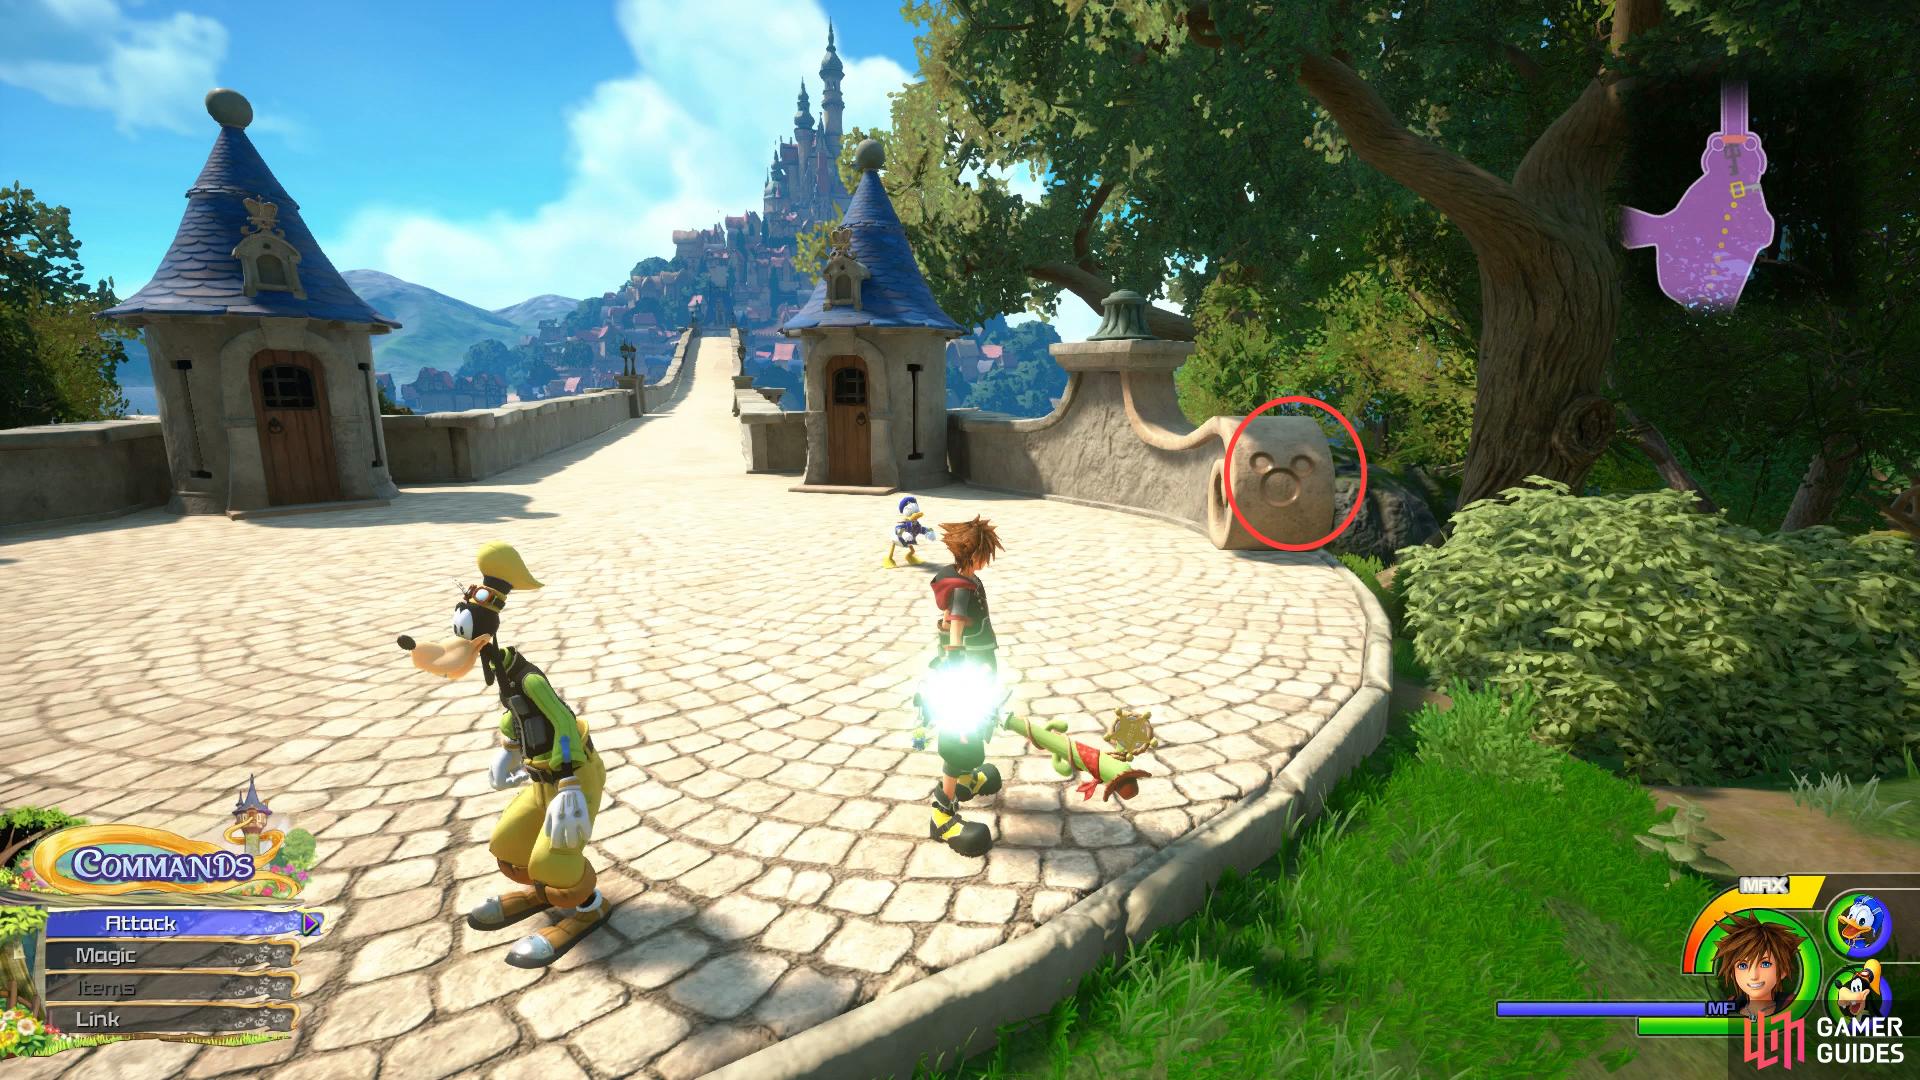
Head back outside of the Kingdom to find this Lucky Emblem
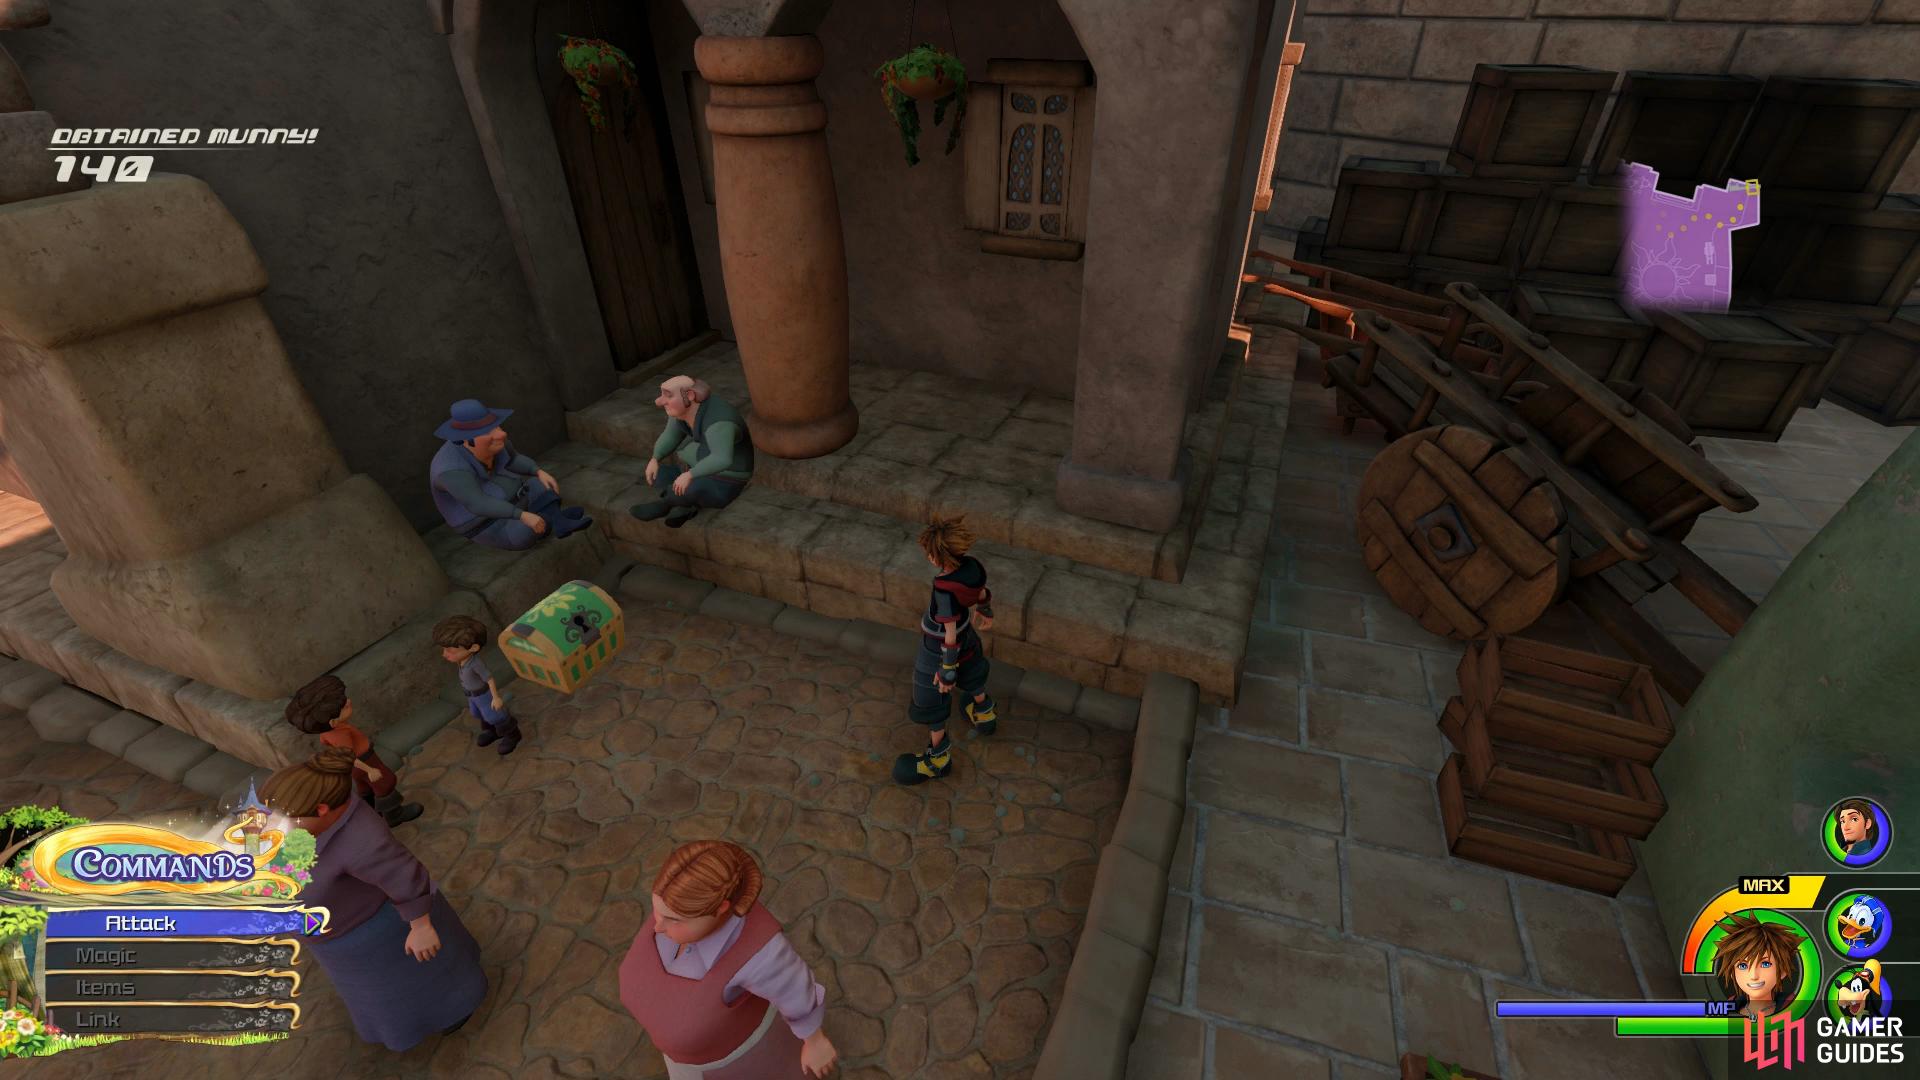
perform on a nearby barrel to gain access to this chest.
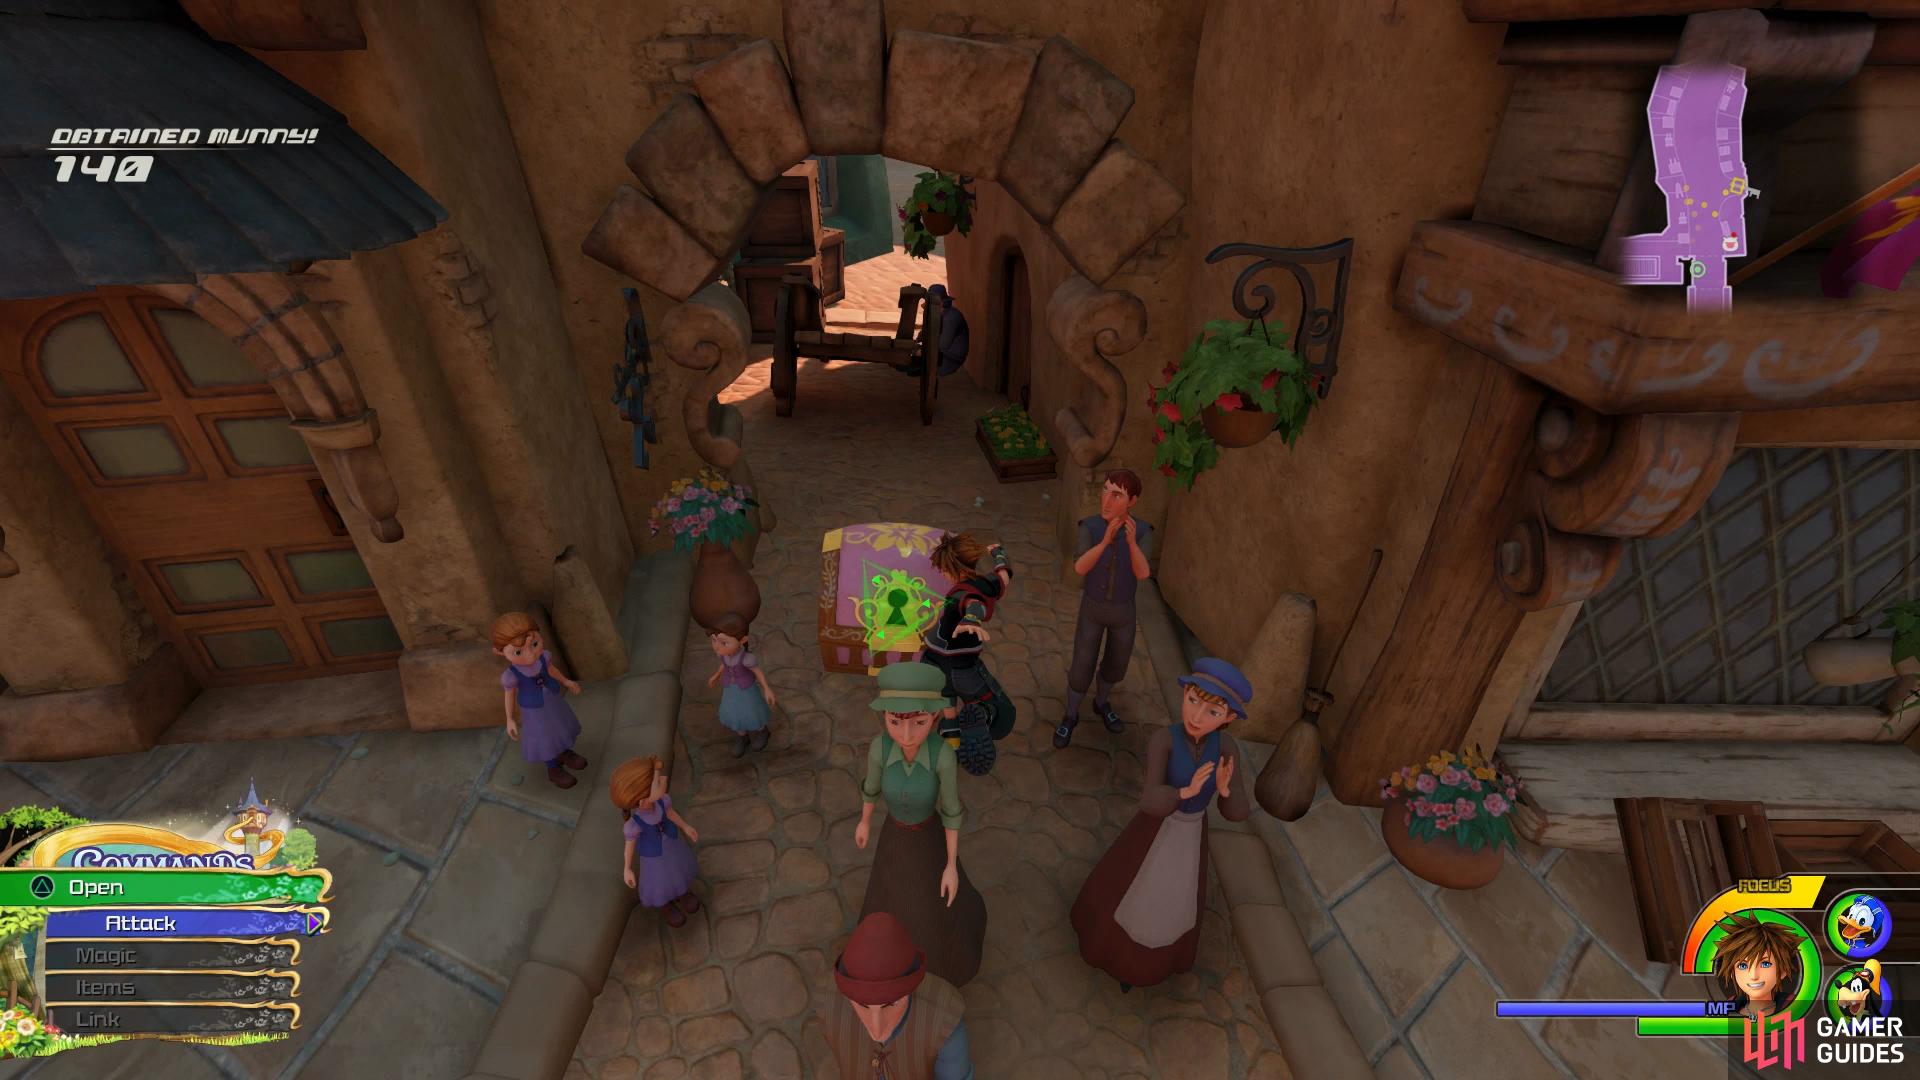
Back in the Kingdom, head forward and make use of the Save Point and the Moogle Shop. Take a left around the corner of the Save Point and before you head down the stairs, you’ll spot a chest containing Treasure #25 - Ether. Return to the main straight and head up it and you’ll notice a group of people surrounding a large chest. Head to the nearby barrel and use it to perform, not only will you will receive some Munny for it but the people will also move allowing you to claim Treasure #24 - Classic Kingdom: The Karnival Kid.
Resume your trek north (you can slash the market stalls to obtain some ingredients here) and before you pass through the archway, look on the left side of it to spot Lucky Emblem #5. Pass under the archway to meet up with Rapunzel in the Plaza as she kick starts a Festival Dance.
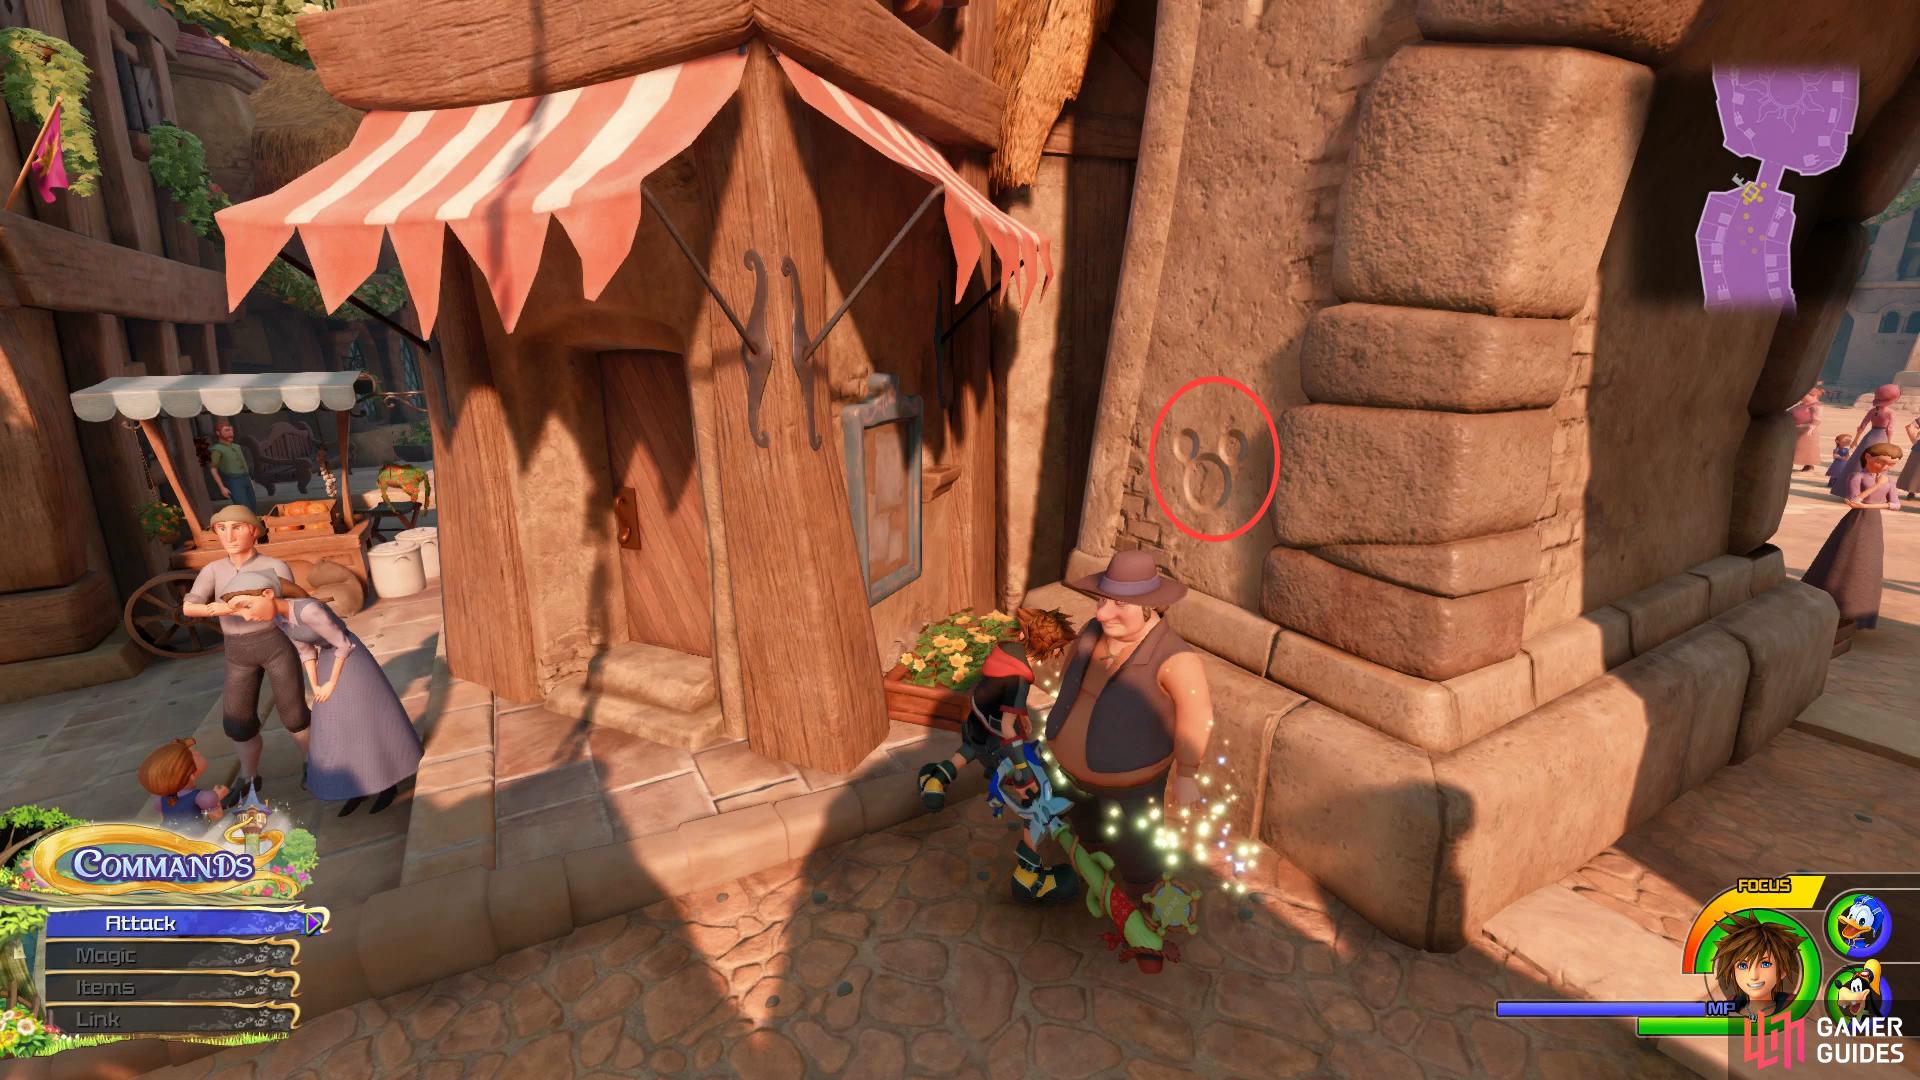
Look on the left of the archway leading to the Plaza
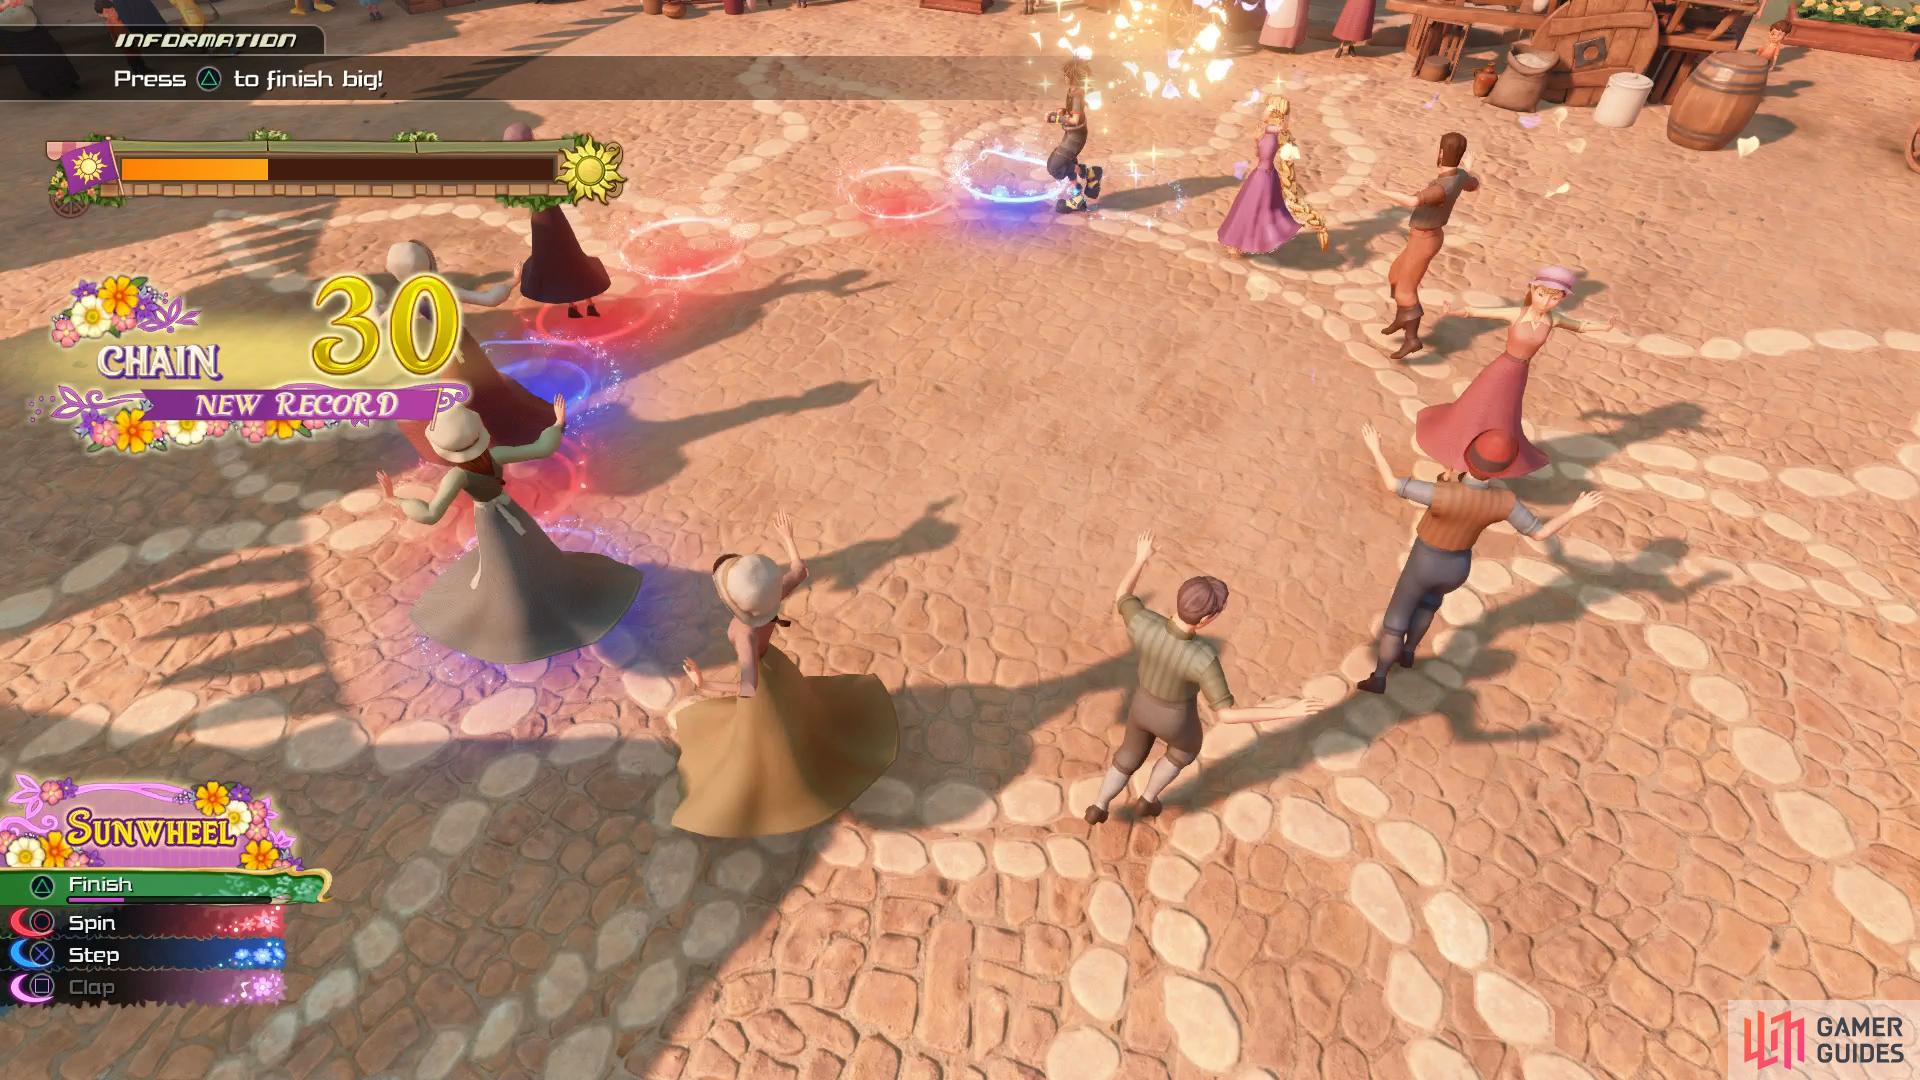
you can fill the bar greatly by performing in the center.
In order to dance you’ll need to time your presses of the [X]/[A] button in the middle of the blue circles, the [CIRCLE]/[B] button on the red circles and finally the [SQUARE]/[X] button on the pink circles. You can’t earn a highscore at this time but later you’ll be able to replay the dance for a Trophy so consider this practice. Ignore the [TRIANGLE]/[Y] button prompts, when you replay the dance you can lose valuable time. Eventually you’ll see a prompt to press the [TRIANGLE]/[Y] button to bring everybody into the center and the game will control itself and you’ll need to time your button presses.
You’ll obtain a Magic Boost for completing the dance and night-time will descend upon Corona. Following the cutscene Sora will be ambushed by a group of Nobodies, make use of your Fire spells on the Reapers to make short work of them while using any Situation commands that appear. Once the Dusks appear, start firing off the Thunder spells to hit large groups at a time.
| Character | Ability |
|---|---|
| Sora | Rising Spiral |
| Donald | Damage Syphon |
Once you regain control following the events that unfold, you’ll find yourself in another battle against more Nobodies. You can choose to battle these or just ignore them and make a dash for the Tower. Regardless of your decision, continue south and make use of the Save Point before preparing yourself, once you’re ready, head past the hordes of Heartless and towards The Tower to defeat one final group of Heartless. Save your game once more and equip a new piece of Armor for Sora before you head over to the Tower.
| Character | Ability |
|---|---|
| Sora | Armor Slot |
| Donald | Max HP Increase |
Boss: Grim Guardianess
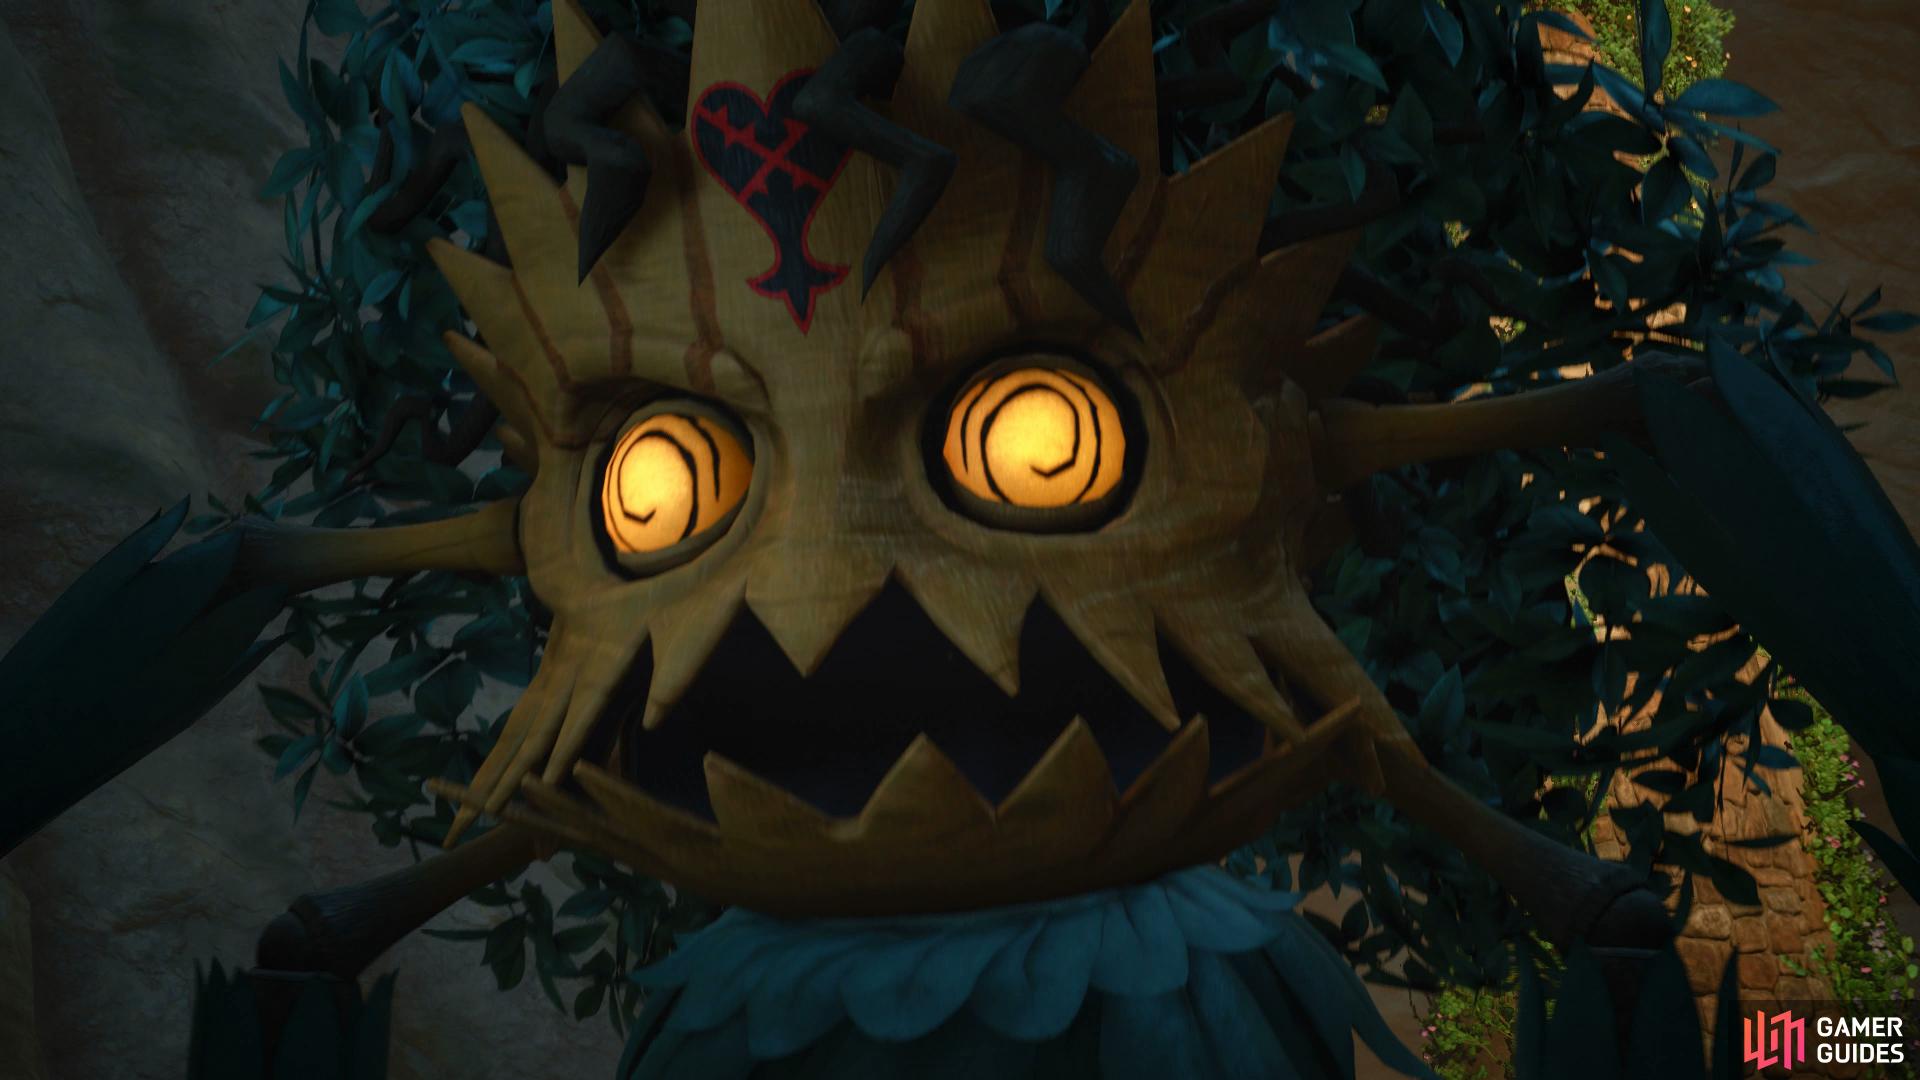
Mother Gothel’s Heartless is not a foe to be underestimated, she has many dangerous attacks up her sleeve. To begin with, the head is your target so you’ll want to stay locked on to be able to gain the height from Air Combos. In the first phase, the Grim Guardianess will use a Grab move which will cause small damage to Sora and a Spin attack that can hit Sora from a large distance, this is easy to dodge out of the way however.
Once you’ve dealt over half her HP, the real battle will begin as she becomes a lot more dangerous. The Grim Guardianess will flash the screen and retreat to the top of the Tower. Your goal now becomes reaching the top of the Tower to begin striking her once more. It won’t be as simple as dashing up the Tower however, the Grim Guardianess will summon a circle of branches to trap you within, look around to spot a small gap you can jump through. Be quick however, as while you’re looking for a way out, she will summon Acorn Bombs that will explode and deal heavy damage.
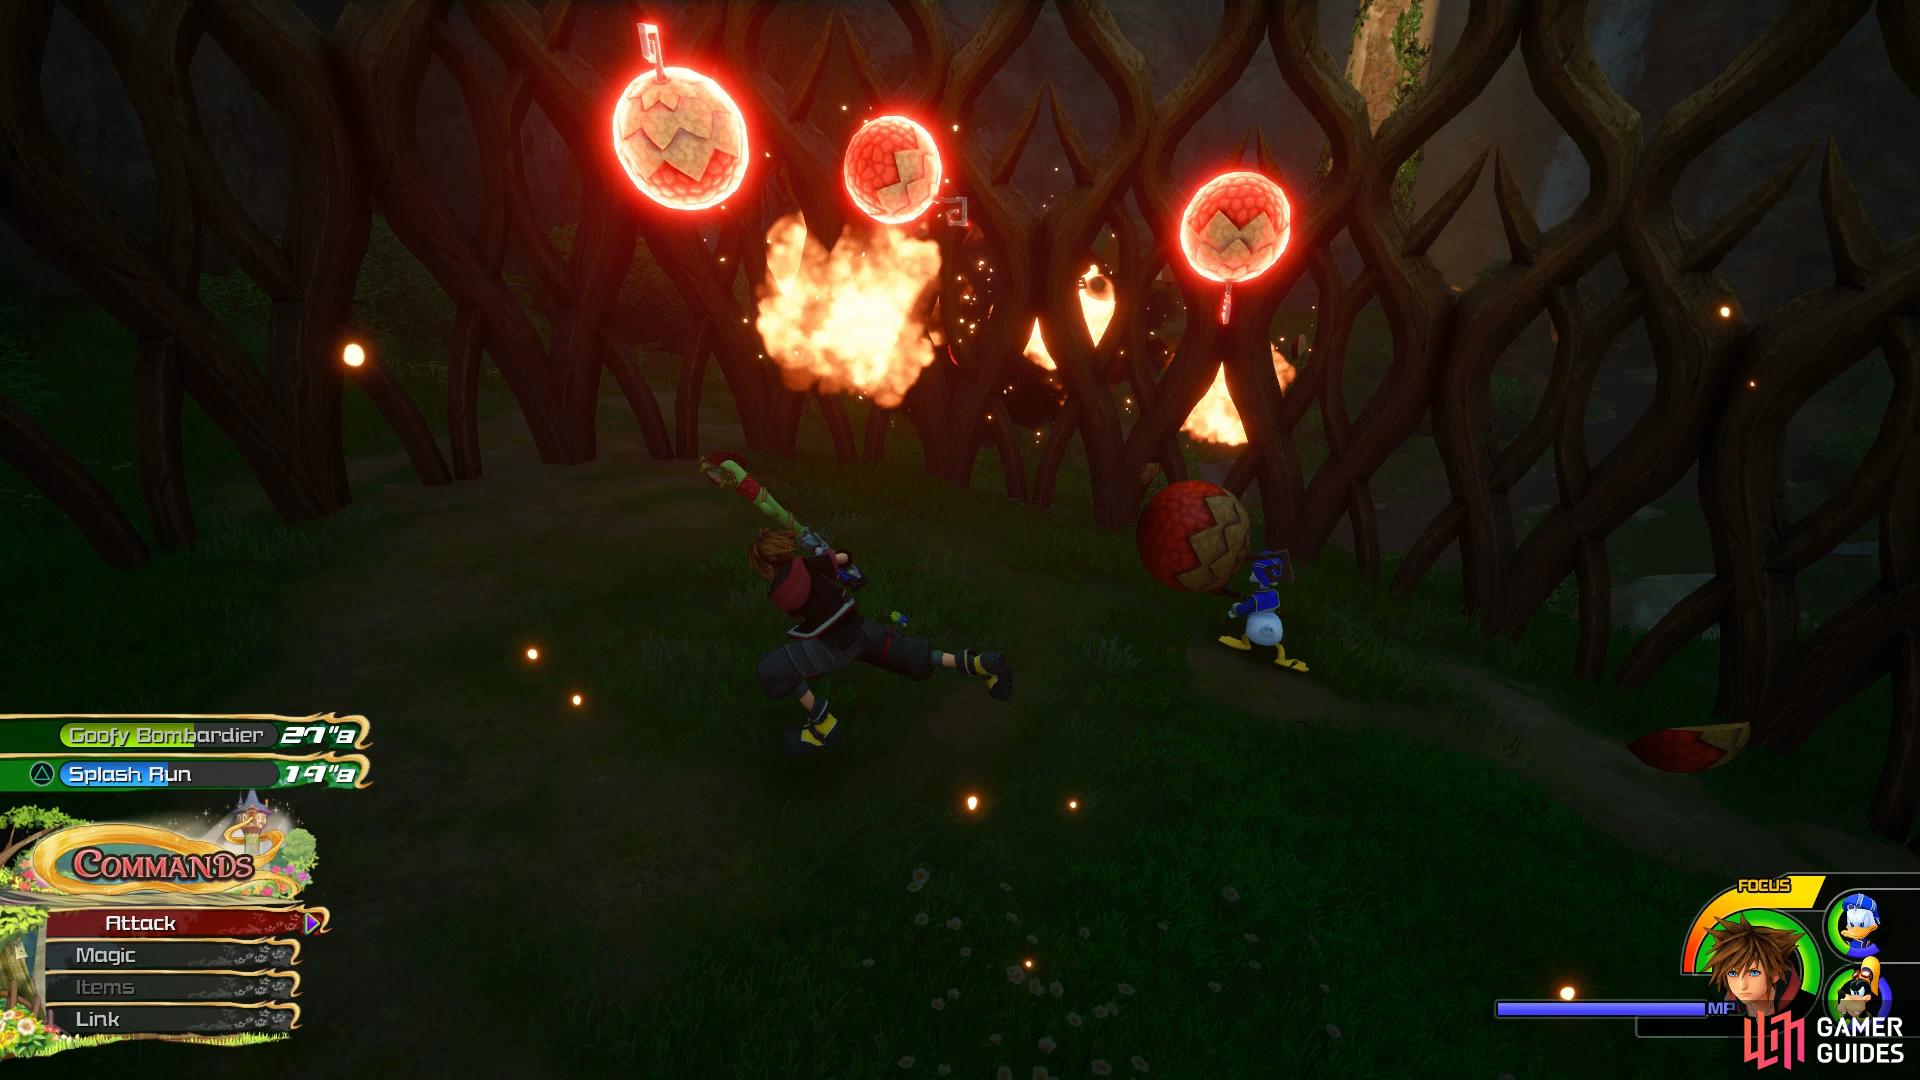
The bombs will deal heavy damage to Sora
be sure to attack while falling off the Tower with the Grim Guardianess.
These Acorn Bombs will continue to fall as you make your way to the Tower and begin dashing up it. Once you reach the top, lock on to the head and begin striking at her to knock it off the Tower and back down to the ground. This is a great time to allow Sora to fly through the sky and plunge the Keyblade into her head once the prompt appears for major damage. Once she hits the ground, she will flash you once more and you’ll need to make your way back to the Tower. Repeat the previous steps as you continue making your way to the Tower and striking at the Grim Guardianess to end the battle.
| Character | Ability |
|---|---|
| Sora | Max HP Increase |
| Goofy | Accessory Slot |
With the threat of the Heartless removed and the Kingdom saved, you’ll obtain the Ever After Keyblade and return to the Gummiship.


Following the events, a new Galaxy will open up on the World Map however before you venture out for pastures new, return to the Kingdom of Corona to find the remaining Lucky Emblems and Treasures.
Kingdom of Corona Revisited
Return to the Thoroughfare Save Point and head back to the Plaza where the Festival took place earlier.
As you pass through the archway, take out your Gummiphone and snap a photo to complete Photo Mission #7 allowing you to Synth Moon Amulets. Head towards the mural of Rapunzel and her parents and head into the northeast corner to spot a chest surrounded by people. Perform on the nearby barrel to move them along and then open the chest to obtain Treasure #23 - Magic Boost. Head left from the Mural now and look to your right as you go down the street to find a large wooden door containing Lucky Emblem #6.
Perform on a nearby barrel to gain access to this chest
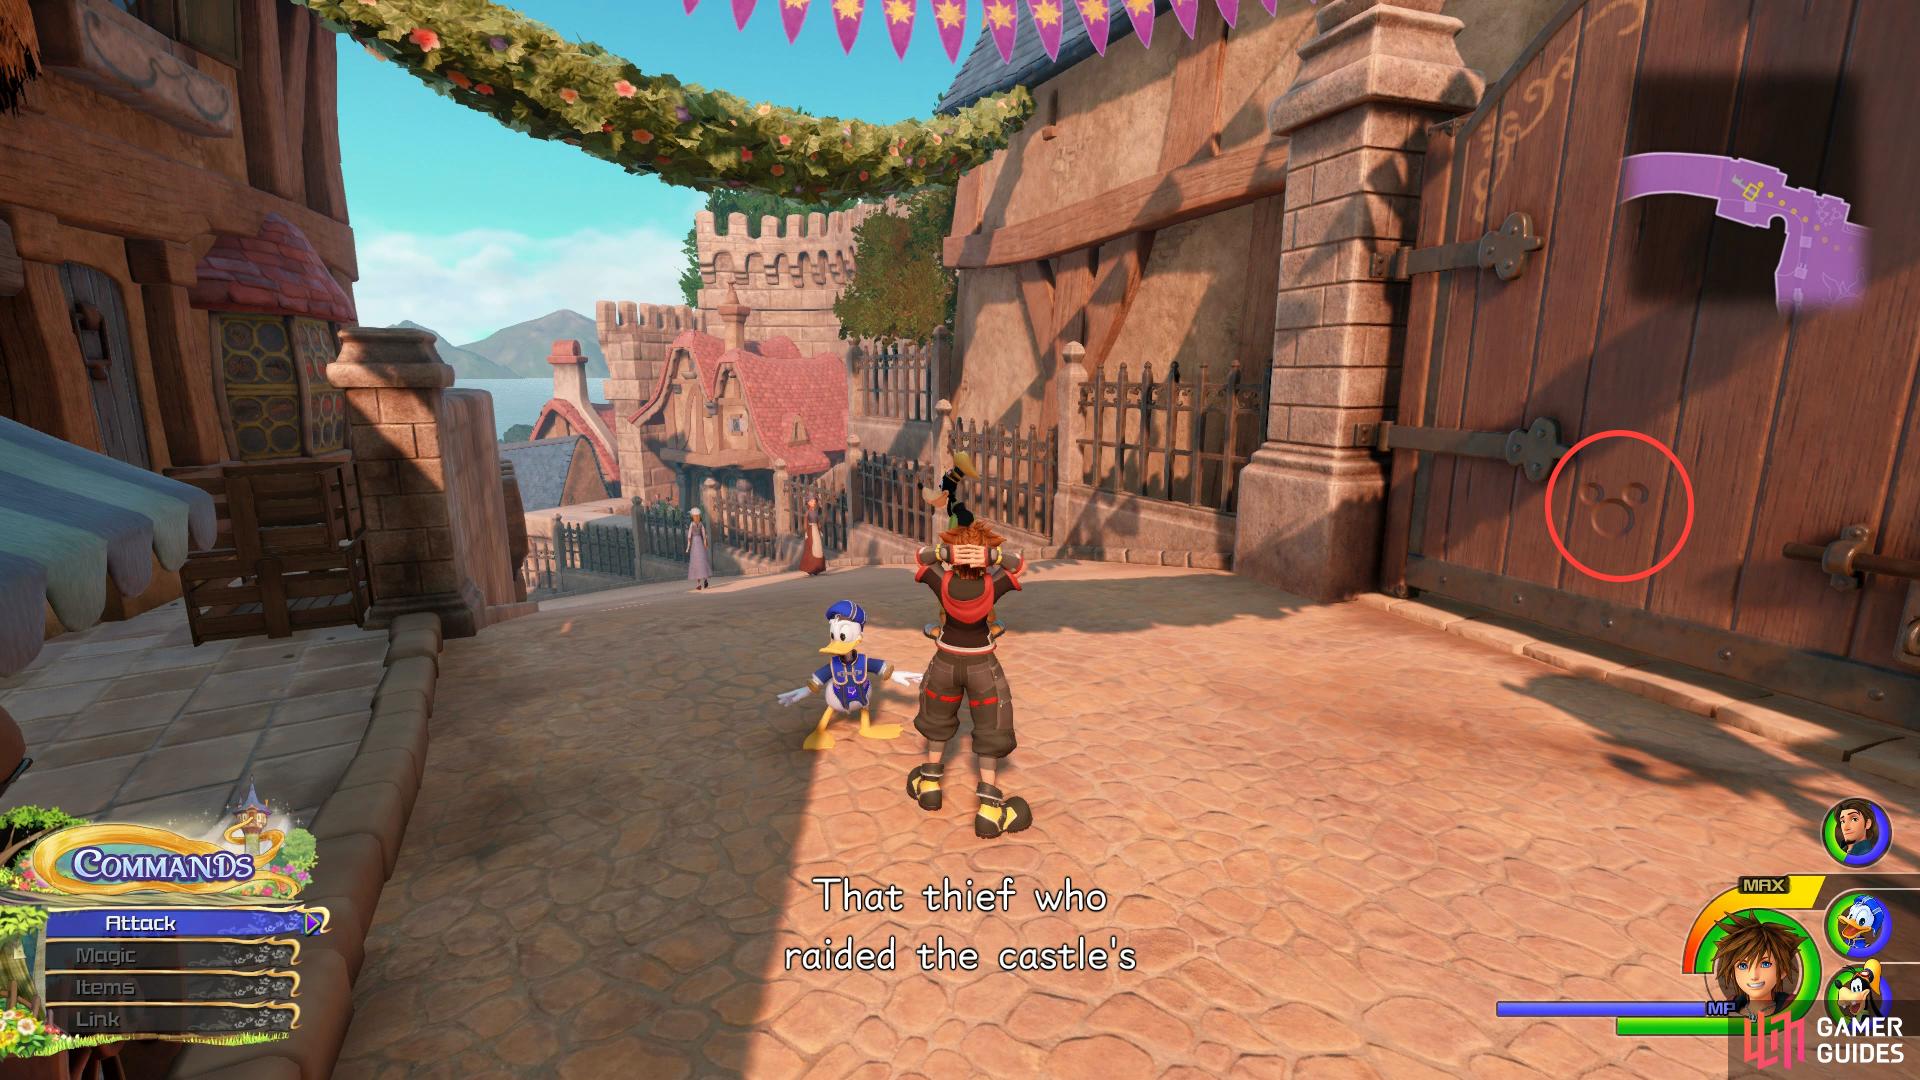
look on the wooden door as you make your way to the Wharf.
Return to the Save Point and this time take a left from it and head down the stairs to the Wharf. Once you reach the bottom of the stairs, to turn your left to spot Lucky Emblem #8. You can drop into the water here and search around for some new Ingredients to bolster your recipes for Little Chef. Once you’ve nabbed the Ingredients, jump back onto the first pier and follow it to the end to spot a chest containing Treasure #26 - Sea Bass en Papillote+.
This Lucky Emblem can be difficult to spot.
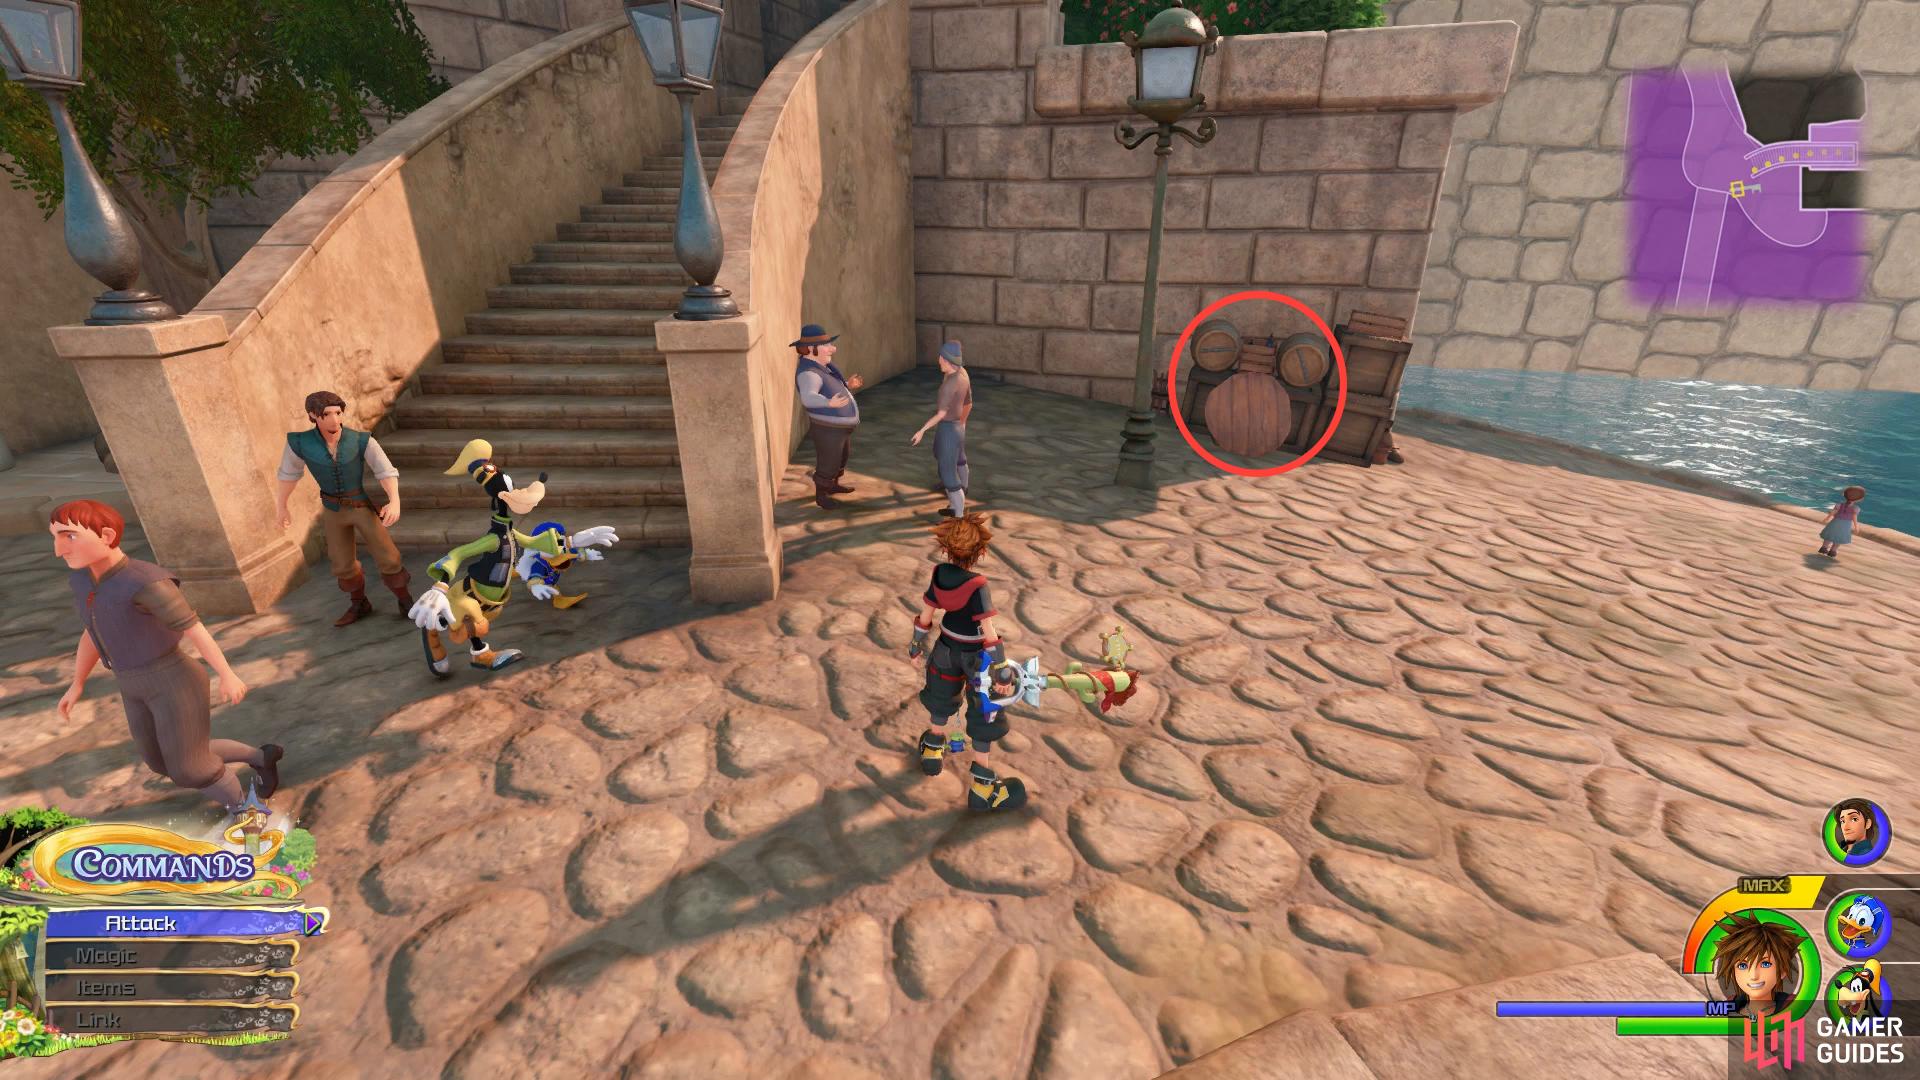
Continue to the west and you’ll come across a small tower, make your way to the top of it to find another chest, this one containing Treasure #27 - Rune Ring. Drop to the base of this tower now and search the northwest side of it to find Lucky Emblem #7 on the side of the door which should be your 40th and reward you with a Strength Boost. Continue to the west and make your way towards the Lighthouse and you’ll spot a large group of crates and barrels, destroy these to reveal the final chest containing Treasure #28 - Hi-Potion. Finally, run up the Lighthouse to reach the top and you’ll discover Lucky Emblem #9 on the brazier.
Look on the door of the small tower for one emblem
and climb the Lighthouse for another.
With all the collectables in your possession, make your way back to the Plaza and speak with Rapunzel to get the opportunity to perform the Festival Dance once more only this time you can obtain a Hi-Score and a Trophy. Refer to the tips earlier in this section on how best to obtain a Hi-Score such as avoiding to perform and nailing every circle for the time boost. You’ll obtain Unison Thunder and a Magic Boost for obtaining an A along with a Trophy if you manage to obtain a score of 70,000+ Points (Requires a chain of 80).

There’s one final task to take care of in the Kingdom of Corona, head back to the Save Point and warp to the Hills Save Point. From here, make your way east and then south as you head towards the cave that leads to The Tower. Along the way you’ll spot your next Flantastic Seven, the Orange Flan.
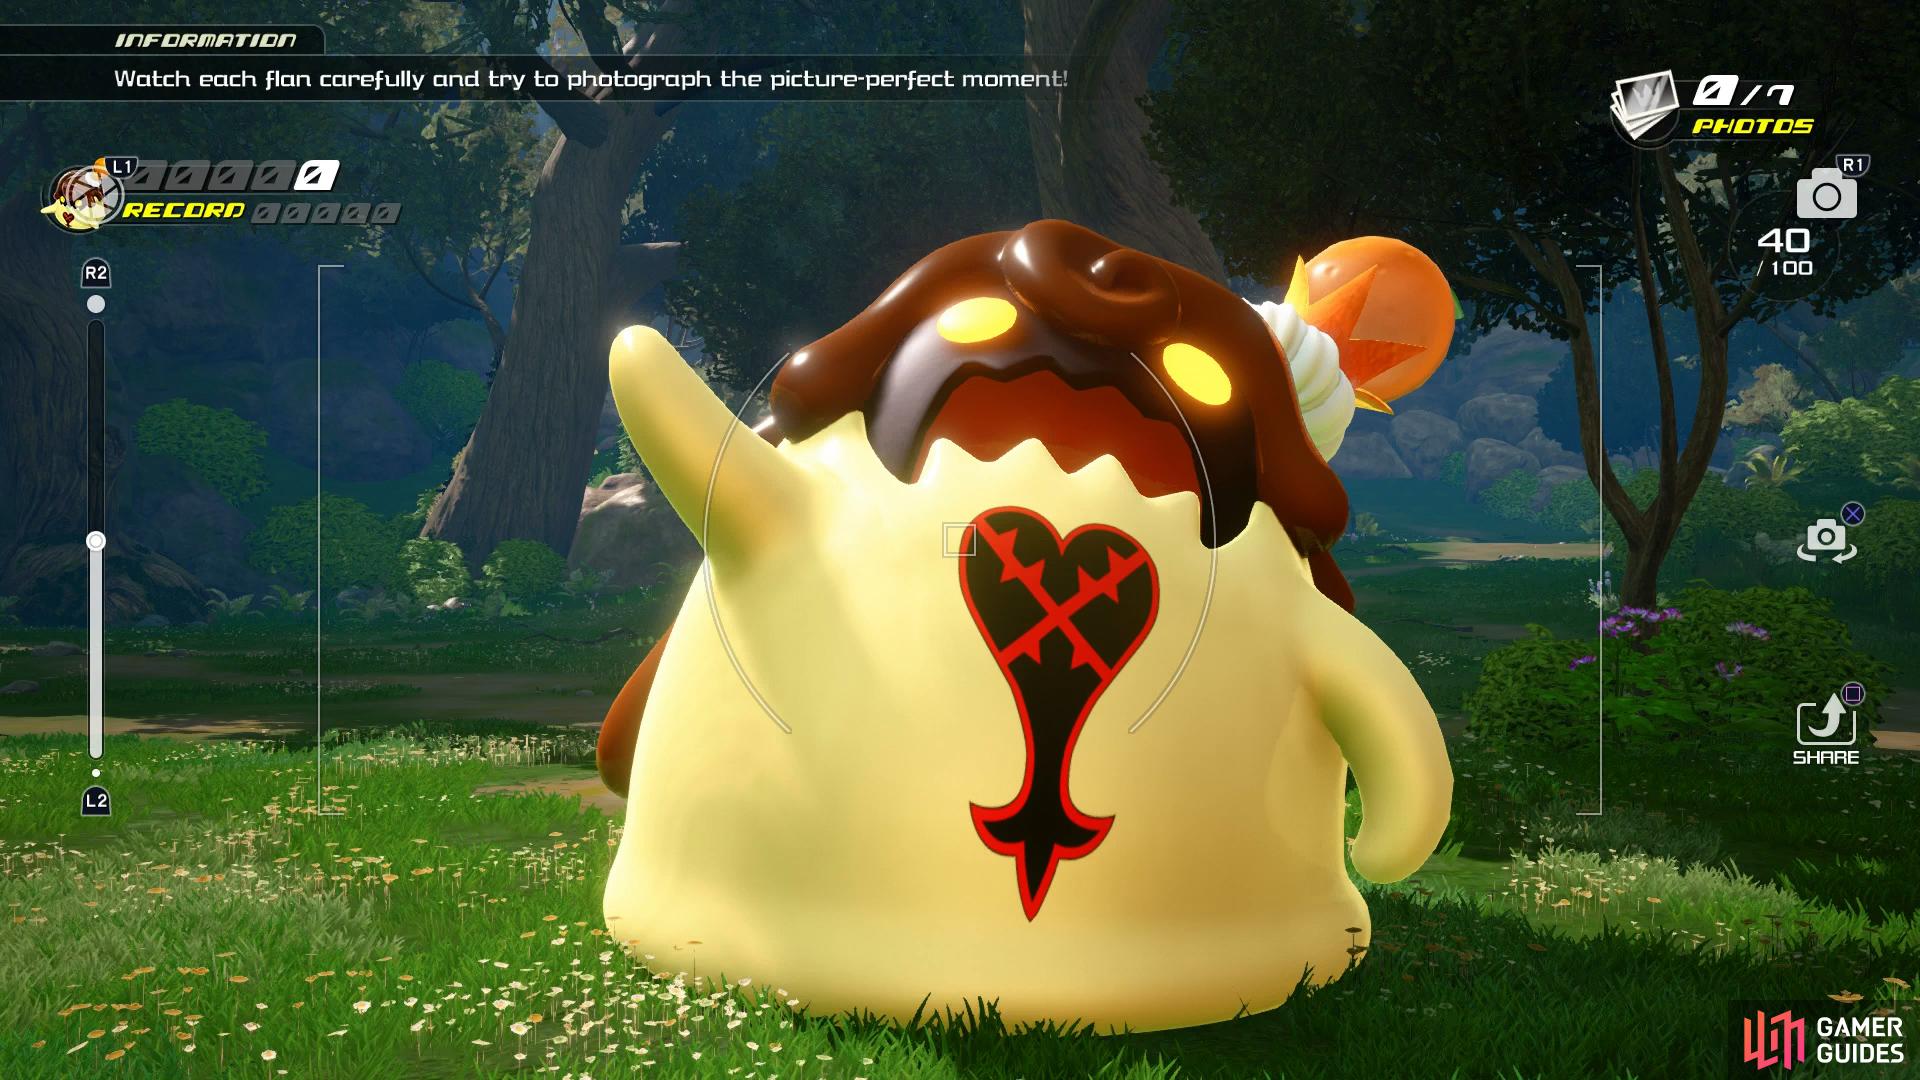
Orange Flan
For this Flan, snapping photos is the name of the game. You’ll see numerous Orange Flans in varying sizes around this area and you’ll need to snap seven photos. The trick to getting the Hi-Score is by achieving an Excellent rating on every one of your photos. You obtain this rating by holding your picture until they strike a pose, some of which are easier than others. There are number of ways you can do this but consider the ones below:
- Directly in front of where you begin, face the Flan and wait for it to put it’s hand up before snapping the picture.
- Head northwest from the previous Flan and as the path goes north, look up the tree to spot two Flans together. Wait for them to drop to the ground and merge into a pudding before snapping the picture.
- Northwest from the previous Flan, wait for the Flan to face you and put it’s hand up before snapping the picture.
- Continue north form the previous Flan to find a group of Flans, stand at a distance and aim the camera as they make several poses. You’re waiting for the central Flan to flex it’s arms, once it does snap the picture.
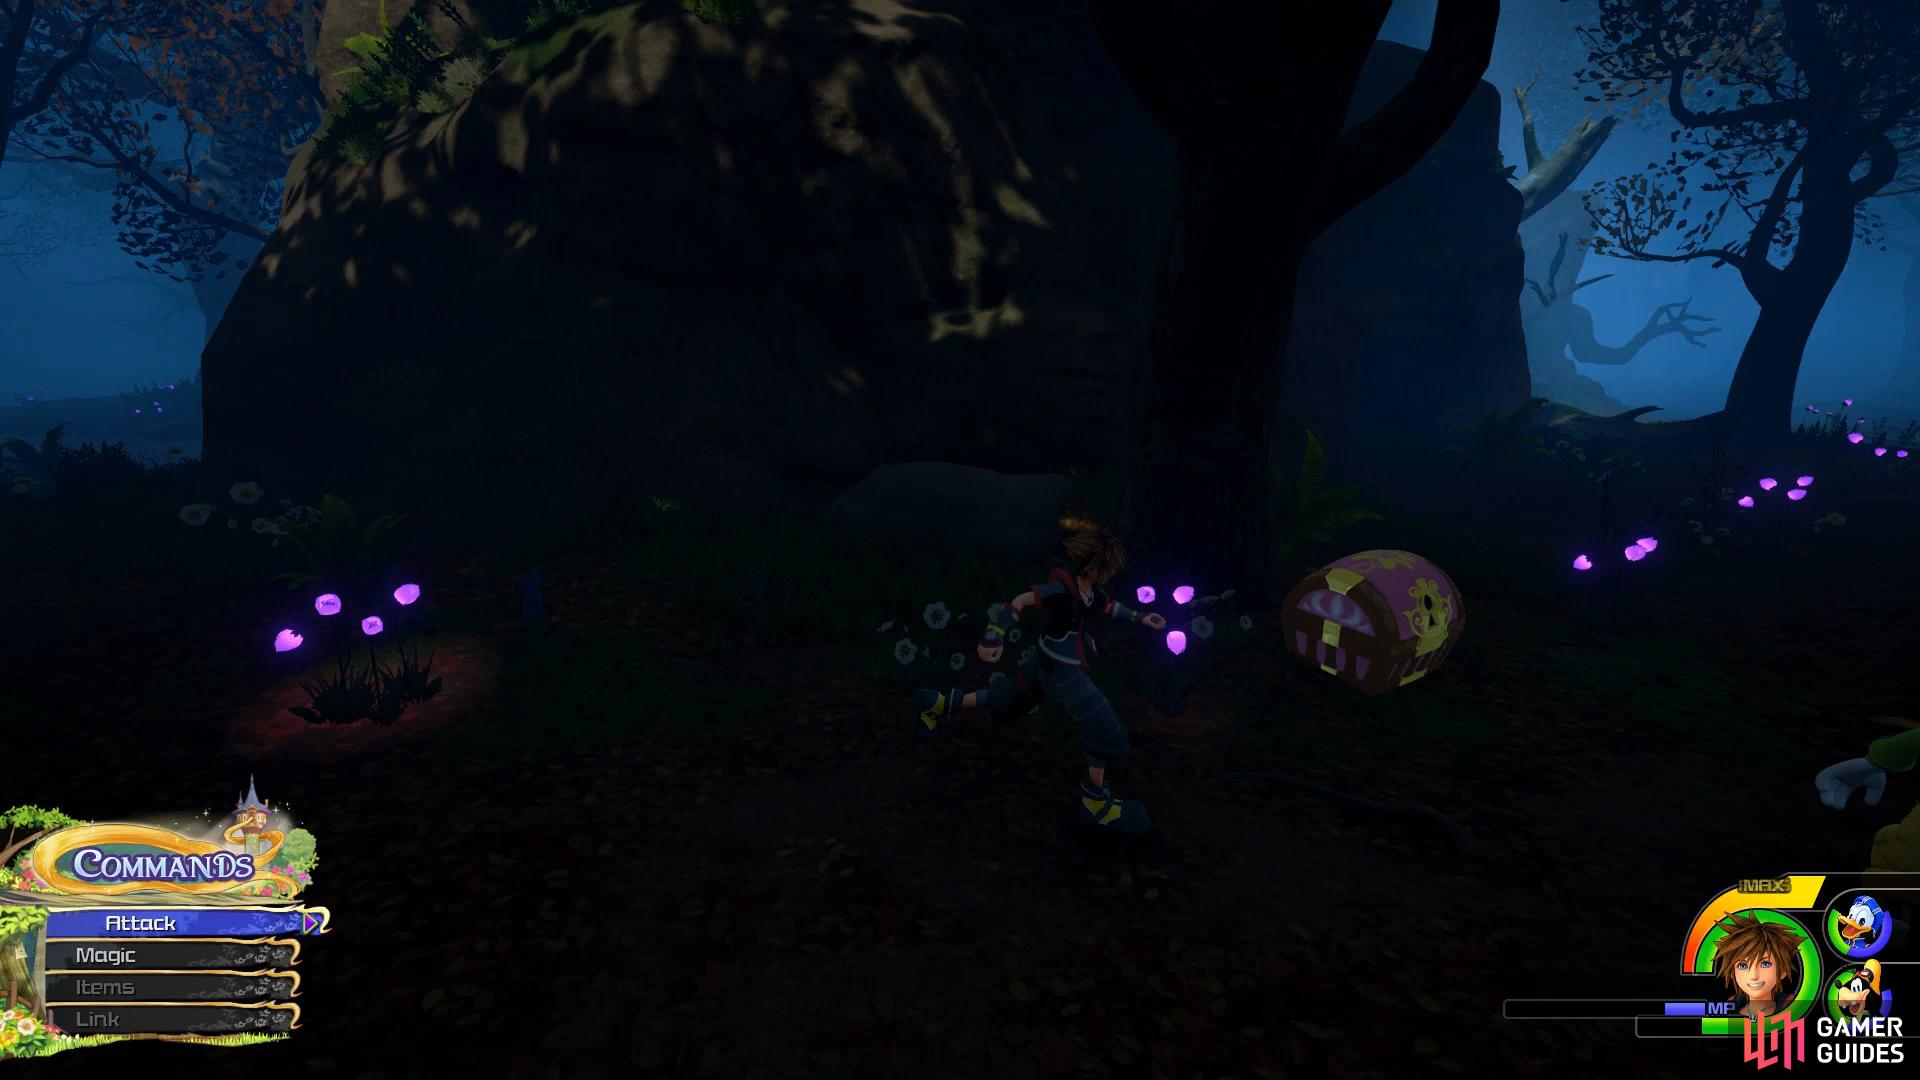
- Return south and then head southeast towards the cave where you found a chest earlier, as you approach the area a miniature Flan will run out, snap the picture.
- Return north and run past the first Flan you see as you head northeast. Face the next Flan and wait for the rabbit and two birds to land on it before striking a pose.
- Head east to another easy to spot Flan, wait for it to finish running and strike a pose to snap the final picture.
Follow these photo opportunities to complete the task and obtain the Treasure Magnet ability and Blood Orange x3. You’re done with the Kingdom of Corona for now so head back to a Save Point and return to the World Map. Switch to the Misty Stream galaxy and plot a course for Monstropolis to the west.
No Comments