Oddly, despite the fact that the entrance room is DIRECTLY connected to the Great Sea outside, the water rises every 15 ~ 30 seconds. Since you are connected to the Great Sea, you’d also expect some wind - that will not be so and you will have to cruise/swim everywhere here.
To begin, go to the south-eastern corner of the part of the room available to you. The room will only appear while the water is lowered. When the water is lowered, exit the boat and swim to the platform. Climb onto it and go through the door.
Inside, you find several wooden blocks nearby, as well as a new enemy: the Yellow Chuchu. These are nearly unique - they have bio-electric fields that can only be stopped by stunning the enemy (Boomerang works well) and they can give one of either a Red Chuchu Jelly or a Green Chuchu Jelly.
Target the enemy and use the Boomerang. This should stun the Chuchu - strike it with the sword to eliminate it. Try to defeat before the water rises, or there will be a nuisance on the loose - the enemy can’t be stunned while floating, but can still damage you with its bio-electric field. Once the water rises, you’ll find several alcoves.
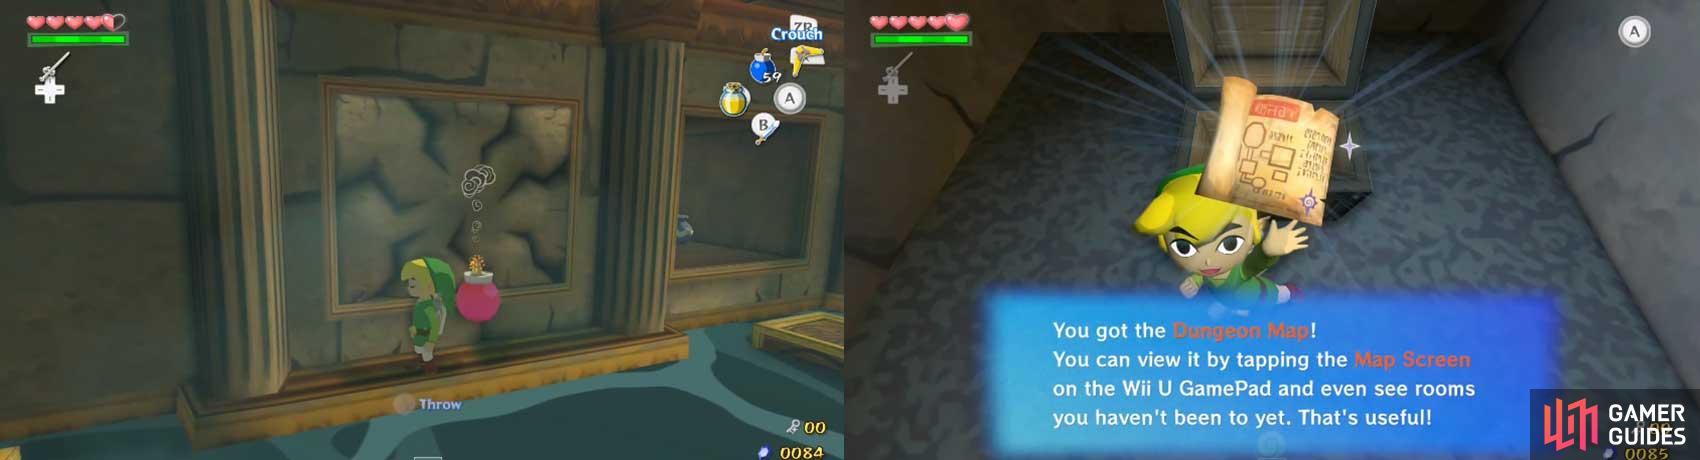
On the south side of the room, one is blocked by a cracked wall; put a Bomb beside it to break the wall. Inside the newly-revealed alcove, you’ll find the Dungeon Map. At this point, returning to the main room will make four Yellow Chuchus fall down. Defeat them and leave the room.
Back in the entrance room, sail to the north-eastern corner of the available area - north of the door you just exited - and you’ll find a ledge that you can only get onto while the water level has risen. On the ledge is a sealed door.
There is also a glowing platform nearby, as well as a form of statue (an Armos statue). Coincidence? I think not! Pick up the statue and place it on the glowing platform to unseal the door, permitting you to go through.
This room is somewhat reminiscent of the tunnel rooms of Forest Haven. There is indeed a pit/trench in the middle of the room. However, it is much wider. The ground is also of equal height on both sides, implying that usage of the Deku Leaf would be useless. There is no Grappling Hook Stick, either.
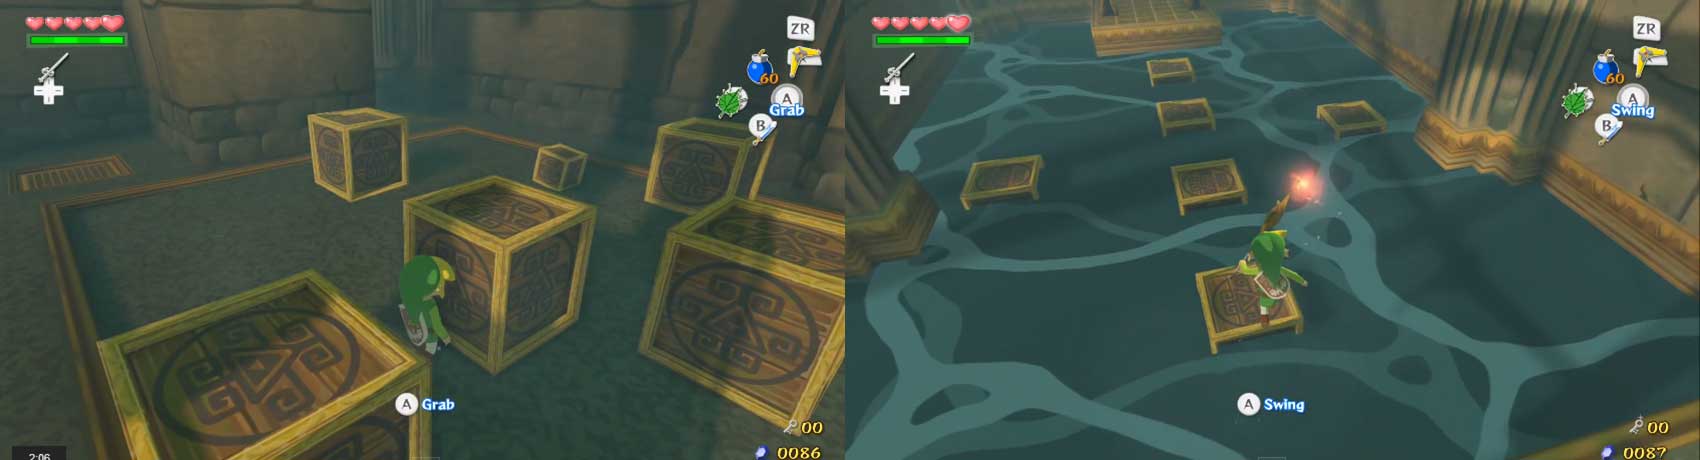
Go into the trench and you’ll find some small crates and a glowing platform. Place a crate on the glowing platform before the water level rises to make a crystalline bridge appear. However, the crates float on water - if the water level rises, the crate floats and the bridge disappears. At least the crates don’t move…
Anyhow, go across the bridge when possible to the hut-like thing on the other side. Under the “roof”, you’ll find a large statue made of stone. Run back to the other side, but beware, as the statue will reappear at the “hut” if it gets into the water. When you get across, go through the door with the statue.
Outside and to the left (still on the ledge), you’ll find a cross-shaped indentation in the ground. Coincidentally, the bottom of the statue also is a cross-shape. Press R while near the indentation to set the statue into the indentation. Light will beam up around it, and the large golden gate on the eastern side of the room will lower.
Return to the boat and cruise along the newly-opened path. At the end, you’ll find a ledge that you can get to when the water level has risen. On the ledge, you’ll find two Armos statues and two glowing platforms. Place an Armos statue on each platform to unseal the nearby door. Go through it.
Here, you’ll have make a bridge out of the crates in the bottom of the room. The larger crates will need to be dragged along. The smaller ones can be picked up, as you already know.
Drag the boxes to create a line. The smaller crates are optional for the pattern, but they have saved a few times when I’ve played. Whenever you the pattern ready, be it mine or your own, run across the bridge while the water level has risen.
If you can make it across the bridge without falling into the water or having to grab onto a box, the bridge will likely work. Go to the entrance ledge and break one of the pots that contain sticks. Light it on one of the nearby torches. Run across to the other side and light the torches here. A chest will appear. It contains a small key. Now, leave the room.
Go back to the boat and cruise to the western wall. As you can easily see, it has several sections that are cracked. Like with other walls, you can blow them up. However, you will need one thing - the Bomb Cannon.
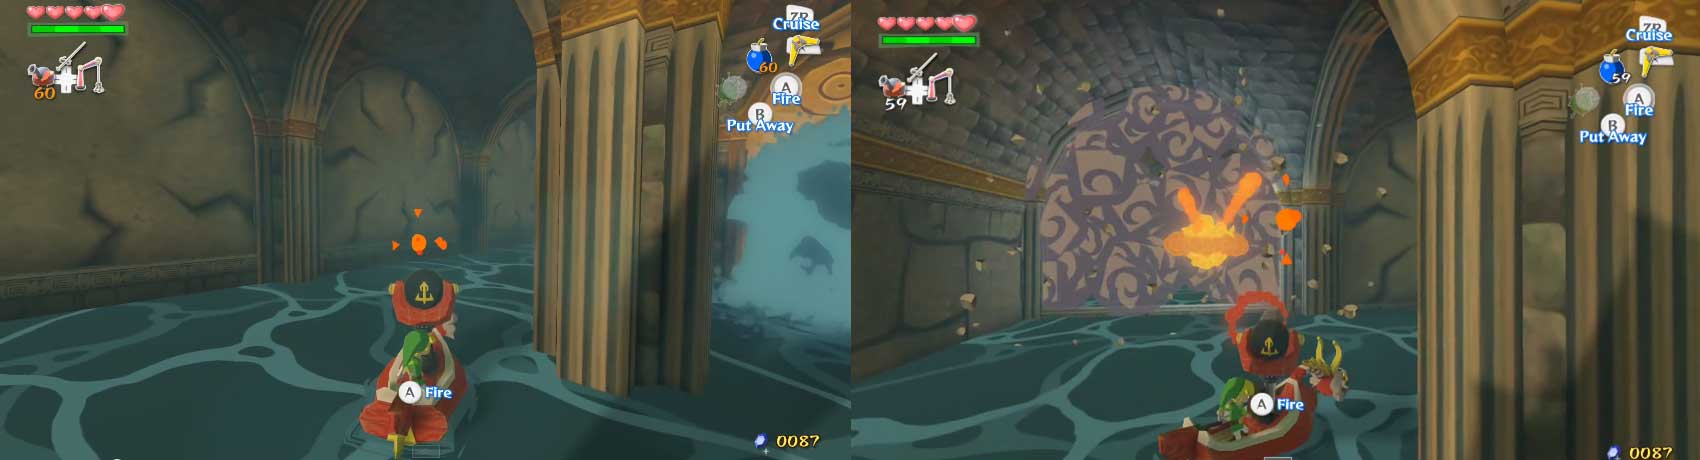
Equip the Bombs and use the boat’s cannon to shoot Bombs at the wall sections. If the hit is good, the wall section will break, revealing a hole to another section.
Go to this area. Here, go up the staircase to the door - you may need to fight a couple of Yellow Chuchus on the way. At the top of the staircase, enter the door.
Inside, you’ll see a chest… and a floating skull! (Wonder if we should call Ghostbusters?) This skull is surrounded by a red cloud. This cloud is actually a flame, and will set you on fire if you touch it. However, the enemy is easy to beat - merely a strike or two of the sword will do it. Open the chest to receive the Compass. Now, leave the room.
Outside, look to left for a jar with some sticks in it. Break it and grab one of the sticks. Light it on a torch and, when the water lowers, go to the lower floor. Light the two torches on either side of the locked door.
When the two torches are lit, a chest will appear on a ledge near the staircase. Inside, you’ll find a Joy Pendant. When you are done, go to the locked door and unlock it with the small key to get to the next room.
Inside this room, you will fight four Yellow Chuchus. Use the Boomerang to stun them, then hit them with the sword to defeat them. If the water should rise before you can defeat all four, avoid the yellow blobs that appear on the surface of the water - these are the Yellow Chuchus, and they still have their bio-electric fields!
Even worse, you are unable to disable them at this point!! When the water level lowers, defeat any that remain. A rainbow staircase will appear, going to another cross-bottomed-statue. Grab it and, when the water lowers, quickly leave the room.
Outside, go up the staircase. To the right, you’ll find a ledge with a cross-shaped indentation. Press R while carrying the statue near this indentation to place the statue into the gap. Back in the main area of the room, the water-gushing mouth will stop gushing water, giving the job to two other mouths on the sides.
This reveals a pathway and a door. Once the water level rises, swim back to the boat and to the path. Follow the path and go through the door.
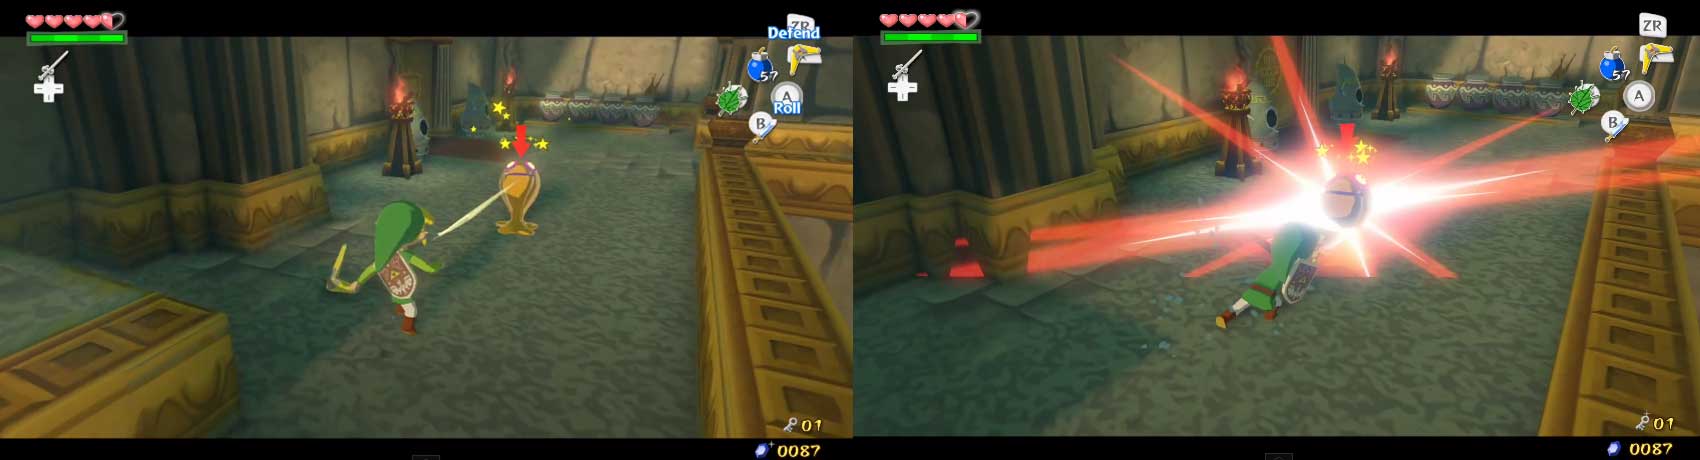
This tall room has more than just two rats in it. It has one of the most annoying enemies in existence - the Beamos. As you cross the line of sight (as if the red ball is the “eye”), the red ball will swell and emit a laser as it follows you. At this point, it is nearby impossible to destroy it. You can still eliminate the rats - to make it easier, one hit with your Boomerang will do the job.
Now, on the entrance side, there are two Armos statues. Take each one to the other side of the room (where the glowing platforms are) and place one down on one of the glowing platforms. When both are on this side, step onto one of the glowing platforms yourself. This will cause the platforms nearby to begin moving. Jump along them until you get to the point where you can see the door. Go through it.
 Sign up
No Comments