


Blades of Fire is all about the weapons that Aran can forge and wield on his quest to stop the Queen. The Polearms category offer a way of mostly dealing heavy blunt damage to your foe, with some exceptions and if you want to unlock all five weapons, you’ll need to be diligent in the foes you slay. Keep reading to learn how to unlock all five Polearms along with the location of all of the Seneschals.
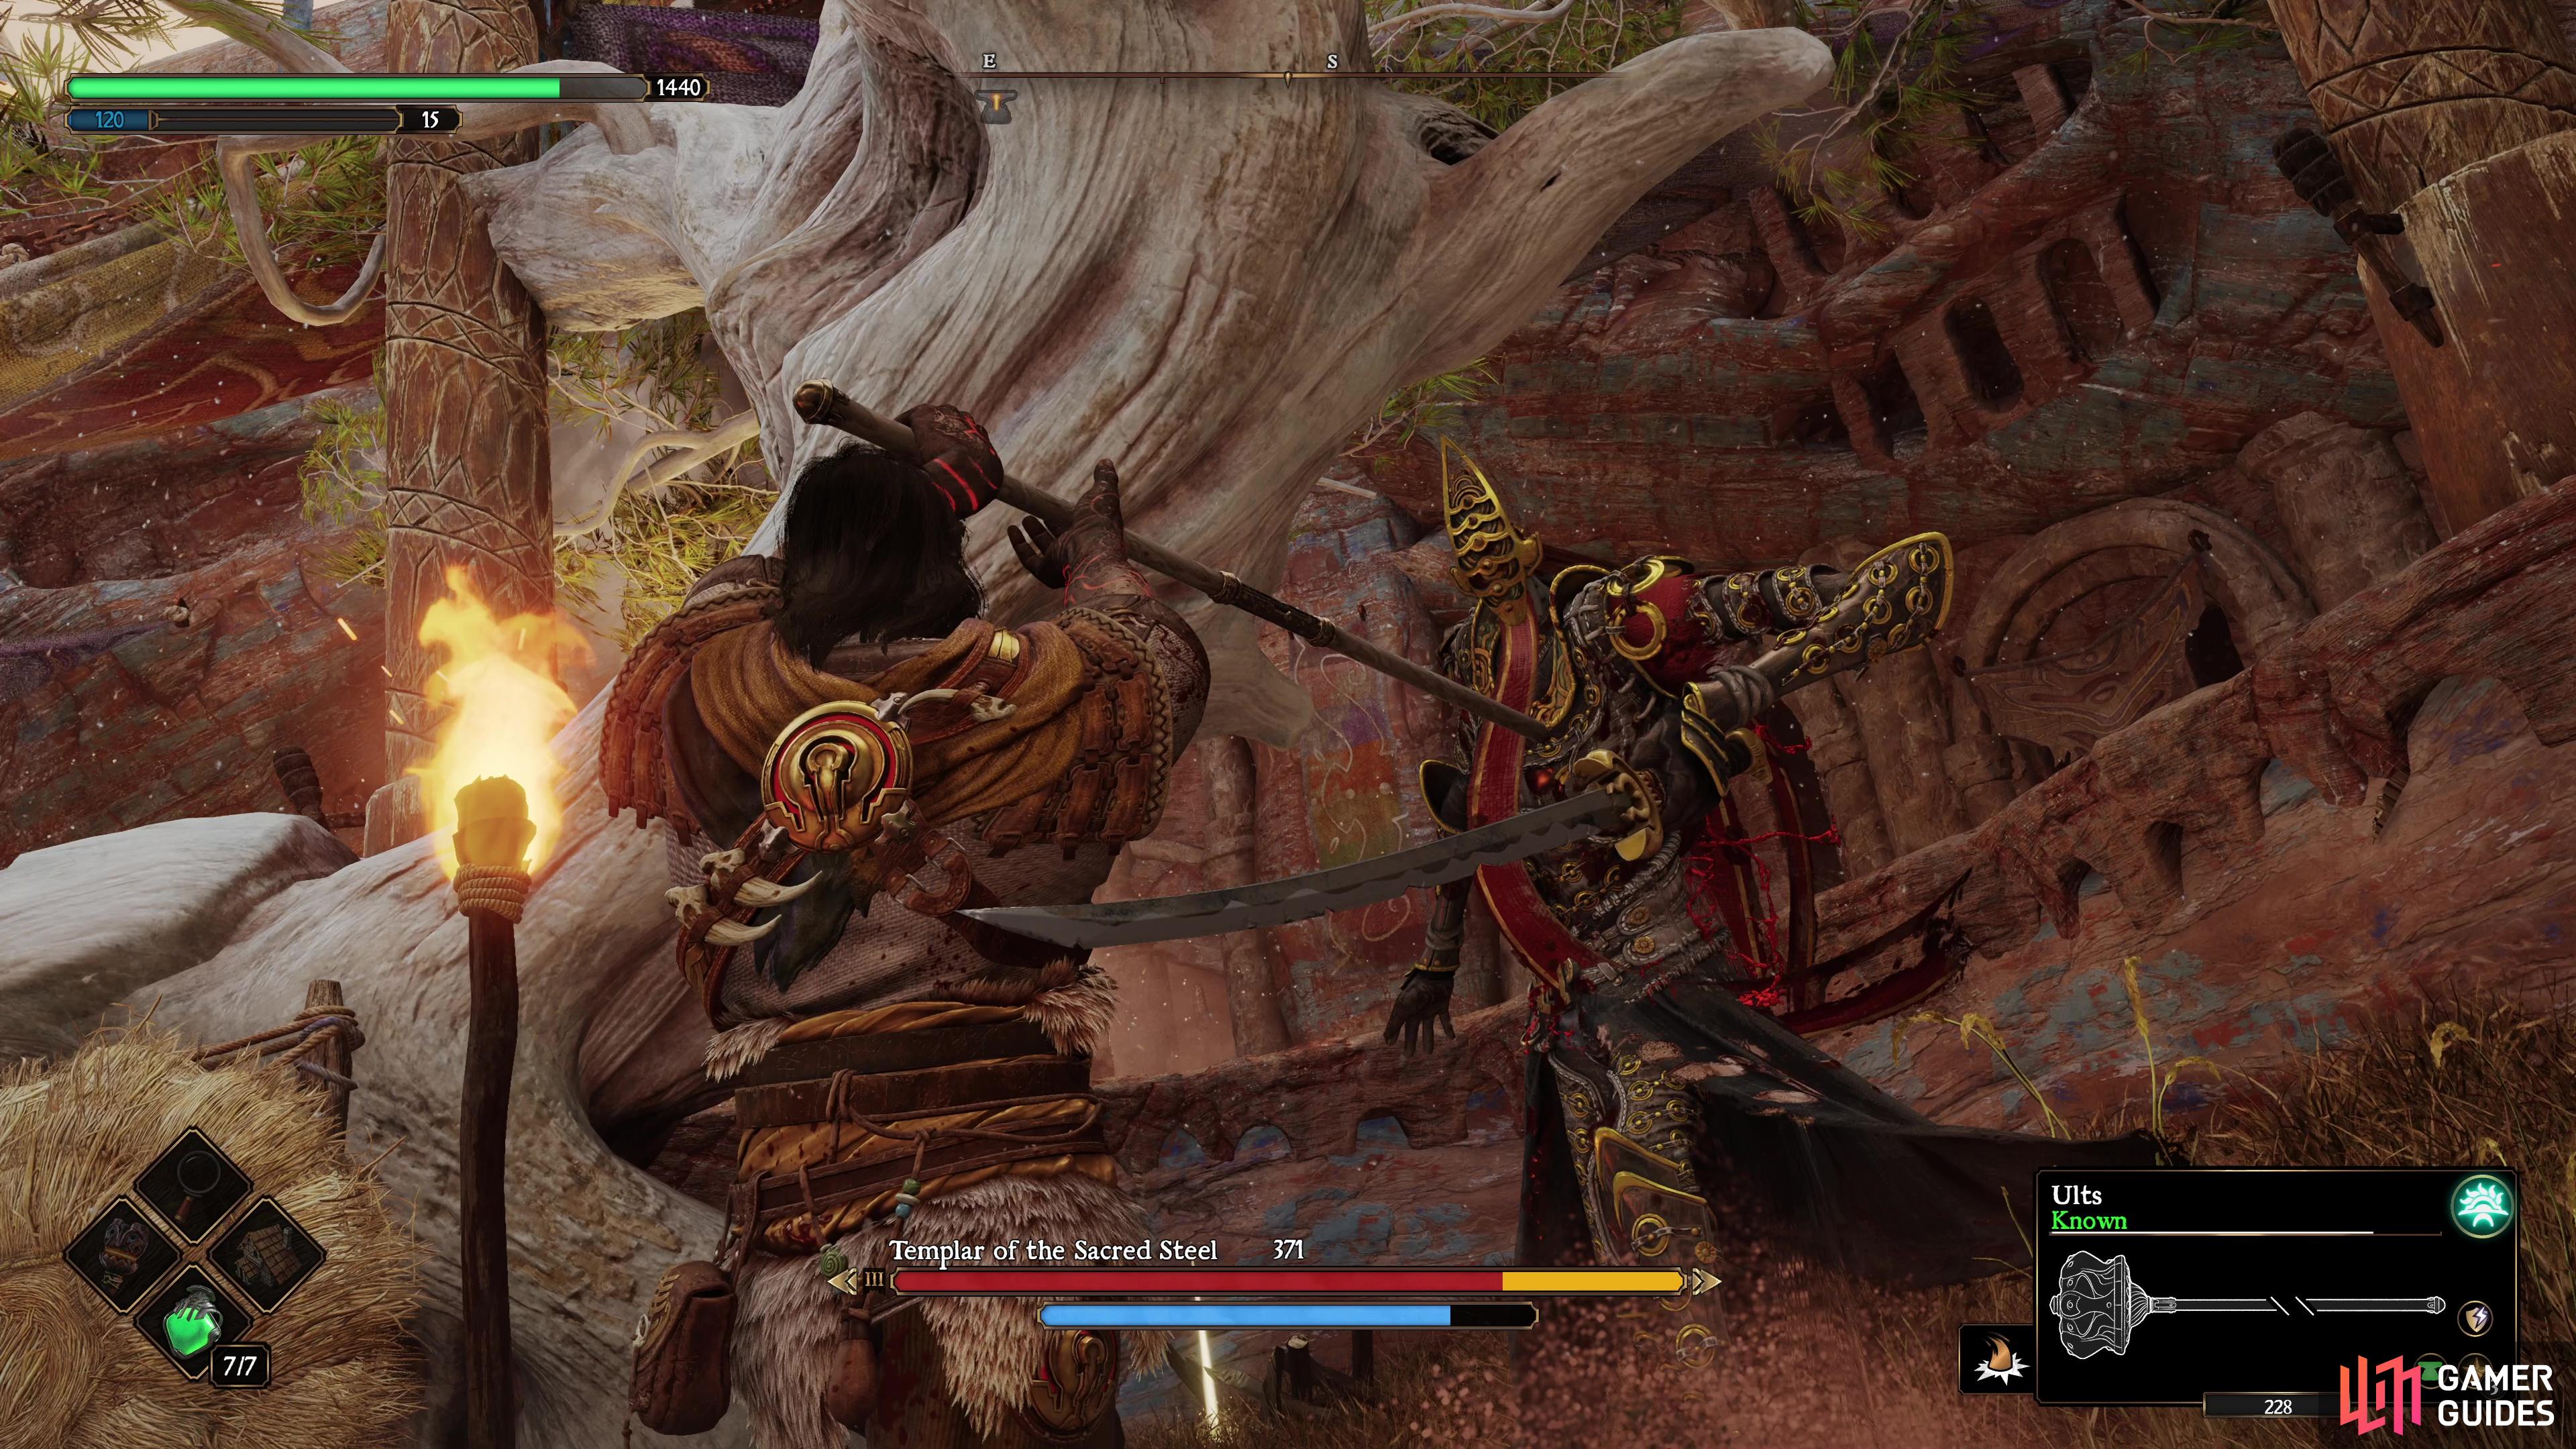
Polearms deal heavy damage to your foes in Blades of Fire.
Table of Contents
If you want to jump to a specific section, click on the links below.
| Quickjump |
|---|
| Polearm Playstyle |
| Hyssop |
| War Pick |
| War Axe |
| Warhammer |
| Great Axe |
| All Polearm Seneschal Locations |
Polearm Playstyle
The  Hyssop, a Polearm, is the first weapon you will wield as Aran in Blades of Fire, so you’ll quickly get used to how they feel and play as you unlock the next available weapon (the
  Army Sword). The table below details the general stats of Polearms, ranging from one (lowest) to three (highest):
| Category | Rating |
|---|---|
| Speed | 1 |
| Recovery | 1 |
| Advance | 1 |
| Damage | 3 |
| Stagger | 3 |
| Strike Area | 3 |
The long and short of it is the Polearm category of weapons are the slowest in the game, but for that trade-off you’re getting the strongest Damage, Stagger, and Strike Area of all the weapons. You’re essentially deciding if you want ultimate power at the cost of being incredibly slow.
This means when playing with Polearms, you need to be more careful with your swings, often if you miss, it could leave you wide open, especially to the faster enemies. On the other hand, you can time charged attacks as an enemy comes into range and often kill them in one blow in a bloody, gory mess. The Hyssop and  Warhammer are great Blunt weapons, arguably the best in the game at that damage type, and it always helps to have one in your equipment at any given time for when you may face armored enemies.
When it comes to forging Polearms, look to always go for maximum reach if you can, along with Spears, they’re the longest weapons in the game and making use of that trait is something you shouldn’t turn down. Polearms will also always be slow, so although it can be tempting to add more Stamina to them, you’re better off focusing on the pure damage potential of them instead and learn how to time your strikes better.
Polearm Unlocks
As mentioned at the top, there are five Forger Scrolls for you to find for the Polearm category, although one of them, the Hyssop, will be unlocked from the start of the adventure. You’ll find each of these in the sections below with details on where you can find the enemies needed to complete the unlock condition.
| Weapon | Required Enemies |
|---|---|
| Hyssop |
Default weapon |
 War Pick War Pick |
Defeat 30  Spore Brutes Spore Brutes |
 War Axe War Axe |
Defeat 20  Elementals Elementals |
| Warhammer |
Defeat 10  Mayhem Warmongers Mayhem Warmongers |
 Great Axe Great Axe |
Defeat three  King Ashkhanars King Ashkhanars |
Hyssop
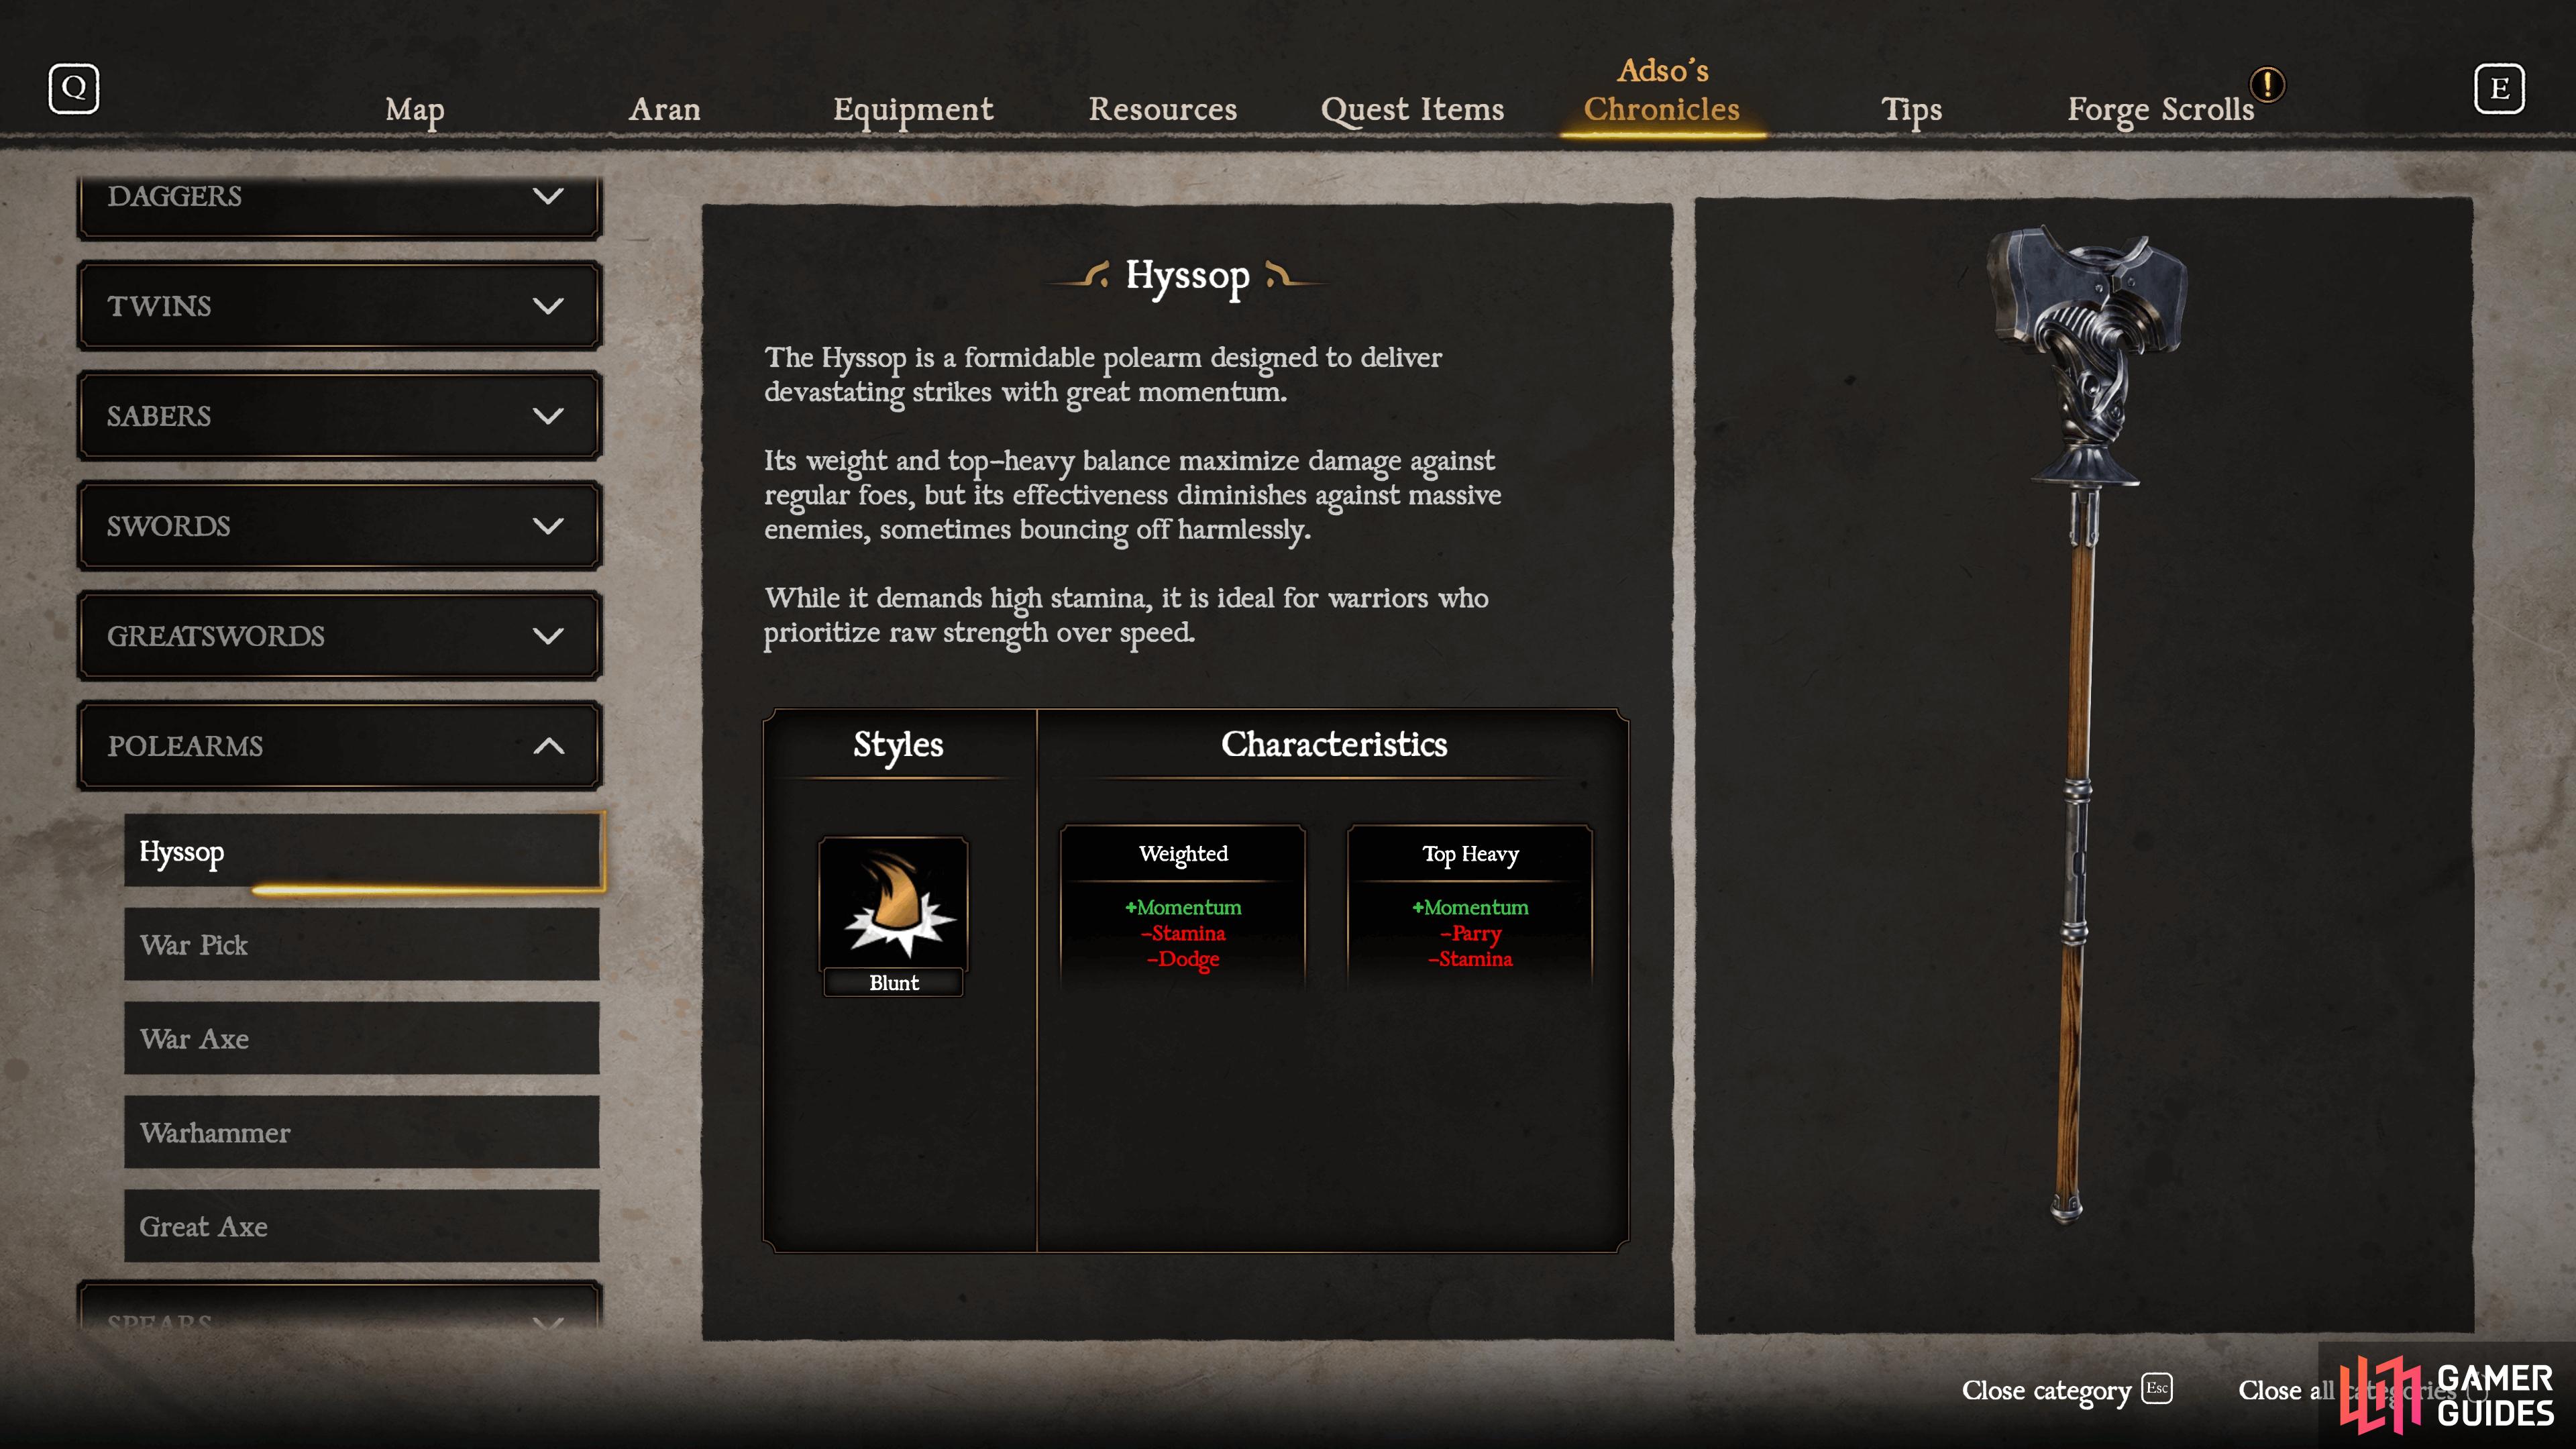
You will start the adventure with the Hyssop unlocked.
| Style | Characteristics |
|---|---|
| Blunt | Weighted (+Momentum, -Stamina and Dodge) and Top Heavy (+Momentum, -Parry and Stamina) |
You won’t have to do anything to get your hands on the Hyssop, this will be the first Forger’s Scroll that Aran gains in Blades of Fire and how you’ll be taught on how to make use of the forge to customize your weapon.
The Hyssop is all about pure damage, so you’re better off wasting materials (or going with a smaller Head) to try and increase your Stamina at the expense of damage. You want to be using Polearms for the massive damage they’re dealing, so if Stamina is a problem, you’re better off looking at the other weapons on offer. Instead, focus on unlocking Seneschals for this weapon until you can give the Shaft a Reach of 80“.
War Pick
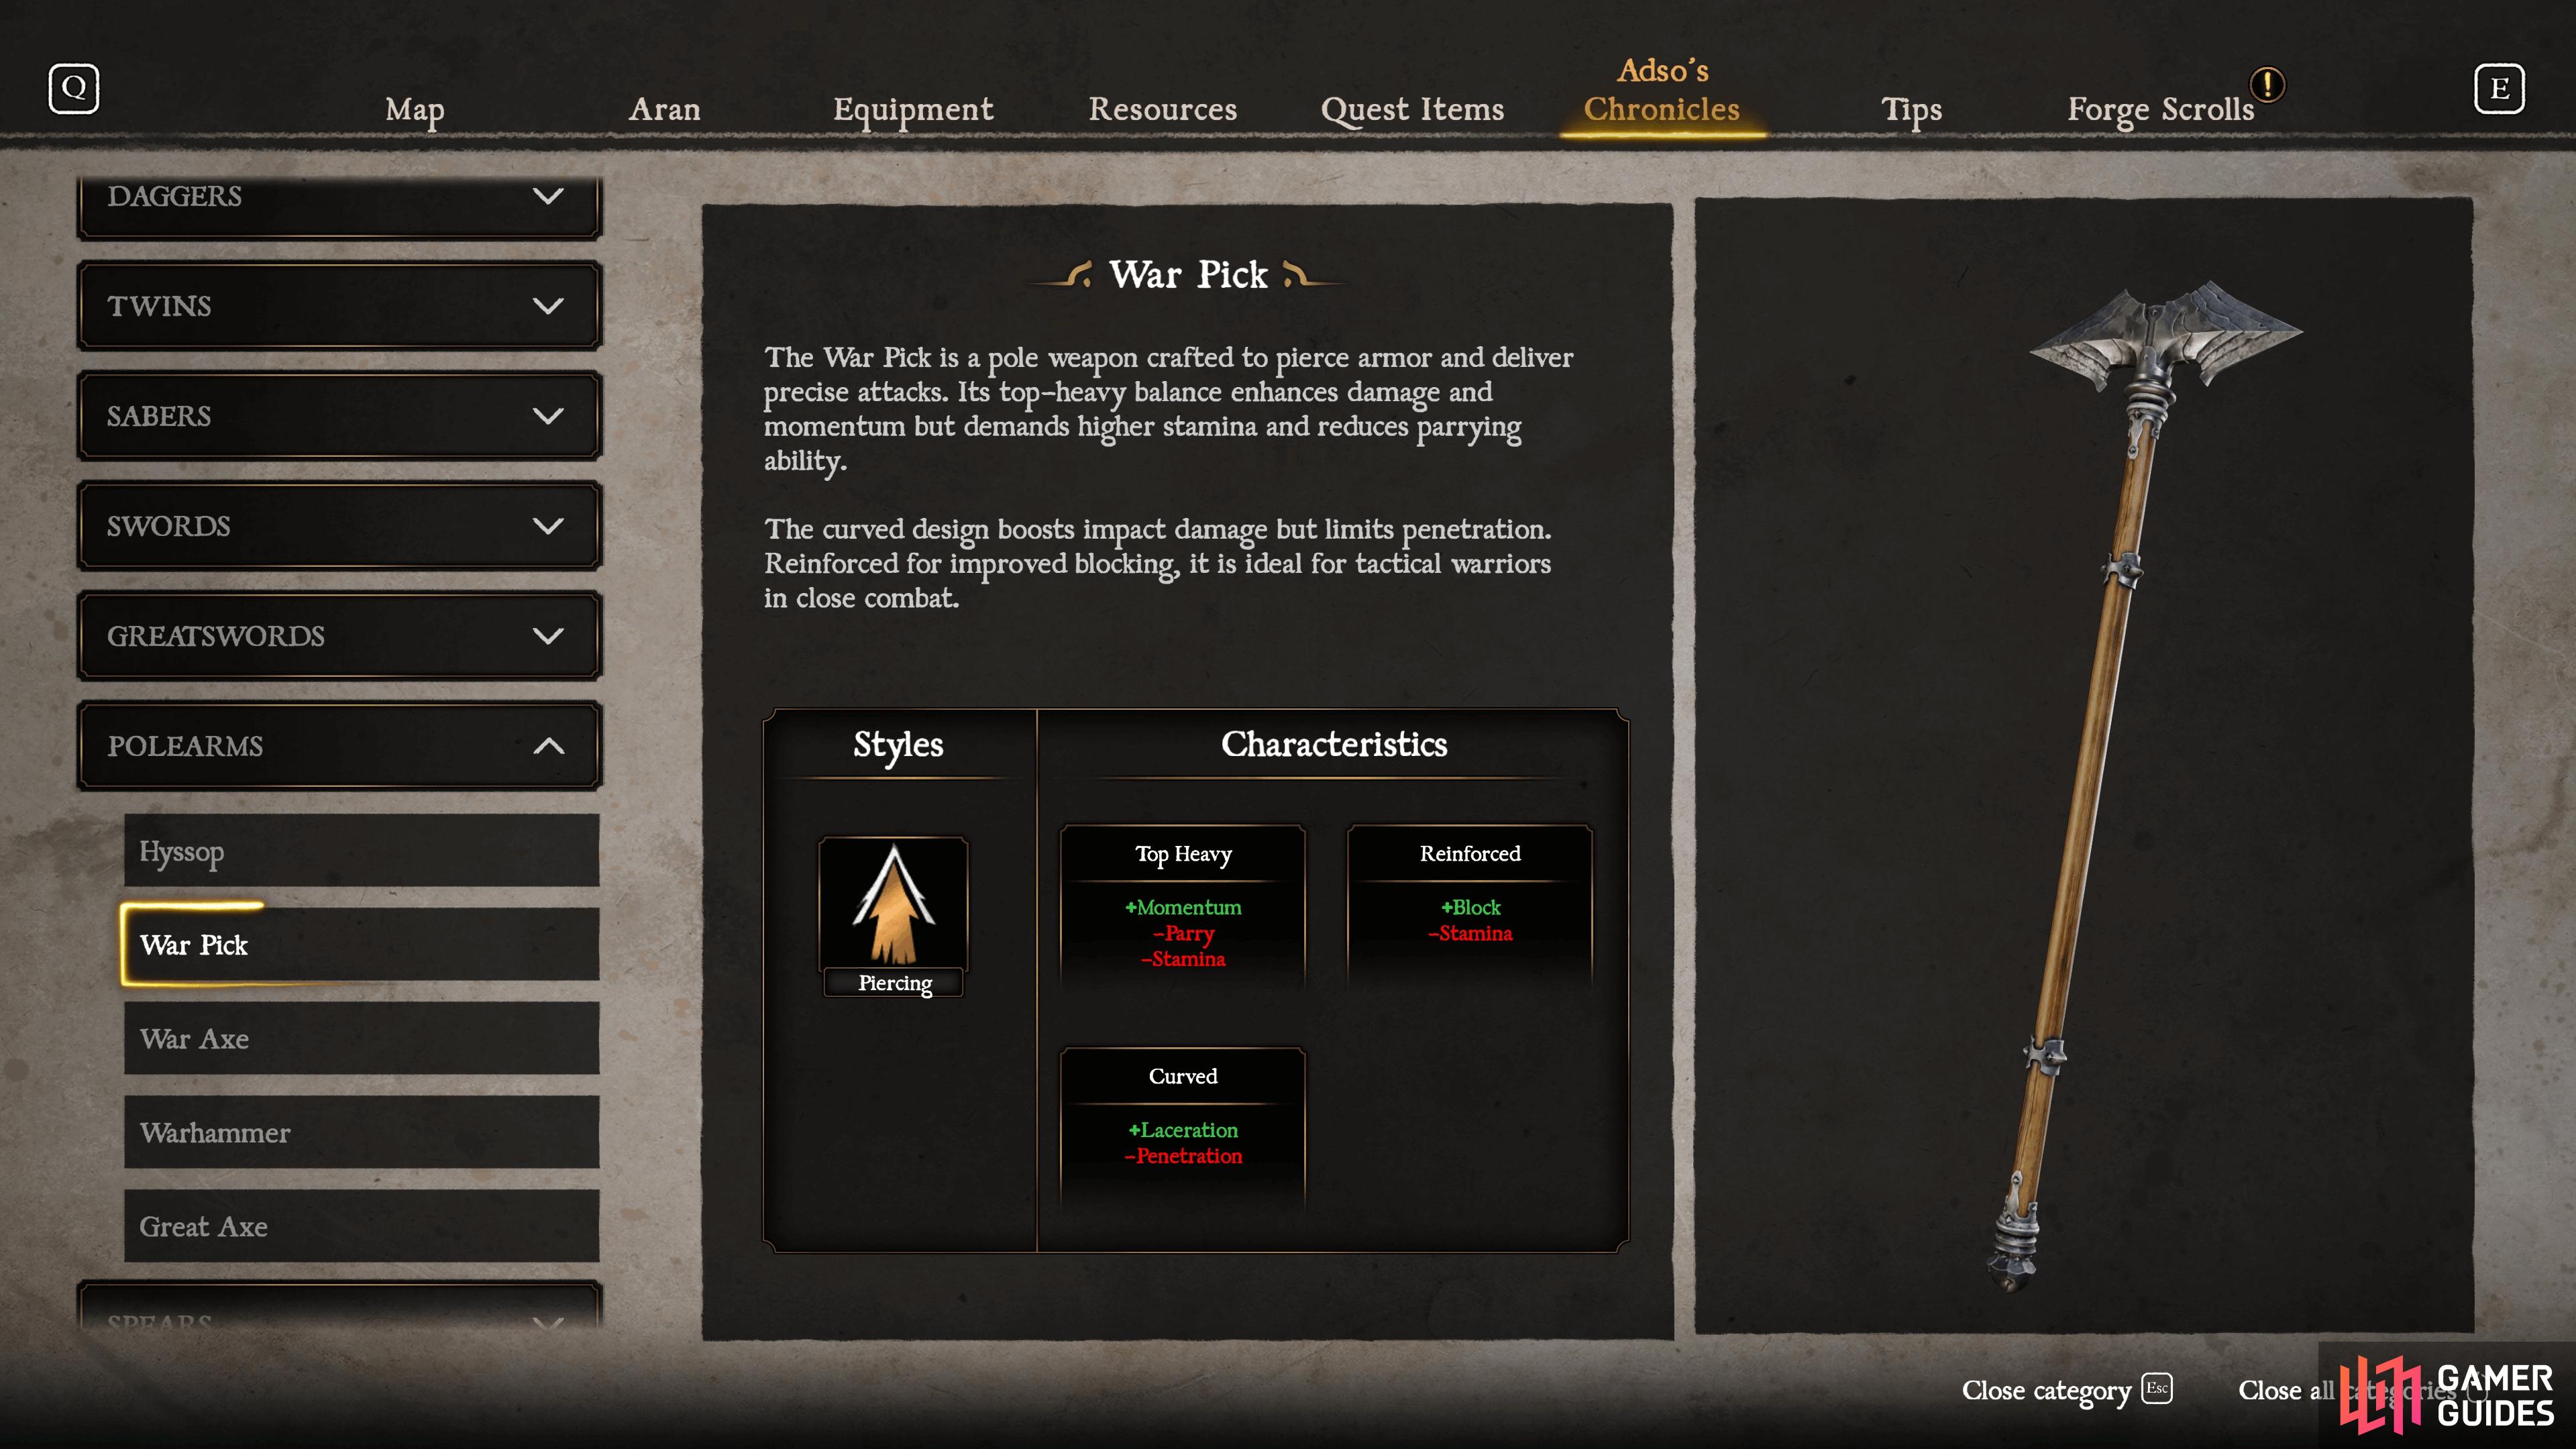
The War Pick has two damage styles.
| Style | Characteristics |
|---|---|
| Piercing | Top Heavy (+Momentum, -Parry and Stamina), Reinforced (+Block, -Stamina), and Curved (+Laceration, -Penetration) |
You’ll have to wait a little until you can add the War Pick to your list of unlockable weapons as the required enemy, Spore Brutes, don’t start showing up until you make your way south of Bessacar Hamlet and enter the  Kar-Lethel Swamp. As soon as you enter the area, you’ll start encountering them when you go up to the northeast part of the area. If you’re looking to find a lot of them, then head to the Angel’s Cliff Anvil in the southwest of the swamp. By going up to northwest from here, you’ll find a cave that is packed full of Spore Brutes.
The War Pick only has the Piercing style available to it and has the lowest range of all of the available Polearms (56“ is the highest) however it arguably features the best block out of the Polearms due to its Reinforced Characteristic. This means the War Pick is great for being close up to the enemy, blocking their blows, and then thrusting the weapon out after to push them back. Consider using a Normal head for greater Penetration and, once unlocked, the 56“ Reinforced Shaft will prevent you from losing any Block on the weapon.
War Axe
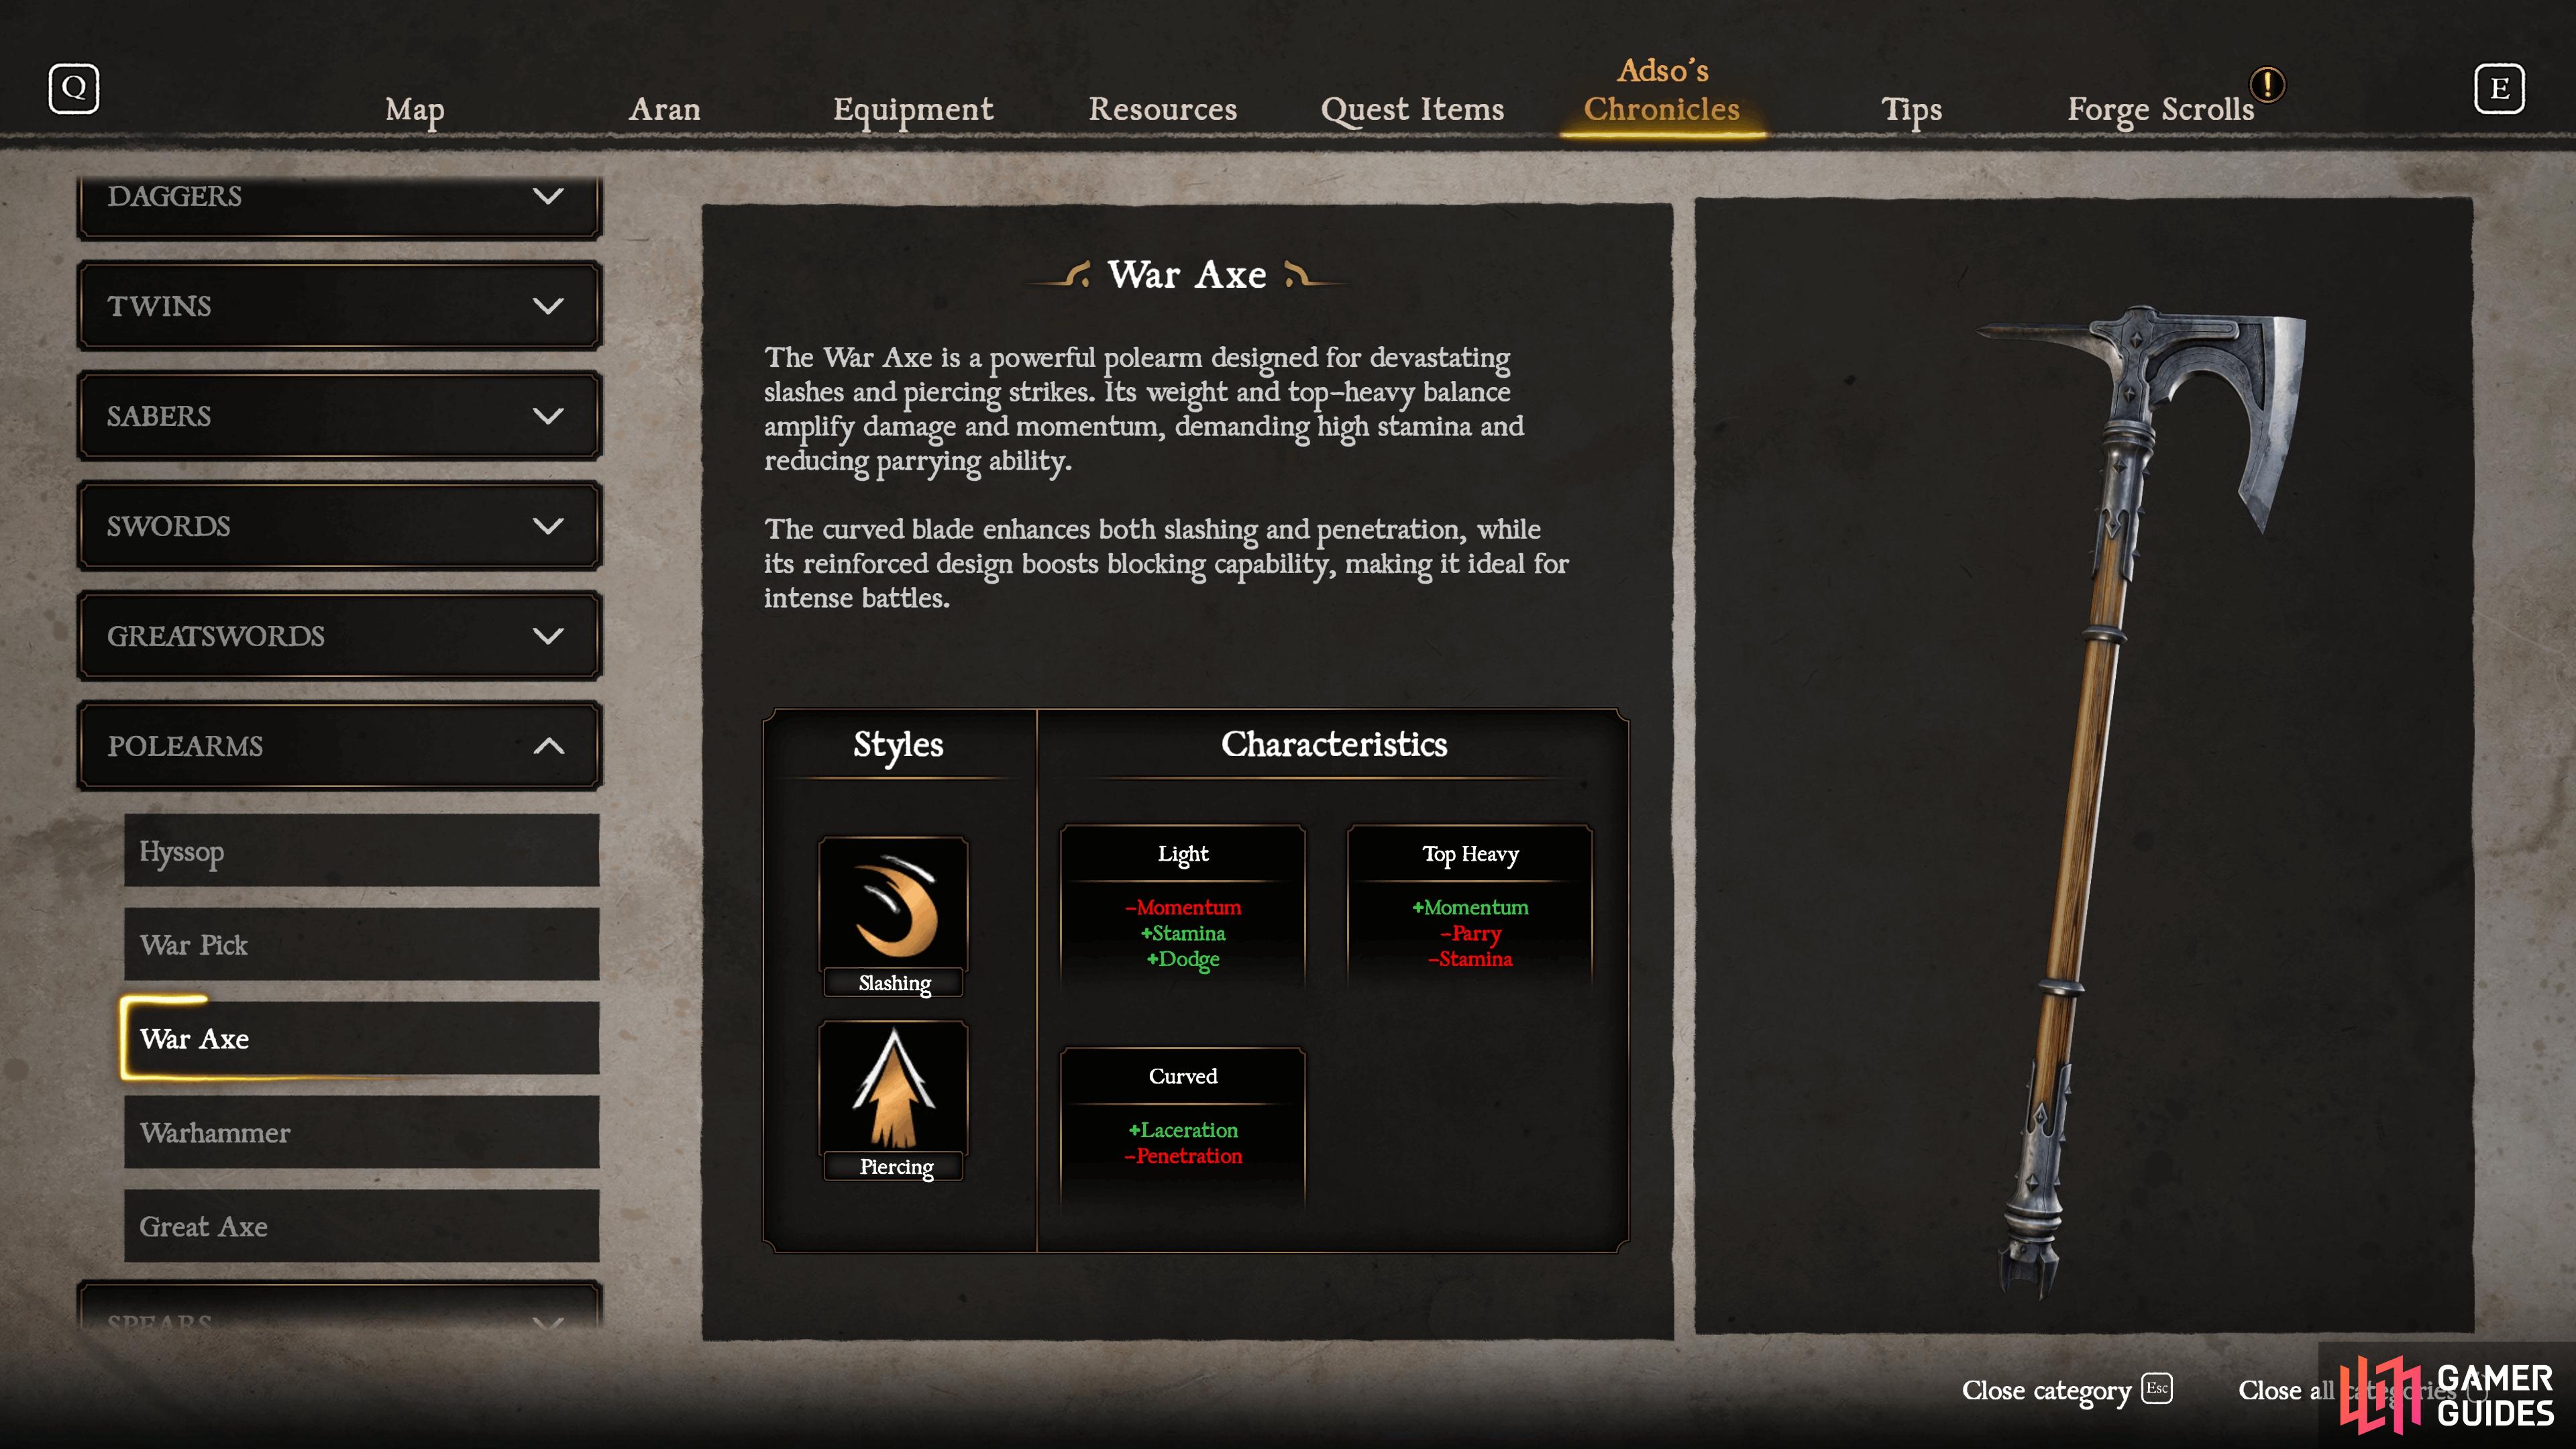
The War Axe is arguably the fastest Polearm.
| Style | Characteristics |
|---|---|
| Slashing and Piercing | Light (-Momentum, +Stamina and Dodge), Top Heavy (+Momentum, -Parry and Stamina), and Curved (+Laceration, -Penetration) |
While you can encounter your first Elemental almost immediately in Bessacar Hamlet (head to the north of the area), it is only a single encounter, and you’ll need to defeat 20 of them to unlock the weapon, so you could be there a while farming them (fortunately the Anvil is very close). You’ll encounter them in greater numbers in the southern parts of Kar-Lethel Swamp or the rivers of  Doyen Graves too, but essentially, where there is water you can walk into, you’ll find Elementals. If you’ve still yet to unlock this weapon by the time you reach Tok’s Kingdom, you can find plenty of them in
  Watchtower Domain, to the east of Tok’s Tower (expect to see three or more here at any given time).
The War Axe is one of two Polearms that features two Styles on it, and one of two that features the Slashing style, making it rather unique in this category. While still on the shorter end of Polearms (a maximum of 60“), it makes up for it by having the Light characteristic which improves its Stamina and Dodge, for the most part, this is the quickest Polearm out of the five on offer. When building the War Axe, look for opportunities to increase its Stamina by keeping the Shaft at 46“ and attaching a Medium Pommel. If you’re not using the War Axe to attack enemies with heavy armor, then slap a Curved head on for greater damage at the expense of Penetration.
Warhammer
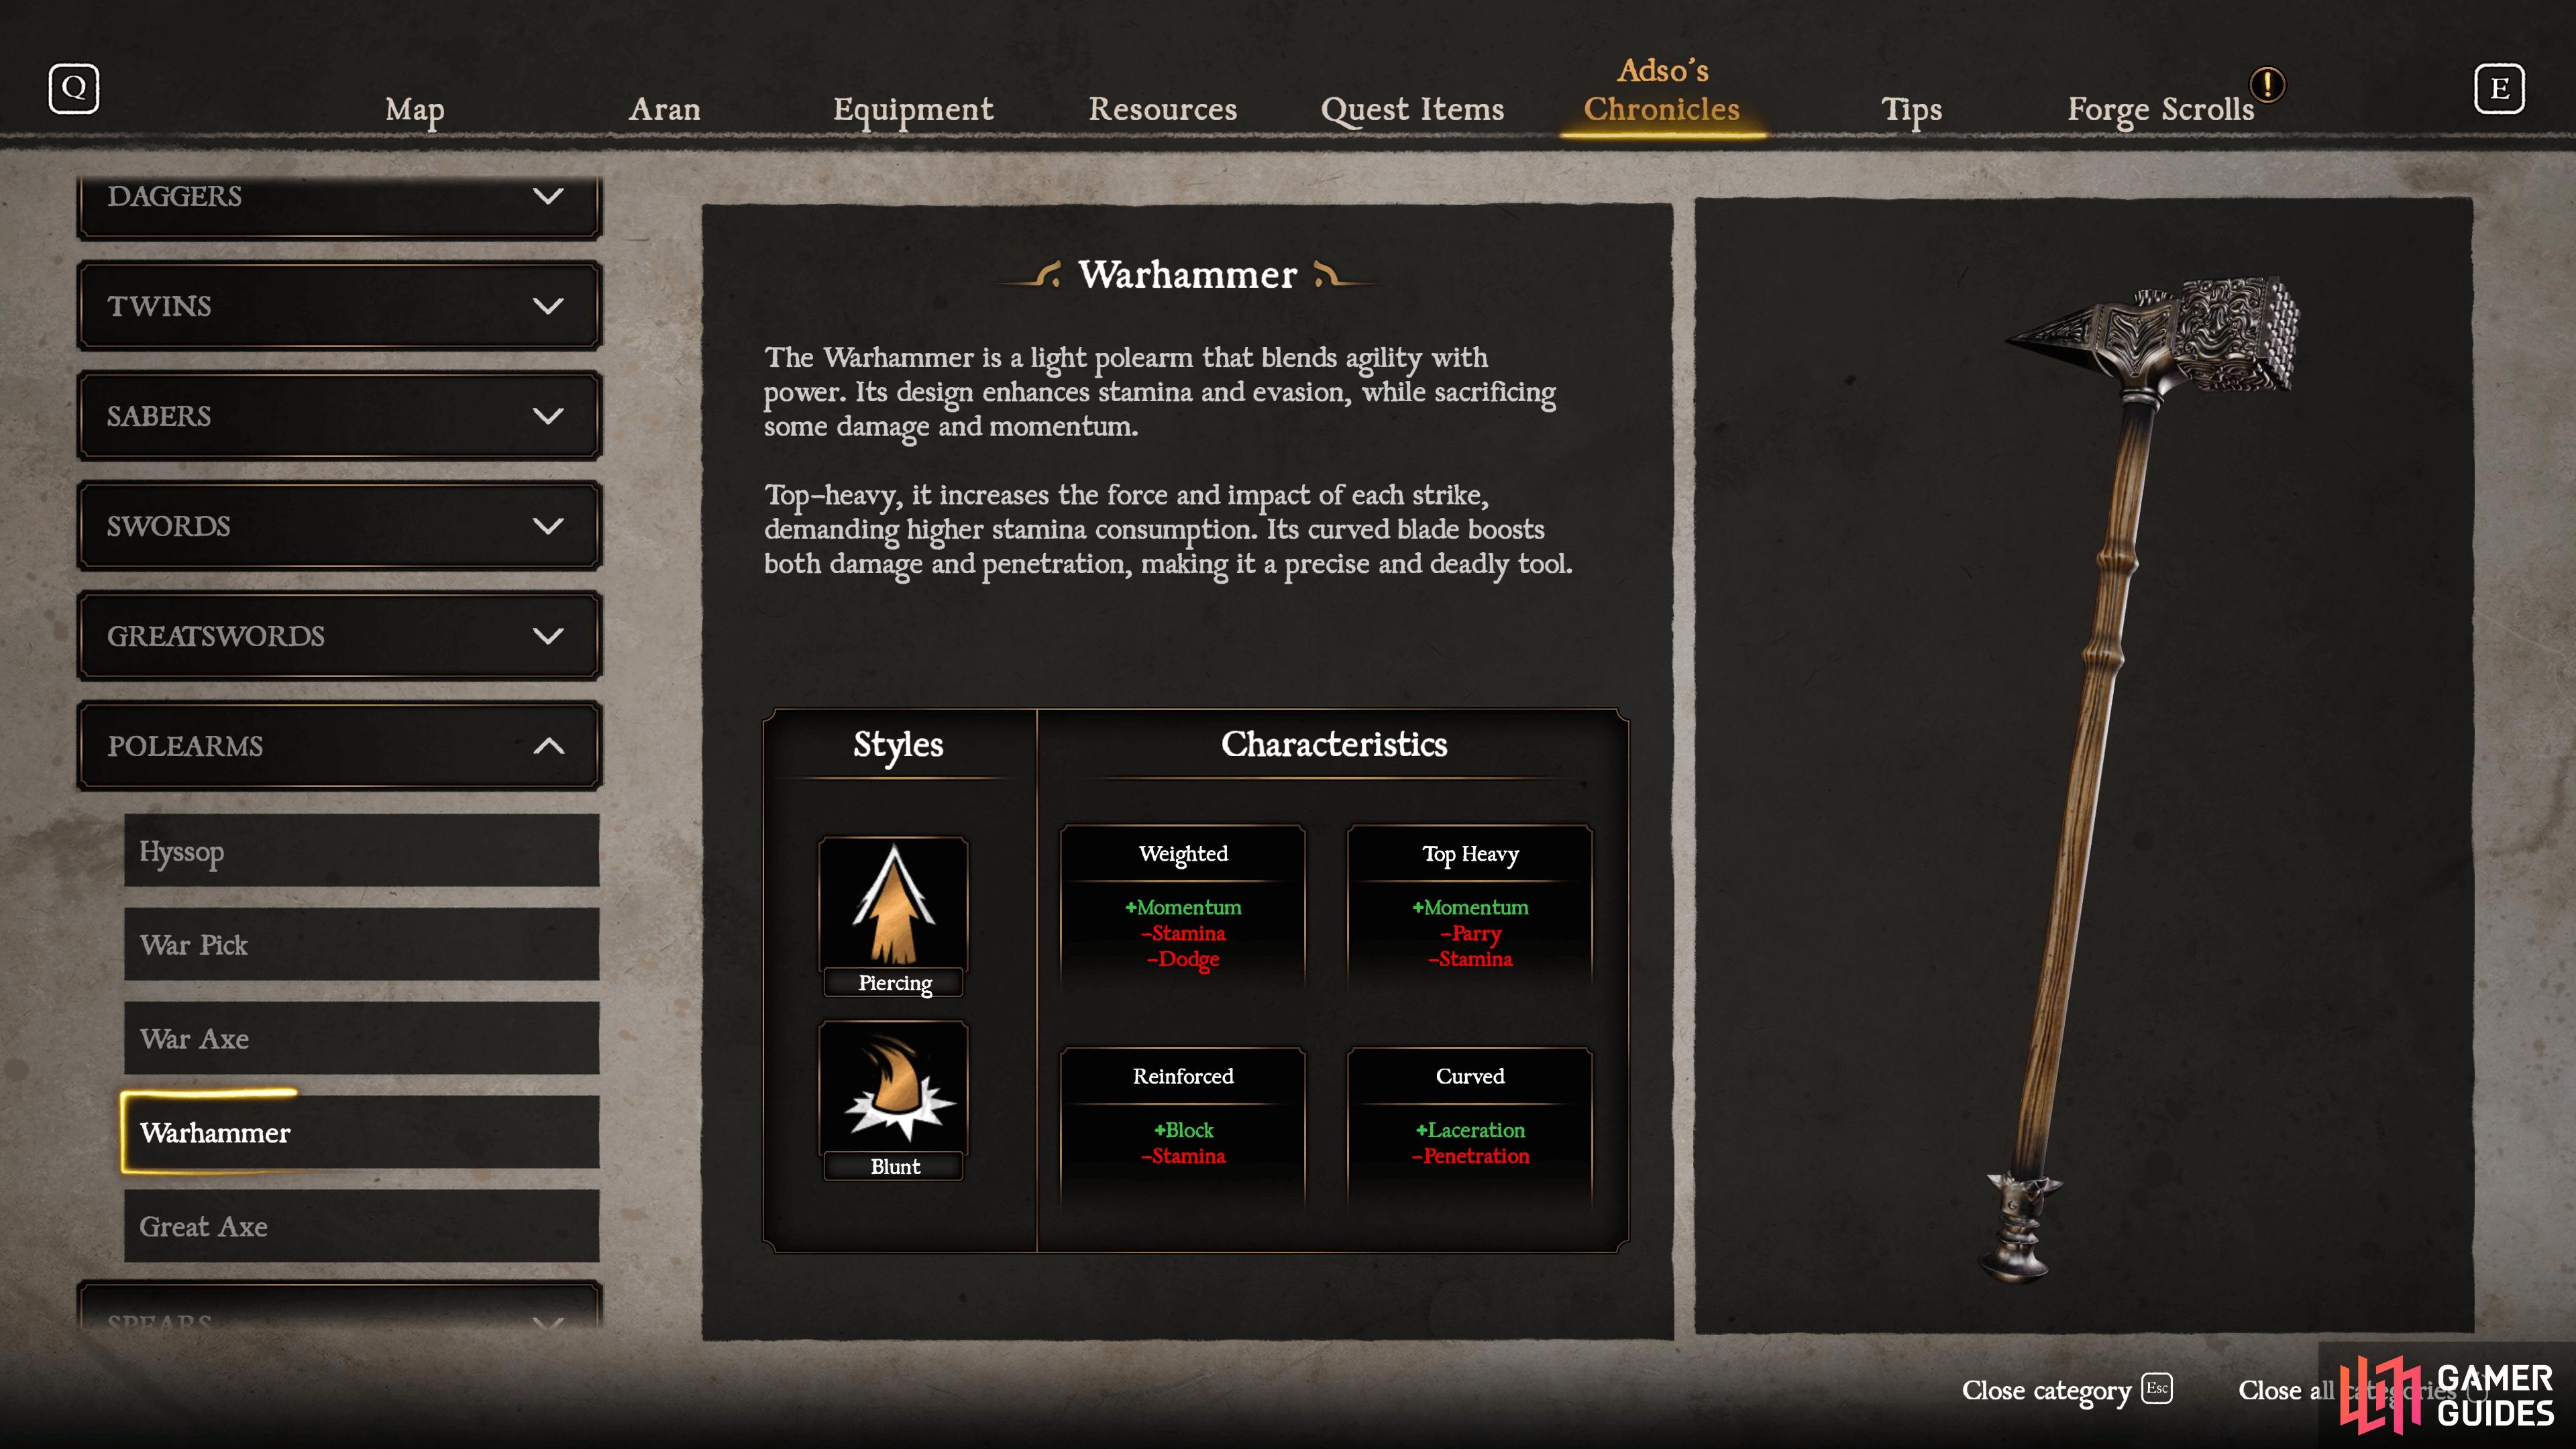
The Warhammer has two styles including one for Blunt damage.
| Style | Characteristics |
|---|---|
| Piercing and Blunt | Weighted (+Momentum, -Stamina and Dodge), Top Heavy (+Momentum, -Parry and Stamina), Reinforced (+Block, -Parry), and Curved (+Laceration, -Penetration) |
While you’ll come across your first Mayhem Warmonger early in the adventure, leading south into  The Hollow Plain, it is unfortunately a key bearer, meaning it won’t respawn once killed. Fortunately, there is one that respawns in The Hollow Point itself, in the camp to the northeast of the area if you want to grind the 10 needed to unlock this weapon (use the Troll River Anvil in Bessacar Hamlet to respawn them). If you’re against grinding that one Warmonger, however, you can wait until you reach
  Belitara’s Witchwood to the northeast of the region where you’ll encounter plenty of them.
Like the War Axe, the Warhammer features two styles and the return of Blunt, making this very attractive for that reason alone as it’s one of the only weapons to feature Blunt as a secondary style. It’s also arguably the quickest of the available Polearms and where you should focus a lot of your thinking around building the weapon, as damage is not the main focus here. You should definitely add the 64“ Shaft, not only is the extra Reach useful, but you’ll also gain some extra damage and only lost 3% Speed (from an already massive 94%).
Great Axe
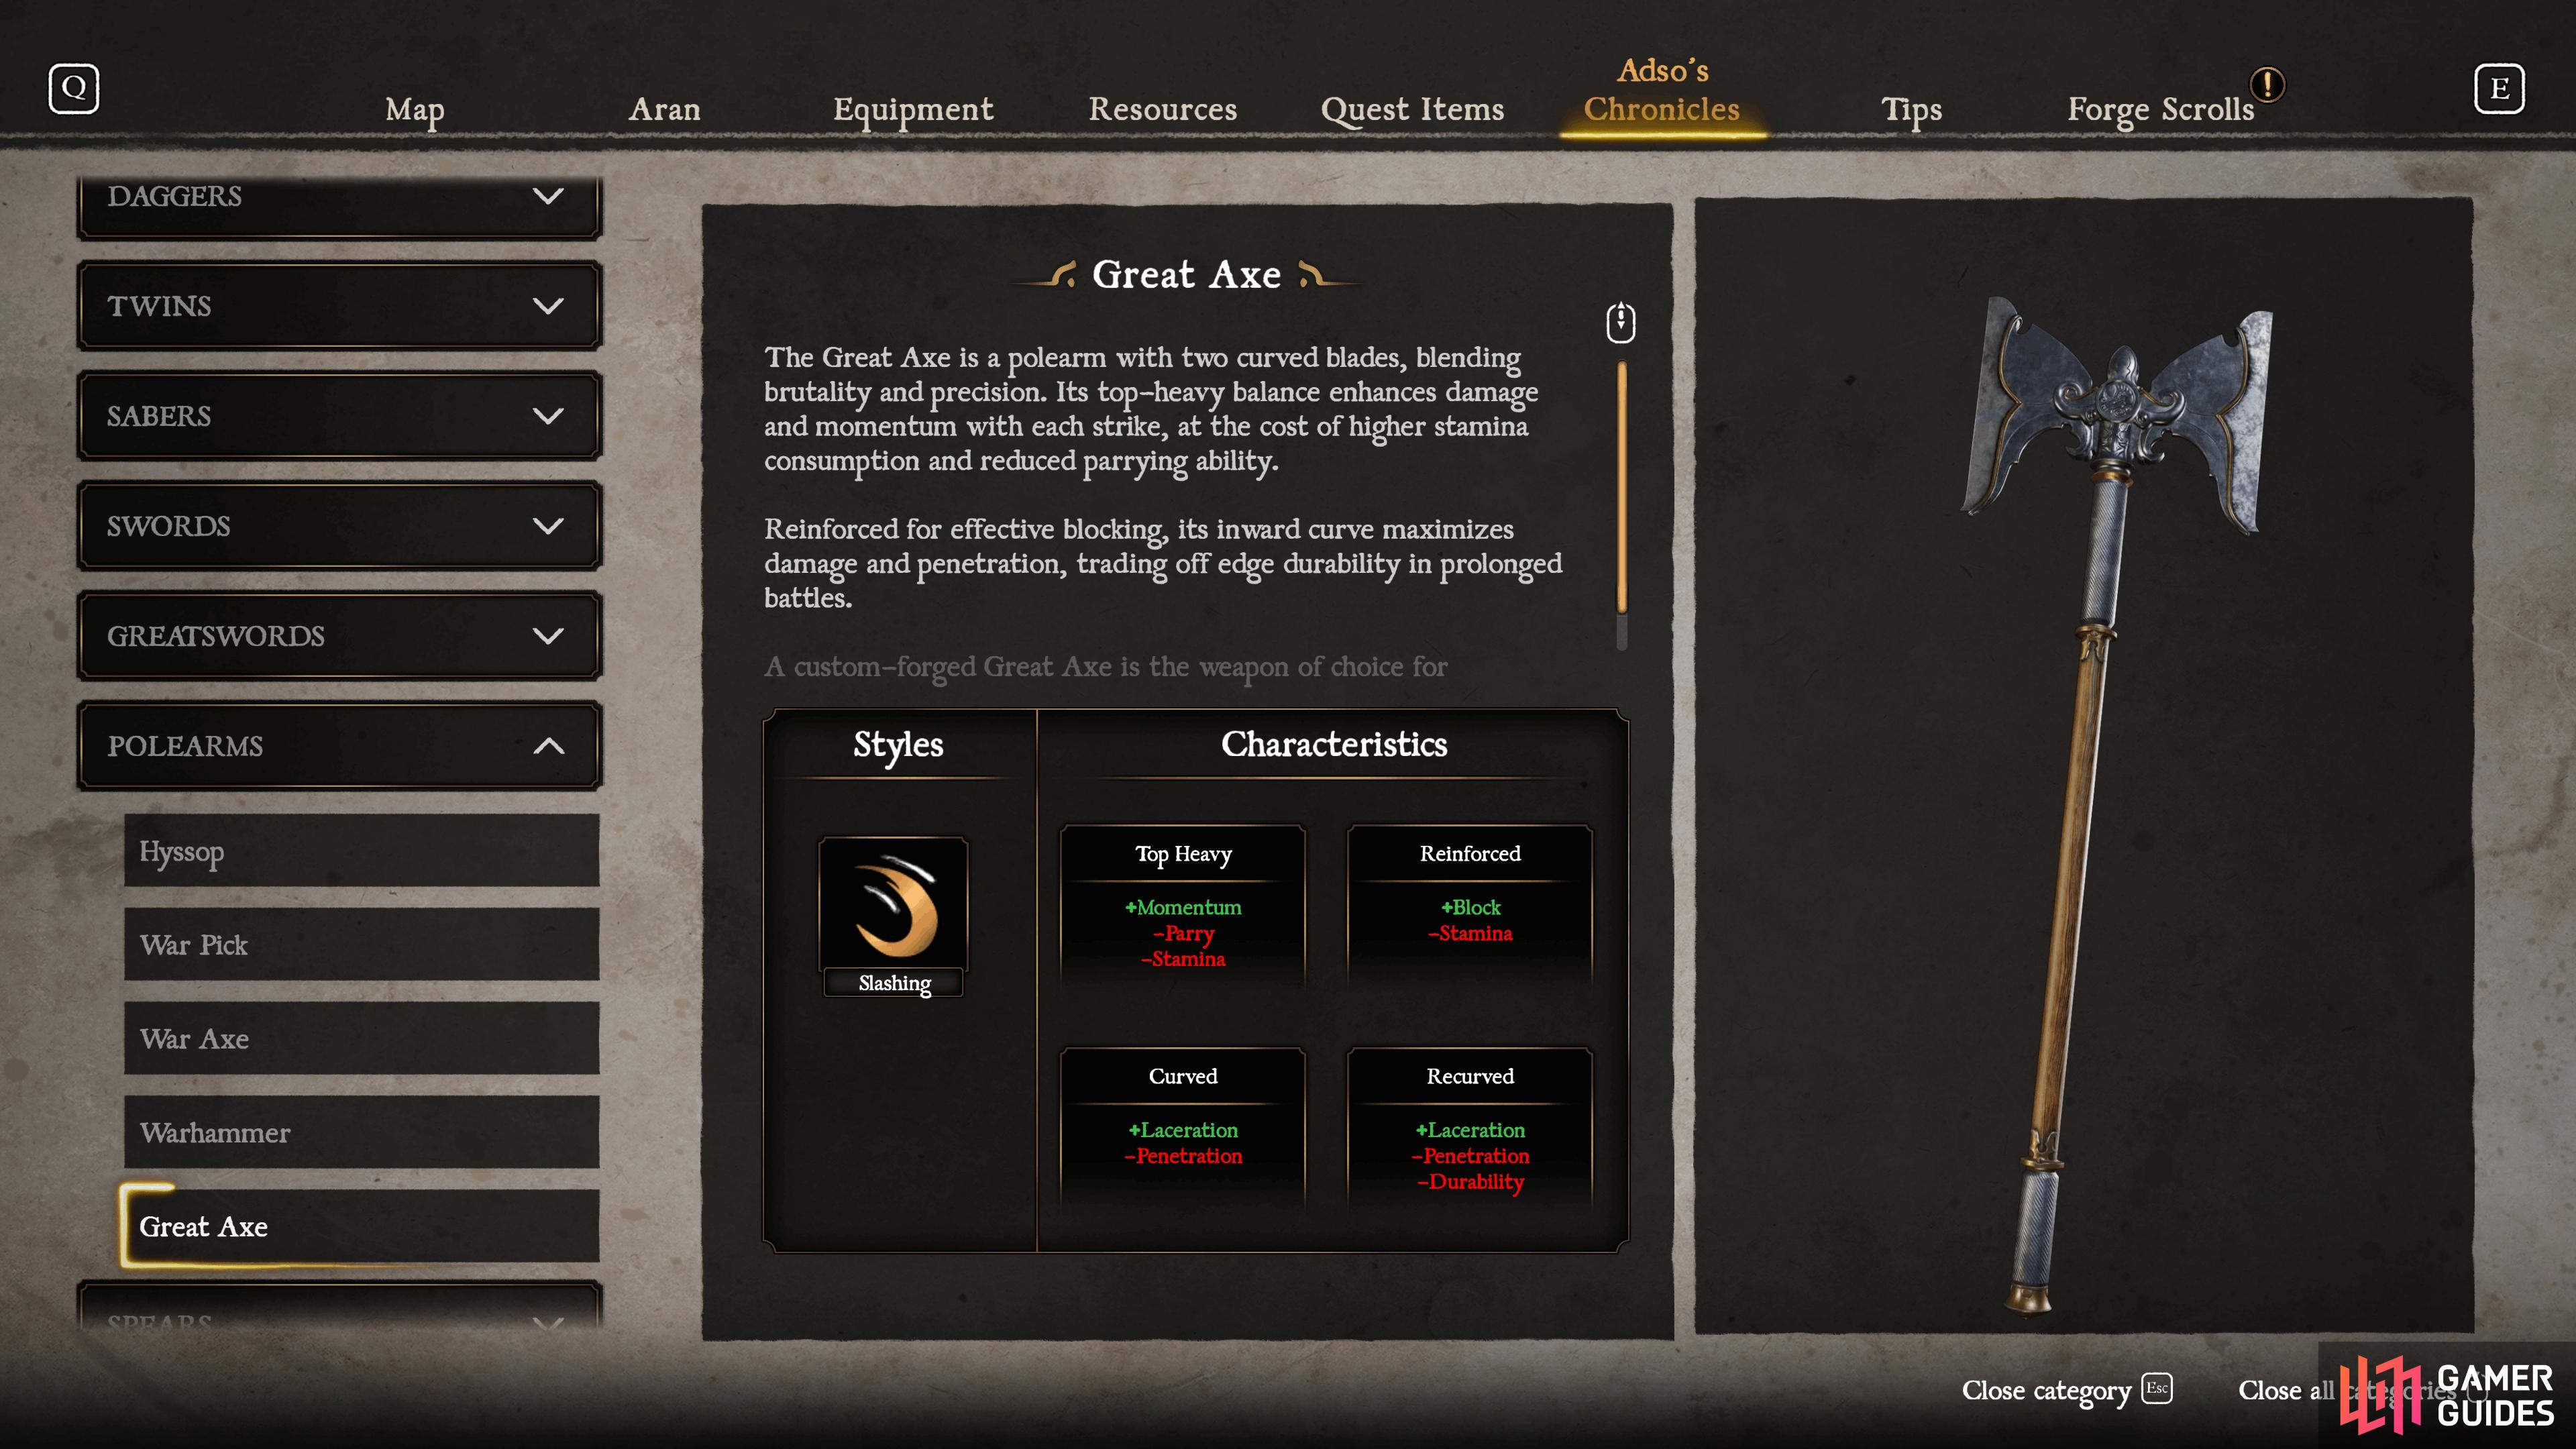
The Great Axe is the most difficult Polearm to unlock.
| Style | Characteristics |
|---|---|
| Slashing | Top Heavy (+Momentum, -Parry and Stamina), Reinforced (+Block, -Parry), Curved (+Laceration, -Penetration), and Recurved (+Laceration, -Penetration and Durability) |
The Great Axe is the final, and toughest Polearm to unlock in Blades of Fire, as you’ll need to defeat the challenging King Ashkhanar, a Thaumatergist that will spawn in specific areas of the game. You can encounter him at the following locations:
- Aceides’ Domain - Doyen Graves: From the Gazebo of Solitude Anvil in the east of the area, drop down and go through the large gate (which you drop with a switch).
 Northern Hiss City: Make your way down into the center courtyard (that leads to the Central Hall to the south), make sure you deal with the other enemies in the area before challenging him.
 King’s Bastion - West Tower Cells: Make your way over to the southeast tower and ascend to the top of it.
The Great Axe is the Polearm of choice when focusing on pure damage in this category of weapons, as you may expect with the difficulty in unlocking it. Featuring the second longest reach (at 68“) of all of the Polearms, you can deal heavy damage at range. It does take a hit to durability in exchange for its damage and requires more Stamina per swing to make use of it, so with that in mind, you may want to consider only bringing this weapon out for the most challenging encounters.
All Polearm Seneschal Locations
Throughout your adventure, you’ll encounter statues, known as Seneschals, that when presented with a weapon belonging to that type, will unlock a new part to make use of in the forging process. You can see on the Forger’s Scroll screen how many parts a weapon can unlock and you will only gain a part for the weapon presented. The table below will show you where to find all of the Polearm Seneschals.
| Number | Location |
|---|---|
| 1 | Besacaar Hamlet - Troll River Anvil: Southeast corner from the anvil. There’s a path leading down instead of taking the door to the south |
| 2 | Kar-Lethel Swamp - South from the northern entrance, overlooking a cliff |
| 3 | Kar-Lethel Swamp - Angel’s Cliff: There’s a cave nearby just to the west of the hut, go in and then right to reach this statue on the cliff’s edge |
| 4 |  The Crimson Fort - Eagle’s Bridge: Go all the way to the bottom and before you reach another bridge across, look to the cliff on your left to find a gap leading to this The Crimson Fort - Eagle’s Bridge: Go all the way to the bottom and before you reach another bridge across, look to the cliff on your left to find a gap leading to this |
| 5 | Doyen Graves - Three Towers: Go in the ruined tower to the southwest of the anvil |
| 6 |  The Iron Castle - Entrance: Go to the eastern side of the courtyard and then go left to find two The Iron Castle - Entrance: Go to the eastern side of the courtyard and then go left to find two  Rotspawn. On the right wall is a gap you can go through that takes you to it Rotspawn. On the right wall is a gap you can go through that takes you to it |
| 7 | Tok’s Kingdom - Northern Hiss City: In the far eastern corner of the area, requires a Viper Key |
| 8 | Tok’s Kingdom - Citadel of Tharas-Munda - The Penitent’s Gate: After dropping down and taking the moving platform across, go up the stairs and after the sand trap, go to your left |
There you have it; you now know everything there is to know about the Polearm category of weapons in Blades of Fire. You can now deliver brutal blows to any enemy that dares cross your path.

No Comments