
Messing with MyCastle, IV
Not much to do with MyCastle this time around, there are all of two new buildings you can construct, and that’s about it. First up is the Dawn Dragon, which heals your defenders in castle battles, should you care to participate in such ancillary content.
More interesting is the Arena , which allows you to gamble resources (ore and food) on battles between a randomly chosen character (or characters) of yours and an equally random enemy (or enemies). Bet one resource and win, you get two back. If you lose, you forfeit what you bet. It’s not a bad way to duplicate rare ores and foods you may have collected by visiting other castles or collected as random drops in battle.
Mokushu Forest
| Location | Objective |
|---|---|
| Ninja Village Mokushu | Rout the enemy. |
| Enemies |
|---|
| Ninja |
| Shrine Maiden |
| Diviner |
| Archer |
| Spear Fighter |
| Master Ninja |
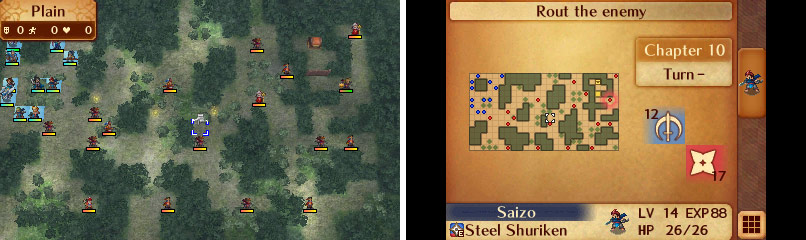
Map of Chapter 10.
Start the next mission and your army will advance to Mokushu , yet another independent nation near Hoshido. There are an awful lot of those, eh? The boss from the previous level will attempt to parley with you after which you will find that the previously amiable ninjas in this region have allied with Nohr. Untrustworthy ninjas?! Who’d have thought? Simply put, Mokushu is playing political opportunists with you. Prepare for battle!
As should be expected, there are Ninjas everywhere on this map. You might want to keep magic-users on the bench for this fight. Speaking of magic-users, the enemy also has Diviners and Shrine Maidens, so they’ve got plenty of variety. Finally, rounding things out are Spear Fighters and Archers and Kotaro , the leader of this treacherous Ninja, who is a Master Ninja. Needless to say, green weapons will come in very handy in this fight, but you’ll also be well-served by bringing Sky Knights. Necessity dictates taking along some red-weapon users and healers, too. In addition, be sure to bring Azura along, as she’s got another role to play besides just Singing and cutting things with her Naginata.
As for the terrain, the forest is going to hamper and bottleneck your foot units. Thick Forest is outright impassable, and Forest will slow you down. Sky Knights, however, can fly above it all and take paired character for a ride. And of course there are Dragon Veins, which will reveal hidden spike traps on the indicated map tiles. If your unit or an enemy unit is on a spike trap at the beginning of their next turn, they’ll take two damage. This isn’t much but it can add up, and is a real nuisance (although perhaps it is also an experience gold mine for your healers!).
You’ll start out in the north-western corner of the map, challenged by Ninjas and Spear Fighters, but the enemy will not sit passively by this fight; expect them to be joined by other Ninjas and other foes. There’s also a spike trap just south-east of where you start out, which can’t be disarmed, and encompasses the ground upon which you’ll likely face off against the first batch of baddies. A Sky Knight can, however, ferry a noble unit (the protagonist, Azura or Setsuna) over some Thick Forest to the east and activate a Dragon Vein to spring a trap, if that interests you.
You should probably leave Azura along the western edge of the map, however, as after a turn of fighting Takumi will show up, and he… isn’t quite right. Do as Azura suggests, use her singing ability (move Azura adjacent to Takumi and select the “Talk” command) and Takumi will soon be cured of whatever was ailing him and will join your fight. As an Archer, he should be a great help, as green weapons (bows) work well against many enemies on this map. The inherently powerful Fujin Yumi and his high crit rate will only help. Oh, and his divine bow also ignores terrain… Takumi is just all sorts of good here.
Fight your way east and activate spike traps (you might as well; they’re going to trigger anyways). This map, again, is all about Ninjas. They’ve got a high dodge rate, which will make you waste turns on spike traps, and you might need to cycle out units in safe spots so they can recover from cumulative debuffs they’ll gain from the Shuriken. Even if you’re units are strong and high-leveled, a few hits will make you severely vulnerable to damage. The enemy Shrine Maidens will drop their healing staves when they die, giving you extra healing, should you need it. Also, behind Kotaro is a chest, which can be safely (and sneakily!) reached by pairing a Ninja with a Sky Knight and dropping the Ninja off near the chest. Your reward for all this effort is a Rescue staff.
After finally navigating the level you’ll reach Kotaro, who has some interesting weapons. Like any good Ninja he’s got a Shuriken, but his “Dual Shuriken” has the odd property of “Inverts weapon advantage and doubles its effects”. Normally blue beats red and green beats blue, but with this weapon equipped, red beats blue. Also, his melee weapon, a Kodachi (which will be dropped at the end of combat) is a red weapon that’s rather gimped. Attack him with red or blue weapons and he’ll fall in short order.
After your victory, Takumi will make peace with your protagonist and Azura. Then he’ll permanently join your party (Hinata and Oboro are pleased). You’ll also be joined by yet another Ninja, Kagero, one of Ryoma’s retainers. It’s time to continue your search for Ryoma.
No Comments