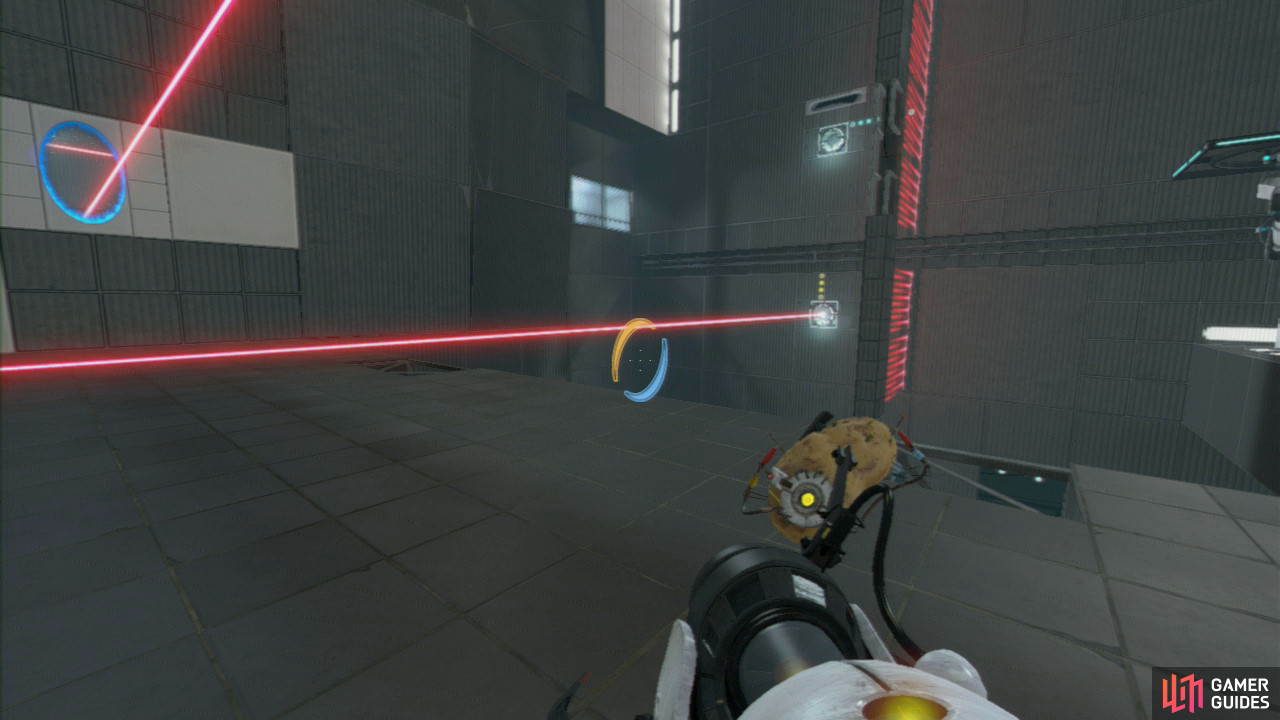
Place your first portal on the wall where the beam hits the wall and then look for the wall panel on the wall to your left (in between the power receptor and the monitor) that has four mini blocks either side of it. Set your second portal here so the beam hits the receptor at the other side of the chamber.
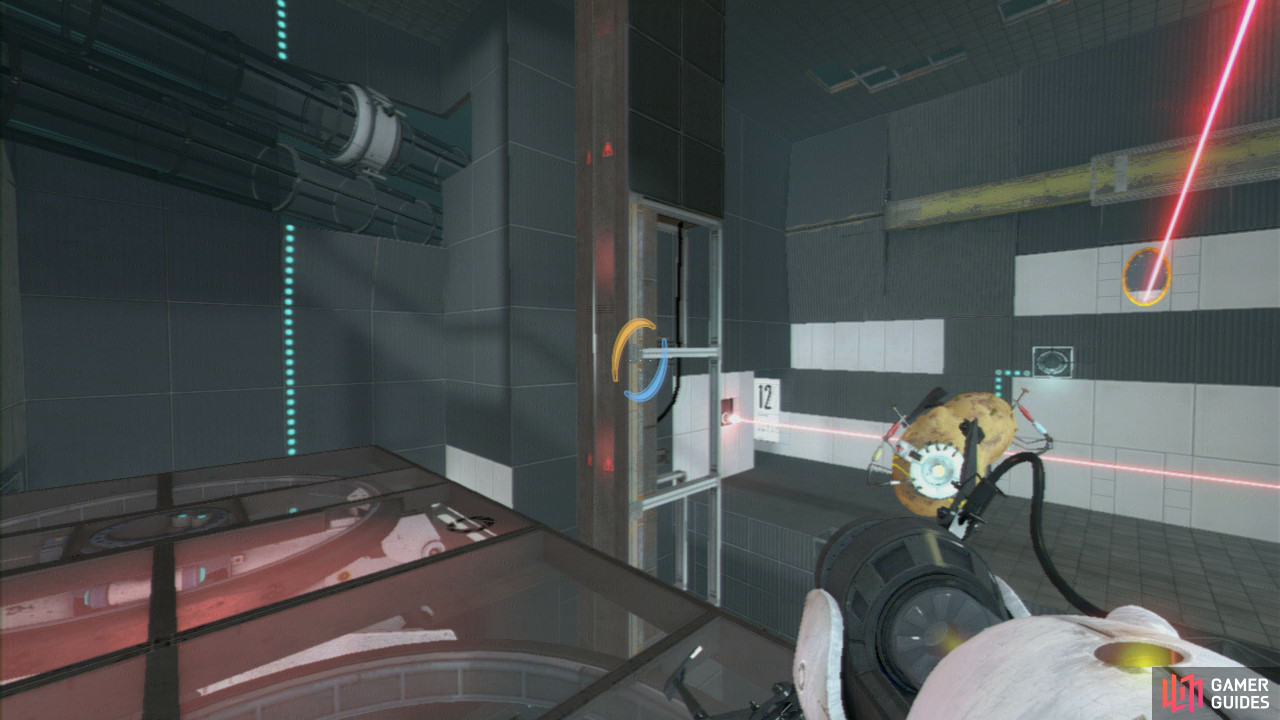
Wait for the moving platform to reach the wall on the far left-hand side of the room and set a portal up on that wall so it’s overlooking the platform. Step through the portals so you’re now on top of said platform.
Position yourself so you’re standing on the far right-hand side of the platform and get the portals repositioned so they’re powering up the platform once again.
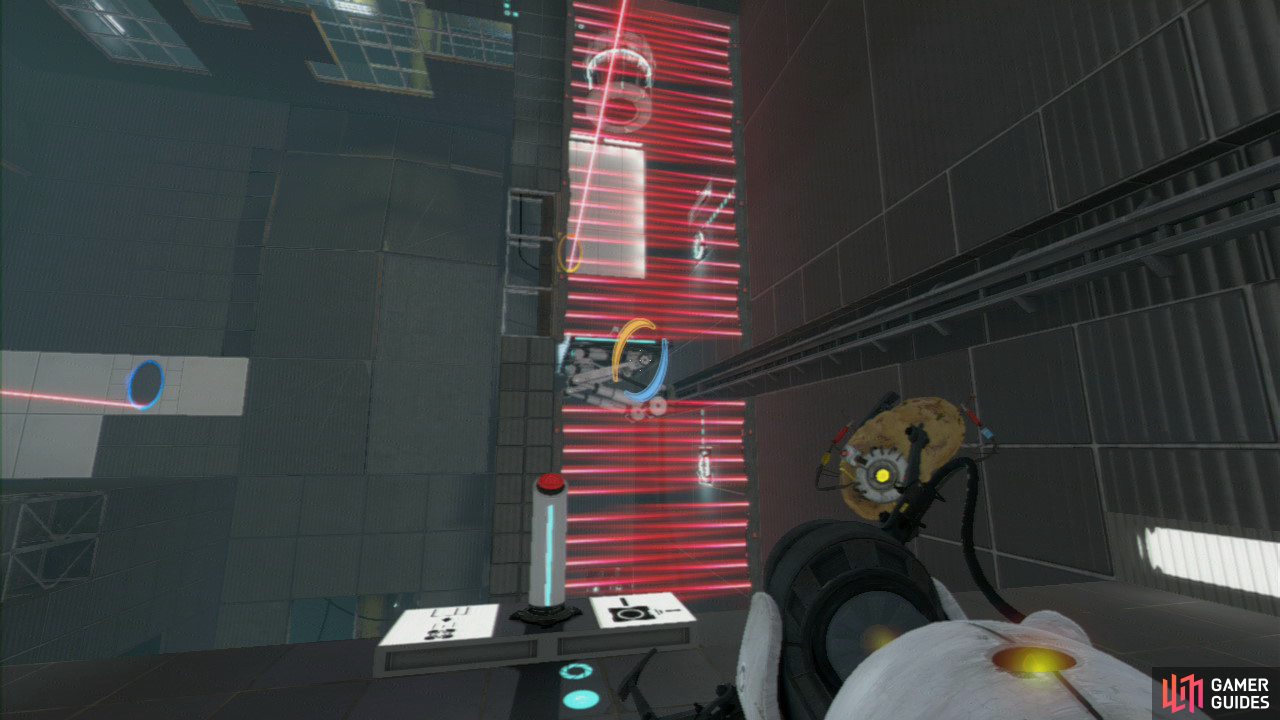
Once you’re moving again zoom in and place your crosshairs at the highest wall panel (directly above the portal that’s aiming the beam at the receptor below you). This will remove the killer laser beam field on your immediate left (so be quick otherwise you’re toast)!
With the beam field removed for now, walk across to the far left side of the platform and reposition the lower portal so it’s once again powering up the platform. Jump off to the button just below you and hang around here watching for the platform to arrive back at the wall over at the far end of the room.
Once the platform reaches the wall, remove the portal that’s directing the beam to the receptor and place it up on the far right-hand wall, shutting it down. Hit the button and a Displacement Cube will drop down onto the platform.
Now turn to your immediate left and fire a portal here so you can step through and onto the platform with the Displacement Cube now resting on it. Repeat the steps as before to get yourself moving (remembering to stop the laser beams as the platform is just over halfway through it).
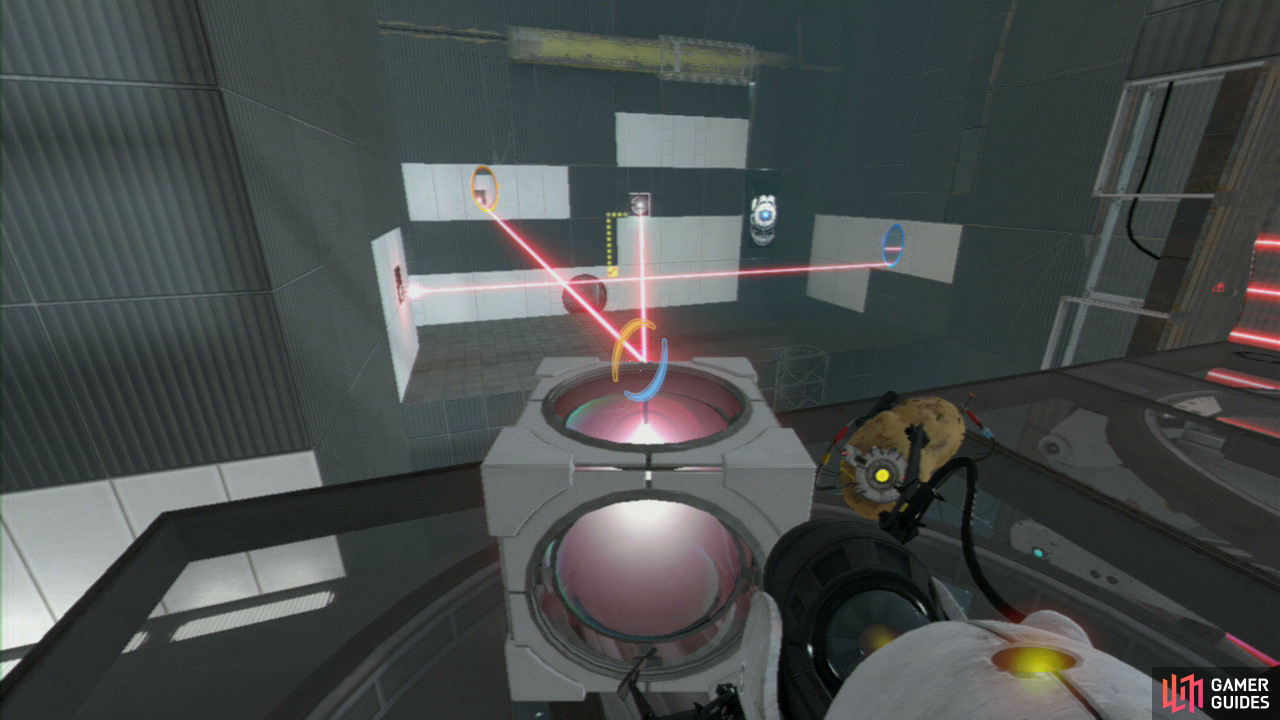
Once the platform is closer to the left side of the room, stop it from moving and position the Cube just in front of you. Get a portal on the laser beam and then one directly in front of you so it’s hitting the Cube. Direct the beam so it’s powering up the receptor positioned just above the exit.
Set the cube down and then jump back down to the platform below. Set up a portal near the exit and on a nearby wall and walk on through. Now simply reposition the portals the way they were (so the beam is powering up the exit) and now walk on until you have to jump into the transportation beam.
It’s now a simple matter of following the metal walkways until you drop into the room and the screen fades to black…
No Comments