
Before coming here, refer to the “The Zora’s Flippers” page, which tells you how to obtain the Letter in a Bottle and subsequently the Premium Milk . You don’t need the milk to come here, but if you’re going here, you may as well deliver it to save time. Also be warned that this area can be difficult early on. From the Tower of Hera weather vane, go one screen right; continue right to find a broken bridge. Fire the Hookshot right, at the wooden pole on the other side, to cross the gap.
Past the bridge, the summit stretches onwards. Hastily make your way right, avoiding the centaur-like Lynels, because they’re strong. Then take the exit in the top-right corner. Here, there’s a large mountainous area with a peak in its centre and various monsters to watch out for. Make for the right side of the peak, where Maimai #27 is on the wall. Next, make your way round to the peak’s bottom to find a cave; inside is a puzzle room requiring the Hookshot and Link’s merge ability to conquer.
$$$item 3866
From the entrance, hookshot the wooden frame up ahead and Link will painfully slam into the wall. As soon as the “Merge (A)” icon appears, press A to merge into the wall; the timing can be tricky to get the hang of. Then walk left or right and emerge when there’s space for your feet. Next, head up the stairs and hookshot the wooden frame and merge like before. From here, walk left and emerge when the moving wire mesh platform is underneath.
Wait for the wire mesh platform to meet the wall on the left (merge back into the wall you came from, should it go the other way), then merge to the left, walking right until you reach a ledge. Here, fire the hookshot up to snare a pull switch and then pull down to activate it. A stationary wire mesh platform will appear; go on it and grab the rupees to the right. Walk back left a few paces and hookshot the wooden frame ahead, then merge and walk right, before emerging on the ledge.
Go right, along the ledge, and wait for your gauge to refill. Next, merge into the wall and walk right until you reach another ledge. Step on the red switch to make the small wire mesh platforms move. Go left, across the small platform, then look to your left. Hookshot the wooden frame to the left and merge, then quickly walk left. Follow the rupees in the wall and stop at the final rupee, then wait for the small platform to appear below you, before emerging. Finally, remain on the platform to reach a chest containing 100 rupees .
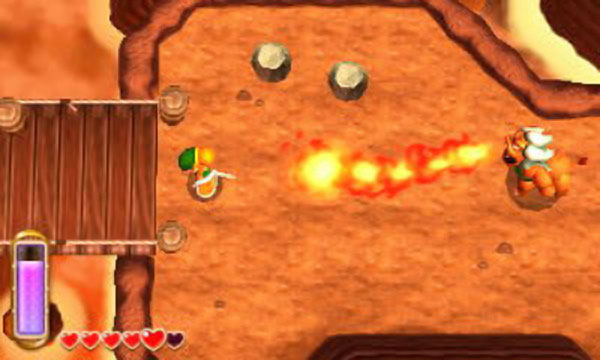
Lynels are centaur-like monsters that are strong, tough to kill and breathe fire. Early on, avoid them like the plague. Later, when you’re stronger, block their flames with the Hylian Shield or walk behind them unnoticed. Then slash at them non-stop, moving forward each time to chain your hits (unless you’ve cornered them). If there are two Lynels, you can also run between them so they get caught in the cross-fire.
Return to the first screen with the Lynels and head for the bottom-right corner to find a cave. From here, the treacherous journey to Rosso’s Ore Mine begins. Inside, go one screen left and you will see a platform; stand on it and it will move left. When the platform stops, look left and you will see another platform further down. Quickly drop down left and you should hopefully land on the second platform. Watch out for Keese flying around.
The platform will move down; at the end, drop down to the third platform. This platform will take you left to a large circular area. From here, you can go in three different directions: left, down and right. Either way, watch out for two Lynels further down–they can breathe fire and fire hurts.
From the central area, head down to deliver the Premium Milk . Merge onto the wall to the south, then walk around and emerge when a platform arrives. These platforms are pretty easy; all you have to do is walk to the next platform when they meet. However, when you step on the third platform, beware of three moving spikes going left and right. Once you’ve passed the spikes, there will a new platform on the left and right side; take the left platform.
$$$item 3838
At the end, watch out for the Keese (bats) and leave the cave through the south exit. Outside, you’ll be on a lonely mountain ledge. Step right a bit and merge onto the wall just above, then walk right, across the gap, and emerge on the other side. On this new ledge, you’ll find Bouldering Guy–the person who requested the Premium Milk. Hand the milk over and he’ll let you keep the Bottle . Next, drop off to your left. After you land, pick up the small rock nearby to uncover Maimai #28 .
$$$item 3867
Next; enter the cave just ahead to return to the large cavern you were in moments ago. Inside, watch out for the Keese again and step on the platform just ahead. When you get to the part with three platforms, take the middle one to return to the large circular area.
Go left to begin a difficult trial for a Piece of Heart . Merge onto the wall on the left, then walk around and emerge when a platform with a smiley face comes. Have your Hammer at the ready. When the platform reaches the far left, hammer the face and let it propel you up to a higher platform. This next bit is where it starts getting tricky.
Look up to see a platform moving left and right. Wait for the platform to reach the far left, then as soon as it starts heading right, count 2-3 seconds and hammer the smiley face, hopefully propelling you to the platform and not the lava below.
$$$item 3835
When this platform moves right, look to your right and watch for a platform coming from above. As soon as you see it, hammer the face and it should propel you to the next platform; any later and you may fall down. Next, hammer the face just before the platform touches the wall to the left. With luck, you’ll land on a stationary platform or at least the next smiley platform (if you landed on the smiley platform, walk down to the stationary one, so your progress is saved should you fall next). This next smiley platform is the last one, but also the hardest.
As soon as you step on the platform, it’ll move left quickly. After a while, it will head up, then right. Finally, it will go down and turn left again, completing its cycle. To reach the higher platform with the treasure you desire, hammer the smiley face moments before the platform reaches the top-left corner. Once you’ve gotten the Piece of Heart, you now have to get back down… Look down and wait for the smiley platform to come from the left. As soon as it begins moving right, count 1-2 seconds, then drop down. The rest of the journey back should be simple.
Finally, from the central area, head right to reach Rosso’s Ore Mine . During the early part of the game, all you’ll find there is a lost Maimai. Like before, merge onto the wall on the right, then walk around and wait for a platform to appear below before emerging. Here, you must drop down platforms again, but the timing will be more difficult. First, step on the bottom-right corner of the platform and look to your right. As soon as the platform you’re on stops to the right, drop down right.
From here, wait until you can see the next platform and both your platform and the next platform stop moving. As soon as the platforms begin moving again, count 1-2 seconds and then drop down right. Next, keep to the left side of your current platform. Wait until it goes all the way up and stops. As soon as it begins moving down, count roughly 3 seconds and then drop down left. For the final drop, wait until the platform you’re on stops to the left. Then wait 1-2 seconds and drop down.
After landing, watch out for Keese below and take the exit to the south. You will now be outside again, on a lower part of the mountain. Head to the bottom-right corner to find a great fairy, who will replenish your heart–if you fell a lot before, you probably needed that. From the great fairy, head left and you’ll find a narrow log path. Slowly make your way across the log path and you’ll end up in an area with lots of rocks. Lift up the top-most small rocks to rescue Maimai #29 .
$$$item 3868
From the rocks, go right to find a broken bridge that you can hookshot across. Just pass the bridge are more rocks, big and small–this is Rosso’s Ore Mine. Later, you will want to come here, but right now, there’s nothing to do here.
For now; head right, avoiding the Lynels, and you’ll be back near the entrance. At this point, you may want to ring Irene’s taxi service and leave this area.
No Comments