
From the vacant house go one screen down and you’ll be in the Swamp Palace area. Head right to find Maimai #61 stuck on the wall; merge next to it and emerge behind it to force it off. Next, go left to find a surprisingly empty cave; come back here after beating the Thieves’ Hideout dungeon and you can claim a chest containing 100 rupees . Outside and to the left of the cave are some statue pillars and a tall pillar–should you need to return to Hyrule, merge into the pillar and walk behind it to find a doorway to Hyrule.
Head south from the pillar to find a deep pool and in its centre, Maimai #63 , which you can dive to rescue. Further south is the Swamp Palace itself; you can enter the dungeon right now, but you’ll find you cannot progress due to the water that’s in the way. Hint: you may need to do something about the giant cracked rock outside the dungeon. Head right from the dungeon and you’ll spot another giant cracked rock ahead. Go up and dash into the pillars to dislodge Maimai #62 . Further up and you’ll be back at the entrance.
$$$item 3906
Well, now you’ve seen everything there is to see here, so it’s time to deal with those giant cracked rocks. Return to the Big Bomb Flower and get ready for a long trip; you now have to haul a big bomb all the way to the big cracked rocks here. Along the way are a variety of monsters, which will set off the big bomb should they so much as scratch it. So basically an escort mission where the escort can blow up on you. Arm yourself with arrows or other projectile attacks and familiarise yourself with the layout of the areas, plus the monstrous inhabitants.
From the Big Bomb Flower, head one screen right, then one screen down. Use the bushes as cover and fire at the Taros Tafrom afar, then cut through bushes and go right, felling the chomping Snap Dragons, to reach the next screen. Here, defeat more Snap Dragons and go up. Next, defeat the javelin Moblin as soon as possible, then take out the Taros to right. Head right, then up over the hill and go right to the next screen. You’re almost there; slash the Taros to the right. Finally, go down to the Swamp Palace area; here is where it gets very tricky.
To begin with, go right at the first junction. Next, slowly and carefully make your down, weaving through the statue pillars and dealing with the fast-moving Karat Crabs.
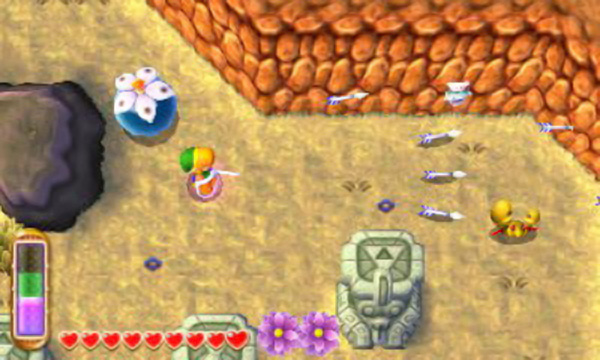
Karat Crabs are the Lorule version of Sand Crabs. As well as being stronger and tougher to take down, they’re also extra fast. Like before, approach them from below or above, as their vertical speed is lacking.
Once all the crabs are gone, head for the central statue pillar, surrounded by water. Look to the right and below and you’ll see a line of bushes between two pillars–hopefully you didn’t cut down them. Go around the pillars and down and let the big bomb get stuck between the pillars and the bushes. Now you can go and clear the path of monsters without fearing a stray hit setting off the bomb!
Past the pillars, go left and dispose of a Taros. Next, head down, past the Swamp Palace, and crush another Taros near the end. That should be all the monsters in the way, so return to the big bomb and lead it again. Bring the big bomb before the giant cracked rock in front of the Swamp Palace and set it off. With the giant rock gone, the water level will drop and you can now proceed past the dungeon’s first room. Although, with the water gone, you can no longer swim up to the entrance. Don’t fret; take out your trusty hookshot and fire it towards the wooden stumps to get across.
Since you’re here, you may as well blow up the other giant cracked rock. Follow the same instructions as before, but instead of turning left to the Swamp Palace, turn right. There, many monsters await you; it’s vital you let the big bomb get stuck, so it’s not a hindrance. Wait for the flying Zirro to drop down and attack, then let it have it.
$$$item 3911
Smash the shield Moblin with your usual Hookshot or Fire Rod tricks. When all the monsters are gone, go back and lead the big bomb to the giant cracked rock and detonate it. Inside the cave is a Piece of Heart plus two chests containing 100 and 300 rupees . Now that’s a prize worthy of your efforts!
No Comments