
Having obtained all seven paintings, enjoy the amazing sequence that follows. Then point your broom at Lorule Castle, in the centre of Lorule, to end everything once and for all! Step in front of the door to Lorule Castle and the barrier will give way, allowing you to enter the castle.
Needless to say; the final battle draws nigh, so make you’re well prepared before entering; check those bottles in case your fairies escaped or your blue potions leaked away.
The first room (1F south) is pretty straightforward; just follow the path left to reach the next door, while disposing of the Lorule soldiers. However, there are two chests that you can’t reach to tease you. Well, you can reach one right now; just before the door leading up, push the gargoyle statue to the right of the door into the lava below.
Next; merge into the wall above and walk right, across the gap. Open the chest at the end to score yourself a respectable 20 rupees . Then go back the way you came and head through the door leading up.
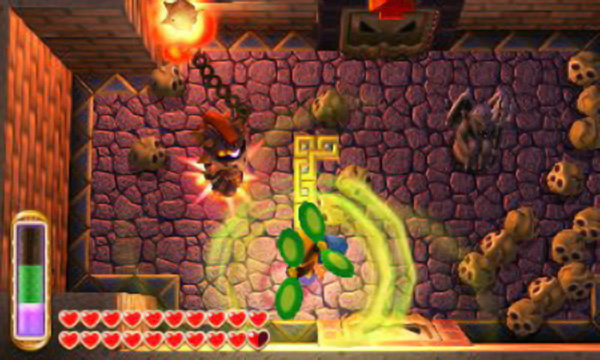
The next room (1F north) isn’t so easy, as you’ll be locked in with a flaming Ball and Chain Soldier. As soon as you can, use the Tornado Rod, Boomerang or Hookshot to stun the soldier, then go in for the kill; stun the soldier after every 1-2 strikes so it doesn’t get a chance to act and chuck a flaming ball in Link’s face. If things aren’t looking good, merge into the wall to avoid its attacks. Once the soldier’s dust, the doors will open; take the door ahead, leading up.
Upstairs in Floor 2F, enjoy the view below of the previous room, and take the door down to the next screen. Here (2F south), follow the path right, watching out for more Lorule soldiers along the way, as well as the smiley face block shooting fire. Follow the path to the end and merge onto the nearby wall; continue across the gap to reach a ledge with a chest containing a Monster Horn .
Go back across the gap and head all the way for the door to the right. In the next room (2F south-east), take out the Lorule soldier above; be careful of the smiley face block shooting ice. When it’s safe, grab the chest above to obtain 20 rupees .
Next, put out the torches besides the 20 rupee chests and cautiously head down the room. In the middle of the chasm will be a glow-in-the-dark narrow path; follow the path down to discover a chest containing a much better 100 rupees . With the rupees firmly in your wallet, leave the room and return to the previous one (2F south).
This time take the door near the bottom, leading left and upstairs to Floor 3F. Here (3F south), the camera will pan to a large door ahead–the door that eventually leads to the boss. However, you can’t enter until you perform four specific tasks.
For now, hit the round switch ahead to reveal a warp zone to the entrance in front of the big door. Next, go up to the gargoyle statues and push them over the edge, creating space for you to drop down ahead. Follow the gargoyles down to reach the remaining chest in the first room (1F south), containing a Small Key .
From here, drop down below and head right for the warp zone, which will take you back to the room before you leapt down (3F south). After you materialise, head left and open the locked door leading left.
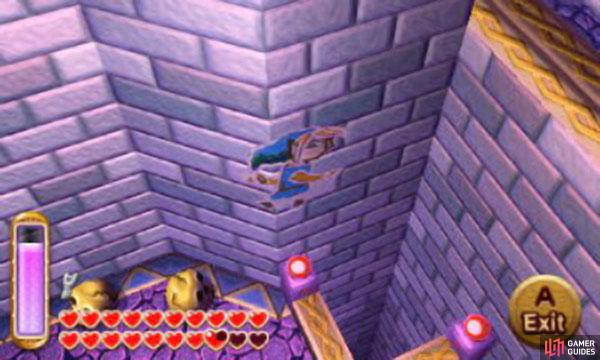
You will be at the highest point of the central column (4F south); look down for a nice view. In the centre is a chest containing the Compass . Now check your map and you may notice there’s a chest somewhere below you in the same room, but there seems to be no way to get there.
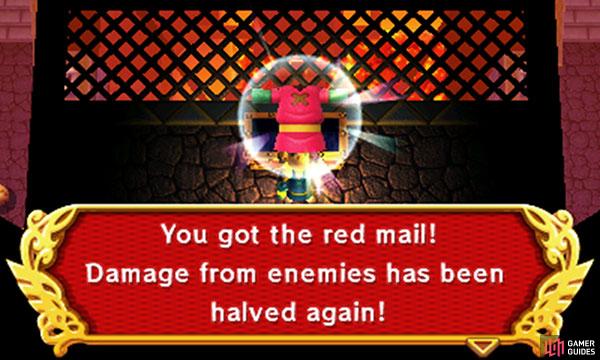
Put out the torches next to the central chest and the way will be revealed, literally. Just below are two narrow glow-in-the-dark platforms, tight ropes even. Carefully make your way down and open the big chest at the end to claim the Red Mail! This awesome clothing further reduces enemy damage to half that of the Blue Mail!
Floor 3F - Left-hand door
From the big chest, merge into the wall below and walk left. At the first corner, emerge to drop down, hopefully to Floor 2F, on a high platform. Merge into the wall below and walk all the way right. At the end, emerge to land next to a door leading left (to 2F west); go through to find a pool of fairies. Next, return to the central room (2F south) and drop down below to the first floor.
From here (1F south), return to the warp zone again to transport to Floor 3F, right before the big door. Now there are four doors ahead of you and you must complete the challenges in all four doors to progress.
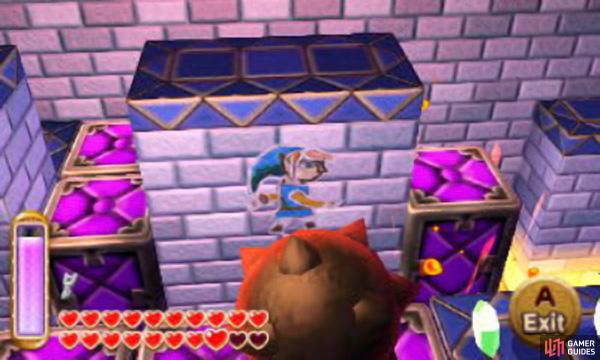
Next to the door are two pillars with a “bomb” icon on it–you’ll need bombs to conquer the room ahead. Step on the raised floor tile below the door to open it, then proceed inside. The first room features many Mini-Moldorms and coloured barriers with round switches to toggle them. In a sense, this room is a repeat of the Tower of Hera.
To begin with, head all the way up and hit the first available round switch. Head left to find a locked door, but you don’t have a key yet to enter. Look left and you may notice a giant cracked rock–seems like you’ll need a big bomb later.
For now, place a bomb on the first round switch and return left, across the lowered barrier. Next, head down, where there’s an annoying smiley face shooting fire at you; keep moving to avoid it. Set a bomb and throw it left, across the coloured barrier, to trigger the next round switch. Then go left and plant a bomb on the round switch, before heading down to stand on top of the lowered barrier. Once the bomb triggers the switch, you’ll be raised up.
Head down until you reach a square pillar. Stand on top of the barrier to the right and throw a bomb right, to get up; open the chest at the end to earn 20 rupees . Hit the round switch again to lower the red barrier, then plant a bomb next to the round switch and run all the way left to stand on top of the lowered on the far side. Go down until you’re immediately to the left of the big bomb flower. Set a bomb and throw it right, over the barrier, to ignite the big bomb flower, blowing up the giant cracked right behind it.
Use your regular bombs to throw over the barriers to kill any guards before they can touch the big bomb you’re protecting.
Next, merge into the red barrier to the right and walk left to reach the big bomb flower. Strike the round switch at the end, to the right, to lower the red barrier. Then go up to the big bomb and lead it with A. Now the fun begins–you have to lead the big bomb all the way to the giant cracked rock near the top of the room.
Head left; then at the corner go up. At the end, throw a bomb left to dispose of the Lorule soldier. Be careful not to throw it too close to the barrier or it’ll rebound and possibly hit the big bomb instead.
Once the soldier’s a goner, throw a bomb ahead to trigger the round switch, lowering the blue platforms. Go right, then stop in front of the red barrier ahead. Throw a bomb ahead to defeat the Lorule soldier, then return left and throw another bomb at the round switch. Before the bomb goes off, return right, past the lowered blue barrier.
Go up, then left, next to the round switch. Just ahead is a smiley face that shoots ice and a Lorule soldier–throw bombs over the barrier to kill the soldier. Now you need to prepare for the last corner and the deadly smiley face block.
Plant a bomb on the nearby round switch, then run right. Once the switch is activated, the way ahead will be clear. Don’t swipe the nearby round switch with your sword or you may accidentally hit the big bomb instead. When it’s safe, head up and hide near the top of the room. The smiley face will keep shooting ice at Link, but the ice will hit the jutting wall instead. Cautiously poke your head right, then immediately after the smiley face shoots ice, go right and freeze it with the Ice Rod to immobilise it.
With no more threats to the big bomb, hastily proceed right and set off the big bomb in front of the giant cracked rock at the end. If you can’t escape the explosion in time, merge into the wall to come out unscathed. With the rock gone, you can reach the chest containing a Small Key . With this key, you can open the locked door ahead; drop down right and pass on through the locked door. Downstairs (2F north-west) you have to defeat purple Moldorm, a tougher version of the Tower of Hera boss.
To make things harder, the boss room is small and the walls will move in to make it smaller still! If you’re feeling brave, jump in and use the Hammer to stun Moldorm; otherwise, rain bombs from your vantage point. It’s easier to hit Moldorm with bombs when the walls close in and it has limited space to move around. With normal bombs, it will take while, so we hope you upgraded them! After Moldorm has been exterminated, a red warp tile will appear; step on this to return to Floor 3F. One of the four corners of the big door will also light up.
Floor 3F - Right-hand door
Unlike the other puzzle rooms, there aren’t any hint pillars next to the entrance. We’ll just have to go in to find out what’s needed of us. Step on the raised floor tile in front of the door to open it, then proceed through. Upon stepping through, there are some gargoyle statues, a smiley face block shooting ice and a whole load of lava.
At first, you may think you need the Ice Rod, but the platforms you make aren’t the right height to proceed. Instead, make your way up and towards the very end, where the platform juts out.
To the right, a platform will emerge from the lava, allowing you to cross right. You may also notice more platforms emerging from the lava ahead. It would seem this room is all about these platforms that you can’t see until you’ve close to them. From the lone platform, continue right, while avoiding the fire bar below.
At the junction of platforms, go down. Past the fire bar is a giant spiked ball blocking the way down. Now head all the way up; at the end, there’s a gargoyle statue. If you wait, a giant spiked ball will appear from above and crash into the gargoyle statue.
Pull the gargoyle statue left and watch as the spiked ball continues down, before plunging into the lava once the platforms end. Hmm, if the spiked ball could continue all the way down, maybe it could do something to the spiked ball below. As you’re thinking this, another spiked ball will appear from above to replace the one that make a fiery demise. Aha, so the spiked balls are always replaced; well that changes everything. When it’s safe, step just above the platform below and wait for a spiked ball to come.
Carefully lead the spiked down down, being sure not to move too fast or the platforms will disappear before the spiked ball gets anywhere. At the end, just before the stationary spiked ball, turn right to avoid getting flattened. Should the moving spiked ball reach its destination, it’ll knock the stationary one out of the way, allowing you to proceed down.
Head down; but mind your step because there’s a gap between the last platform and the other side below. Don’t continue down, expecting a complete bridge or you’ll drop into the lava!
You can drop down here by merging into the wall at the top of the stairs behind you. From here, merge into the wall in the lower level and walk left until you reach the door. Inside you’ll find a few very friendly and health-inspiring Fairies to use/place in a bottle.
Instead, merge into the platform to the right and walk right, along the platforms, to reach the other side. Head through the door leading down and the next room (3F east) will lock itself. Walk toward the edge of the platform to find a bunch of platforms emerging from the lava. Next, the floor tiles will spin and fly towards Link; use the shield for cover. Once all the tiles are gone, the doors will open and a wire mesh platform will emerge from below, bridging the lava. Go right, up the stairs and through the new door.
You will be back in the big lava room (3F north-east), on the right side. Head up, across the platforms emerging from the lava and turn right when you reach another stationary spiked ball; then follow the path of platforms up. At the end, there’s a giant spiked ball to the left, trying to go down. This next bit is clever. There’s a gap between you and the spiked ball, but you can make platforms appear for it, to your left, as long as you’re close by. So stay close to the giant ball and carefully lead it down from a distance.
Move fast because there’s not a lot of room for error. When you reach a tall platform in the way, don’t go around or you’ll lose the spiked ball! Instead, merge into the platform and walk right, then emerge when you’re on the other side. Succeed and the stationary spiked ball will plunge into the lava and you can proceed past it.
Make your way up and stop when the platforms split directions. You want to go up, but look ahead and you’ll spot the spiked ball from earlier. Cautiously proceed up, then immediately turn left for the chest or you’ll get hurt. Open the chest for a Small Key .
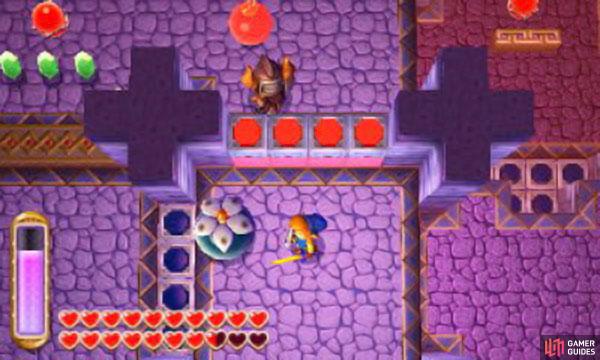
The purple platforms will appear as you’re near them, so the trick is to memorize what makes them appear (and dissapear) so you can roll each spiked ball to the other end of the room (the second one on the right of the room requires you to merge with the walls in your way as the ball runs down to your left - see screenshot above).
From here, go down and take the first left; drop down to return to the left side of the room. Walk down a few steps, until you’re just out of range of the fire bar, then walk left a few steps and follow the path up, then left. At the end, open the chest to find one Monster Tail .
Then go up and open the locked door leading up. Downstairs (2F north-east), you’ll be locked inside a room with a moving floor and a purple Gigabari. Watch your footing so you don’t fall into the lava, especially because slashing the Gigabari will send Link bouncing back a bit.
Slash the Gigabari when it’s idle. When it’s generating electricity, use the Hookshot to damage it or freeze it with the Ice Rod. Unlike the regular Gigabari, shooting the hookshot doesn’t stun it, nor does it stop its electricity. As such, it can easily close the distance; if you need to escape, circle around the pillar in the middle or merge into it.
Once the Gigabari dies, it will split up into several smaller Bari. Patiently shoot arrows or slash them after stunning with the Tornado Rod. Afterwards, a red warp tile will appear, leading back to Floor 3F. Plus another corner of the big door will light up.
Floor 4F - Left-hand door
In front of this door are two pillars with a “lamp” icon. We have a feeling it’s going to be dark inside. Step on the raised floor tile to open the door, then step through. Head up the stairs to find a bunch of rupees, skulls and a torch floating in mid air. Put out the torch to plunge the room into darkness.
You can now see the invisible path clearly, but there’s a catch–when the room is dark, barriers will appear blocking your way. If you hope to proceed, memorise the path, then light the torch again. Ignore the rupees, because they’re red herrings.
Only turn off the lamp once you’ve sussed out the route you need to take (as the path ahead will be near impossible to see with the lamp off). There’s no enemies nearby so take your time and don’t rush!
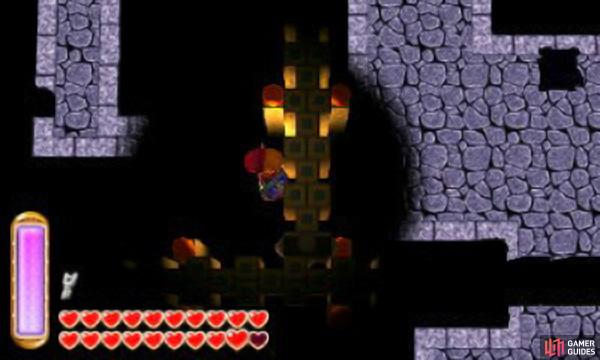
From the torch, head left and stop immediately before the skull at the end, and before going past the left-most narrow tall pillar, with a red orb on the top. From here, go up to the next torch and put it out. Next, you’ll need to follow the path left. If you want, use the Boomerang to collect the rupees on the ledge to the left. After memorising the invisible path, light the flame again. From the torch you’re at, go right and stop when you reach the second skull, toward the far right.
Stand immediately to the right of this skull, then proceed up to the third torch. Again, put out the torch to show the path ahead, then light the torch after it’s clear in your mind. From the torch, step down a pace, then walk left, stopping at the first skull to the left. Stand immediately above the skull, then go left and stop until you’re directly facing opposite to the chest above. Then go up and open the chest to obtain a Small Key . Next, you need to make your way back. Walk down and stop just after passing the narrow tall pillar.
From here, head right, then after passing two narrow tall pillars, head up, towards the two skulls. Watch out for a Lorule soldier coming your way. On the other side, step on the red warp tile to warp to the bottom-left corner. Here, hit the round switch to reveal a ledge below, allowing for easy back. Then step into the nearby red warp tile to return back to the point before heading into the first red warp tile. Finally, open the locked door and head on in.
Upstairs (5F north-west), you’ll be locked inside a dark room with a flaming Ball and Chain Soldier. To complicate things, there are some invisible walls impeding your movement. At this point, remove your lamp so you can see more clearly. Cautiously close the distance and pace around to avoid the chain.
When you’re close enough, run in and use the Tornado Rod to stun the soldier, then hack away at it. After every 1-2 slashes, use the Tornado Rod, Boomerang or Hookshot to stun it again. Dispose of the soldier and a red warp tile will appear, leading to Floor 3F. One of the corners of the big door with light up too.
Floor 4F - Right-hand door
There’s a single pillar with a “hookshot” icon and a pull switch across the gap. Fire the Hookshot at the pull switch and pull backwards to open the door ahead, as well as bridge the gap. The next room is conceptionally a hellish nightmare–you have to navigate a lava room while avoiding a Wallmaster. Luckily, there are a couple of metal railings here and there to hide under. First, head right and hookshot the wooden board ahead to cross the lava. At the end, step on the moving platform above and use it cross to the other side.
In the top-right corner, open the chest to claim 50 rupees. Then wait under the metal railing until a Wallmaster comes crashing down. Right afterwards, go left and hookshot the pull switch ahead to create a moving platform below, going left. Ride the new platform left; you may need to circle around to avoid getting grabbed by a Wallmaster. At the destination, there’s a locked door and two eyeball pillars missing an eye. Oh dear, it seems we need to drag some eyeballs around again.
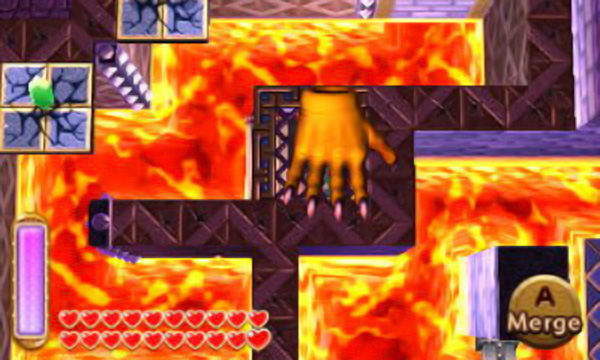
Let the hand slam the button for you to drop the barrier that’s in your way.
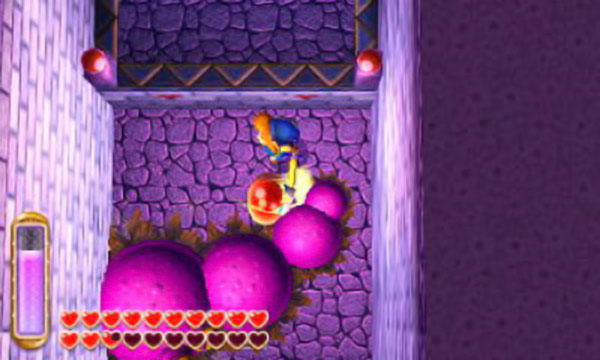
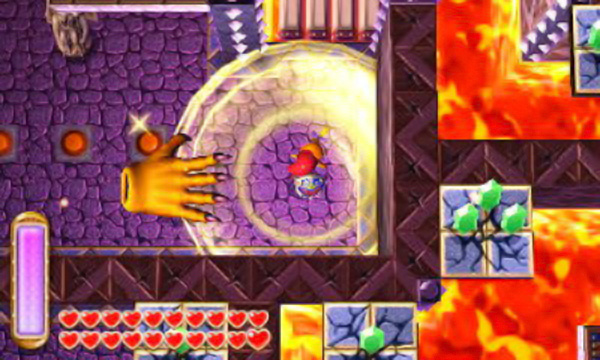
From the pillars, go up and step on the raft. The following passageway is completely Hookshot-able, if that’s a word. Fire the Hookshot left, to drag the raft left, then fire it up and then right. Wait here for a Wallmaster and let it smash the floor switch on the platform above. The barrier ahead will lower and you can proceed further along. Fire the Hookshot up, right, up and right again to reach another safe spot. Then fire the Hookshot left, up, left and finally go down to step onto land again.
In this corner of the room, there’s a gargoyle statue, a Javelin Soldier and three skulls. When it’s safe, break the skulls to reveal three floor switches. Drag the gargoyle statue onto the middle one. Next, run in a circle around the gargoyle statue and wait for the Wallmaster to land on the left-most or right-most floor switch, then quickly run to the remaining switch to trigger all three at once. The barrier below will lower, allowing you to pass. At the end, stand below the cracked floor tile with the eyeball and wait for a Wallmaster to smash the tile, then pick up the eyeball.
This is the tough part: you now have to drag the eyeball back to the pillars. Throw the eyeball onto the raft and use the Hookshot to go backwards, along the lava channel. Be careful not to accidentally Hookshot the eyeball or you’ll waste time, leaving you potentially vulnerable to the Wallmaster. Don’t worry about dropping the eyeball into the lava, because it’ll bounce back onto the raft. When you reach the pillars, chuck the eyeball onto one of them–just one more to go.
Buy yourself more time by killing the hand with a well-timed spin attack (it’ll take much longer to reappear if it’s been killed previously).
The next eyeball is easy in comparison. From the eye pillars go left and merge into the wall to the left. Walk left to cross the lava and emerge on the other side. Stand below the cracked floor tile with the eyeball and wait for a Wallmaster to smash the tile, making the eyeball drop down. This time, don’t pick up the eyeball and instead go back across the gap. Step onto the moving platform below the eye pillars and wait for the platform to stop left.
Standing near the centre of the platform, or further right, fire the Hookshot at the eyeball to the left to reel it in towards you. Now pick up the eyeball and drag it up toward the remaining eye pillar and throw it on top. With both pillars activated, a chest will appear between the pillars–inside is a Small Key . Now that you have a key for the locked door, head left and open the locked door, then go inside.
Upstairs (5F north-east), the room will lock and you must defeat Arrghus, the boss of Swamp Palace, again. Use the exact same tricks as before. Fire the Hookshot at the small eyes from a distance to drag them off the boss and slash them. When the boss has no more eyes around it, it will pound the arena and shoot a laser three times at Link.
Slash the boss each time it lands and run around in circles to avoid the laser; merge into the wall if you’re getting cornered. After the boss falls, a red warp tile will appear, leading back to Floor 3F. One of the corners of the big door will light up.
Floor 3F - Big door
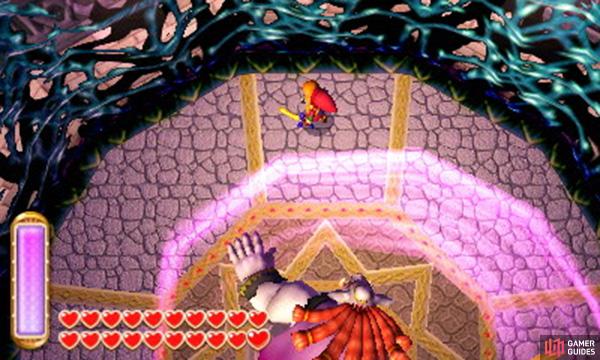
After you’ve completed all four puzzle rooms and lit up all four corners of the big door, the big door will open. Go on ahead to appear in Hilda’s room–the first place you arrived in Lorule. If necessary, go through the doorway to Hyrule above to emerge in Zelda’s room, where there are fairies to replenish health.
As before, the door to the right leads to a long and menacing balcony (dash with the Pegasus Boots to save time). At the far end, go through the door leading up to reach the throne room and begin the final boss fight.
Boss: Mutated Yuga
This is the third time Link clashes blades with Yuga, but due to plot reasons, it’s nothing like the previous battles. At the beginning, Yuga has two attacks. First he will thrust his trident forward, pushing Link back; be sure to shield or sidestep to avoid taking damage.
Secondly, he will swing his trident–if you’re near Yuga, shield to deflect the attack; otherwise stay away. After swinging his trident, Yuga will briefly pause and you can take this opportunity to swipe at Yuga. Each time Yuga takes a hit or two, he will vanish and materialise a short distance away, before continuing his regular attacks.
Keep damaging Yuga and he’ll gain some more tricks. On occasions, Yuga will glow red and gather power, then lunge his trident forward. Stay far, far away or hover with the Tornado Rod to avoid getting hit. After Yuga lunges, you’ll have another opportunity to hit him, so it’s not all bad. When Yuga vanishes, he may remain hidden, while a volley of red fireballs rain down on Link–keep moving to avoid them. Once the fireballs stop, Yuga will materialise and continue his usual attacks.
Later, Yuga may swing his trident a second time, moments after the first swing, so don’t get carried away trying to attack. After gathering power, Yuga may throw his trident and send it spinning across the room. Keep to the right of Yuga and circle the edge of the room to avoid getting hit. Yuga will materialise further away to pick up his trident; if you’re quick, you can get a few hits in while he regains his weapon. Keep up the hits and Yuga will keel over. But is the battle really over…?
Boss: Yuga (Round 2)
Like all good final bosses, Yuga won’t go down without another fight. Now he will hover around the arena and shoot a ball of energy towards Link. Don’t avoid the ball; instead strike the ball with your sword to send it back towards Yuga. Yuga will hit the ball back, at which point an exciting game of energy ball tennis begins.
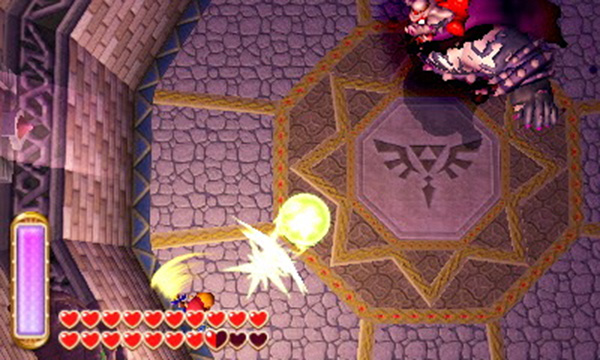
Beware that the speed of the energy ball increases with each hit, so vary the pacing of your strikes accordingly. Eventually Yuga will fail to send the ball back and get stunned; in anger, he will merge into the wall and become invulnerable.
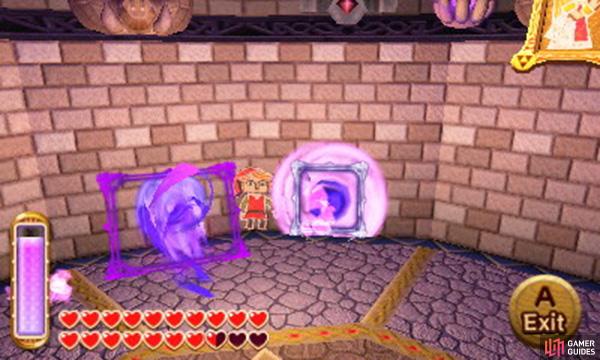
At this point, Link will receive the Bow of Light . Equip this evil-banishing bow and Link can fire arrows of light while in painting form! Merge into the wall a fair distance away from Yuga and shoot the Bow of Light in his direction. Yuga will hold the light arrow in his claws. Emerge and run behind Yuga, then merge back into the wall and fire another arrow at Yuga’s back. This arrow will hit Yuga, pushing him out of the wall. Follow him back to 3D land and hack away while he’s stunned.
Yuga will then vanish and a wall of flames will surround the arena walls, plus fiery wisps will emerge to damage Link–run quickly and carefully to avoid them. Next, Yuga will reappear and shoot another energy ball–play another game of tennis to stun him and send him back into the wall. This time Yuga will run while in the wall. Don’t follow him and instead merge into the wall opposite to try and intercept him. When Yuga comes towards you, fire an arrow ahead, then emerge immediately because he’ll try to ram you.
Merge back into the wall behind Yuga and quickly fire the bow of light at his back, while he tries to stop running. Succeed and Yuga will be pushed out of the wall again–run up to him and give him a good beating.
Yuga will vanish again and you’ll have to avoid the flames on the walls and more fiery wisps. When Yuga reappears, he’ll shoot two energy balls at Link. Don’t think too hard and just swing your sword non-stop. Eventually Yuga will get hit by both balls and hide into the wall again.
Hiding in the wall (where the slight angle is); will allow you to ignore nearly all of the purple flying buttergly-like energy. (Much easier than trying to dodge it all).
This time, when you shoot the bow of light, Yuga will laugh at the arrow and knock it aside. He’ll keep doing this no matter how many arrows you fire at him. You’re frustratingly close to beating Yuga, but he seems to have gotten the upper hand… or is there something else you can do?
Immediately after you fire an arrow ahead, face the other way and fire the bow of light in the opposite direction. An arrow of light will travel all the way round the room and hit Yuga from the back, pushing him out of the wall. Approach Yuga to deal the finishing blow.
Final Boss Fight Video (With Commentary)
When you start a new game, you can now play in Hero Mode, which is exactly the same as before, but enemies now do 4x damage to Link. If an enemy did half heart damage, they now do 2. There’s also a book in the vacant house in Lorule (where Link’s House is in Hyrule) with a neat throwback. Our top tips for Hero Mode? Stun monsters with the Hookshot or a similar item before going in for the kill. Also grab every Piece of Heart ASAP!
No Comments