| Enemy Name | Weak | Resist | Null |
|---|---|---|---|
| Black Raven | Elec | Cut, Wind | -- |
| Bribed Fuzz | Wind | Stab | -- |
| Desirous Maya | Ice, Light | Bash, Fire | -- |
| Phantom Mage | Fire | Wind, Dark | -- |
| Protective Lexy | Dark | Stab | Light |
| Rainy Brother 2 | Elec, Light, Dark | -- | -- |
| Rainy Pot | Fire | Wind | -- |
| Trance Twins | Wind | -- | -- |
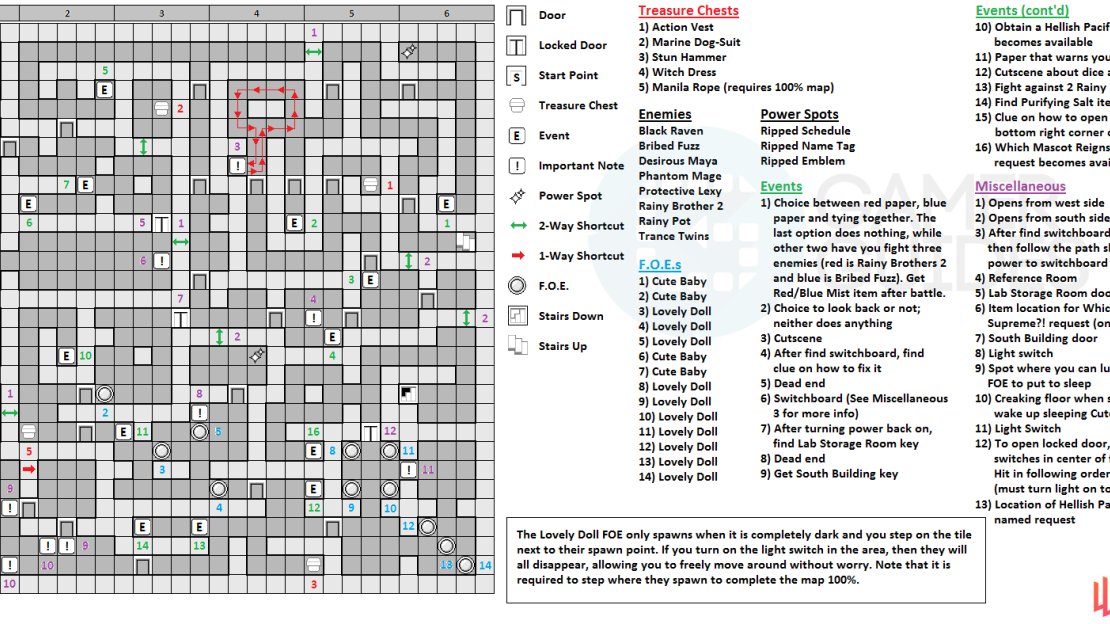
There’s only one path at the beginning of the floor you can go, so keep going until you hit a fork, with one of the paths being a door to the east. This will lead to another fork, with the northern path bringing you to a Power Spot and the southern one going to an event. This event has one of three possible outcomes, where you can either pull the red paper, pull the blue one or tie them together. The last option will do nothing, while pulling either of the others will force you into a battle with three enemies each (blue leads to three Bribed Fuzz enemies, while red has you fighting three Rainy Brother 2 enemies). Completing the battle will get you a consumable item, with a Red Mist for the red paper and Blue Mist for the blue paper.
Anyways, go back to the first split and head north this time, which will lead to a door to go through. Here, you’ll have a loop in the path, with nothing important being there, as well as two doors. The eastern of these leads to a dead end where you find a paper on the ground, asking you to look behind you or ignore the warning. It doesn’t matter which you choose, as both lead to nothing (read the paper again after your choice). Take note of the one-tile dead end right next to the other door, as it will become important later on for this floor.
At the next split, go through the north door to find a chest that contains an Action Vest , so grab it and then head through the next door to view a cutscene. In the same room as the cutscene will be a shortcut that leads back to the stairs for the previous floor, so make sure you activate it from this side. The room to the east has nothing in it, except for a shortcut you activate from the southern side, so continue into the western room, which is the Reference Room. You’ll be coming back here later, so make a note of it on your map. Past that will be a locked door, which you’ll need the South Building key to unlock it. Go north through three doors, until you come to a long east-west hallway.
If you go all the way east, you’ll find a shortcut you can open that will lead you all the way near the beginning, so make sure you do that as it’s always helpful. Continue west in the long hallway and you’ll come around to a door, as well as two dead ends, one of which has an event that will be nothing. Through the door will be an important area, for two reasons, as there’s a loop on the east end, which leads to a locked door (Lab Storage Room). Also, you should see a shortcut on the north end of this loop, which leads to an isolated room with a treasure chest ( Marine Dog-Suit for Koromaru).
On the south end of the entire room will be a dead end, where you’ll find the switchboard. However, electricity isn’t running to the switchboard and you’ll need to go back to the Reference Room first. Before you head back there, though, go out the west door in the area to find two paths, with the north one going into a room with a Power Spot and the southern one leading to a dead end event. Back at the Reference Room, investigate the stack of papers in the lower right corner to find a path you will need to walk. The only problem is that you don’t know where to start.
Pulling either color will get you a battle and item, while tying them does nothing (left). Remember to mark the Reference Room on your map, as you will be going back to it later (right).
Remember that one-tile dead end I mentioned earlier on this floor as being important? It was by the first looping room on the floor (near the event where nothing happened whether you turned around or not) and that’s where you need to start for this riddle. Head to that tile and follow the directions given, which are as follows:
East one, north two, east two, north two, west three, south two, east one, south two and west one.
If on the right path, you should get some “notes” telling you that and once you’re done, electricity will now be flowing to the switchboard. Head back there and use it to turn on the lights, allowing you to get the Lab Storage Room key nearby. Use it on the nearby locked door and you’ll be in a large, empty room. On the west end, you’ll trigger a Cute Baby FOE to drop, so lure it into the big room (it’s afraid of the lights and won’t step on those tiles) and maneuver around it to go where it came from, allowing you go through the door and into the next room.
On the south end of this room will be the South Building key , so grab it and head back to the locked door, which should be easy thanks to the shortcut in the large room. After opening the South Building door, you’ll encounter another Cute Baby FOE in front of the next door, so lose it and head through the door it was guarding (there’s nothing else in that room). In the next room will be another shortcut that you have to open from the other side, as well as the 100% map chest ( Manila Rope key item, which makes the Bracer of Might accessory available to buy in the shop). To the north is a path that leads to a dead end, where you can get the Obtain a Hellish Pacifier request to become available. Go through the door in the southeast corner of the room to come to another scene, where you get told to not run.
This is important, as you’ll be introduced to a new FOE in the upcoming area, the Lovely Doll. As with the Cute Baby FOE, they don’t show up on the map and don’t appear at all when there’s light around, as they thrive in the darkness. You will see soon enough what I mean, because as soon as you move to an adjacent tile to the Lovely Doll, it will pop up and block your way; luckily, they don’t move at all, so you don’t have to worry about them chasing you. There are three in the room ahead, including one blocking the exit in the bottom right corner of the room. The door in the upper right leads to both a Power Spot, as well as a shortcut right outside of the South Building door.
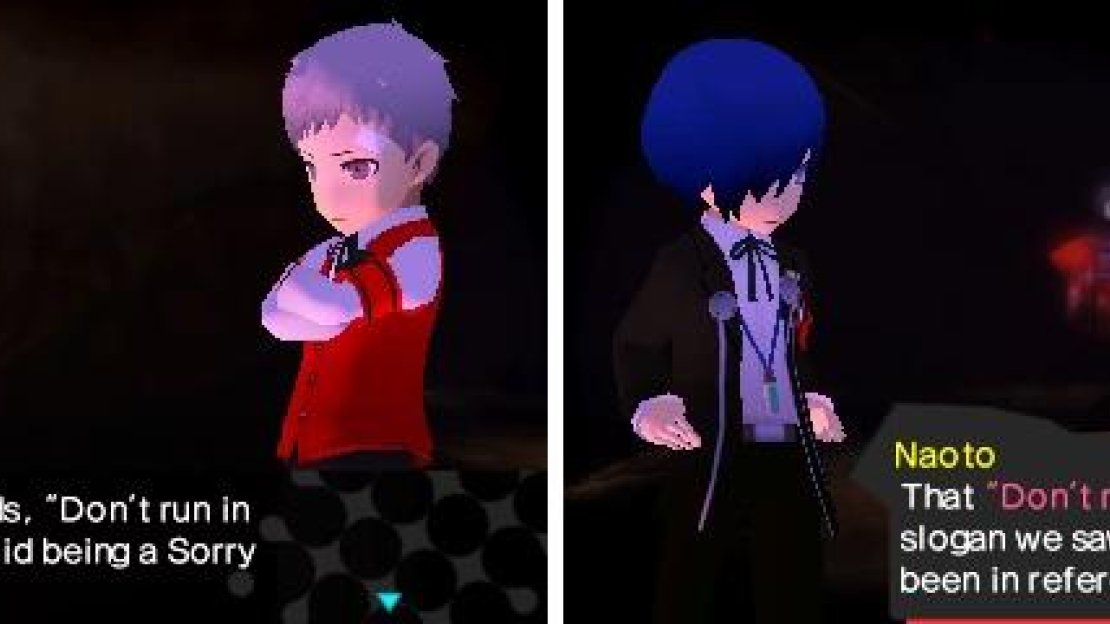
Heed the warning to not run, else you accidentally hit the Lovely Dolls (right) while moving around. Also, they are spooky!
In order to get rid of the Lovely Doll blocking the southeastern door, check the wall one tile north of the northern Lovely Doll for a switch you can use, which will turn on the lights in the area and make all of the FOEs disappear in the room, letting you get through the door in the southeast. Straight ahead will be a clue about a puzzle on the floor, so pay attention to it. The door to the southeast leads to that puzzle, so ignore it for now and go south to find a treasure chest ( Stun Hammer ). Go straight west now, where you’ll encounter a battle with two Rainy Pots, as well as acquire a Purifying Salt item at the dead end.
Take the other southern path that leads southwest and you’ll be in a large area, where you can find another music room and there’s also a few spots where the floor will creak when you step on them. As you take the westernmost path, you’ll run into a Cute Baby FOE, so lure it to the west exit of the music room to make it fall asleep. Now, this is one of the puzzles in the game that involve FOEs and in order to get past this one, you’re going to have to step one on of the floorboards that will creak. This will wake up the sleeping FOE and it will continue to chase you, but if you go where it initially came from, then you’ll run into another Cute Baby, trapping you.
So, when you wake the first FOE up, lure it to the other entrance of the music room. Make sure you don’t step on any tiles that will wake this FOE, then go and make the other one appear, luring it to the west exit of the music room. With both asleep, you will have to wake them up again to get past the second FOE you lured, but you can make a straight dash to the door they were both blocking. There are three things in this room, so start with the treasure chest to get a Witch Dress . The second thing is a clue to the main puzzle on this floor, and the last thing is the pacifier item that is for the Obtain a Hellish Pacifier request . Once you’re finished, use the shortcut to exit the room and return to that one door in the southeast you didn’t go through the first time.
This is the main puzzle of the floor and the area is separated into four 3x3 rooms, with the top-left and bottom-right having four and three Lovely Doll FOEs, respectively. In the middle of each room is a switch that will activate when you step on it, but you need to do it in the right order and in between the top-left and top-right rooms is a light switch. The first thing you should do is go into the top-left and bottom-right rooms and count the number of FOEs in each (4 in top-left and 3 in bottom-right). After that, turn on the lights to get rid of them and go into the other two rooms to count the lights (2 in top-right and one in the bottom-left). Using those numbers, step on the switches in numerical order (so bottom-left, top-right, bottom-right and top-left) to open the locked door.
Head west to find a dead end, where you’ll get the Which Mascot Reigns Supreme request , then go north and east to find the stairs to the third floor.


No Comments