
| Enemy Name | Weak | Resist | Null |
|---|---|---|---|
| Cowardly Maya | Fire, Ice, Elec, Wind, Dark | -- | -- |
| Laughing Table | Pierce, Fire, Light, Dark | -- | -- |
| Lying Haberlie | Bash, Fire, Elec, Light | -- | -- |
As soon as you enter the labyrinth, you’ll get a Leather Notebook from Zen, which will allow you to draw the layout of the dungeon. The path (and the walls if you have that option on) will be drawn for you, but other things like doors, treasure chests and F.O.E.s will not be drawn for you. Not far into the dungeon, you’ll get forced into another battle with a Laughing Table and two Cowardly Mayas, with the former being weak to pierce, fire and light.
You’ll pick up two items off of the floor, which are Blank Cards . Ignore them for now and keep traversing through the dungeon. When you come upon a clock, there will be a short scene. Also, it should be around this time that the blue circle in the bottom right corner of the screen will start changing. This is the Encounter Gauge and as it changes color (blue to green to orange to red), there’ll be a chance for a random battle to encounter.
Anyways, keep moving along the only path you can for now, grabbing the treasure chest ( Life Belt ) and you’ll happen upon the other side of the wall with another clock. These are shortcuts on the map, with this one being a two-way one, but some of them can only be opened from a particular side before you can use both ways. The path for now is still linear, so keep going until you encounter an F.O.E.
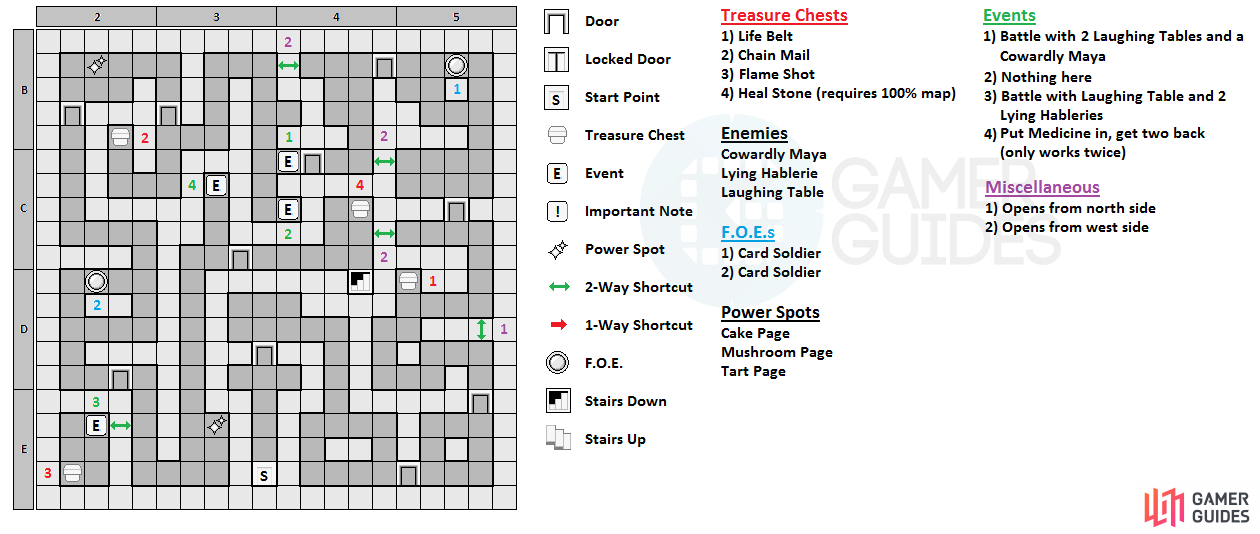
These enemies are shown on the map, as well as when you exploring, and happen to be tough ones that shouldn’t really be fought until you’re stronger. The good side, though, is that they usually move in a pattern, so it should be easy enough to slip past them without having to fight them. Eventually, you’ll see a short scene that talks about the stairs that lead down to the next floor, as well as another battle on the other side of the door with two Laughing Tables and a Cowardly Maya.
FOEs are shown while you wander around the dungeons and are pretty strong, so it’s best to avoid them until you get stronger.
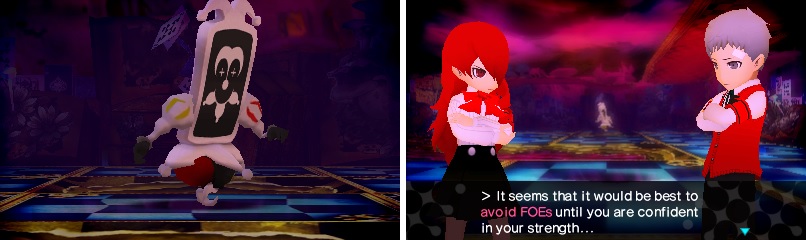
You’ll get three more Blank Cards after the battle, which will be used shortly. If you go south here, you should get an event that is a dead end, but will see some conversation about whether you’ve been drawing the map or not on your bottom screen. At the next door, don’t go through it yet and go south to find another chest ( Chain Mail ). Through the door will be a Power Spot, which will grant you a few items that you can’t get elsewhere, but there’s a chance that you will get into a battle instead (the game will warn you about this).
You will encounter another F.O.E. further on, but it should be easy to pass, since it just goes around in a circle. There will also be another Power Spot along the way to the exit to the second floor, as well as an event in the dead end before a door. This event is a magical box that will allow you to put a Medicine inside and get another, but it only works twice. The third time you try it out, the box won’t produce another Medicine and you will lose the one you put in, after which, you can’t use the box anymore.
In the final room will be the stairs that lead to the second floor, but there’s also a treasure chest. This chest is special, in that, it won’t open unless you have explored 100% of the first floor. The percentage that you’ve explored is shown at the top of your bottom screen, next to the name of the dungeon, and it counts the tiles you step on. Interacting with the chest will show locations on your map that you haven’t explored. You can also spend 3DS Play Coins to open the chest, but the amount of coins you have to spend is proportional to how much of the map you have explored (less explored equals more coins).
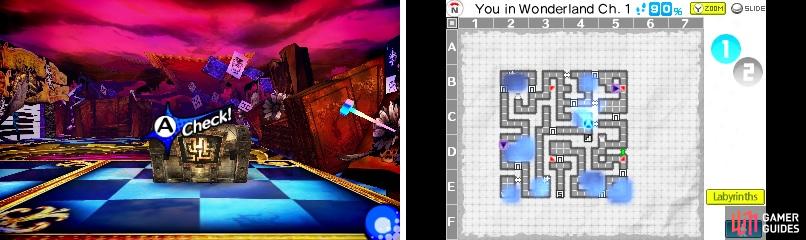
The Map Chests usually offer great items, but require you to get 100% exploration on that particular floor. Interacting with one will point out locations on your map that haven’t been explored, shown as blue spots (right).
Either way, use the stairs to go down to the second floor, where there will be a short scene. It seems something weird is going on with the protagonist’s ability to use multiple Personas, so Naoto suggests going to the Velvet Room to talk with Margaret. It’s a good idea to use a Goho-M for now and return to the school, where you’ll automatically head to the Velvet Room. After another scene, you’ll learn about Sub-Personas, which everyone except for Rei/Zen can equip.
These Sub-Personas will give you extra skills, as well as increase your HP and SP. This extra HP and SP acts sort of like a buffer, with that amount of HP and SP being restored if you don’t dip below it during battle. This is shown as a white portion on those two bars in battle (you don’t get the bonus outside of battle). The Personas you get are Sandman , Agathion , Anzu , Pixie and Koropokkur . You will also randomly get Personas after battles in the dungeons now, but you can only hold onto a total of 14 at any given time. You always get a higher level Persona after defeating a FOE.
No Comments