
| Enemy Name | Weak | Resist | Null |
|---|---|---|---|
| Apostate Tower | Light, Dark | -- | -- |
| Fierce Cyclops | Light, Dark | -- | -- |
| Immortal Gigas | Wind | Cut, Stab, Ice | -- |
| Indignant Machine | Elec | Light, Dark | -- |
| Iron Dice | Elec, Light | Cut, Stab, Fire, Wind | Dark |
| Mach Wheel | Ice, Dark | Bash, Wind | -- |
| Platinum Dice | Ice, Dark | Cut, Bash, Fire, Wind | Light |
| Rain Leg Musha | Ice | Cut, Wind | -- |
| Reckless Okina | Fire | Elec, Wind | Dark |
| Valuing Nyogo | Elec | Fire, Ice | Light |
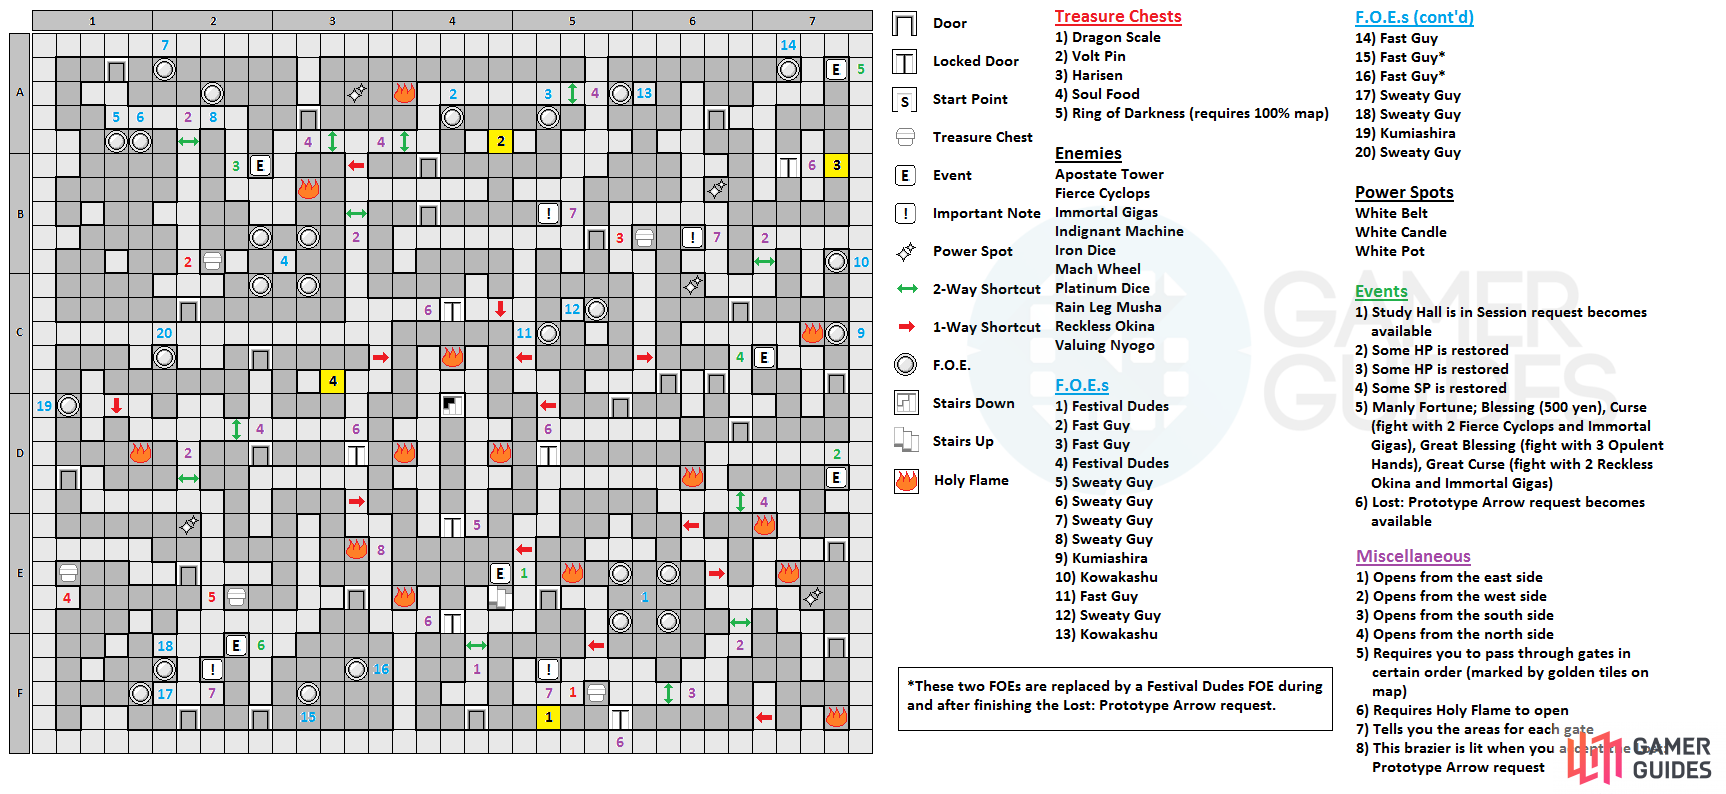
As soon as you enter the fourth floor, you’ll see a cutscene where you get told that the floor is divided into four quadrants, with each one represented by one of the gates that you’ll need to pass under to open the sealed door nearby. The order in which you need to pass through them is Suzaku, Genbu, Seiryu and Byakko , so it will be red, black, blue and finally white . Before you can venture through any of the doors, though, you need to go back to the previous floor to grab the Holy Flame and light the bonfires on the fourth floor. It’s best to light them all now, so you don’t have to worry about them later.
South Area (Suzaku)
Start off by going through the south door, where you’ll see a shortcut to the east as soon as you enter (opened from other side). Go through the next door and the Suzaku gate will be right in front of you, but going through it will place you at a dead end, so take the north path and open that shortcut. In the next area will be an unlit bonfire to your east, as well as a one-way shortcut along the western wall that leads back to the main room.
Do that and light your torch from the southern bonfire, then go through the door, the two-way shortcut and the next door to light the bonfire you just passed. Continue on the north path and into the room south of it, where you’ll see the Festival Dudes FOE roaming about. In the same room are two one-way shortcuts (bottom left corner and upper right corner), as well as two regular shortcuts in the one tile spaces, with the eastern one opened from the side you’re on now (the other is opened from the south). So, take that two-way shortcut that leads east and find the regular door on the east end, which leads north.
There will be a Power Spot here, as well as another door to the north, so go through that one, too. At the dead end just north of you, there’s an event where your HP will be restored a little bit and on the other end of the same path will be a two-way shortcut that opens from the north, leading into a T-shaped room with an unlit bonfire. Use the one-way shortcut on the west side to get back into the room with the Festival Dudes. From the east side of the lit bonfire, light your torch and make your way to the northeast corner of the map, taking the one-way shortcut into the T-shaped room, where you will light the bonfire there.
Now, you can take the torch with the Holy Flame from there and light the bonfire in the room with the Power Spot, as well as the bonfire in the bottom right corner of the map. With this one lit, take your torch and go up one tile, two west and one more south, where you’ll find a one-way shortcut that goes west. From here, you can continue west and through the sealed door, grabbing the chest ( Dragon Scale ) and passing underneath the first gate.
There are four areas on this floor, all of which will contain one of the four statues needed to unlock the final sealed door.
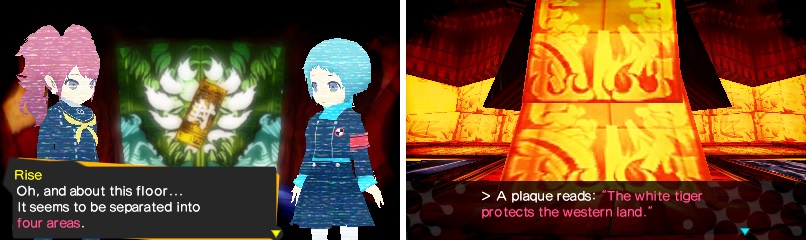
North Area (Genbu)
The second gate you need to pass through is in the north area, so light the torch right by the door and go through the sealed door. Follow the path and you’ll see the second gate right in plain sight in the next room, but you’ll get ambushed by some Fast Guy FOEs if you go through it from the south. So, ignore the gate for now and go through the door on the west end, where you’ll find a one-way shortcut that leads into a big room with a Festival Dudes FOE, as well as an unlit bonfire. Before doing anything else, open the two-way shortcut just south of where you entered the room and head back to the room with the main area (there’s a one-way shortcut just east of the sealed door you used to enter the area).
You can use the shortcut you just opened to get the flame from the main room and to the unlit bonfire. On the south end of the room with the Festival Dudes, make your way past them and through the door west of them to enter a new room with two Sweaty Guy FOEs. In the northeast corner of the room will be a two-way shortcut that leads back into the room with the Festival Dudes, letting you grab the chest there ( Volt Pin ). Head back and through the door in the north to another room with more Sweaty Guy FOEs. At the dead end just before the next door is a cutscene that ends with some HP being restored.
Through the door, you’ll see another Power Spot and an unlit bonfire. If you head to the far east end of the area, you’ll find a two-way shortcut that goes into the room with the gate, where you’ll be right behind one of the FOEs from earlier. Head back to the Power Spot and you’ll notice two two-way shortcuts here, one that leads into the room with the Festival Dudes and the other being right outside the room with the gate. Remember how you lit the bonfire in the room with the Festival Dudes? Good, because you’re heading there, lighting your torch and going through the shortcut to light the bonfire in the room with the Power Spot.
From here, you can reignite your torch (do it from the south side) and head through the other shortcut that leads right outside of the room with the gate, entering it. As soon as you enter, go north to the wall, then east two spots, south two (passing through the gate) and west to the door again. If you time it right, your torch will go out as soon as you hit the door, letting you pass through the entire area without having to fight any of the FOEs. The next area you will be going through is the eastern one.
East Area (Seiryu)
Light the torch and go through the sealed door, into the eastern area, lighting the bonfire at the end of the path ahead of you. There will be two doors here, one going north and one going east. Ignore the north one for now and go through the east door, where you’ll find an event along the dead end nearby that will restore some SP. If you head through the next door, you’ll find a Kumiashira FOE blocking your path, so head back to light your torch from the bonfire you just lit. Your goal right now is to just light the bonfire that is sitting right to the Kumiashira, as you will find out when it moves out of the way, there’s a Kowakashu just north of it, who will begin chasing when you have the flame.
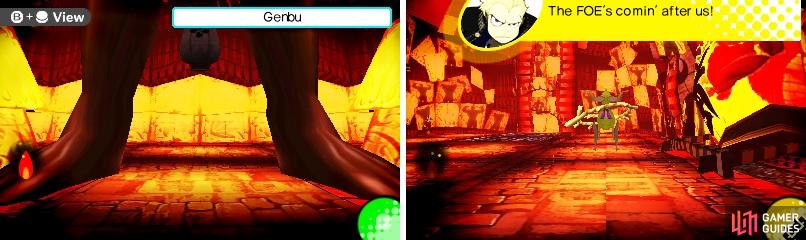
Remember that you need to pass under the statues in a specific direction, else you will be trapped (left). You will encounter all of the FOEs in this dungeon on this floor as well (right)
Head back to the previous room where there was a door that lead north, where there will be one of those plaques mentioned earlier, a Power Spot, as well as a treasure chest ( Harisen ). Ignore the door to the east and take the other southern exit that’ll lead you to a room with a Sweaty Guy and Fast Guy FOE. You can’t go up the left side of the room and if you try to normally go up the right side, it’s likely the Fast Guy will catch up to you. The trick here is to move back and forth until you can get the Sweaty Guy FOE to be at its northernmost position at the same time you’re in the southeast corner.
Do it like this and when you move into the line of sight of the Fast Guy, its northern path will be blocked by the Sweaty Guy, allowing you to make it to the north door without having to encounter either one. Of course, that freedom doesn’t last long, as there will be the pair of a Fast Guy FOE and Kowakashu FOE in the next room. This can be a tricky room, as to avoid an encounter with either one (with the Fast Guy being the likely candidate), you need to wait until the Kowakashu is on the left side and the Fast Guy is just passing you on either side (preferably right).
Once you make it to the door, you’ll find another Power Spot and a two-way shortcut at the southern dead end. Go through it and to the Holy Flame, light your torch, then go back through the shortcut. Head north and then east, then take the first north path and go through the sealed door. You should now be on the north side of the third gate, but don’t walk through it yet. At the north end of this area is an event where you find a Manly Fortune. You can use it four times and will get four different results, which are as follows:
- Blessing: 500 yen
- Curse: Battle with 2 Fierce Cyclops and an Immortal Gigas
- Great Blessing: Battle with 3 Opulent Hands
- Great Curse: Battle with 2 Reckless Okina and an Immortal Gigas
When you’re finished, walk south through the gate and head back to the main room, where your final destination is the western area.
West Area (Byakko)
This will be the final area in which you have to trek through, as it houses the fourth gate. Go through the next door, keeping in mind the two two-way shortcuts just past the door which open from the other side, and head south to a fork. South will be the 100% map chest and north will continue the labyrinth. You’ll pass by an unlit bonfire and there will be no way for you to light it (doing a request you get shortly will light it for you), so ignore it and go through the door. There’s two Fast Guys in this big room, who pace east and west and you want to get to the southwest corner, so sneak by them when you see an opportunity.
In this small area, go north to get the Lost: Prototype Arrow request to appear in the Nurse’s Office, as well as read a plaque that was mentioned earlier. Head through to the next room, where there will be two Sweaty Guys. You want to head up the west side of the room (there’s a chest with a Soul Food in the northwest corner) and to the door in the northeast corner. Feel free to loot the Power Spot here, then go to the next room, where there’s a Kumiashira blocking your way north and an unlit bonfire to your east.

For the Lost Prototype Arrow request, you can find all three arrows needed for it at the spots pictured above.
Head back to the main room and light your torch via the one right outside the western door, then go straight west and through the shortcut, lighting the bonfire you just passed. For this next part, you will need to manipulate the position of both the Kumiashira and Sweaty Guy FOE you will see as you force the other to run away from you. The Sweaty Guy moves between four spots and you want it to be at the correct position when you start moving through the corridor where it’s at. From the Kumiashira’s initial position, make it move north, east, south one spot and then stop when it’s at the center of the crossroads there (so the Sweaty Guy can still move to all of its spaces).
This is where you need to manipulate the position of the Sweaty Guy, along with there being a puddle at its western spot, as you want it to be just to the right of the Kumiashira. This ensures that instead of the Kumiashira moving forward when you move with the flame, it will either move up or down, while also allowing the Sweaty Guy to keep moving. The sweat puddles will enable you to keep moving forward and out of harm’s way of the Sweaty Guy. Once you manage to make it past them both, open the two-way shorttheut from the north side and head into the final room with the gate. It doesn’t matter which way you activate the gate, as you can get out from either side, but it will be the final one and you’ll get a notice from your party and the game that the sealed door is now open.
Head back to the main room and open the door, then you can return to the school to heal and stock up for the impending boss fight. When you’re ready, go down the stairs and watch the cutscenes, then get ready for the boss!
BOSS: Best Friend
First of all, the boss can take two actions per turn and all of its attacking moves are physical, so if you have any party members that can minimize physical damage via skills, they will be helpful here. It’ll also help if you can lower its strength, either by Tarunda or a move like Fang Smash. Its three main attacks during the initial part of the battle are Blade of Fury (hits one row), Spin Slash (hits everyone) and Rabbit’s Foot, its most devastating move.
This move can hit ten times total, but it’s random on who it hits and the move has horrible accuracy. Best Friend has no elemental or physical resistances, and it cannot be poisoned or cursed, so don’t expect help from those in dwindling its HP. Of course, it can still be panicked and using something like Strength or Magic Bind will be helpful as well if you don’t get Panic to stick. Anything that increases your evasion or lowers the boss’ accuracy will be beneficial.
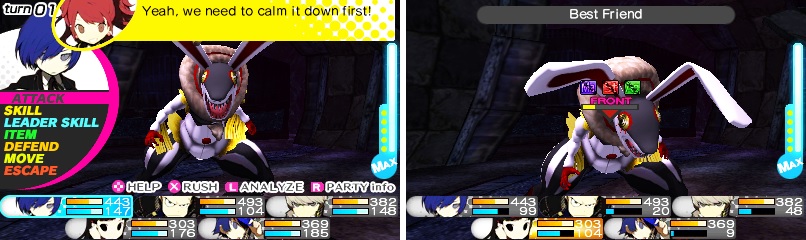
The Best Friend can put quite a hurting on you, but as with most bosses, getting status ailments/binds on it will help in the long run.
Besides the above skills, it can also buff its strength and defense with Tarukaja and Rakukaja, respectively. Once it reaches 50% HP, it will begin wasting a turn by “taking a deep breath,” with its next turn being used on a move called Deafening Roar. Although it doesn’t do any damage, this move has a high chance of knocking everyone in your party down, making it so you can’t move until the end of the current turn. If used in conjunction with Rabbit’s Foot, it can prove fatal for a few characters.
Make sure you keep an eye on your buffs and debuffs, even when you think you have won, as the boss won’t be dead when its HP reaches 0. Once it does, you will see Endure kick in and the boss will regain 6,000 HP. This will essentially reset its patterns, so there will be no new surprises. Keep fighting it the way you have been to put an end to the boss for good.
No Comments