
How to find all the Intel in Leysha’s second scene (Scene 03 - The Loft) in Vampire the Masquerade: Swansong.
Hidden throughout Leysha’s second scene (Scene 03 - The Loft) you can find three caches of sensitive intel that will compromise the Masquerade if left unattended. In the wrong hands, this Intel will raise Suspicion, making future scenes more difficult. Collecting all three units of intel is also a bonus objective on this scene, and completing it will earn Leysha XP. All in all, you have plenty of incentive to find it, and most of this intel can be found without the expenditure of any resources (Willpower or Hunger).
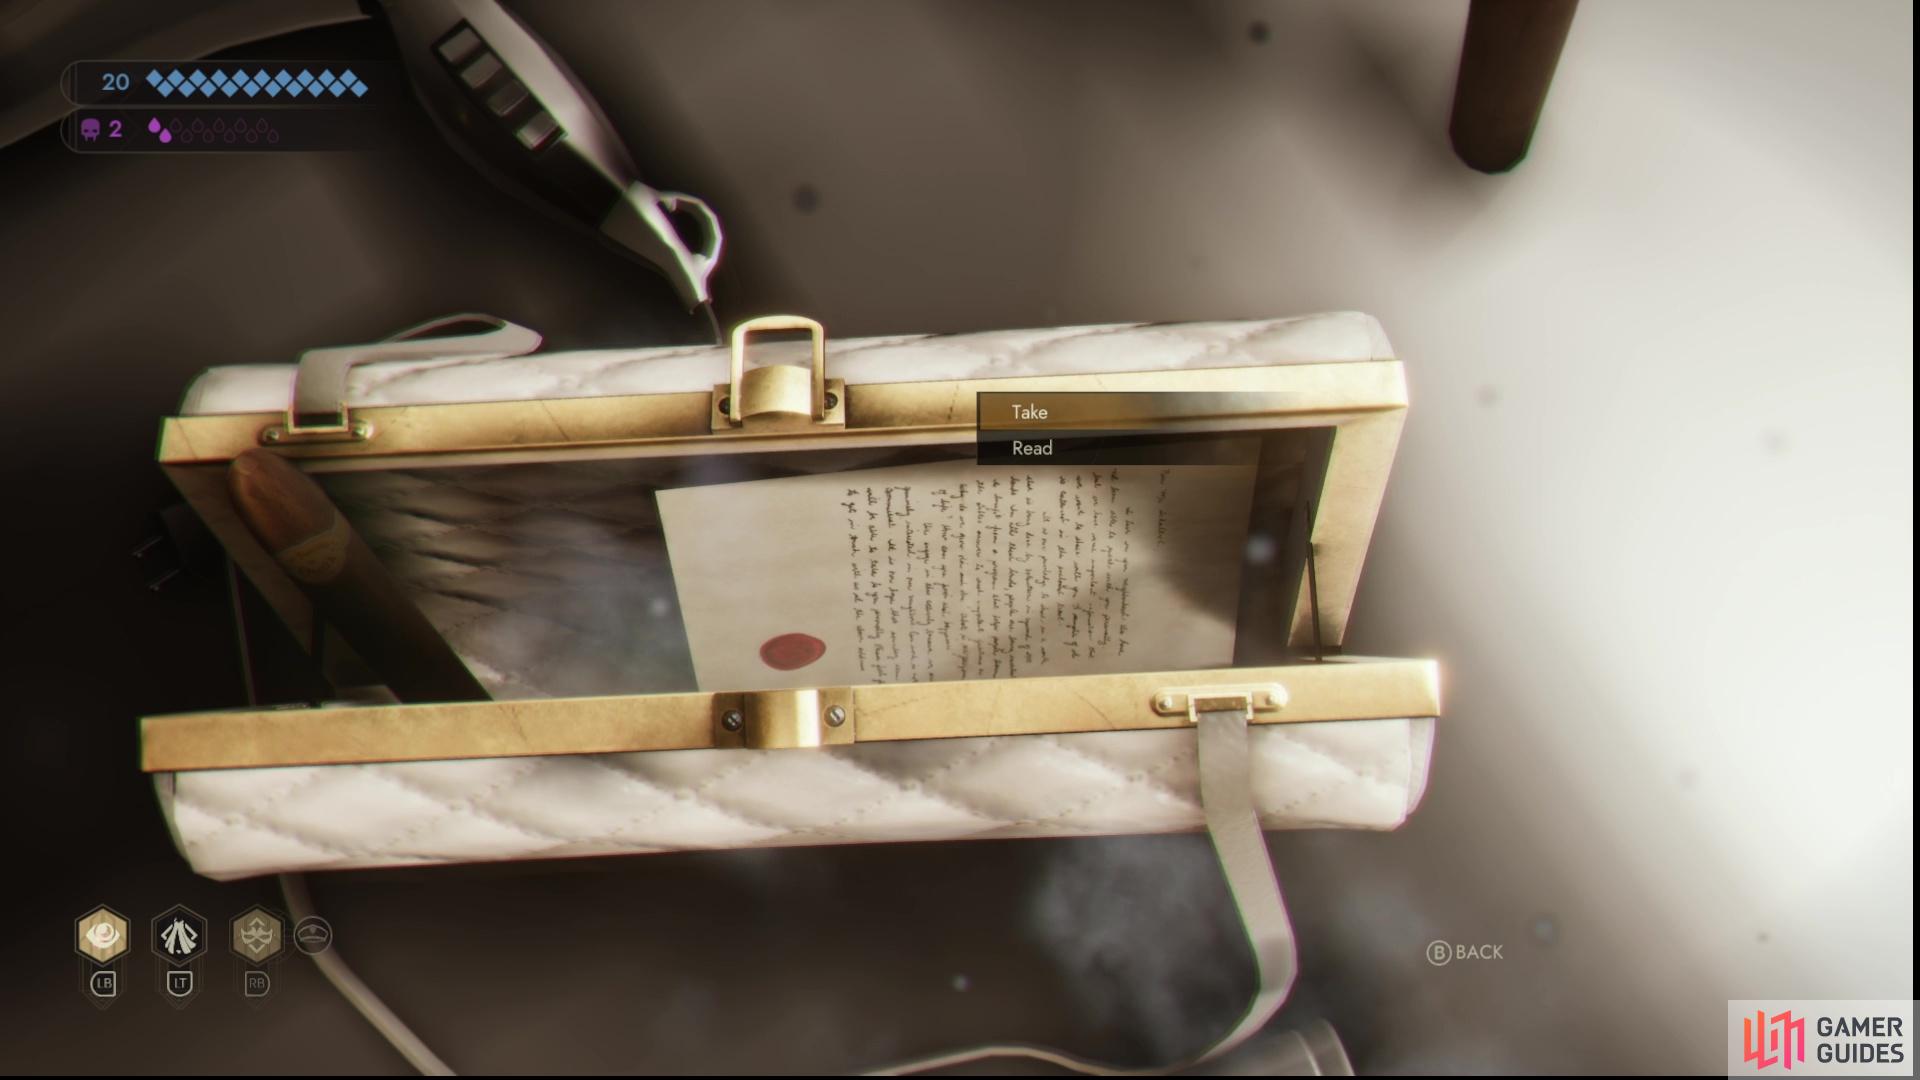
Search inside a handbag in the bathroom to find Miley’s Speech.
Where to Find Miley’s Speech
You’ll have to progress through the scene a bit to find the first bit of intel; use Obfuscate to copy the uniform of a Homicide Officer, pass through the police tape to enter the second room and get through the first confrontation with Halsey. Afterwards, go through a door to the right to enter the loft proper then turn right. After a scene with some cops and feds discussing what to do with various staked corpses, continue through the large living room and when you find some more police tape blocking your path, turn down the hallway to the right. Get through the second encounter with Halsey and go through a door to the right to reach the Safe Room - Bathroom.
Search a handbag near the sink and investigate a letter inside, near a cigar. Read the letter, after which you’ll be able to take it, acquiring Miley’s Speech and keeping it out of the hands of dangerous, inquisitive mortals.
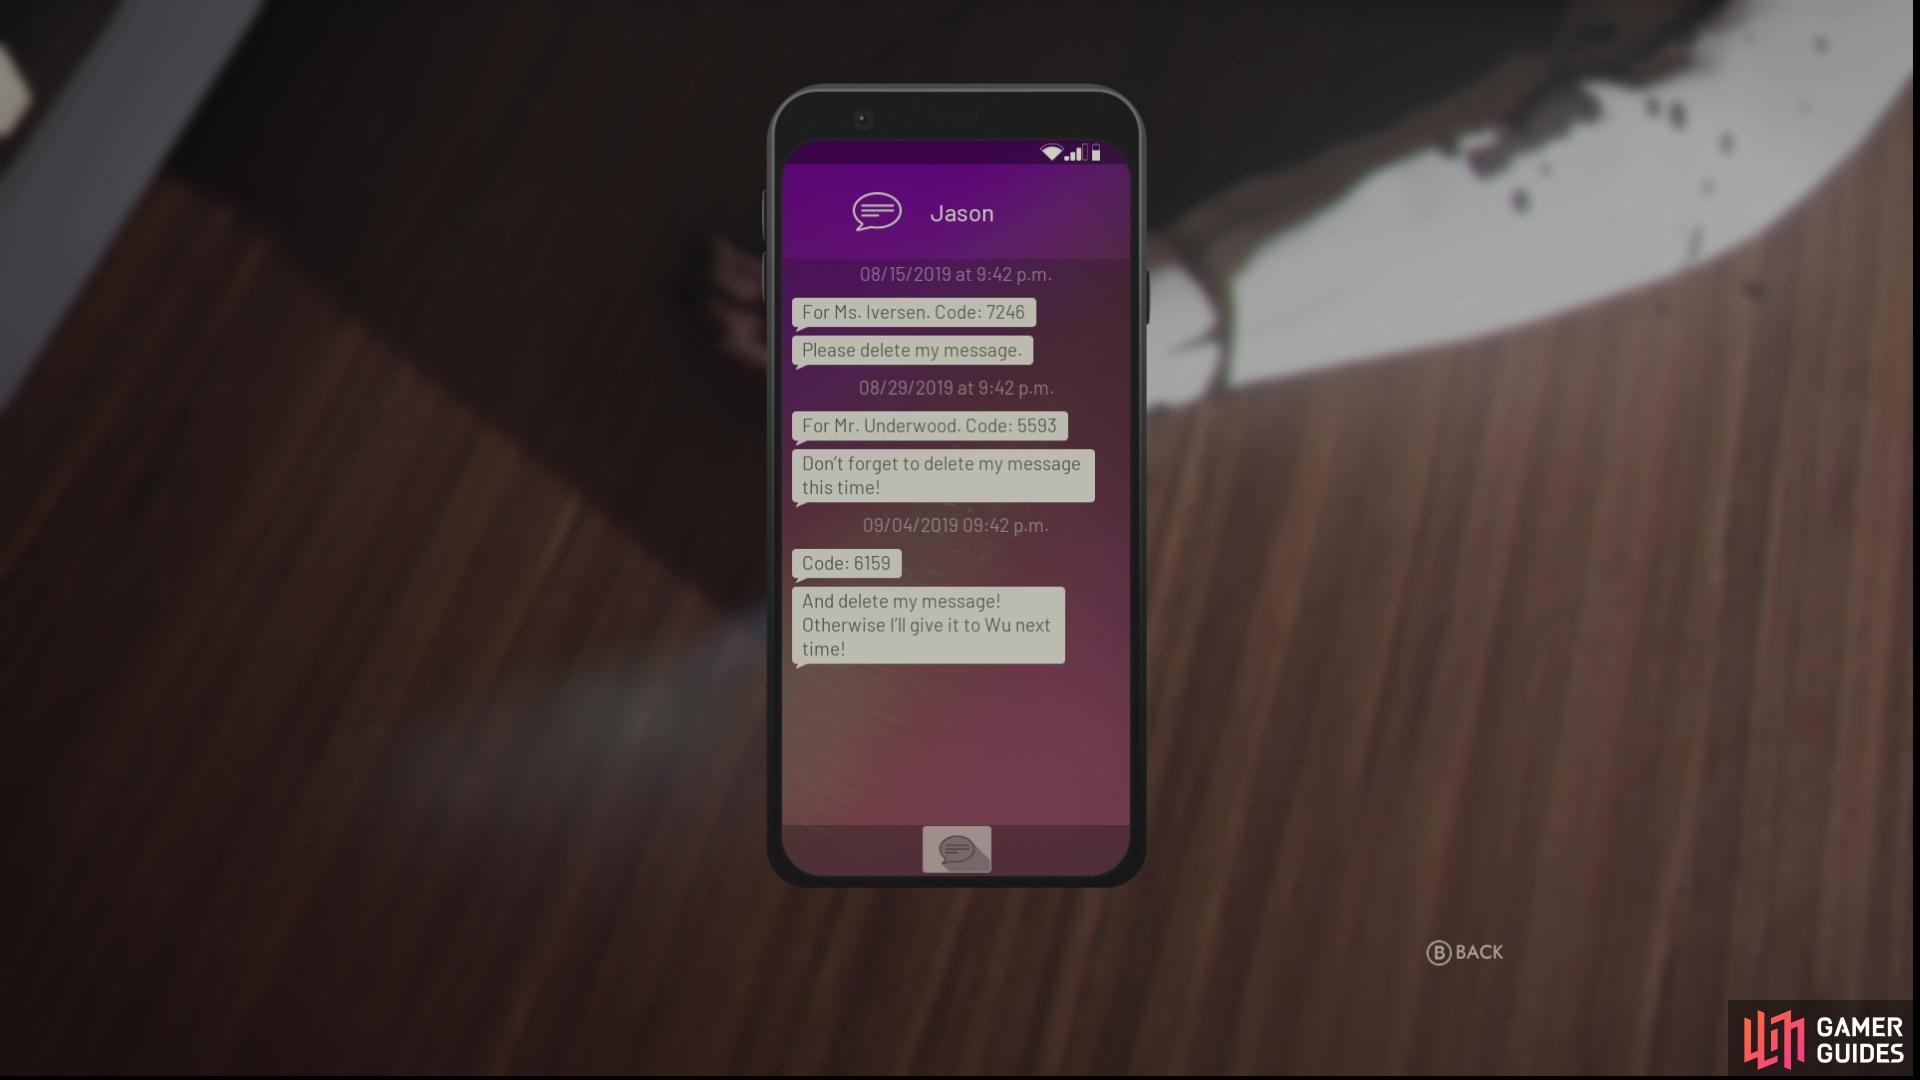
Search a corpse under a wine rack to find a passcode on his phone,
which you can use to open a briefcase in the kitchen and obtain the Red Salon File.
Where to Find the Red Salon File
Exit the Safe Room - Bathroom and enter the kitchen across the hall. On the corner of the island counter in the middle of the room you’ll spot a briefcase, which can be opened by entering the correct passcode combination or by passing a Security check, if you don’t mind needlessly burning Willpower.
To find the passcode, head into the wine room adjacent to the kitchen and search under the collapsed wine racks in the center of the room to find a dead vessel. Search the deceased mortal and scry over to the phone in his hand, where you’ll find some correspondence. Note the bottom-most code (it’s fortunate for us that this vessel wasn’t very obedient), then head back into the kitchen and enter the code found on the phone into the mechanism on the briefcase. This will open up the briefcase and allow you to read and obtain the the Red Salon File.
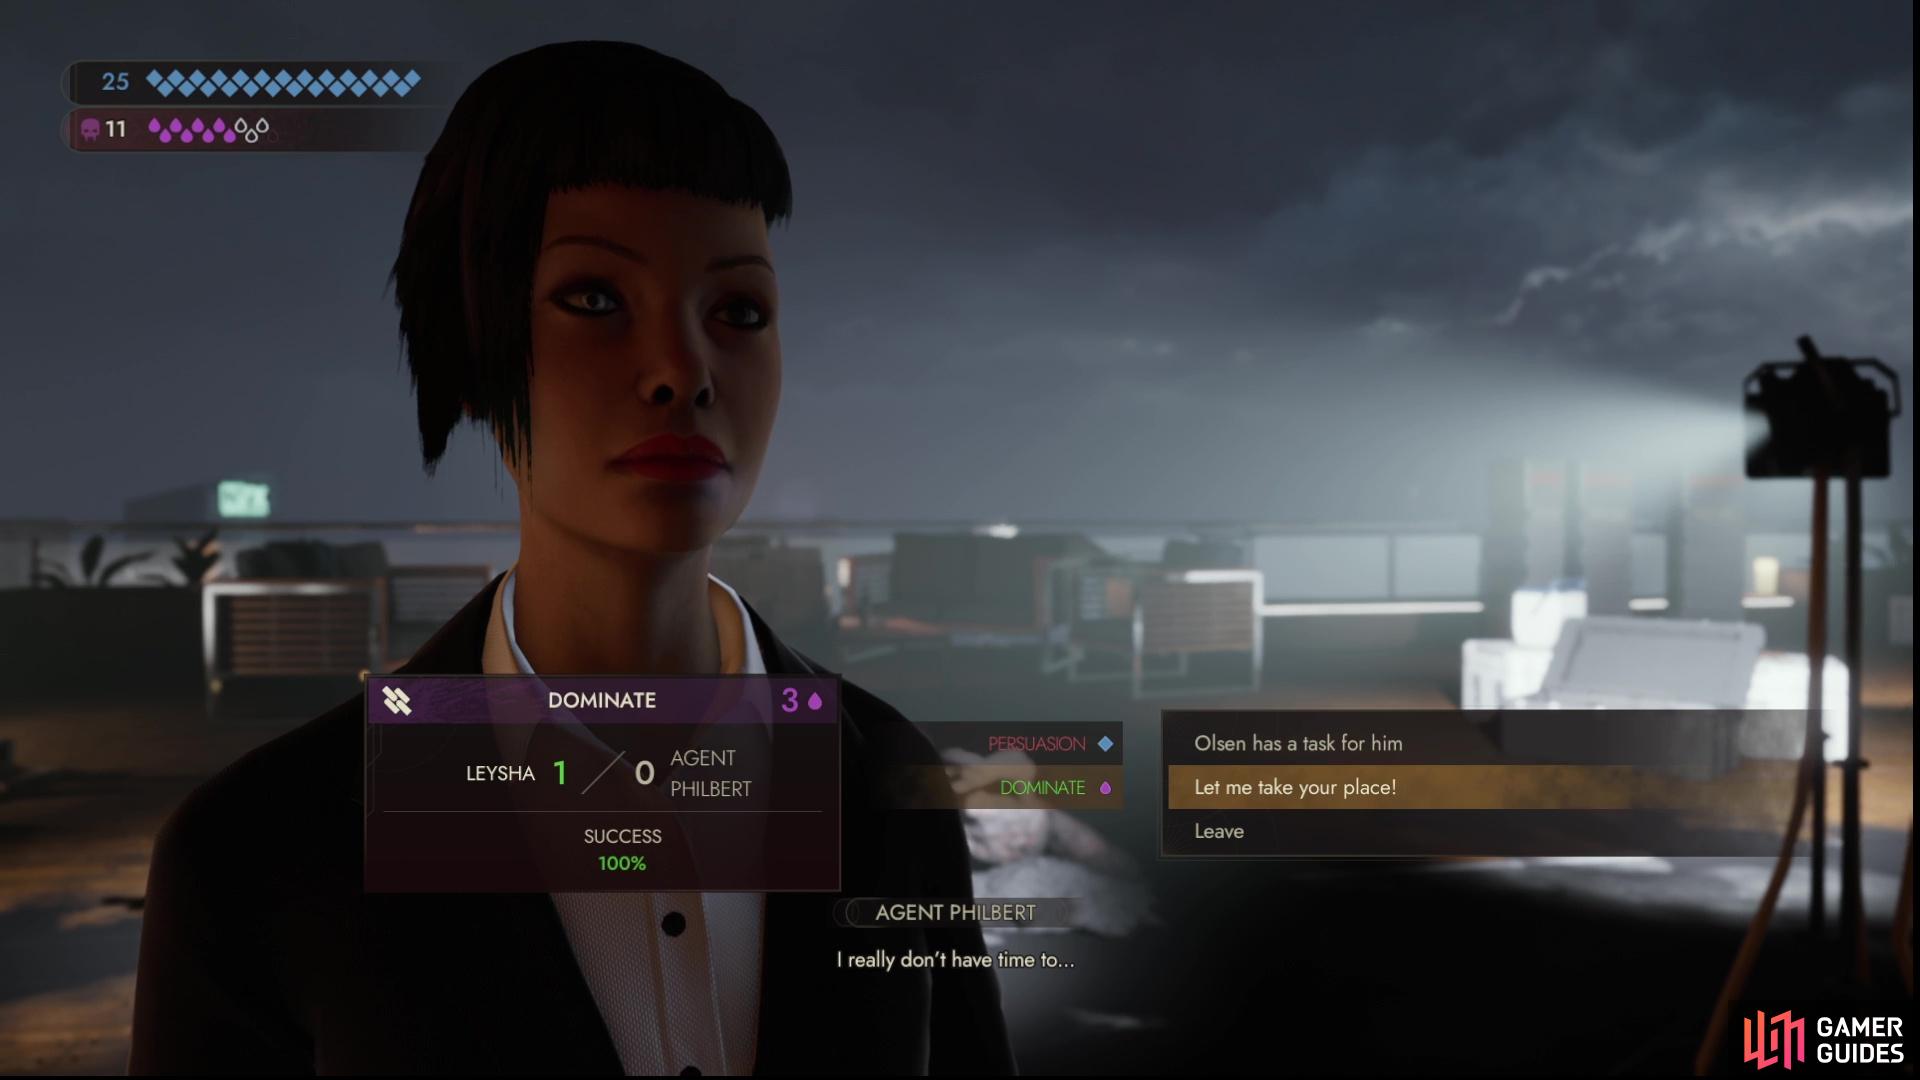
Get rid of Agent Philbert using either Persuasion or Domination,
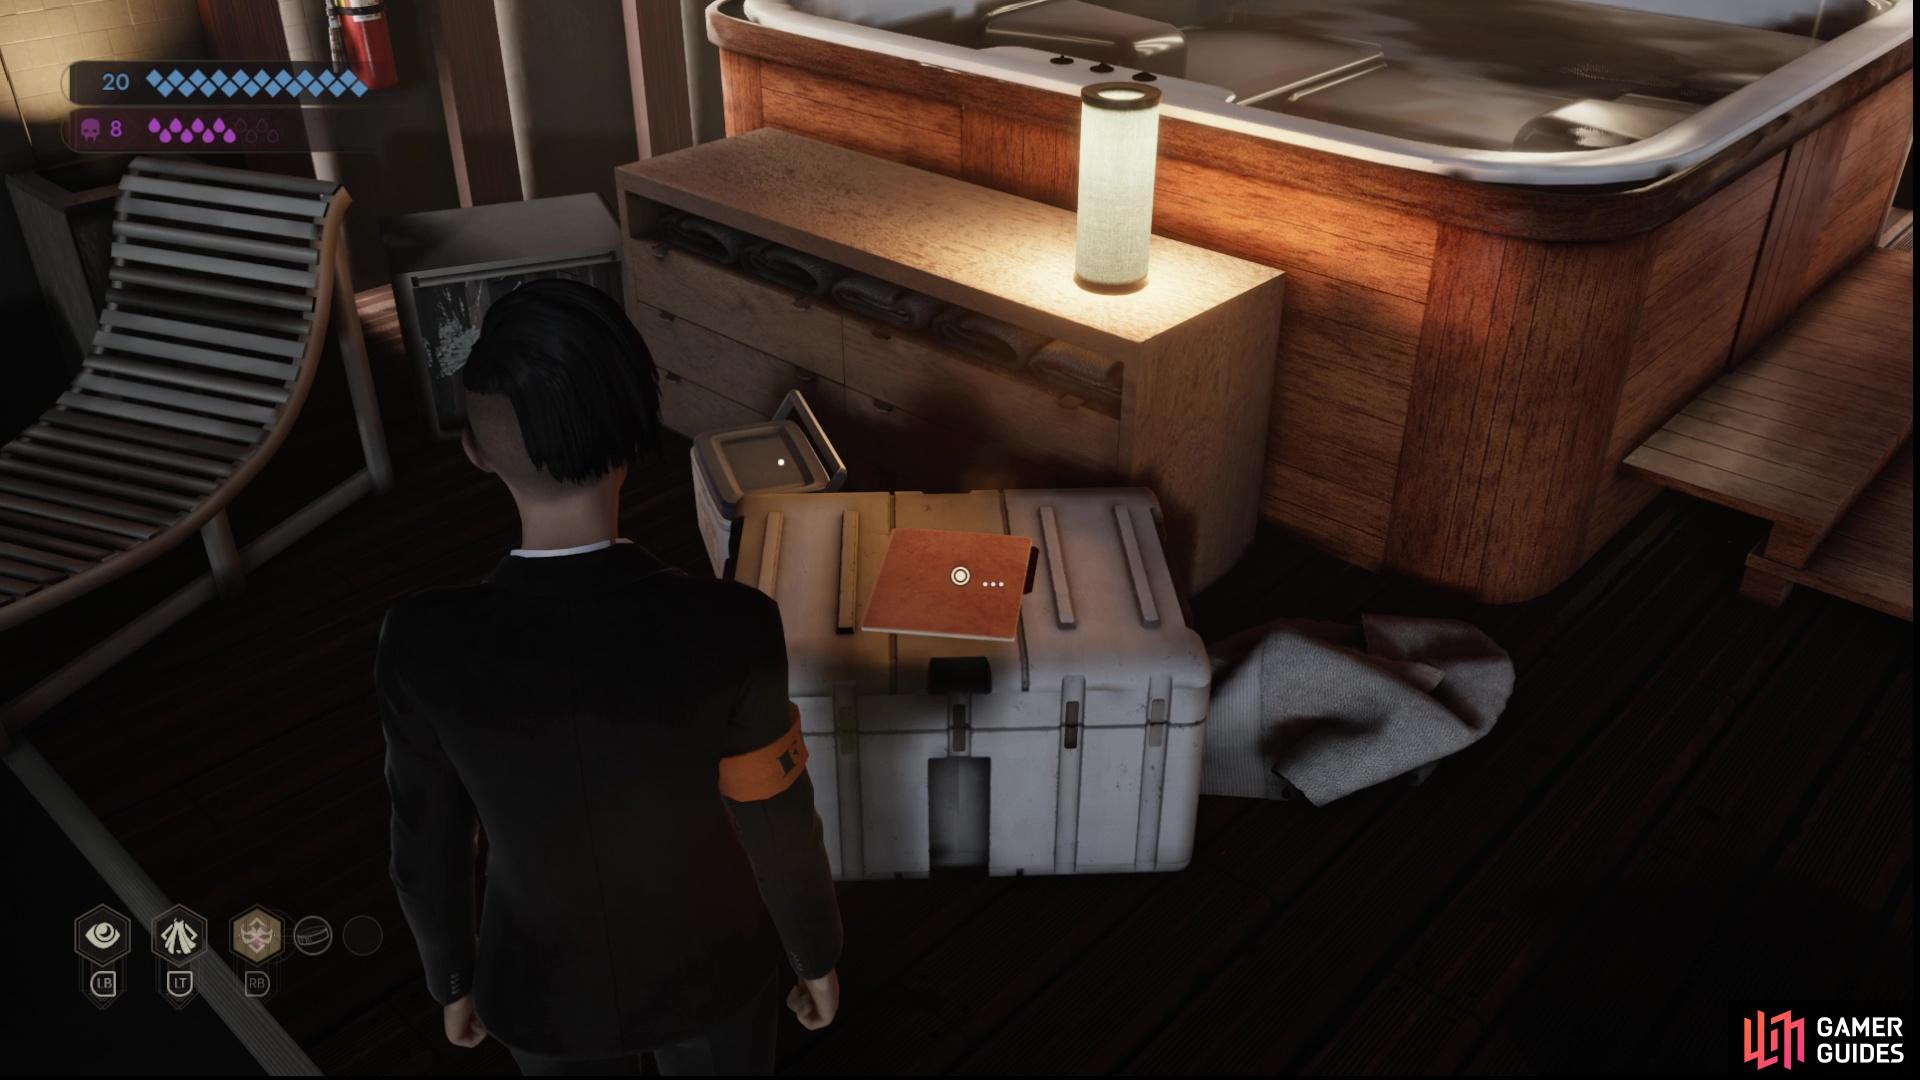
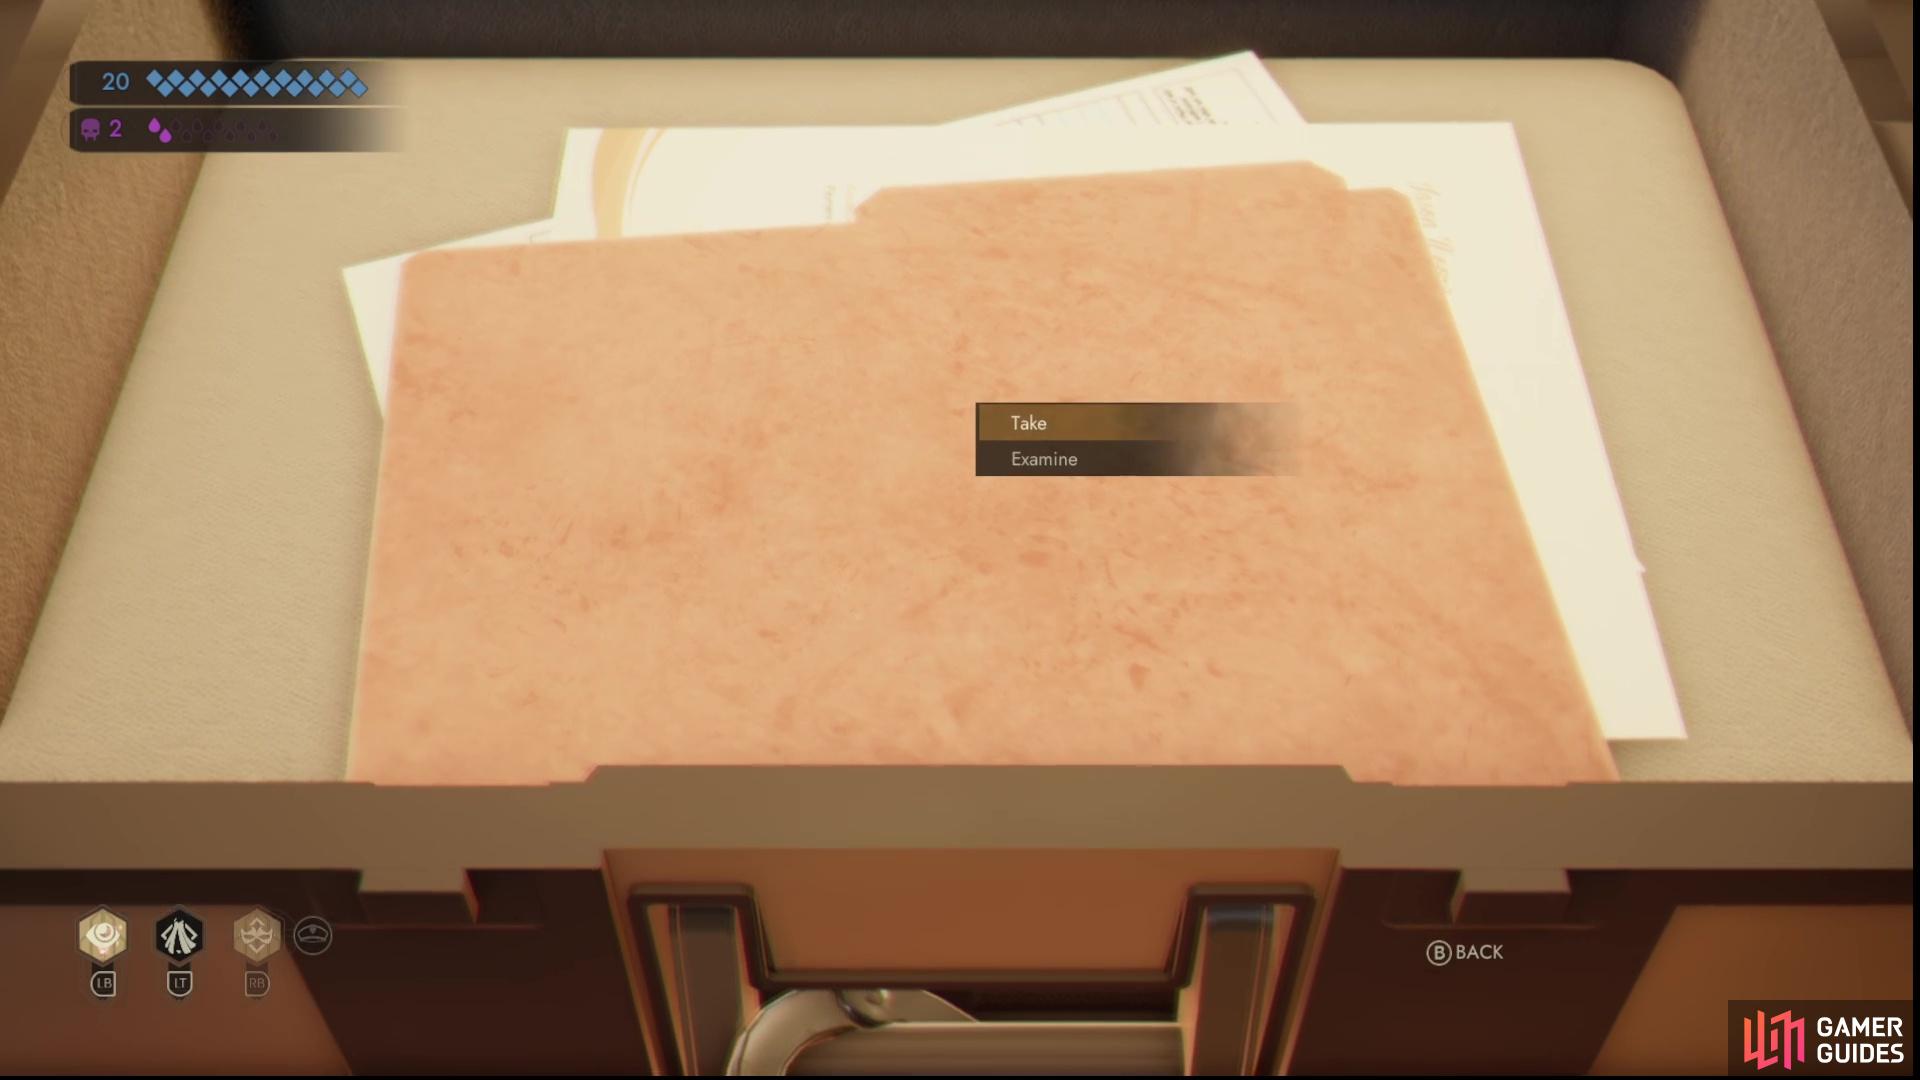
then grab the Study Files from near the hot tub.
Where to Find the Study Files
Once you’ve claimed the Red Salon File, talk to Officer Opuedo (he can be found standing nearby in the kitchen), then use Obscucate to copy a Forensics Specialist uniform. Change in the Safe Room - Bathroom, then cross the police tape just outside the kitchen. Halsey will appear shortly thereafter and guide you into another Safe Room, where the third confrontation will occur.
After the third encounter with Halsey, exit the Safe Room - Laundry Room and turn right. Head down the hallway and go through the door to the right. In this room you’ll automatically engage in a confrontation with Richard, after which you’ll be free to go through a hole in the wall to the left, which exits out to the balcony.
When you reach the balcony turn left and approach the agent blocking your way forward. Copy his suit to obtain the Government Agent outfit, backtrack to a Safe Room and change into this new outfit, then return to the balcony. You should now gain access to the main part of the balcony where you’ll need to seek out Agent Philbert who can be found near the hot tub.
Agent Philbert isn’t all that interesting on his own, but he does watch over a nearby folder - the last bit of intel you need to acquire. You won’t be able to claim this intel until you deal with Agent Philbert, which you can achieve by talking to him and using Dominate (3 Hunger). Alternatively, find and talk to Novice Olsen (he can also be found on the balcony) the return to Agent Philbert and you’ll now get the option to pass a Persuasion 2 check. If you manage to pass this check, follow up by saying ”Go see the local police” during a timed dialogue selection to get rid of Agent Philbert.
However you manage it, once Agent Philbert is gone you can read and take the Study Files, the last bit of intel you need to complete this bonus objective and mitigate Suspicion. Reading these Study Files can also help you identify which container Miley is being kept in.
No Comments