Return to the Excavation Site and check behind the boxes near the northeast stairs for an invisible treasure sphere with Librascope (remember to press R1 to uncover it). Then go back to Echoes of the Past area with the pillars.
You can choose to take the tunnel on the right or path on the left. To the left of the tunnel is a concealed treasure sphere containing a Capsule (needed for a quest in this timeline). Take the tunnel for it leads to a shiny gate in the cavern and some treasure; A treasure sphere in a dead end with another Capsule (needed for a quest in this timeline), another treasure sphere in a dead end for 8x Mana Droplets , and then examine the shiny gate for a Live Trigger: (These gates may be appearing in other places in the timeline. What are they and why did they appear?). Then go west from the shiny gate, and press R1 near the concealed treasure sphere for a Rune Bracelet .
When you exit the tunnel, proceed north (that giant hand will smash the surroundings again), and then turn east around the corner for a Live Trigger: (We either fight Atlas head-on, or take our chances with the device. Before I decide, how do I reply?). Afterwards collect 2x Gysahl Greens from the treasure sphere and wave hi to Chocolina. You can also grab a Phoenix Down from the nearby treasure sphere. There is a big giant Atlas. It’s not advisable to go charging in as you have no chance of defeating it at this stage.
Turn around and enter the tunnel on the right. When you reach a cavern (nab the treasure sphere with the Orange Newsboy Cap ) with paths branching east, west and another corridor connecting the cavern with the outside area (Chocolina’s shop is in this corridor as well), hike west (grab the Star Pendant from the concealed treasure sphere) to a dead end with another Live Trigger: (In the future, it’s taught that Cocoon fell to Pulse during a war. What should I ask Noel to clarify?). Afterwards dash east to find a special device…
Enter the Temporal Rift, a mess that requires you to synchronise the timeline. There’s three different types of rifts.
-
Tile Trial: Collect all crystal fragments in the area, while the panels you step on disappear when you get off them.
-
Crystal Bonds: Connect the star system of the shown monster by linking together two crystals when they’re of the same shape AND color.
-
Hands of Time: Clear all numbers on the clock. For clock puzzles we reccommend the following Shockwave app. http://clockpuzzle.pl (in English, supplied by JoeyRay) It will help you amazingly. Or you could do it the hard way; with your brain and lots of trial and error. Pressing Square resets the current stage of the puzzle, and pressing R1 + L1 at the same time quits the puzzle.
Tile Trial
Now with that out of the way, clear the three stages of Tile Trial to obtain AF005 BRESHA RUINS FRAGMEN T - Delicate Crystal (01/08) + 200CP . Examine the device to deal a slight shock to Atlas… oooh, ran outta juice? Return to thr giant war machine and prepare for va mortal battle!
We had these paradigms prepared.
- COM/COM/SEN
- RAV/COM/SEN - default paradigm
- RAV/RAV/SEN
- SEN/SEN/MED
- RAV/COM/MED
- SEN/SEN/SEN
Boss Battle: Atlas Giant (Weakened)
Oh… I guess it can’t defeat us just yet. Soften it up with RAV/COM/SEN and after two or three loadouts of punishment switch to RAV/RAV/SEN to quickly stack up its Chain Gauge. Switch to COM/COM/SEN if the gauge begins to deplete too quickly to slow down its depletion rate.
Atlas lets out a yell, which inflicts Curse - respond by switching to RAV/COM/MED and have Cait Sith Esuna everyone, so that you’re not interrupted while launching attacks. Upon staggering Atlas, it slumps over and takes normal damage from both magic and physical attacks. Continue the assault
For perfect Cinematic Action you get the Fragment Crystal . Answer the Live Trigger: (The paradox may have been caused by someone meddling in history. Let’s think about that) and nab the AF005 BRESHA RUINS FRAGMENT - Atlas Fragment (02/08) + 250CP . Advance into Lamentable Rest, the area past Atlas and examine the monument for some scenes. Chocobos can now be employed for riding, and a Live Trigger Cube appears a bit north from Alyssa.
Check the northeast corner of Lamentable Rest to find a concealed item and press R1 to uncover the Eclipse Artefact which activates the shiny gate in Echoes of the Past area with the pillars. Now remember where the giant hand smashed the environment for the second time in Echoes of the Past? Go there and use R1 to nab the Reunion Artefact which activates the shiny gate in the Echoes of the Past cavern area.
Go to the warp gate in Echoes of the Past area with the pillars and activate it with the Eclipse Artefact - it unlocks the AF010 Yaschas Massif timeline.
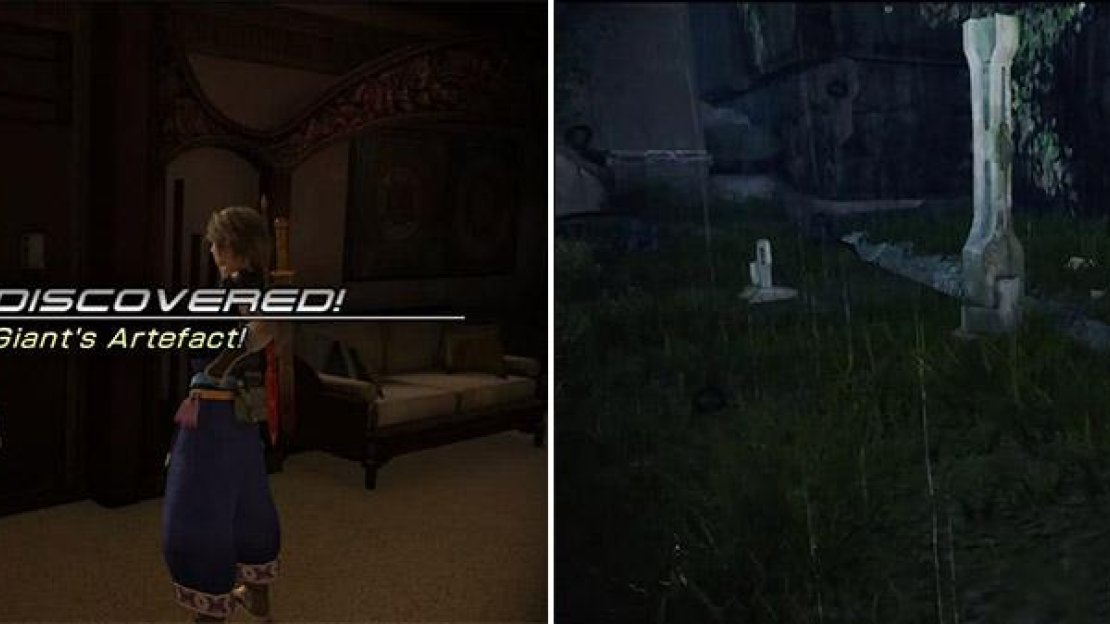
The Giant’s Artifact can be found here (left). Find the concealed item here (right).
Press L1 while in Historia Crux to switch between two different types of views.
Return to AF005 Bresha Ruins and activate the shiny gate in Echoes of the Past caverns area with the Reunion Artefact to unlock AF300 Sunleth Waterscape .


No Comments