
When traversing around the Sunless Skein in Lords of the Fallen, you will come across Byron at the Vestige of Catrin provided you’ve been talking to him throughout the game. You’ll find out that someone stole his beloved ![]() Catrin’s Pendant from the Vestige, and he’ll ask you to find the person responsible for it. If you don’t find the thief before leaving the area, he’ll get the pendant back himself, but this will kill off an important NPC. If you don’t want this happening to you, read below to find out how you can find the thief before it happens.
Catrin’s Pendant from the Vestige, and he’ll ask you to find the person responsible for it. If you don’t find the thief before leaving the area, he’ll get the pendant back himself, but this will kill off an important NPC. If you don’t want this happening to you, read below to find out how you can find the thief before it happens.
You’ll need to find your way to Revelation Depths if you want to find the thief, Winterberry.
Byron Sunless Skein Location
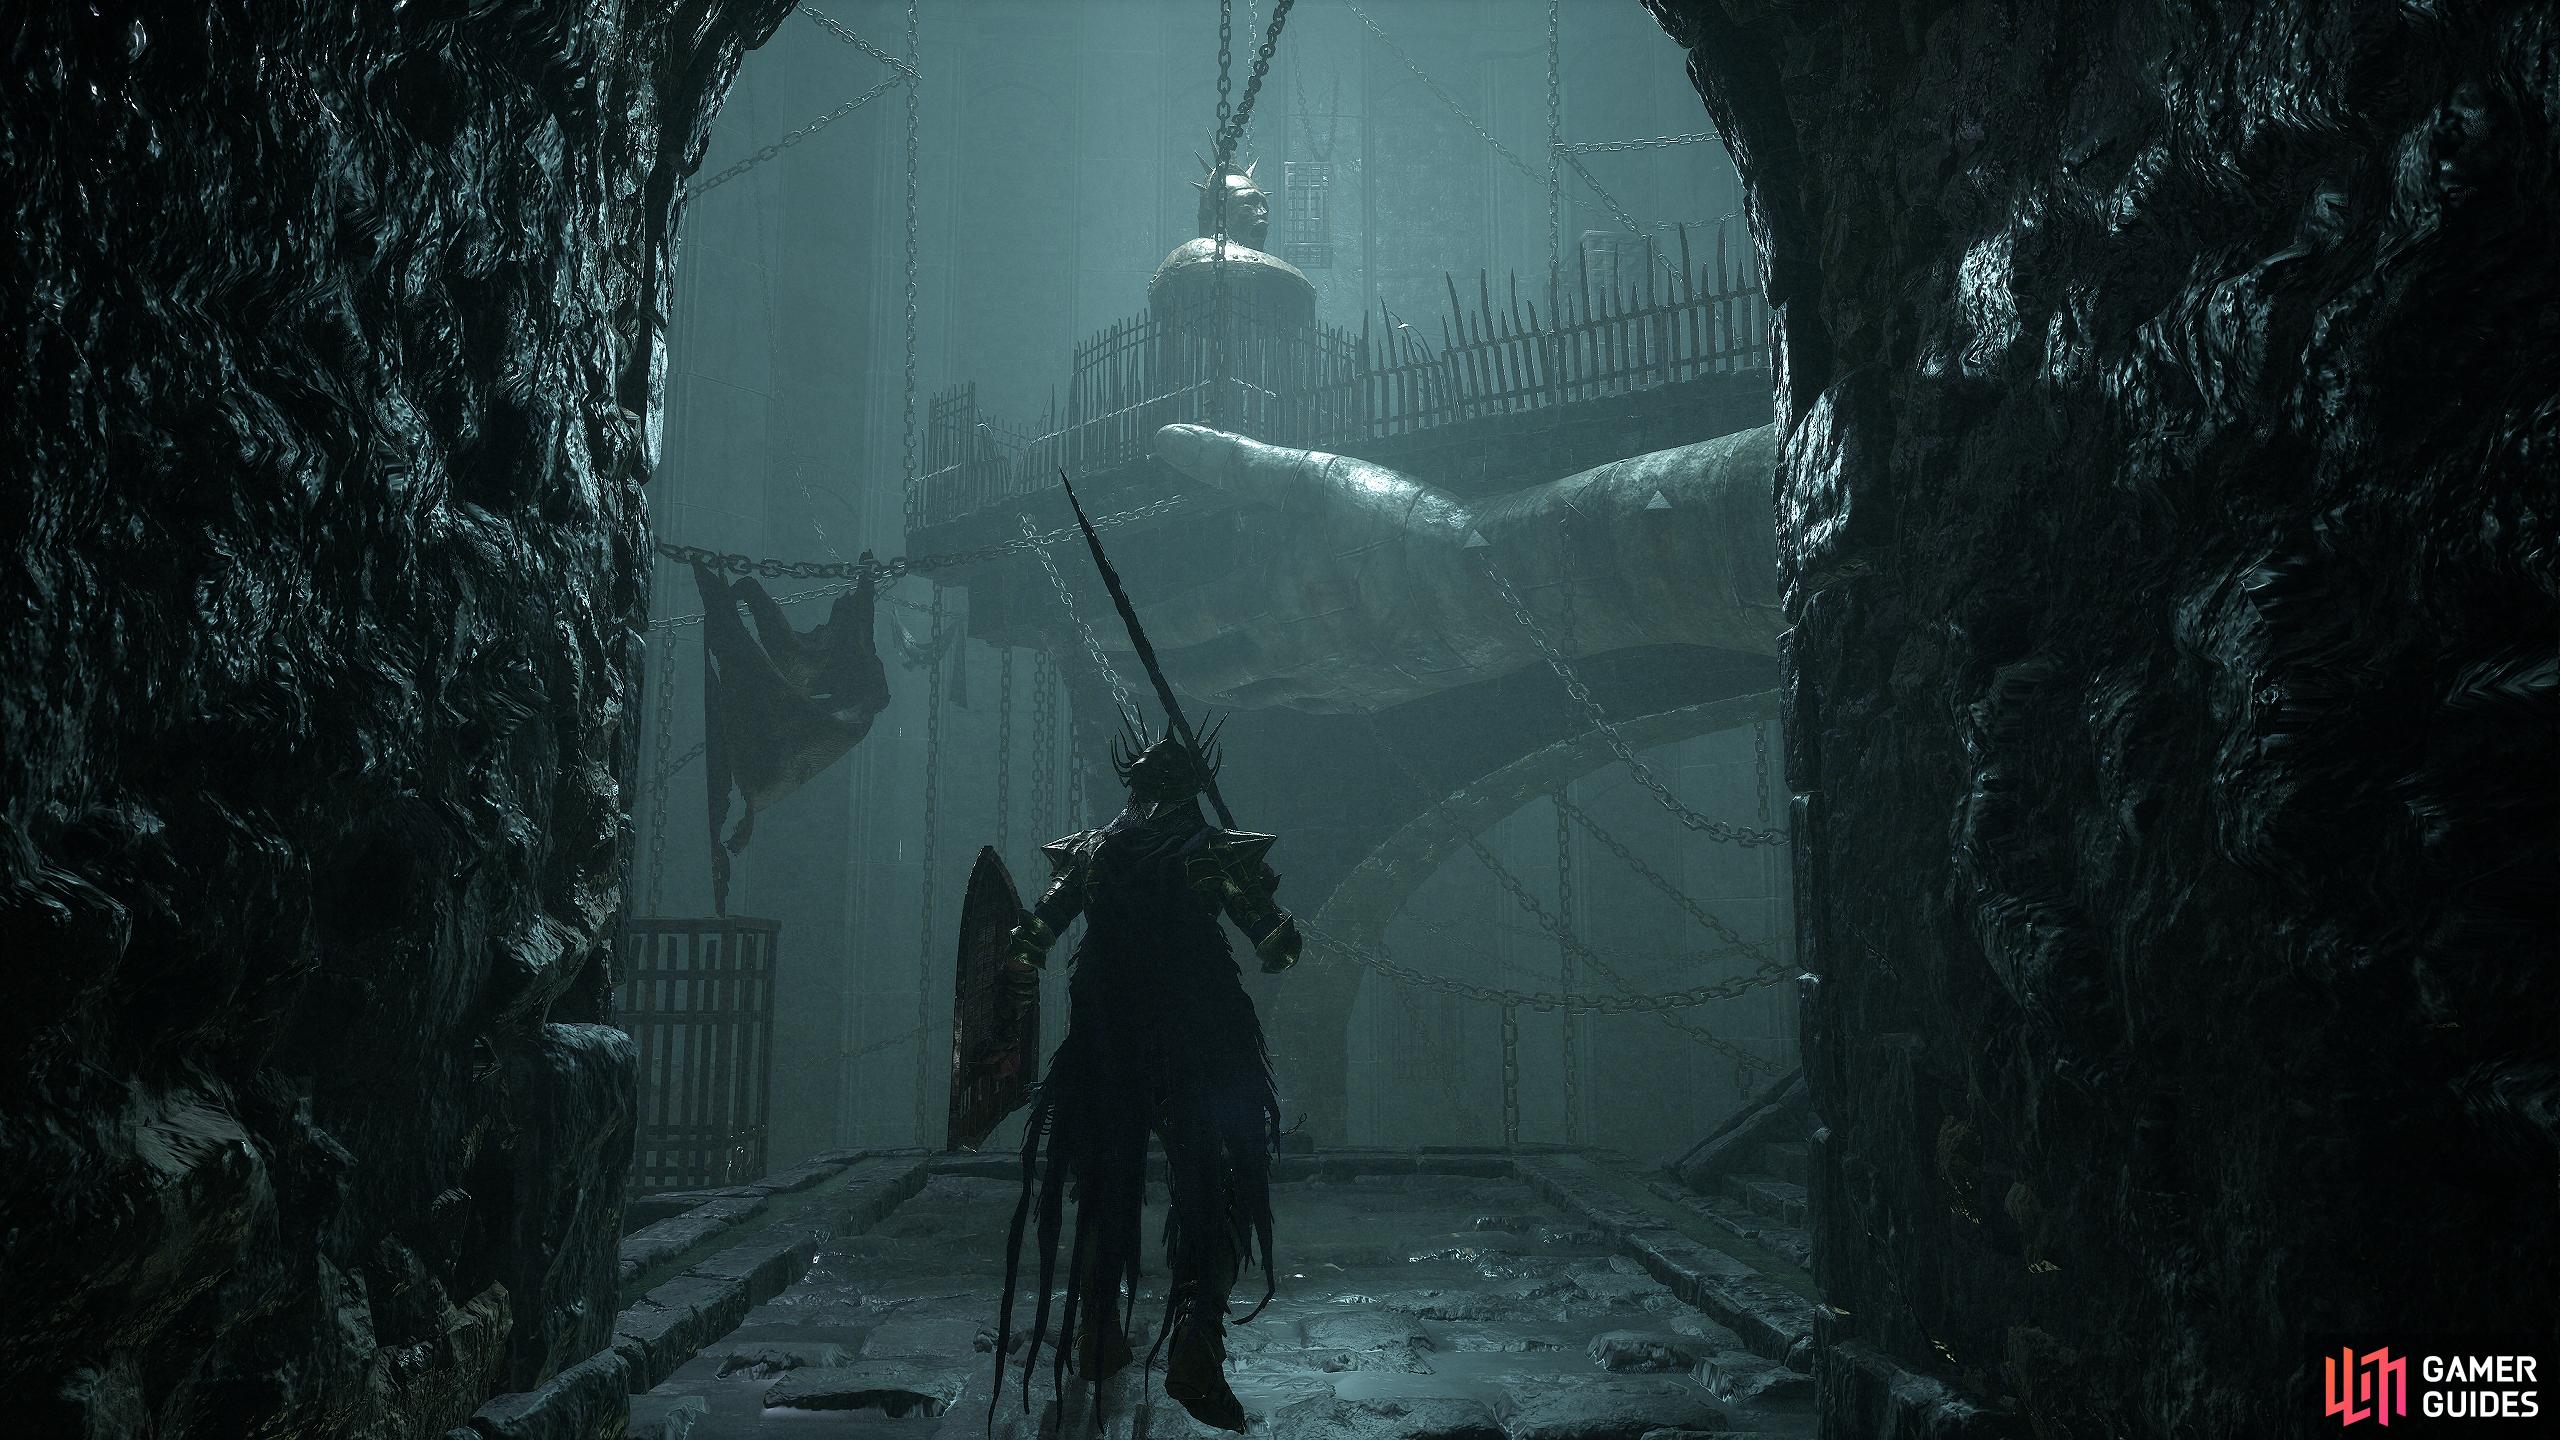
Before you can find the thief, you’ll need to find Byron and progress his quest. You can find him at the Vestige of Catrin in the Sunless Skein Hoist area. This is the area where you need to drain the water to progress.
How to Drain the Water in Sunless Skein
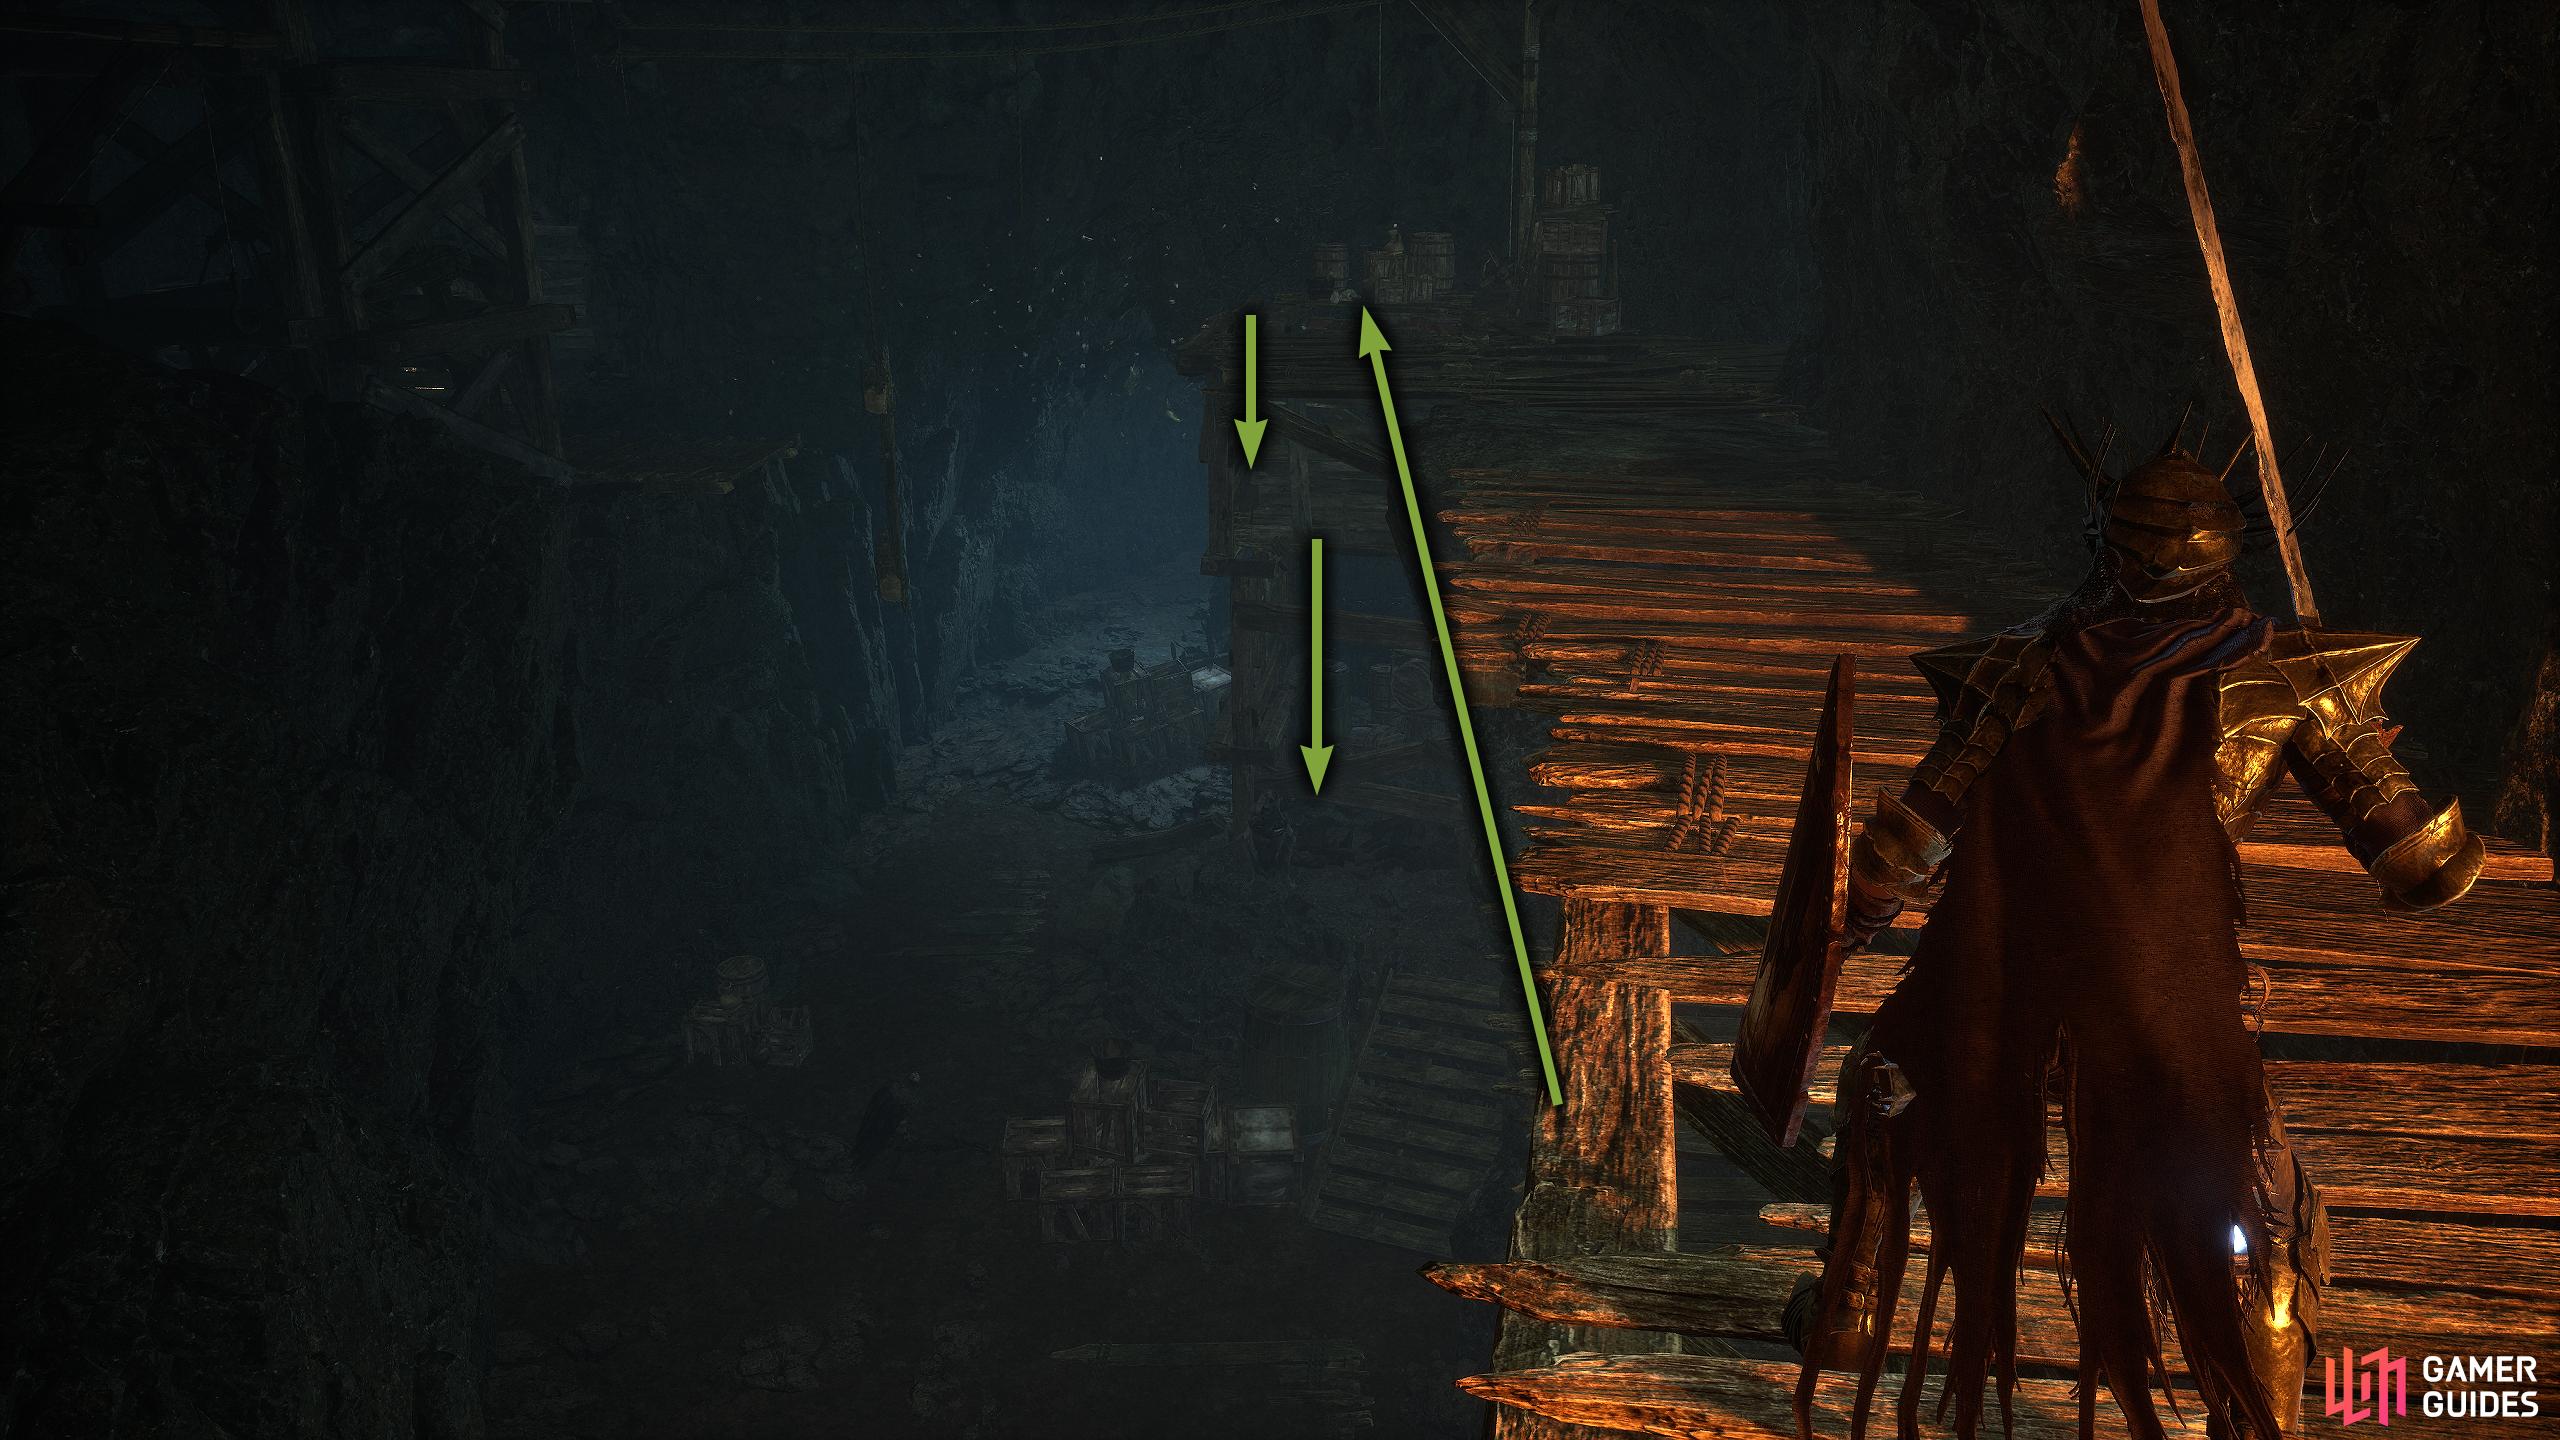
When you reach the area, you’ll have a pool of water with a few enemies scattered around. Switch to the Umbral Realm, drop into the area where the water was, and Soul Flay the body where the ladder is. This will move the platform blocking the ladder which allows you to climb up it. Note, there are a lot of enemies here with the more dangerous one being an easter island head (Mendacious Visage), but if you’re quick, you can ignore it, although you will probably want the loot that’s down here. At the top of the ladder, you’ll find the Catrin Vestige; use it to switch back to Axiom, then activate the lever near the ladder you just climbed. Head back to the Vestige to find Byron, and exhaust his dialogue to progress his quest which will have you looking for the thief.
How to Find Byron’s Thief
The thief that Byron is looking for can be found in an optional area called “Revelation Depths” which can be accessed by heading to the area where the Skinstealer boss (and the elevator). This area is a large cistern area where heading up the stairs leads to the above boss, while heading down will lead to Revelation Depths (eventually).
Head up first, and defeat Skinstealer to receive the “![]() Drainage Control Key”, but DO NOT go up the elevator. Instead, make your way down the stairs, defeat the parasite-protected axeman, and drop onto the wooden planks which will reveal a doorway to your left (if you go into the Umbral Realm and take the platforms down, you can find a boss, and a couple of weapons). Go through the maze-like sewer area head straight while defeating enemies as you go along. If you’ve not been to Fief yet, you’ll encounter an enemy that goes invisible and will shoot at you from afar but is still deadly at close range. Either close the distance to it and swing your sword, or throw magic in its general location.
Drainage Control Key”, but DO NOT go up the elevator. Instead, make your way down the stairs, defeat the parasite-protected axeman, and drop onto the wooden planks which will reveal a doorway to your left (if you go into the Umbral Realm and take the platforms down, you can find a boss, and a couple of weapons). Go through the maze-like sewer area head straight while defeating enemies as you go along. If you’ve not been to Fief yet, you’ll encounter an enemy that goes invisible and will shoot at you from afar but is still deadly at close range. Either close the distance to it and swing your sword, or throw magic in its general location.
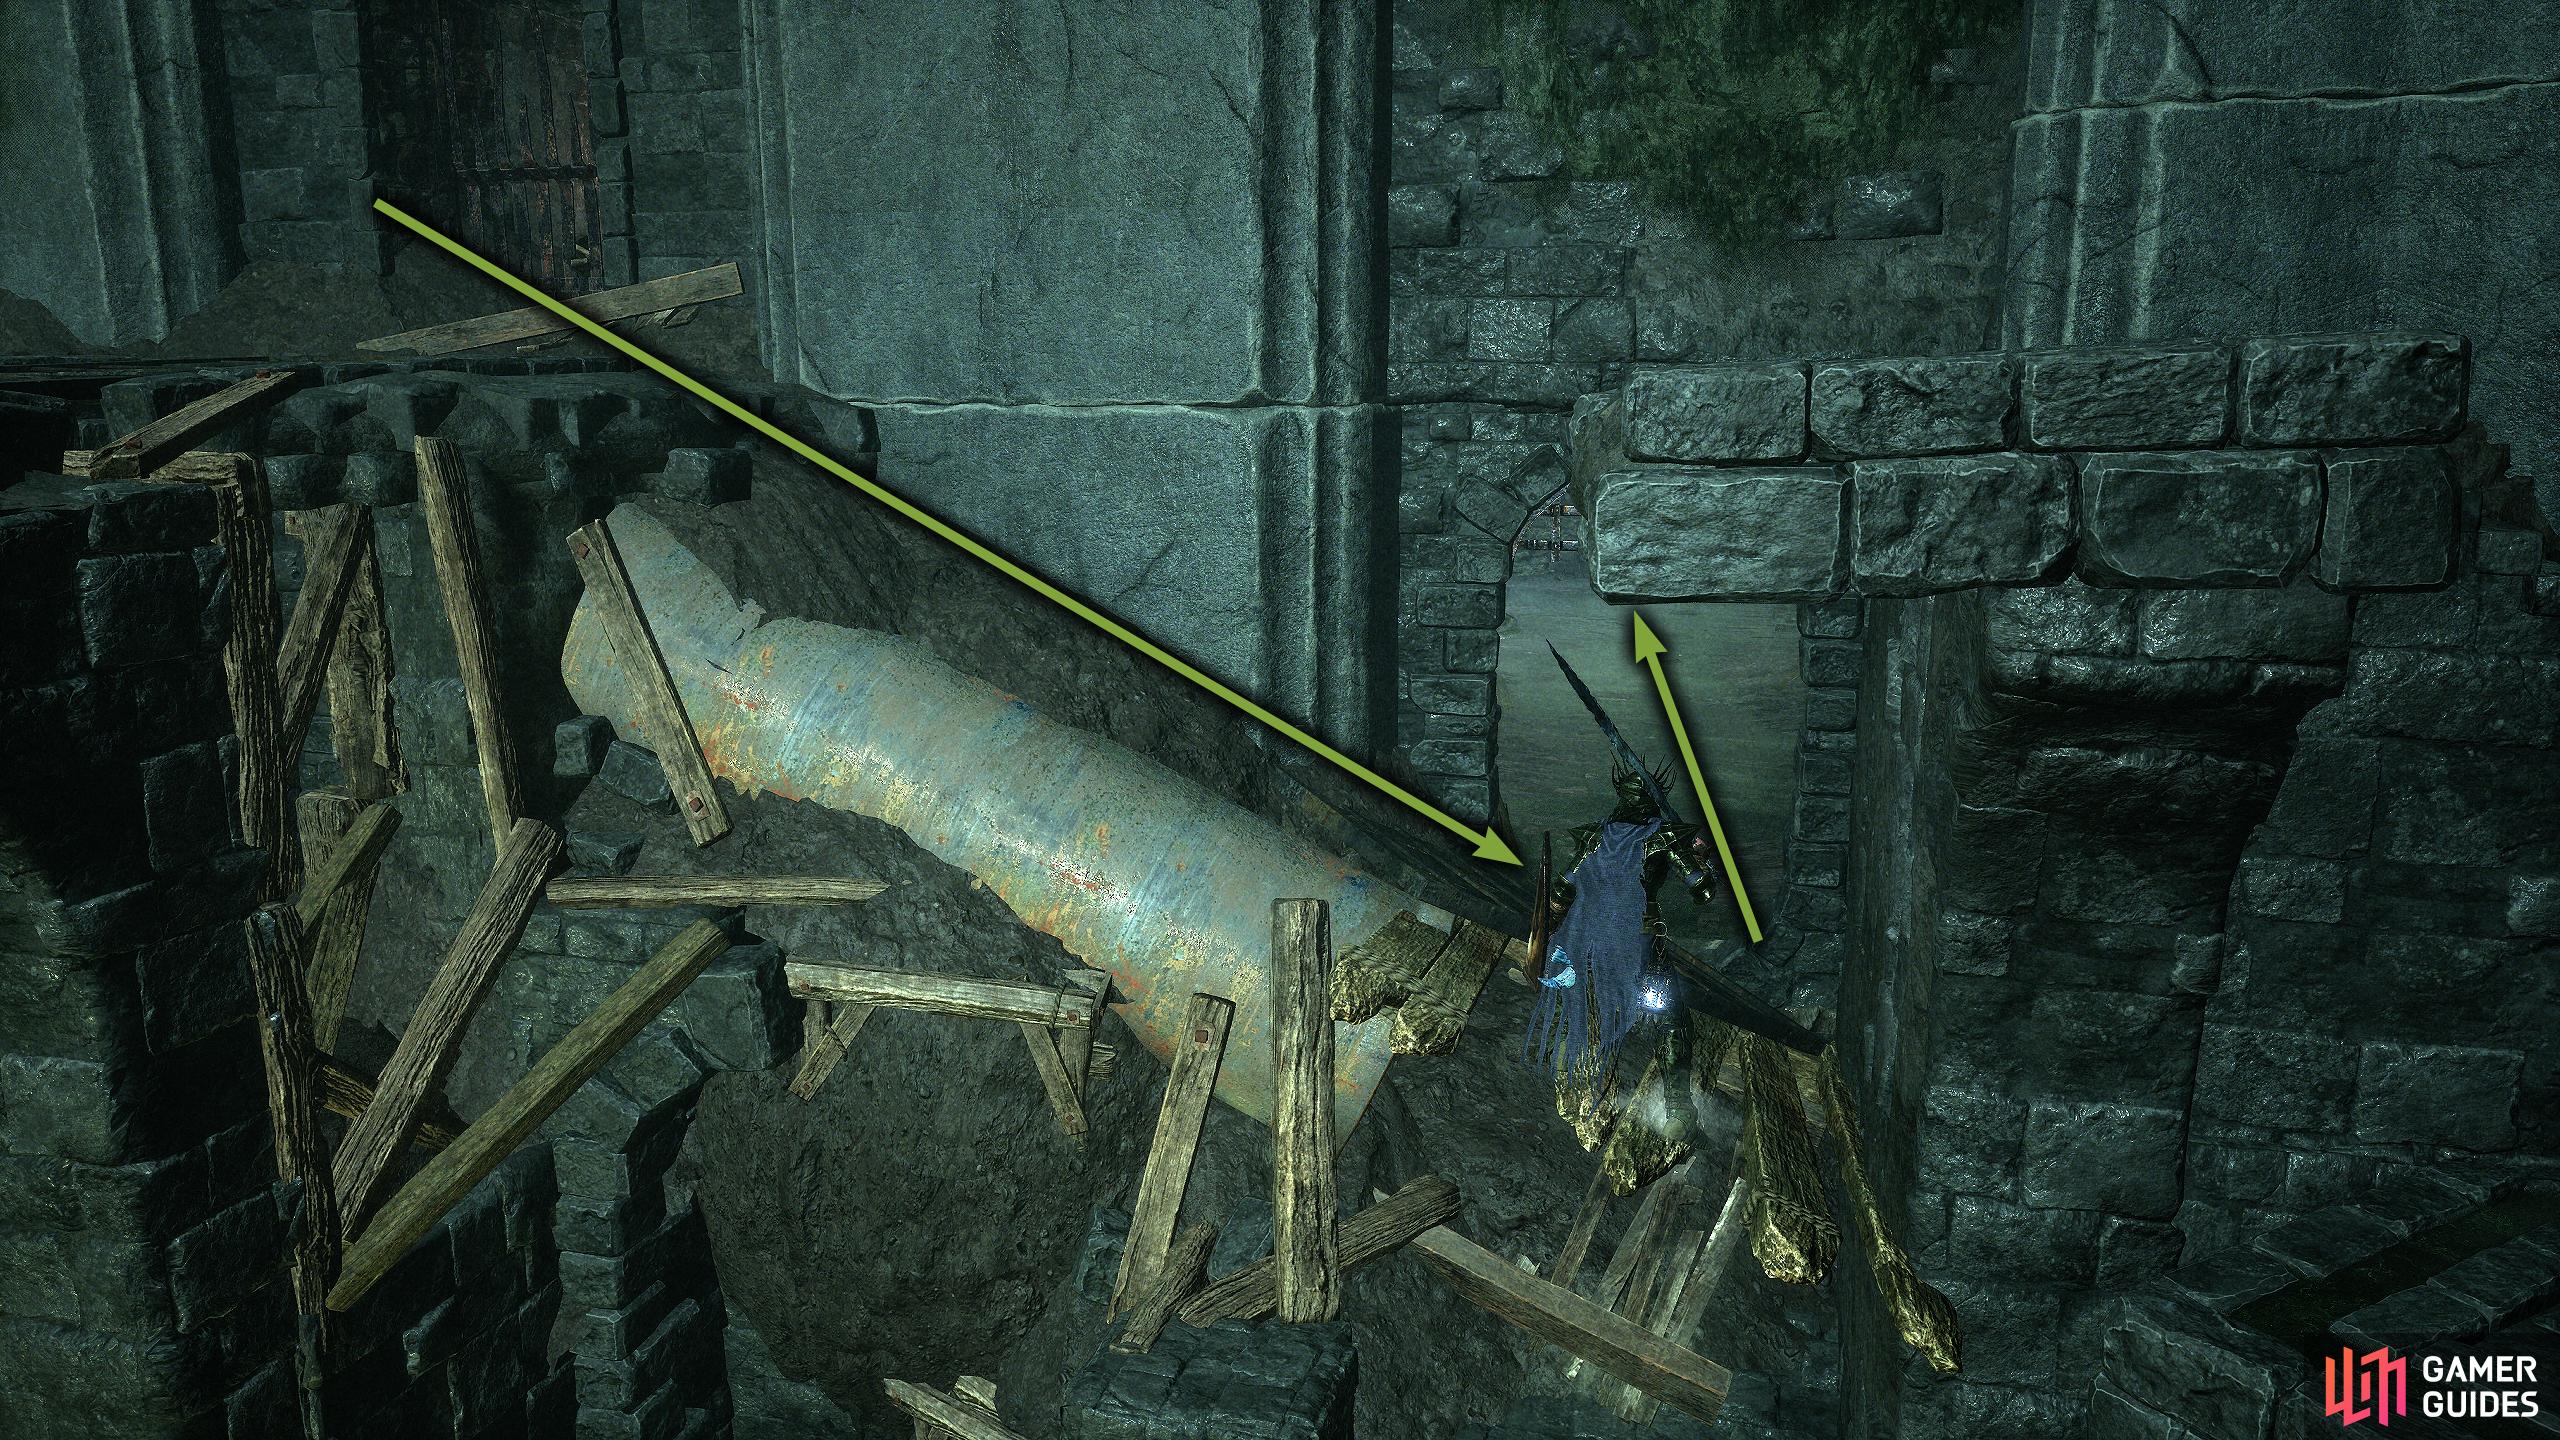
(1 of 3) Follow the stairs down until you defeat the axeman then head through the doorway around the corner.
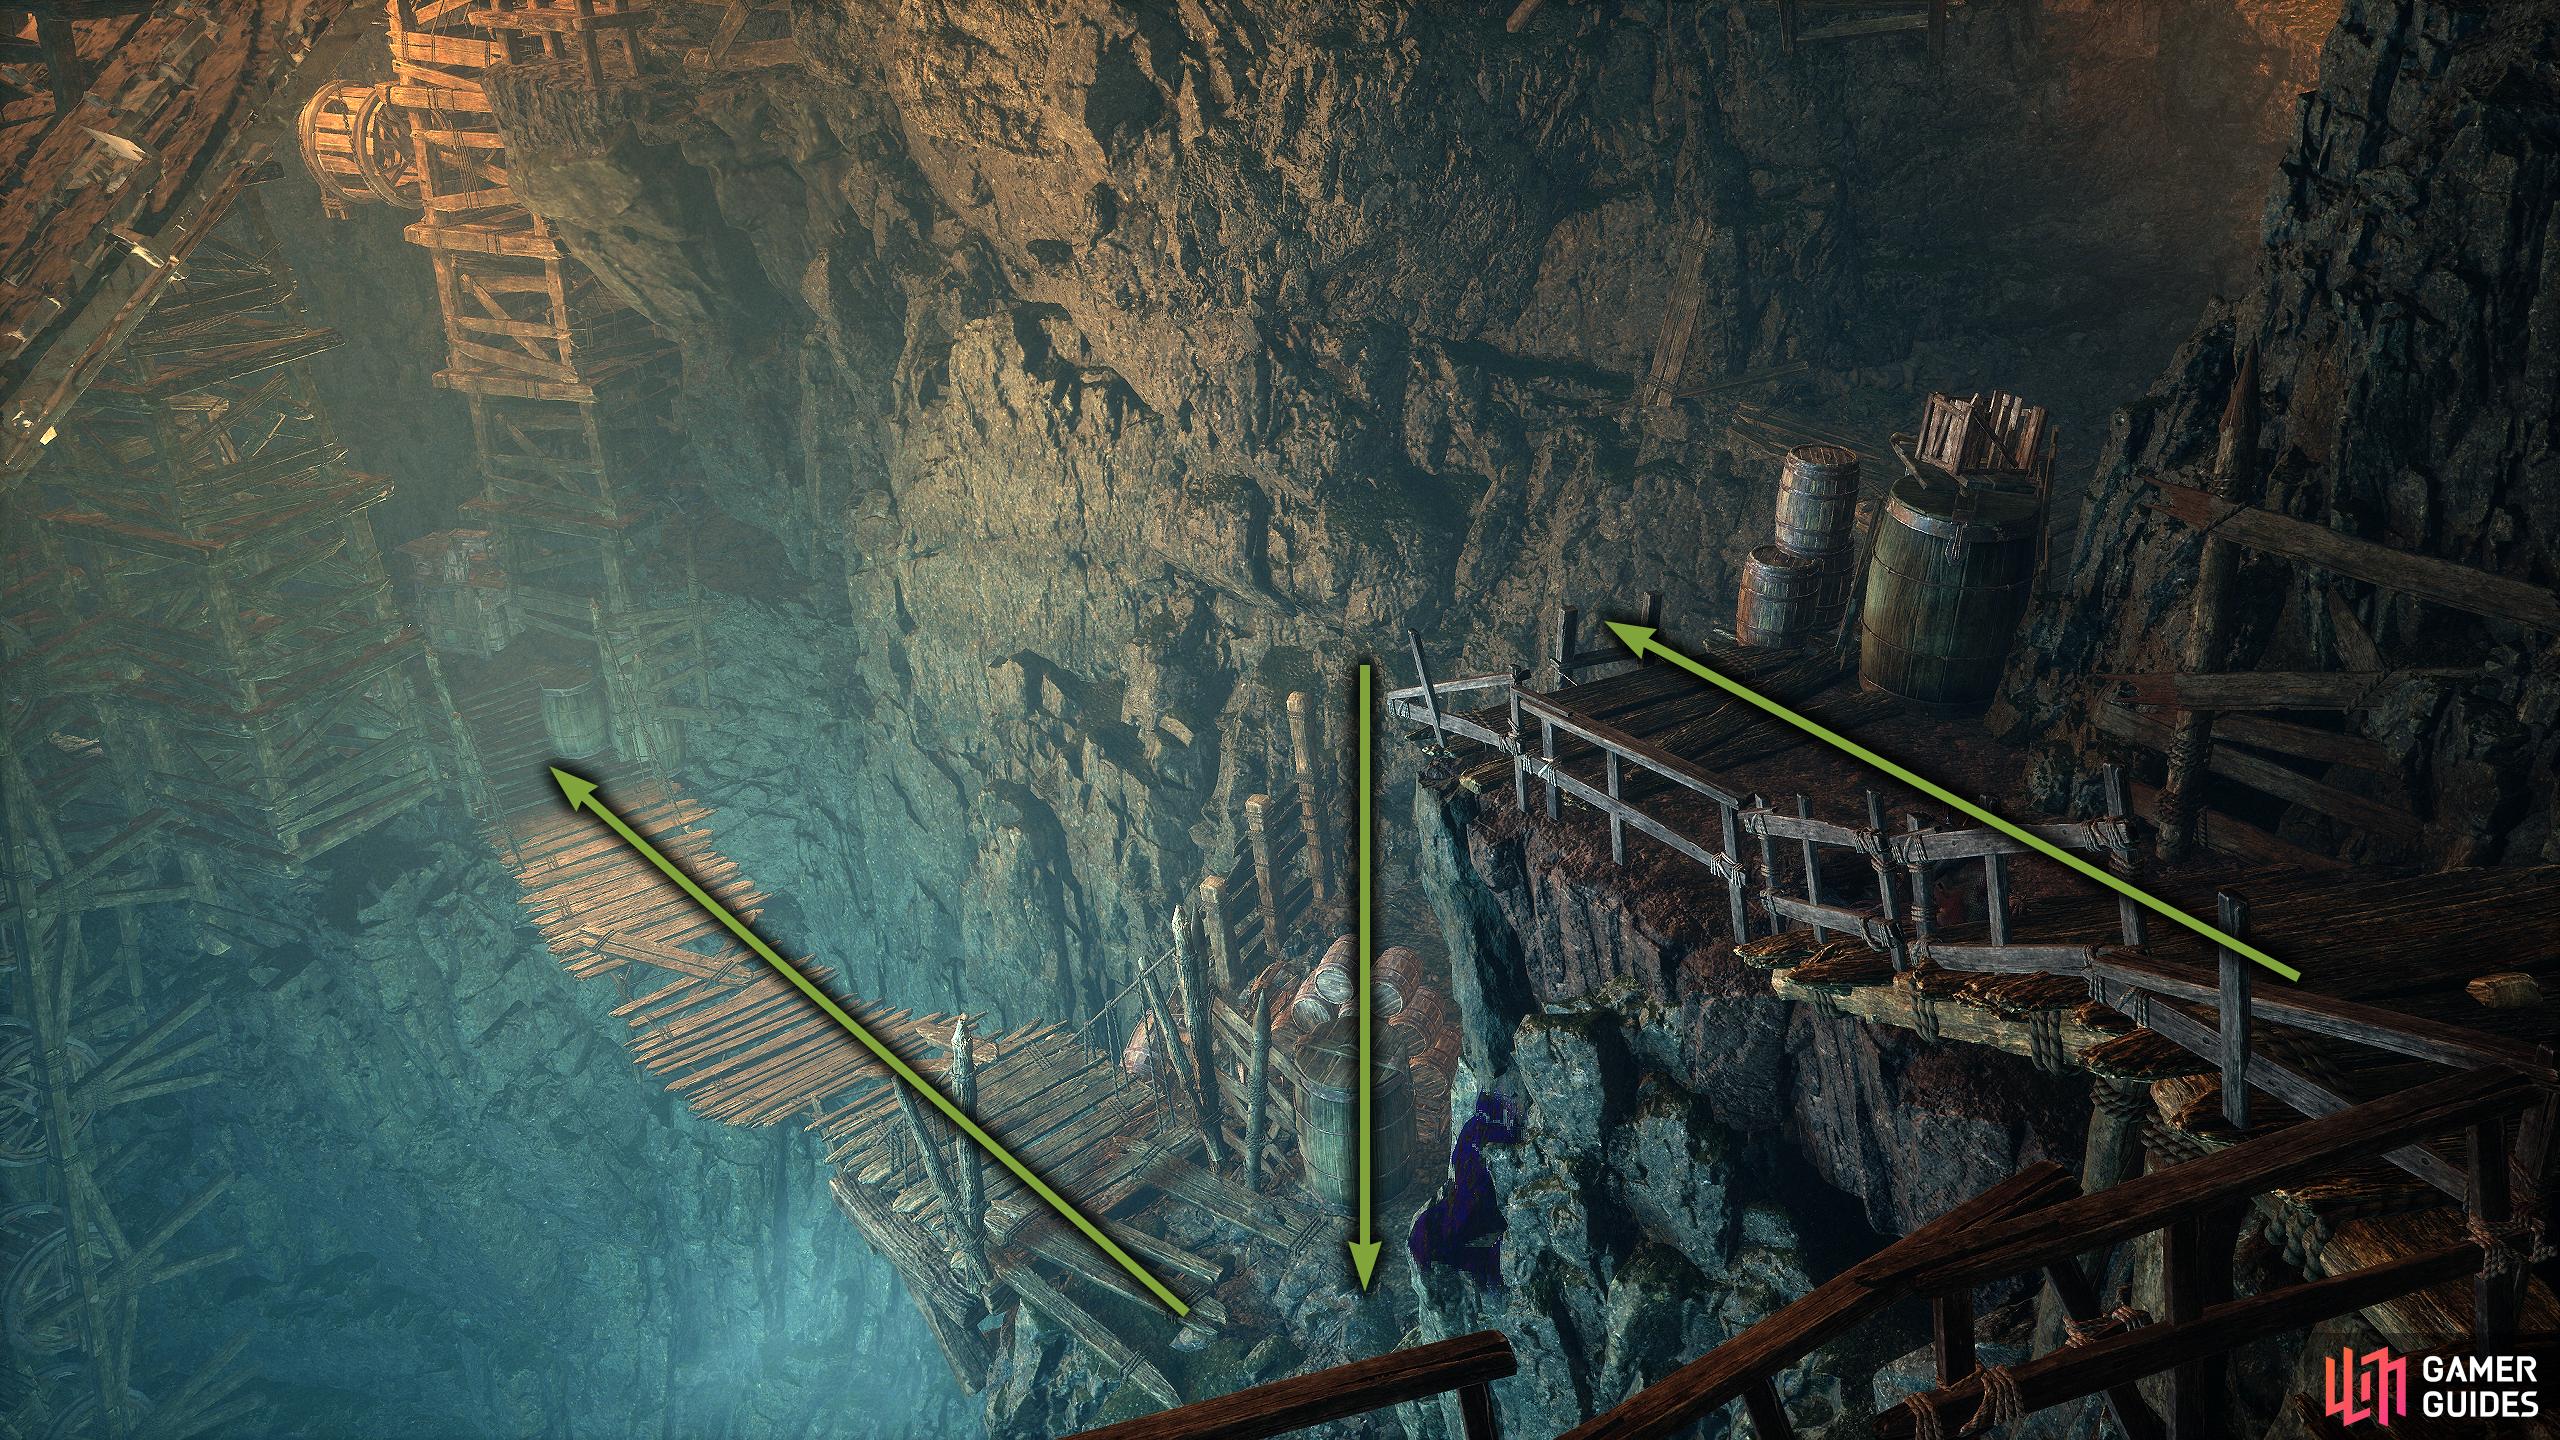
Once you’ve dealt with the enemies, make your way to the end of the path, and go through the doorway with the torch beside it, and climb the ladder inside. At the top, to your right will be a dog, and further to the right, a Fire Watcher Swordsman. We suggest quickly opening the door in front of you with the Drainage Control Key, and activating the lever inside as this will drain the water that leads to Revelation Depths; that way if you die, you won’t have to come back here. With the lever activated, take out the Fire Watcher Swordsman, and go down the path he came from. Here, there is an altar with the quest item Adyr-Worshiper’s Saw, and behind it, a hole to drop in which will put you in the place where you killed the invisible enemy. From here, head back toward the entrance, but take the first left you can into a small doorway.
Drop, then head through the doorway to the right. Immediately take a left through the doorway, and follow the path down which will lead back to the area with the Skinstealer boss. Drop onto the crates, below and follow the path while picking up the items which will lead to another doorway (with another item). Enter the doorway, and follow the tunnel down to find Revelation Depths.

(1 of 6) At the top of the ladder, unlock the gate in front, and activate the lever to drain the water.
Where to Find the Thief Winterberry in Revelation Depths
Finding Winterberry can be a bit of a pain as she’s about halfway down the depths. From the entrance, drop to the platform to your right, and follow the path until you reach a ladder. Climb down, and activate the first fire next to the bridge. Go across the rickety bridge, follow the dark narrow path to your left, and light the second fire.
Climb down the next ladder, but be careful of the Enslaved Miner behind it when you reach the bottom, then take out the mage, and miner at the end of the path (one will be hiding to your right, and will push you off). Head into the nearby cave, light the third fire then follow the path right until you drop through a hole where the crates are. You will be ambushed by an Enslaved Miner as you land, so dispatch it quickly, and drop again to the floor.
Drop off to the right then follow the path to the end. Now, light the fire before going across the bridge.
At the end of the next platform. Climb down the ladder, but watch out for the miner below. Now, run to the end of the path then turn right. Beware! There’s a mage, and a miner before you go through the doorway.
Be careful when you drop as there are a couple of enslaved miners, as well as a Fungal Miner (invisible enemy) down here. Defeat them, and head forward into the chasm. Turn left when you exit the cave, and follow the path until it turns to the left. Light up the fourth fire, and there will be a few enemies down here; three enslaved miners, and a Fungal Miner (invis) who’ll be on the platform just above it.
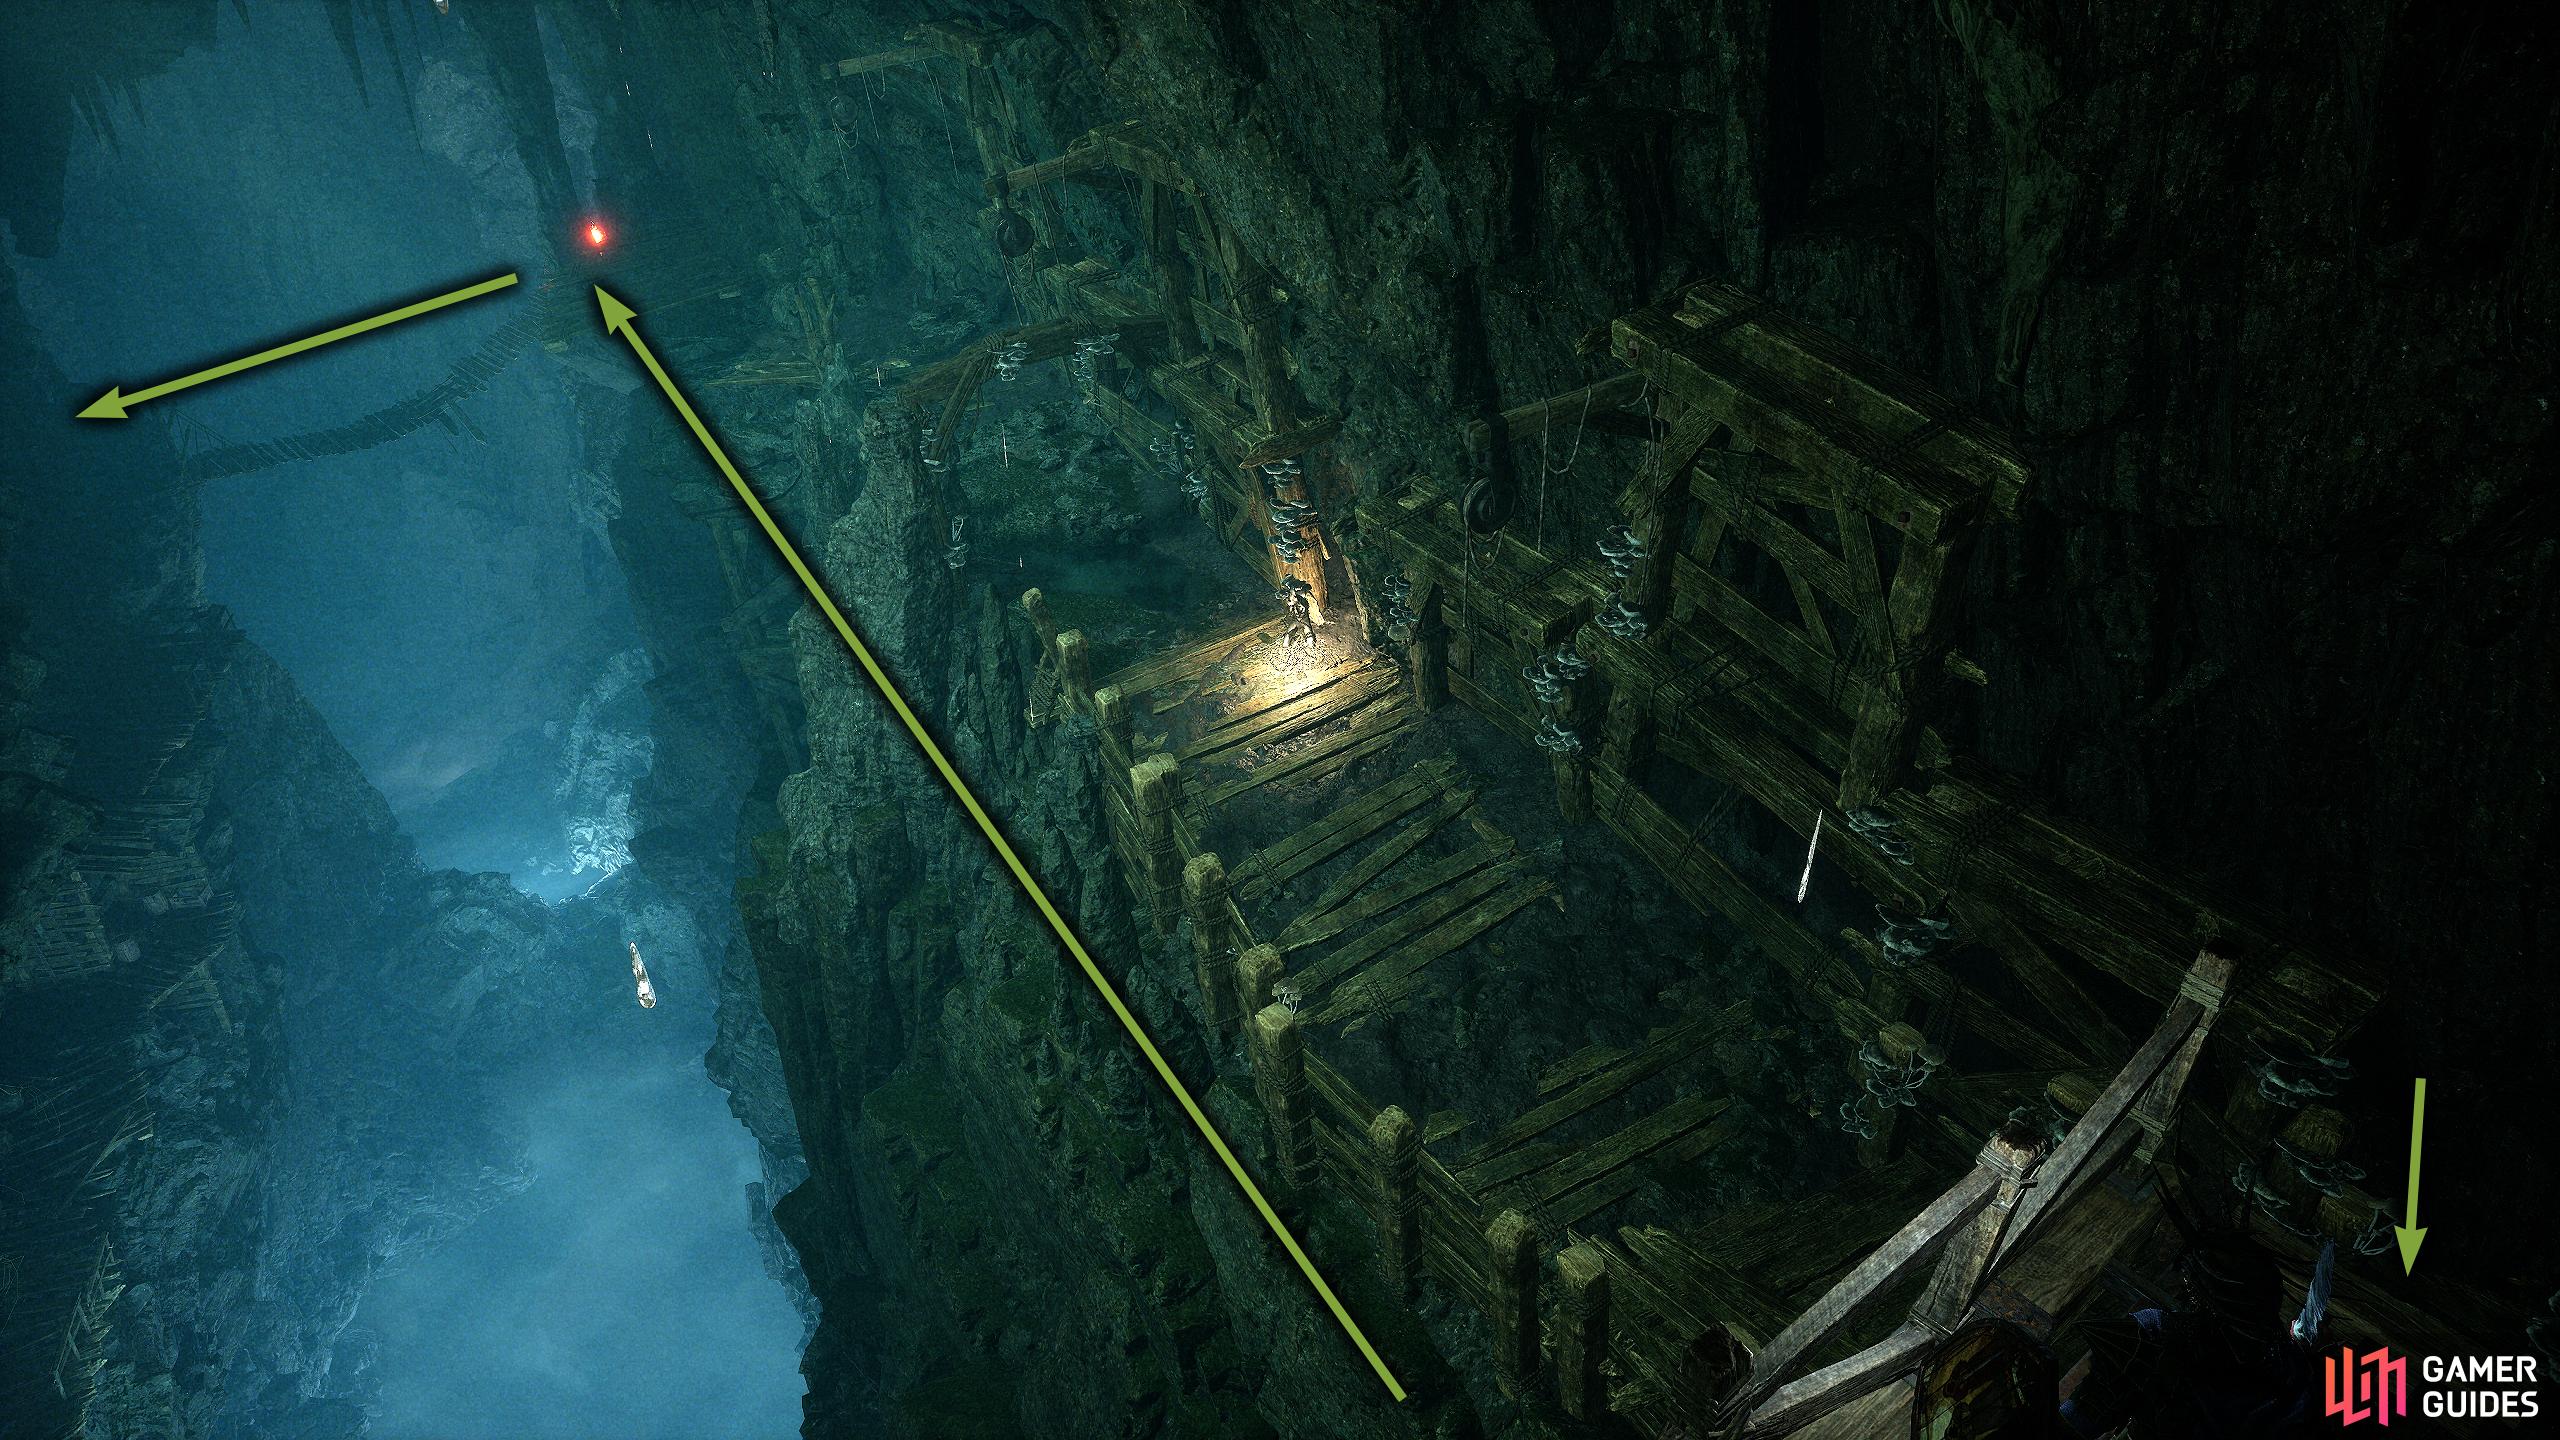
Take them out, and continue along the path where you’ll see what appears to be an elevator shaft which will be a shortcut later. For now, head over to it, destroy the parasite near the mage at the back, and defeat the enemies. Now, you can use the elevator to your left which will take you outside the Vestige of Catrin in Sunless Skein, you’ll just need to open the gate. At the top of the elevator, you can activate the fifth fire then head back down after you’ve unlocked the shortcut.
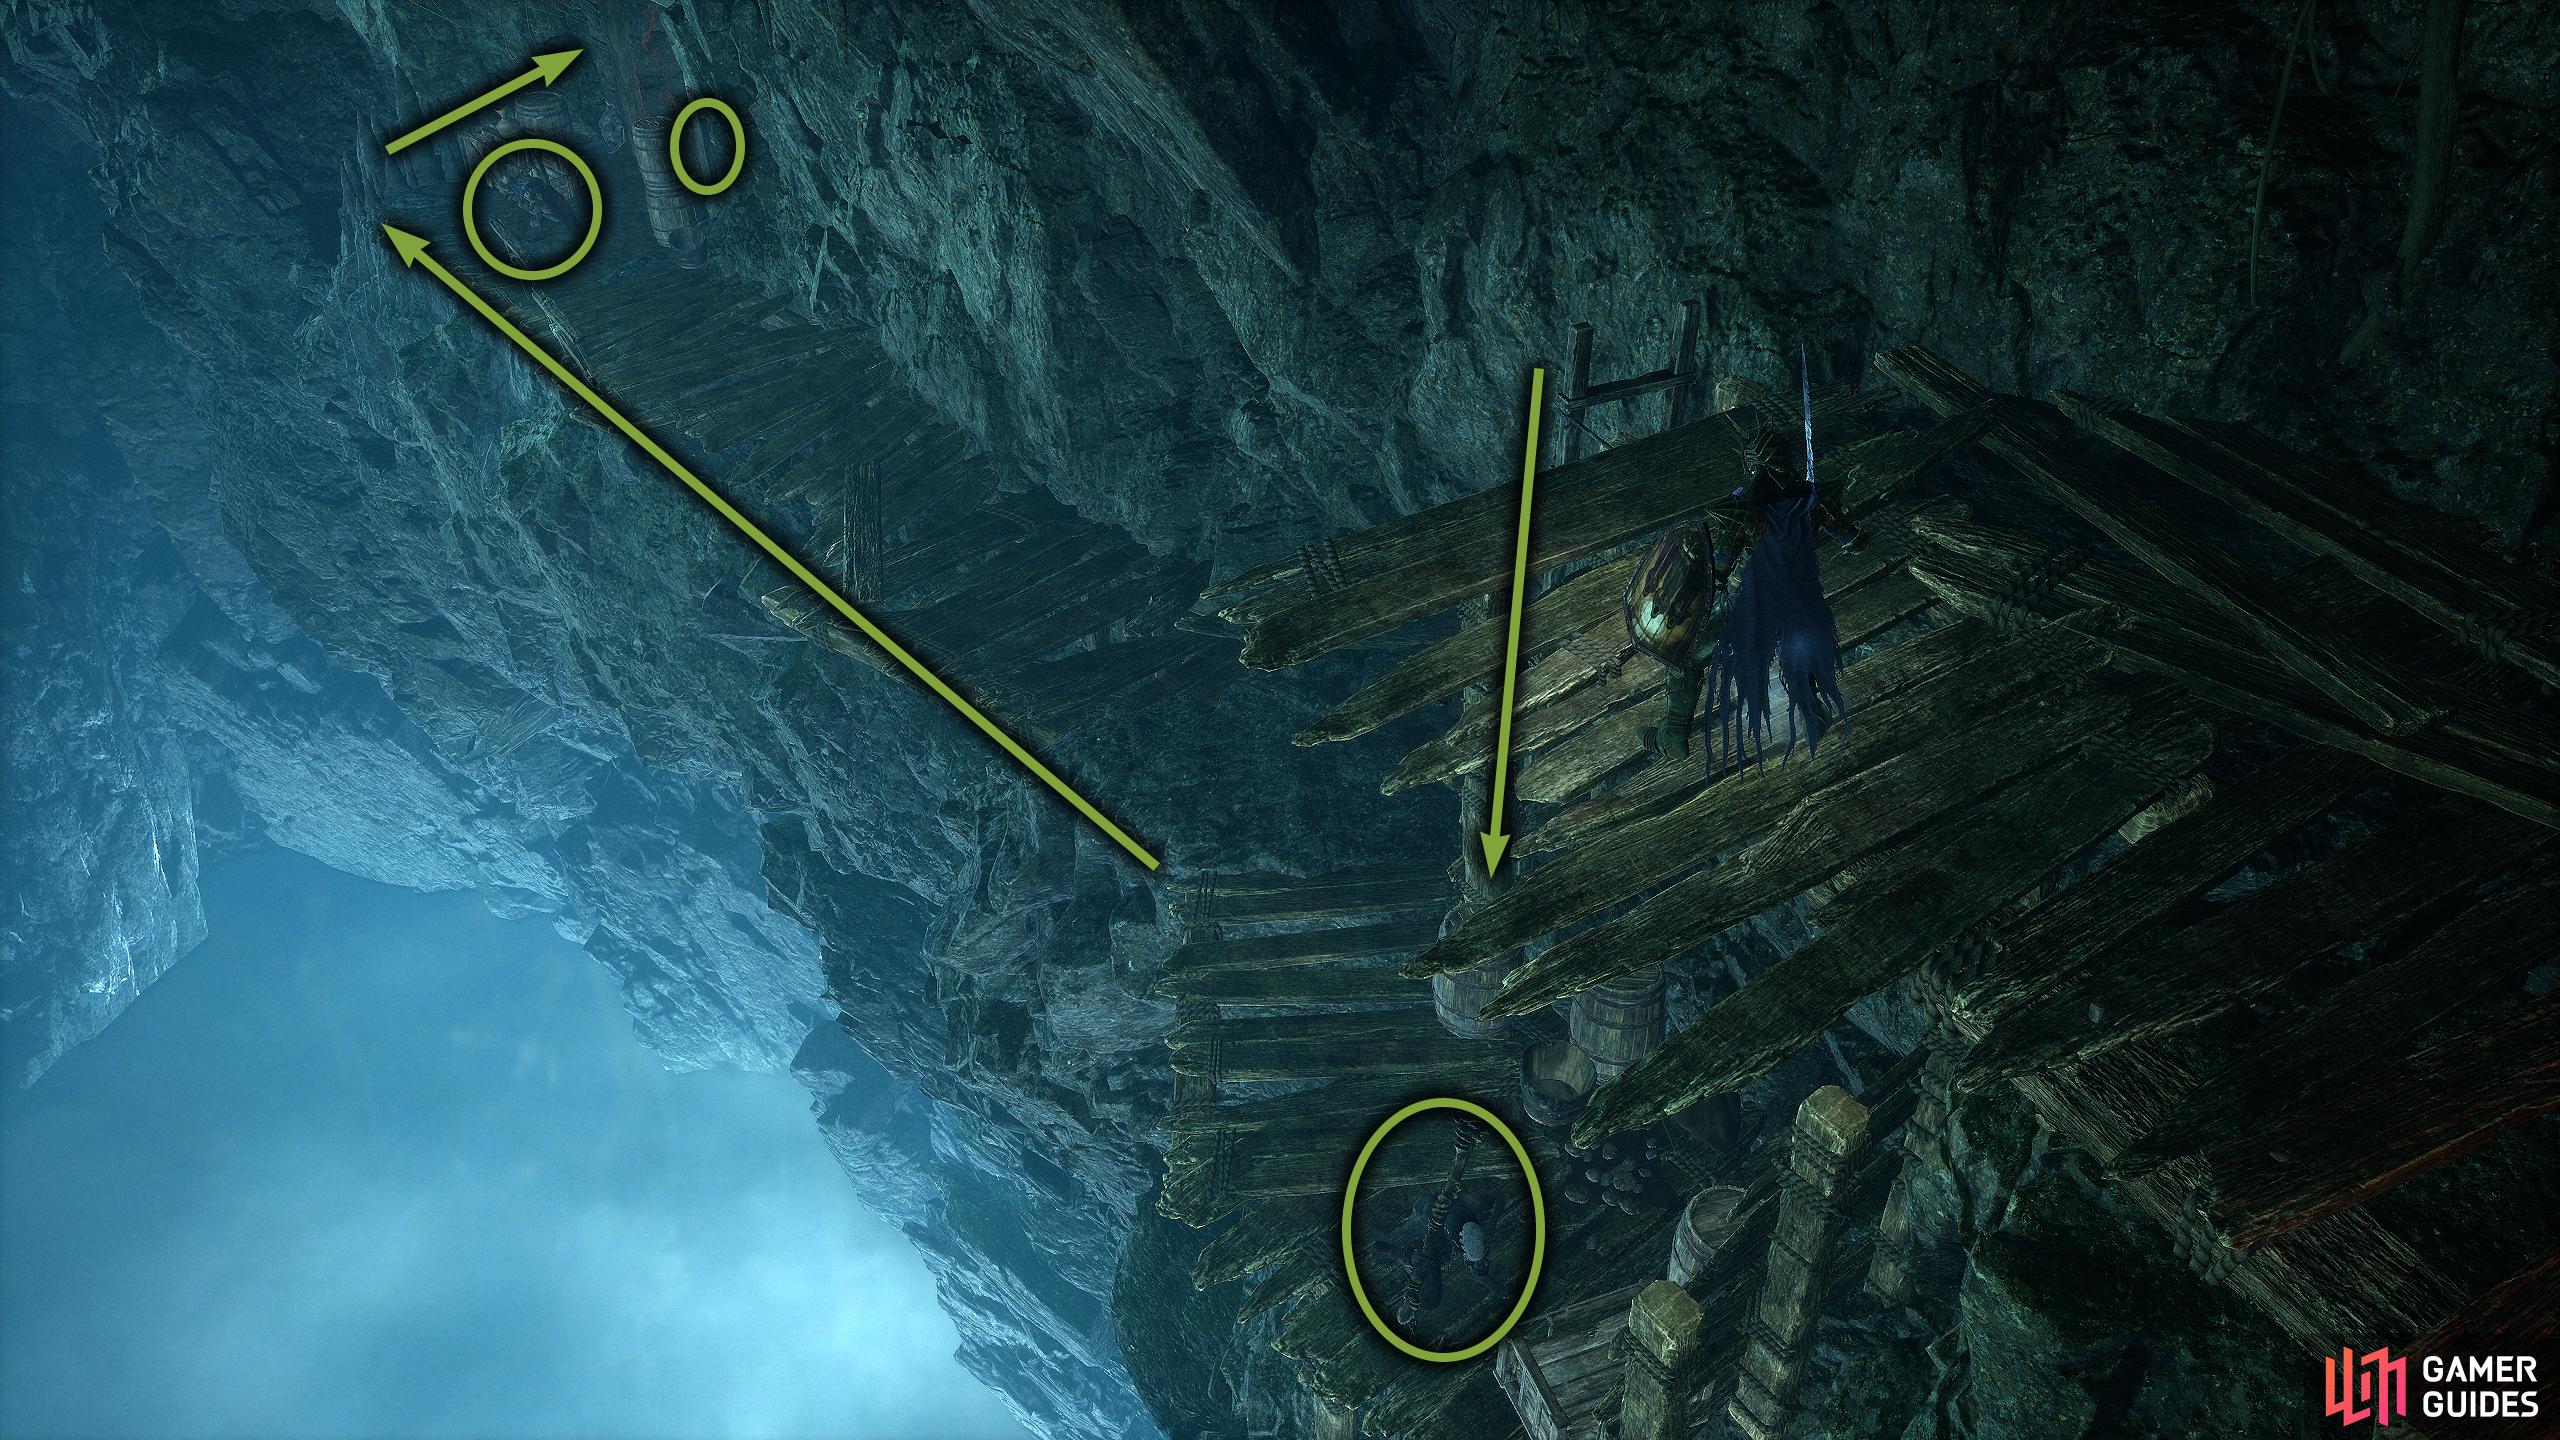
Progress down the chasm and follow the path where you’ll find an imp at the back. As you approach it, another one will jump out at you from the left. Defeat them, and follow the path around the corner where a mage will be waiting for you. Dispatch the mage, and climb down the ladder then defeat the two enslaved miners (one on the bridge, one to your right). Go across the bridge, and defeat the Enslaved Miner hiding to the right and the mage in front of you. If you’re in the Umbral realm here, there is a Reaper too as well as an Emergence Effigy to bring you back to the Axiom realm.
On the other side is another bridge, go across it into the next area where another two enslaved miners will be. Once again, one will be hidden to your right. Take them out, and you’ll have to contend with two fungal miners (invis), one to your left underneath the pulley system, and one in front of you at the back standing by the ladder (has a parasite). These can be a pain to deal with so try baiting them into a better position, or try rushing the one to your left. Once they’re dead, climb down the ladder, and take care of the three enslaved miners; two near the bridge, one hidden to the right of them.
At the bottom, near the Emergence Effigy, there is a cave to your right (this is where the third Miner will come from). Head through, and follow the tunnel, but be prepared to fight four imp enemies shortly as you approach the dim green light. One will be at the back, one will be hiding to your left, and the other two will be hanging off the ceiling. When they’re dealt with, follow the path around, past the tent area (item down there), and up the wooden stairs.
Follow the path around and whatever you do, do not pick up the item as there is a mimic there. You can Soul Flay the item to rid the mimic, and pick up the items if it pleases you. Jump across the gap, and head into the cave where you can go two ways. Take the right path, and follow the dark tunnel down while defeating the two enslaved miners then get ready to fight a Fungal Miner (invis) at the bottom.
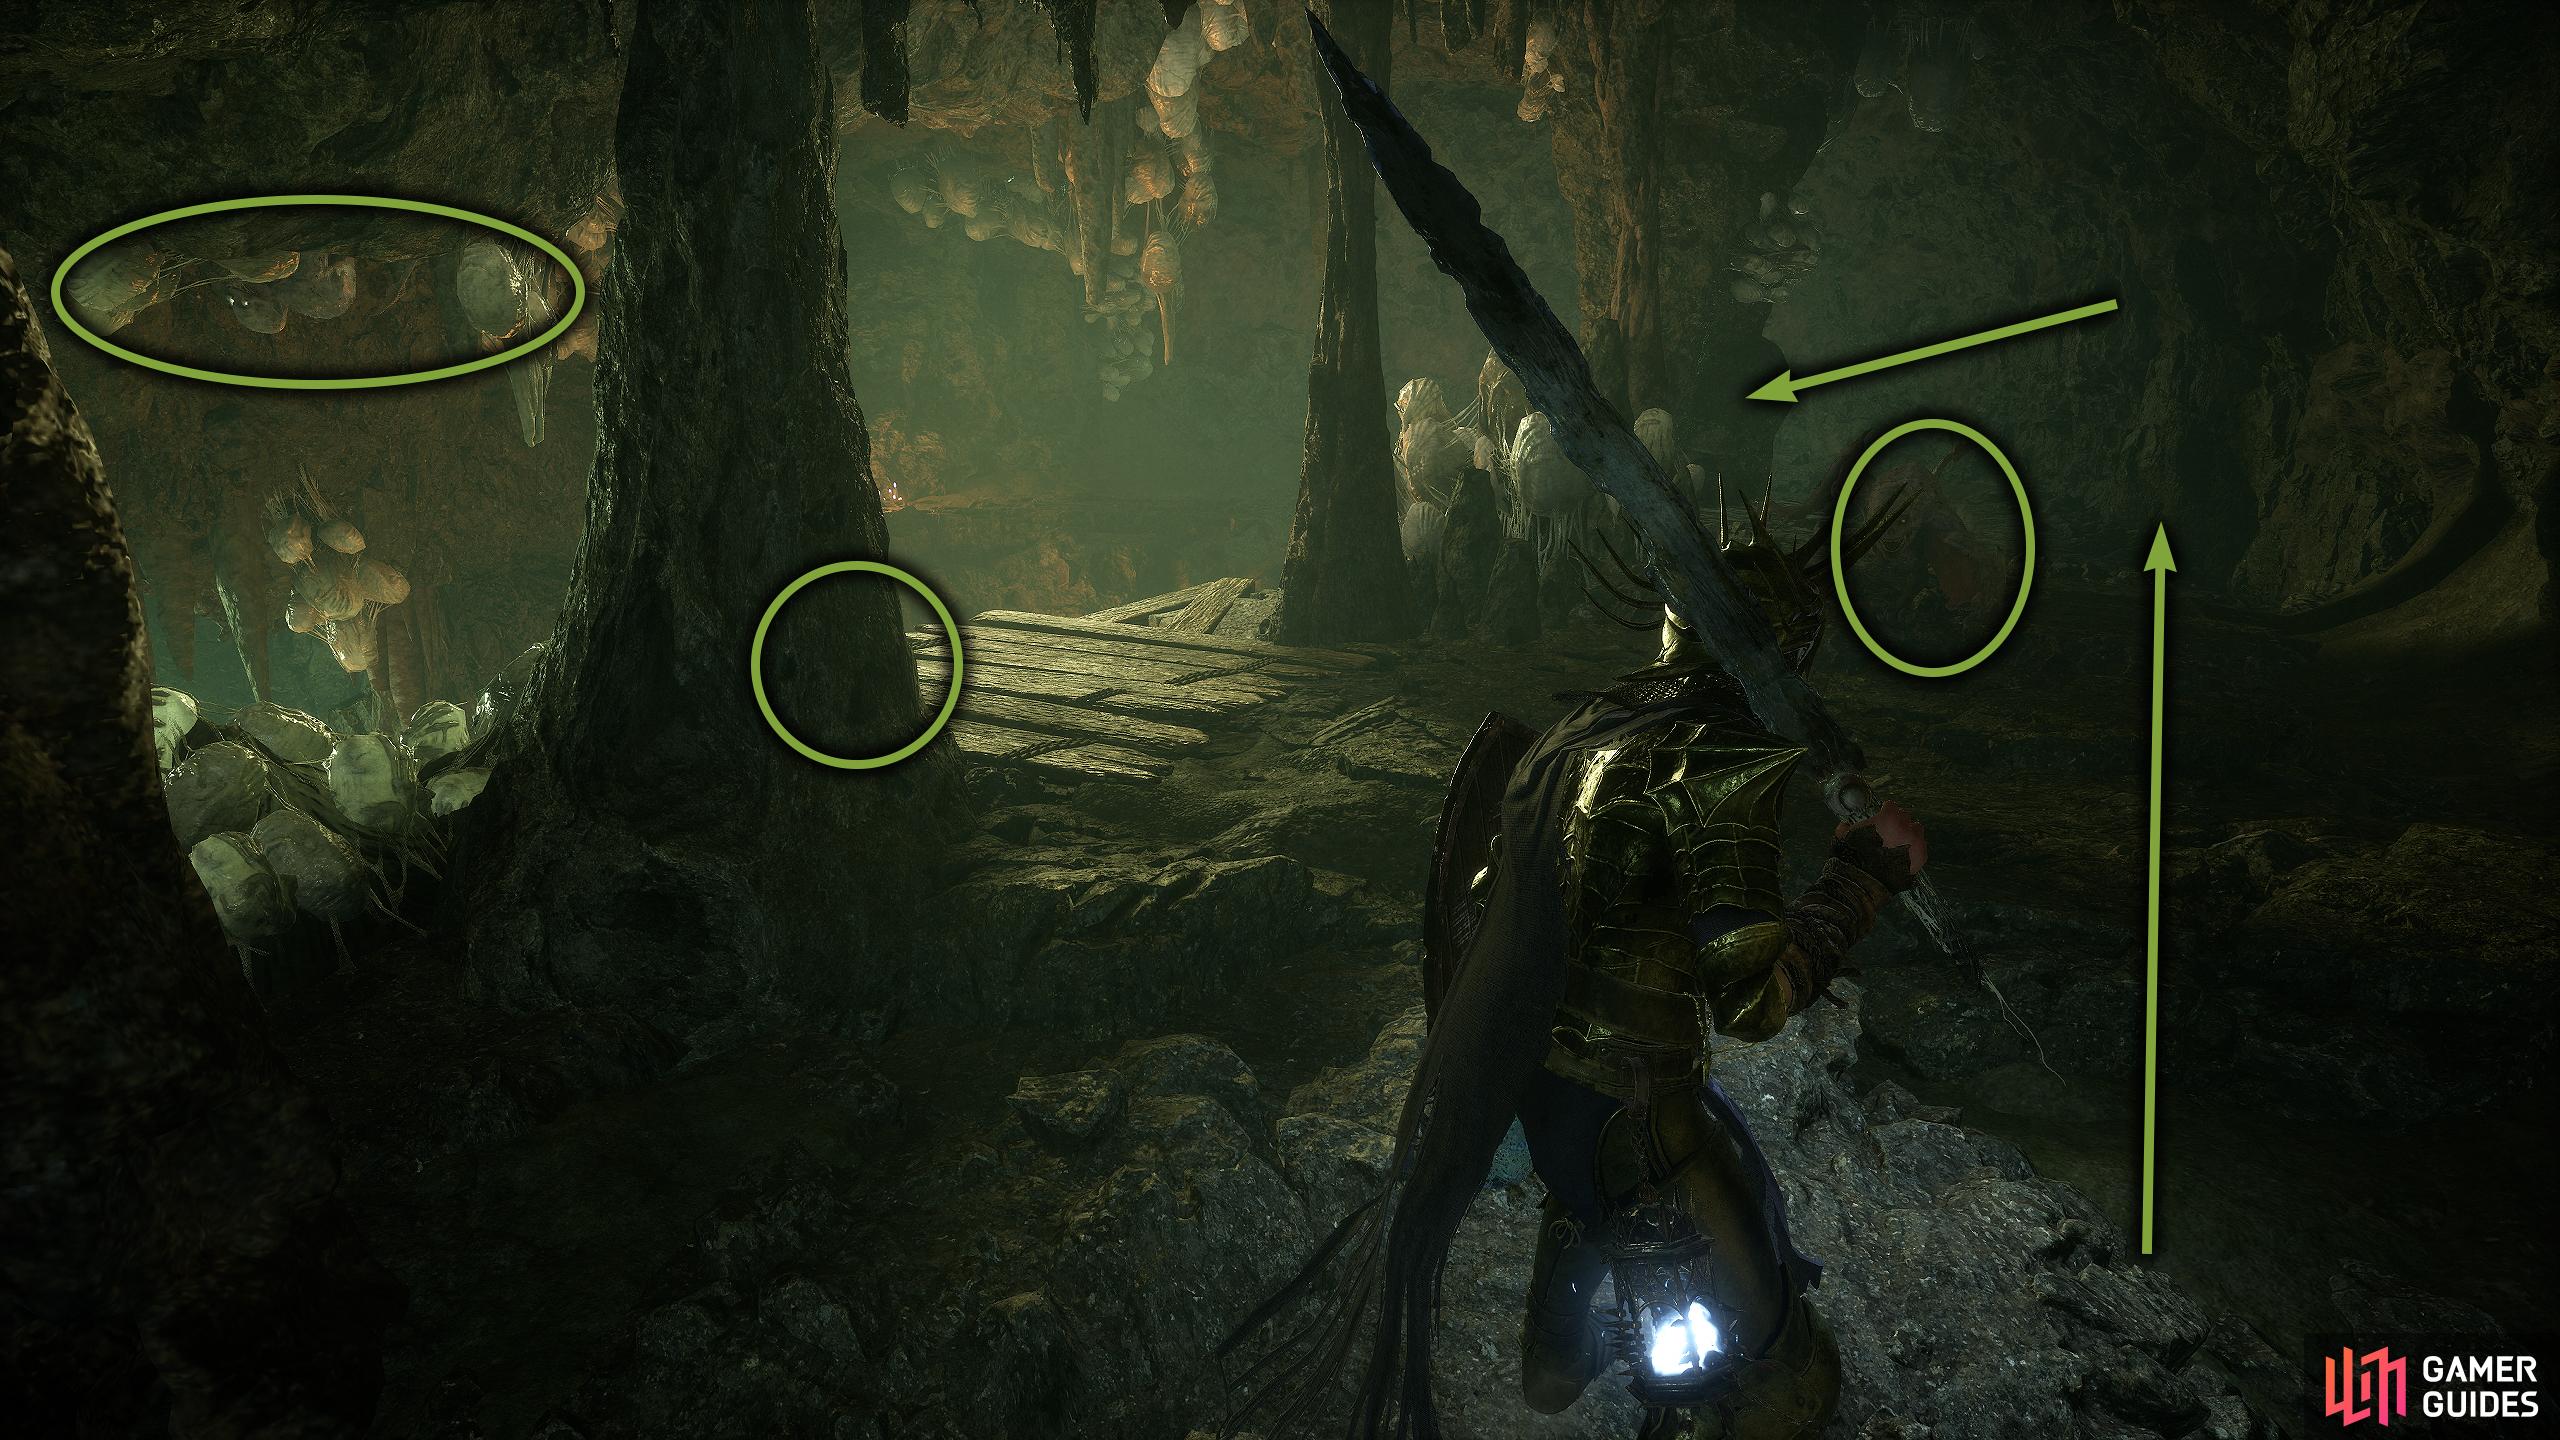
(1 of 3) At the end of the tunnel you’ll be in a room with a green hue. Here, you’ll find four imp-like creatures. These are marked with the ellipses in the image.
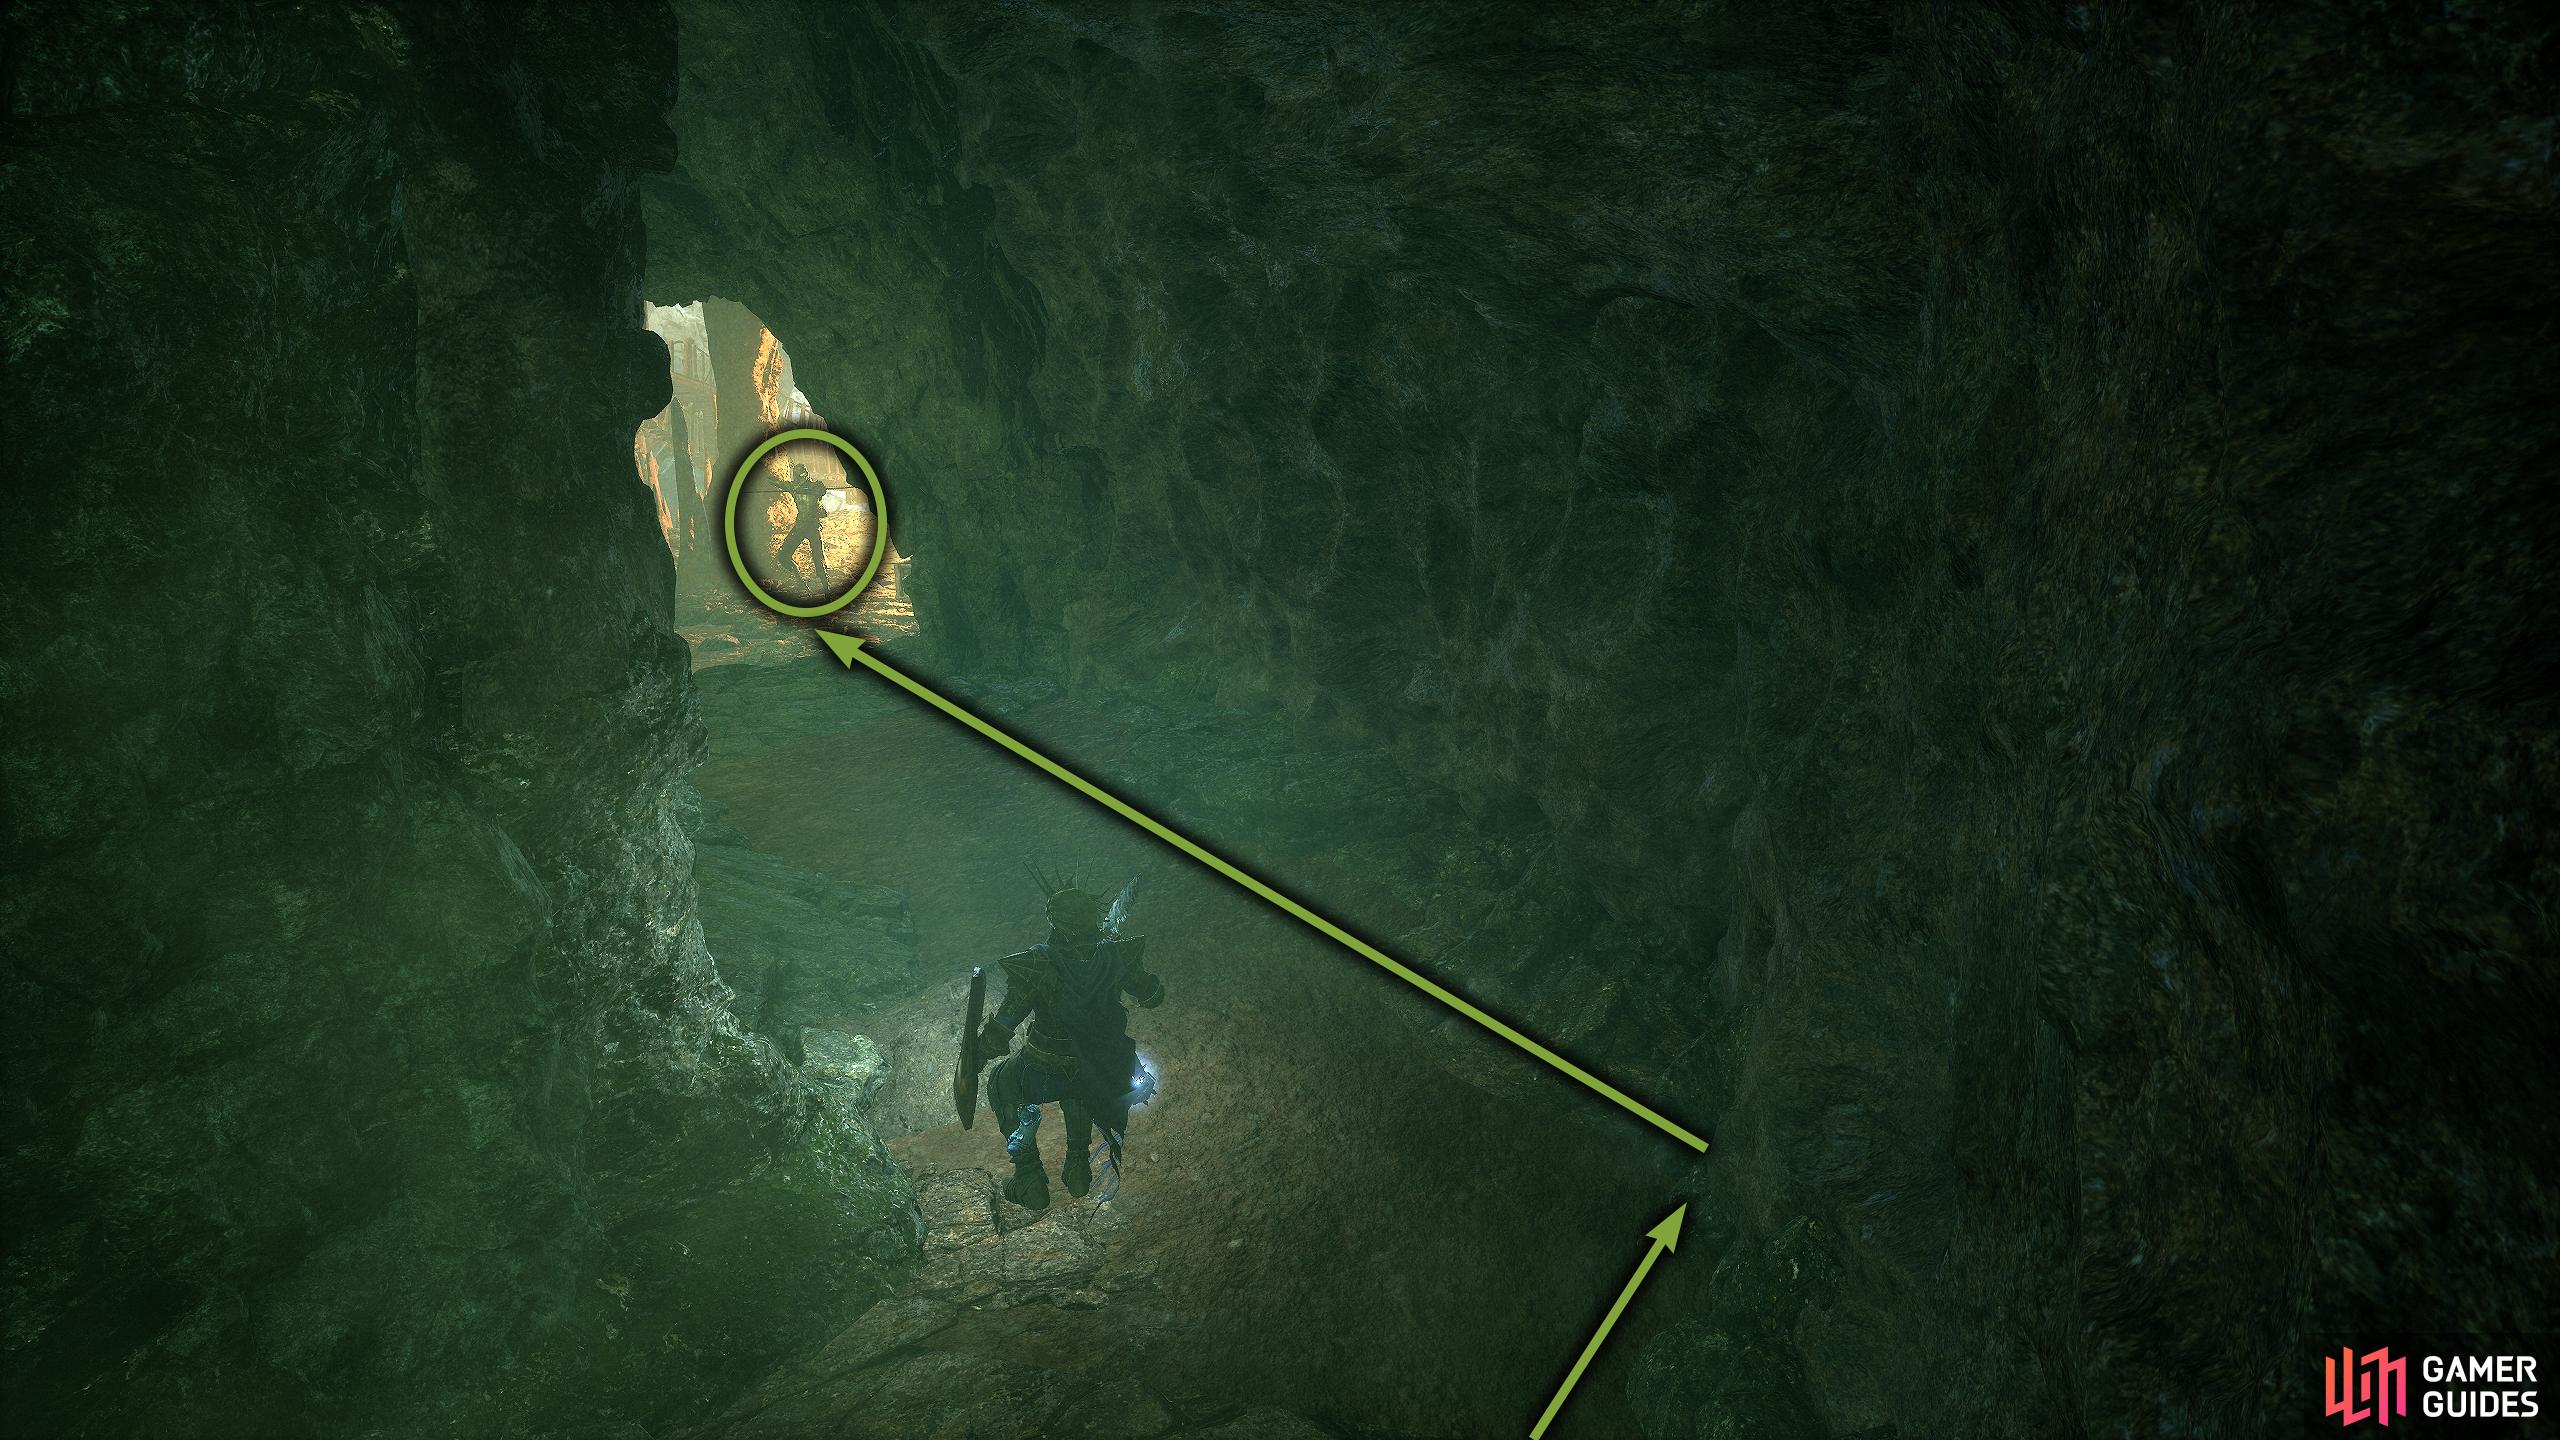
As you approach the fungal miner, another enslaved miner will come at you from your left, back up into the tunnel, and take care of it there, then head back down to defeat the fungal miner. Now, here, you’ll have two paths to choose from, right or left. On your right, you can kick down the bridge for a shortcut (bypasses imp room) and your left is the way towards Winterberry.
Get the shortcut then head through the doorway to your left. In the next small room, you’ll find an altar, a barricade you can break, and a Reaper if you’re in the Umbral Realm. Break the barricade to your left then follow the lit-up tunnel to the top where you’ll find Winterberry. When you speak to her, you’ll find Catrin’s Pendant in her inventory, but you won’t be able to purchase it, nor will you be able to convince her to give it to you. Either way, exhaust her dialogue, then head back to Byron at the Vestige of Catrin, and tell him about Winterberry which will make him change his tune about punishing the thief.
As always, exhaust the dialogue, then return to the Skyrest Hub where you’ll find both Winterberry and Byron. Winterberry will become a merchant (who sells a ![]() Rebirth Chrysalis), and you can talk to Byron which will lead to you getting the
Rebirth Chrysalis), and you can talk to Byron which will lead to you getting the ![]() Umbral Eye of Ethryg. If you exhaust his dialogue, you’ll also receive Byron’s Shovel which is supposed to be an axe. However, if you tell him the truth, he’ll leave the world for good, but you can still get the shovel as well as the pendant by heading to the Manse area above Pilgrim’s Perch where it will be laid out on a rocky path.
Umbral Eye of Ethryg. If you exhaust his dialogue, you’ll also receive Byron’s Shovel which is supposed to be an axe. However, if you tell him the truth, he’ll leave the world for good, but you can still get the shovel as well as the pendant by heading to the Manse area above Pilgrim’s Perch where it will be laid out on a rocky path.
No Comments