
The Forsaken Fen is a difficult swampy area to progress through due to the enemies being able to inflict poison damage, so you’ll need to stock up on Poison Cures. However, if you are striving for the platinum trophy, then you’ll want to explore every nook and cranny item which is a difficult endeavor here, so this page will help you navigate the area safely and will point you in the direction of the most important items.

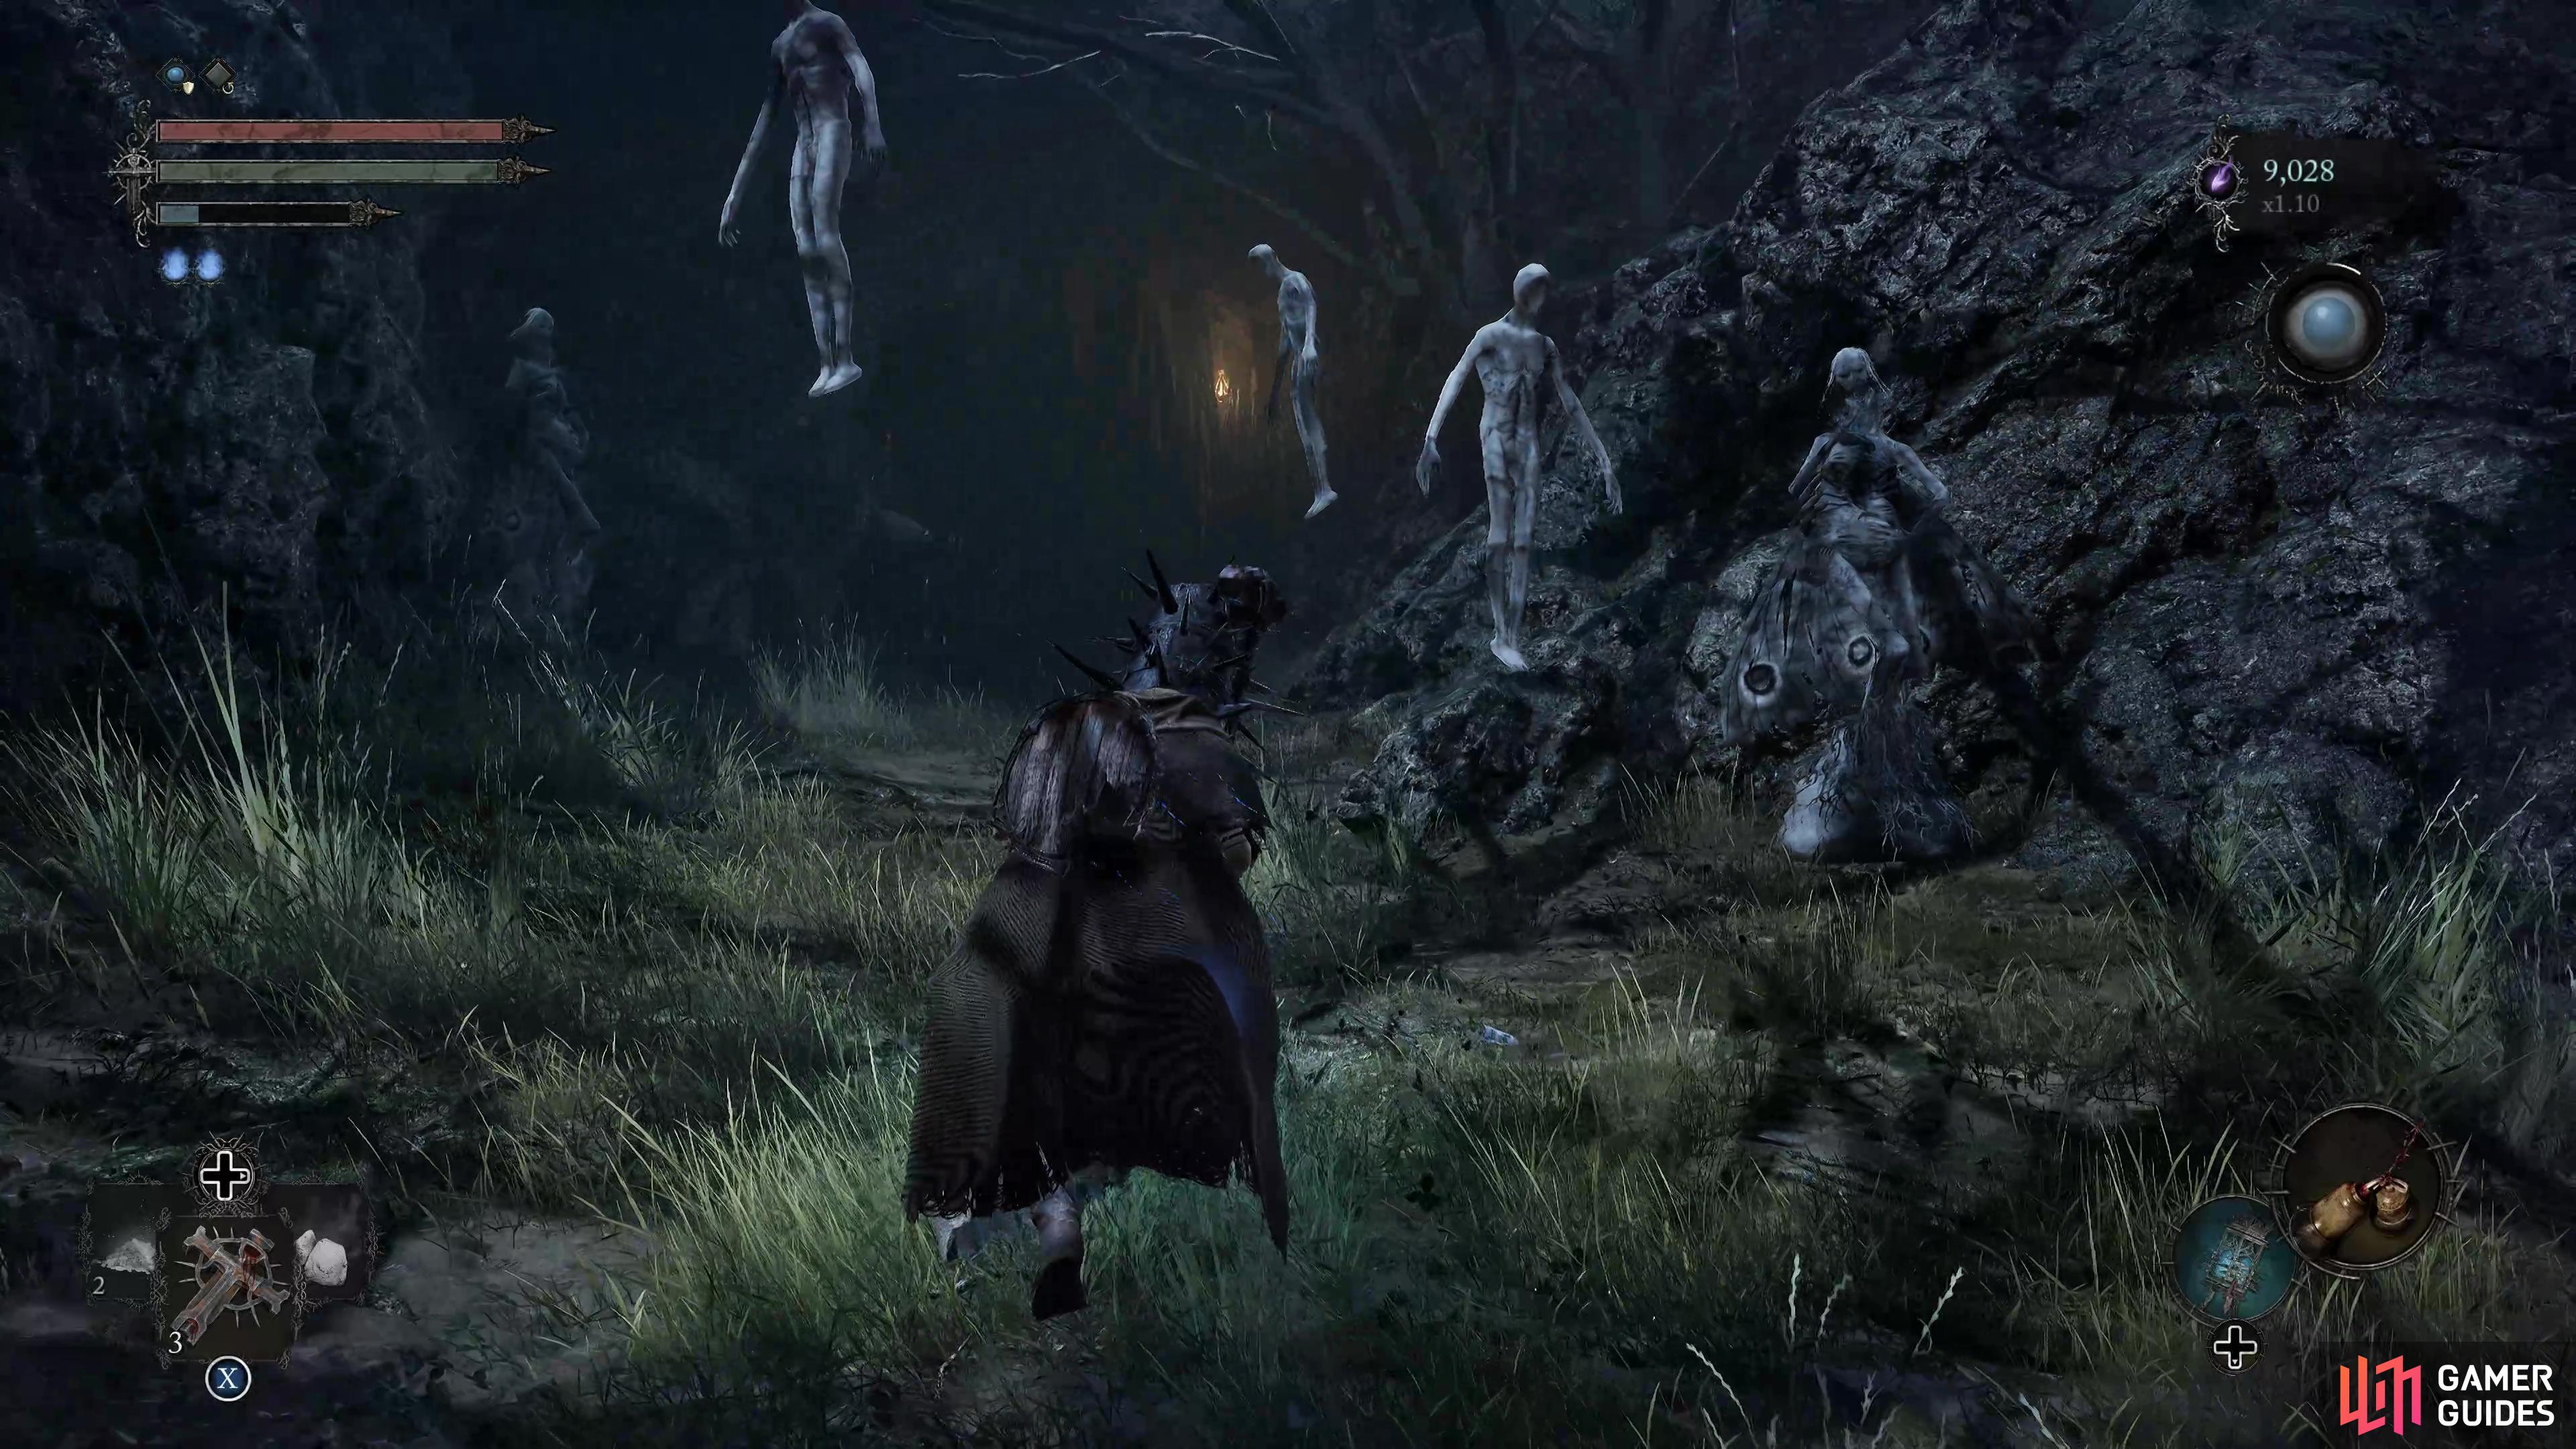
The Forsaken Fen is a harsh environment to explore.
Defeat The Congregator of Flesh
Immediately as you enter The Forsaken Fen you’ll come across a friendly merchant named Thehk-Ihir and he’ll sell you some useful items, but you’ll want to make sure you stock up on the ![]() Poison Cures for the upcoming boss fight. You’ll now want to continue following the narrow path down until you see a wooden plank bridging the gap, then fall down into the pit to initiate the boss fight, The Congregator of Flesh. This boss shouldn’t cause you too much of a problem due to its movement speed being very slow, so you’ll want to stick to attacking its legs from behind as it’ll allow you to avoid its attacks. However, it’ll regularly slam its back into the ground, so be ready to dodge away from that. Throughout the battle, it’ll summon a parasite which will attach itself to it so you can’t deal any damage until you siphon it via the
Poison Cures for the upcoming boss fight. You’ll now want to continue following the narrow path down until you see a wooden plank bridging the gap, then fall down into the pit to initiate the boss fight, The Congregator of Flesh. This boss shouldn’t cause you too much of a problem due to its movement speed being very slow, so you’ll want to stick to attacking its legs from behind as it’ll allow you to avoid its attacks. However, it’ll regularly slam its back into the ground, so be ready to dodge away from that. Throughout the battle, it’ll summon a parasite which will attach itself to it so you can’t deal any damage until you siphon it via the ![]() Umbral Lamp. If you end up keeping your distance then you’ll want to watch out for its lunge attack.
Umbral Lamp. If you end up keeping your distance then you’ll want to watch out for its lunge attack.
Find Byron

Defeat the Congregator of Flesh

and exhaust all of Byron’s dialogue.
Once you’ve taken down the Congregator of Flesh you’ll obtain a ![]() Vestige Seed, Remembrance of the Congregator of Flesh and an
Vestige Seed, Remembrance of the Congregator of Flesh and an ![]() Umbral Scouring. From here, head through the tunnel and make your way onto the wooden bridge and collect the
Umbral Scouring. From here, head through the tunnel and make your way onto the wooden bridge and collect the ![]() Poison Resistance Balm then enter Umbral to gain access to the area below. Clear out the nearby enemies and pick up the
Poison Resistance Balm then enter Umbral to gain access to the area below. Clear out the nearby enemies and pick up the ![]() Minor Fire Salts from the corner and head up the hill, then activate the Vestige of Valade before speaking with Byron and exhausting all of his dialogue. Follow the hill up to the right of Byron and collect the
Minor Fire Salts from the corner and head up the hill, then activate the Vestige of Valade before speaking with Byron and exhausting all of his dialogue. Follow the hill up to the right of Byron and collect the ![]() Ammunition Pouch and
Ammunition Pouch and ![]() Small Manastone Clusters along the way, then once you walk under the bridge you’ll find a Small
Small Manastone Clusters along the way, then once you walk under the bridge you’ll find a Small ![]() Deralium Fragment tucked away in the corner on your left.
Deralium Fragment tucked away in the corner on your left.
Where to Find the Petrified Woman
Enter Umbral and continue hugging the left wall and you’ll be able to soulflay a statue for the ![]() Angel’s Axe, then head up the nearby tree branch and follow the path along to the right until you reach a door which will lead you back to the Vestige of Valade. Head back through the door and lower the nearby ladder, then enter Umbral and climb up the ladder ahead. From here, pick up the Regular
Angel’s Axe, then head up the nearby tree branch and follow the path along to the right until you reach a door which will lead you back to the Vestige of Valade. Head back through the door and lower the nearby ladder, then enter Umbral and climb up the ladder ahead. From here, pick up the Regular ![]() Deralium Nuggets that are sitting beside the barrels, then follow the path ahead whilst clearing out the three enemies along the way. Pick up the Harbinger Amour Tinct that’s hiding within the flames, then head on up to the top of the hill and emerge from Umbral.
Deralium Nuggets that are sitting beside the barrels, then follow the path ahead whilst clearing out the three enemies along the way. Pick up the Harbinger Amour Tinct that’s hiding within the flames, then head on up to the top of the hill and emerge from Umbral.
Head to the end of the path until you reach a bridge and enter Umbral to cross the gap, then when the path splits head right to find a ![]() Smite Cure. You’ll now want to head all the way up to the top of the hill to find a
Smite Cure. You’ll now want to head all the way up to the top of the hill to find a ![]() Resh-Mesah’s Sword before returning back to the main path. Work your way down the hill and pass through the gate by using the Umbral Lamp, then at the end of the room you’ll find a
Resh-Mesah’s Sword before returning back to the main path. Work your way down the hill and pass through the gate by using the Umbral Lamp, then at the end of the room you’ll find a ![]() Shuja Harmony Hoop. Return to the main path and enter Umbral to obtain a stigma, then drop down and rest at the Vestige of Valade.
Shuja Harmony Hoop. Return to the main path and enter Umbral to obtain a stigma, then drop down and rest at the Vestige of Valade.

Go back into the main area via the shortcut you opened earlier and this time climb down the ladder to the right. Destroy the vines on your right to reveal the hidden items, ![]() Cursewyrm Ring and the Exemplar Amour Tinct. Head out into the open and clear out all of the enemies, then make your way over to the left side to find the Petrified Woman hiding behind some vines in the corner. Use a holy item to stop her from being petrified and exhaust her dialogue, then log out of the game and log back in to find Wilmare’s Catalyst where she was sitting. Make your way across the wooden bridge and look over to your left and enter Umbral, then drop down and work your way through the cave to find the Poison Javalin at the end of the path.
Cursewyrm Ring and the Exemplar Amour Tinct. Head out into the open and clear out all of the enemies, then make your way over to the left side to find the Petrified Woman hiding behind some vines in the corner. Use a holy item to stop her from being petrified and exhaust her dialogue, then log out of the game and log back in to find Wilmare’s Catalyst where she was sitting. Make your way across the wooden bridge and look over to your left and enter Umbral, then drop down and work your way through the cave to find the Poison Javalin at the end of the path.
Where to Find the Iron Wayfarer
Head back across the wooden bridge and you’ll see three enemies in the corner on the right, so take them down and enter Umbral then drop down into the area below and perform a soulflay on the corpse to retrieve the ![]() Saintly Quintessence. Climb up the ladder to reach the roof of the nearby wooden hut to find the
Saintly Quintessence. Climb up the ladder to reach the roof of the nearby wooden hut to find the ![]() Shuja Warrior Spear before returning to the wooden platform, then head under the bridge and take a left when the place splits. Follow it around and place down a Vestige Seedling so you can return to this area later.
Shuja Warrior Spear before returning to the wooden platform, then head under the bridge and take a left when the place splits. Follow it around and place down a Vestige Seedling so you can return to this area later.
Go back the way you came and hug the wall on the right side and you’ll find a wooden plank you can destroy to gain access to a side area. Enter Umbral and perform a soulflay on the corpse to retrieve the ![]() Verdure Ring, then break through the vines until you stumble across the Iron Wayfarer. As always exhaust all of his dialogue, then head back the way you came and take the route on the right.
Verdure Ring, then break through the vines until you stumble across the Iron Wayfarer. As always exhaust all of his dialogue, then head back the way you came and take the route on the right.
Defeat the Mendacious Visage
Watch out for the three rolling balls and make your way up the hill then at the end of the path you’ll encounter the optional boss, Mendacious Visage. At the start of the battle you’ll want to perform a soulflay on the two bodies to reveal the boss, then clear out all the nearby enemies before focusing on the boss itself. You’ll sometimes see the boss open up its head and then you can perform a soulflay on the enemy on the inside which will allow you to perform a grievous strike. When its head is closed you’ll want to attack from behind, but watch out for the following attacks:

Defeat the Mendacious Visage
and collect the Vanguard Barros’ Rosary from the nearby hut.
- Jump - If you get too close then it’ll jump up and slam back down into the ground unleashing a Frostbite AoE, so you’ll want to make sure you create some distance when you see this.
- Slam - If you are attacking it from the front, you’ll see it raise both of its arms and immediately slam them down into the ground in front of him, so get ready to dodge to the side.
- Frost Worms - It’ll unleash multiple frostbitten worms that’ll follow you for a short amount of time, so keep your distance until they disappear.
- Homing Spell - If you are fighting from a distance then be sure to watch out for its homing icicles.
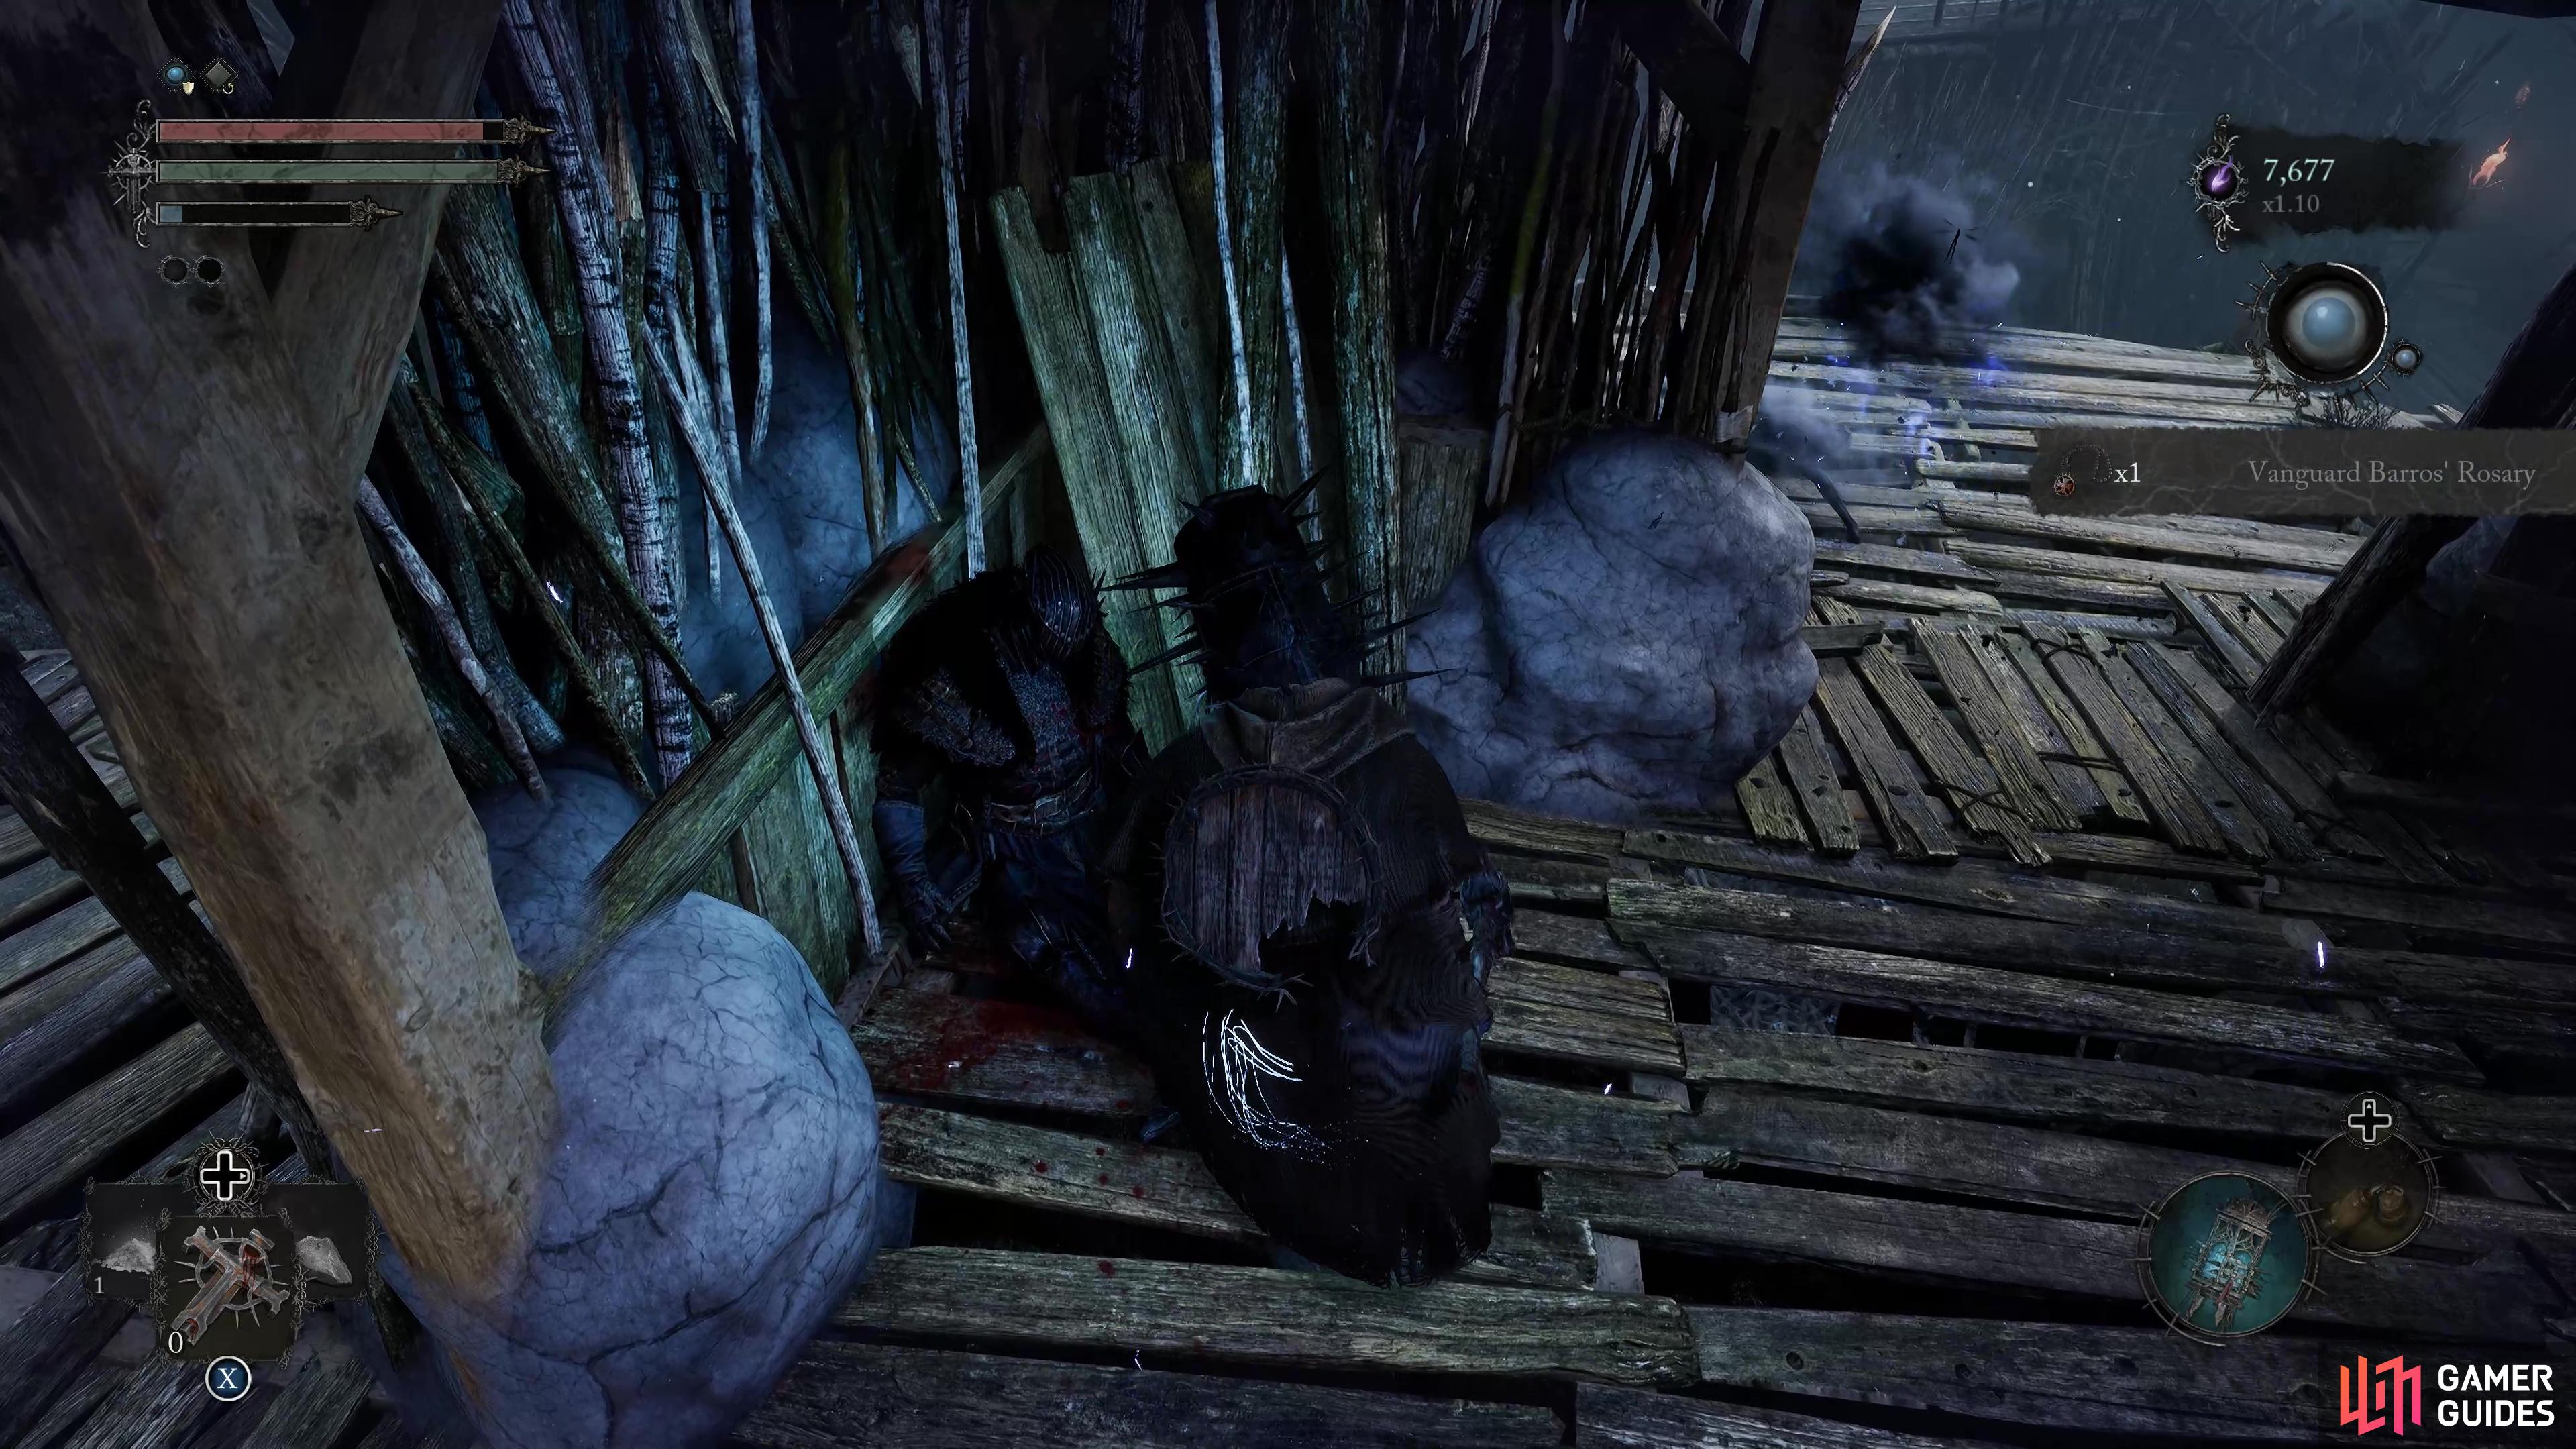
Where to Find the Vanguard Barros’ Rosary
Once you’ve defeated the Mendacious Visage you’ll be rewarded with a Mask of Wrath, Vestige Seed and a ![]() Precision Hammer for your troubles, then head into a hut which is located in the upper area to find a
Precision Hammer for your troubles, then head into a hut which is located in the upper area to find a ![]() Purifying Balm. From here, you’ll want to follow the wooden platform along to the right side of the area and push down the ladder to create a shortcut, then follow the path around and enter another hut to find the
Purifying Balm. From here, you’ll want to follow the wooden platform along to the right side of the area and push down the ladder to create a shortcut, then follow the path around and enter another hut to find the ![]() Vanguard Barros’ Rosary. Return to the vestige and teleport back to the Vestige Seedling you placed down earlier and enter Umbral and drop down in the lower area. Clear out all the enemies, and head over to the right side and soulflay the corpse to lower the platform and then immediately look to your right and soulflay another corpse.
Vanguard Barros’ Rosary. Return to the vestige and teleport back to the Vestige Seedling you placed down earlier and enter Umbral and drop down in the lower area. Clear out all the enemies, and head over to the right side and soulflay the corpse to lower the platform and then immediately look to your right and soulflay another corpse.

Head back down to the lower area and go down the recently opened path and follow it around. Defeat the flying enemy on your left and perform a soleflay on the corpse to retrieve the ![]() Umbral Eye of the Pale Butcher, then make your way across to the right side of the area and you’ll reach a large bonfire. Siphon all of the Umbral Parasites in the area before dealing with all the enemies, then enter the huts on your right to find
Umbral Eye of the Pale Butcher, then make your way across to the right side of the area and you’ll reach a large bonfire. Siphon all of the Umbral Parasites in the area before dealing with all the enemies, then enter the huts on your right to find ![]() Pale Butcher’s Blade before lowering the bridge on your right for a shortcut. Use the Umbral Lamp to cross a bridge, then you’ll find a
Pale Butcher’s Blade before lowering the bridge on your right for a shortcut. Use the Umbral Lamp to cross a bridge, then you’ll find a ![]() Pyric Cultist Staff. Enter Umbral and backtrack a little then drop down into the area on the left to find a chest that contains the Angel of the Void Armor Set on the left, then go over to the right side and soulflay the two corpses to open up another pathway.
Pyric Cultist Staff. Enter Umbral and backtrack a little then drop down into the area on the left to find a chest that contains the Angel of the Void Armor Set on the left, then go over to the right side and soulflay the two corpses to open up another pathway.
Defeat the Hushed Saint
Return to the large bonfire and head back down the left path to reach the boss, The Hushed Saint. This is a very fast-paced opponent and comes equipped with some high damaging attacks, so you’ll want to focus on attacking him from behind whilst also not getting too greedy so hit him once or twice and then retreat until you see another opening. Additionally, there are Umbral Parasites scattered around the arena, so you’ll want to try and lure the boss towards them, then pop it to temporarily knock him off the horse. Below you can find a list of the attacks you can expect to face during this fight:
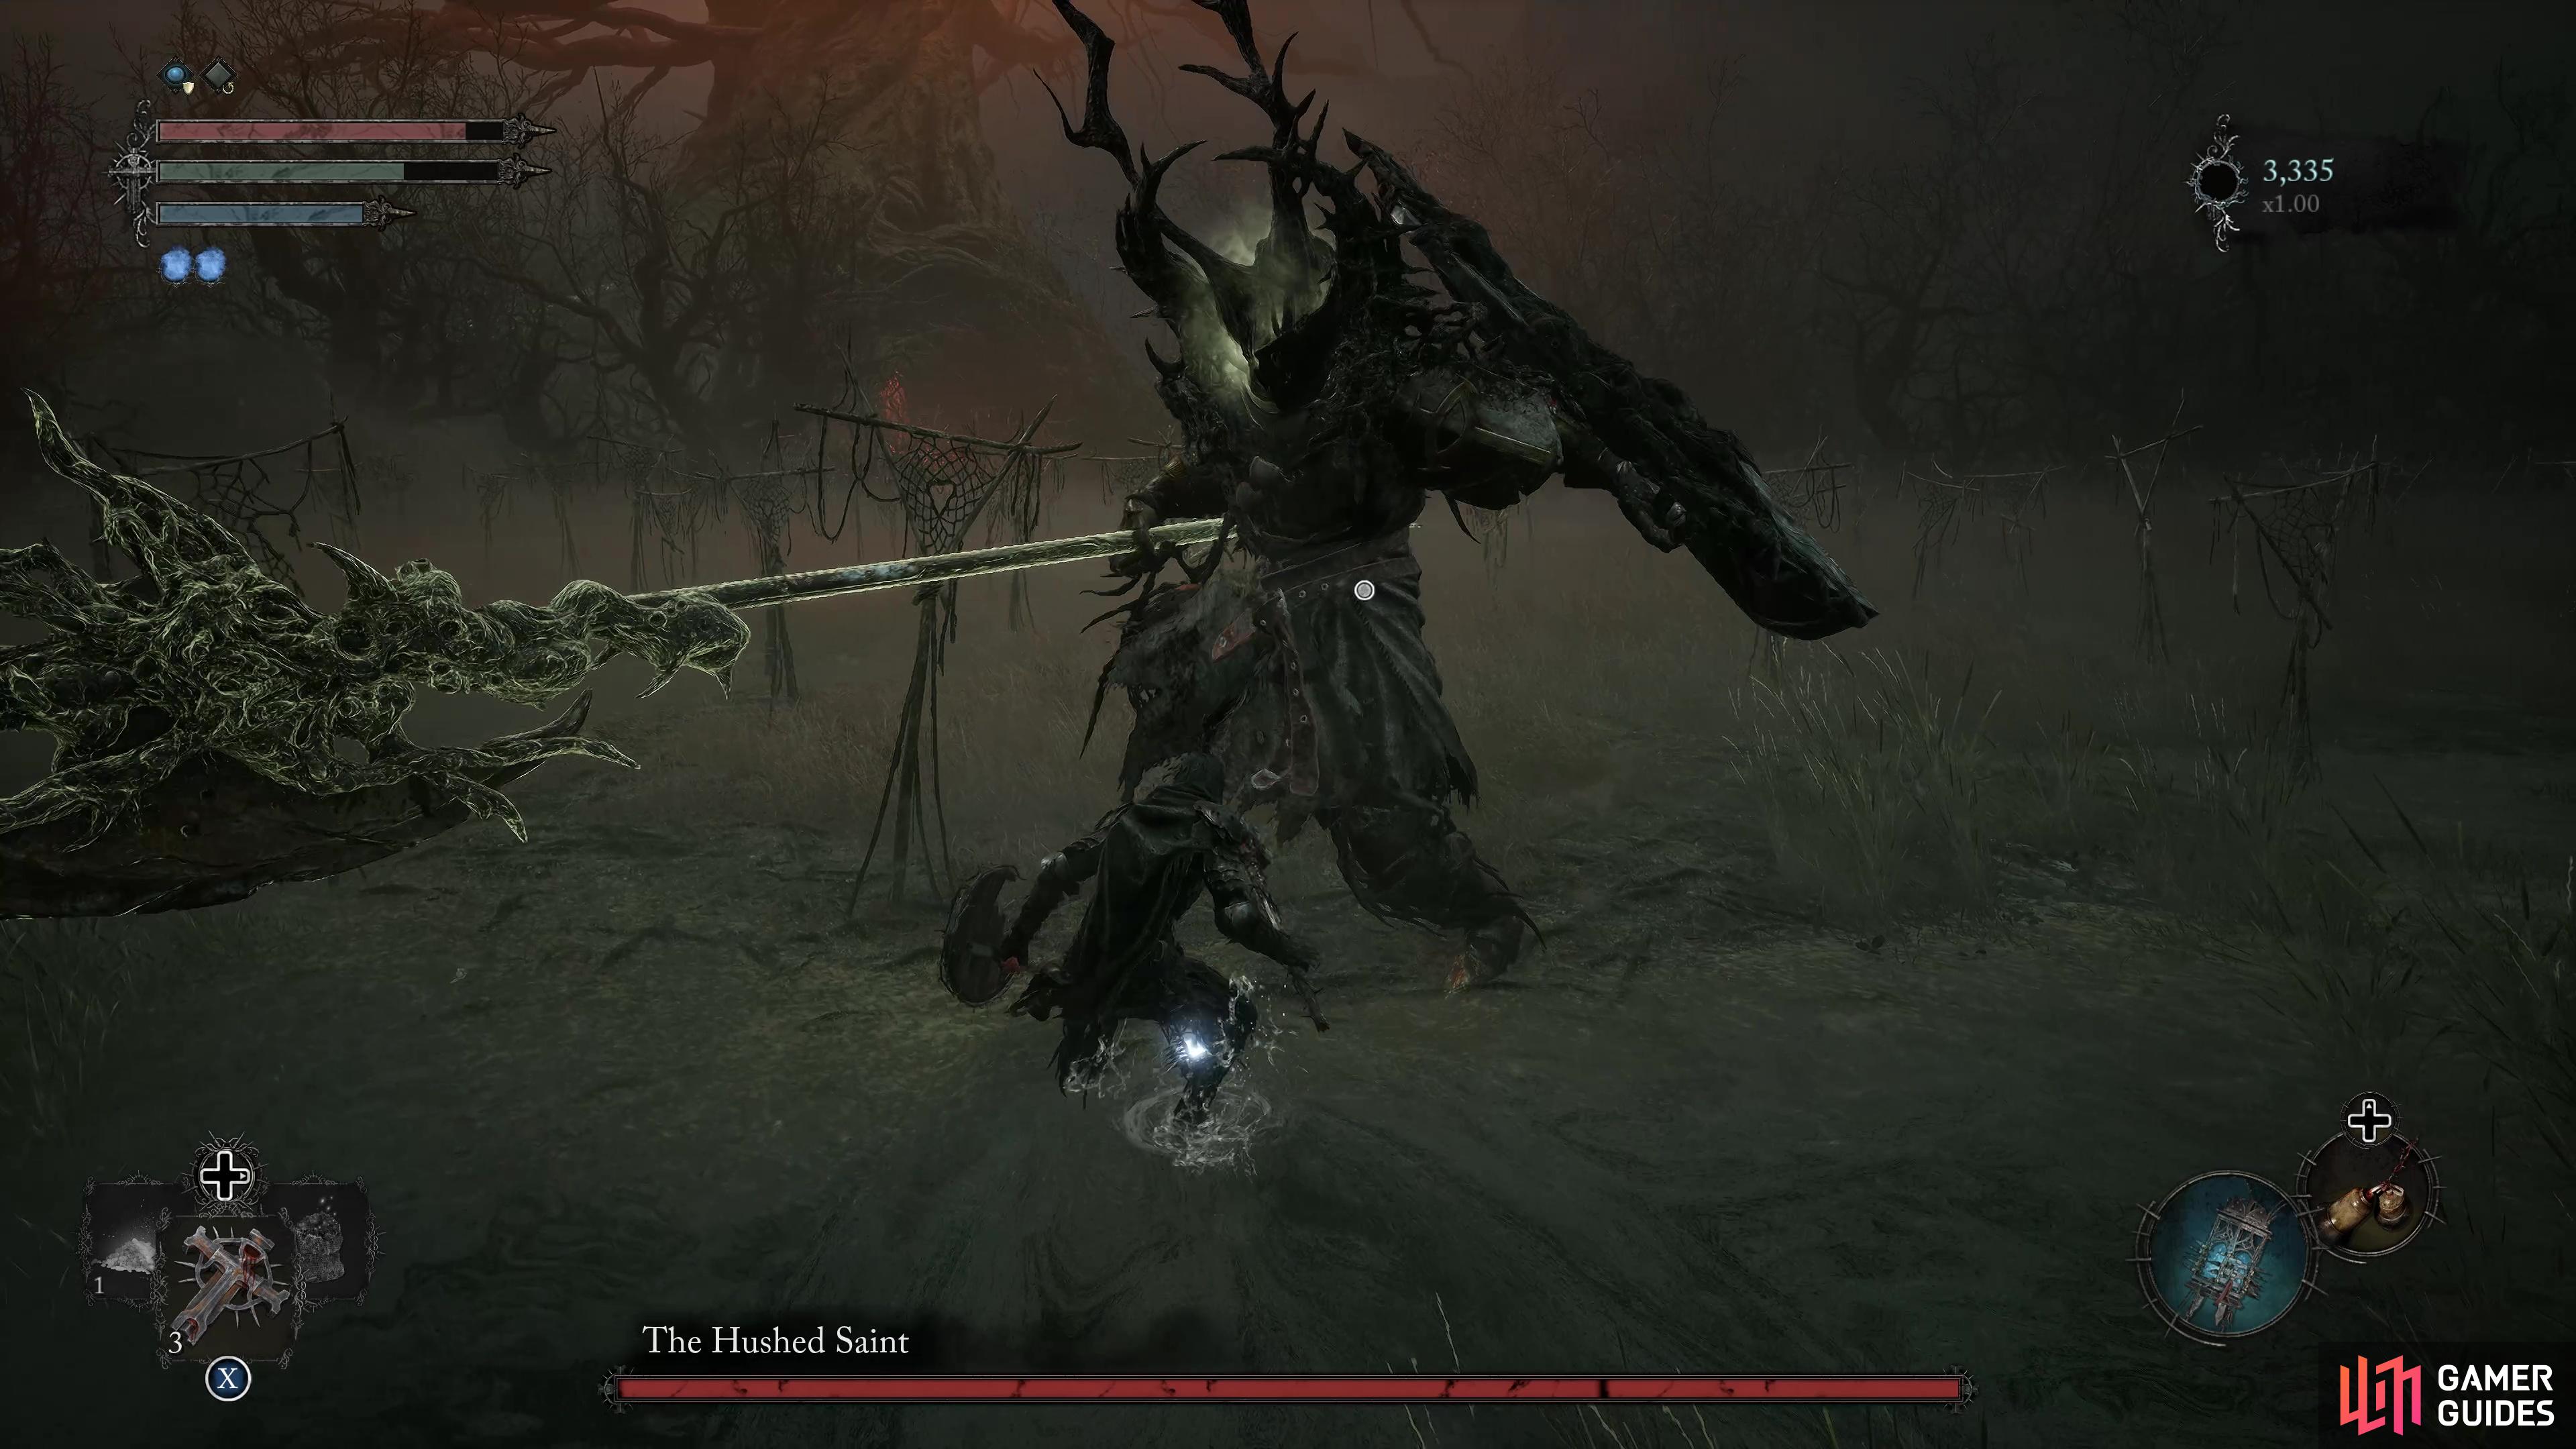
The Hushed Saint can perform a sweeping attack

and can launch his weapon across the battlefield.
- Ground Slam: If you’re standing in close proximity to the boss, then the horse will raise its legs into the air and slam them back down creating a shockwave.
- Shield Attack: Whilst the boss is off his horse he can slam his shield into the ground and push it towards you, so get ready to quickly back away.
- Sweep Attack: Whilst the boss is off his horse can sweep the area in front of him with his weapon, so avoid standing anywhere near him until it stops.
- Flying Halberd: Throughout the battle the boss will launch himself into the air and throw his halberd like a spear in your direction, so keep dashing to avoid it.
After you’ve managed to defeat the Hushed Saint you’ll be given a Vestige Seed, Umbral Scouring and a ![]() Kukajin Invoice, then enter Umbral and grab the stigma whilst you make your way towards the beacon in the corner. Here choosing to cleanse the beacons will affect your ending, so check out our Lords of the Fallen: All Endings and How To Get Them to learn how to get the one you want. Regardless of your choice, take the exit out on the opposite side and grab another stigma, then grab the Vestige of the Pale Butcher at the end of the path.
Kukajin Invoice, then enter Umbral and grab the stigma whilst you make your way towards the beacon in the corner. Here choosing to cleanse the beacons will affect your ending, so check out our Lords of the Fallen: All Endings and How To Get Them to learn how to get the one you want. Regardless of your choice, take the exit out on the opposite side and grab another stigma, then grab the Vestige of the Pale Butcher at the end of the path.
More Lords of the Fallen Guides
If you want any more help with Lords of the Fallen, check out our pages below. You never know, some of them may help you defeat Pieta.
No Comments