Published Title Publisher
New Title Publisher
Updated Title
Published Title Score Editor's Choice
Published Title Score

Monster Hunter World

Purchase on Amazon

Landing the Landslide Wyvern

By
Nathan Garvin
Quest Info
Objective: Capture a Barroth
Reward Money: 3600z
Time Limit: 50 min.
Conditions: HR 3 or higher
Failure Conditions: Time Expires / Faint 3 Times / Barroth is slain
Other Monsters: Apceros / Kestodon / Gajau / Noios

Since you need to have completed Snatch the Snatcher to start this quest, you probably don’t need another tutorial on capturing. The Barroth is a much sturdier foe than the Kulu-Ya-Ku, so be prepared for a longer fight. Despite that, there are more similarities than differences as far as general strategy goes. Get to Scoutfly Level three before you engage, then punish the Barroth until it flees for its lair and a skull appears by its mini-map icon.

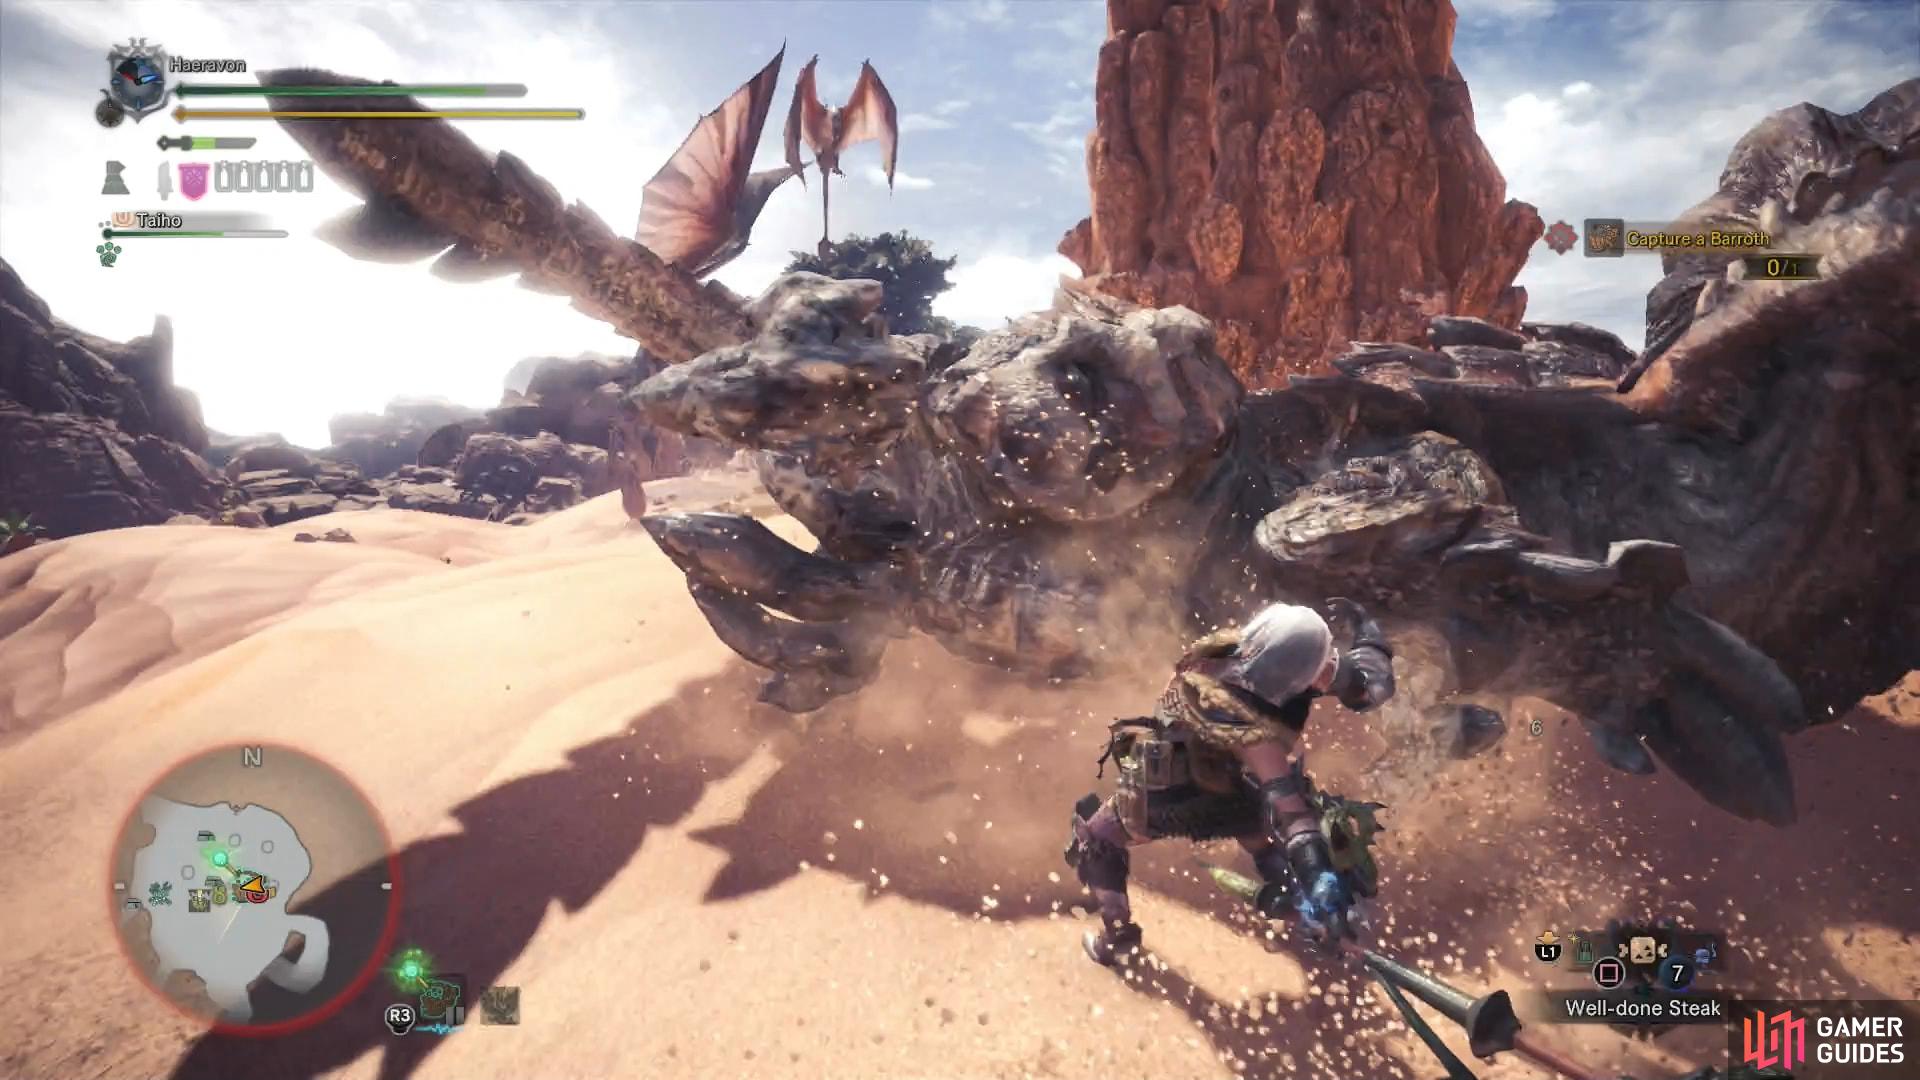
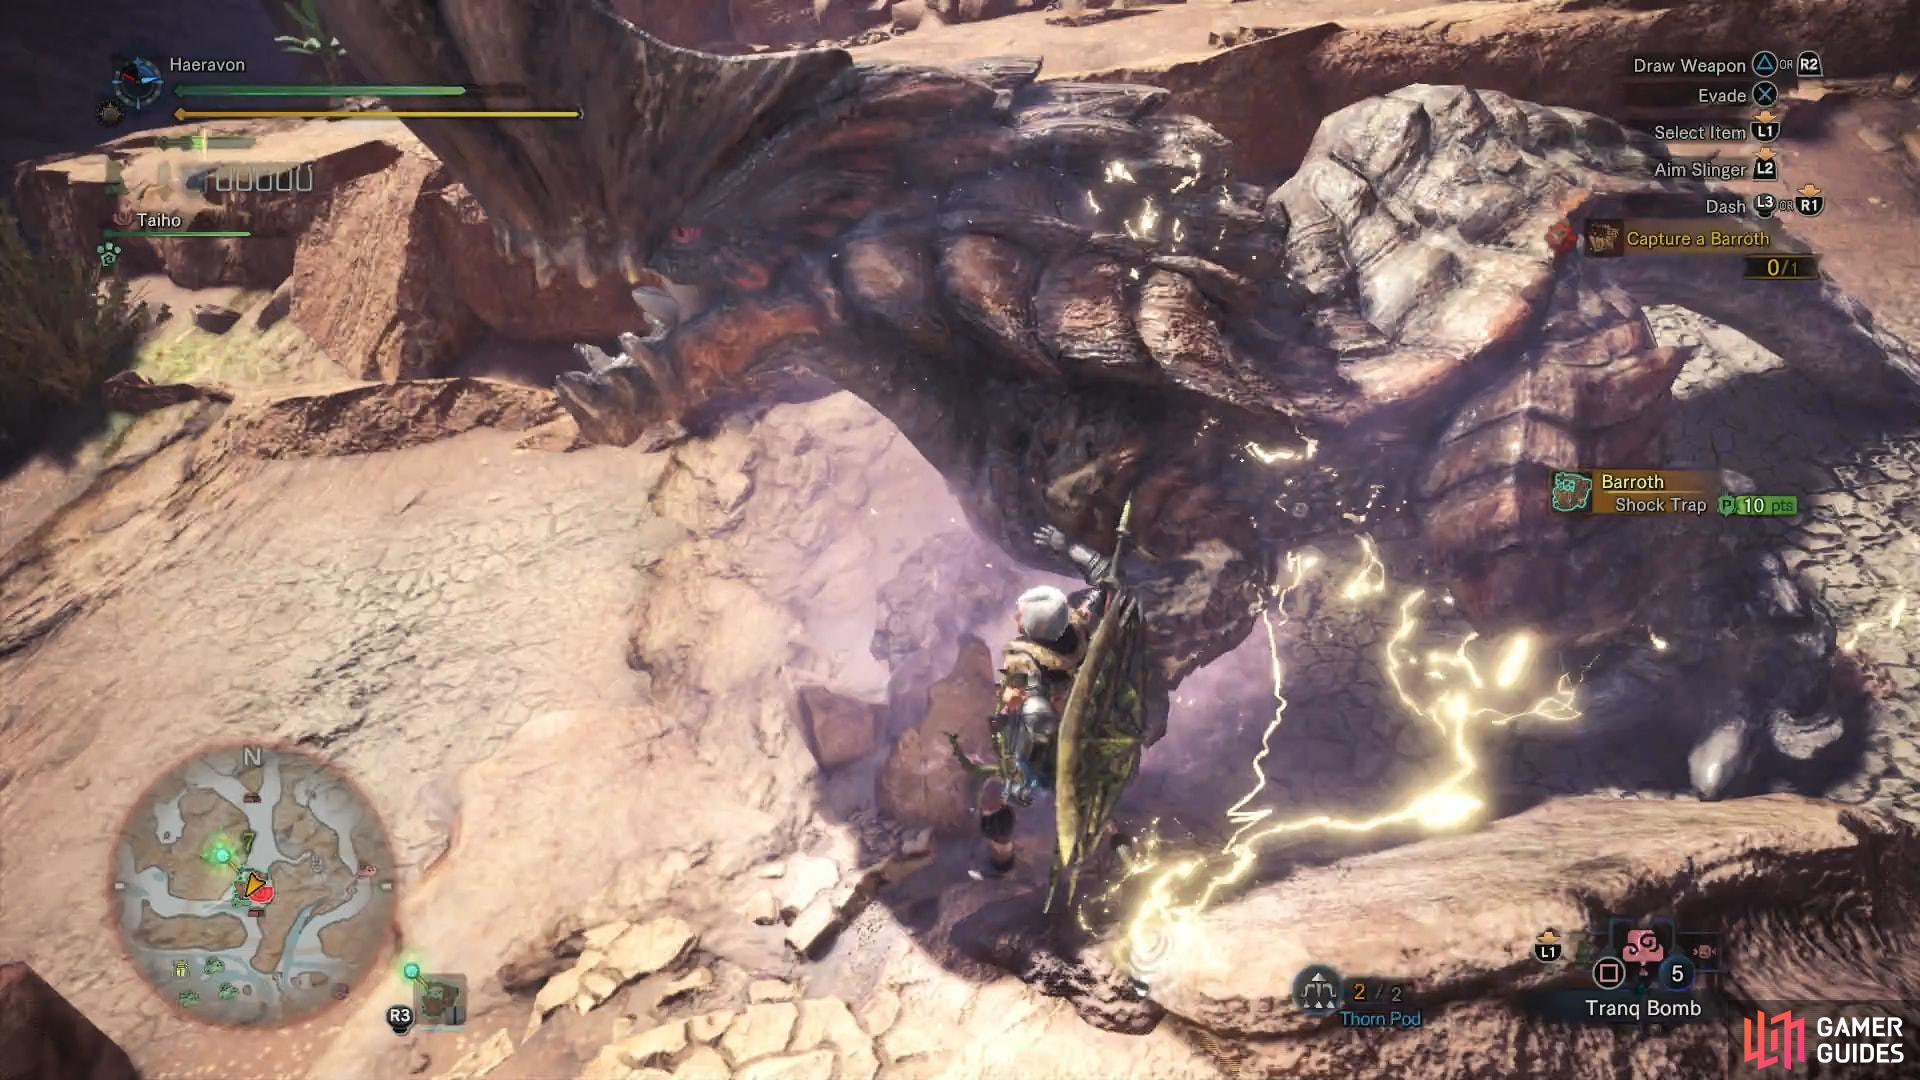
(1 of 2) Smack the Barroth around however you will

Smack the Barroth around however you will (left), then trap and tranq it (right)

Some things to watch out for include the Jyuratodus, which may be in the swamp. If it gets territorial with a weakened Barroth, it could complicate matters. Also, be aware that the Barroth’s lair is under water, and not a suitable place for setting traps. Since you can’t place a trap where it sleeps, you’ll either have to head it off as it flees towards its lair and drop your trap along its path, or provoke it once it’s sleeping, retreat to more suitable ground, and place your trap when it comes to attack you. Once it’s captured, this quest will end.

Back in town, be sure to visit the Smart Biologist again for 600 Research Points. If he’s got further requests, however, they’ll have to wait until you advance the main story further.

No Comments
Guide Information
  • Publisher
    Capcom
  • Platforms,
    PS4, XB One
  • Genre
    Action RPG
  • Guide Release
    13 February 2018
  • Last Updated
    7 December 2020
  • Guide Author
    Nathan Garvin

Share this free guide:

This guide features a full, beginning-to-end walkthrough written in an “ideal chronological order of events” format. Main quests are interspersed with side quests in the order in which they unlock, although some side quests and arena challenges may only be referenced instead of fully explained. These are typically quests that have you facing a monster you’ve already fought under similar circumstances that offer no unique reward for completion. For example, after completing most main quests you won’t be able to attempt that quest again, but you’ll usually unlock an identical side quest allowing you to hunt the same monster in the same area with the same success/failure conditions.

Monster strategies will be discussed in detail as you encounter them throughout the walkthrough, featuring elemental and status information and drop lists. The guide also features a fully detailed bestiary for those who just want information about specific monsters unaccompanied by a walkthrough. Trophy/achievement information can also be found in a separate trophy/achievement guide, although be warned: many trophies/achievements in Monster Hunter World are easier said than done.

Other features of this guide include:

  • Information on crafting/harvesting.
  • Side quests that unlock mantles, ingredients and other useful features.
  • Field Researcher quests including where to catch rare fish, how to capture small monsters, and where to locate Grimalkynes/Gajalaka.
  • Grimalkyne/Gajalaka quests.
  • How to upgrade the Ancient Tree/Harvest Box and how to unlock various fertilizers.
  • How the Elder Melder works, melding different items and decorations.
  • Where to find the Powertalon and Armortalon, and how to upgrade them into the Powercharm and Armorcharm.
  • Detailed information on how to unlock Tempered Monsters, the difference between Threat Level 1, 2 and 3 Tempered Monsters.
  • Information on Feystones, including drop rates, the differences between the types (Mysterious, Gleaming, Worn and Warped).
  • How to get Warrior’s Streamstones and Hero’s Streamstones.

Get a Gamer Guides Premium account: