
Starfield’s 11th mission is one of the most choice-heavy decisions in the game. When you get to this mission plotline, be ready, as you’ll need to maker a heavy choice about who dies or not in your quest. Here’s everything you need to know about the ![]() High Price to Pay choice in Starfield, along with some other factoids about the mission later on.
High Price to Pay choice in Starfield, along with some other factoids about the mission later on.
High Price to Pay Choice: Who Dies in Starfield?
You need to make a choice in High Price To Pay, which will lead to someone dying in the mission. Who dies in Starfield, is up to the choice in this mission, so pick correctly.
Spoiler alert, but you’re going to need to make a choice about who dies. You should learn this now, rather than accidentally kill your sweetheart romance you’ve been trying to flirt with all campaign long. The worst bit is because of the short autosave system in the game otherwise the Creation Engine brick itself, you’re likely to find out what happened and not be able to go back unless you have a manual save a little further back.
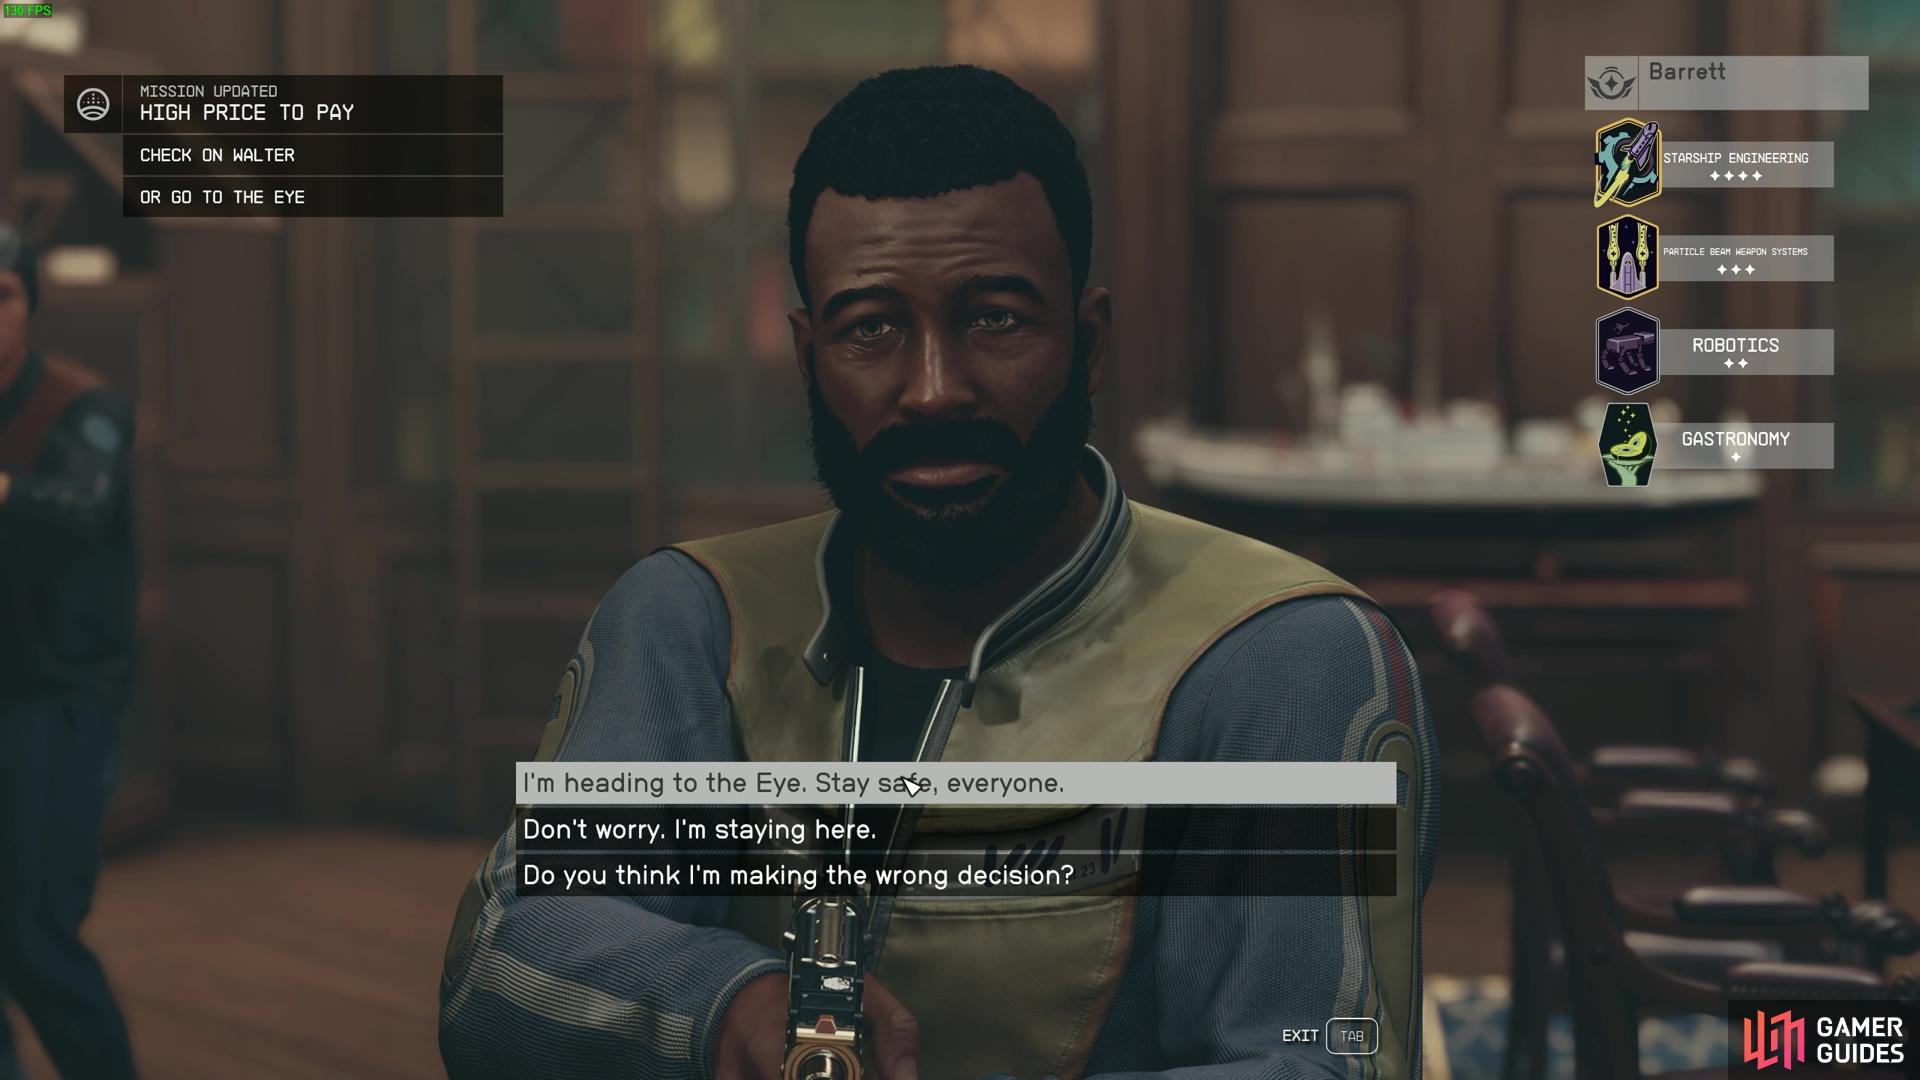
When you arrive at the lodge and have added the latest artifact to the display case, you will get a distress call from those on ![]() The Eye, floating above the orbit of
The Eye, floating above the orbit of ![]() New Atlantis. Those in the Lodge with you are like we should all defend here, and handle the artifacts and put them away. However, it is also pressing you to go to the eye and patch up your wounded allies.
New Atlantis. Those in the Lodge with you are like we should all defend here, and handle the artifacts and put them away. However, it is also pressing you to go to the eye and patch up your wounded allies.
The game largely makes more sense to defend those artifacts, with them being the entire focus of the main storyline, not to mention even before you leave you can see one of the ![]() Starborn in the room getting a hold of Walter.
Starborn in the room getting a hold of Walter.
But, you still have time to make a decision:
- Defend the Lodge
- Go to the Eye
High Price To Pay Choice Endings
If you chose the Defend the Lodge, then you’ll get approval from ![]() Barrett. However, You’ll later find out that
Barrett. However, You’ll later find out that ![]() Sarah Morgan dies of her wounds, while
Sarah Morgan dies of her wounds, while ![]() Andreja, Vladimir, and
Andreja, Vladimir, and ![]() Sam Coe survive their wounds and injuries.
Sam Coe survive their wounds and injuries.
Meanwhile, if you chose to go to The Eye, then you can Save Sarah Morgan, and get plenty of approval, from Andreja and Sam Coe along the way. You then get Sam Coe as your active companion for a short while, and when you speak to anyone in the lodge, there’s a lot of Sam Coe Loves that. However, Barrett dies instead, and Vosco is pretty injured, so you lose him as a crew member temporarily.
The main decision here is how immersed you are in defending the storyline’s main focus point, the artefacts. Or, you’re choosing which companions you want to do the personal quests for later on.
If you want to romance Barrett or role-play as the artifact man, stay at the Lodge. If you intend to romance Sam Coe and Andredja, then going to them is a nice boost of approval to make it easier. If you intend to Romance Sarah Morgan, then you absolutely need to go to The Eye and save her.
High Price To Pay: Fighting Hunter
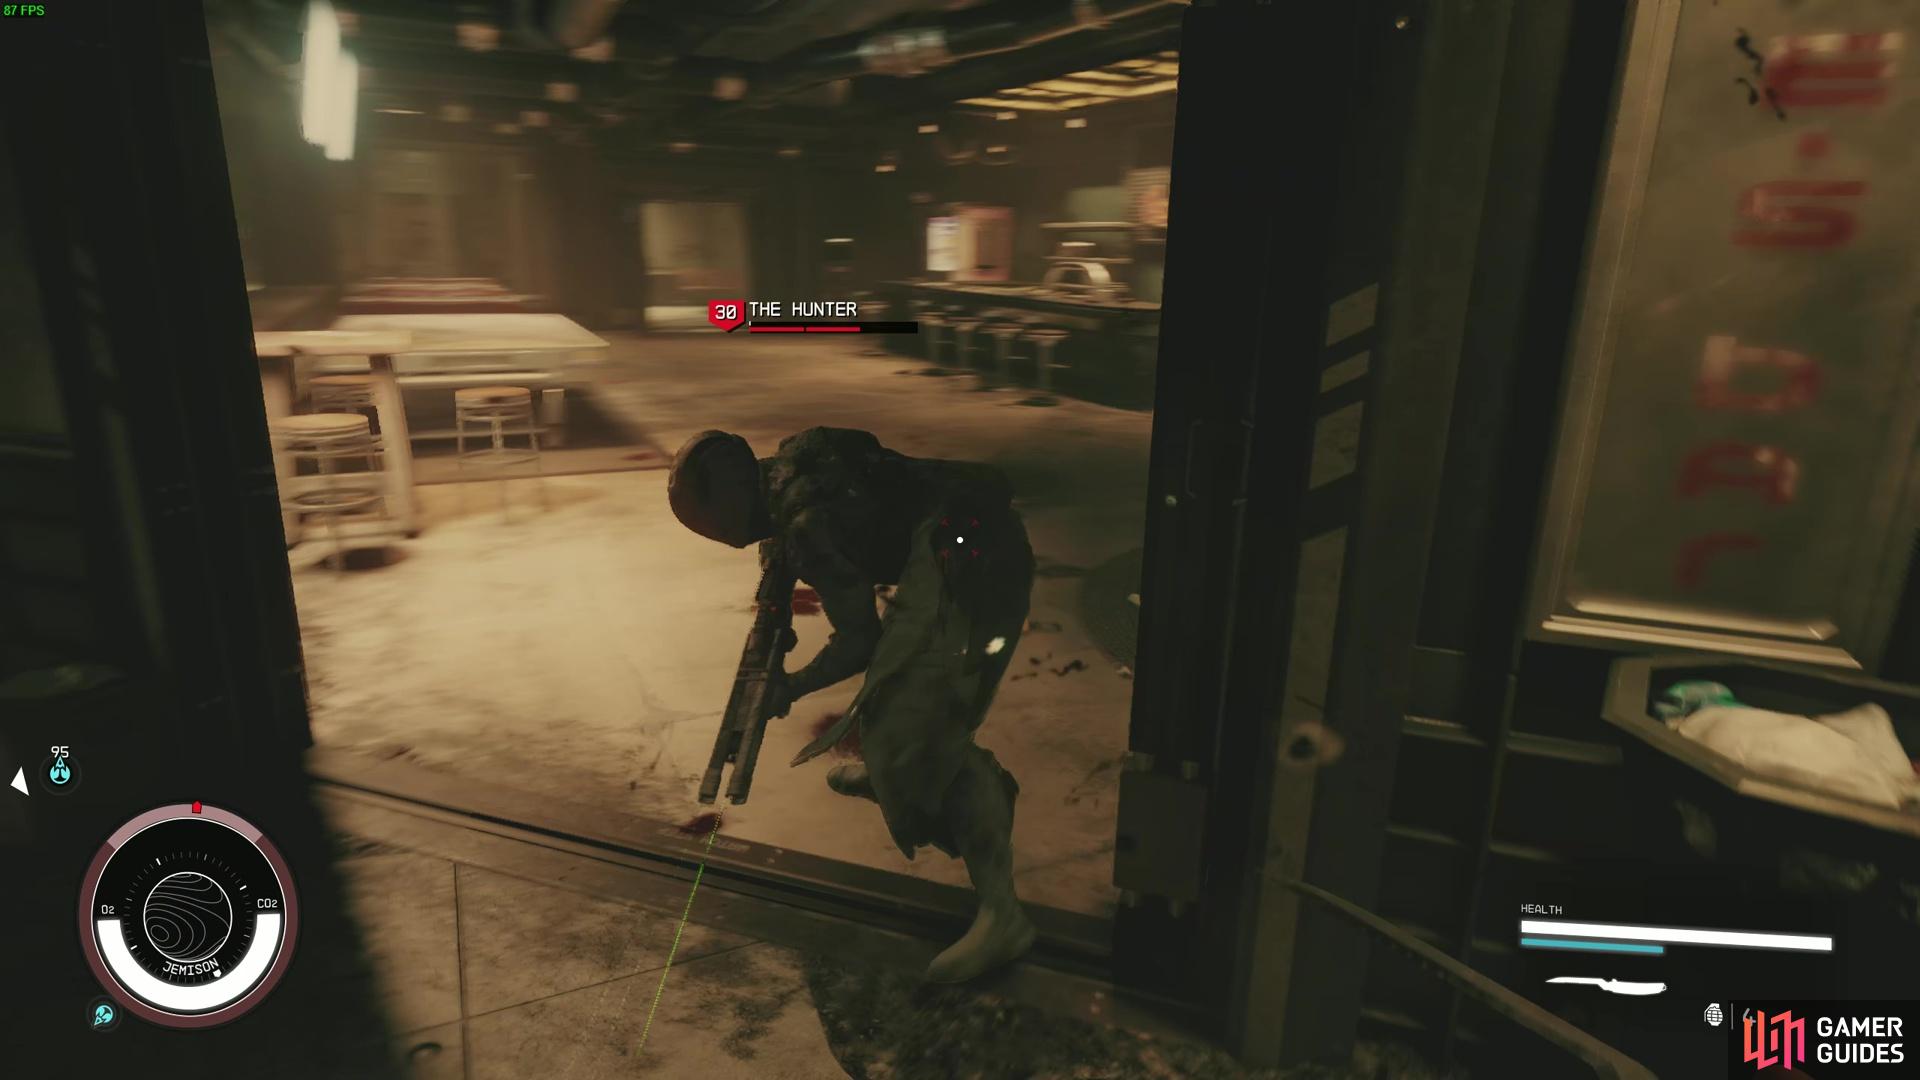
Get the Hunter low enough, and you’ll force him to retreat temporarily.

If you defeat The Hunter in the High Price To Pay Mission, you will get a special reward and cutscene for forcing him to retreat.
No matter what you choose in the High Price to Pay Starfield mission, you’ll get to a point where you help Noel run through the Well, and escape with the artifacts. When running through the Well, you will stumble upon The Hunter, the mysterious Starborn that hurt your companions at the Eye and the Lodge. The main story mission mainly has you flee through the Well, dodge The Hunter the best you can until you get to your ship and escape with the artifacts.
However, if you try to kill Hunter, which is doable, even if you have only done the main story, there are a few secret rewards for it. Try to bat down The Hunter the best you can, and avoid his clone. Make sure to land those headshots, and if you’re a melee build, running orbits around Hunter to avoid getting beat down, or shot at. Also, hotkey Trauma Kits or Medpacks so you can withstand the higher damage this level 30 enemy will deal to you. When you reduce the creature’s armor down to 0, and the creature is on around 55% HP, it will restore all of its HP and Armor and then disappear for a short while, before returning later on as you escape the Well.
If you intend to make combat with it easier, make sure to run to a more guarded area of the Well, or on the Surface of New Atlantis. There are a lot of guards around the more dense areas of the Well, and near the Spaceport of the UC, so, you can get them to shoot at it too for some extra damage against the creature.
When you get the creature to dip, B-line for the ship and enter orbit. You’ll then get a cutscene with The Hunter and its ship, telling you it has been a long while since The Hunter had to retreat. He will then say he will reward you for not being beaten like that in a long time, and you get the lazer rifle, ![]() Unrestrained Vengeance for it. It comes with a Hitman perk, which is a 15% damage boost, while ADS, is a very strong rifle modification. If you’re using Lazer weapons in your build, this might be one of the best mid-game weapons in Starfield for that playstyle.
Unrestrained Vengeance for it. It comes with a Hitman perk, which is a 15% damage boost, while ADS, is a very strong rifle modification. If you’re using Lazer weapons in your build, this might be one of the best mid-game weapons in Starfield for that playstyle.
With that said, this concludes the High Price To Pay Choices in Starfield. You now know which choice you should make for your playthrough and whether or not you should spend your time wailing into the bullet sponge boss that The Hunter is.
Read More:
No Comments