Exit the room and examine the crosses for another mandatory entry in the journal and then speak with Sam for an Optional Conversation about Avery’s obsession with Saint Dismas.
Circle around the back of the crosses and examine the lamp and then return to the from of the crosses. You need to select each of the portals below each cross and align the beams with certain points on the wall to create the constellation Orion.
Dismas - Second star from the bottom and the top right star
Jesus - Top and bottom stars
Getas - Final two stars
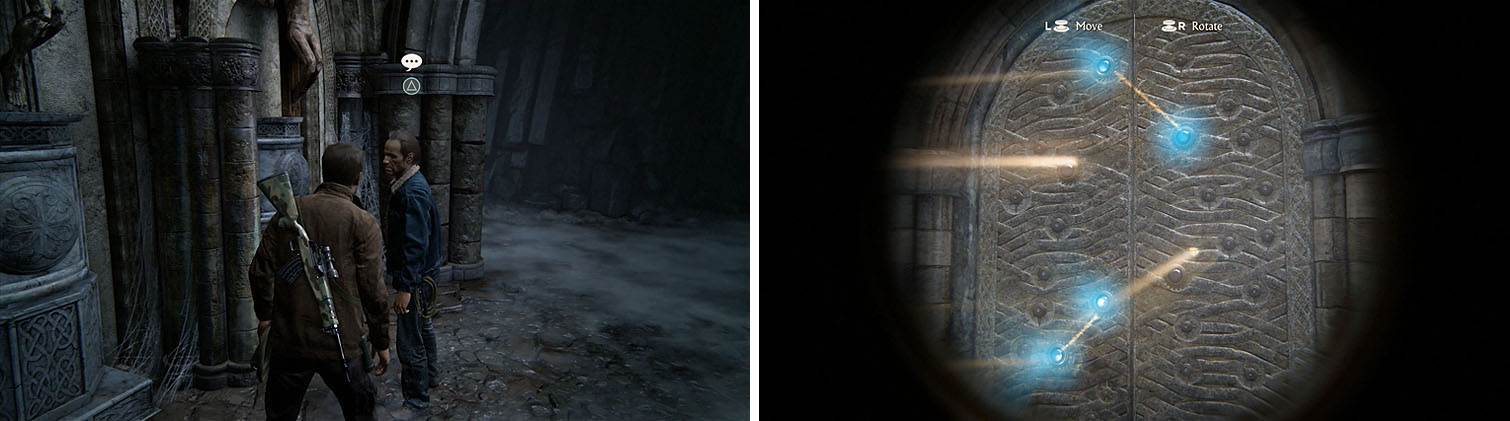
Speak with Sam before you light the back of the crosses and then solve the puzzle.
Circle to the back once again and speak with Sam for another Optional Conversation and a Journal Entry . You can now examine the lever on the wall to unlock the door and find your next destination.
To do this you’ll need to be quick, because a certain goon will ruin the whole thing if you don’t reach the end before he leaves his original post.
Begin by running toward the Shoreline crate with dynamite and jumping catty-corner onto the outer ledge. From here you can hop/shimmy along the outer wall, climb up to grab onto the crumbled wall, and continue right until you spot the large cross beneath you.
Drop down and roll into the tall grass when the enemy in the tan shirt isn’t looking and then head straight through the grass and grab onto the ledge of the wall ahead.
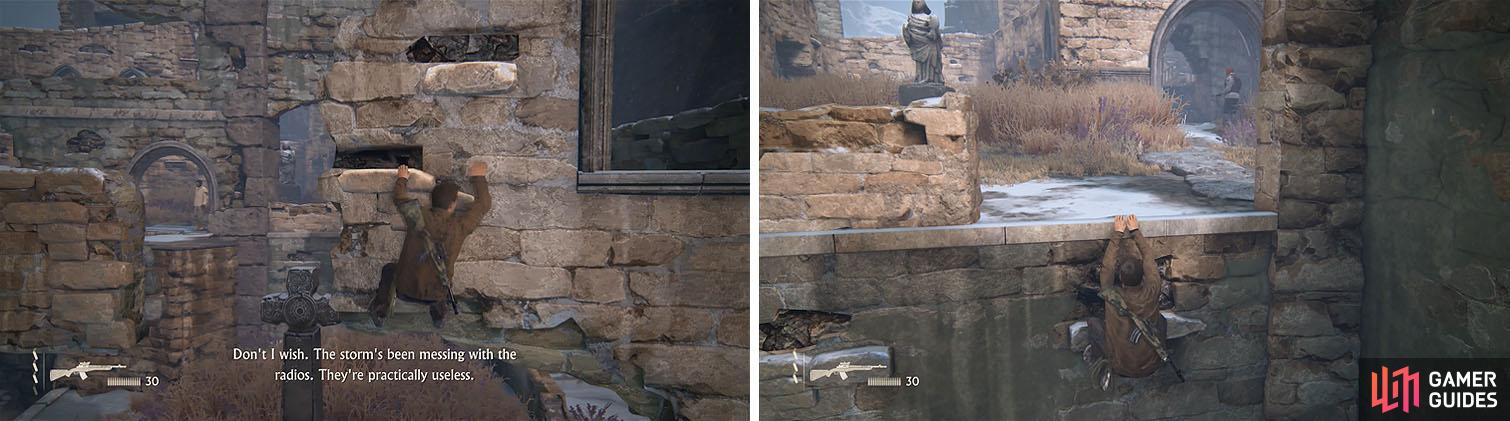
Shimmy along the outside to the large cross and drop (left). Then head straight for the wall ahead (right).
You should see an enemy in a red cap on the right, but wait for him to head down the stairs on the right before you pull up and quickly hide in the grass across the way.
Pass to the grass on the left, right in front of the statue with the AK-47, and then wait for the enemies to start walking away. The mercenaries above should start a conversation about Nadine throwing Nate out a window at the auction as you run to the small section of wall, using it to jump up the wall on the right.
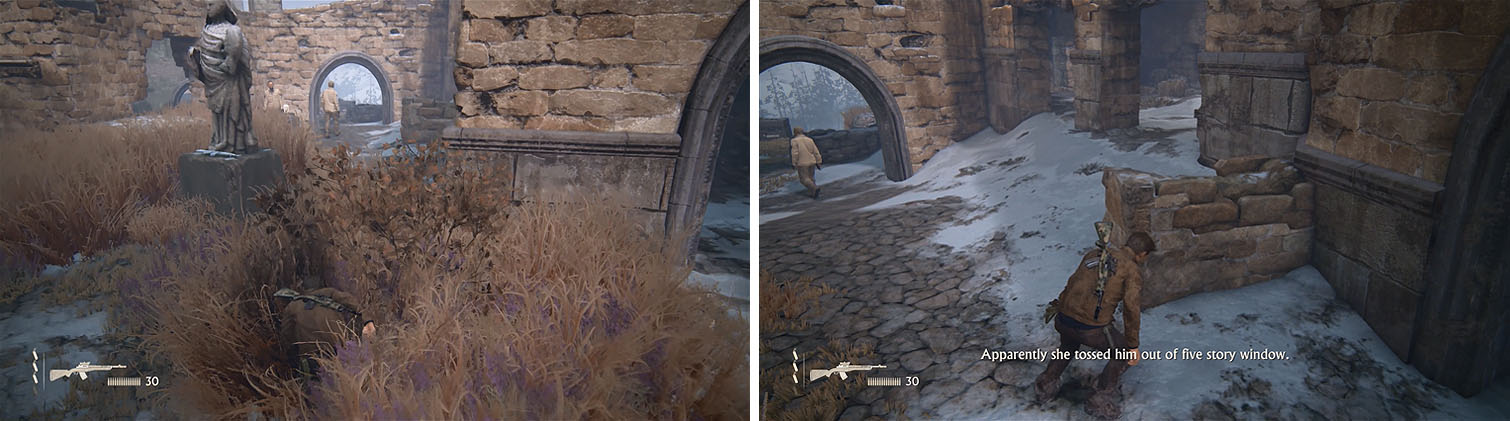
Pass through the tall grass and jump to the wall when the two enemies turn away.
Climb up to the ledge and shimmy around the corner and wait for the conversation to end. If you did it right the conversation should end and you should be able to climb up once the upper mercenary turns around just before the shotgun carrying enemy heads back up the stairs behind you.
Walk toward the pillar straight ahead and make sure the enemies further back aren’t walking toward you and then dart up the stairs to the right and spam Triangle like there is no tomorrow. Once you open the gate and sneak through undetected you’ll obtain the Trophy: Ghost in the Cemetery .
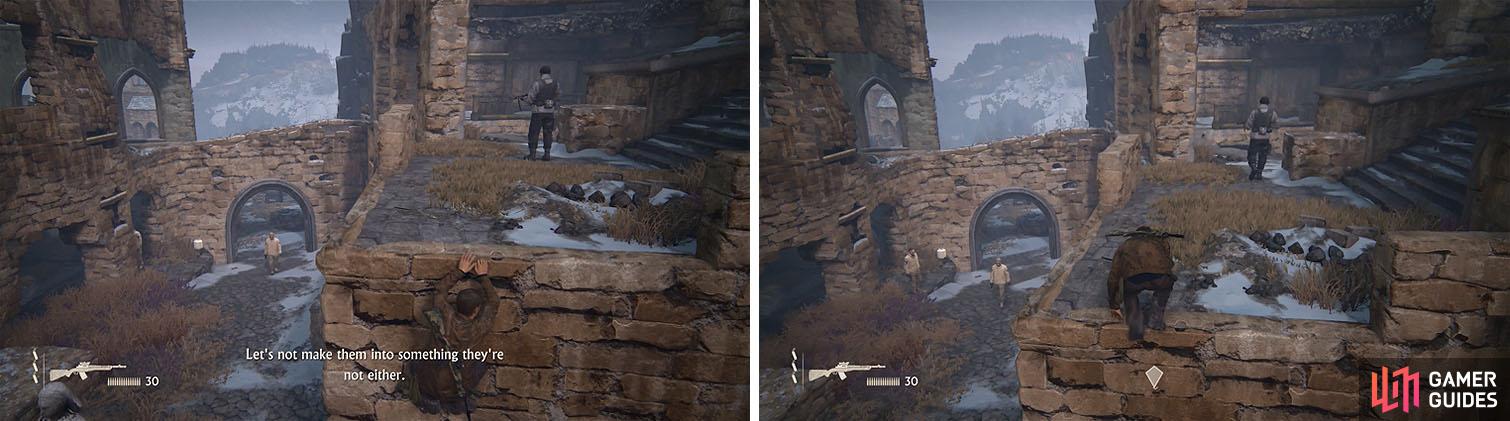
Shimmy around the building and wait for the conversation to end (left). As soon as it does, pull up so that you aren’t detected from below (right).


Head left and slide down the gravel to a wooden beam, circle around the large jagged rock and then jump across to another section of land. Jump again to reach the coastline and press L3 and then continue for a quick chat from Sully.
After you grapple across the gap you’ll encounter three Shoreline goons, which are pretty easy to take care of, and then make sure to enter the tunnel.
Instead of climbing up the tunnel shaft, look for another path that you can crouch under to find a hidden cave with the Slipjoint Clasp Knife . You can now make your way to the top of the area and boost Sam up, but before you follow turn around and jump across the gap to find another cave with the Pewter Singing Bird Box .
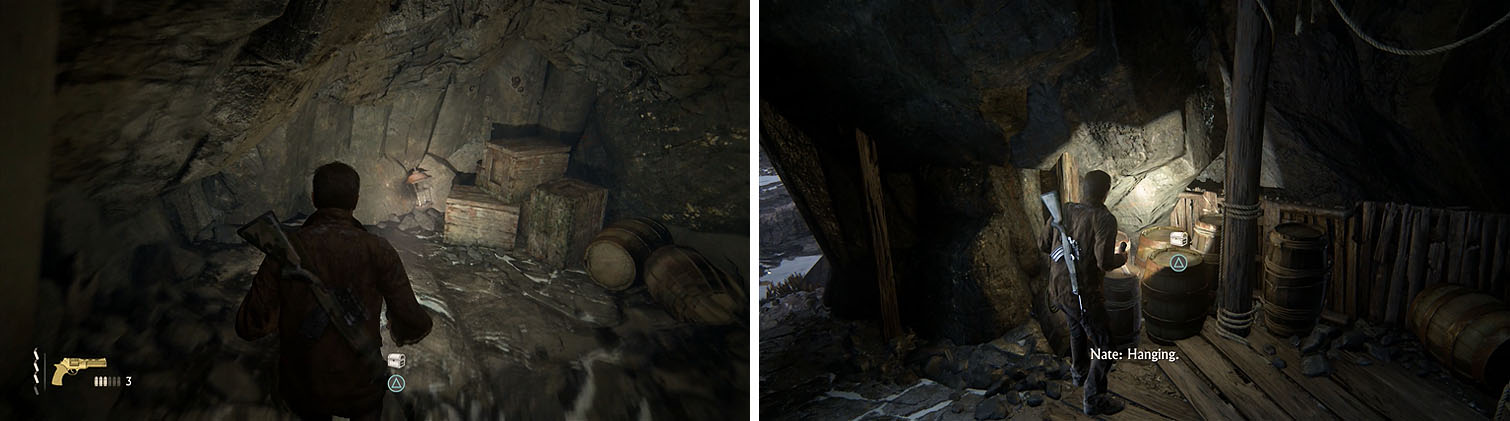
After encounter more enemies, collect the treasure in the tunnel and the cave.
After Sam places the beam on the supports, press L1 and rappel up to the top ledge and then latch on again and drop off the other side of the area. Swing left until you have enough momentum to grab the ledges and then follow them left and upward until you reach a dead end above a post.
Drop down to grab the post and then swing and jump into the gravel, pressing L1 at the end to attach yourself to another beam. Swing to the ledges and climb up to the left and then grapple another beam, climbing up the rope until you’re high enough to swing over the obstruction.
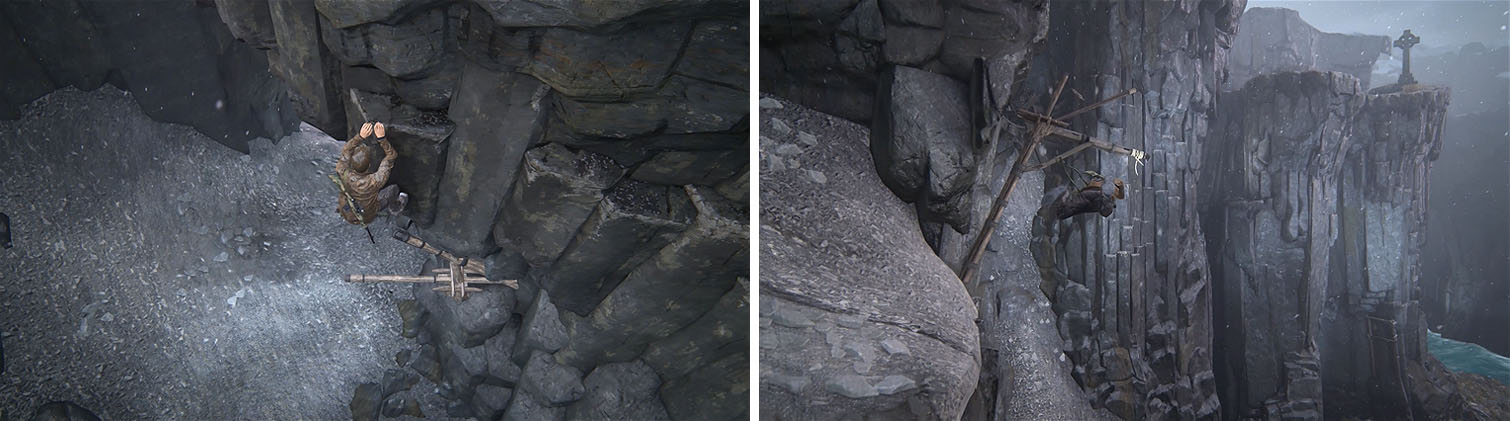
Drop onto the post from the ledges and then make sure to grapple on the other end.
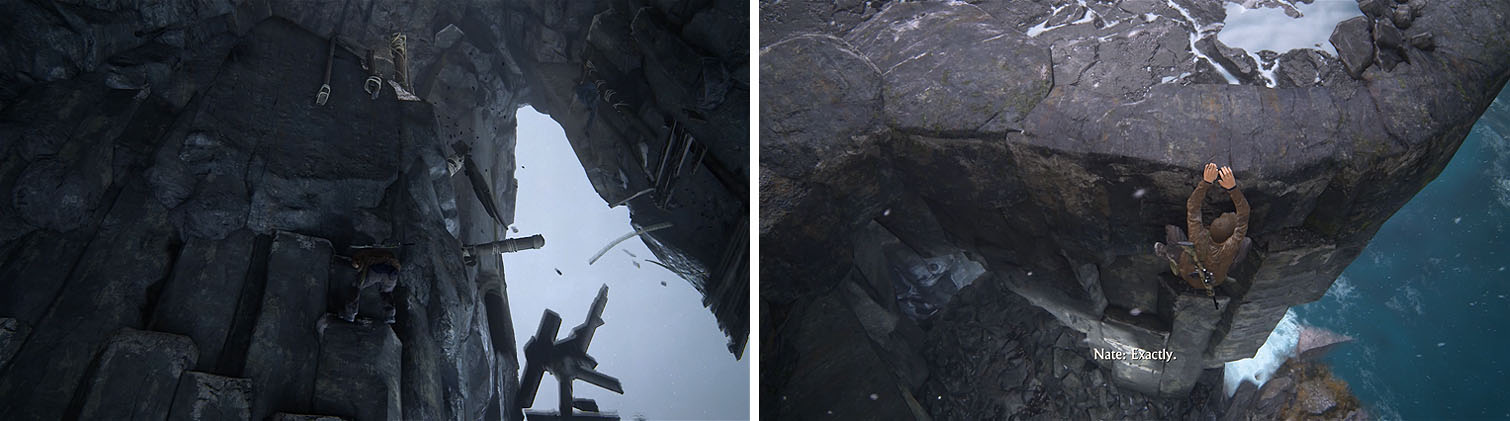
Once you jump over you’ll land on another slope of gravel, so stick to the left and jump at the last minute to grab the ledges across the gap. Shimmy right along the ledges and then back jump to the other side to continue right to a ladder.
The ladder will crumble as you climb it and when Sam crosses the bridge he’ll inadvertently reveal a beam that you can grapple. Jump to the wooden support and follow the ledges up to the top where Sam will help you up.
Turn left and drop off the ledge where Sam climbed up and then make your way down the ledges to an outcropping below that has the Tortoise Shell Snuff Box . You can now climb back up and walk over to the large cross, pressing L3 to spot the cave.
Sam will create a path when he crosses the bridge (left). After Sam helps you up, make sure to explore his route for a treasure (right).
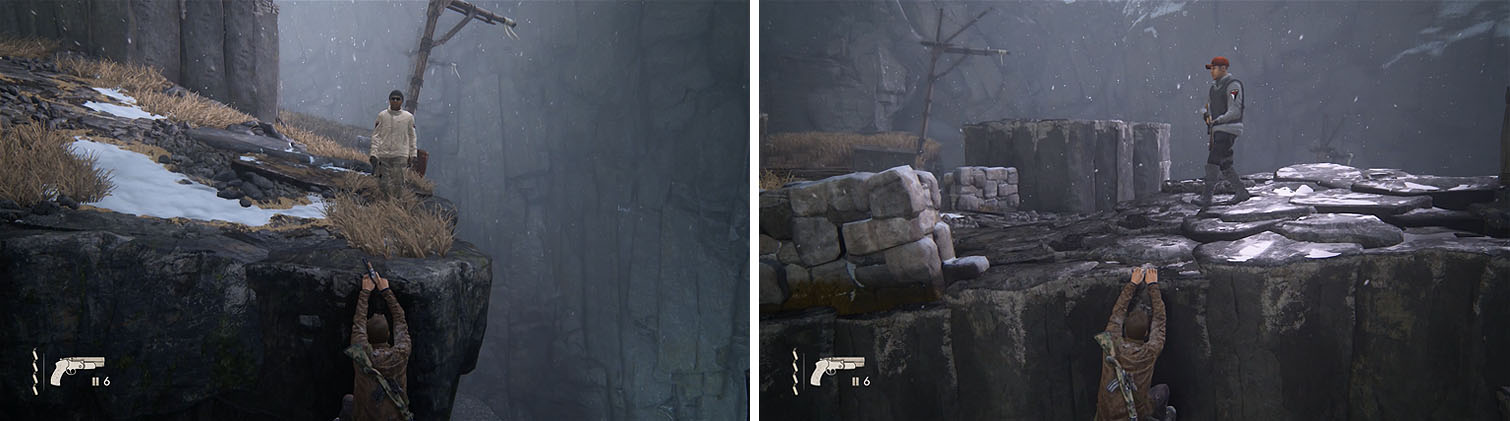
Turn around and follow the path to the right and jump to the ledges and then make your way down until you can drop in the tall grass below.
The enemy straight ahead will stare off to the right for quite a while, giving you plenty of time to jump across the gap and hang on the ledge. Shimmy right and pull down the guy when he walks by and then pull up and climb the wall next to you and shimmy around until you’re in position to take out the next Shoreliner.
Shimmy further left and pull up into the tall grass when the man across the way isn’t looking and then jump onto the ledges below the crate. You can’t pull the enemy over the crate, so shimmy left until you’re on the other side and drop to the ground.
Stealth kill the first two enemies by hanging from ledges nearby.
From here you can use the tall grass to take out the enemy on the lower level first and then the one you passed. The remaining enemies are pretty easy to take out now that you can get behind them without being seen.
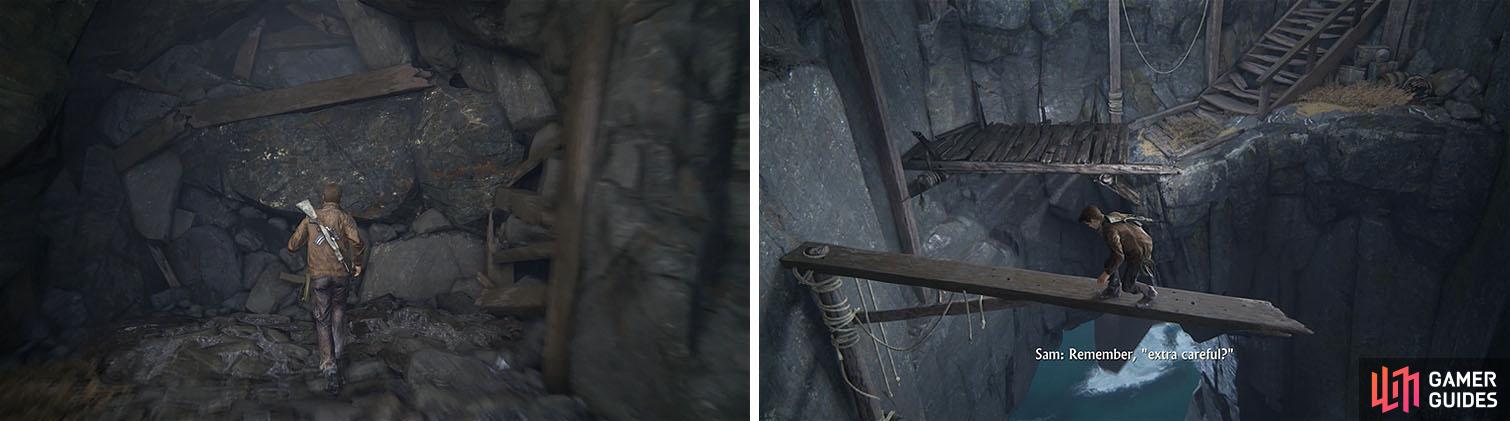
Locate the tunnel at the back of the area and climb up, crawling through until you raise the beam with Sam’s help. Drop down into the gravel slope and jump at the last moment to reach the ledges across the way and then grapple across the gap ahead.
Walk out onto the beam and hop down to the next beam, again to the next beam, and then finally to the wooden bridge.
Find the tunnel at the back of the encounter area (left) and make your way to the wooden beams that leads to a set of stairs (right).
Take the first set of stairs and then head right of the second set to find the Persian Tailoring Scissors hiding in the dark alcove. You can now follow the path up and into the cave to complete the chapter.
No Comments