
One of the great joys of playing !Conan Exiles comes from the freedom it provides to different types of players. You can focus purely on the survival aspect of the game without doing much of any base building if you wish, or you can create magnificent structures using the fairly intuitive base-building features that the game has to offer. Most players will want to engage in a bit of both to get the most out of the game, but if you want the most amount of freedom while exploring, and especially while building, understanding how to use the Admin Panel and console commands is crucial. On this page, we’ll show you how to use both of these features so that you can customize your game in whatever way you prefer, within the limitations of the engine. We’ll also provide you with some useful commands that can be used if you experience glitches, or if you get stuck while playing.
Console Commands in Conan Exiles
How to Use the Admin Panel in Conan Exiles
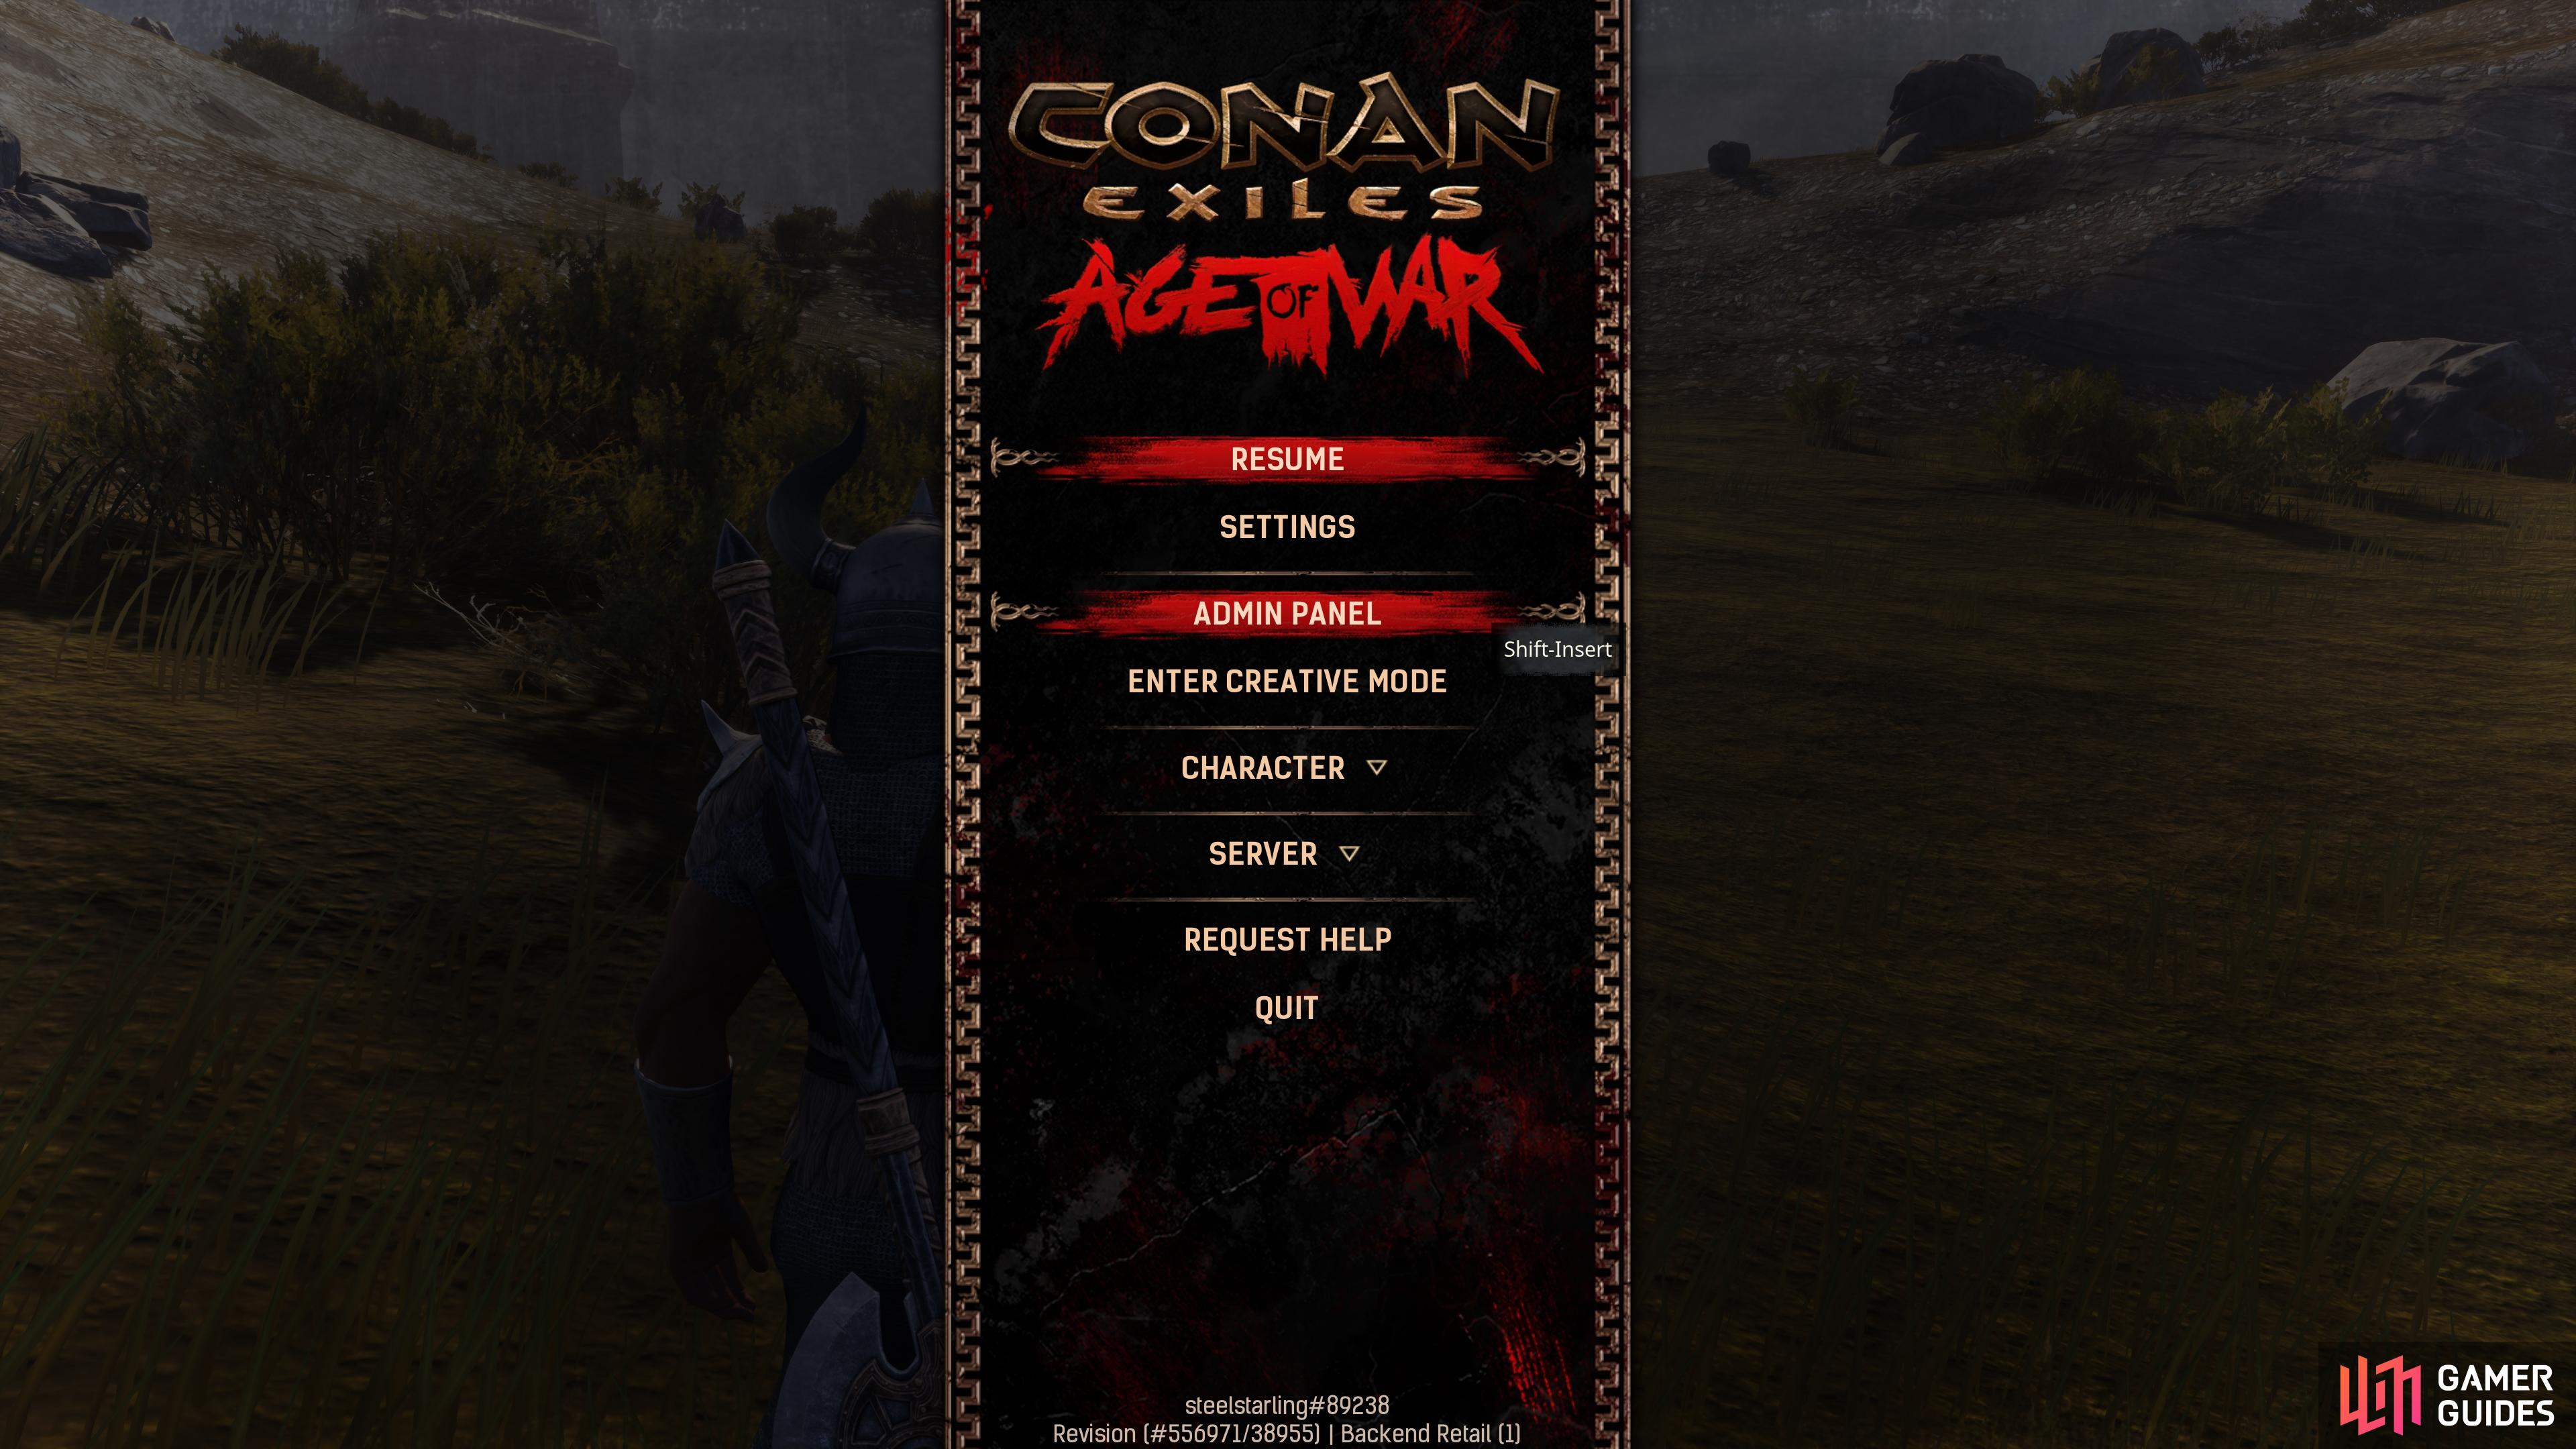
The Admin Panel in !Conan Exiles can be used by anyone who is playing a single-player game, or by those who own their own server. To access it, you need to go to the main menu and select Settings. From there, go to the Server Settings tab and look for the “Make Me Admin” option, as shown in the screenshot below. You’ll see an “Admin Rights Granted” message appear when you click it, and the next time you open the main menu there will be an “Admin Panel” option and “Enter Creative Mode” option available. We’ll talk more about what you can do with the creative mode later, but for now, we’ll cover the basics of the admin panel.
The first thing to notice when you’re in the admin panel is that there are three main tabs: the main admin panel tab, Spawn NPCs and Player List tab, and the Spawn Item tab. We’ll cover what you can do with each of these in more detail below.
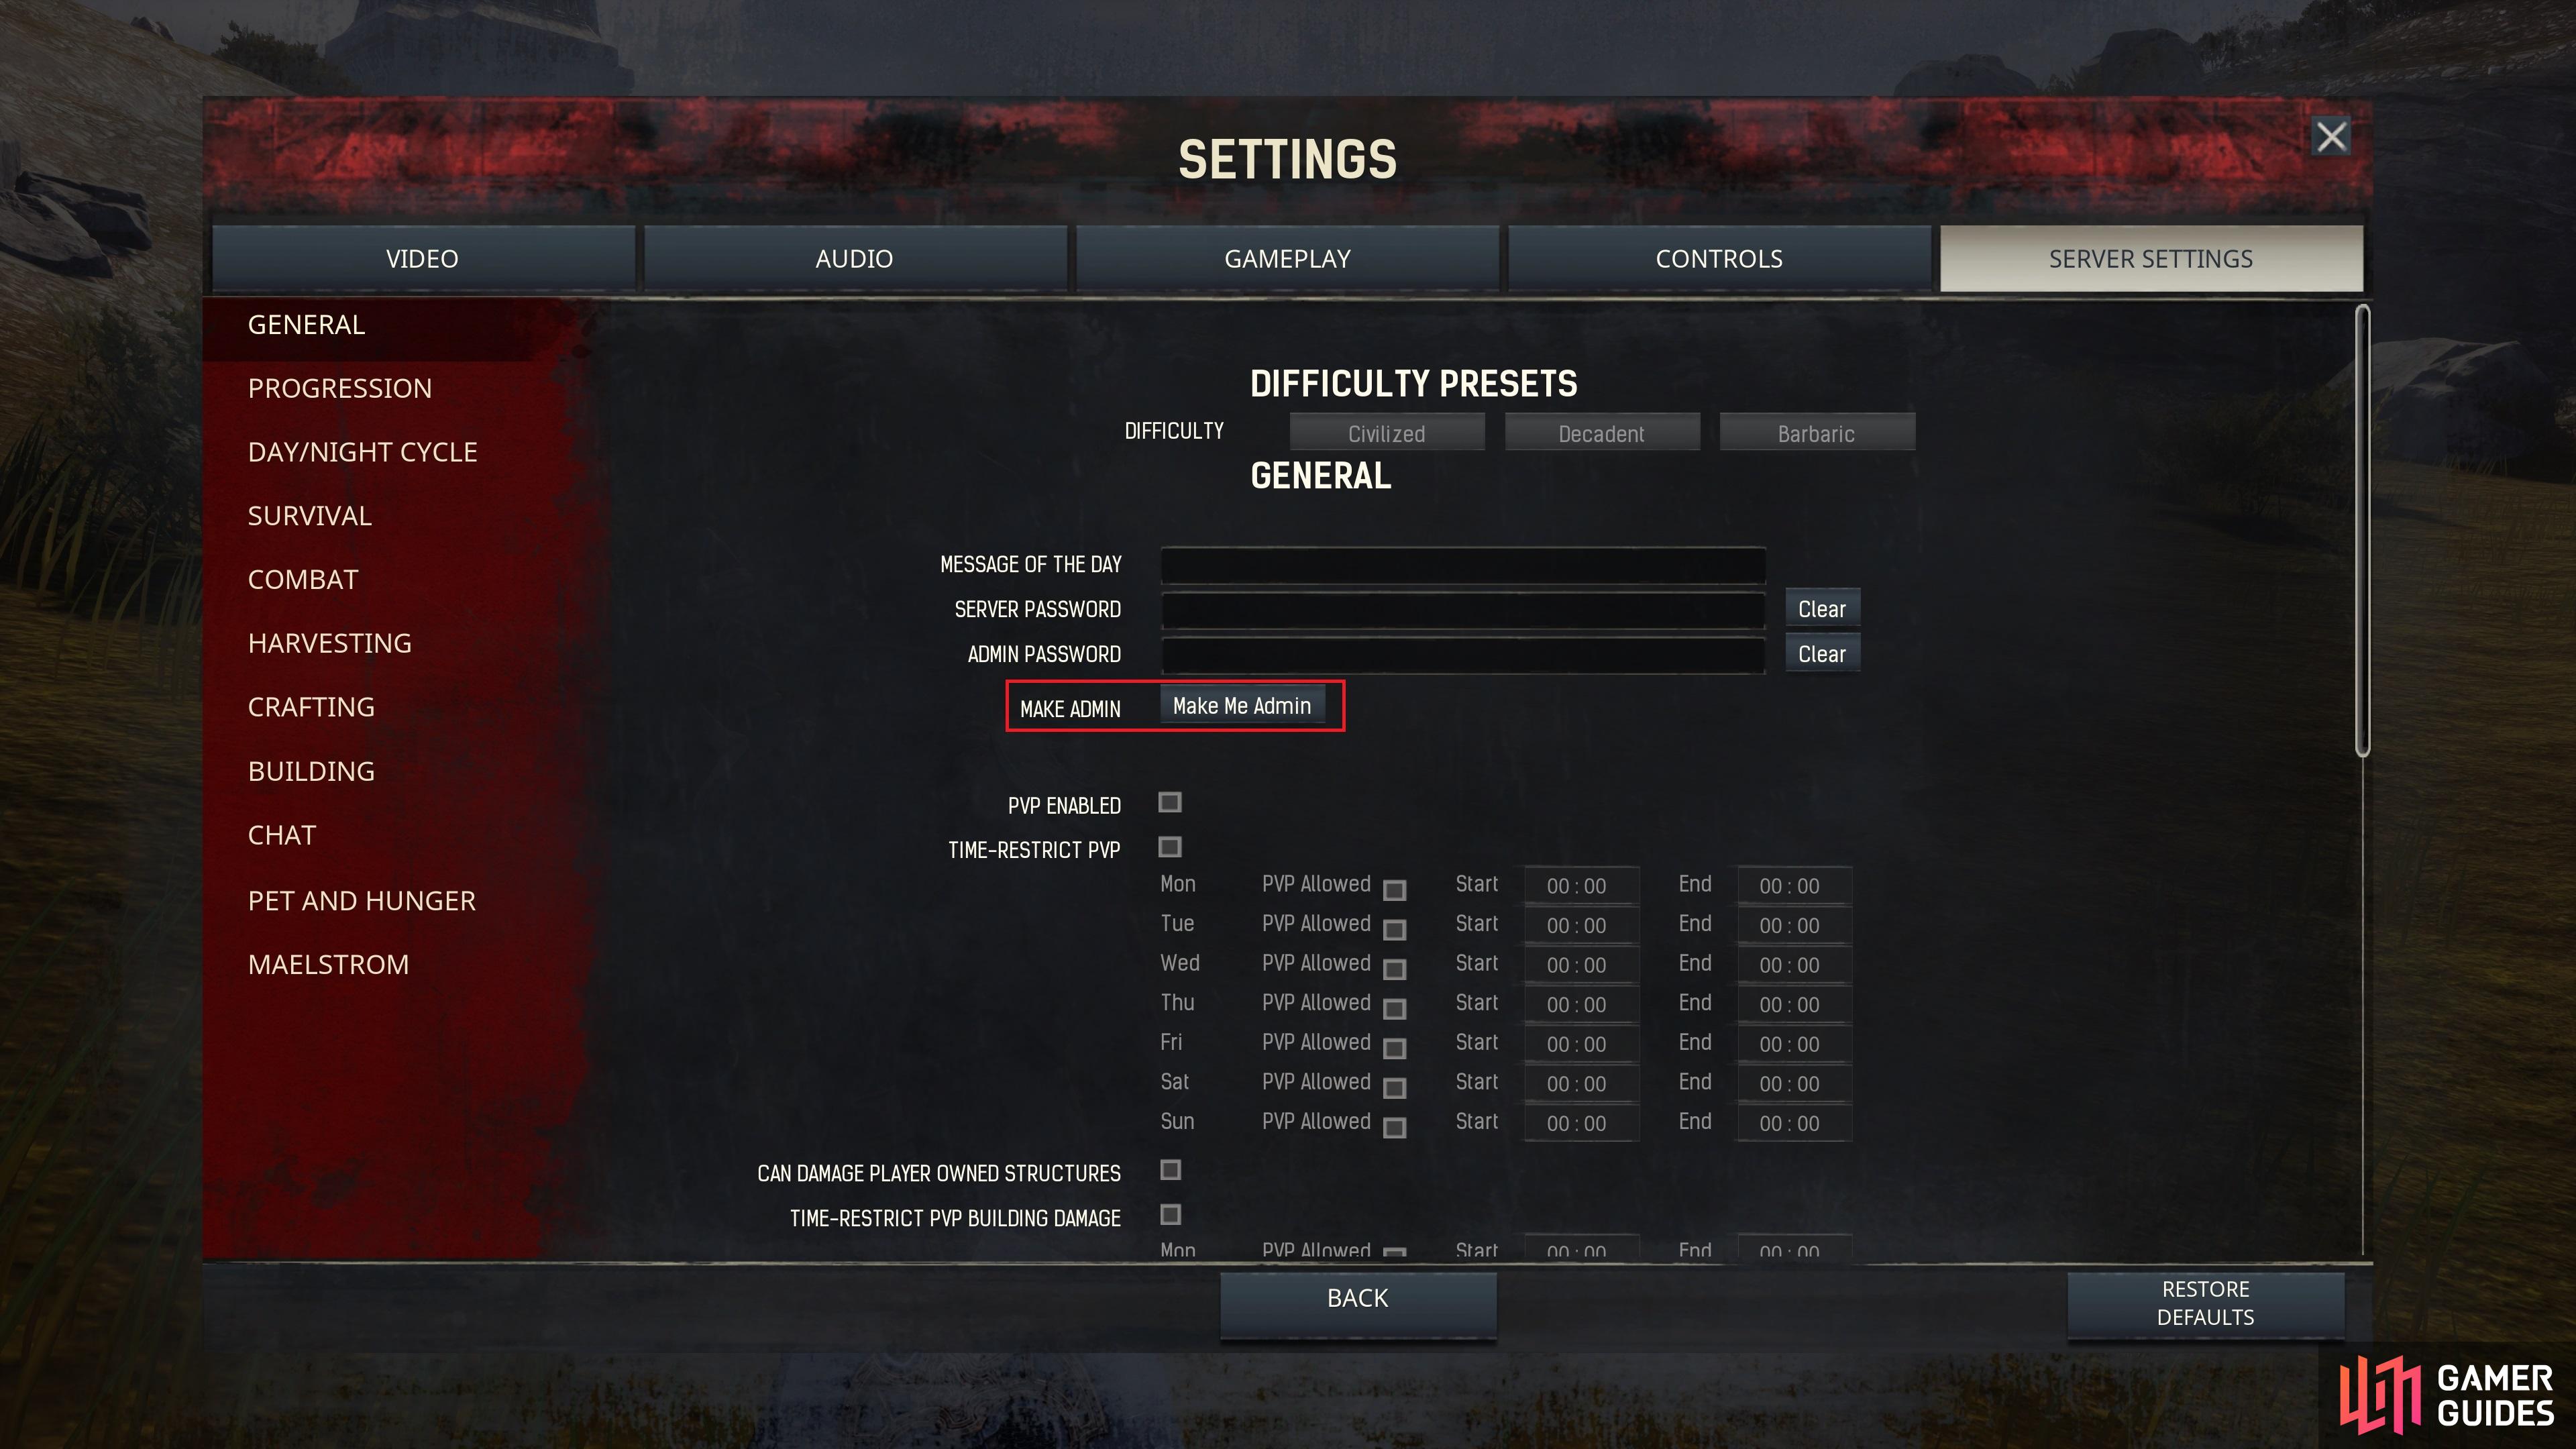
(1 of 2) Go to the Server Settings tab in the main menu and select “Make Me Admin”.
Go to the Server Settings tab in the main menu and select “Make Me Admin”. (left), After making yourself an admin, you’ll see the Admin Panel option in the regular settings menu. (right)
Admin Panel Options
The main admin panel allows you to do basic things such as increase your carrying capacity (+Encumbrance), increase your maximum health, add Feat points or Levels, or even set the specific level that you want to be. You can also give yourself XP manually, make yourself invisible to creatures in the world, turn on god mode which makes you invincible (including from fall damage), and even turn on a function that allows you to fly through the world. Flying can be a great way to get from one side of the map to another, especially if you’re looking for a particular resource that can only be found in small quantities in specific areas, such as ![]() Raw Ash. Be sure to check our maps for The Exiled Lands and the Isle of Siptah if you’re looking for the best areas to farm specific resources.
Raw Ash. Be sure to check our maps for The Exiled Lands and the Isle of Siptah if you’re looking for the best areas to farm specific resources.
In addition to these more basic settings, there are others which you can toggle such as no building costs, which allows you to construct anything without having to get the relevant materials first. There’s also an option to unlock all of the recipes in the game and reduce the cost of all spells. If you want some respite from the basic survival mechanics, you can also turn off thirst and hunger from the admin panel.
Finally, you’ll notice at the bottom of the admin panel that you can change the time of day, set a specific duration for the length of a day, set the specific time of day, freeze time, or even adjust weather conditions such as fog density and wind severity or direction.
Spawn NPCs and Player List
The Spawn NPCs and Player List tabs do what you might expect: the former allows you to spawn essentially any type of NPC that you can think of in the game, and any number of them, right in front of you. This allows you to harvest specific materials by fighting the creatures if you wish, but it can also be used to practice your fighting skills against them in a more controlled environment. If you want to get more creative and you’re feeling a bit Roman, you can even create something of a colosseum, into which you can spawn different creatures and watch them fight them out. If that’s your thing, hours of entertainment await.
The Player List is a bit more boring. It’s mostly used for admins of co-op or online servers, allowing you to see exactly who is online at any given time, and which players have been whitelisted or banned.
Spawn Items Panel
The Spawn Item tab is among the most useful. You’ll see four separate categories that you can choose from: Resource, Gear, Building, and Other. Clicking on any one of these will show you everything there is to offer from them, and all you need to do is click on any item that you want, as many times as you want, to spawn them in your inventory. In this way, you can start a new game but instantly have access to all the best gear, building materials, and resources without having to do all the grinding that you’ve probably already done in a previous playthrough.
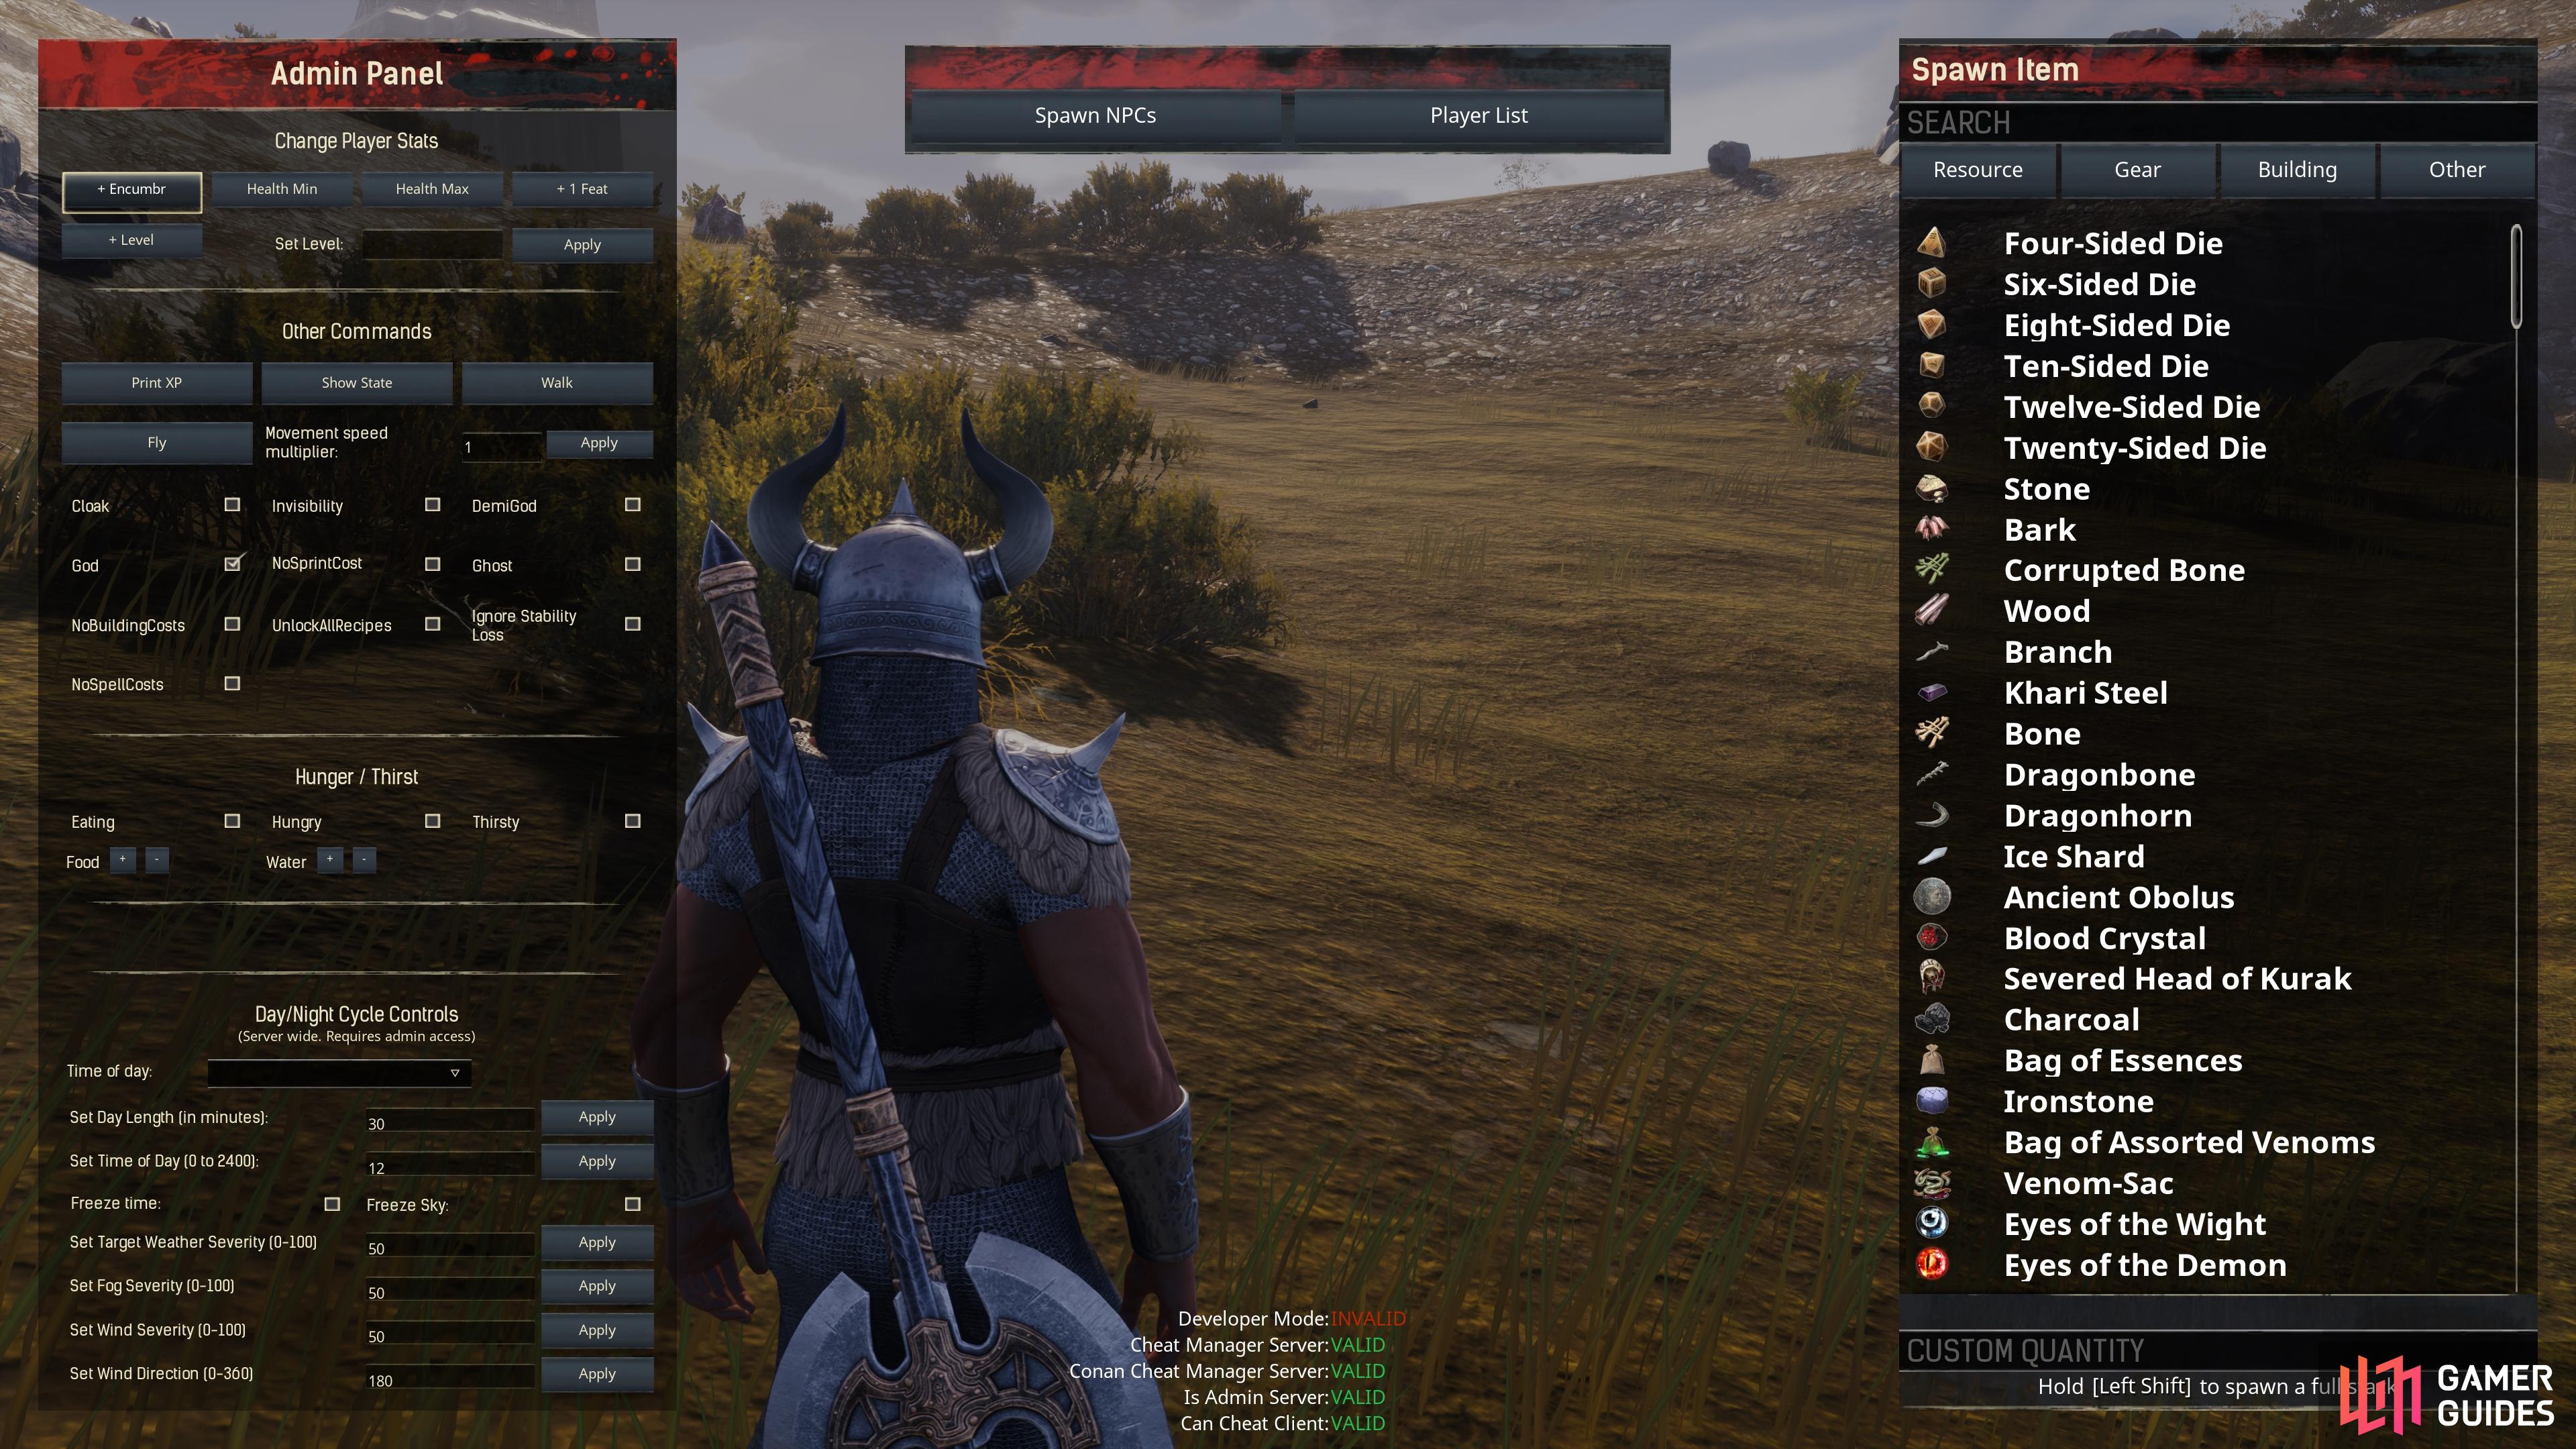
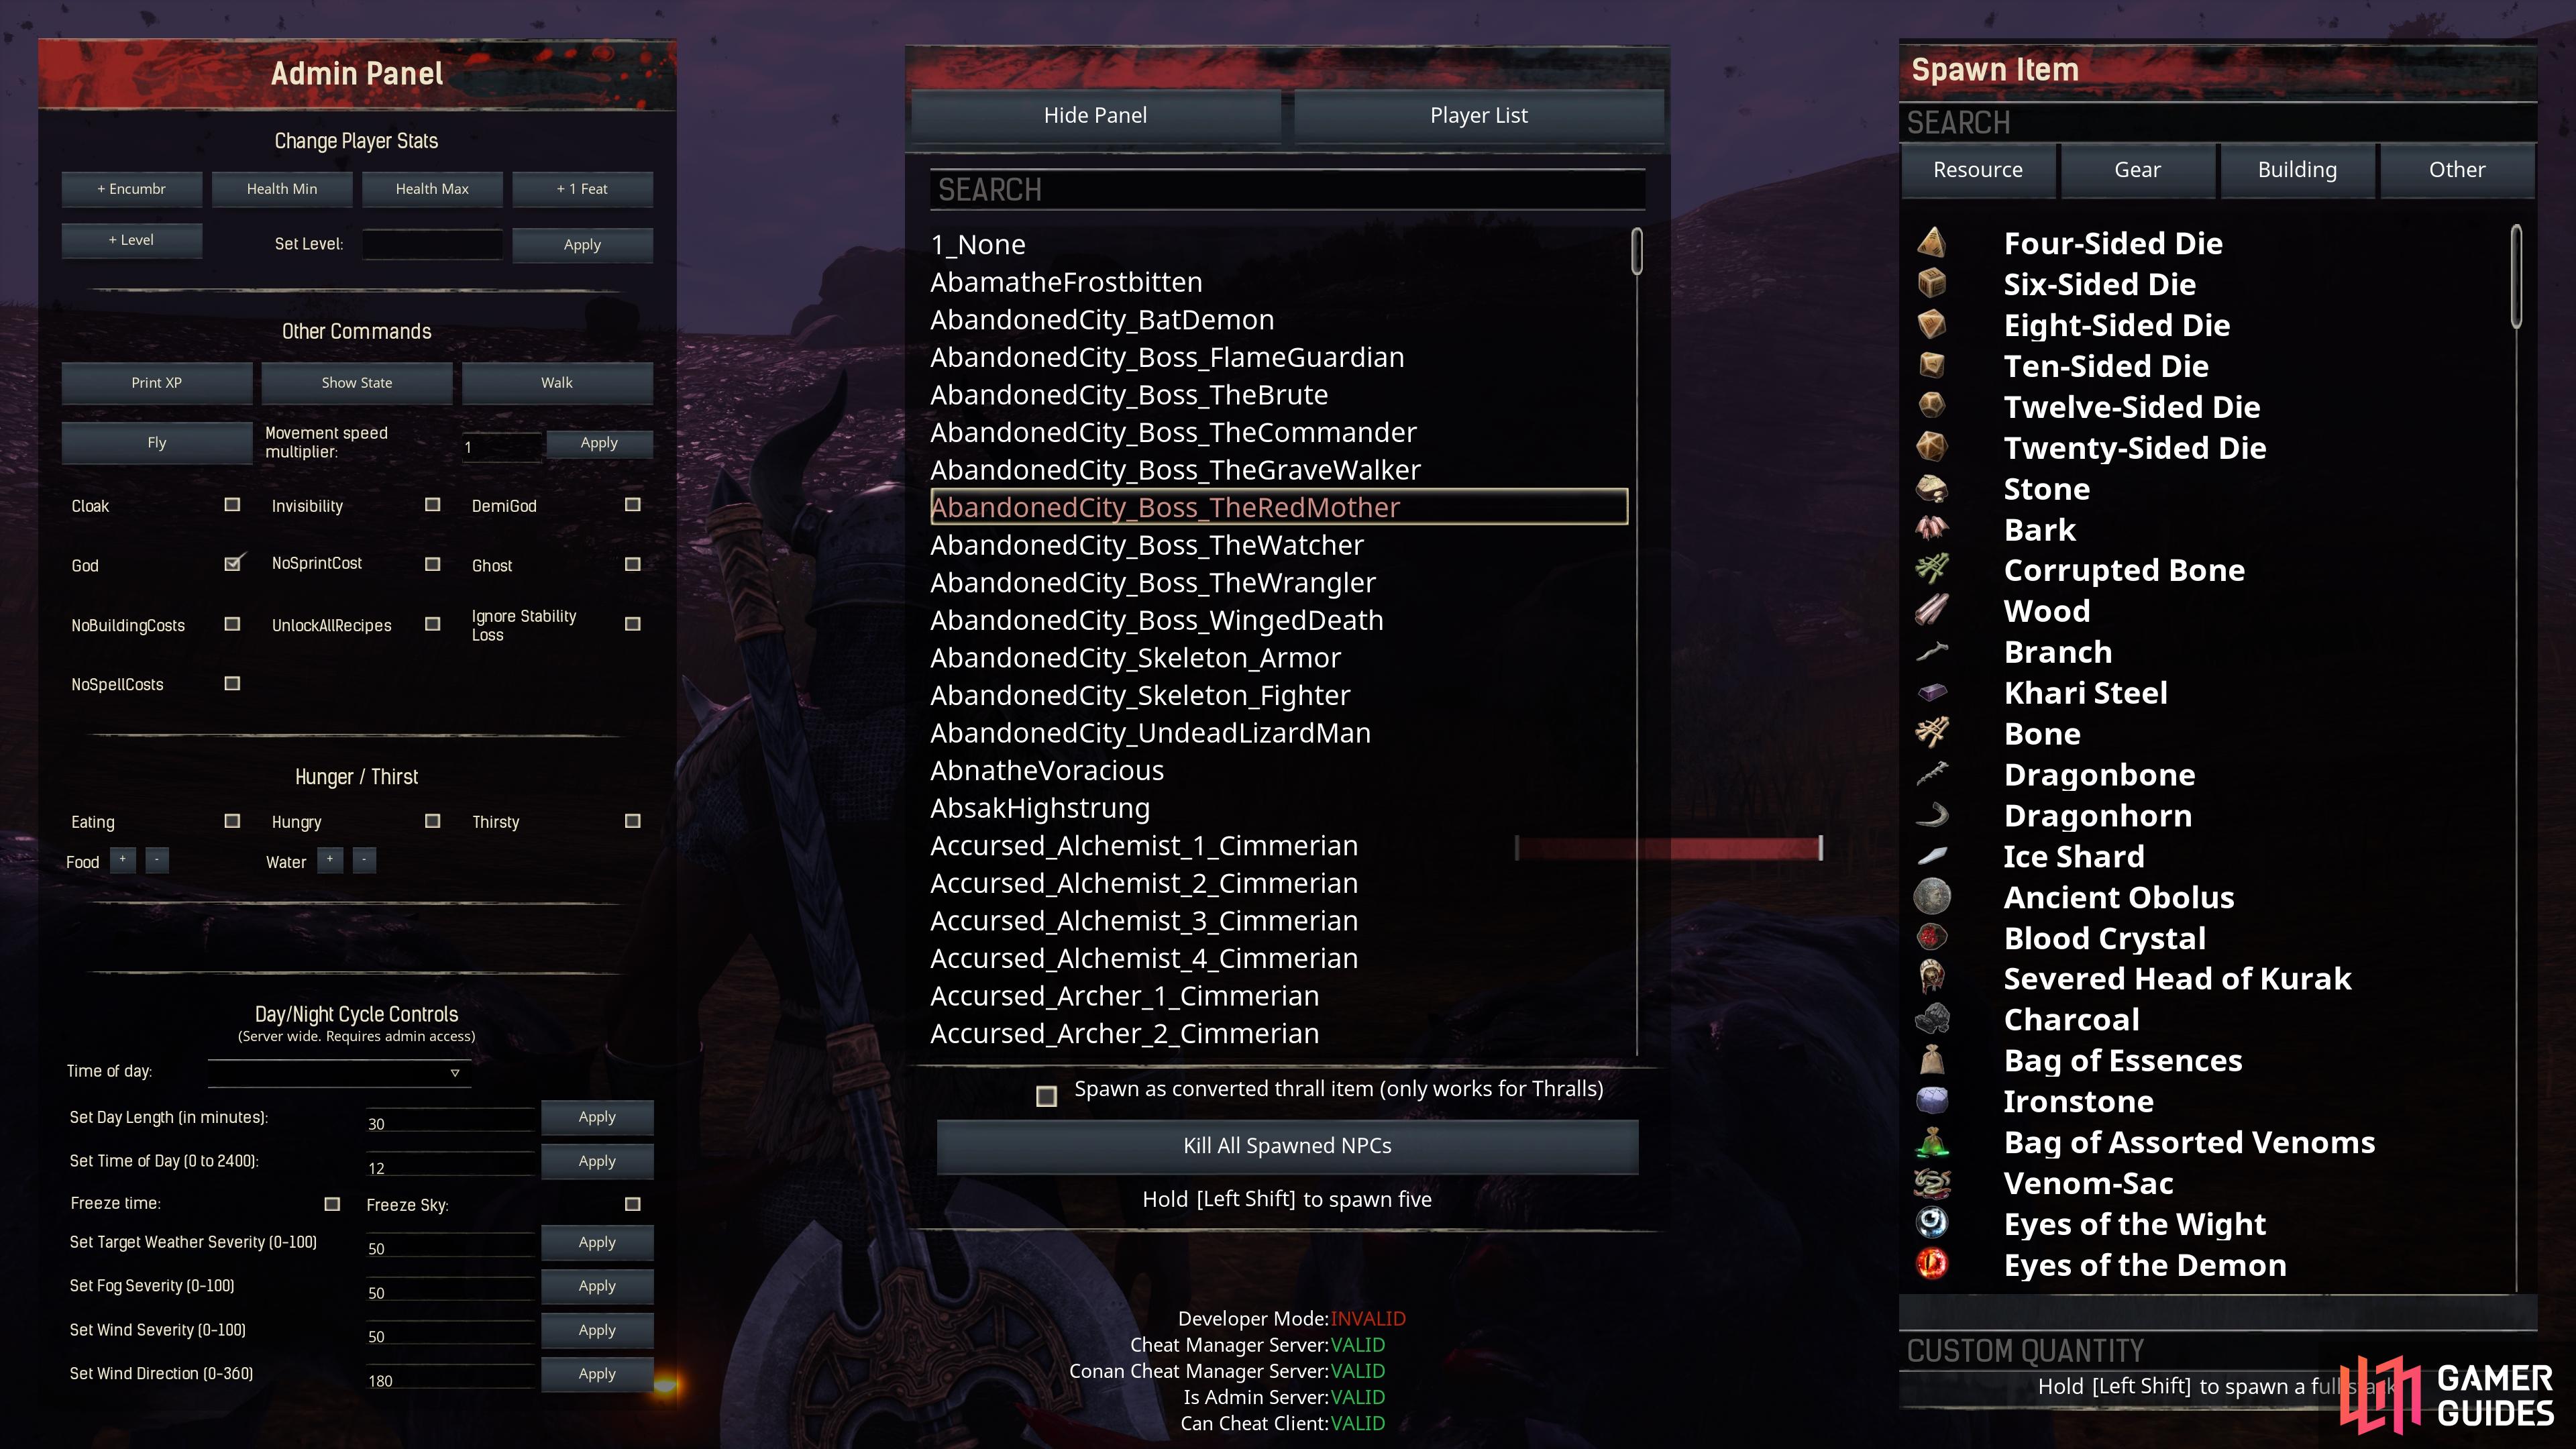
(1 of 3) You’ll see a lot of basic options for commands in the admin panel on the left, including all resources on the right.
What Does Creative Mode Do in Conan Exiles?
The creative mode in !Conan Exiles is the ultimate feature for anyone who just wants to build things. When you enter it, all hostile creatures will ignore you, so you’ll no longer be pestered by them attacking as you’re trying to build. Not only that, you’ll have access to all of the building pieces, crafting stations, and decorations that are available in the game. All you need to do is select the Construction Hammer that appears in your quickslots (or in your inventory if your quickslots are full), then press 
One of the best things about creative mode is that none of the building items that you choose to construct cost anything to build. You can combine creative mode with the flying ability from the admin panel to have the most amount of freedom in materials and perspective when building the base of your dreams. Say goodbye to unending grinding sessions for just a few scraps of materials, and welcome your life back.
All Console Commands in Conan Exiles
There are numerous different commands that you can make use of in !Conan Exiles, many of which are already available via the admin panel. However, there are still plenty of options that can be activated via the console which provide you with more freedom for building, improving your followers, and changing specific settings for servers if you’re an admin of one. You’ll find a brief overview of every command and what they do in the table below.
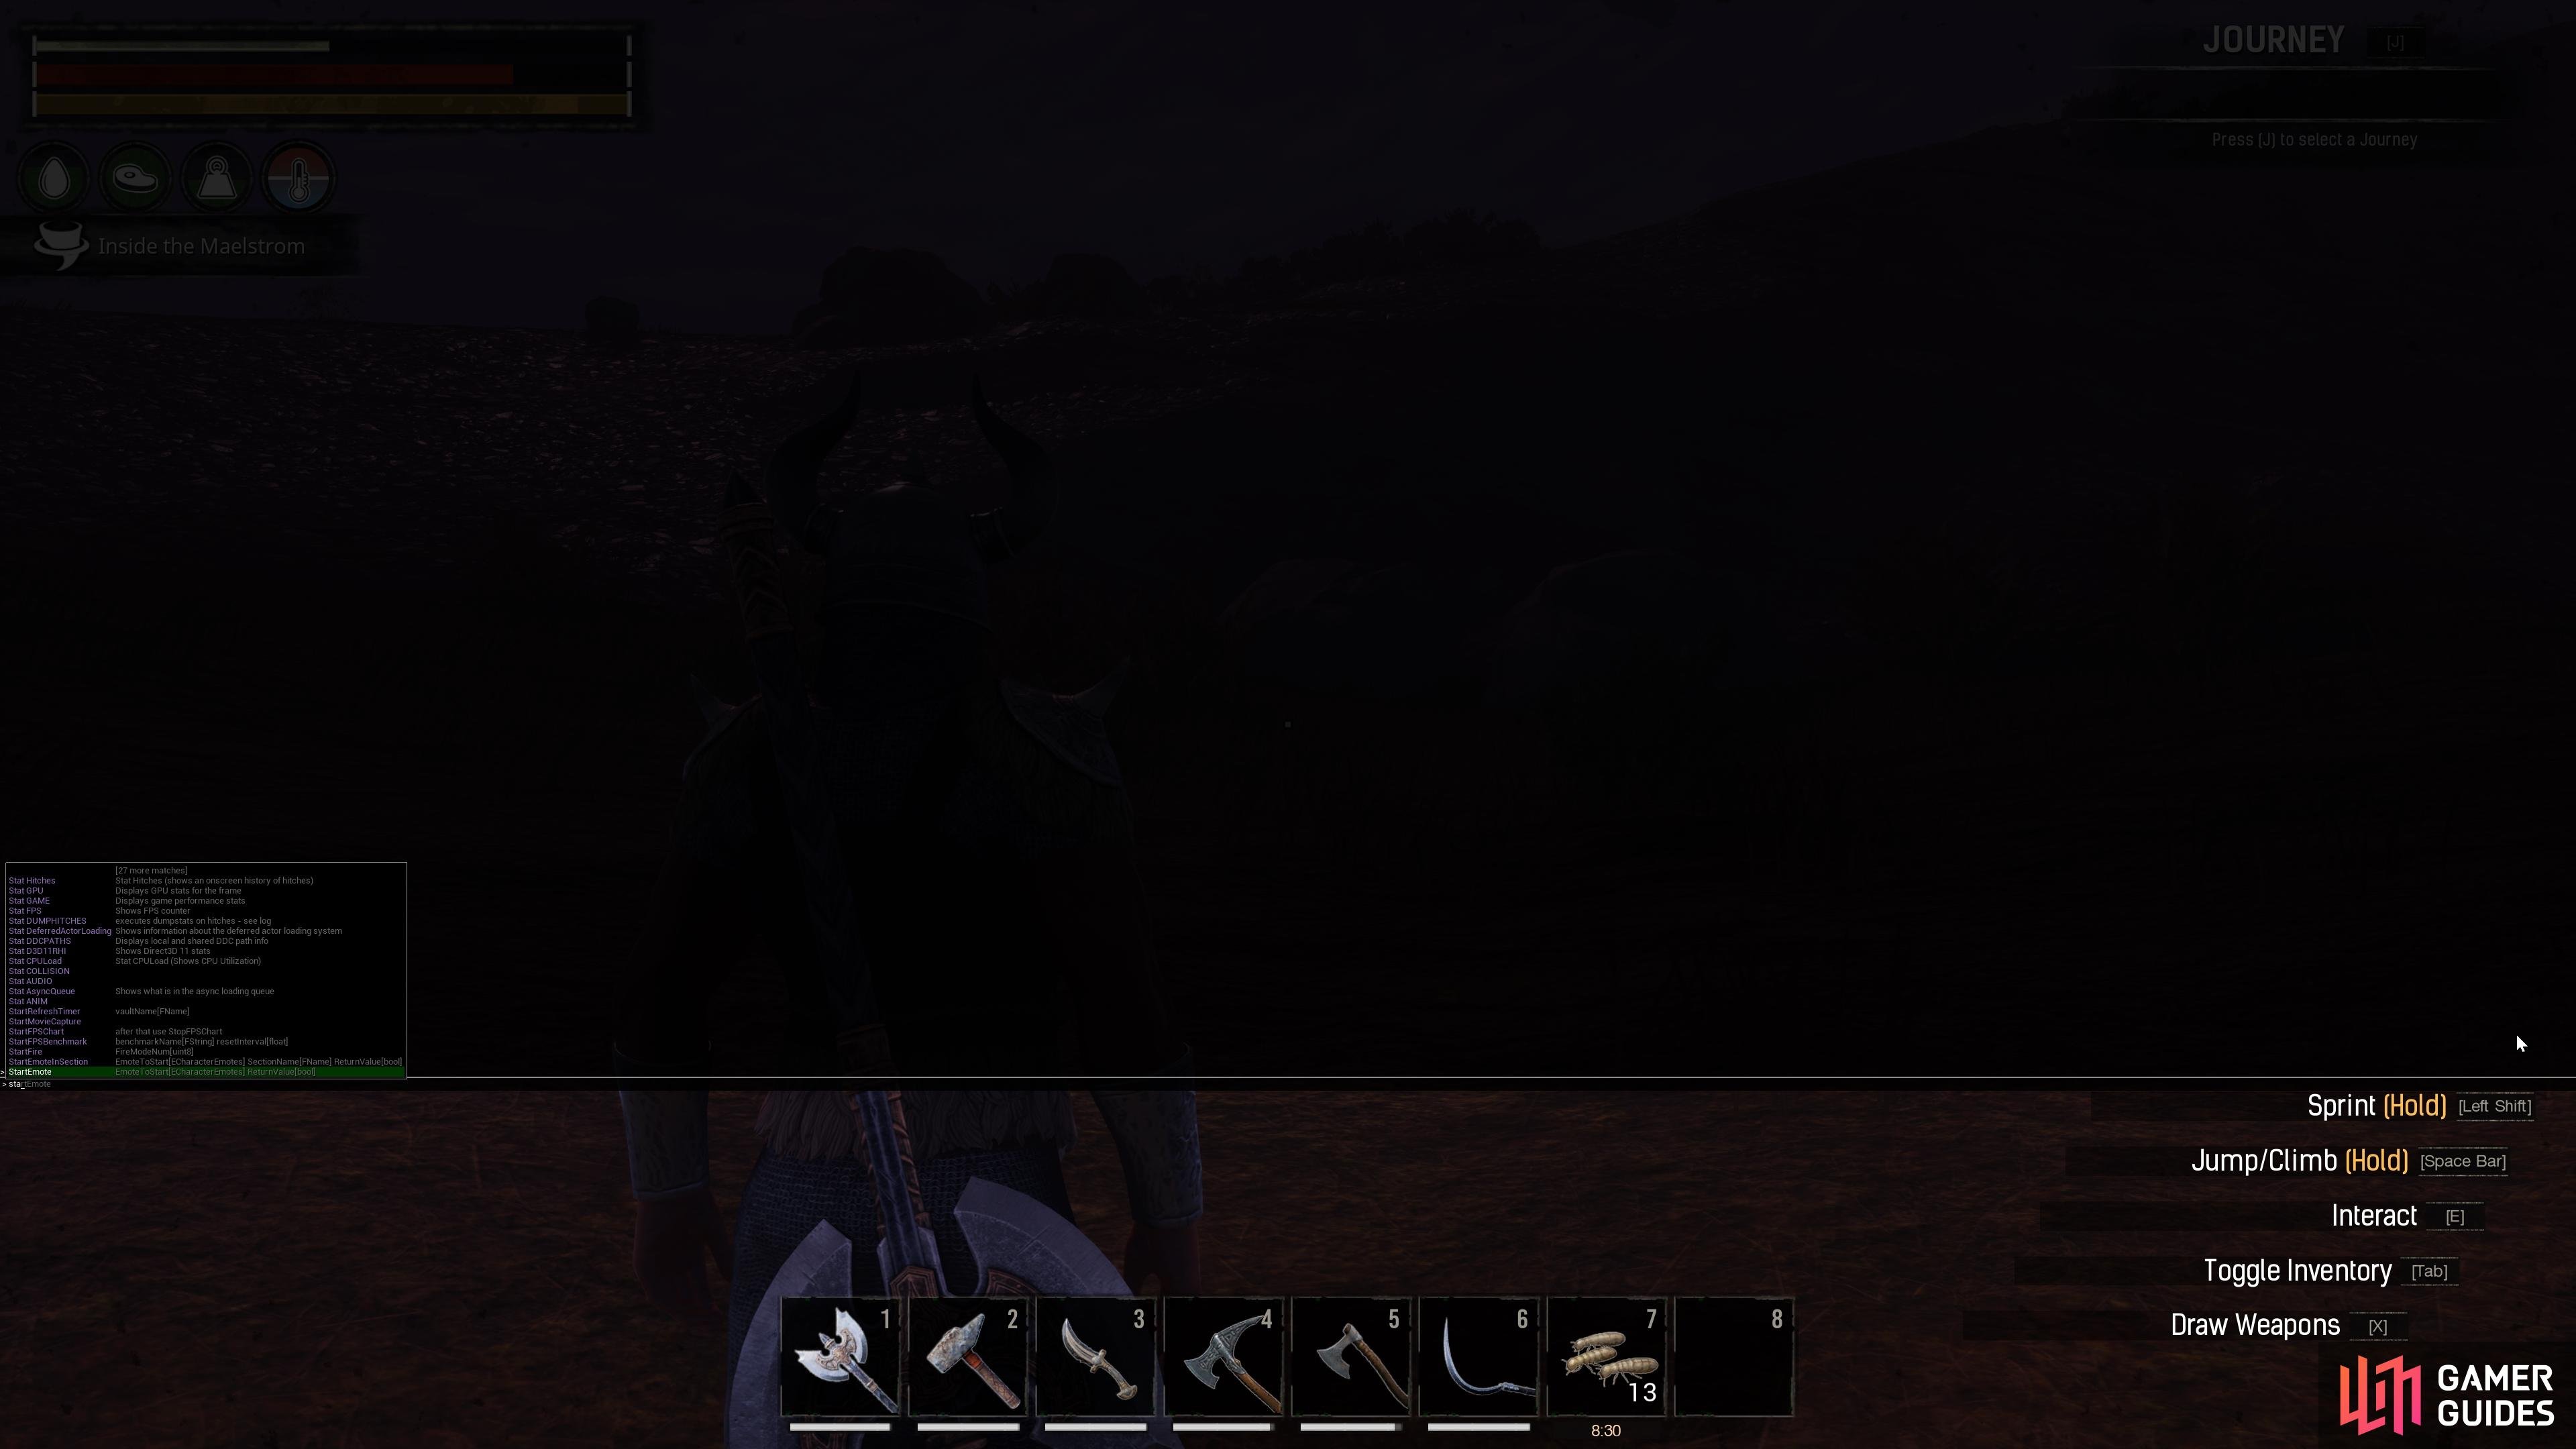
How to Use the Console
If you’ve never used the console in !Conan Exiles before, all you need to do is press the tilde key 
List of Console Commands
| Command | Description |
|---|---|
| BroadcastMessage [Message] | Deliver a broadcast message to all players in the server. |
| Cloak | Become invisible to all creatures. |
| DamageTarget [Value] | Inflict the specified amount of damage to NPCs in your crosshair. |
| BuildingDestroy [Value] | Destroy the targeted section of a building with your crosshair. |
| DestroyTarget | Destroy the entire structure of a targeted building. |
| p.clothphysics [Value] | Changes the way cloth physics moves with the wind or by running. |
| EmptyAllClanPurgeMeters | Empties all purge meters from your clan. |
| EmptyPlayerClanPurgeMeter | Empties the purge meter from your character only. |
| Fly | Grants you the ability to fly. |
| Ghost | Makes the player invisible to all creatures; also allows you to fly through objects and barriers. |
| EndPurge | Ends the current purge. |
| FillAllClanPurgeMeters | Fills all clan’s purge meters. |
| FillPlayerClanPurgeMeter | Fills your own clan’s purge meter. |
| FlushLog | Flushes the events log for the server. |
| SetFollowerStat [stat] [value] | Set a follower’s attributes for the following: AttributeHealth, AttributeStamina, AttributeMight, AttributeAthleticism, AttributeAccuracy, AttributeEncumbrance, AttributeMetabolism, DamageModifierMelee, DamageModifierRanged. |
| GetAllServerSettings | Reveals all the server settings that can be tweaked for your server. |
| GetServerHealth | Provides info related to your server’s player count, bases, individual structures, and FPS. |
| BuildingIdentify | Provides information about a specific building targeted by your crosshair. |
| LearnEmote [emote] | Allows you to learn any emote that you don’t currently have. |
| LevelFollowerUpTo [value] | Level up your follower to the specified level. |
| MakeMeAdmin [AdminPassword] | Grants admin powers to anyone with the server admin password. |
| MakeMeNormal | Allows you to exit admin status. |
| PlayerCanBuildEverywhere [PlayerName] | Grants the ability to build anywhere, ignoring building restrictions, for the specified player. |
| ToggleDebugHUD | Provides details about the status of your server or machine such as FPS, ping, and more. |
| PrintPlayerInfo | Provides basic information for a specific player in a server. |
| SetServerSetting serverSetting[FString] Value[FString] | Allows you to redefine server settings after creating a server. |
| r.ShadowQuality [Value] | Changes the way shadows are displayed in game. |
| SpawnItem [ItemID] [Quantity] | Allows you to spawn a specific quantity of a specific item, so long as you specify the name correctly. |
| StartNextPurgePhase | Triggers the next purge phase, or starts a new one. |
| StartNextWave | Triggers a new wave of the current purge. |
| StartPlayerPurge | Restarts a purge. |
| SummonPlayer [PlayerName] | Allows you to teleport a specific player to your location. |
| TeleportPlayer X[float] Y[float] Z[float] | Allows you to teleport a specific player to the coordinates stated. |
| TeleportToPlayer [PlayerName] | Allows you to teleport to the location of a specific player. |
| Teleport | Allows you to teleport to any part of the map specified. |
| God | Enables or disables god mode. |
| Invisibility | Enables or disables invisibility. |
| ShowPlayers | Reveals a list of all players currently on the server. |
| NoSprintCost | Removes stamina cost for sprinting. |
| ViewPlayer [PlayerName] | Allows you to view the perspective of a specified player. |
| ViewSelf | Resets the camera to focus on the player. |
| Walk | Allows you to exit flying mode. |
| dc meteor spawn | Trigger a meteor event (only in set meteor shower locations) |
Purge Console Commands
As mentioned above, you’ll notice that some of the commands that you can use in the console can be executed without having to type anything from the admin panel. The main exceptions to this relate to the purge commands, which allow you to reset the purge, set a specific level of the purge, or change the level of purge for a specific clan, which can be particularly fun on multiplayer servers. The teleport player commands are also useful in this context, allowing you to reach the location of a fellow adventurer much more quickly. The console is also invaluable for anyone who owns their own multiplayer server since you can use the diagnostic commands to check the status of the server and the players within it.
More Conan Exiles Guides
If you’re looking for more Conan Exiles guides, be sure to check the links below, including where to find some of the rarest resources and what they’re used for.
 Sign up
No Comments