
This page will cover details regarding exploration in Mass Effect 3, including information about scanning systems for war assets and resources, Reaper alertness, and avoiding Reaper searches.
Scan systems,
to locate points of interest.
Scanning for Resources and War Assets
Like the previous Mass Effect games, you can explore the galaxy for various resources. Traveling between clusters costs you nothing thanks to the presence of Mass Effect relays, but once within a cluster, you’ll have to rely on the Normandy itself for propulsion if you wish to travel between systems, and this consumes fuel. Fuel can be purchased at Fuel Depots in most major clusters, but given the state of the galaxy right now, you’re just as likely to find the fuel you need as you explore. Might as well be scavenged by you rather than left to go to waste, right?
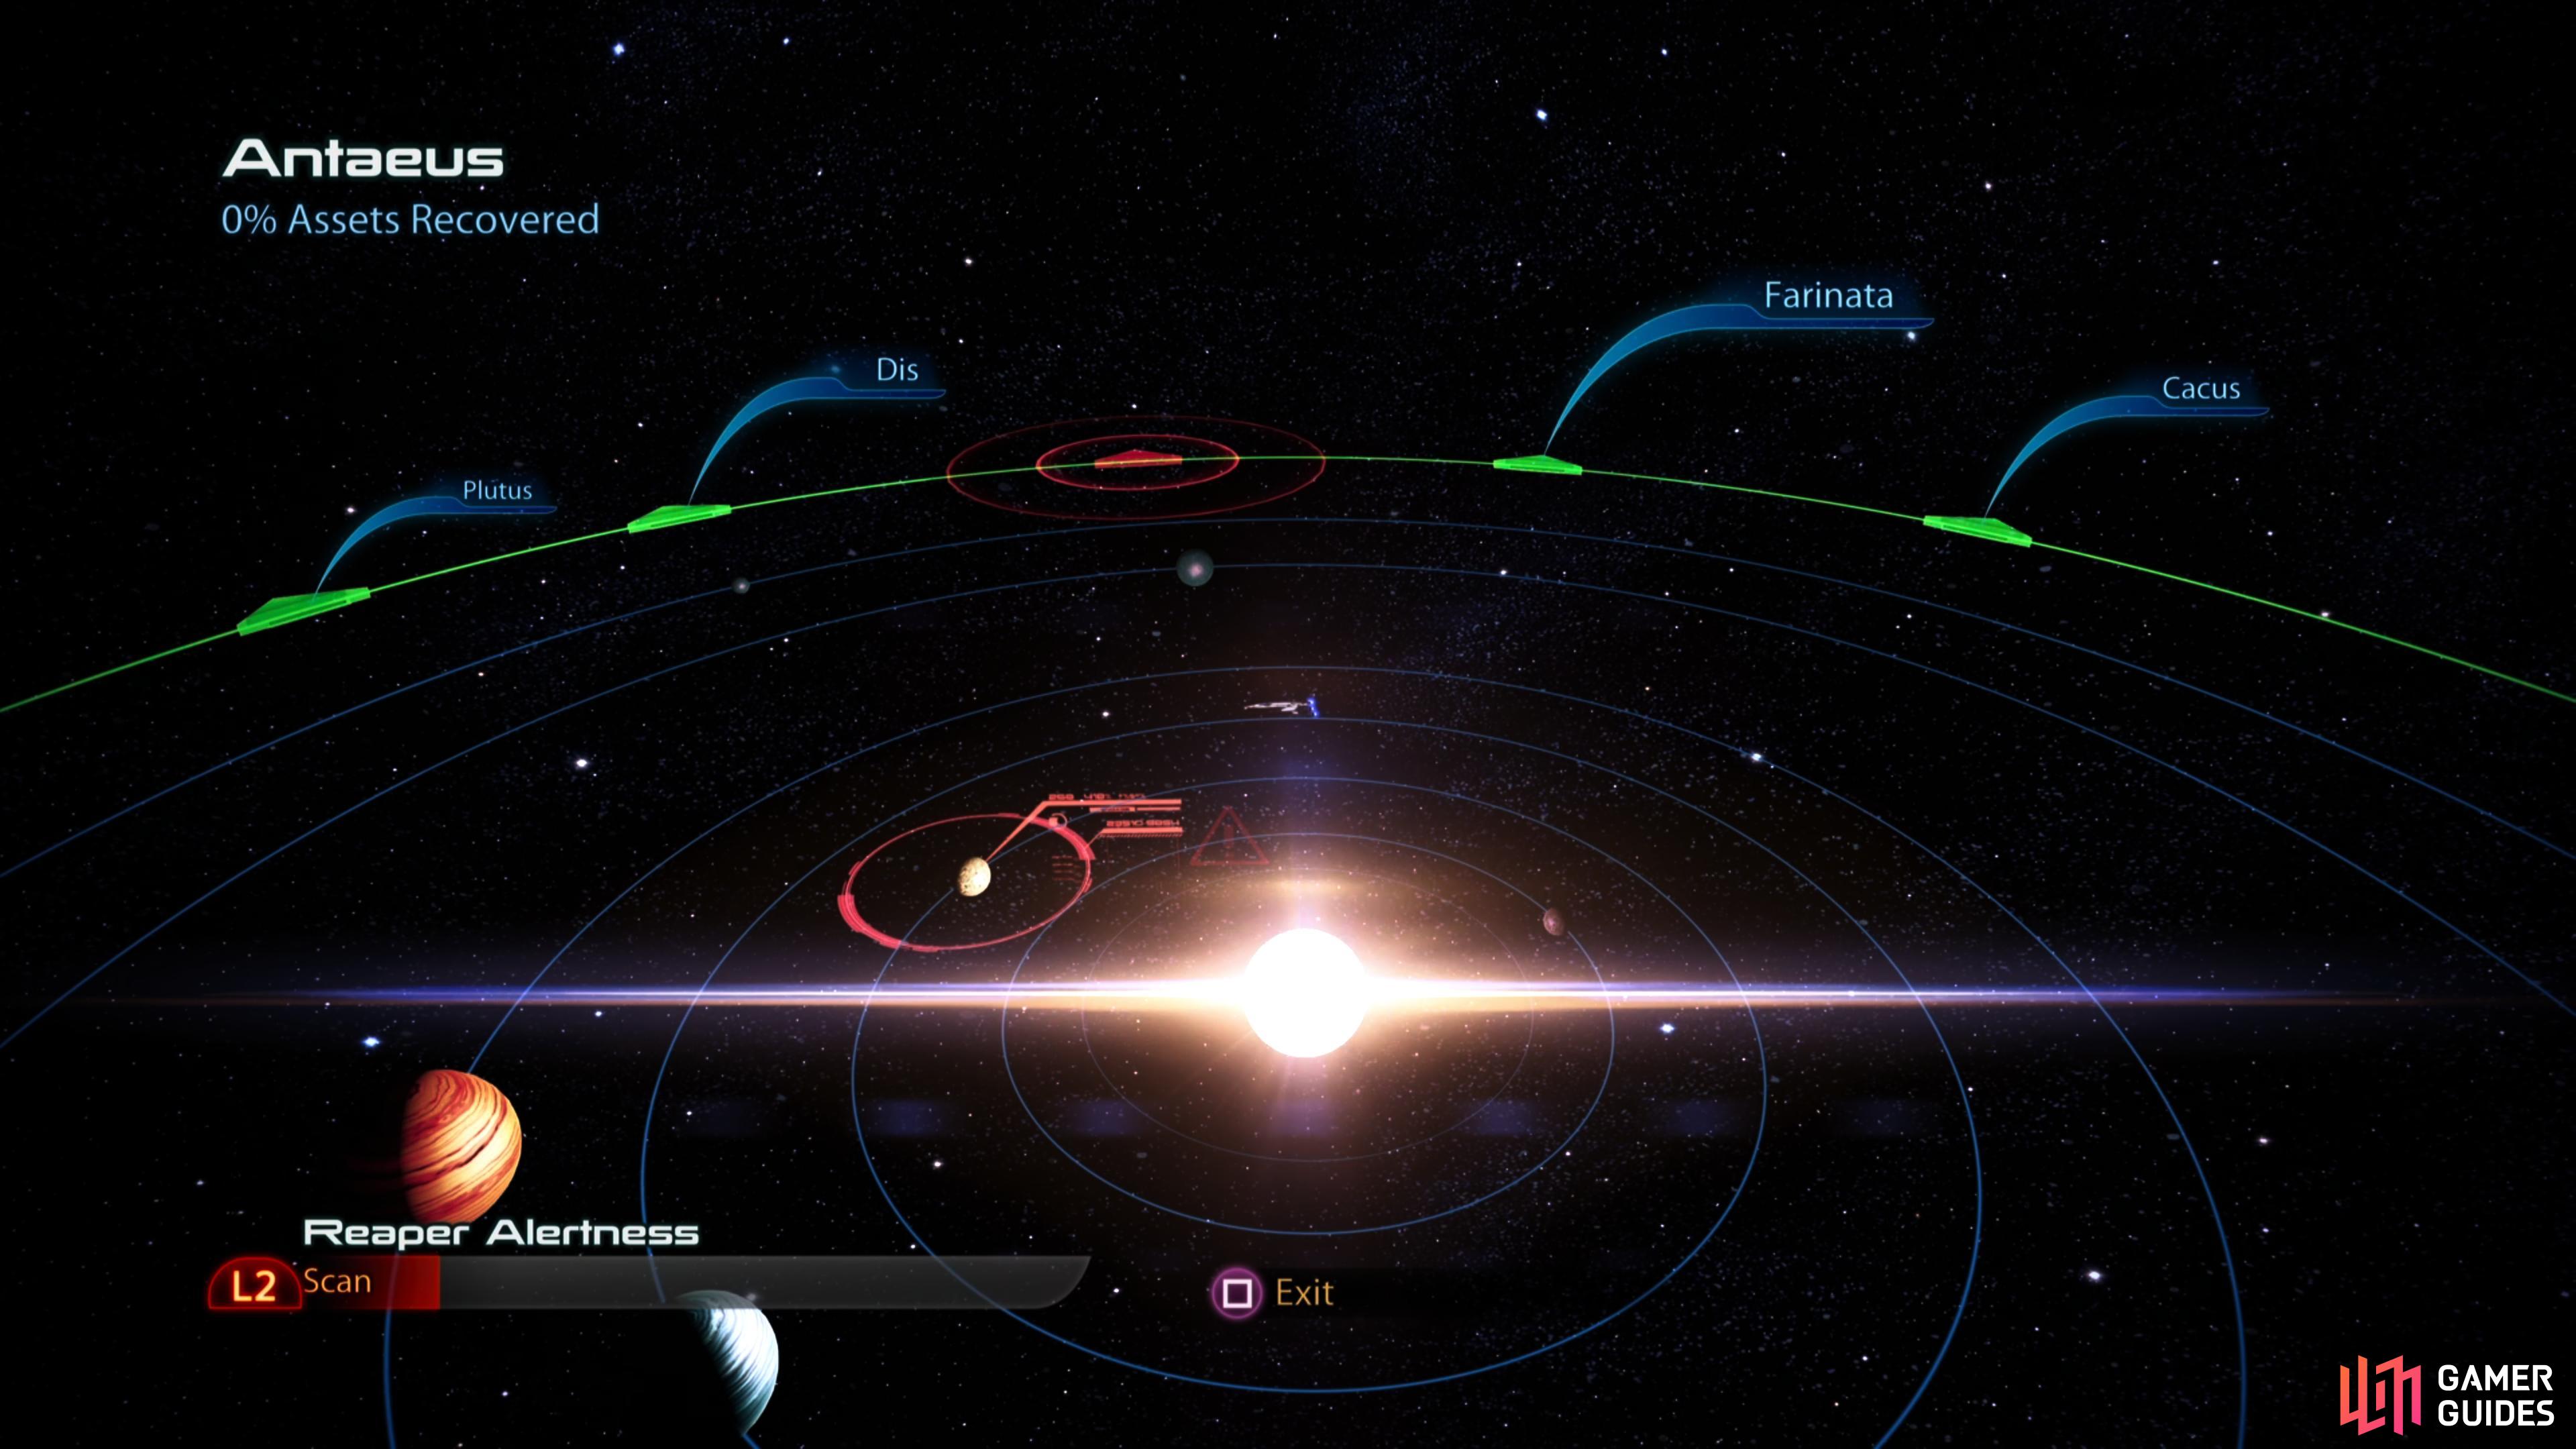
While planet scanning has also returned from Mass Effect 2, the process has been greatly simplified - you’re no longer scanning each planetary body in search of mineral lodes of varying quality, instead you scan the system as you pass through it, finding all points of interest within range. If such an anomaly exists on a planet, you’ll scan that planet just like scanning for anomalies in Mass Effect 2. You’ll typically earn two things while scanning: resources (including Credits and fuel) and war assets, the latter of which will contribute to galactic readiness and influence the ending(s) you receive.


You can reach the cluster map by exiting a system, from which you can travel between systems within a cluster. This consumes fuel.
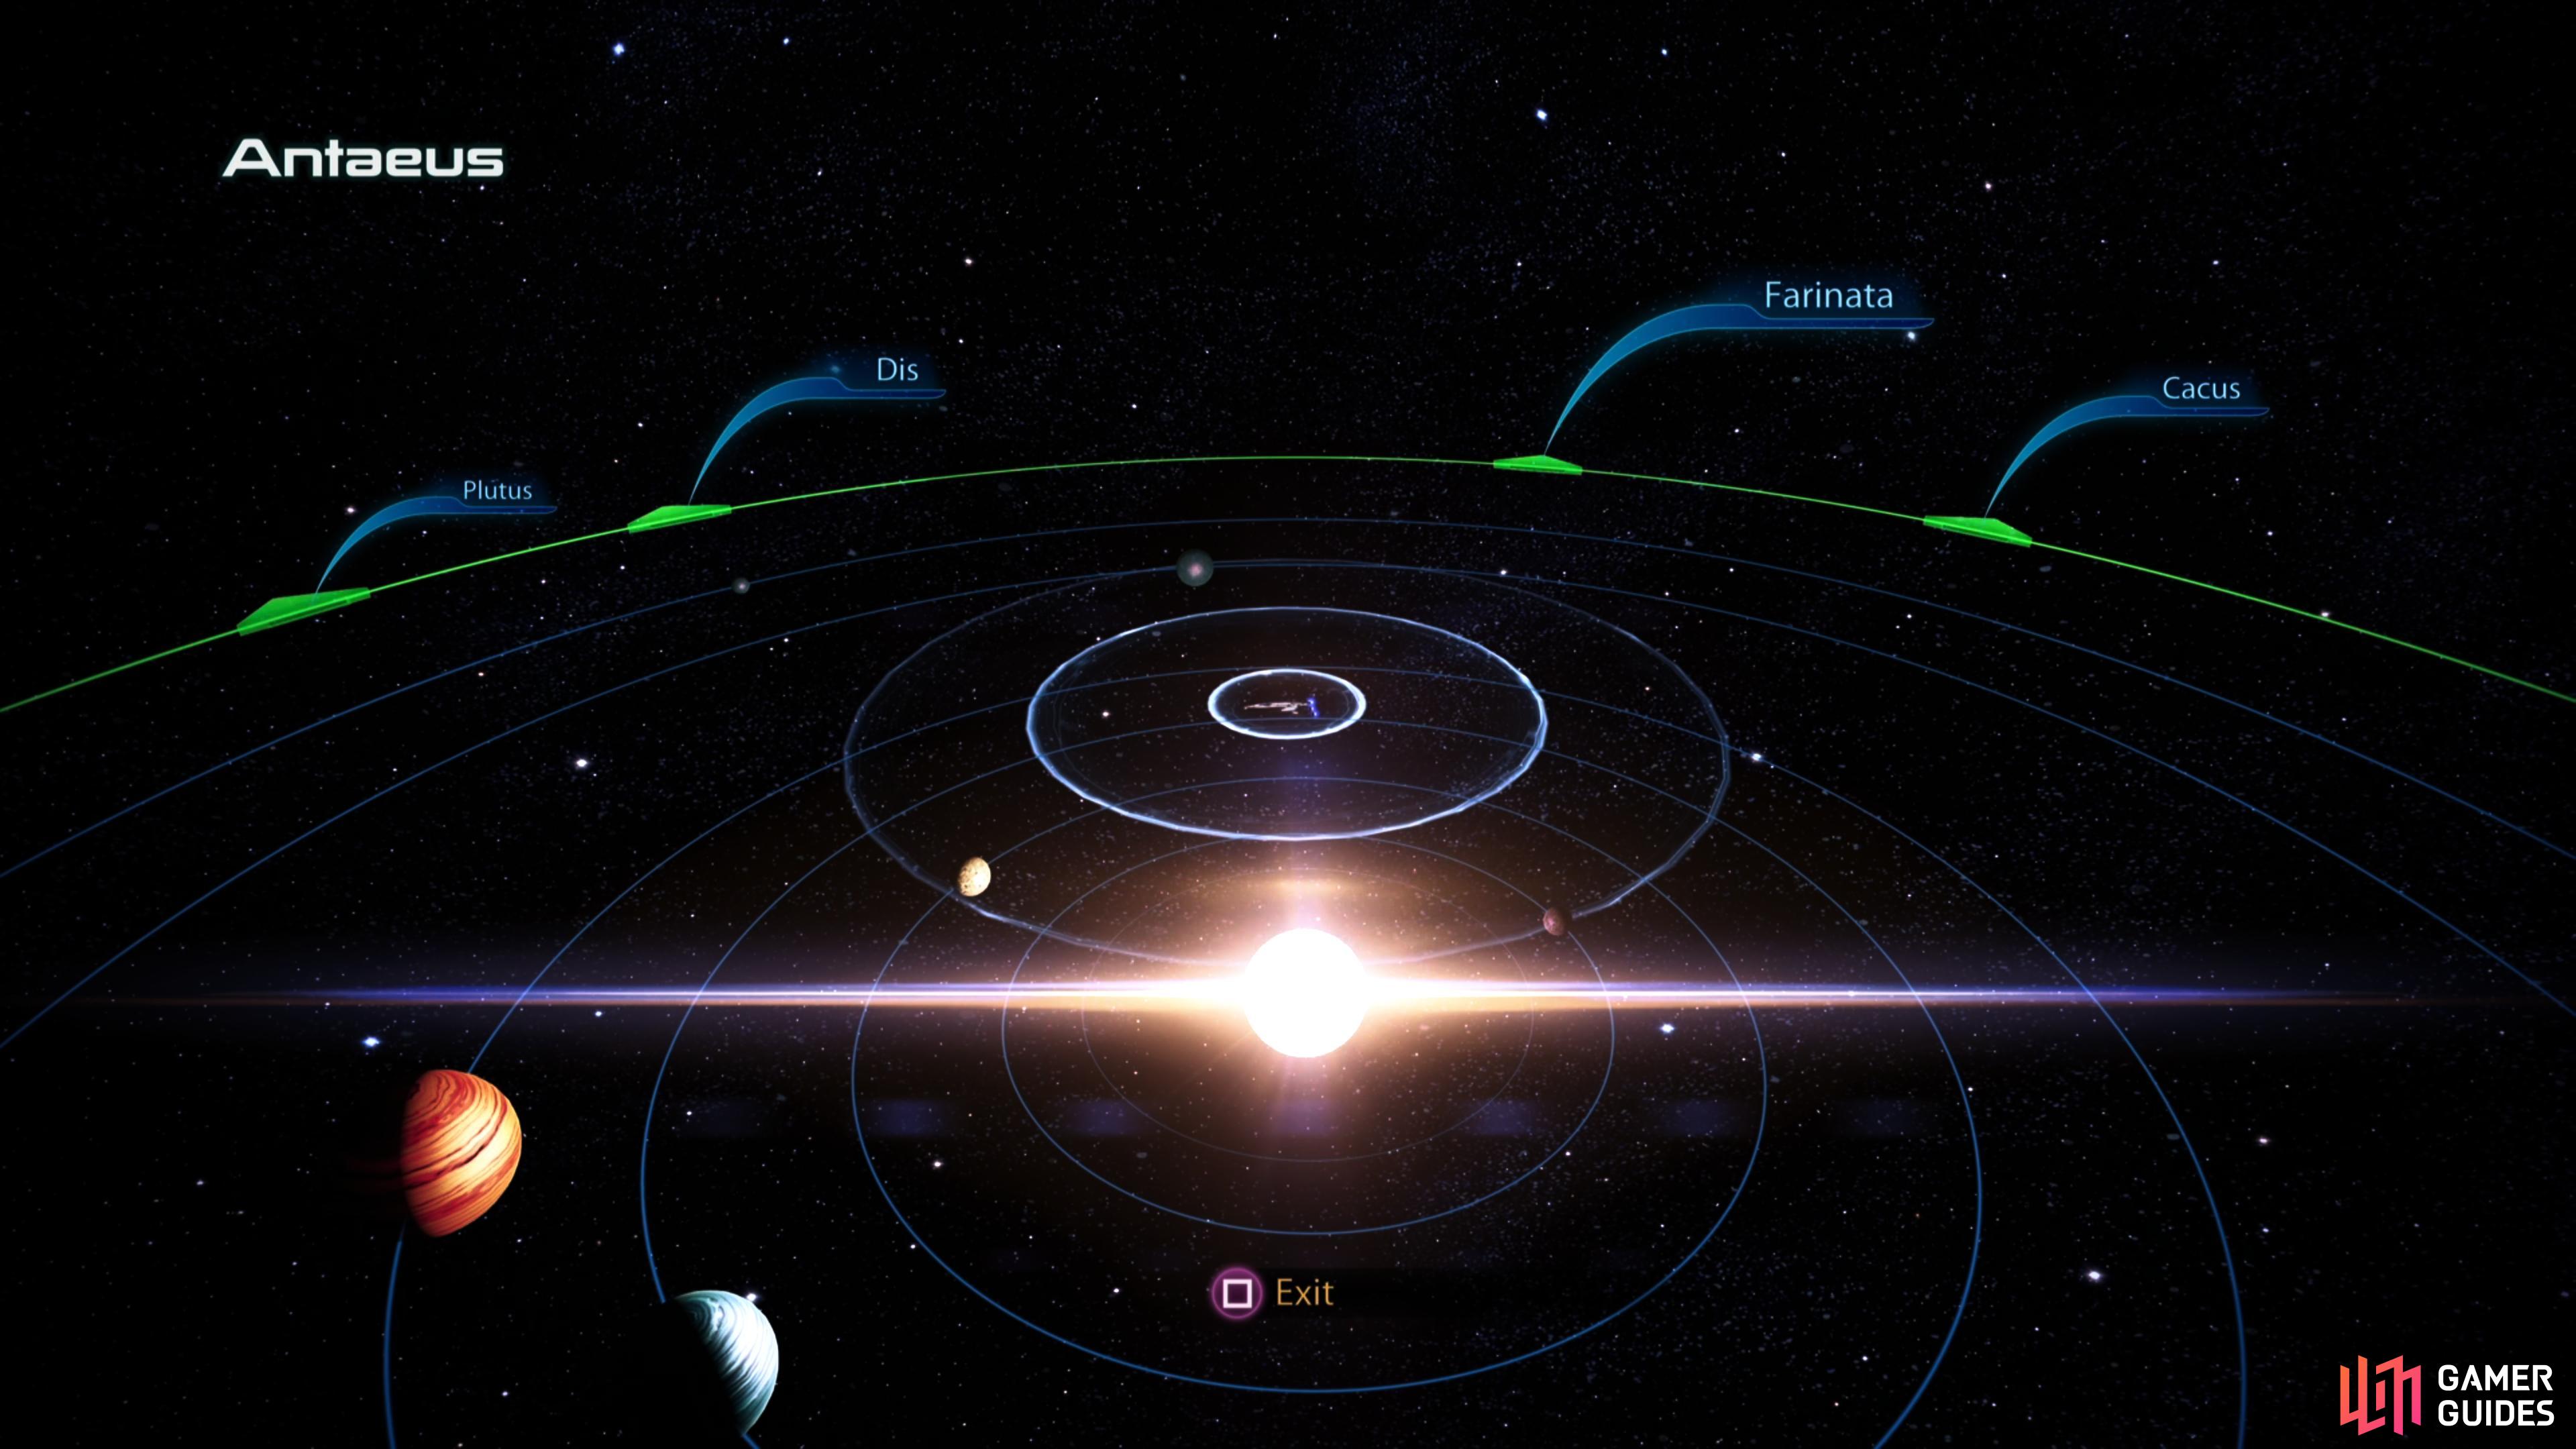
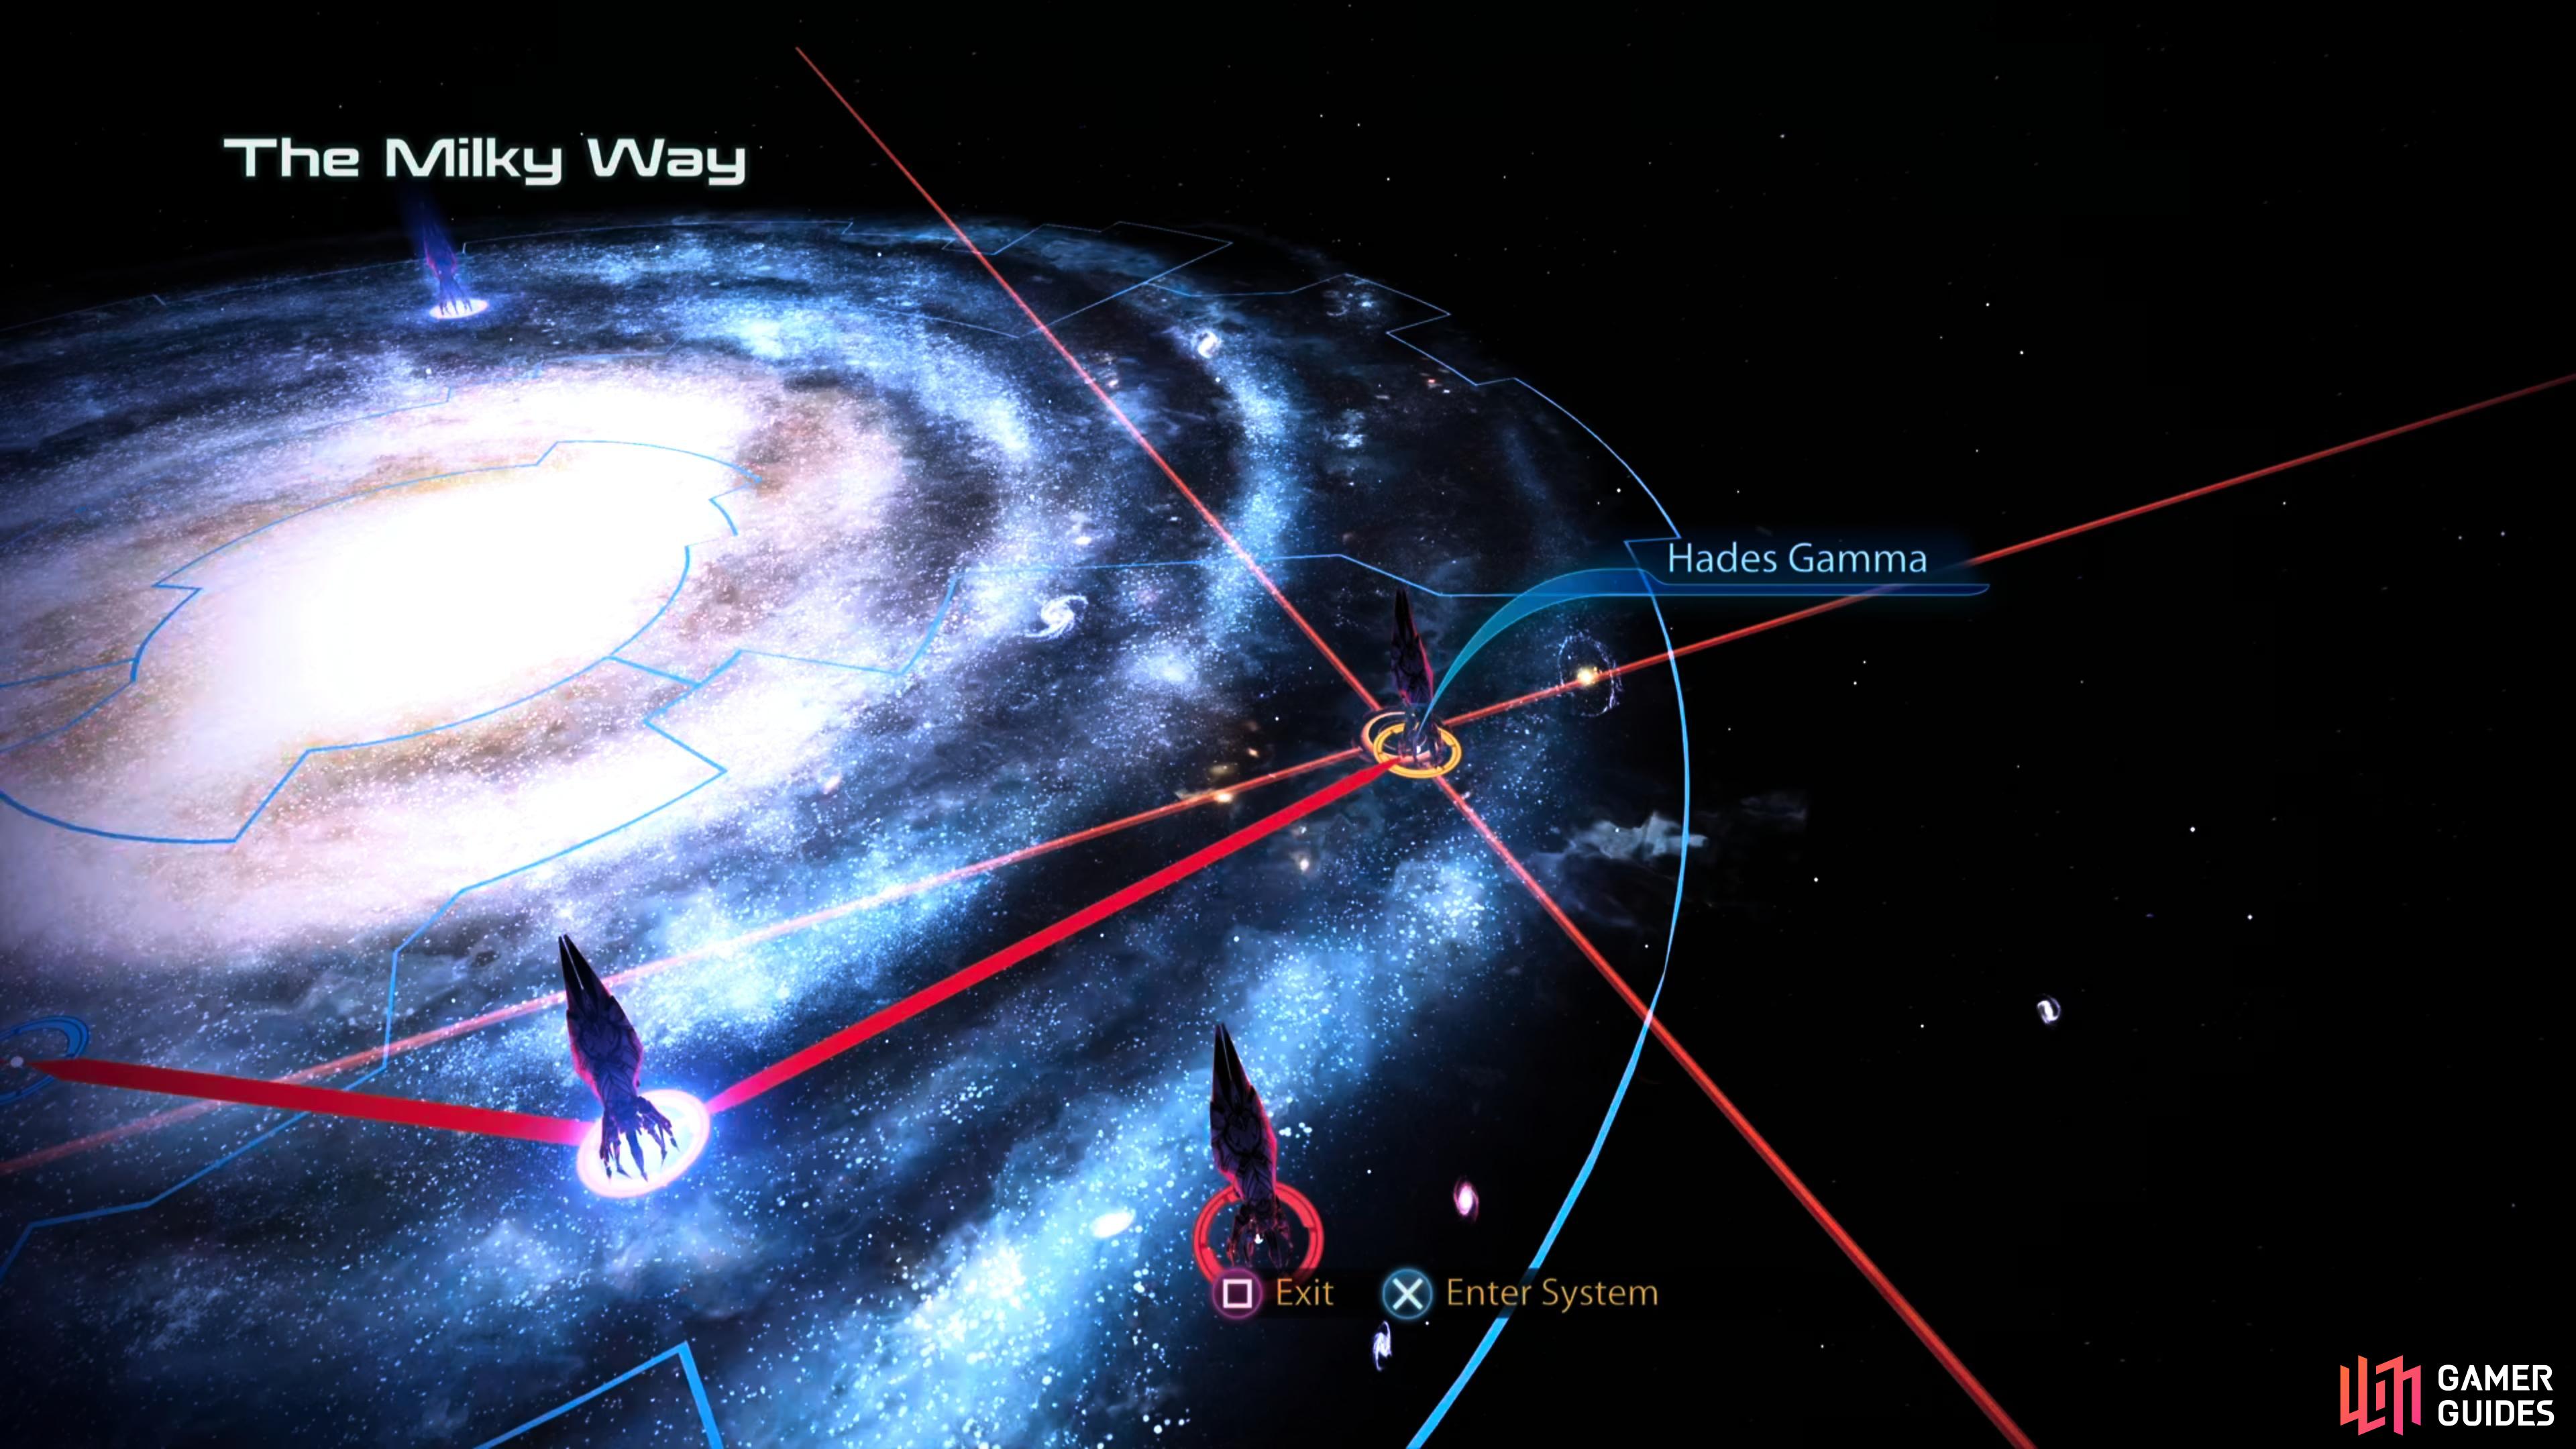
Galaxy Map, Galaxy, Cluster and System View
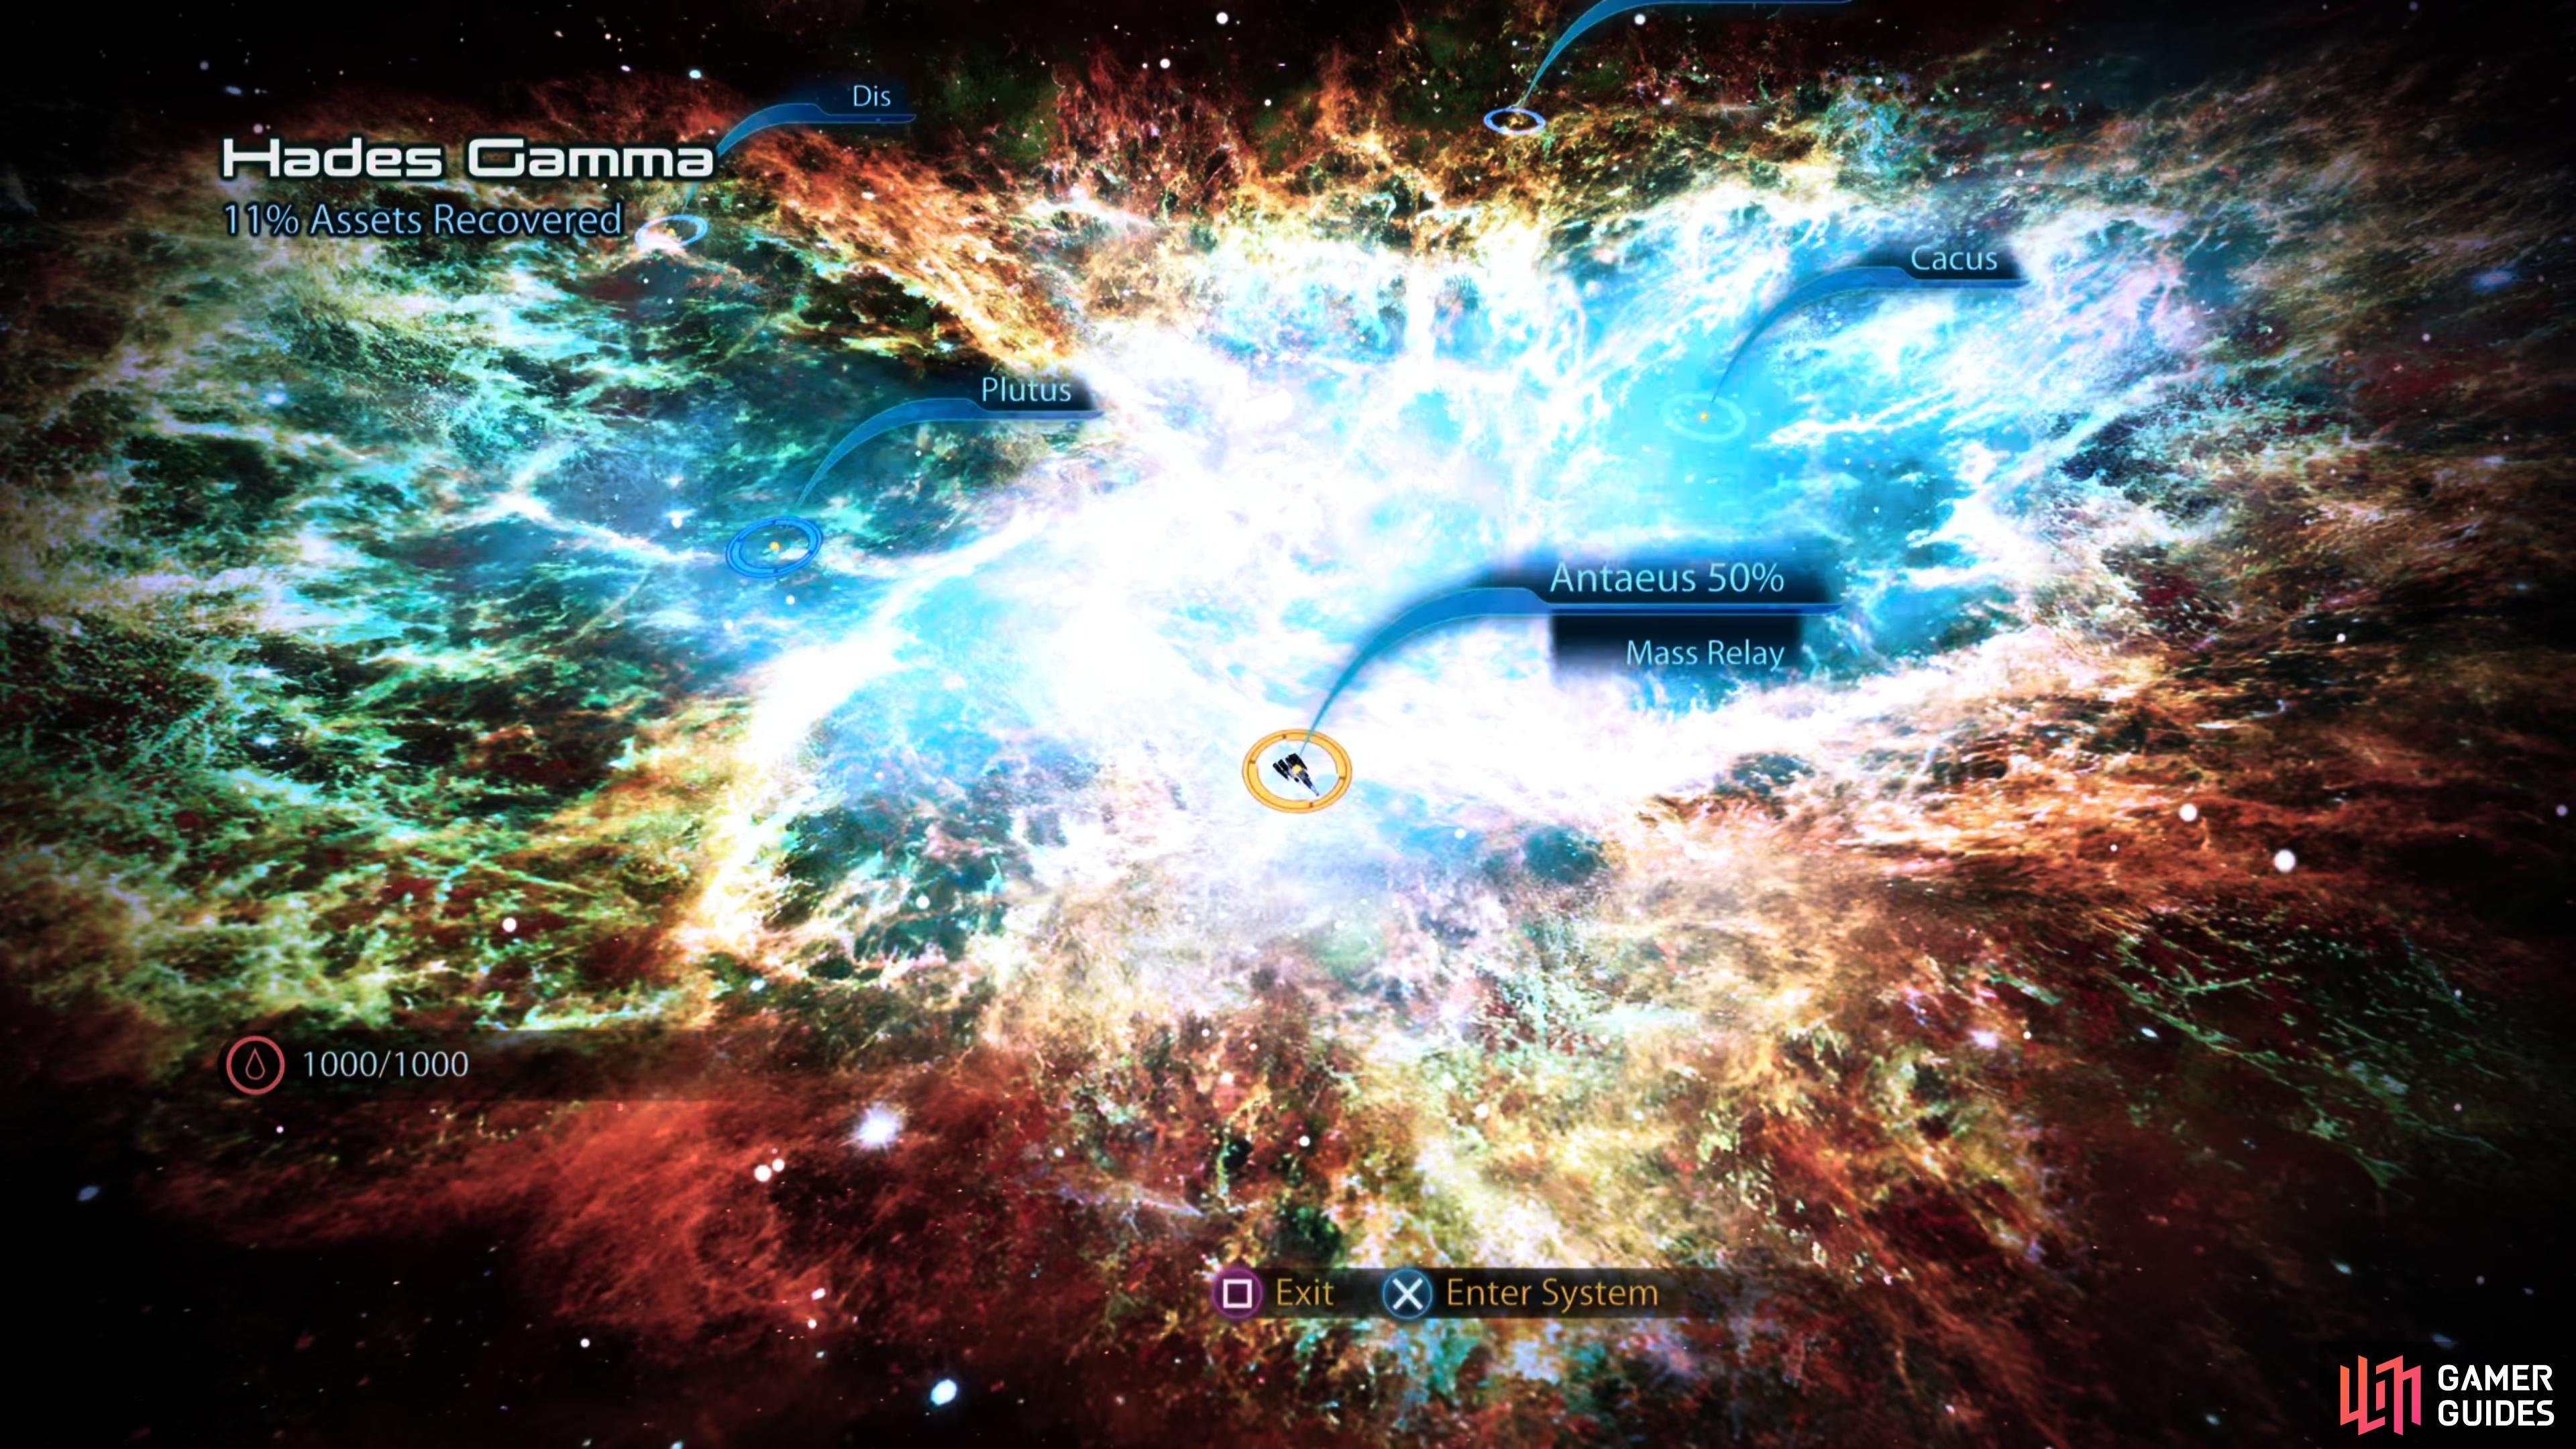
When you interact with the Galaxy Map on the CIC of the Normandy you’ll find yourself transitioned to the… Galaxy Map. Despite the name, there’s actually three levels of magnification, on the Galaxy Map you’ll have the entire Milky Way at your disposal, with a reticle you can use to select different clusters. Once you select a cluster to travel to you’ll appear in the System Map, where you’ll pilot the Normandy around the system, scanning and entering the orbit of various planets, stations and points of interest. Moving between clusters on the Galaxy Map or within a system on the System map doesn’t consume fuel. Should you pilot to the edge of a system (indicated by a green boundary ring) you’ll exit the system and find yourself on the Cluster Map, which works much like the System Map in that you can pilot the Normandy around. On the Cluster Map, however, you cannot scan, nor are there objects (planetary bodies or otherwise) to orbit - you’ll use this map solely to travel from system to system within a cluster. Moving between systems on the Cluster Map consumes fuel, however, so don’t make such trips trivially.
Most points of interest will be found on the Systems Map, and it’s here you’ll do your scanning, not to mention traveling to various planets (where most missions will occur) and stations (typically Fueling Depots and Mass Effect Relays). Of course, we’d be remiss if we neglected the giant metal bug in the room: on the Galaxy Map you’ll find that some cluster markers are flashing, indicating the presence of mission objectives, and some have Reapers looming over them. Speaking of which… see the following paragraphs.
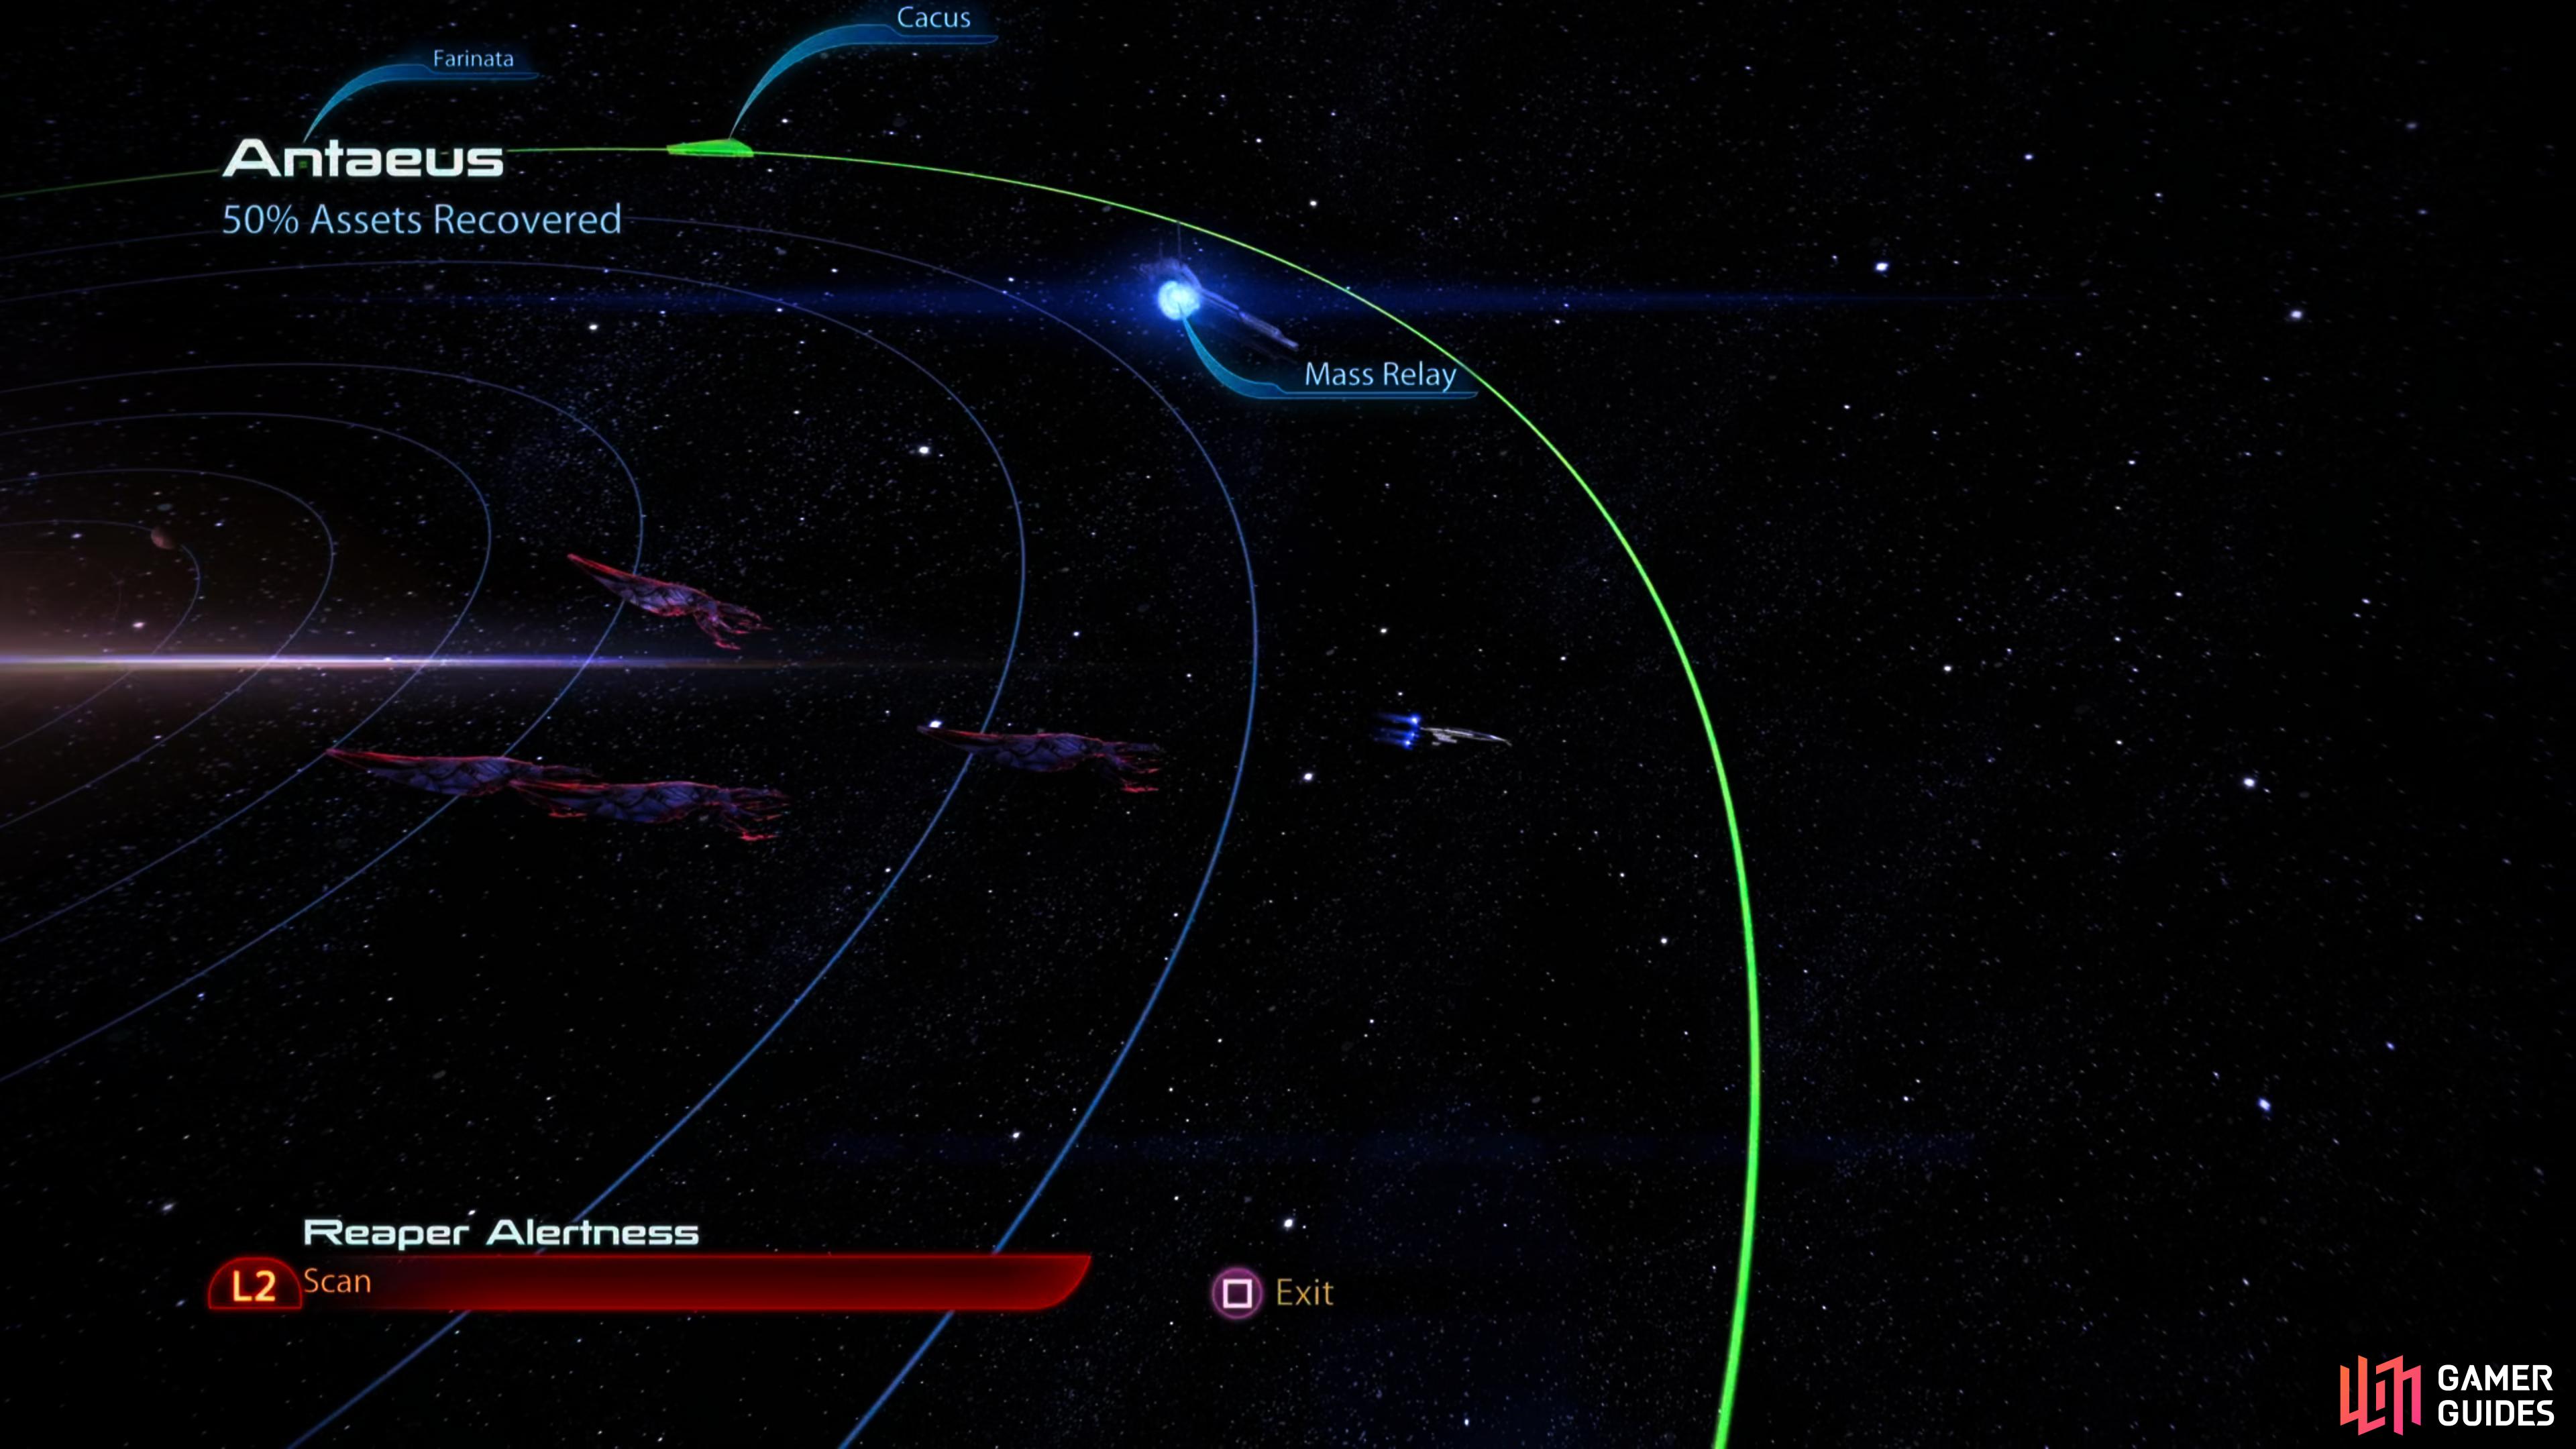
Scanning in Reaper-occupied systems will alert the Reapers, eventually leading to pursuit - escape to the boundary of the system or to a Mass Relay.
Reaper-occupied clusters are marked with a Reaper icon on the galaxy map.
Scanning, Reaper Awareness and Pursuit
There is, however, a major complication in Mass Effect 3 - there’s a war going on. More specifically, a fleet of genocidal machines looking to exterminate all signs of advanced organic life. While the Normandy has state-of-the-art stealth functions, all that goes out the window once you start scanning for points of interest. Every time you use your scanner - whether you find anything or not - you’ll increase the Reaper’s awareness of your activities. How many times you can get away with this varies - some systems have more Reapers lurking on the periphery than others - but you can typically expect to scan 2-3 times before being detected. Reaper presence is indicated by a Reaper icon looming ominously over a cluster icon on the Galaxy Map.
Once you’re detected - and even with save-scumming, you’ll probably be detected at some point - Reapers will spawn on the edge of the system and start moving towards you. You can tell where they’re going to spawn by the alert warnings you get every time you scan. If they catch you, it’s game over, so you’ll need to flee to the edge of the system or to a Mass Effect relay to escape. Note that once the Reapers have been drawn to a system, they’ll stay on alert there until you complete a mission, meaning as soon as you enter said system they’ll respawn and start chasing you.

When Reapers are alerted within a system, you don’t have to stop scanning and harvesting points of interest. In fact, when you enter orbit around a planet or point of interest, the progress of the Reapers will halt, giving you time to deal with the point of interest. You can enter a system, scan and investigate points of interest, all while evading the Reapers, just be sure to be smart about the runs you make when being chased by Reapers, as they build up speed the longer you’re in a system and can eventually catch you if you make a prolonged stay or try to exit near where a Reaper spawns. If you do largely linear runs through a system, you should be fine. Also note that where you enter a system determines where you’ll appear; if you escape Reaper pursuit by exiting the system border you’ll find yourself on the cluster map, and if you reenter the system while near its left border on the cluster map, you’ll appear on the left side of the system map.
Save your game, give it a try, then when you have the hang of things you can get to harvesting systems. The first scan or two will likely go uncontested, after which you’ll need to switch to doing scan-and-run flythroughs of systems, evading Reapers, noting points of interest, traveling more or less linearly through the system, revealing and picking up with you can. If you don’t feel safe grabbing something your scanner detects, don’t worry - you can always come back later after the Reapers have left and pick it up uncontested.
Everything you can find via scanning will be noted in the following pages, organized by cluster and system.
No Comments