Head on through the first room, past the statue here and into the chamber beyond. In the centre of this area you will see a giant cage with a lever out of reach inside. Go into the door to the right and use the summoning circle here to summon a Dead Lord. Return to the main room and have the Dead Lord use the lever in the centre of the room to open the locked door.
Here you will see a platform on the far side that we need to cross over to. Between us and the platform however you’ll find quite a hefty gap. Before doing anything else, Look up at the bottom of the left hand cage and shoot the crystal for a Stone of Power. Now lets head into the door to the right. As you enter a group of undead prowlers and skeletal champions will spawn. If you want to make things a little quicker head over to the summoning circle to have a Dead Lord help you out.
When the room is clear, pull the switch in the back right hand corner and return to the entrance. Get the dead lord to cruise over to the pressure plate opposite. This will raise the nearby platform. Drop down into the pit below and push the pedestal between the two platforms here to create a platform between the two and climb back out. Jump across the platforms and pedestal to reach the other side.
Before heading down the stairs here, check the small area to the left for a chest and the right for a Soul Arbiter’s Scroll. Continue down the stairs and through the door. Walk forward until you see a scene. Geez, this game loves making you go and find three of certain things in different dungeons doesn’t it?! We’ll now have to go and locate three souls. It happens that the three souls are in three different towers around the dungeon, so let’s get started.
$$$item 1542
$$$item 1603
First Soul
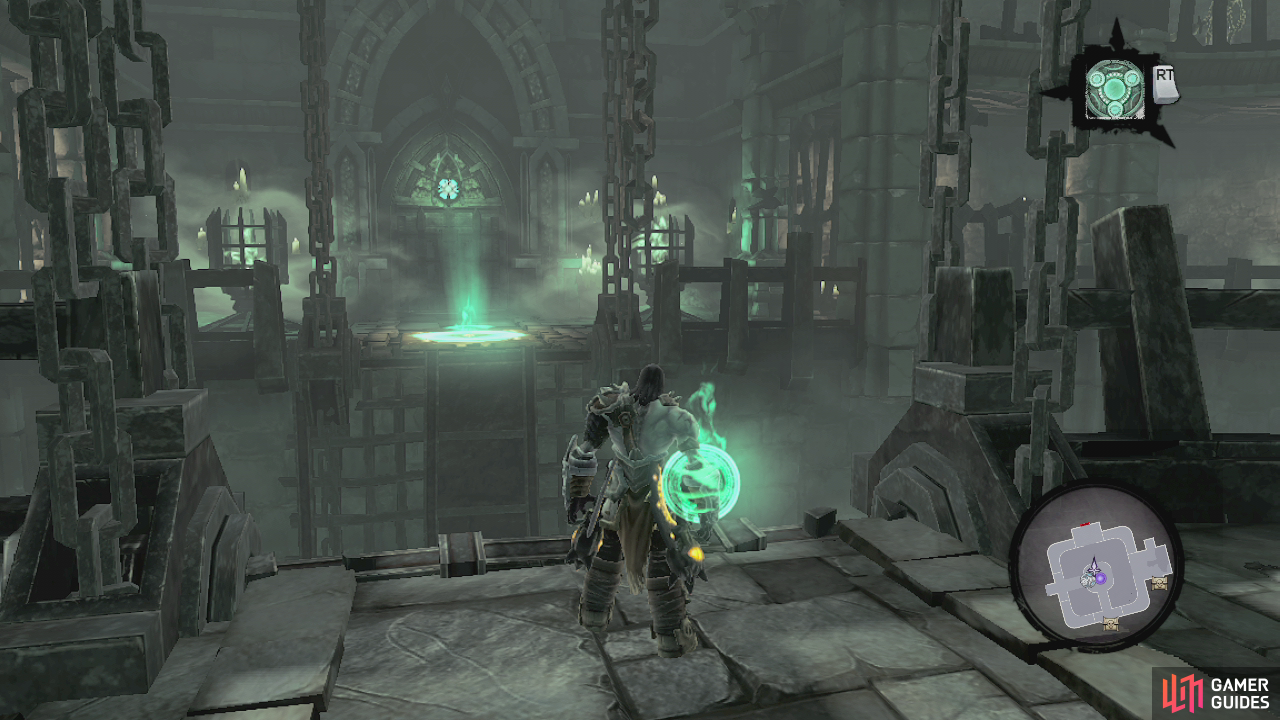
After the scene, the door on the right side of the room will unlock, so head on through. Continue across the bridge and into the hallway beyond. As you enter you will meet a new enemy - the lich. These floating bad guys can be quite a handful and will continuously summon skeletons to attack you. If you get too close to the lich, he will also do a nasty ground slam attack. Try to focus on the lich as much as you can and only really killing the skeletons when they get in your way (he will just replace them if you keep killing them). Once the lich is dead, head through the next door. At the end of the corridor, use the summoning circle and head through the door nearby. Use your Dead Lord buddy to activate the switch across the gap directly in front of you. Cross the bridge that rises into the centre platform. Here you will notice one of those lantern statues in the centre, but he has no lantern. Head to the south of this platform and use the dead lord to activate the pressure plate across the gap. The bridge will only rise half way, so switch to your death grip and use it on the dead lord to pull yourself across the rest of the way. Look in the right hand corner for a chest containing the dungeon map and grab the lantern off the ledge using death grip. Look to the left of where the lantern was to find a small hole in the wall with a bomb plant. Use this to destroy the crystals and this will raise the other side of the bridge. Grab the lantern and return to the centre of theroom. Give the statue the lantern. Rotate it once to the left to open the gate for a chest. Grab the chest and then head back to the middle area and rotate the statue 180 degrees. Now get the dead lord to use the pressure plate across the gap to the north. Enter the door here and go through the door at the end of the next hallway to enter a circular room. Drop down into the water here and across the opposite side of the room beneath a platform’s supports you will find a Relic of Khagoth. Return to the entrance and use the nearby block to start up a platforming section, follow the blocks handholds and death grip chains to reach the top of the room. Run over to the cage here and use the action button to collect your first soul. Kill the lich and the pair of skeletal champions that appear. Afterwards, Look at your map and drop down to the platform with the chest on it below. Fall down the rest of the way and back track to the judicator.
$$$item 1593
The Second Soul
Talk to the Judicator for a scene and afterwards he will unlock the next door for you. Cruise through here and across the bridge. Inside the room here we will find a locked skull door. A scene will play and some of the gates from around the room will open, pitting us up against a small group of undead prowlers. Killing all of these will have 4 skeletal champions spawn. Defeat them and you will have to fight a mini boss.
Now that he is dead, head through the now open doorway and then climb the stairs opposite to the door at the top.
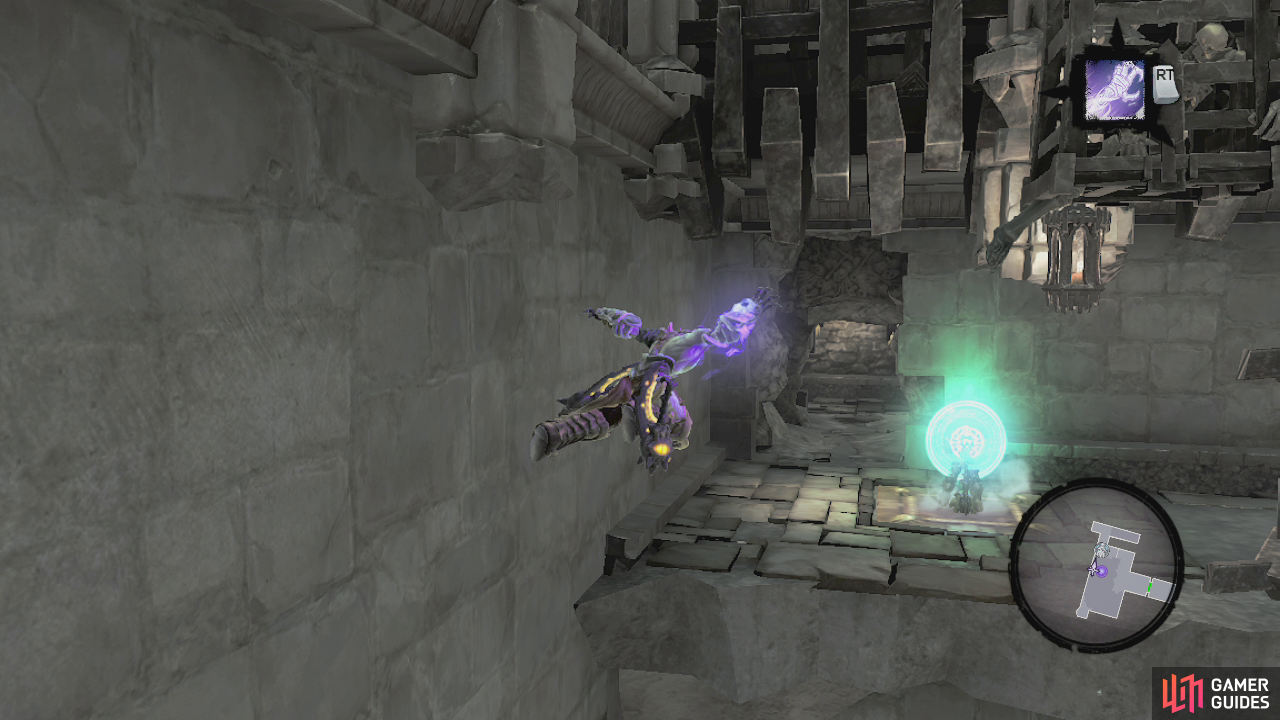
Use the summoning circle here and get the Dead Lord to activate the pressure plate in the Northeast corner of the room. This will flip a couple of sections of wall around. Wallrun across to the second block and instead of jumping again, let him run until he drops and you will land on a platform with a chest. Wallrun over towards the platform with the Dead Lord and use your death grip on him to pull yourself across. Enter the nearby passageway. Inside turn to the left to find a Book of the Dead page, turn around and use death grip to cross the gap.
Throw the switch at the top here and head over to the open gate nearby killing any skeletons that get in the way. Inside, follow the balcony around to the left to find a chest containing the skeleton key. Continue around to the other end of the room to find another chest here. Return to the previous room and drop down the hole next to the lever. Before heading back to the door, enter the hallway to the East of the summoning circle. In here the camera should change and show you a death grip ring. wallrun up to this and up to the handhold. Move to the left and drop down to find a platform hosing a relic of Etu-Goth. Run back up to the previous handhold and use it to wallrun to the left to find a chest.
Drop back down and return to where we fought the Tormentor. Kill the skeletons in here if you like and when you are ready, open the locked door to enter a the second tower, which is a tall circular room similar to the one containing the first soul.
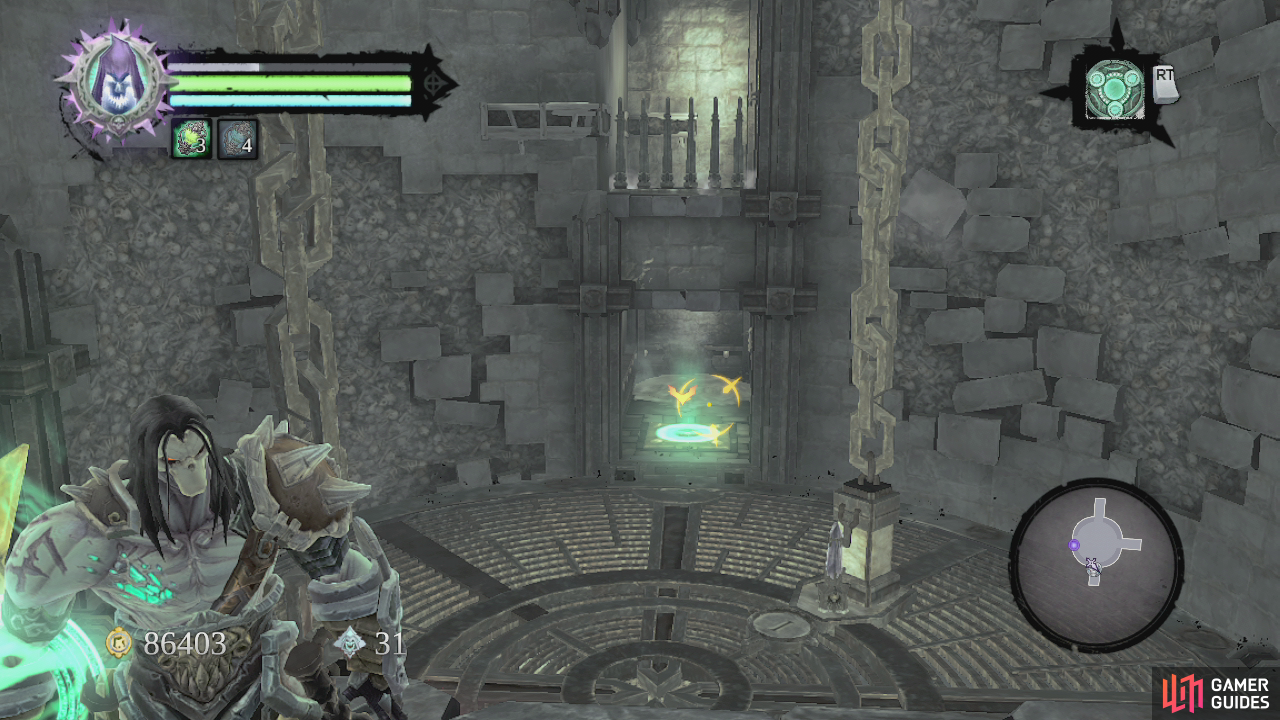
Cruise up the stairs to the right to find a death grip hook. Climb up to the central ledge. From here look to wards the next death grip hook and to the right to see another Book of the Dead page – death grip this. Now grab that ring nearby to start off a platforming sequence, continue along using all the hooks and handholds until you emerge at the top of the tower. Grab the soul from the cage here. Grabbing this will trigger an undead stalker and a pair of skeletal champions to spawn. Dispatch them and drop back down to the room just to the right of the statue here to find a set of broken stairs below with a chest Drop down into the water at the bottom to find a Boatman’s Coin . Backtrack back to the Judicator.
$$$item 1604
$$$item 1481
$$$item 1572
$$$item 1483
The Third Soul
After a quick chat, the Judicator will now open the final door for you. Move over to the South and through to the next area. Wallrun across to the other side of the gap and go through the door. Use the summoning circle there for Dead Lord backup before heading into the circular room ahead. Kill the undead general that attacks you at this point. After the fight, you will notice you are in a lift similar to the one we encountered in the Phariseer’s Tomb. Hit the crystal indicating level 2 and it will raise, but it will stop short, and you will see it has been blocked by yellow crystals. At this point look around to see two pressure pads, one in an alcove to the East and another on a passage to the West. Send your Dead Lord to stand on the stitch on the west side of the room. Enter the East passage and climb up to the platform above. At the top, use the handholds to the right to wallrun around the length of the room to the balcony opposite. From here you will be able to see the pressure plate on the Eastern side of the room. Send the dead lord over to sit on it. Use the handhold to your right to move around the corner and climb up a couple of blocks to reach a handhold above. Wallrun to the right until you reach the platform with the bomb plant. Grab this and sent it down to destroy the yellow crystals blocking the life below. This will bring the lift up to your level. Go through the door to the south. Check out the pool in front of you for a Boatman’s coin and continue up the nearby stairs. Use death grip to climb up to the platform here and grab the final soul from the cage. Attempt to leave the room to initiate a boss battle.
When he is dead, return to where you jumped up and rather than dropping down right away, follow the railing around to the right to find a Book of the Dead page. Drop down to the room below and head all the way back to the Judicator.
After a short scene you will get a new objective and a message indicating the completion of the dungeon, huzzah! Note that when using interdiction from now on you will have two dead lords to command.
We are all done here so feel free to fast travel back to the Eternal Throne. If you feel like restocking potions or selling your trash, go for it. When you are ready then head back to the Gilded Arena.
$$$item 1519
$$$item 1482
No Comments