Iron Glade
Enter the door at the east of the room. Kill the stingers and you should see a glowing red crystal in the death fluid in front of you. This is the chaos ore. Make your way up the stairs to the Northwest corner of the room. You’ll find a bomb plant here. Grab this and toss it down onto the red crystal, shoot it to obtain the first piece of ore (1/7) .
Return to where we entered the room and climb the stairs to the left, follow the platform all the way around until you reach the chest. Drop back down to the room below and enter the room to the left. As you enter, a platform will rise in the centre of the room and spit out some forge crawlers – these are essentially the same as scarabs and shouldn’t trouble you too much, just a couple of shots from your pistols should polish them off in no time.
At the far end of the room you’ll see a pressure plate in front of a locked gate, flanking this are two sets of stairs also leading to locked gates. Have the first clone climb down the stairs to the right and step on the pressure plate. This will open an underwater gate.
Have clone number two go down the stairs to the left, hop in the pool and swim through the open gate. Go through the tunnel and surface on the other side. Use wall jumping to get out of the hole and then pull the switch nearby to open the gate. Exit Soulsplitter mode.
Enter the now open area ahead. As you enter, drop down the hole in front and dive under the grating to the left and swim to the end for a chest. Return up to the main floor of the room, climb the stairs to the right for a chest and then look to the left of the entrance.
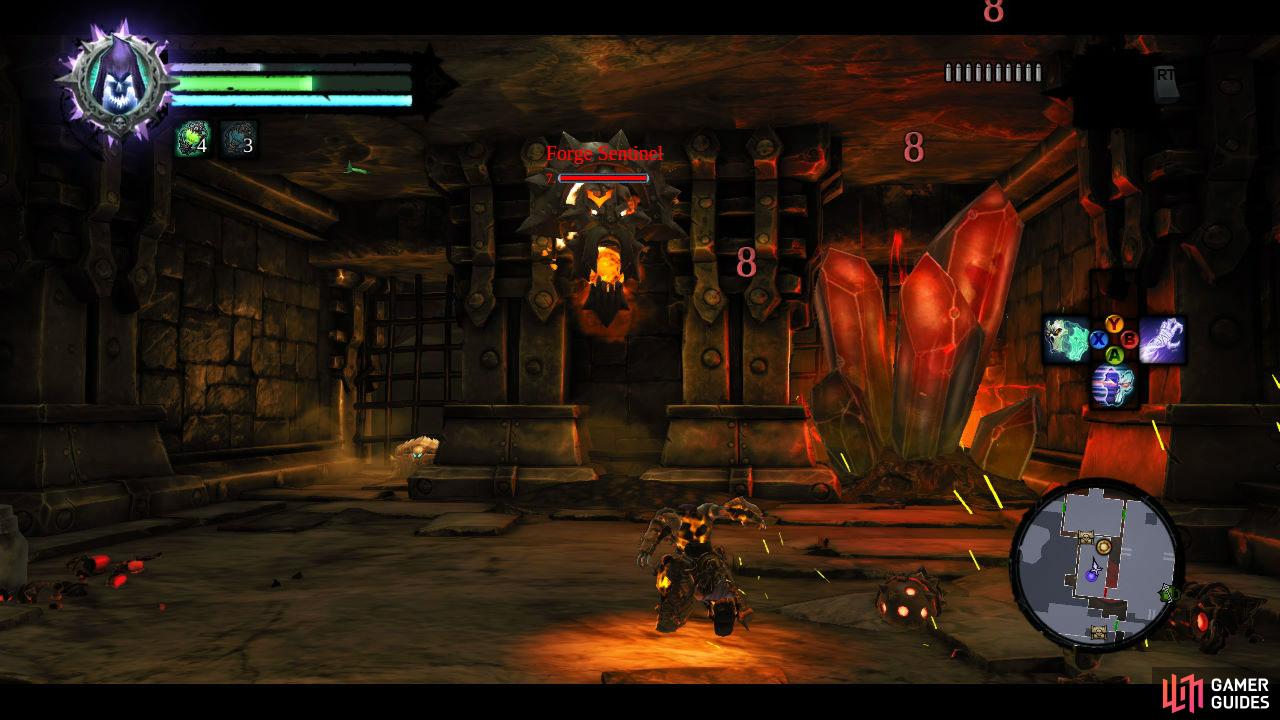
You’ll see stairs to the left and at the top of these there is a locked skull door that we can’t open yet so make your way across the walkways to the door directly to the south. Enter and inside you will be attacked by a set of three forge sentinels – like the sentinels in the main game, these guys can resurrect constructs. Once they are dead, explore the West side of the room for a chest and another chaos ore (2/7).
Return to the previous room. Return to the skull door and follow the path in front of it all the way to the east and down the stairs to the next unlocked door. Here we’ll see a pressure plate in front of a blocked ramp with a ball on it. Enter soulsplitter on the pressure pad for and have Death’s first copy to climb the wall to the left. Shimmy to the left and drop down behind the fence, follow the path here back towards the door to find a chest.
Return to the wall and climb up, follow the passage and just before the third handhold, drop down into the room to the right. Wall run up and grab the switch on the wall. Have clone 2 grab the blue ball and punch it up the ramp. Exit soulsplitter and climb up the wall to the left, follow the passage all the way to the end until you reach a courtyard at the top of the area.
Kill the enemies here and then find the top of the ramp. Step on the pressure plate here and use soulsplitter, have your first clone backtrack down the side passage and use the hanging switch on the wall. Get clone 2 to run down the ramp, grab the blue ball and shunt it up to the very top of the ramp. Exit soul splitter mode. Grab the ball and stick it in the socket nearby.

Enter the now open gate; climb down the stairs to the right. At the foot of the stairs you’ll find another chaos ore (3/7).
Climb back up the stairs and turn right. Follow the pathway here and enter the door at the end. Here you’ll have to fight off a group of forge guardians and then a forge champion afterwards. Upon killing them, the door nearby will unlock and you will also be able to duck into the alcove for a chest containing a skeleton key.
Exit the northern door to end up back in the room with the skull door. Head over and open it up! Follow the passageway until it opens into a room. Kill the stingers and crawlers in the area and then head down the ramp for the chaos ore (4/7) crystal here.
Exit to the north. Pull the lever here to raise a bridge back to the Smith. Re-enter the room to the west and this time work your way over the platforms to the north. Enter the door to the left. Climb down the stairs into the large square room. Inside you will have to face off against a single forge hunter (these are essentially a re-skinned version of the stalkers from the main game) and then a pair of them.
After all three are dead, a piece of wall will flip around. Wall run up this and then deathgrip across to the floor above. Smash the chaos crystal (5/7) here and then look to the west and find the pipe bridging the room that is leading into a crack in the wall on the far side. Follow this inside for a chest. Drop down and return up the stairs to the previous room.
Head straight ahead and enter the door to the left. Stand on the pressure plate in the centre of the room and enter soul splitter. Have clone 1 drop down the pole opposite where we came in. Sit the clone on the pressure plate here. Have clone 2 enter the open gate to the left and then through the second gate opposite on the floor below.

In the lower room you’ll find a chaos crystal (6/7) to the left and a ball. Grab the blue ball and punch it back up the chute. Switch to clone 1 and have him punch the ball up the next chute. Exit soul splitter. Stick the ball in the socket. Enter the now open door and follow the pathway all the way to the end and enter the door there.
After killing off the swarm of guardians inside grab the bomb plant to the left and toss it onto the red crystal in the death fluid for the final chaos crystal (7/7). Return to the previous room and take the door on the left for a shortcut back to the Mad Smith.
For returning all 7 pieces of chaos ore, you’ll earn a new talisman - the Mad Smith’s Device . This will enable us to cross the death fluid we’ve been seeing all over the place. Immediately return to the room where we earned the last chaos ore. We can now run across to the platform behind this for three chests. Return to the Mad Smith.
No Comments