After we land, head straight forward and through the door. As you enter, you’ll see a floating golden object and black liquid on the floor. This is some kind of corruption-based death fluid that will damage you if you step in it. So stick to the solid ground to the left.
Jump over the gap to the small circular platform and run up the wall here. At the top, you will need to jump backwards to enter the room above. Here is another golden object with a rotating lever in front of it, this one however is glowing. Spin the lever to lower this golden object into the room below. This will interact with the original object and cleanse the room of corruption, turning death fluid into water and unblocking the door. So drop back town to the floor below and make your way through the door.
Climb the stairs here and you’ll return outside. As you move forward, keep an eye out for a small break in the wall to the right. Check the area behind this for a Boatman’s Coin. Follow the path to the end and use death grip to jump the gap. Head through the door here and the hallway beyond and exit into a circular room with the black waterfalls. There are two unlocked and one locked door, but we can only access one at this time. As such, make your way to the right and through the door on the east side of the room.
Exit the hallway into an outdoor area. Look to the right and instead of climbing the stairs right away, continue past them for a chest. Back track and climb them to the top. Enter the tunnel here and follow it until the dead end. Use the blocks here to climb up to the second level. When you land, go ahead and wall run to the other side of the gap for a chest. Look at the window to your left for a crystal to shoot for a Stone of Mystics before jumping back and continuing to the northwest. Exit the door to go outside for a scene.
$$$item 1530
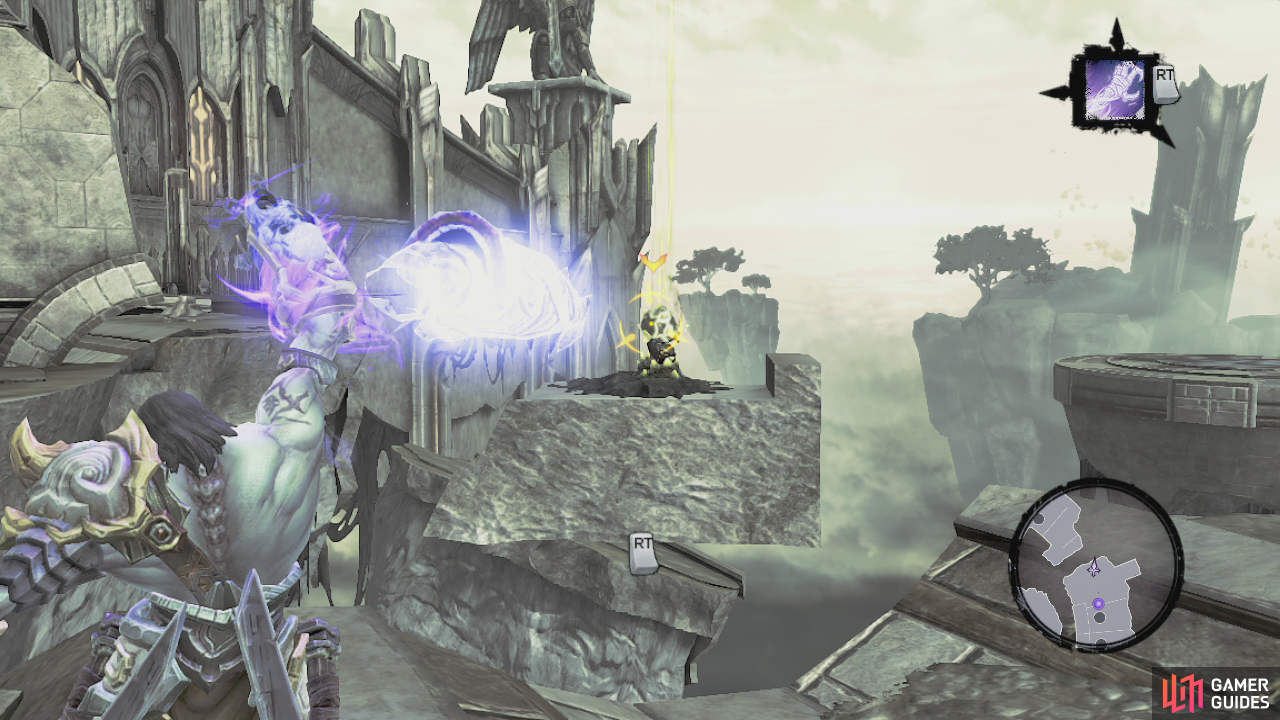
Afterwards you need to death grip across to the platform below and kill the corrupted angels here. Look to the left behind the ruined wall to find a Boatman’s Coin. Look to the wall to the right of the yellow crystals and drop down onto the ledge below. Open the chest here for the Dungeon map. Climb back up and use your platforming skills to wall run around the corner and all the way to the next platform. Go to the westernmost part of this platform to find a Boatman’s Coin.
Go and stand on the large golden platform to the left of the pressure plate and activate soul splitter mode. Send the first copy over to activate the pressure pad and the second copy through the hole in the wall. On the other side look to the left and climb the wall behind the circular hole in the floor here. At the top turn to the left and step on the pressure plate to open the door beneath our body. Return to normal mode and climb up the hand holds ahead.
Now that we are beyond the wall, hop over to the next wall to the east and kill the corrupted angels here. Once the area is clear, look to the right to see a crystal blocked pathway and a bomb plant chilling out on a floating island nearby. Grab the bomb and ignore the blocked path nearby for the moment and do a 180 degree turn. See the yellow crystal up on the balcony to the right? Hit that with the bomb. Once it is gone, return over the wall and climb up to find a switch where the crystal used to be. Activate this and drop back down into the room, here you will find that the switch has opened the small circular passage in the gutter here. Enter this and look around the corner for a special weapon – Goldbringer.
Return to the bomb plant and destroy the crystals blocking the way south. Death grip across the gap, climb the stairs and enter the door. Inside drop down and destroy the demon chest for a new ability – the Voidwalker which if you played the original Darksiders is essentially Death’s equivalent of the Aperture Science portal gun. Huzzah!


See those circular blue pads we have been seeing everywhere? We can place a portal on these. Place two portals on two different pads and you’ll be able to instantly travel between them. Handy!
Create a portal on the pad here and a second up on the balcony above. Exit back through the door and death grip across the gap again. Kill the corrupted angels hanging out here and then use your voidwalker on the blue pad to the left and then look over to the platform over to the right to find another pad to shoot. Upon exiting, look to the right to see another pad on an earlier platform that is angled downwards towards a yellow crystal. Create a portal on that pad and another on the pad here. Next have death grab a bomb and throw it through the portal to destroy the crystal and revealing a chest. Jump through the portal to grab the chest and then return all the way back to where we just portaled from.
When you are back on the far eastern platform, continue around the broken wall here to find a switch before another closed circular door on the floor. Hit the switch to open the door and drop down.
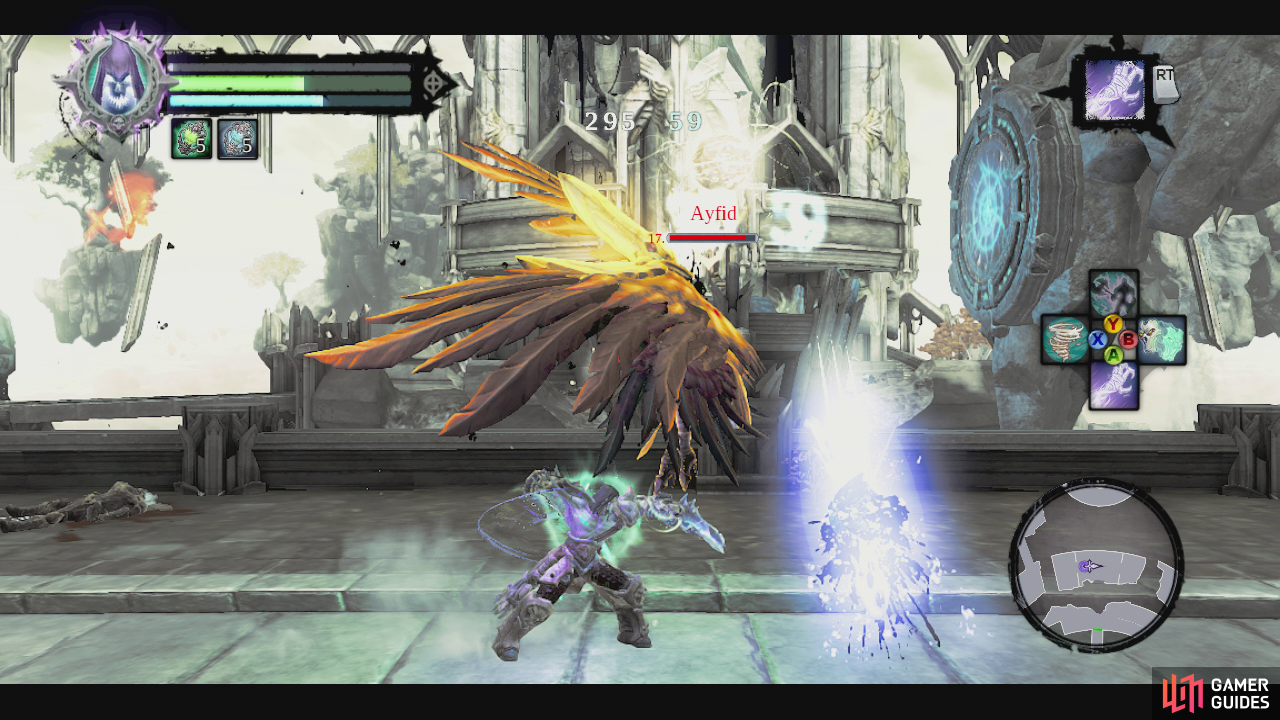
Continue forward and at the intersection, turn right to find a chest. Now, do a 180 degree turn and place a portal on the pad directly behind you. Continue down the remaining branch of the hall here and place a charged portal on the pad at the end (hold down the button to do this). Return to the portal you placed on the wall and jump through to launch up from the portal on the ground and into a new area. From this platform, death grip across the gap and into the doorway in front. Kill the aryfids that appear here.
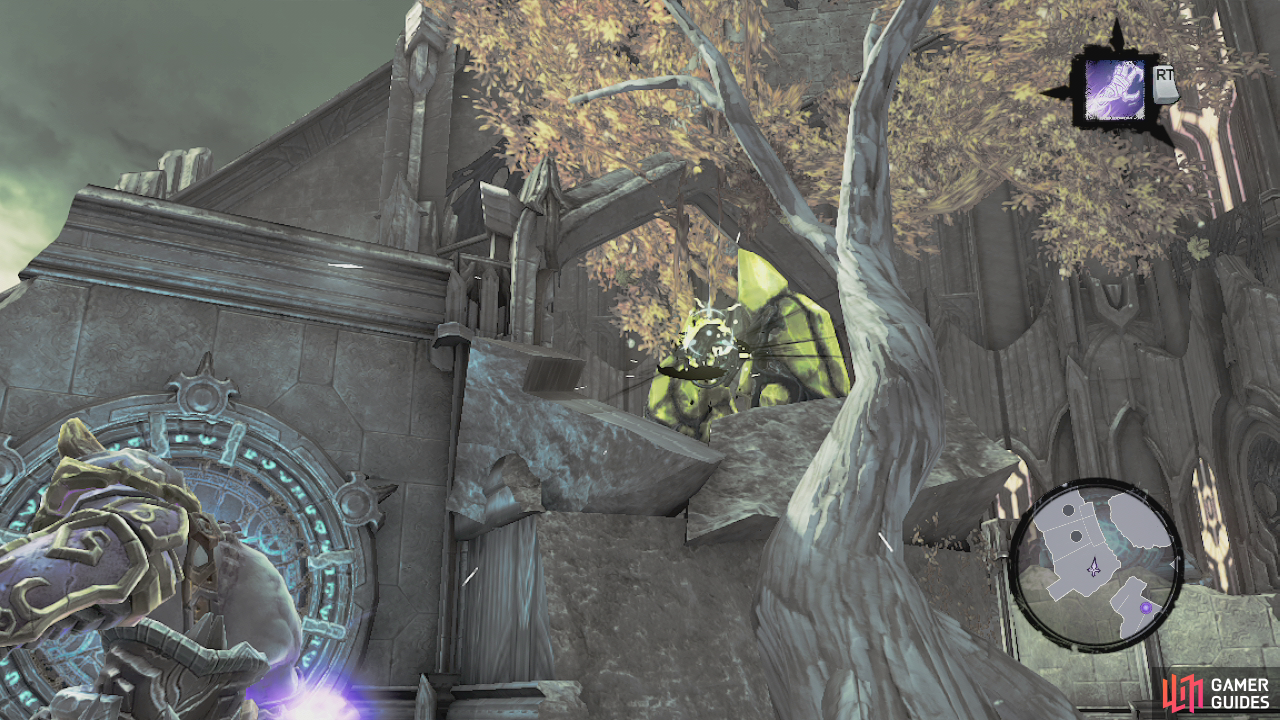
Enter the door at the far end. Use the portal pad to the left and throw a second portal across to the pad on the platform in front. Mosey on through and deal with the corrupted angels here. Cross the bridge nearby and kill more corrupted angels here. You will see a portal pad on the piece of wall here. Head around to the other side of this wall and destroy the destructibles on the back. A chest will spawn. Loot that and from here, look behind a nearby tree for a Boatman’s Coin.
Remember how the activated golden sphere could interact with another and cleanse tainted areas like in the very first room of the dungeon? There is an inactive sphere here and if you look to the southwest you will see an active sphere next to a portal pad. Place a portal on that pad, and then one on the portal pad on your current platform to cleanse the corruption here and unveil a way for us to continue forwards.
Continue across the now accessible bridge and follow the passage at the base of the tower around to the right. Kill the swam of vengeful spirits that attack here. Go into the opening and place a regular portal on the pad on the floor and a charged up portal on the pad on the wall nearby. Return outside and continue left. Hug the wall and look behind the next pillar to find a Boatman’s Coin . From this location you can also look up and towards the stone arch above the stairs in front of you. Shoot the blue stone here for a Stone of Mystics. Ascend the stairs and enter the door at the top.
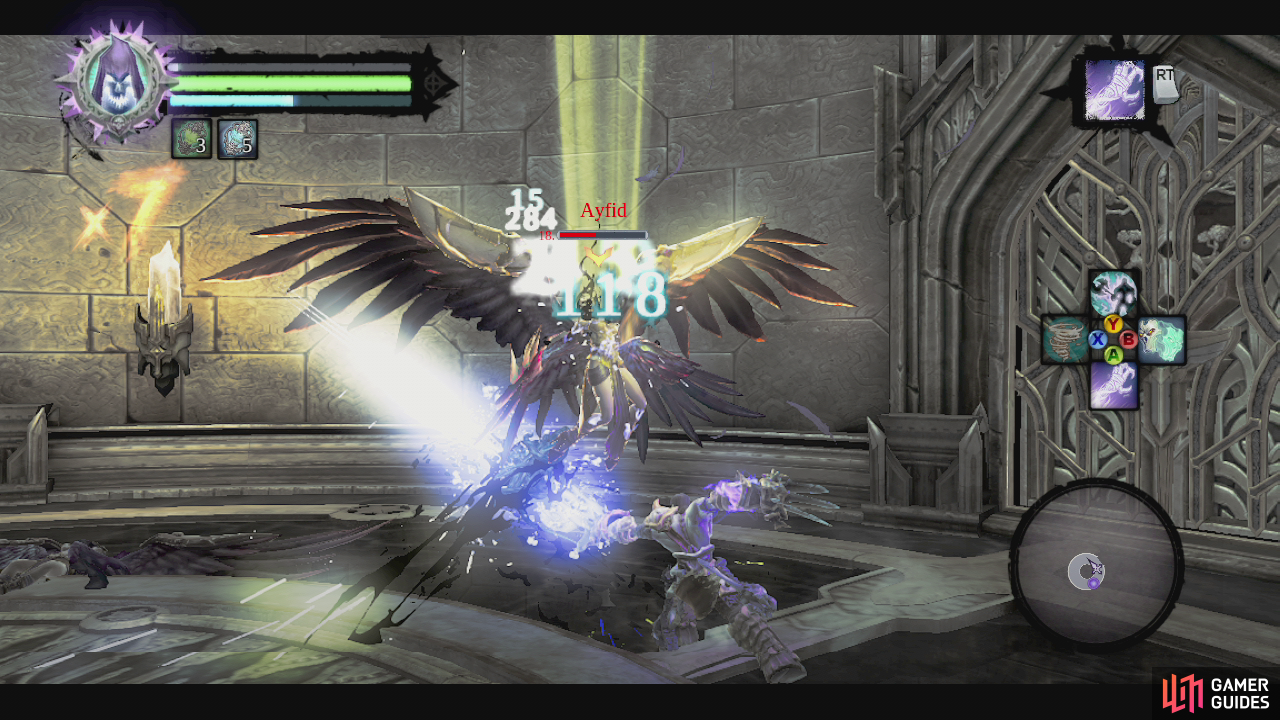
Kill the party of aryfids in here and the corrupted angels that follow. Park Death in the centre of the circular platform on the floor of the room and use soul splitter. Send each of the copies to one of the hanging beam switches on either side of the room. When both have been activated, the floor should open, sending Death down into the portal below and across to the ledge above. Find the handholds nearby and get your platforming on to reach the top of the tower.
Once you reach the top, look left and activate the portal pad, continue and do a U-turn around the pool of death fluid in the centre of the area. Look down to the North and activate the portal pad next to the activated golden sphere to cleanse the pool here. Now that the death fluid has been cleansed, jump into it and continue along the aqueduct to the north. At the second drop down on the aqueduct look behind the falling water for a Relic of Renegoth. Continue north until you drop down to another circular pool.
$$$item 1531
$$$item 1590
From here continue to follow the water here until you reach the yellow crystals on the left. Grab the bomb plant from opposite and use it to get rid of the crystals. Climb the wall vine that had been blocked by the crystals to access the balcony above. Enter the door here. We are back in the black waterfall room we entered near the start of the area. Note that one of the streams has now been cleansed and water is flowing in. Looks like we have to go ahead and cleanse two more water sources! Continue around the platform and exit the door on the other side.
Cruise through the hallway and exit outside. Move forward and up the first flight of stairs. Jump over the railing to the right to find a chest. Climb back up, return to the doorway we entered from and check out the room. At the top of the stairs in front you’ll locate a locked skull door and to your right a yellow crystal blocks the path. As there are very few other options available, make your way to the left and drop down to the platform below. Enter the gate here to run into a new enemy – a corrupted champion. Watch out for the charge and ground slam attacks and you’ll kill him in no time. When the corrupted champion dies, another one will spawn alongside a pair of corrupted angels. Kill them all and the door behind will open.
Enter and turn left. Follow the hallway until it exits into the base of the tower here. Check out the opening to the left first and follow the outer wall around to the south to find a Book of the Dead page hidden behind a piece of corruption that looks like a spider web. Return inside and drop down the hole to the platform below. Here we’ll find an activated golden sphere. We’ll be using this a little later, but for now exit to the balcony and kill the corrupted angels.
Afterwards a scene will play. Death grip across to the handhold and then use your platforming abilities to continue to the left and up the wall at the end. When you reach the balcony turn right and follow the path until you reach a golden switch. Activate this to open a gate back to the tower we were in previously. From here perform a 180 degree turn to spot a Relic of Renegoth sitting in the corner opposite.
Return to where we just climbed up from and let’s have a look at the two rotating switches. You will notice that they control the two sections of wall nearby with portal pads on them. Let’s jump into soul splitter mode. Have the first clone rotate the southernmost switch until the section of wall lowers the entire way. Use the second clone to fire a portal onto the pad on the now exposed second wall section. Fire a second portal at the pad opposite at the base of the tower. Switch back to clone 1 and release the switch to raise the wall again. Now change back to controlling clone 2 and walk over to the portal pad at the base of the tower.
Through this you should be able to see a portal pad on the back of the first section of wall. Shoot a charged portal through and this should create a portal on the back of the first section of wall. Change back to the first clone and use the other switch to lower the other section of wall. Now that the path is clear, jump through the portal at the base of the tower as clone 2 to fly over to a new area. Pull the switch to open the gate here.
$$$item 1491
$$$item 1591
Return to normal mode. Enter the main tower again and drop down the hole in the floor. Activate the portal pad next to the activated golden sphere. Head back to the gate we just opened and from the platform here wallrun across to the south east (note the corrupted water in the passage between two holes in the walls here – there’s a secret in here we will come back for later). Kill the corrupted angels on the platform here and loot the chest for the skeleton key. Climb the handholds nearby and use the bomb plant at the top to destroy the yellow crystals.
Proceed to the door at the top of the stairs and use the skeleton key to unlock it. Place a second portal on the blue portal pad in here and the golden orb will become activated, cleansing the pool beneath it. Look above the doorway to the north for a crystal we can shoot for a Stone of Resistance. Follow the aqueduct south and death grip across to the far platform for a chest. Climb up the hand holds here and rather than going through the door, drop down and go to where you destroyed the crystals before. Drop down to the platform below and enter the now cleansed side passage through the hole in the wall to find a GnoMAD’s Gnome . Return to the cleansed aqueduct. This time head north along it and after the first drop, turn around and look behind the water for a Relic of Etu-Goth. Follow the water until you can go no further, then climb up the nearby wall and enter the door at the top.
We’re back in the waterfall room again! Kill the corrupted angels that spawn on the balcony here and then look at the statue in the centre of the room. There is a blue crystal on its chest you can shoot for a Stone of Power . Exit through the open door on the opposite side of the platform from where we entered. Continue along to the left, into the room here.
Drop down into the water here for a Boatman’s Coin. Proceed across the pool here and climb out. Follow the cave and make your way to the exit. Head down the first set of stairs and loot the chest. Continue to the bottom of the second set of stairs. Use the voidwalker on the portal pad in front of you and then look down to the platform on the right and activate the second pad here. Death grip your way across and into the portal to find yourself on that lower platform.
Look up and to the right to see another portal pad here. Placed a charge portal on this and return through the portal at ground level to launch yourself towards the next platform. Death won’t quite make it, so allow him to wall run across to the next area. As soon as you land look in the corner in
front of you behind the corruption for a Boatman’s Coin. Look to the right to see a portal we can wallrun to so activate that. Next, look down to the right to see another portal pad below. You will need to place a charged up portal on this one. When preparations are complete wallrun into the first portal on the wall to the right. Upon leaving the second portal climb up to the platform on the right.
$$$item 1565
$$$item 1619
$$$item 1580
$$$item 1551

Enter the circular room here to meet a new enemy - the sycophant. These guys will teleport all over the place and try to catch you off guard. Keep an eye out for charging electricity, if you see this, dodge because the sycophant is invisible in this area and is about to unleash a charge attack at you. There’s not much else to them really, just wait for them to attack, dodge it and then lay into them. After killing three of these things, the door will open, granting you access to the next area.
Go down the ramp and in the next circular area, head straight past the activated golden orb to the broken balcony, look behind the door frame for a Book of the Dead page . Continue up the next ramp to find a rotating switch. Enter soul splitter mode and use the first clone to rotate the switch to create an opening in front. Switch to the second clone and pull the block out through the opening.
Return to normal mode and have Death jump onto the crate. Re-enter soul splitter mode and have clone 1 activate the switch and clone 2 push the block with Death on top into the next room. Return to normal mode.
Exit through the only non-blocked opening and continue past the switch to the end. Drop down here to find a portal pad and a Soul Arbiter’s Sacred Scroll .
Shoot a portal at the pad here. Climb up the nearby wall and enter soul splitter mode. Rotate the switch here until a portal pad appears in front of you. Switch to the second clone and shoot the portal here. Have the first clone release the switch and then have clone 2 jump down to the portal pad below. Through the portal, you should be able to see a second portal. Fire a charged portal at this. Have the first clone rotate the switch again. Get the second clone to jump through the portal and grab the chest here. Note the second golden sphere here.
Return to normal mode to reset your clones. Re-enter soul splitter mode. From the switch, disable the portal on the ledge below and have one of your clones return to the first circular room. To the left of the entrance is a ledge we can drop down to. Get the clone to head down here and use the available handholds to climb up the other side. From here we can shoot the portal pad next to the activated golden sphere. Have clone 2 rotate the switch until you see the second golden orb activate. Let go of the switch and the golden orb in the first room will activate, destroying the corruption here and giving you access to the next area.
$$$item 1492
$$$item 1609
$$$item 1594
$$$item 1550
Jump out to the right and wall run over to the next platform. Activate the portal pad her and then look through the hole in the wall nearby to see another. Shoot a portal on this one too and then head through portal number one. Drop down into the cave below.
Head to the right and enter the water, in the pool here you will find a Boatman’s Coin . Exit and continue along the set path until you return to the man-made tunnel. Make your way to the left and pull the switch at the end to open the door. We are back in the waterfall room again, this time it is completely clear of corruption so we can head across the water and into the door to the north.
As you enter, look behind the statue to your left for a statue of Etu-Goth . Shoot the portal pad directly in front of you, then look up and shoot a charged portal at the portal pad above. Run through to end up on a suspended water platform. Turn around and disable the portal you just came through. Now look up behind you to see another pad. Use a charged portal on this. Drop down to the ground floor and hop through to end up on the top platform. When you arrive, look to the left to see an opening. Shoot the portal pad on the roof here and wall run back to the portal we just came through to exit into the side room. Here you will find a chest and if you look up at the roof, a green crystal we can shoot for a Stone of Resistance .
Cancel the portal on the roof and jump over the ledge down to the ground floor. Activate the portal here again and jump back through to the top level. Wallrun to the far platform, open the door here and climb the stairs to the top. Enter the room for a boss fight.
$$$item 1579
$$$item 1564
No Comments