

Howling Winds of Hunger
What better way to introduce yourself to combat and earn some Gil at the same time than by doing a hunt? Talk to the restaurateur and start the hunt “Howling Winds of Hunger”, then leave the restaurant - and the Hammerhead outpost itself - behind. Make your way north-east into the wilderness to find your prey: a pack of seven Sabertusks. Combat time!
First thing to note is that enemies have an awareness meter, indicated by a red bar atop the screen. The longer the bar, the more aware they are of you. Usually, however, you can get close enough to foes that you can start out fights with a potent, pre-emptive Warp Strike. To do this, just hold down R1/RB to lock on to enemies then press Triangle/Y to perform a Warp Strike. Once battle is joined, press Circle/B to attack with your weapon. You can also hold Circle/B down to perform a continuous “chain attack” with your weapon.
Alternatively, holding down Square/X will cause you to take a defensive stance, automatically “phasing” through enemy attacks at the expense of some MP. You can also press Circle/B to perform an evasive roll. Finally, you can switch between weapons and spells (more on those in a bit!) by pressing the corresponding direction on the directional pad.
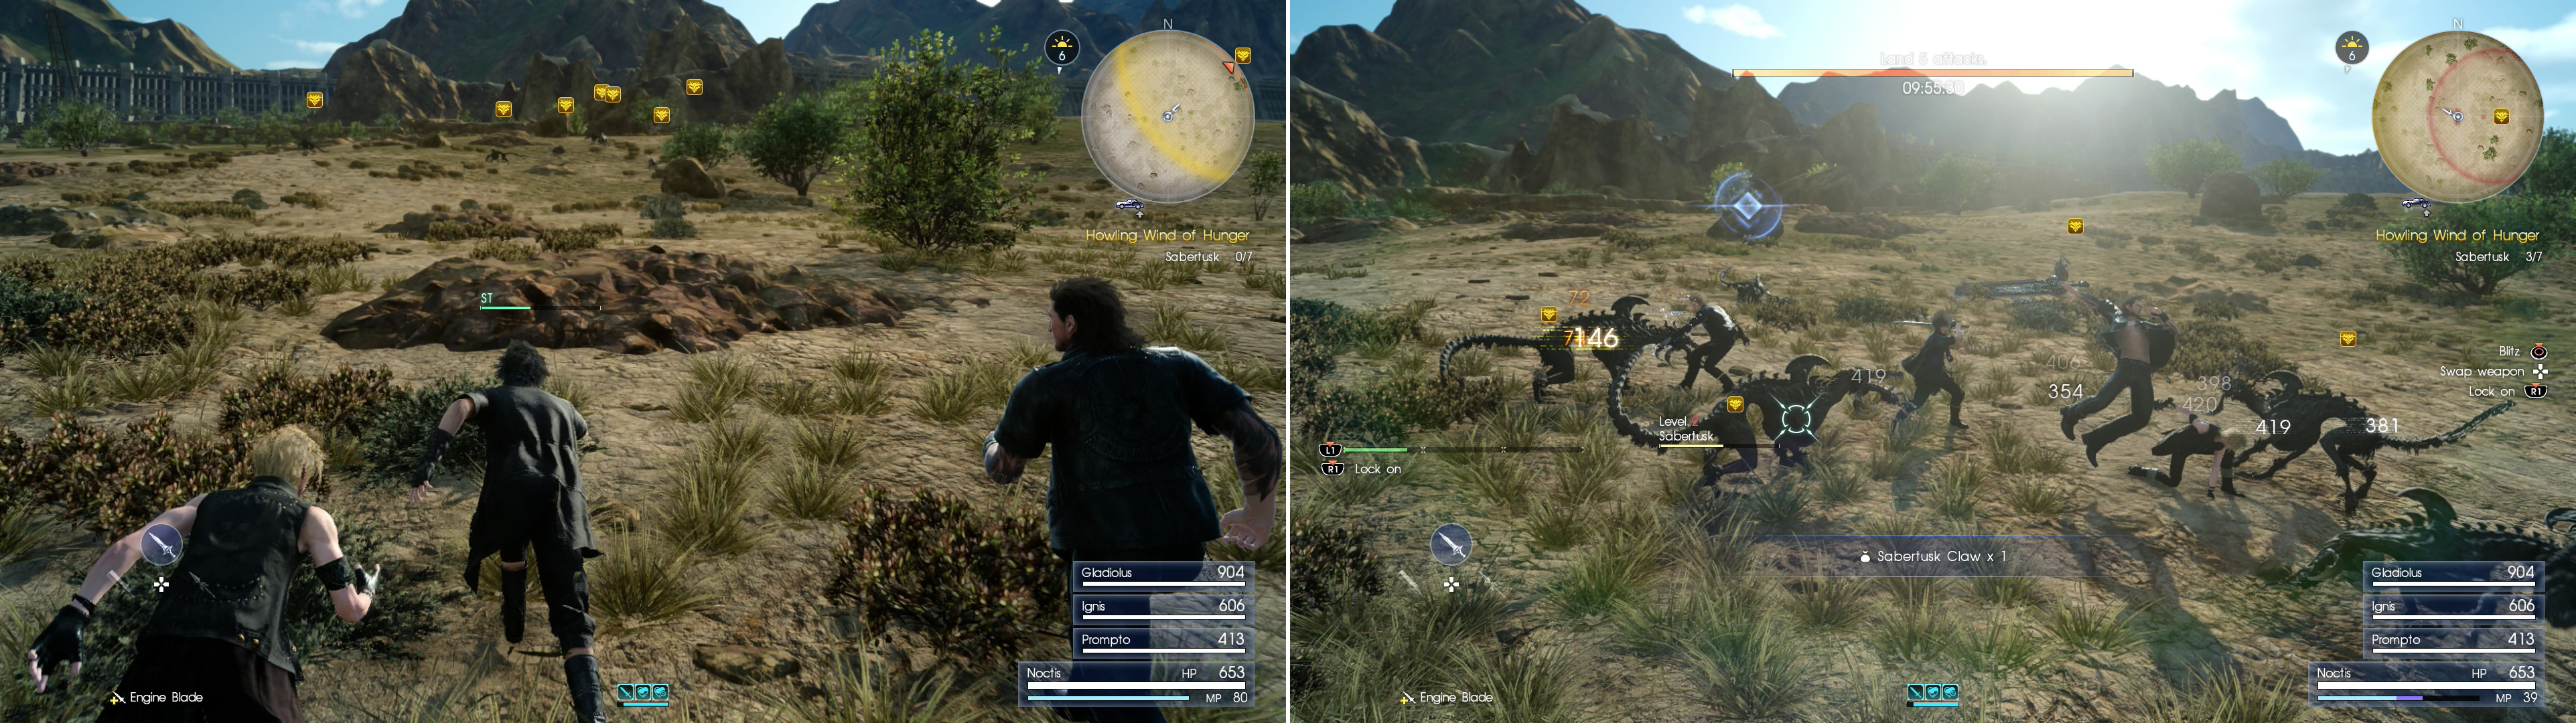
Sprinting expends Stamina, but pressing the sprint button at the right time will fully replenish your Stamina (left). Head to the indicated area and kill the Sabertusks (right).
Battle Fatigue
Since you’ve just had your first battle, it’s time to point out a few things: Hit Points, maximum Hit Points, and what happens when you lose them. If you are knocked down to zero Hit Points in a fight, all is not lost! While in this near-death state you’ll be able to crawl around, hopefully either escaping the battle area (the perimeter of which is marked in red) or getting help from your allies. While you’re compromised your maximum Hit Points will deplete - and continuing to sustain damage from enemy attacks will reduce your maximum Hit Points further. Use items (press R2/RB during combat) like Potions to heal lost Hit Points and Elixirs to restore lost maximum Hit Points. Normal damage will recover very quickly out of battle, while lost maximum Hit Points recovers much more slowly. Some creatures, like Daemons, damage both your current Hit Points and your Maximum Hit Points when they attack.
Cotisse Haven
Slay your enemies, then turn north-west to find a camping site - a haven. Fortunately the province of Leide seems abundantly adorned with elevated, flat plateaus which are well-suited for making camp. Head up to the top of this plateau and note the glowing circle in the middle. Interact with this and you’ll get the options to Camp or Train. In the latter case you’ll spar with Gladiolus in a no-holds-barred fight, which is a way to further hone your combat skills, plus, you’ll get EXP and possibly AP for winning.
You probably don’t need to camp just yet, but there are a variety of reasons why you’ll need to seek camp regularly. First and most importantly is the simple fact that it’s dangerous to travel at night, as powerful daemons will start appearing. You can check the time by noting the number in the small circle left of the mini-map - it’s a 24 hour clock, so when it reaches 20 (8:00) you’ll want to be seeking a campsite. The various different times of day and the hours they occur during can be found below.
| Time | Hours |
|---|---|
| Dawn | 5:00 - 8:00 |
| Day | 9:00 - 15:00 |
| Dusk | 16:00 - 19:00 |
| Night | 20:00 - 24:00 |
Camping at havens/outposts grants two major bonuses. First, all of the experience you have gathered while adventuring will be applied to your characters, increasing their level. Second, you will be able to choose a meal that can be cooked by Ignis, granting various buffs for a time starting at the beginning of the next day. You’ll also gain AP every time you rest.
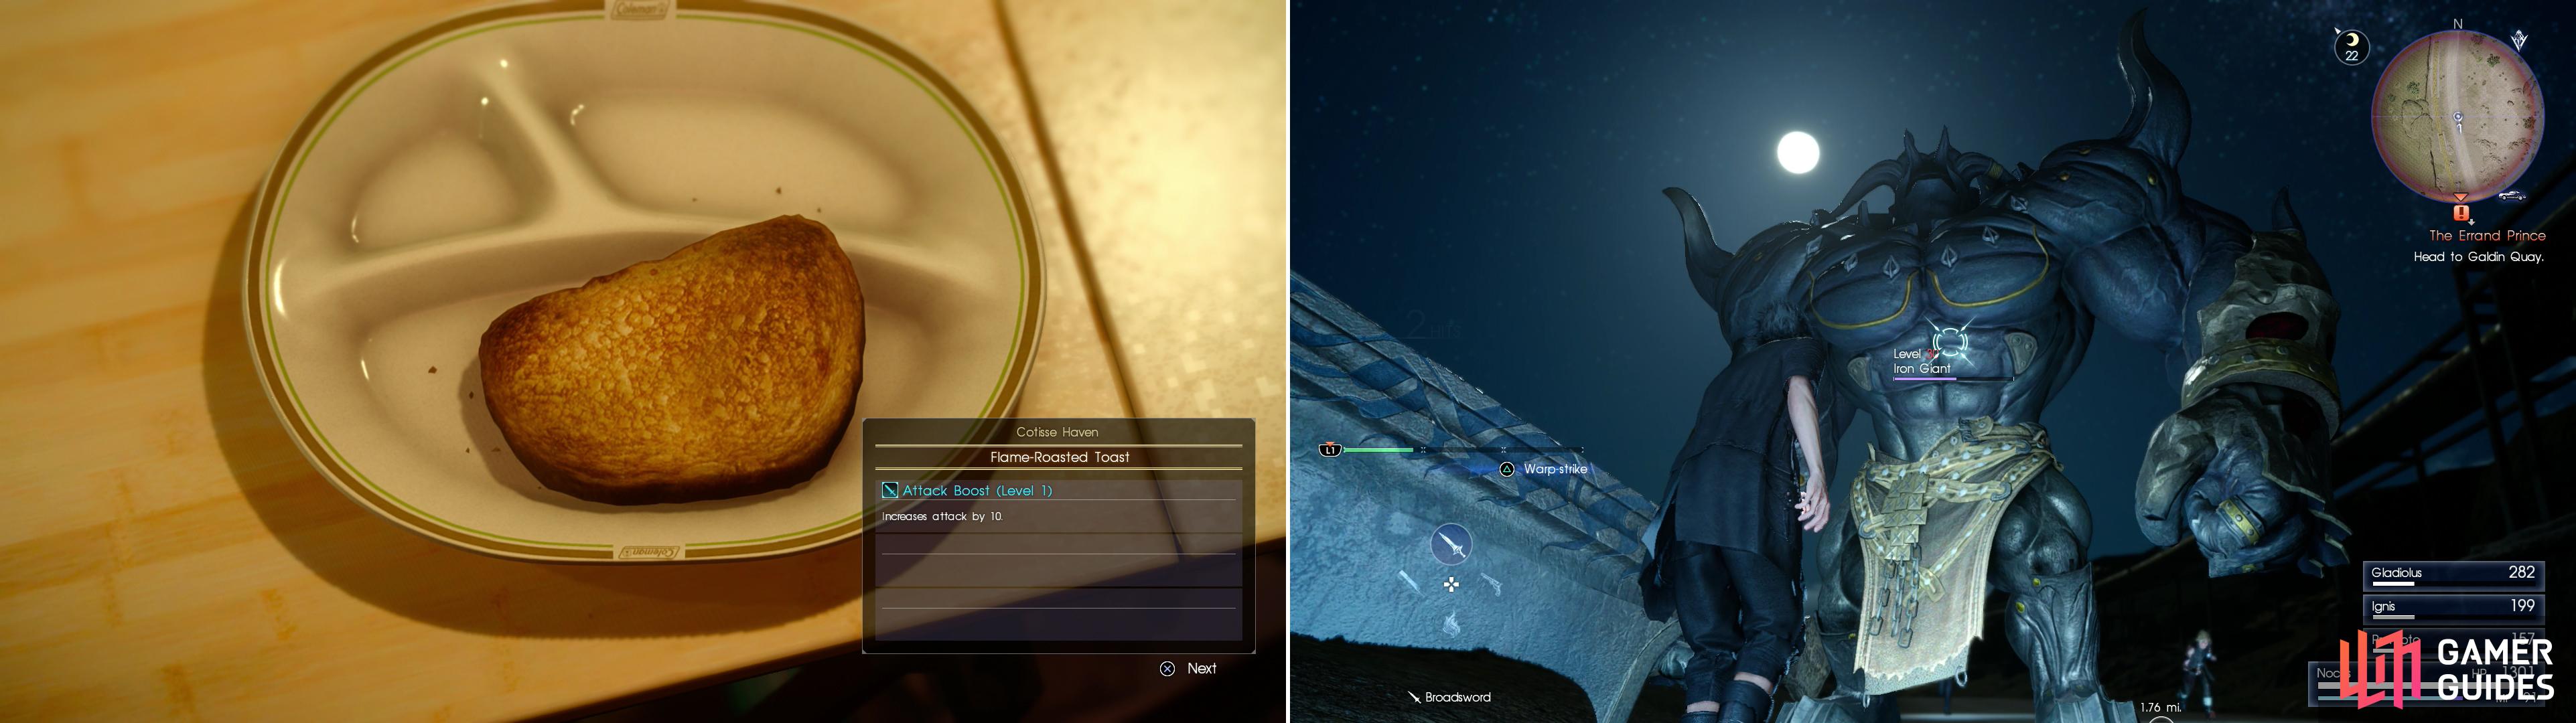
Camping will give Ignis the opportunity to prepare various foods, which give stat-boosts (left). Find somewhere safe to stay at night, as powerful daemons roam the world at night (right).
Elemancy
Ignore the haven for now and turn your attention to the strange, glowing rock formations which invariably surround each haven. Behold, elemental deposits! Go up to these stones (conveniently color-coded by element) and hold X/A to absorb the corresponding element (fire, ice, lightning). Right now you should be able to get around 35 units of each element from one deposit, but this can be improved via talents in the Ascension - Magic tree. And yes, in case you’re worried, deposits do recharge, and relatively quickly.
Of course drawing a bunch of magical energy isn’t enough - this isn’t Final Fantasy VIII, after all! To actually make use of that magic you draw you’ll need to use that elemental energy to craft spells. To do this go to the Menu - Elemancy screen, then click X/A on your Magic Flask. Each Magic Flask can store a different spell, but for now you only have one (this will change very soon).
Once done you’ll be able to select one of the three elements with your directional pad. Do so, then change the amount of elemental energy you want to use crafting a spell - the more elemental energy you use, the higher the potency of the spell is. For example, spend thirty units of fire elemental energy in crafting and you’ll get a Fire spell with a potency of thirty (the number of castings you get out of each crafting isn’t affected by how much elemental energy you use). Sufficiently increasing a spell’s potency may change that spell into an advanced form: for example, a potency 100 Fire spell becomes Fira.
You need not only use one element to craft a spell, though - if you mix ice or lightning elemental energy into a fire spell, the potency will still improve, albeit at a 2:1 ratio. In spells with two elements, the one with the most elemental energy invested determines what spell is crafted. If three elements are used, you’ll create a “Unicast” spell that randomly casts one of the three elements unless one of the three elements used outnumbers the other two combined.
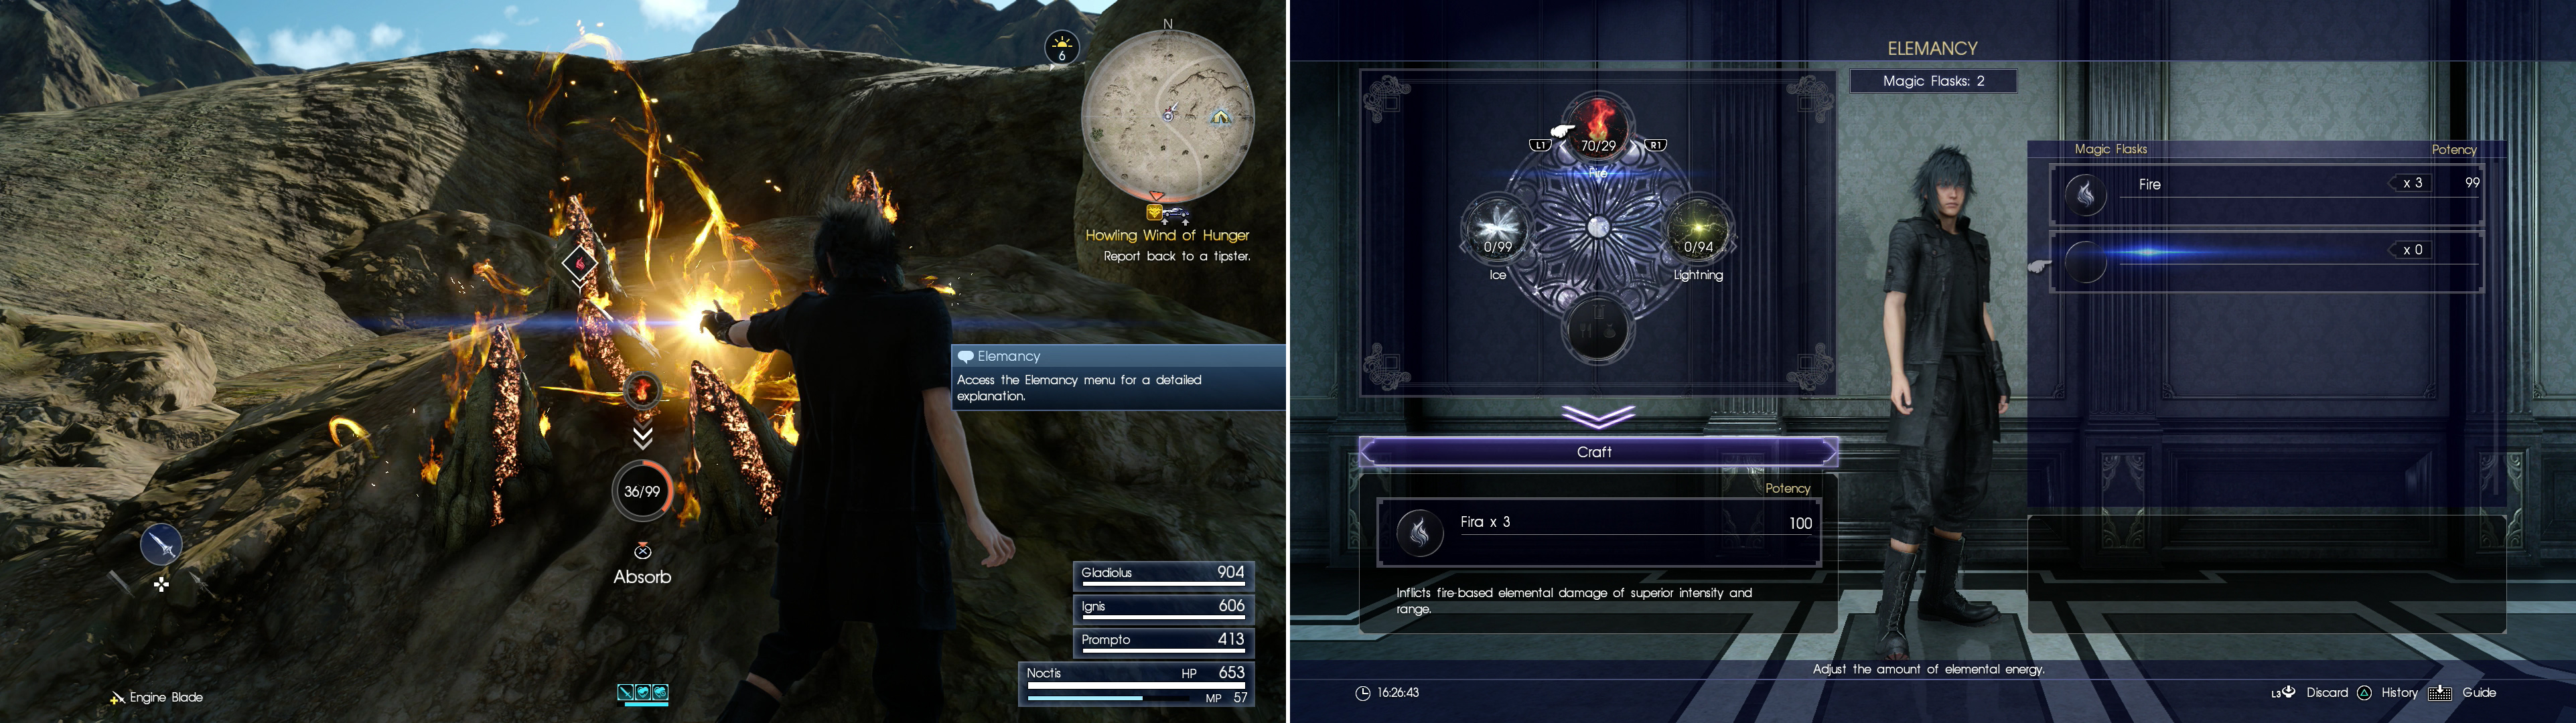
Draw elemental energy from deposits, which are usually found near havens (left), then use this energy to concoct elemental magic of varying potencies (right).
So, with all that explained, mix up a spell if you wish, and be sure to equip it. Spells are equipped like weapons, and use up one of a character’s weapon slots. Again, don’t be afraid to make spells with potencies of 30+ right out of the gate - elemental deposits recharge quickly and adorn each campsite, of which there are many.


Treasure Spots
Certainly you’re eager to get back to the Hammerhead outpost and cash in on your successful monster hunt, but why not make the return trip lucrative as well? From Cotisse Haven head south-west and you should find a Treasure Spot on your map (it’ll pop up when you get close, appearing on your map as a yellow chest icon). Head over to this icon and search the indicated spot to score a Megalixir - a potent healing item and series staple. Explore thoroughly to find Treasure Spots on the map, although be warned that not all treasure you can find lying around will come with a map marker. And yes, in case you’re wondering, Treasure Spots drop static loot and do respawn over time.
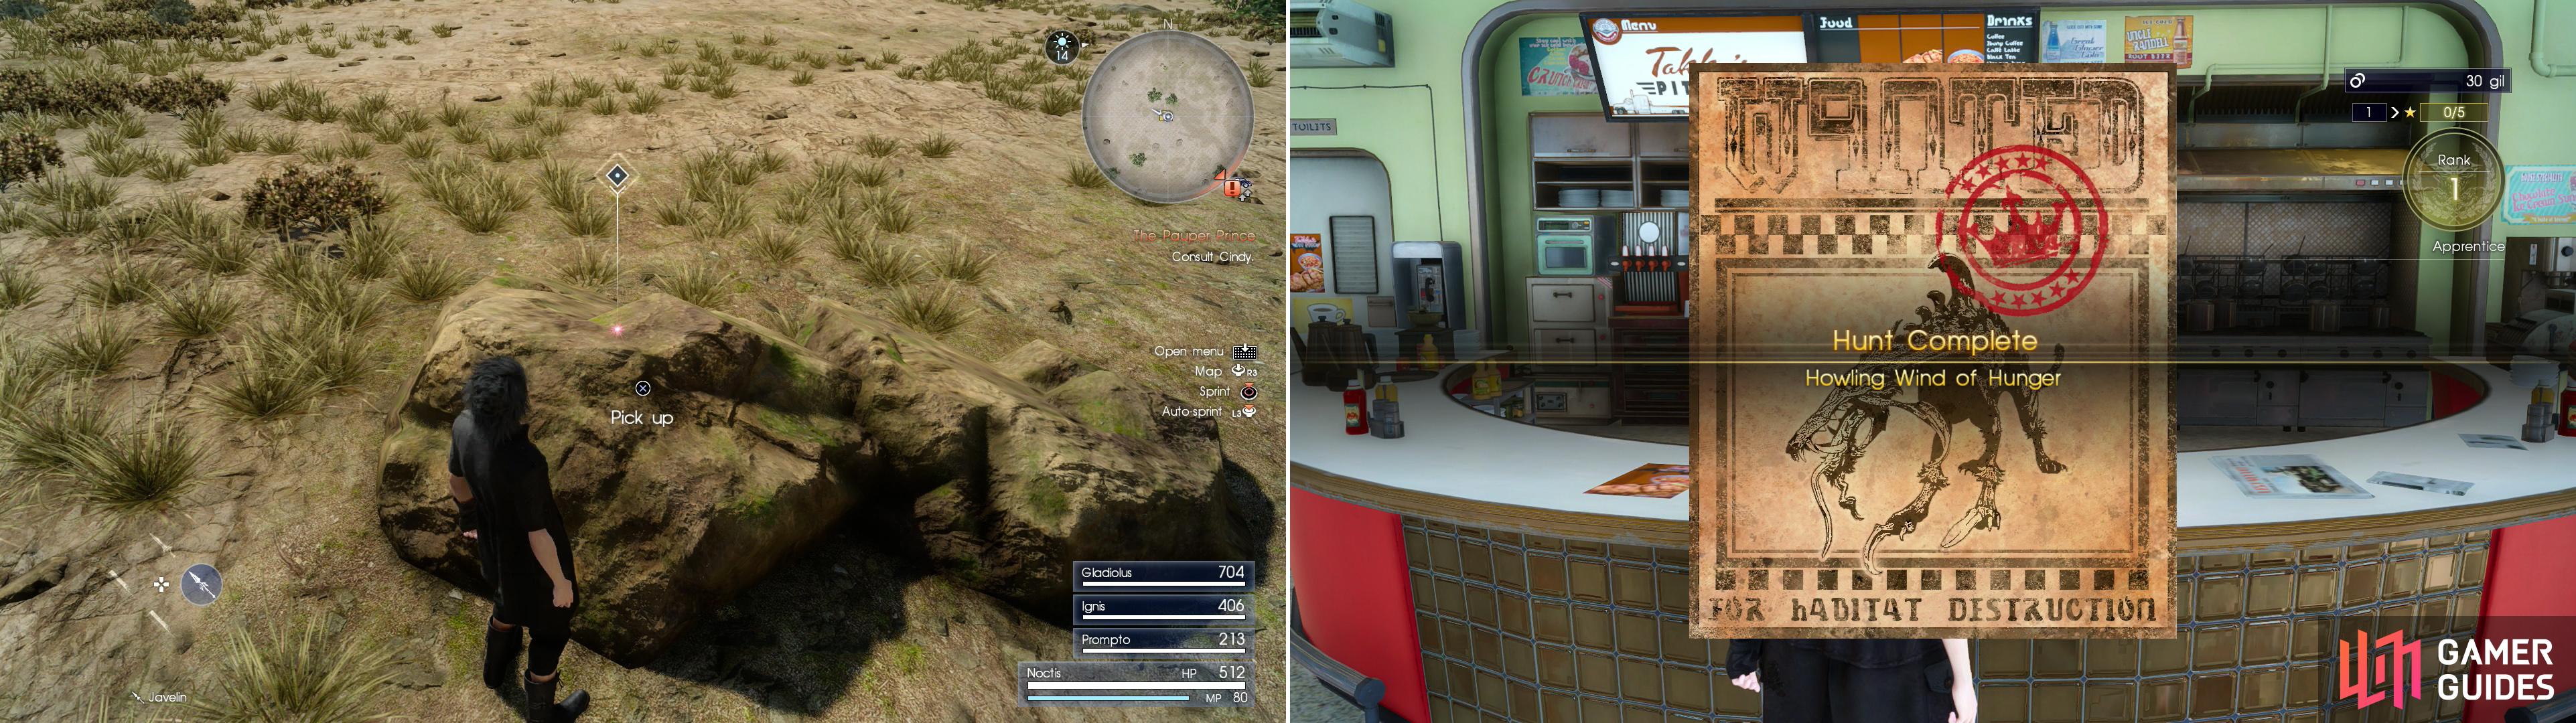
Marked Treasure Spots can be found throughout the world, providing static, respawning loot (left). When you’re done with the hunt return to Takka to claim your well-earned reward (right).
It’s time now to head back to the Hammerhead outpost and move back to the main quest. Return to Takka’s Pit Stop first, however, and claim your reward. You can do any hunts that catch your fancy, and they’ll be pointed out as you come across them in the walkthrough. For more detailed information about each hunt, however, check out the “Hunts” section of the guide.
| Objective | Reward |
|---|---|
| For completing the hunt | 1 Star, 740 Gil, Hi-Elixir |


 Sign up
No Comments