

The Professors Protégé - Griffon
The next place you’ll find Sania waiting for you is the Coernix Station - Cauthess. Talk to her to pick up her next request, which is relatively simple. This time she needs a Griffon Feather, and there are two places you can get one. First, the route the quest will advocate directs you back to the Tostwell Grill restaurant in Lestallum, where you can pick up the hunt “Ruler of the Brave Skies”, the target of which, of course, is a Griffon. Make your way to where the Griffon dwells, which is west of the Aracheole Stronghold, east of the Wainterre Haven Campground, slay the beast and collect its feather to appease Sania.
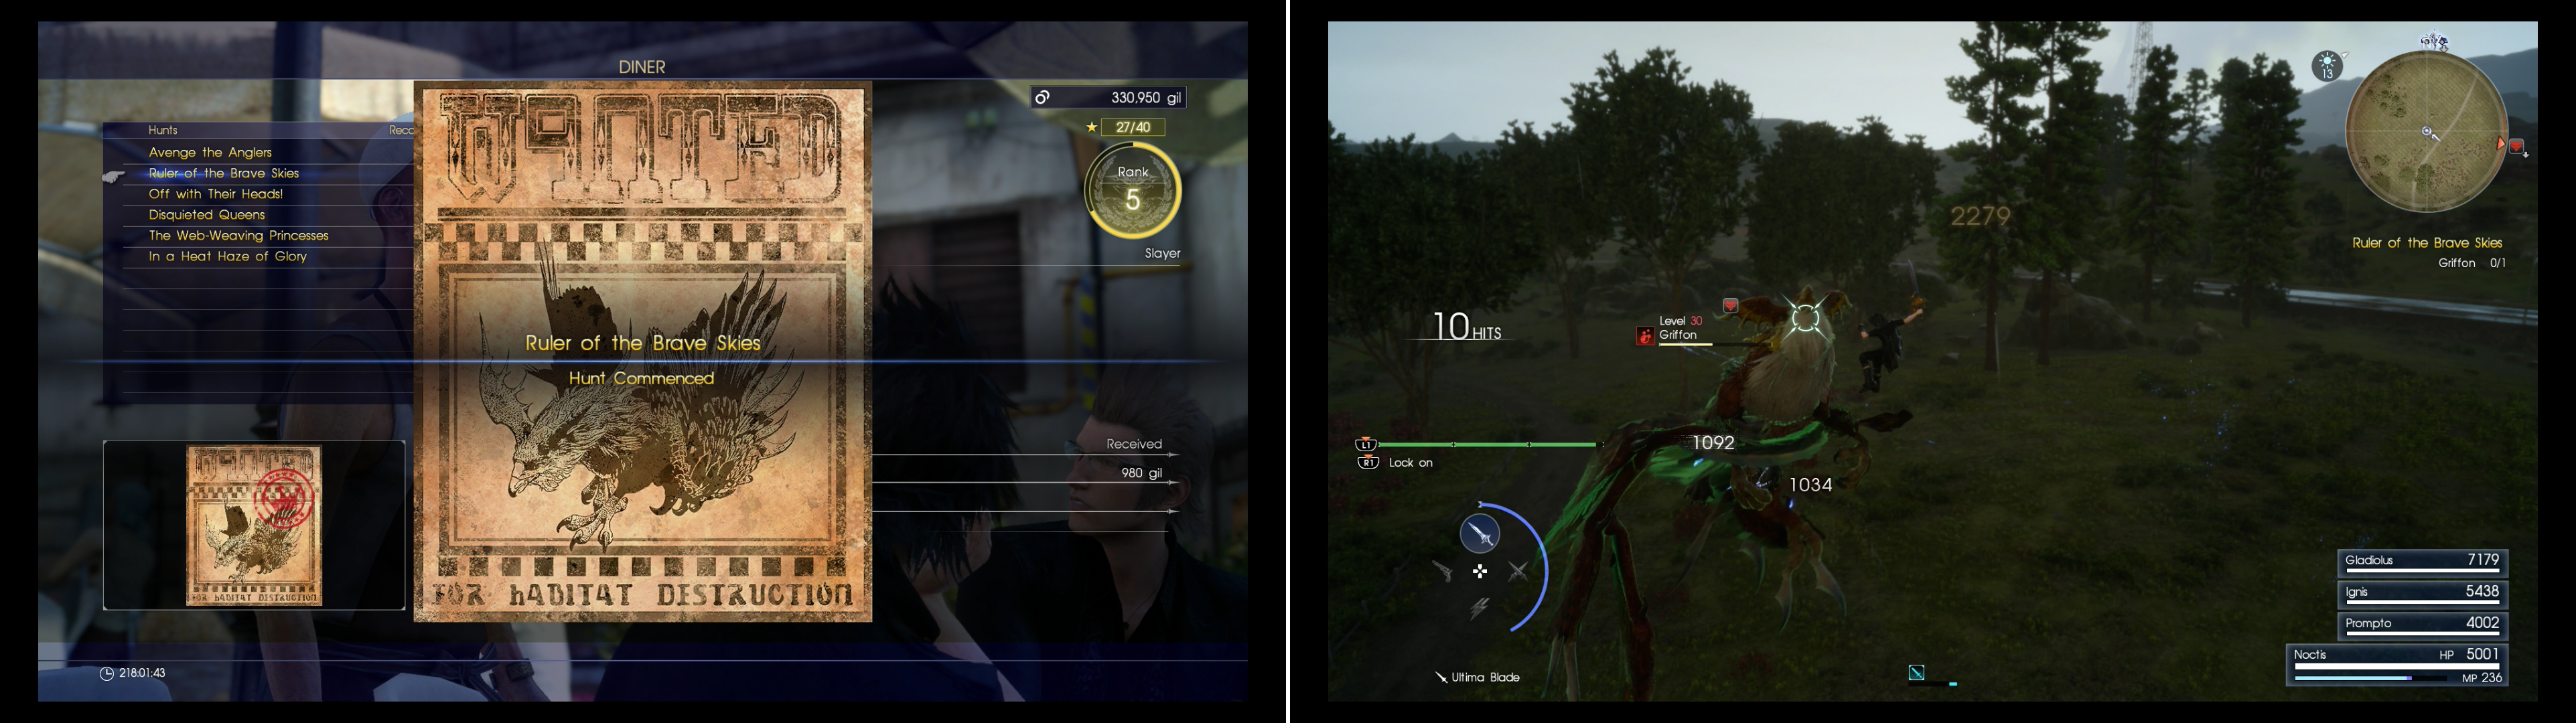
Pick up the hunt “Ruler of the Brave Skies” to challenge a Griffon (left). Fighting a Griffon can easily become an aerial duel between Noctis and the beast (right).
If your Hunter Rank isn’t quite up to snuff, however, you still have an option. Make your way to the Coernix Station - Alstor and from there head north until you reach the northern boundary of Duscae, at which turn west and follow the various rock formations and fences that keep you at bay. Eventually, near (south of) where you touched the second runestone during the quest “The Trial of Ramuh” you’ll find a clearing where a Griffon prowls. This one is stronger than the hunt version, but Sania doesn’t care where you get the Griffon Feather from.
| Objective | Reward |
|---|---|
| For giving Sania a Griffon Feather | EXP 12,000 / Safety Bit |
The Frogs of Legend
However you manage it, get your Griffon Feather and return to Sania for another hefty experience reward, then travel back to the Meldacio Hunter HQ, where you’ll find Sania waiting again in her customary spot. She’s got one more mission for you, and you’re back to collecting frogs again - rainbow frogs. This time, however, she has no leads for you, no quest markers to guide you, nothing more than the fact that they’re near water. It’s the kind of quest that really begs for a guide, no?
Vesperpool Rainbow Frog
There’s one frog in The Vesperpool, so you might as well go grab that one while you’re here. Make your way to The Vesperpool - West Bank Fishing Spot and from there head north-west to find a small “island” upon which a Rainbow Frog resides.

Find the first Rainbow Frog near The Vesperpool - West Bank Fishing Spot (left) at the area indicated on the map (right).
Saxham Reservoir Rainbow Frog
To get the next two Rainbow Frogs you’ll have to make your way back to Duscae, more specifically to the Saxham Reservoir Fishing Spot, which is, of course, near the Saxham Outpost on your map. Despite the name, Saxham Outpost isn’t actually an “outpost” (as in a place you can travel to), but traveling to the Coernix Station - Cauthess and heading south, then south-west at the fork will get you in the area. From the Saxham Reservoir Fishing Spot head east around the northern end of the pond until you find a water tower just north-east of the pond. From there, head south-west over a fence to find the second Rainbow Frog, near a boulder.
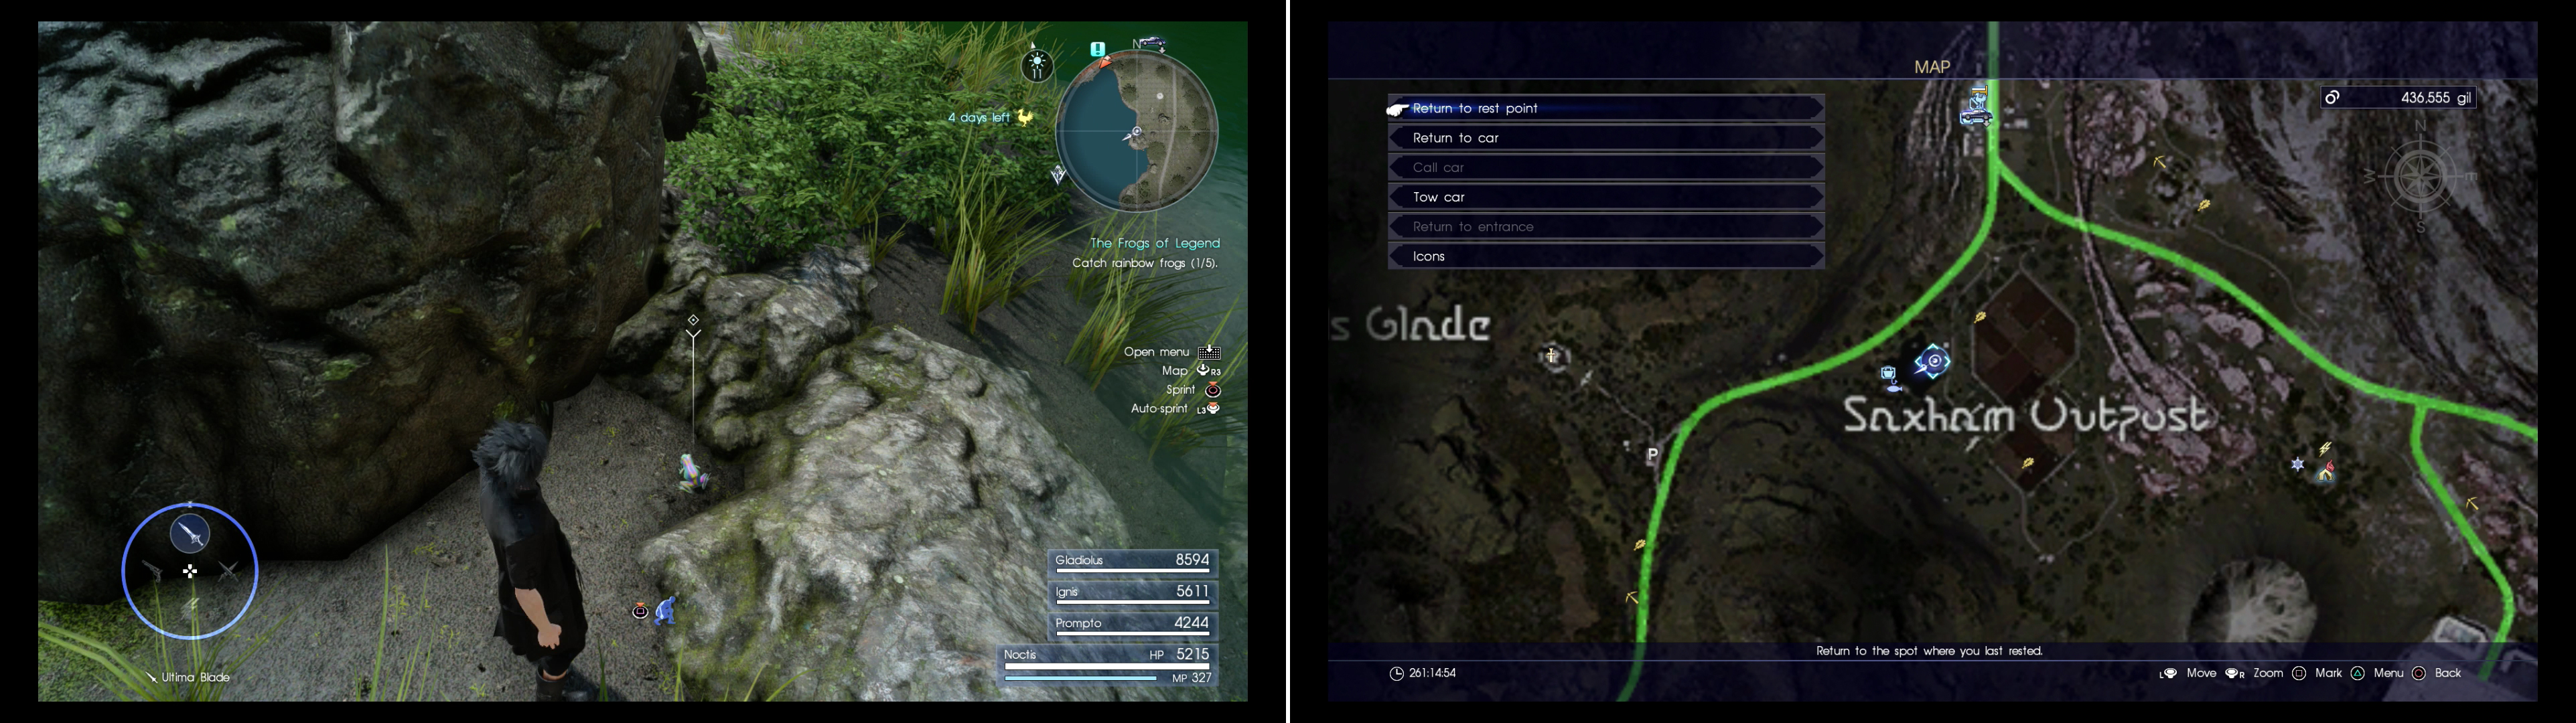
On the eastern shore of the pond west of the Saxham Outpost you’ll find the second Rainbow Frog (left) at the indicated spot on the map (right).
Alstor Slough Rainbow Frog
Froggy number three is also in Duscae, in a habitat where you hunted frogs earlier - the Alstor Slough. Another Fishing Spot - the Neeglyss Towerfront Fishing Spot - makes fine place to start from, so travel there by whatever means you find most expedient, then head south-west along the shore of Neeglyss Pond. You should shortly spot a water tower between Neeglyss Pond and another, smaller body of water, notable for the massive stone arches that terminate along its northern shore. From this water tower continue south-west to the edge of the water and run between a fence and the until you reach some trees. Search between the waterline and the trees to find the third Rainbow Frog chilling under a tree somewhat near the base of the stone arch.
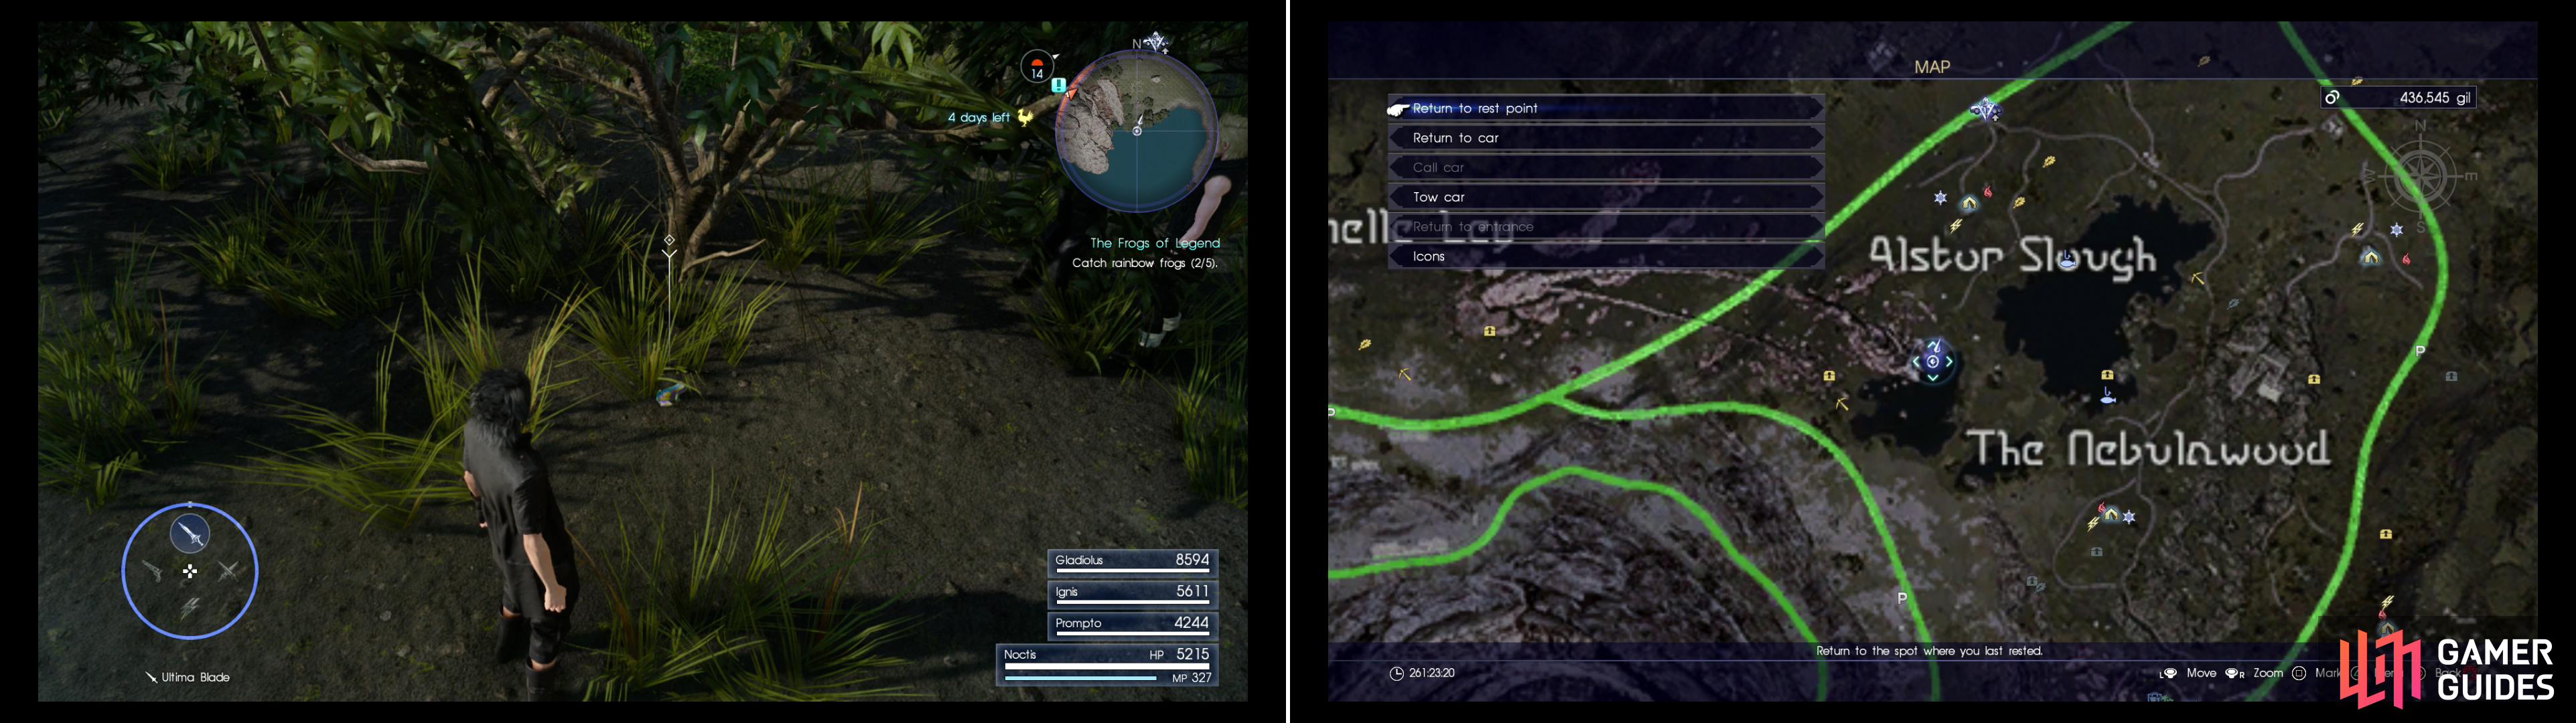
Search under a bush on the shore of the pond west of Neeglyss Pond to find the third Rainbow Frog (left) at the area indicated on the map (right).
Wennath Fork Rainbow Frog
The next amphibian is a bit tricky, as there aren’t many map markers near it. Geography, however, will help you just fine, and it’s highway adjacent, so… there’s that. Travel to The Maidenwater Parking Spot (at the beginning of the Ravatoghan Trail) and from there walk/drive/ride back east until you reach a fork.
At this point the Regalia will be of no further use to you in your task to find the fourth Rainbow Frog, so ditch and note another water tower to the north-east. What? They make good landmarks! Jump the guard rail (further north the smaller guard rail will be replaced by a larger, impassible guard rail) and make your way east to the river. Follow the rocky coast north, killing any oversized fauna you might come across and, just south of where the river splits on the western side of the river, start looking for the Rainbow Frog. You’ll find it near a boulder along the shore, in a V-shaped depression.
The fourth Rainbow Frog can be found along the western shore of the Wennath River, near the fork in the river (left), at the indicated spot on the map (right).
Fort Vaullerey Rainbow Frog
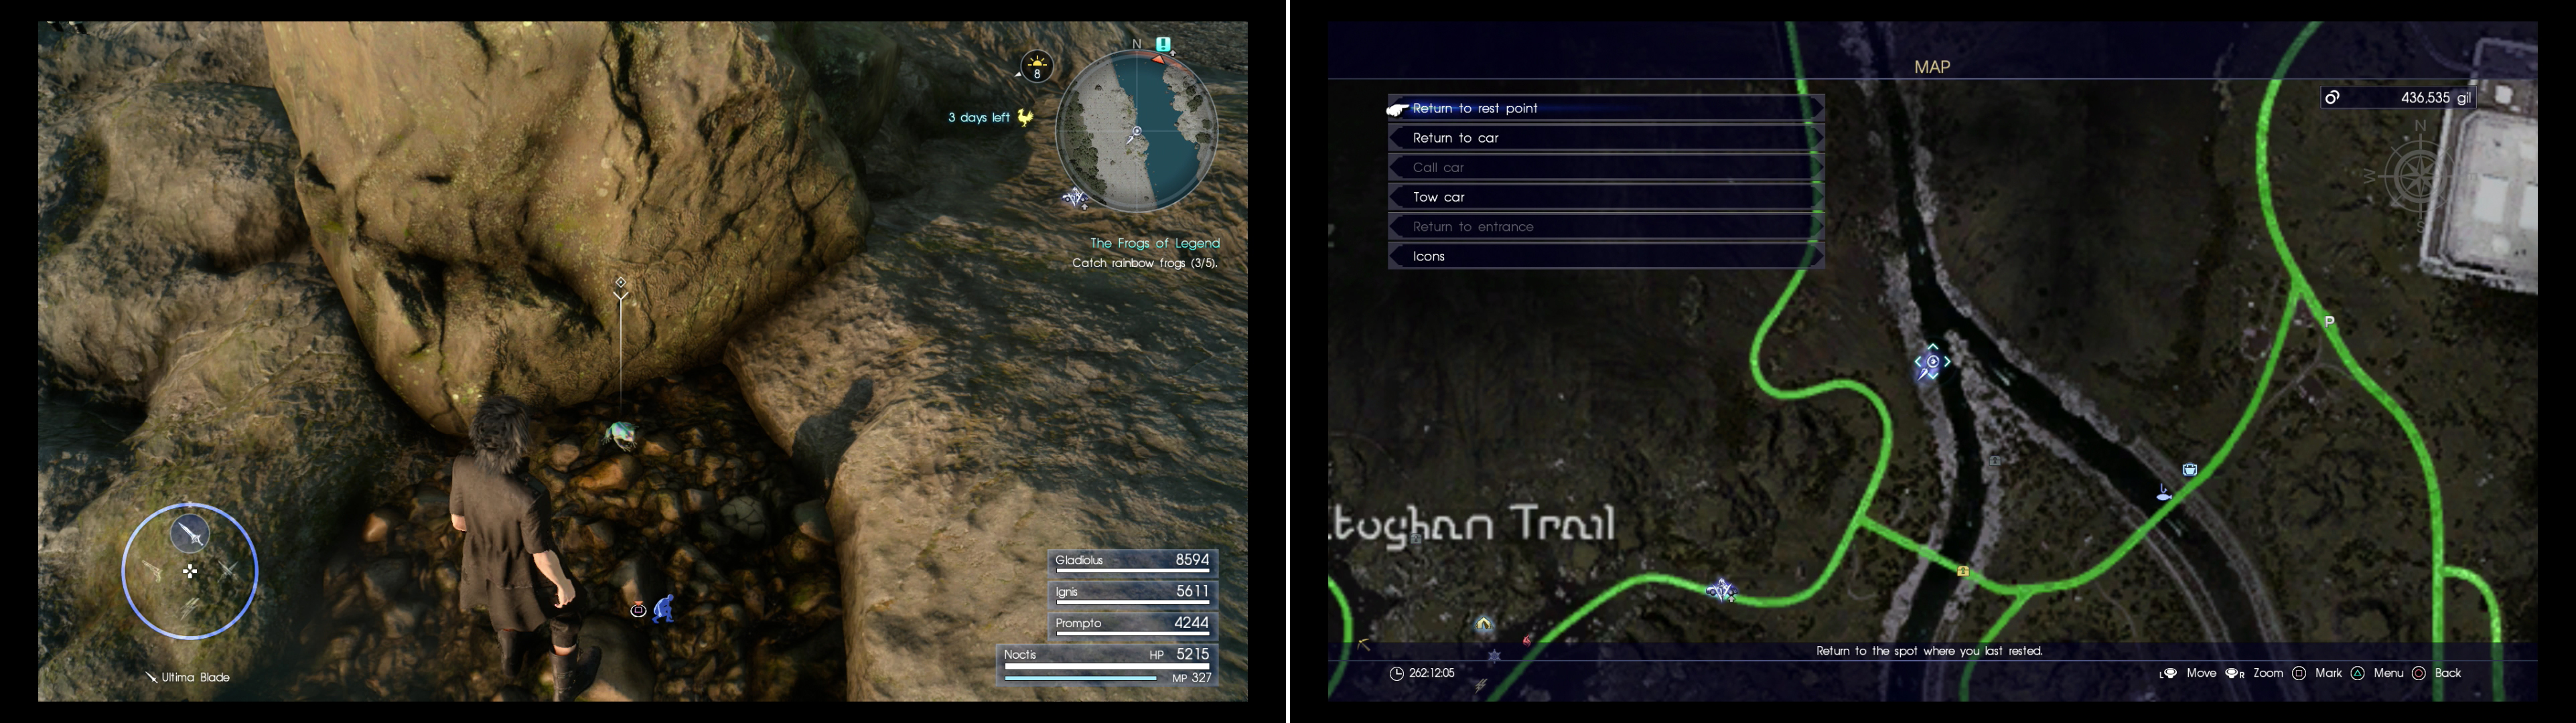
Four down, one to go. Get back to the Regalia and travel south to the Fort Vaullerey Parking Spot, then walk, ride a Chocobo or drive the Regalia further south until you’re flush with the southern edge of Fort Vaullerey. At this point turn west and leap the guard rail, abandoning the highway once again in favor of the river to the west. When you reach the coast turn north and follow the river until you find a boulder, near which the final frog lurks, between the boulder and the water, in sight of the dyke further to the north.
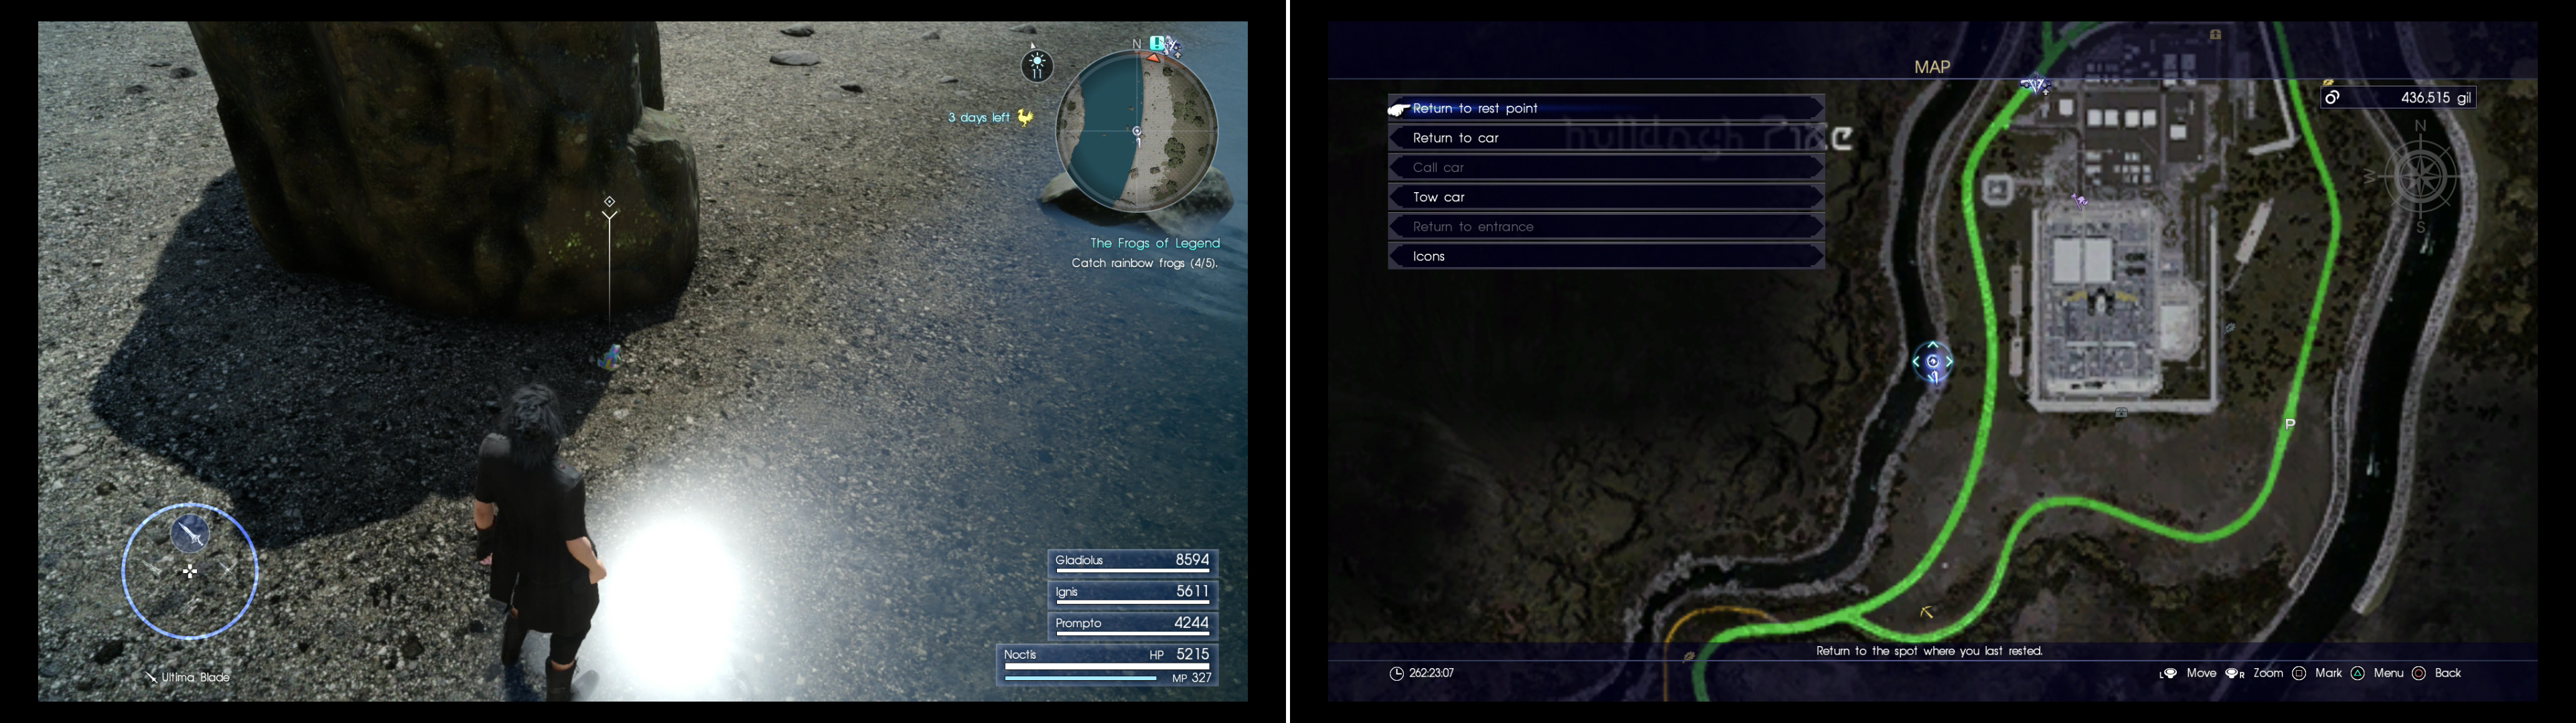
In the shadow of a boulder along the river west of Fort Vaullerey you’ll find the final Rainbow Frog (left) at the indicated area on the map (right).
Collect the fifth and final Rainbow Frog and return back to Sania, who will make all this work well worth your time with this final quest reward. As usual it includes a silly amount of experience, but worth so much more than that is the Ribbon she gives you. Long time Final Fantasy fans will recognize - and rightfully covet - this wondrous accessory, which makes its wearer immune to (almost) all status effects. It should go without saying that this item will be a huge boon to you for the rest of the game.
| Objective | Reward |
|---|---|
| For finding five Rainbow Frogs | EXP 15,000 / Ribbon |
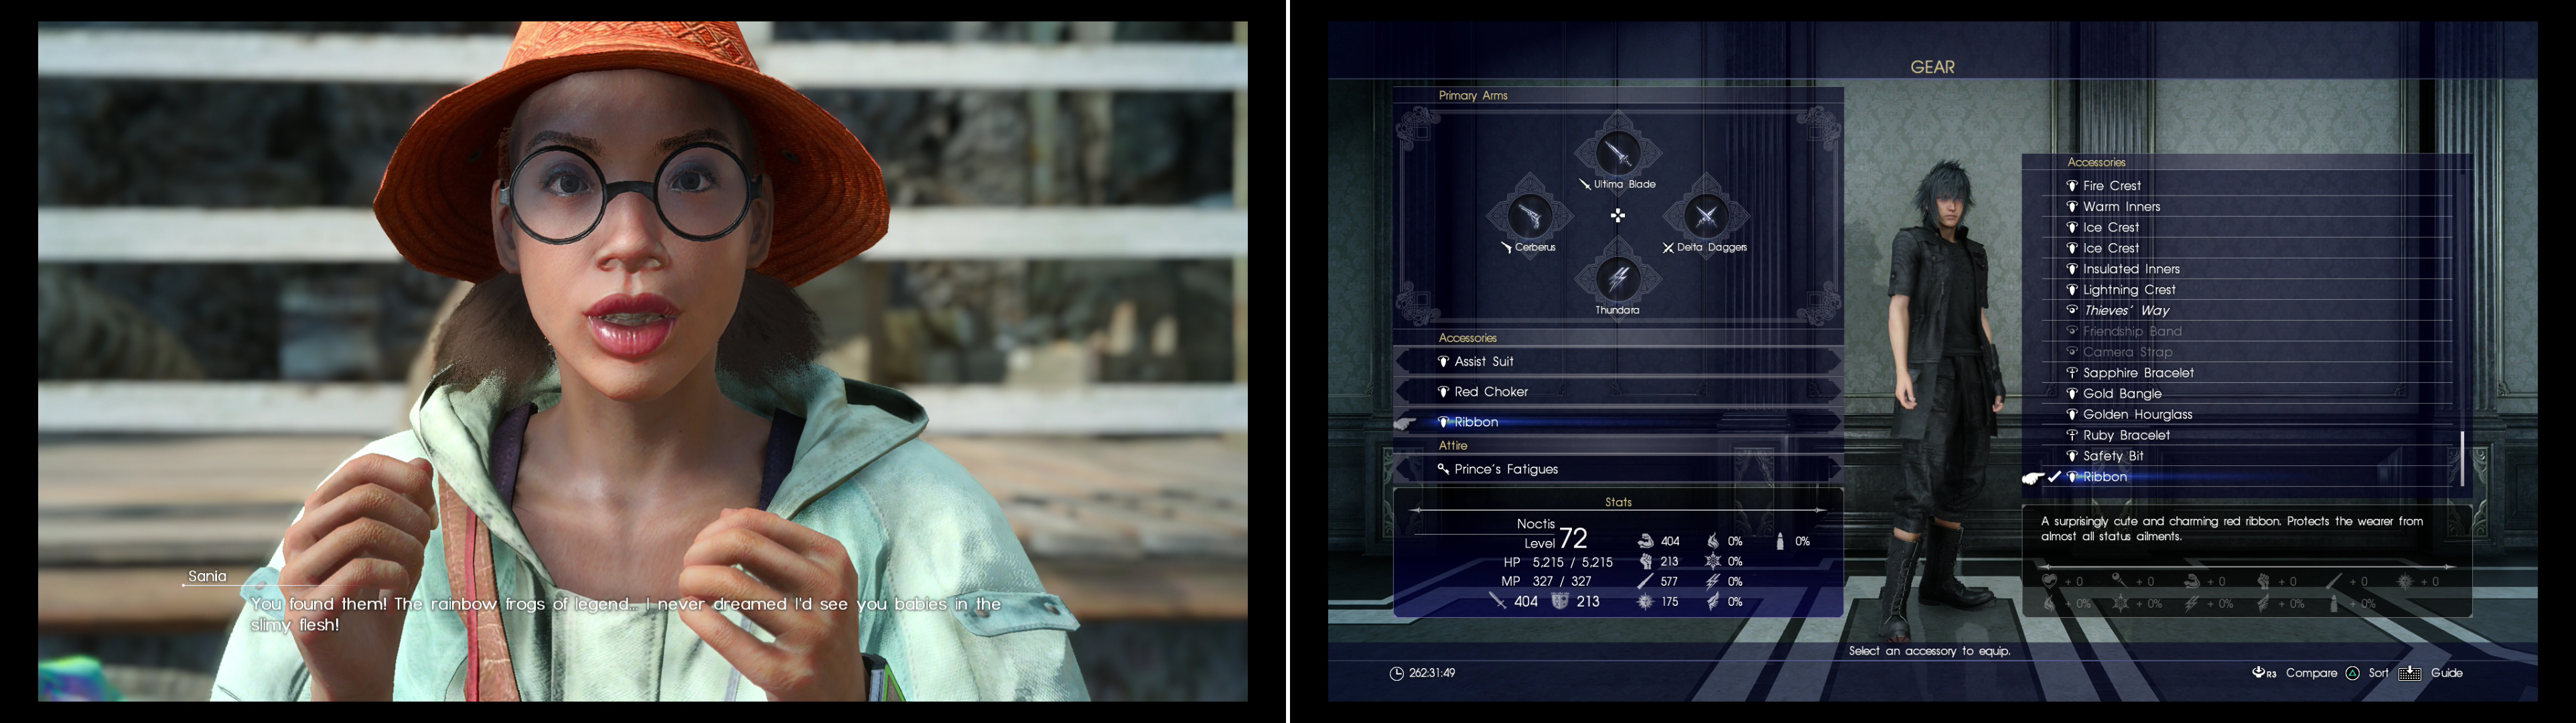
Catch all five Rainbow Frogs and Sania will be delighted (left). So should you be, as your reward - a Ribbon - is a prize worth coveting (right).
No Comments