


Fast travel to the Yarikawa Stronghold and look for Taka to begin this mission. Taka is worried about the Mongols, but Jin assures him that they won’t attack until tomorrow. He also mentions that Yuna is looking for you and is in the keep. She is at the top, so head inside the building at the top of the hill and climb the ladders. There will be a cutscene here, then at the end of it, you will be going into battle. Run to the main gate and get ready for the Mongols that will be coming through it. You will be facing a mix of both blue and yellow-tiered ones, but there doesn’t seem to be any archers in the mix and you will have plenty of help on your side.
You never know when you’ll get hit by a stray arrow
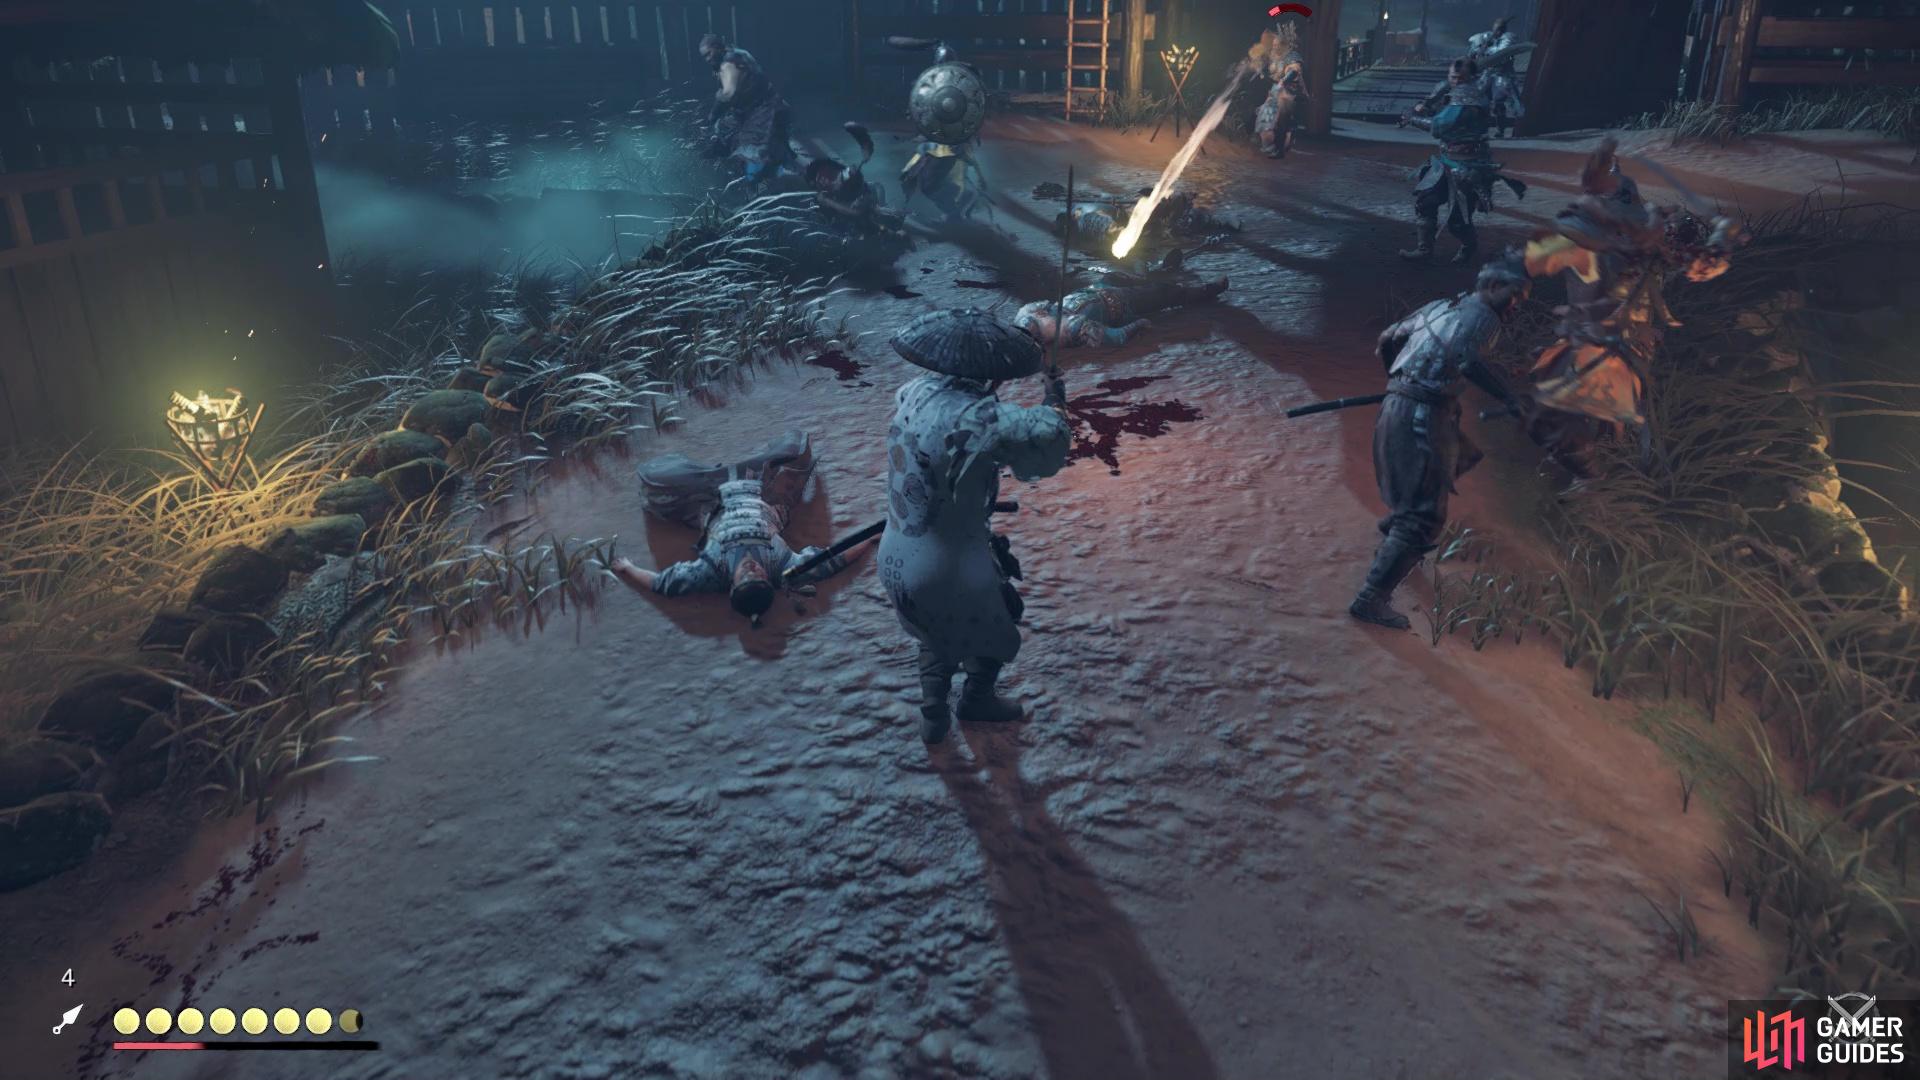
Once you clear the enemies attacking the main gate, you will receive a report that they are breaking through the other gate. While facing the main gate, it will be to the right and you will start seeing archers coming through now. They should be your first priority, as getting hit with a stray arrow (especially a fire one) can be deadly on harder difficulties and it’s also annoying. Keep fighting the Mongols, with some more crossing the bridge, and upon finishing them all off, you will witness a small scene of them retreating. Of course, this will cause the Mongols to begin using siege weapons on Yarikawa, so it’s up to you to stop them.
For this part, you might want to stay hidden, as there are a lot of Mongols in the camp outside the walls. Should you be found out, you will be fighting a lot of enemies, so staying in the shadows is the best option. Once you make it past all of the Mongols, look for the hill that will lead up to the siege weapons, noting there are a few Mongols on said incline. At the top, you will find out that each siege weapon is being guarded by a handful of Mongols, so things aren’t going to be easy on your end. You could try to be stealthy here, if you want, but the placement of the Mongols will make that challenging and you will likely be seen.
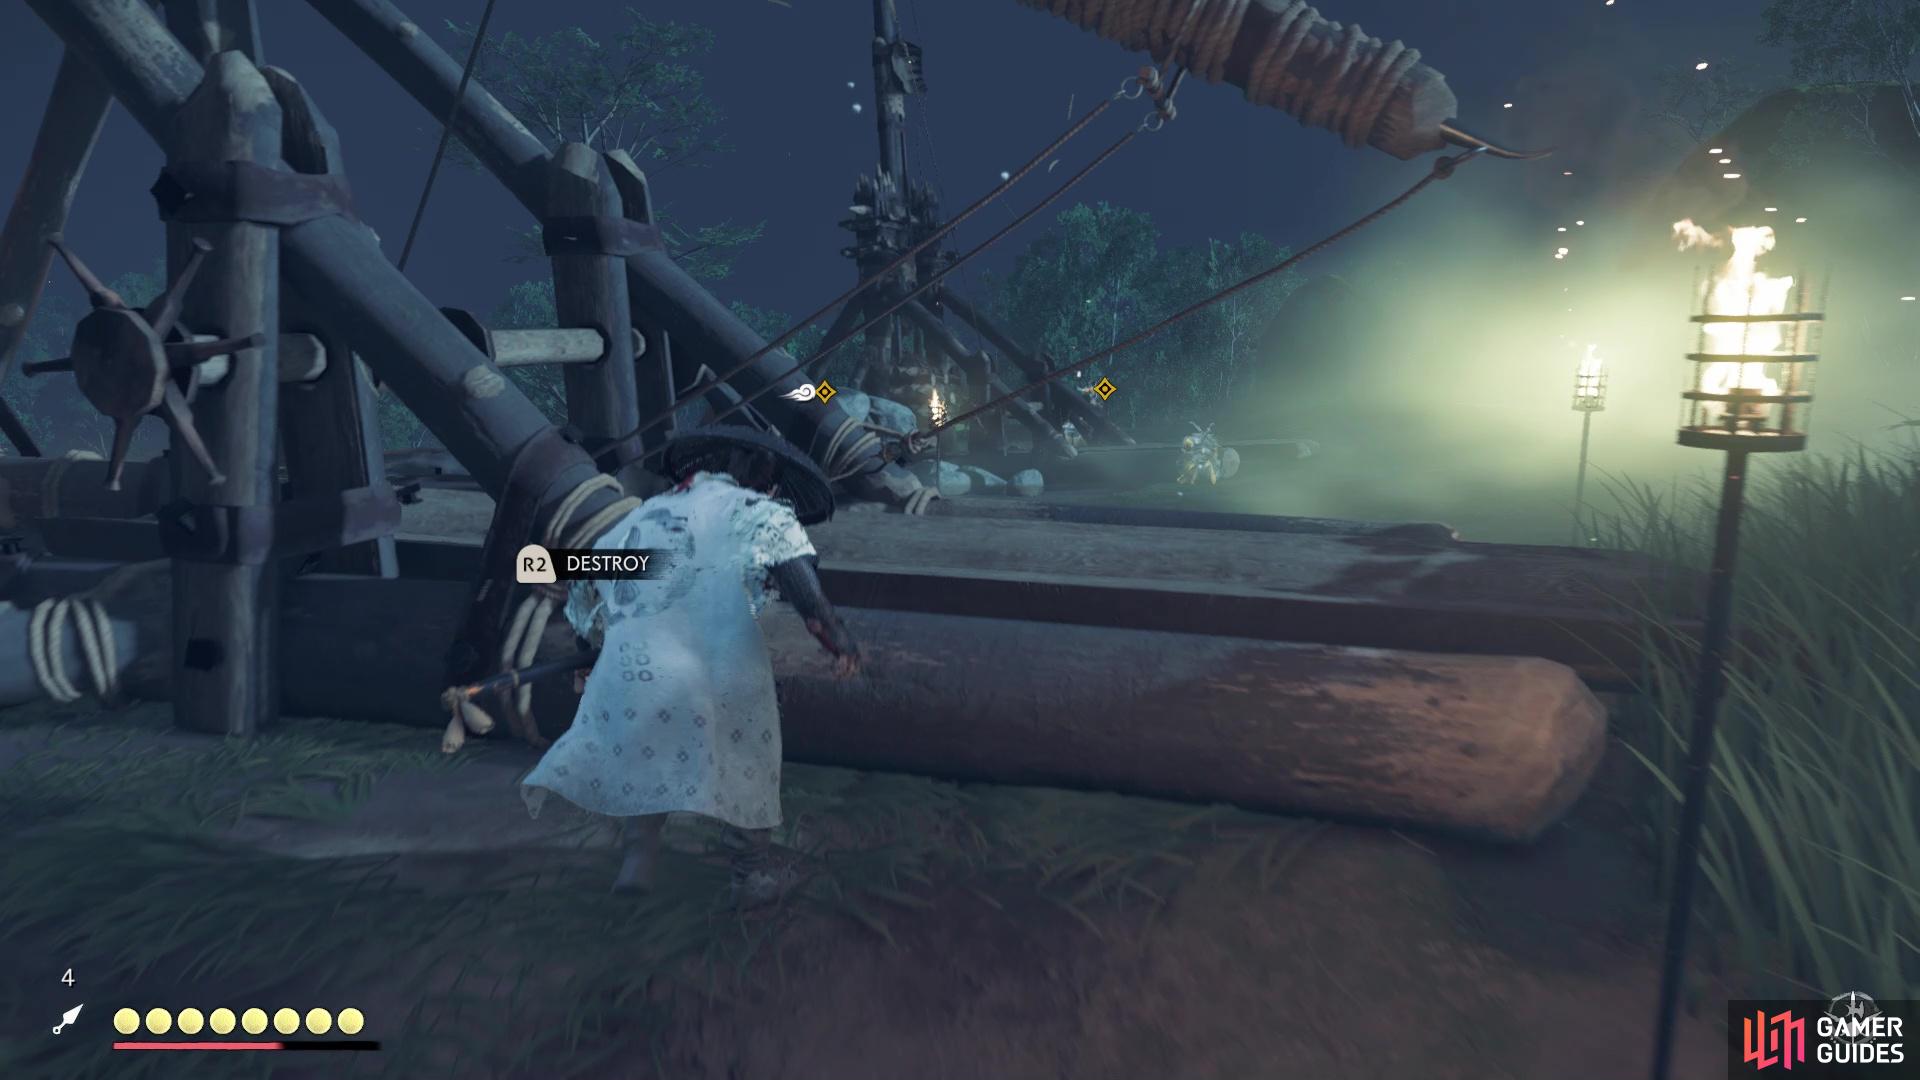
The button prompt to destroy the siege weapons are on the side of them
As always, go after the archers first, then you can concentrate on the other Mongols. When you’ve cleared the area, approach the siege weapon from the side to get a prompt to destroy it. Do the same with the second siege weapon, then it’s time to return to Yarikawa. There will be a lot of Mongols in your way, so you can fight them if you want, but that entirely depends on you. As you enter the stronghold, your goal is to reach the keep, but plenty of Mongols will hinder your progress. One thing you want to do is have your Resolve filled out. Approach the marked gate and go through it, then get ready for a duel.
DUEL - General Temuge
First and foremost, use Water Stance on Temuge, as he wields a shield. Compared to other duels you might have done recently, Temuge is not as difficult. If he’s anything that you’ve faced thus far, he can be similar to a yellow-tiered shieldman, as Temuge will set his sword on fire throughout the battle. When he does this, all of his sword attacks will be unblockable, so you will have to dodge out of the way. He also has that annoying regular attack, followed by an unblockable shield bash, which can be hard to judge as it’s a very quick follow-up.
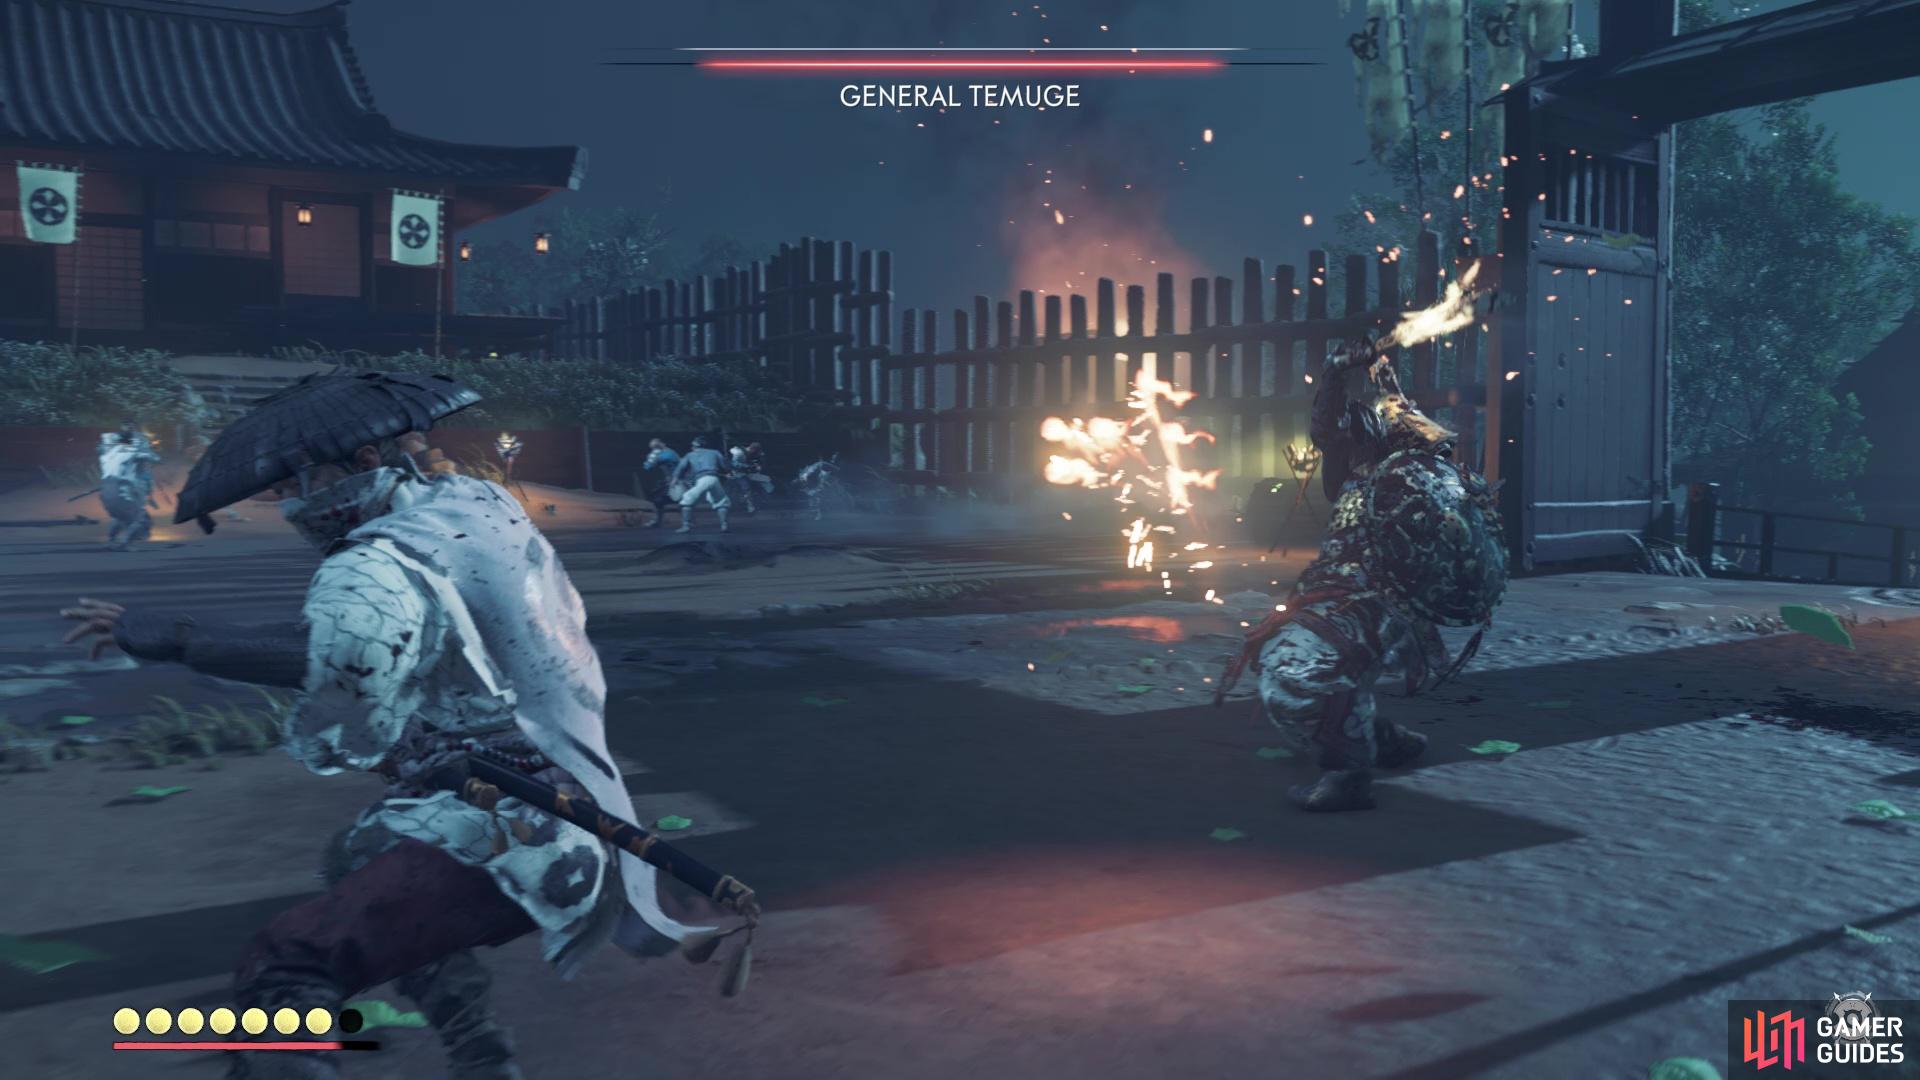
The flaming pieces of debris Temuge kicks up can set you on fire
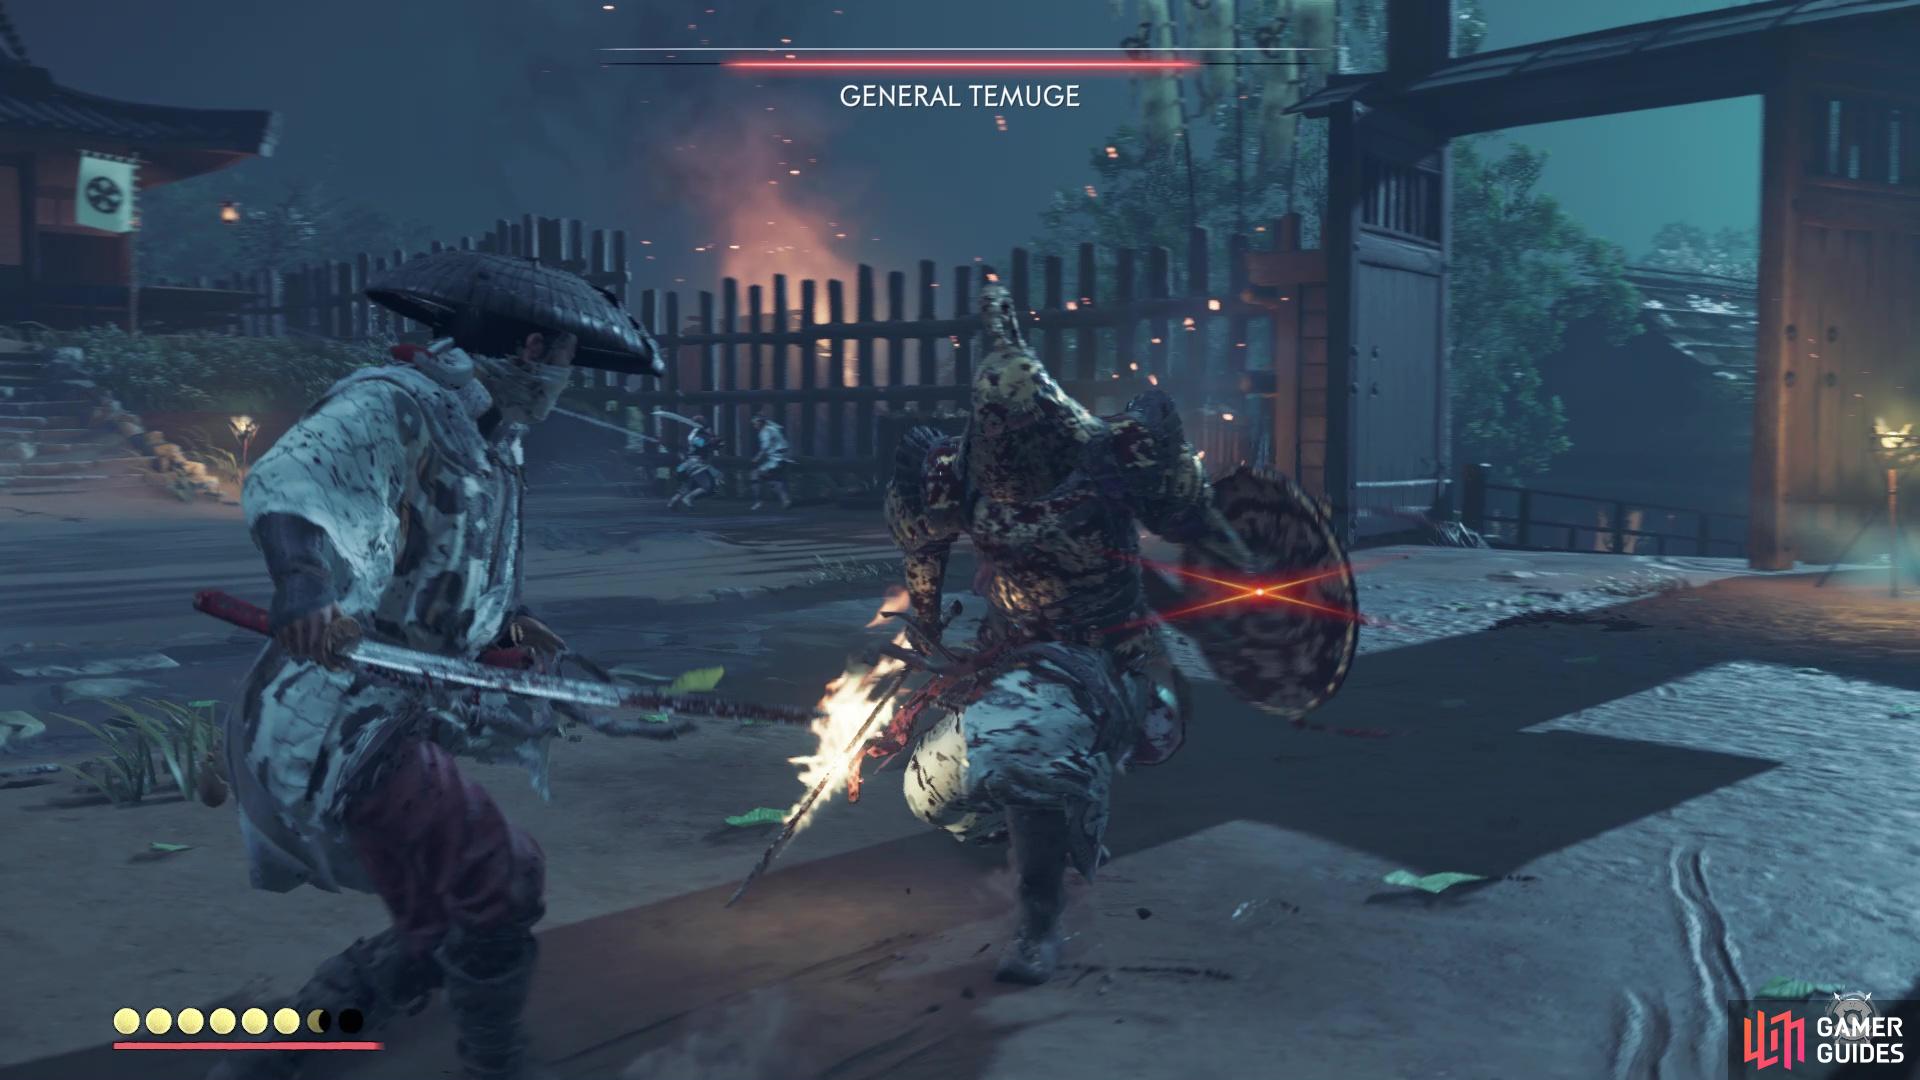
Always keep a lookout for the shield bash, as it’s unblockable
By far, the most dangerous (and deceptive) combo comes when Temuge’s sword is on fire. He does two normal swings of the sword, then the third hit will kick up some little pieces of fire that can light you on fire. Dodging to either side will help in not getting hit from this, so if you see two sword swings in a row when the sword is ablaze, that’s your cue to dodge. Outside of the above attacks, it shouldn’t take too long in bringing Temuge’s health to nothing at all.
Upon winning the duel, you will get a prompt to Slaughter Temuge, unlocking the Ghost Stance for Jin. This is shown in the bottom right corner of the screen and is not like the other stances you’ve been playing with up until now. The only way to use Ghost Stance is by either slaughtering a Mongol leader or killing seven enemies in a row without taking damage at all. When the meter is full in the bottom right, press both L3 + R3 to trigger Ghost Stance. The screen will go white and you will be able to one-hit kill up to three enemies before returning to normal.
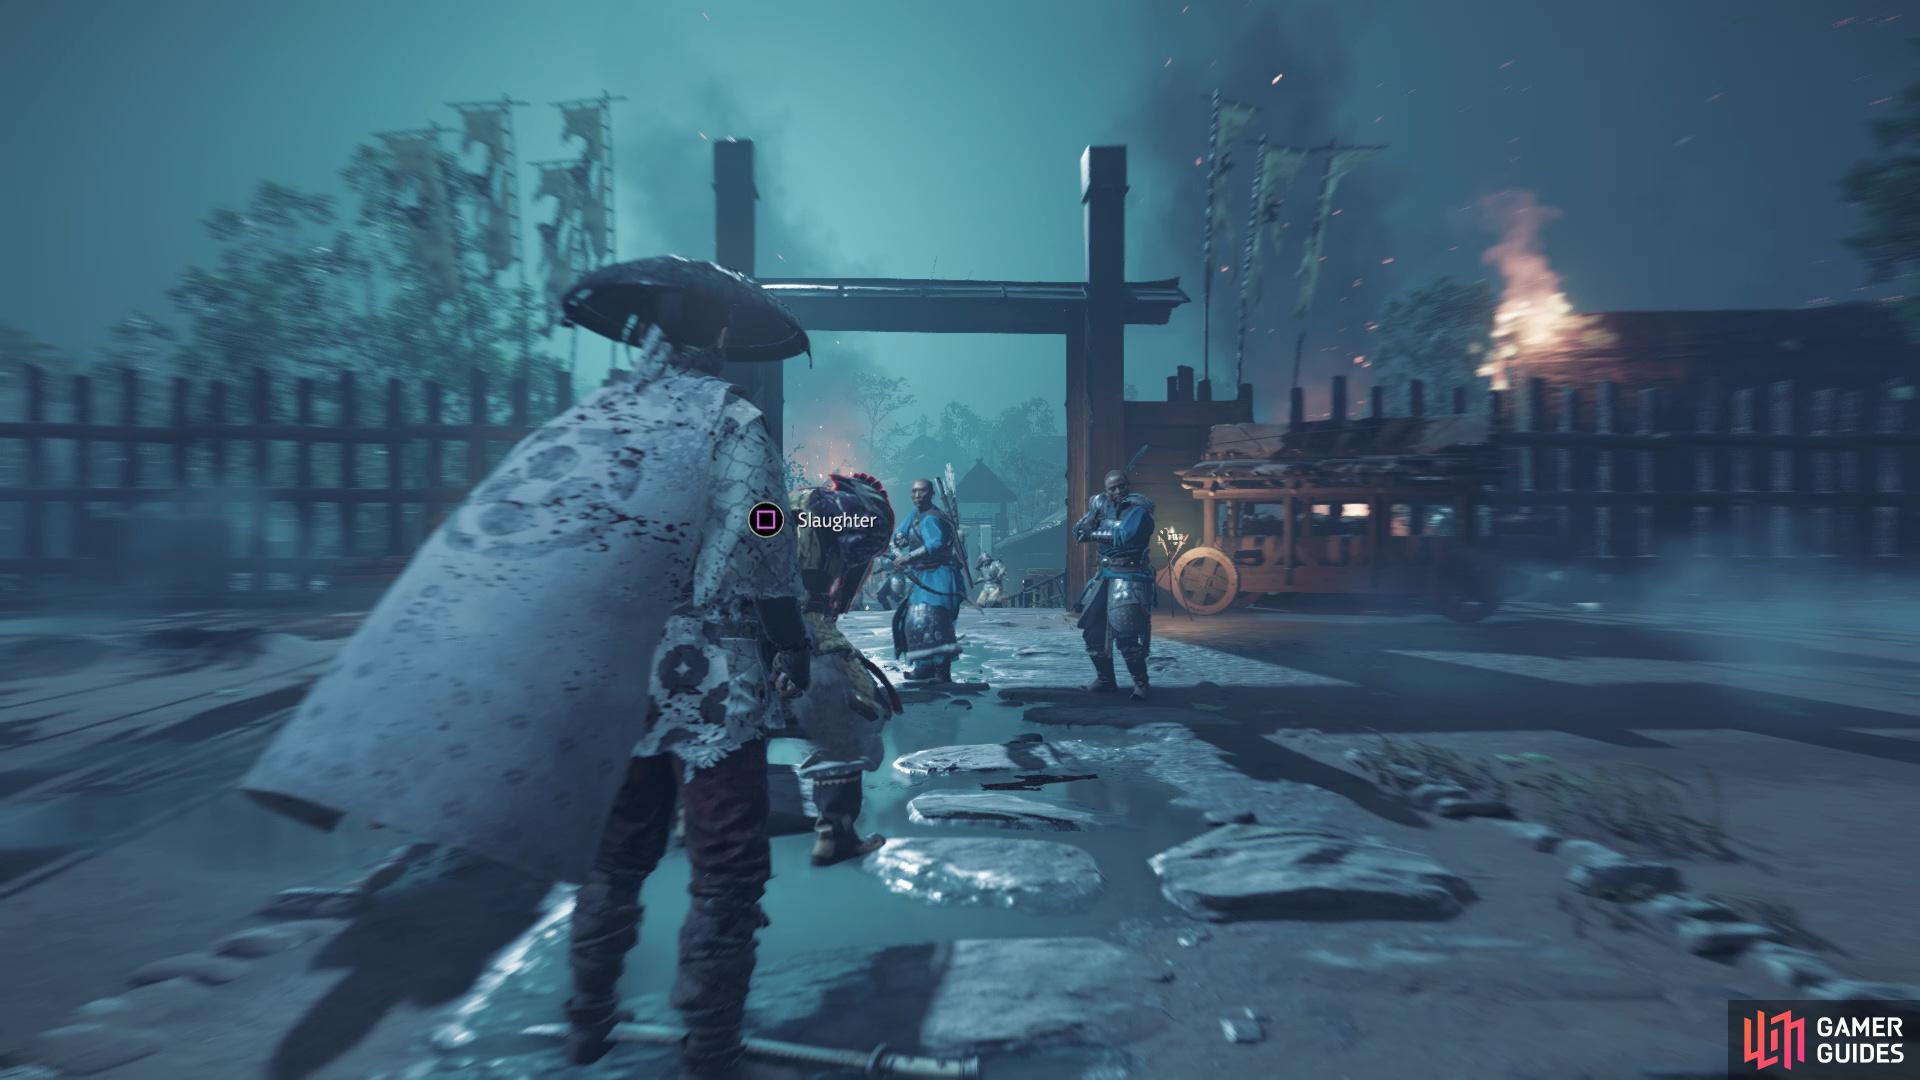
Slaughtering Temuge will unlock Ghost Mode
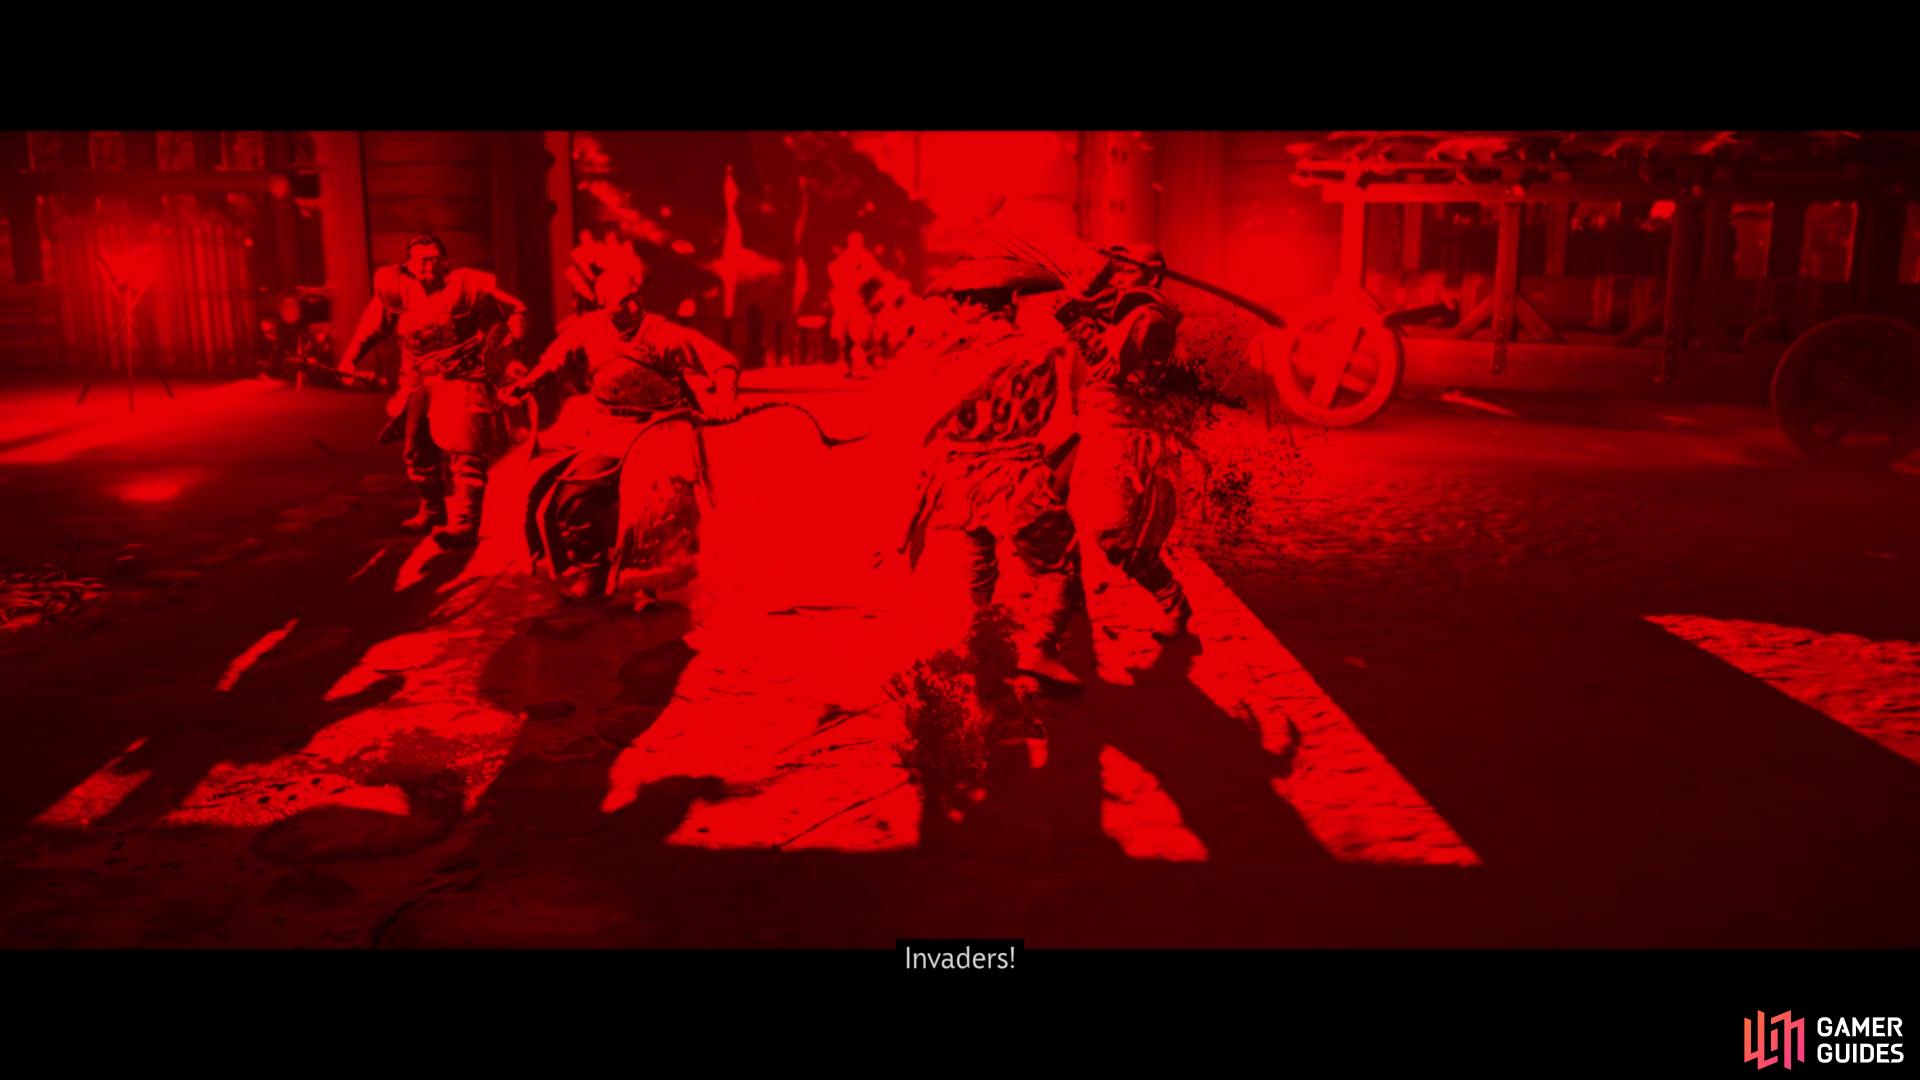
allowing you to one-hit kill a certain number of enemies
The Mongols will be running in fear, so it’s time to drive the Mongols away from Yarikawa for good. There will be some that put up a fight, but for right now, all strikes are lethal, so the battles will be short. Upon driving all of the Mongols out, there will be one final scene before the end of the mission.
No Comments