A Whole New World
Defeat the Heartless in the first area and open the Chest near the Storage for a Mega-Potion . Jump up the crates to a second tier where another Chest awaits, this one holds a Mega-Ether . Now enter the Storage to spot a Save Point but also a Chest behind the barrel for another Mega-Potion . You may have noticed that there are a few new enemies in this area.
Bandit
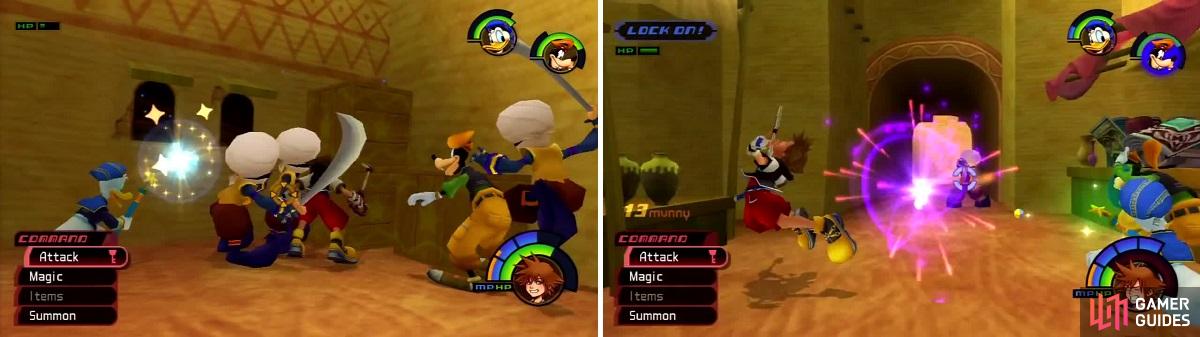
Bandits use swords to attack that can easily be parried. Watch out when they throw them at you (right).
Bandits are nimble like Soldiers but use a sword to aid in combat. The downside to the sword is the pause they have before they strike making it easy to counter. They can throw their swords and manipulate them as well, but it’s easy to strike the Bandit when he is weaponless.
Pot Spider
Pot Spiders look just like pots until you get close, then they grow legs.
The Pot Spider looks just like a regular pot except it sprouts legs and tries to kill you. There isn’t much to it, they jump around and die relatively easy. They often attack in groups and can be a little annoying but they drop a ton of Munny once defeated.
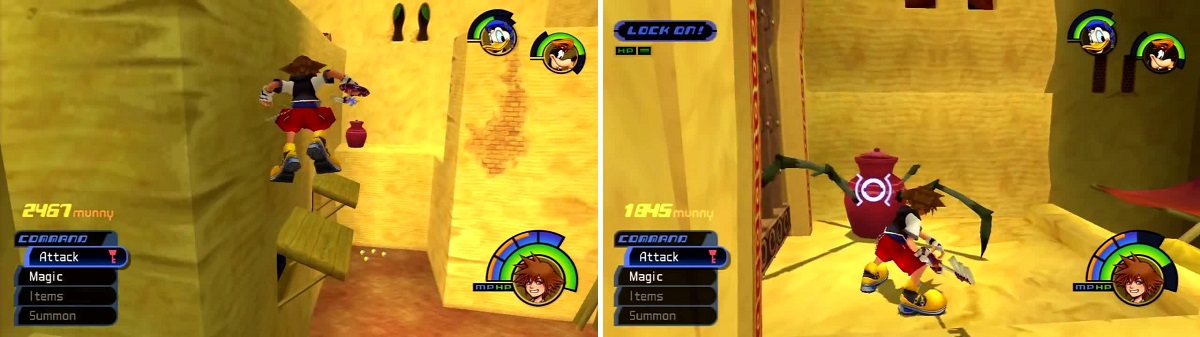
Head out to Main Street and clear out the Heartless, keeping aware that the pots can be Pot Spiders. Climb the building up to the canopy and jump across the gap to a Chest containing a Mega-Ether . Head to the opposite end and into the Alley where Jafar will dispatch Bandits to take you down, but you won’t have any of that. Once the Heartless have been defeated climb up to the next level to find a Chest and another Mega-Potion . Use the Keyhole that’s next to the chest to unlock a door higher up. It can be reached by jumping across the shutters but you don’t need to go that way.
Genie of the Lamp
Return to Main Street and head to the opposite end where you’ll find a pole you can climb to reach Aladdin’s House. Check the Chests in here to find a Scissors-G and a Megalixir . Move the cabinet that is on top of the Magic Carpet and it will fly away. There is also a dresser in this room that can be moved to reveal a Keyhole that opens a gate. Head back to the Plaza jump across the shutters and then across the gap to a Chest with a Cottage . Be on the look out for Heartless and the Pot Spiders though.
From here cross back into Main Street and climb up to the highest point. Jump over to a Chest to acquire a Dark Matter . Now head to the desert via the Plaza and take a magic carpet ride out to Aladdin. Al isn’t doing so well, so clear out the Heartless to help. You’ll want to head back to Agrabah after choosing your party, just keep Aladdin out for now. You’ll be meeting a new Heartless once you return.
Fat Bandit
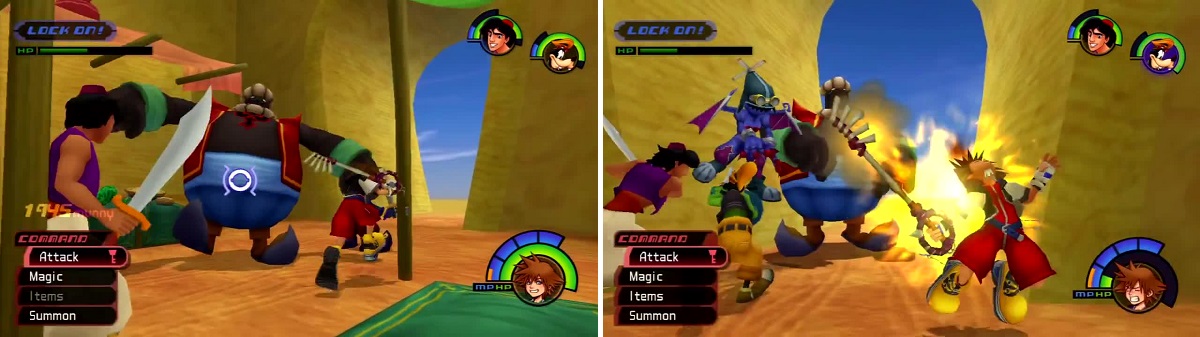
Fat Bandits are a variation on the Large Body that can shoot fiery balls of pain.
Fat Bandits are to Bandits, as Large Bodies are to Soldiers. The Fat Bandit can breathe fire, shoot fiery balls of pain, and turn quickly to strike you. You can bat the fireballs back though and stun the Fat Bandit. It’s hard to fight these Heartless in the close quarter areas in Agrabah but if you acquired Gravity you can make short work of them since they remain highly vulnerable when flattened.
Reach the Palace
Clear out the Plaza and climb up the crates so you can jump across to the Alley. Defeat the Heartless in this small area and jump across the shutters to reach Main Street once again. Now, jump along the canopies to reach the far end and enter the Bazaar. In this area you have a chance at finding Black Fungi, but you’re here to get the Trinity Jump #11 at the bottom of the area – it yields a Mega-Ether . Now climb up and jump across the shutters to reach a Chest with Thundara-G inside. Continue to make the climb and reach another Chest , this one has a Fire Ring . Now use the Keyhole to open a locked gate and return to Main Street.
Head to Aladdin’s House to progress the story then head back to Main Street after you’ve re-equipped the group and saved. Jump across to the yellow canopies and enter the Palace Gates.
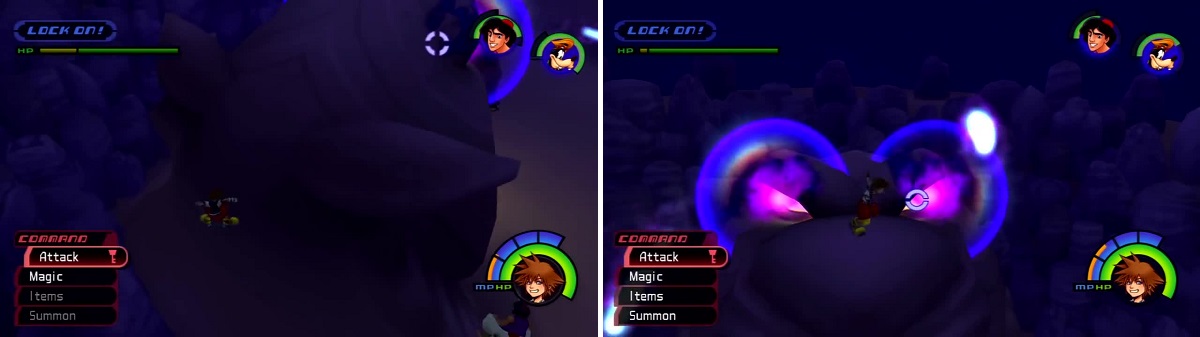
BOSS: Pot Centipede
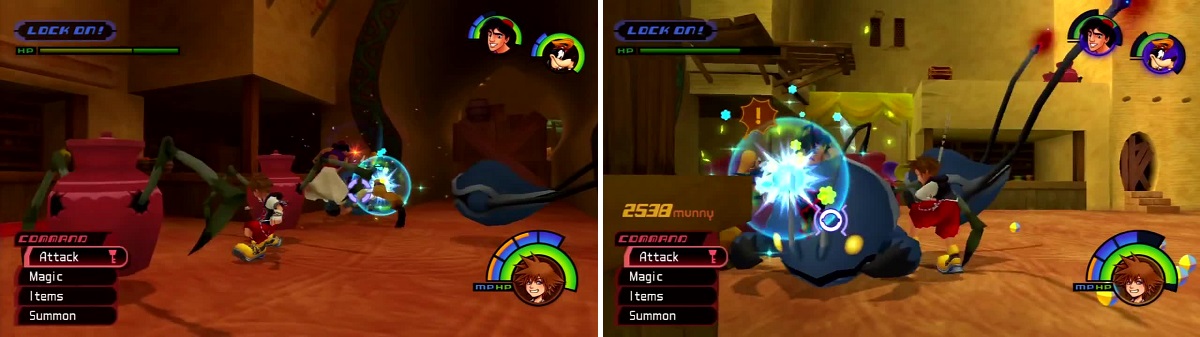
Pot Spiders scuttle to join the Pot Centipede (left), but take them out ot prevent it from growing.
As the battle starts get a lock onto the Pot Centipede’s head. Pot Spiders will come from all areas to join with the Pot Centipede and that’s not a good thing. Use Blizzard to blast them as they try to join to limit the numbers a bit. If you have Stun Impact or Ripple Wave you’ll be able to use those to keep the Pot Spiders from joining as well. Cast Aero on Sora to avoid getting hit too much and focus on attacking the Head or Tail, whichever one isn’t trying to attack you. They switch off and on so just bounce between them. Now and again you can pin one of them in a corner and just completely break all strategy that would be required to win the battle. Use your “Call for Help” to get Donald and Goofy involved if you do pin the Head or Tail so you can quickly end the fight.
Pot Scorpion
The Pot Scorpion spawns in the Palace Gates of Agrabah after you’ve beaten the Pot Centipede. There are 12 pots but only one is the Pot Scorpion. Simply walk into the pots and if they move you can break them but if it doesn’t it’s the Pot Scorpion. Break all 11 pots first then strike the Pot Scorpion. The only way to hurt it is to Guard right when it charges to claw you. It gets knocked unconscious for a moment which gives you a chance to damage it. You can negate the poison attack with Aeroga if you have trouble dodging it. There’s a 20% chance for the item to drop that becomes 35% if you break the 11 pots before attacking the Pot Scorpion. There is also a 10% chance of getting the item when you smash the 11th pot, so make sure you break the other pots first!
Cave of Wonders
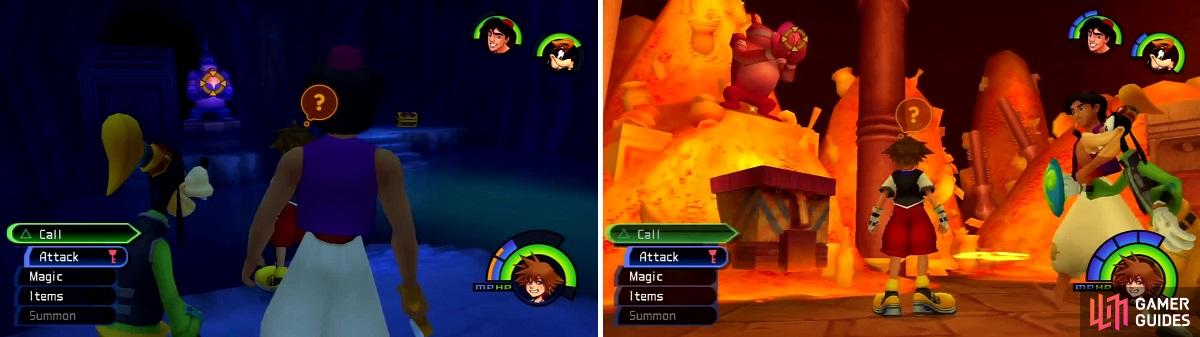
Re-enter the Palace Gates from up high and jump down to the Chest to acquire a Protera Chain . Visit Aladdin’s House to find a merchant selling some items.
| **Merchant** | **Cost** |
|---|---|
| Potion | 60 |
| Hi-Potion | 150 |
| Ether | 200 |
| Tent | 250 |
| Camping Set | 500 |
Head to the desert and catch a ride with Carpet again to find the Cave of Wonders.
BOSS: Cave of Wonders
Walk around the the back to climb onto the head (left). From here you can attack it’s eyes while avoiding the eye beams (right).
During the fight with the Cave of Wonders you’ll have to fight Bandits and Fat Bandits. Start by climbing up the head of the tiger and moving to one of it’s eyes. Begin unleashing your best combos to deal a significant amount of damage quickly. Don’t worry about the beams shooting out of it’s eyes, you’ll dodge them simply from standing here. You do have to deal with the Bandits tossing their swords at you, so use Aero to negate that. Each eye has half the HP of this boss, so be sure to switch off once you break one of them.
While fighting the Heartless here make sure not to fall. Once they have all been defeated check the Chest for a Mega-Ether . Head into the Hall and start cleansing it of Heartless remembering not to fall. When fighting the Green Requiem and Yellow Operas just use magic because if you try to Aerial Combos you’ll likely fall. There is a barrel just before the three water spouts, jump atop it to reach a platform with a Chest containing an Elixir . Jump from here down to the other half and up to another Chest to acquire a Mythril Shard .
At the beginning of this area you can see a pillar with a water spout that bridges the gap to a set of stairs on the far end. Make the jump to reach the Bottomless Hall and a Chest with another Mega-Potion . Head back to the Hall and jump over to the exit back into the Bottomless Hall. To your right is a Chest with an Elixir if you can make the crafty jump. Drop down after you get the item and swim to the Trinity Jump #12 – it spawns a Chest with a Thundara-G inside.
Jump to the platform above the three water spouts to gain access to two chests (left). Grab this chest (right) and push the boulder over the edge.
The Treasure Room
Back at the Bottomless Hall you can jump atop the water spout to reach a Chest with a Cottage , you’ll just have to fight the Pot Spiders and Shadows for it. Enter the Treasure Room from here where there is a chance to spawn White Mushrooms. Clear out the Heartless and use Trinity Charge #4 to receive a Mythril Shard and a large sum of Munny. Jump atop the monument with the flames under it to reach a green Chest with a Defense Up inside. You can jump from here to the other Chest to acquire a Mythril Shard . Jump over to the small walkway for the last Chest in this area and to find Dalmatians 37, 38 and 39 .
Chambers of Secrets
Head back to the Hall and take the steps to a stone platform that leads to the Dark Chamber. Use the Save Point and swap Donald out for Aladdin, you must have Aladdin to progress. Jump over to the Chest for a Cottage then make the other jump to find a Torn Page in the Chest . Now drop down into the water and swim to the Relic Chamber. Go up the steps to the Chest containing a Thunder Ring then make your way to the other end.
Face the monkey statue and “Call” Abu to gain access to some new steps. If you pushed the stone off the cliff earlier you can reach a Chest with a Mythril inside. Head back into the Dark Chamber by using the steps you just received access to and you’ll spot a chest with a Meteor-G inside. Swim up the waterfall (Yes, UP the waterfall) and call Abu again to lower the platform. Grab the Protera Chain from the Chest then swim up the waterfall near the Save Point to enter the Silent Chamber.
Head down the waterfall and call touch the statue then swim back up. Now swim into the Hidden Room and jump-slash the pillar here. After the cutscene head back to the Treasure Room. Call Abu on the statue near the Save Point to reach a Chest with a Thundaga-G inside. Save your game and head to the Lamp Chamber when you’re ready.
Look to the right of the statue to see where that boulder ended up (left). Use “Call” on the Statue to the right (right) when facing the Lamp Chamber to get a chest.
BOSS: Jafar
Jafar always starts by chanting then firing a beam of fire from his staff at you. Just hug the platform that hes on to avoid it. He will use this through the battle and also use an ice storm that is easily avoided. When Jafar whisks around the room in his void ball, Genie will start to attack. You’ll know when he’s going to swing because he’ll yell something about hoping he doesn’t hit you. Chase Jafar around and try to melee him, but if you can’t then fire off some spells. He’ll put up a magic-shield if you cast too many spells but then he’ll come into your melee range and you can still hurt him. Overall, this battle isnt that tough.
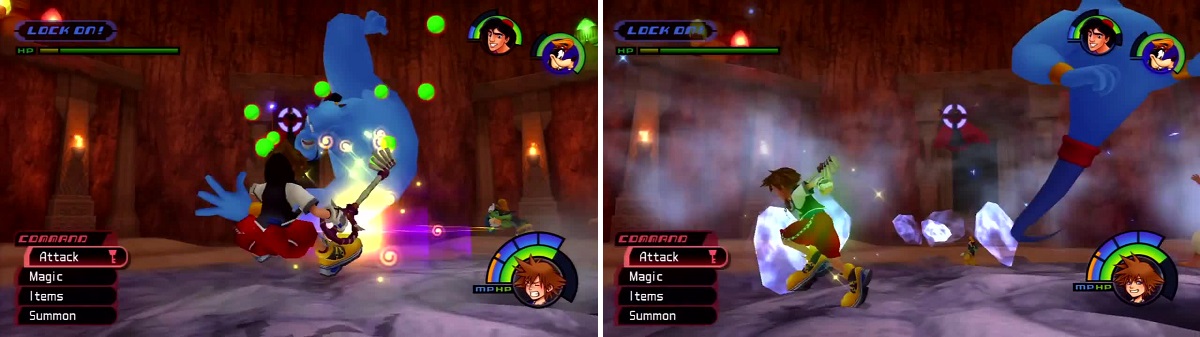
Genie will speak before he throws a punch (left), all while Jafar hovers around the room and shoots a fire beam or ice storm (right).
Phenomenal Cosmic Power
After the battle you receive an upgrade to Blizzard, it becomes Blizzara . Unfortunately, Jafar turns himself into an all-powerful genie. Head back to the Treasure Room Save Point to heal then go after Jafar.
BOSS: Genie Jafar
This battle is one of the simplest battles in the game. Target Jafars lamp that Iago is flying around with and just pummel it. Jafar will throw rocks and shoot fireballs now and again but they dont do a lot of damage at all. There are moving platforms but it plays to your advantage since you can hide behind one to avoid getting hit. Iago can be knocked out to allow for an even easier method of damage, he’ll drop green orbs when this happens.
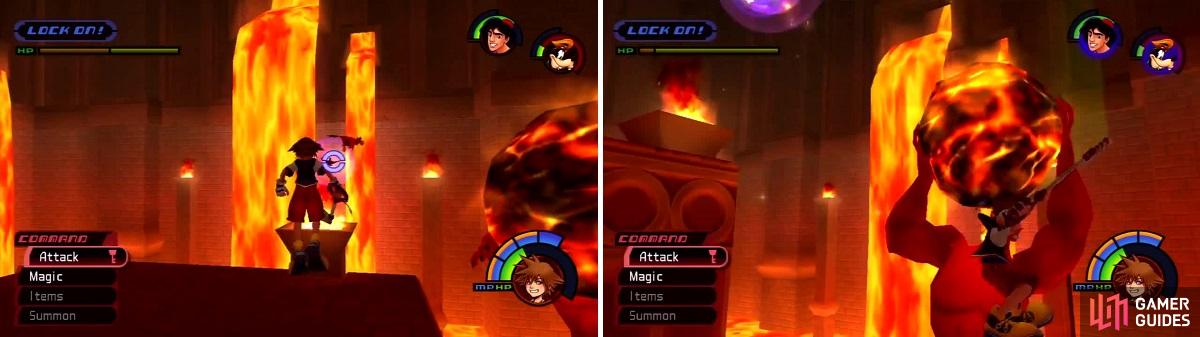
Iago is carrying the lamp so target him (left) whilst Jafar-Genie throws large fireballs at you (right).
Itty Bitty Living Space
You receive an upgrade to Fire, it becomes Fira . You also receive Ansems Report 1 for some good reading. You have to escape the Cave of Wonders by riding the Carpet but it’s not difficult at all. After the scenes end you’ll receive the Summon Genie , Three Wishes Keyblade, and learn the power of Green Trinity , Trinity Ladder. Head to the Storage via the Plaza and youll find Trinity Ladder #1 which gives an Ap Up via the Chest .


No Comments