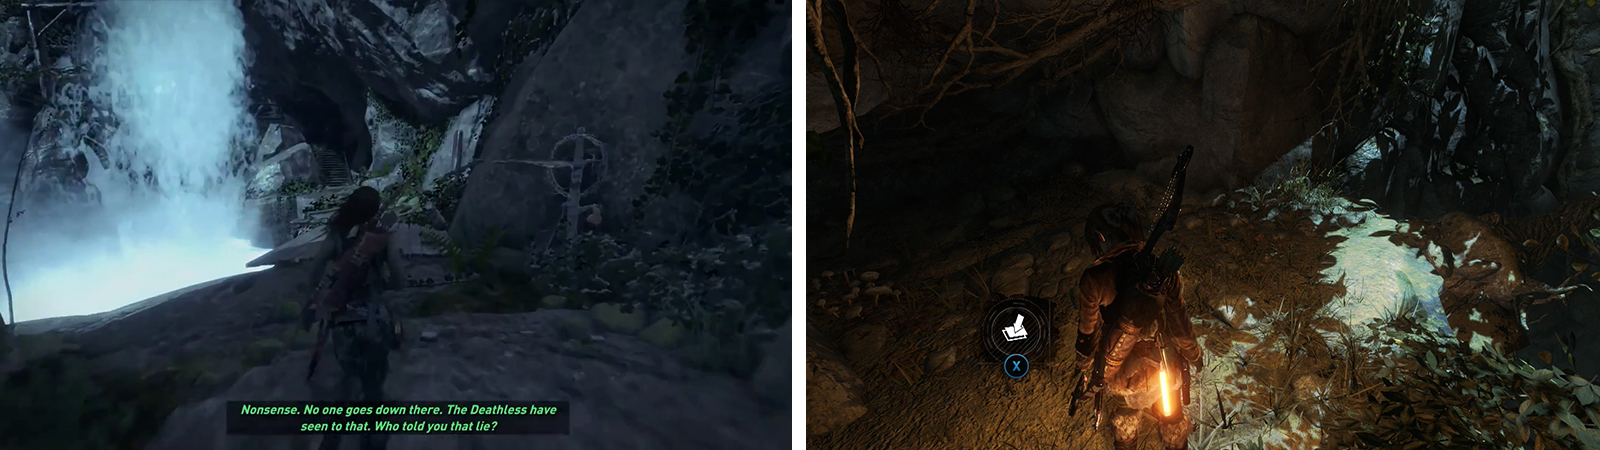
Return to the ‘Ruins Encampment’ Base Camp and follow the path to the northeast, past where we crossed the bridge and witnessed the Remnant pep talk earlier. Continue along the rocky riverside path whilst hugging the right hand wall. This path will lead you behind the large waterfall.
Climb the stairs when you reach them and proceed inside. As soon as you reach the first gap, look on the ground to the left for Mushrooms . Use your grapple axe on the beam above the gap ahead to swing to the far side.
Squeeze through the crack in the wall at the end of the passage to find a new Base Camp ‘Hidden Ravine’. You can use the Base Camp here to apply any upgrades you require and spend any skill points you have. Exit the Base Camp menu when you are ready to continue.
Use your grapple axe to swing across the next chasm and look beside the small waterfall to the right for an Explorer’s Satchel . Continue along the platform and Lara will begin to slide. As she nears the bottom of the slope jump and hit your pickaxe button to grab a hold of the climbable wall opposite. Climb to the top.
The entrance to the Challenge Tomb can be found behind the waterfall (left). Look out for Survival Cache 11 as you proceed towards the puzzle room (right).
Walk across the fallen tree bridging the gap to the next platform and look by the rocks on the left for a Survival Cache [11/20] . Continue into the small cave and jump to the next ledge inside to reach the puzzle portion of the Challenge Tomb.
Swim across to the platform in the distance with the pair of mine cart tracks leading to it. In the back, left corner of this platform, at the base of the scaffolding there is a Survival Cache [12/20] .
Look back towards our entry point and climb the right hand mine cart track to the top. As you reach the top you’ll find a chest containing a Relic [08/13 – Rope Ring] on the ground by the table on the left. To the left of the mine cart is a vein of Magnesite Ore and a handle (we’ll be back for this). In the small area behind the mine cart there is a Document [16/33 - Greek] . There is also a side-tunnel to the right of the mine cart. Jump across to the far ledge and loot the cylinder of reagents and piece of Magnesite Ore on the right. Continue into the next room to find an Archivist’s Map .
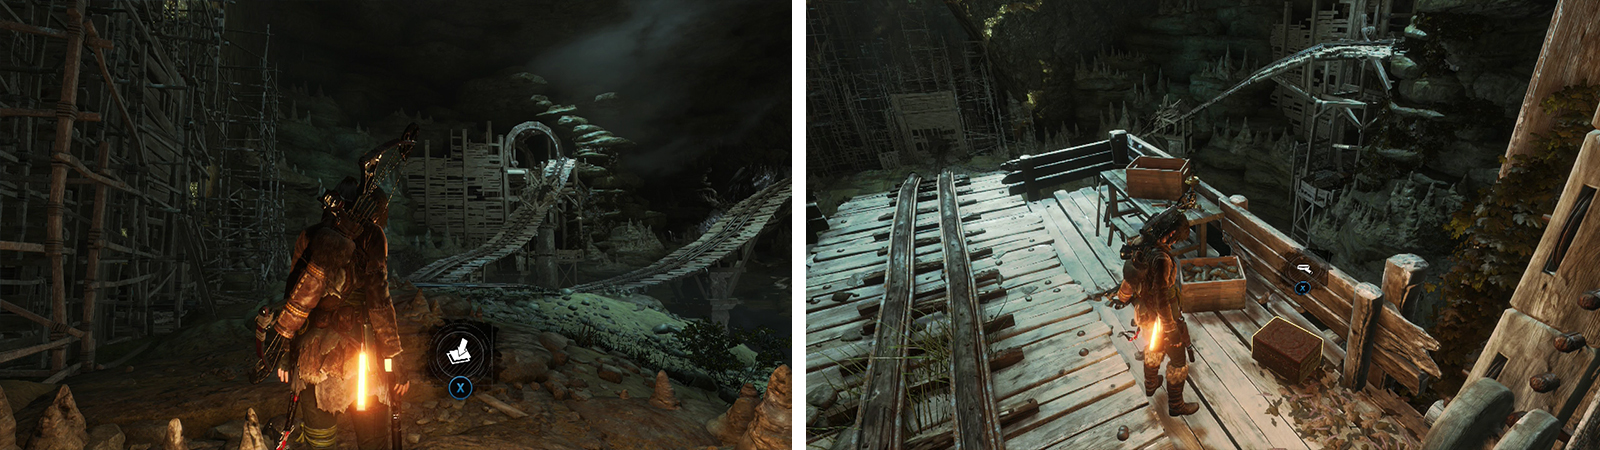
Survival Cache 12 can be found opposite the ramps (left). Relic 08 is by the cart at the top of the right hand ramp (right).
Approach the wheel mechanism by the mine cart and interact with it. This controls the platform that the mine cart is sitting on. We’ll want to rotate it twice. When done correctly, Lara is able to push the mine cart down the slope that we climbed up earlier to open an entrance below.
Return to the wheel mechanism and approach the rope pillar behind it. Shoot a Rope Arrow at the attachment point below the other mine cart track to create a zip line.
Slide down to find a second mine cart. In this area you’ll find another vein of Magnesite Ore to the right as you land and a cylinder of reagents and a chest containing a Relic [09/13 - Dice] on the floor by a second wheel mechanism on the left. Examine the dice with multiple ‘6’ faces to boost your Greek language skill a little.
Scramble up the wall to the right behind the wheel mechanism (this is the lower of two we’ll be using for the next puzzle). At the very top, by the caved in dead-end at the end of the train track there is a Survival Cache [13/20] . Use the second wheel mechanism on the upper floor here to lower the platform as far down as it will go.
At this point, we need to use the first (lower level) wheel mechanism to rotate the platform until the track clears and you can pull the mine cart onto it. Once the mine cart is aboard the tracks, use the lower wheel mechanism to rotate the platform once more so that the ‘open’ end of the track is facing towards the upper wheel mechanism.
Return to the upper wheel mechanism and rotate it all the way until you are back up top with the mine cart. Have Lara push the mine cart down the slope ahead to further open the entrance below. Make your way down to the platform where the two tracks come together and proceed into the opening in the scaffolding at the back.
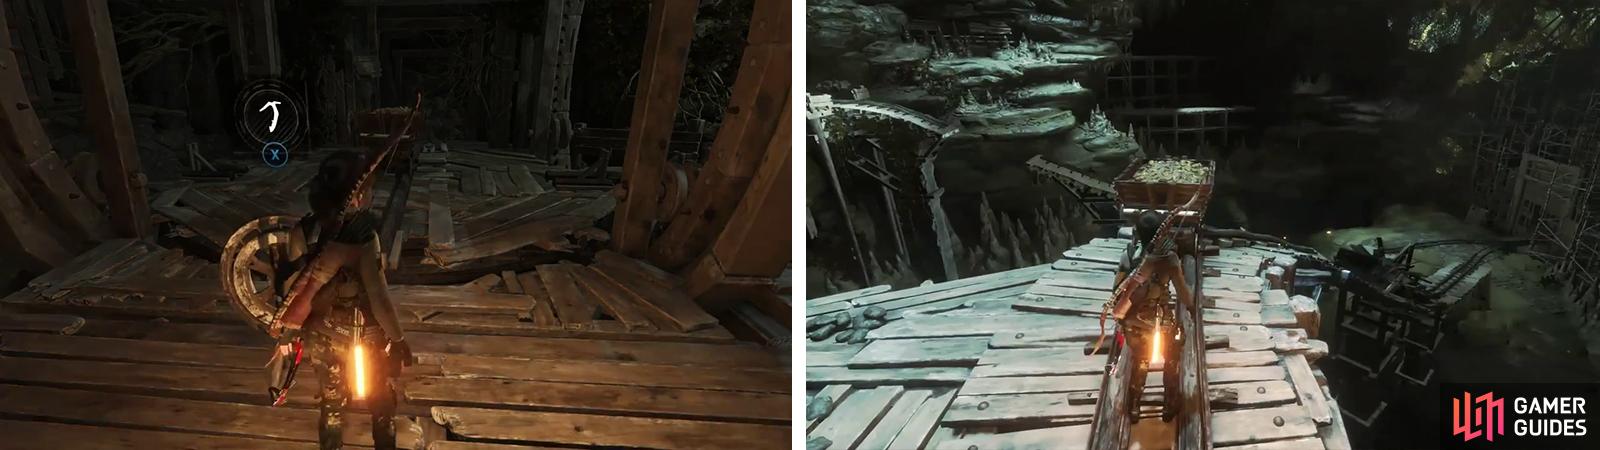
Push the cart onto the lift and into the correct position (left). Raise the lift to the top and push it down the ramp to open the door (right).
In the first room there are a pair of pieces of Magnesite Ore . In the second room (which the carts have just opened up) you’ll find a pair of veins of Magnesite Ore , two Mushrooms , a Document [17/33 - Greek] , a crate/cylinder of resources and the Challenge Tomb’s altar which contains a Codex we can interact with to complete the Challenge Tomb [03/04] .
Head back across the water to where we fell into the room earlier and use the successive sections of scalable walls to return to the top. Backtrack to the nearby Base Camp and fast travel out of there!
Before we keep going with the campaign, its a good idea to travel to the ‘Ruins Encampment’ Base Camp, head into the ruins to the east to find the Monolith we passed earlier. Decipher this using your now level 7 Greek skillz to unlock the final Coin Cache locations on the map (if you aren’t quite there yet, come back later, but don’t forget about it - those Coin Caches will not appear until you decipher the Monolith !). Speak to the Remnant woman in the nearby ruins to hand in your progress of the ‘Ancient Secrets’ side-mission.
Whilst we are here, If you were able to decipher the level 7 Greek Monolith by the ‘Ruins Encampment’ Base Camp, make your way to the entrance of the Crypt we cleared earlier near the eastern side of the ruins to find a Coin Cache [04/09] outside .

Decipher the Monolith by the ‘Ruins Encampment’ Base Camp (left) and then nab Coin Cache 04 by the entrance to the Crypt (right).
To continue with the walkthrough, head back to a base camp and choose the ‘Cliffside Lookout’ Base Camp in the southeast corner of the map.
No Comments