You probably noticed along your journey some hefty looking treasure chests that you couldn’t open. This is because you need a Lockpick to do so! Unfortunately, you have to wait a while before you can get your hands on one.
Once you reach the Hidden City, a side mission will become available - one of the rewards is unlocking a special Merchant who exclusively sells the Lockpick.
To unlock this Merchant, refer to our guide on completing the Skill of the Player side mission. When you’ve purchased the Lockpick, you can begin your hunt for the treasure chests.
There are only 8 in the entire game, and we’ve got their locations right here!
COZUMEL - TREASURE CHESTS (1)
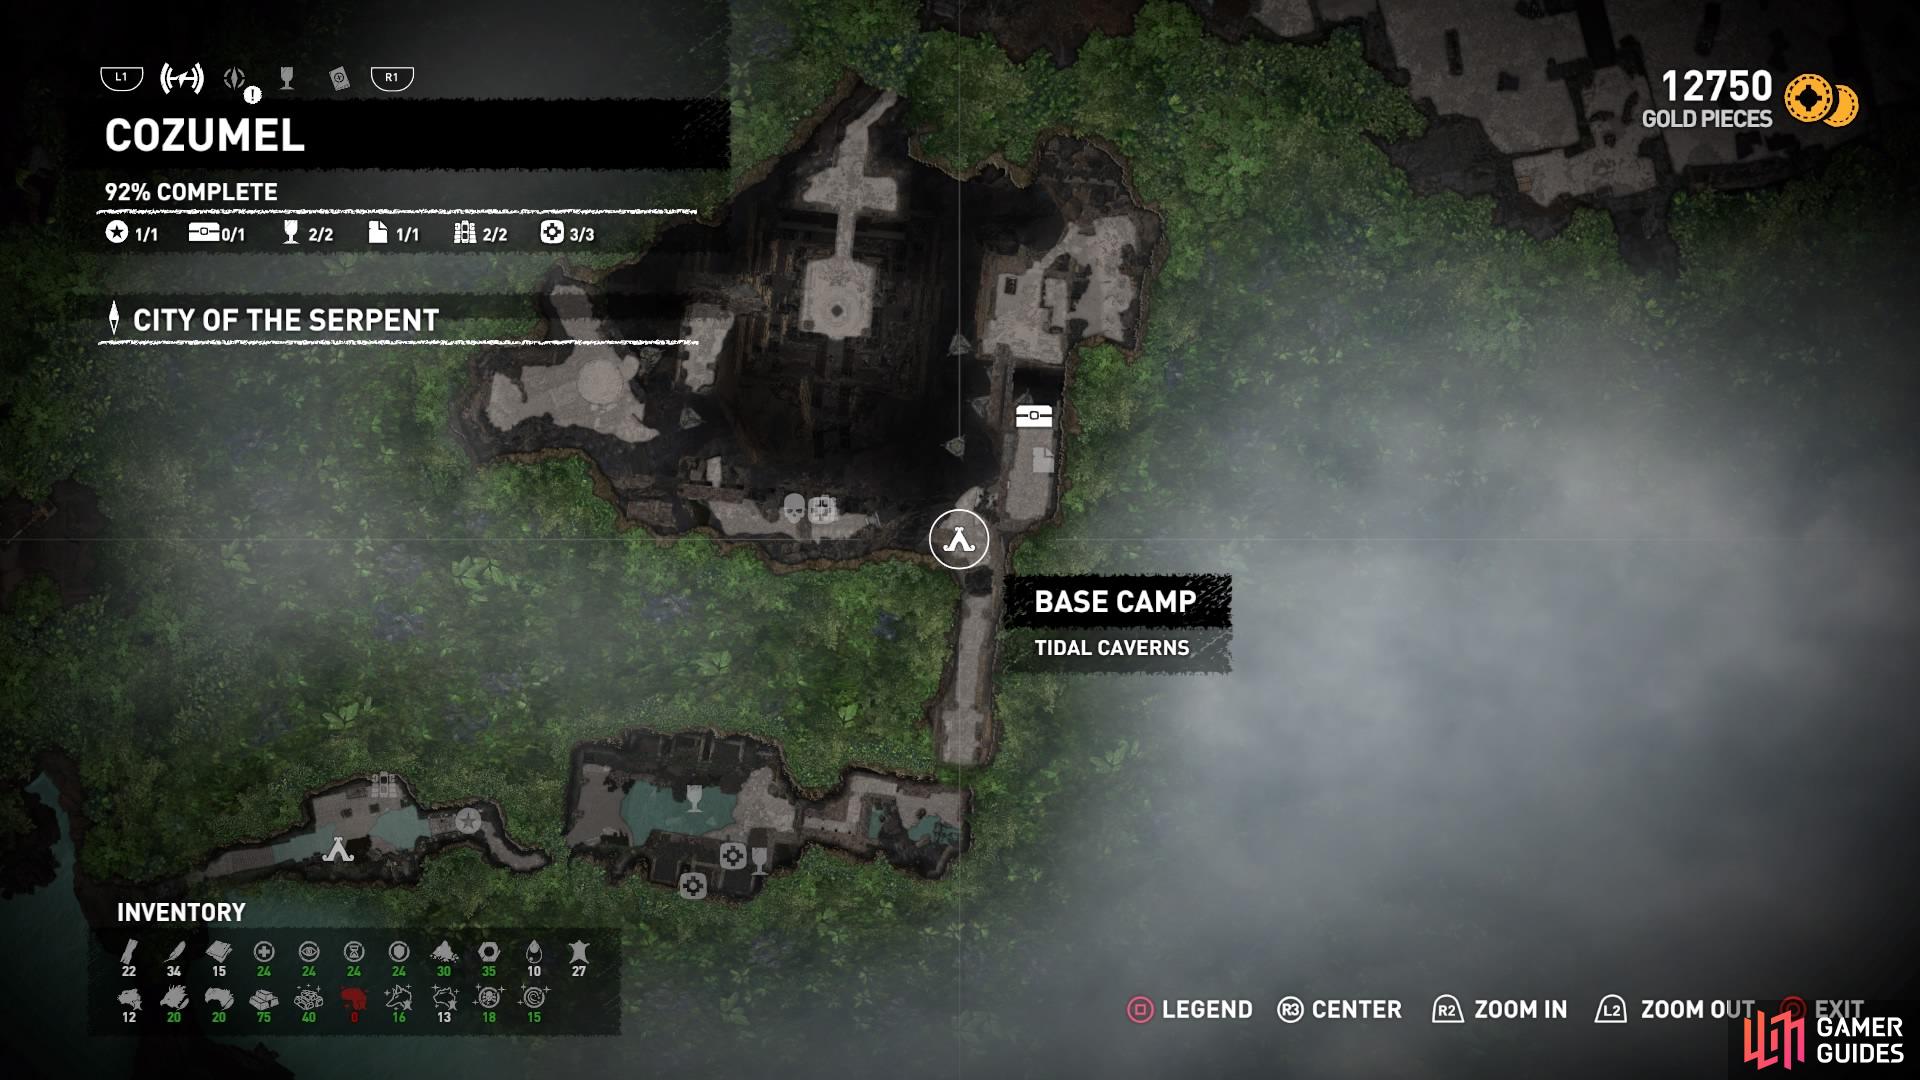
Return to Cozumel via fast travel to the Tidal Caverns Base Camp. This puts you directly at the pyramid - you probably remember climbing it throughout the story portion of the game.
Well, we hope so, because you need to follow the same steps to reach the chest!
It’s not far. Simply follow the pendulums to the upper platform above until you have to tether a rope between two points. Crawl across the rope to the other side and immediately turn around. Now tether a rope between the beam above you and the beam on the upper far side.
Crawl across and head left to open the treasure chest!
PERUVIAN JUNGLE - TREASURE CHESTS (1)
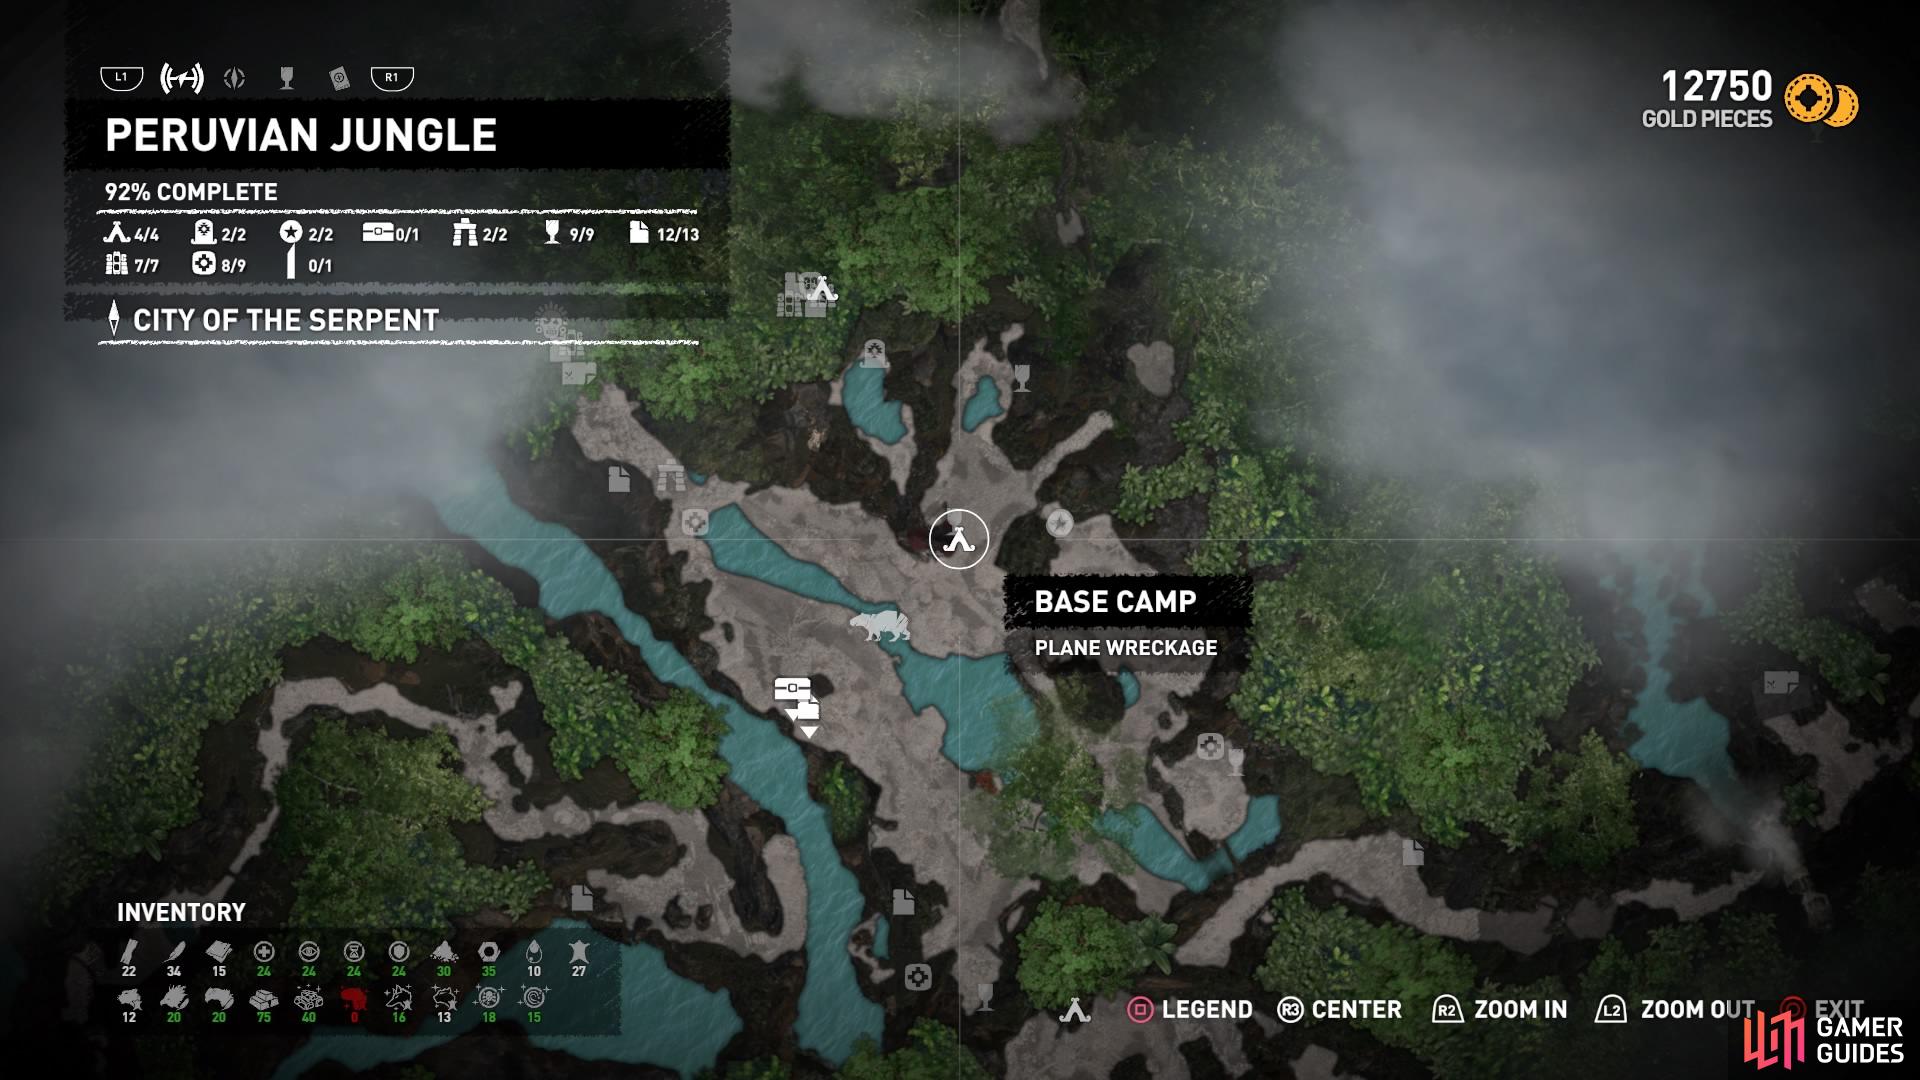
Return to the Plane Wreckage Base Camp for this one. Head straight forward, swim across the pool of water, and look for the rope coiled post on the other side of the river.
There’s a ledge here that you can drop down to, followed by scaling down a craggy wall and traversing left along the handhold.
Pull yourself up into a tunnel and duck through to find the treasure chest, as well as a document.
KUWAQ YAKU - TREASURE CHESTS (2)
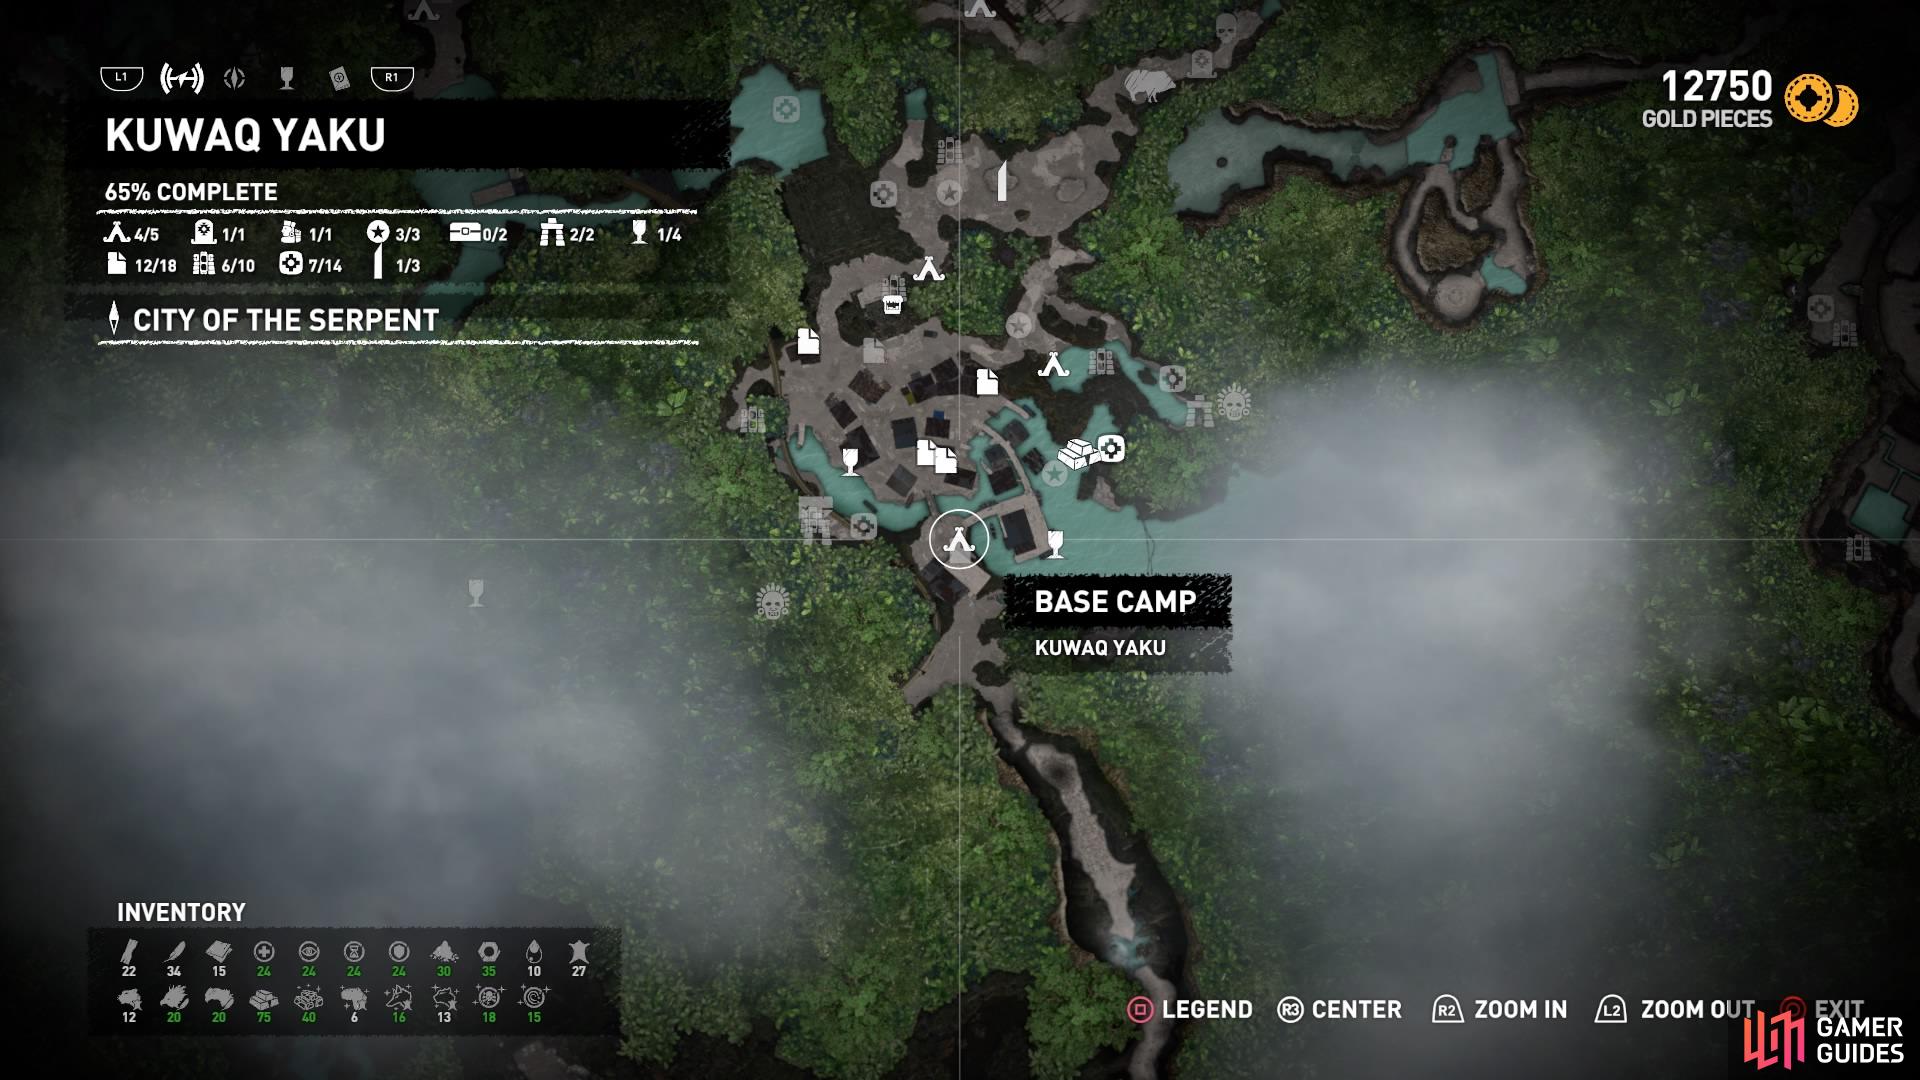
Begin at the Kuwaq Yaku Base Camp outside Abby’s and head right along the walkways and past the huts. Find the mother and her son sitting on the edge of the pier and look straight across to the small island where the monolith stands.
The treasure chest is under the island, so dive into the water and search along the left side for a pry barrier. Break through and follow the tunnel to the chest.
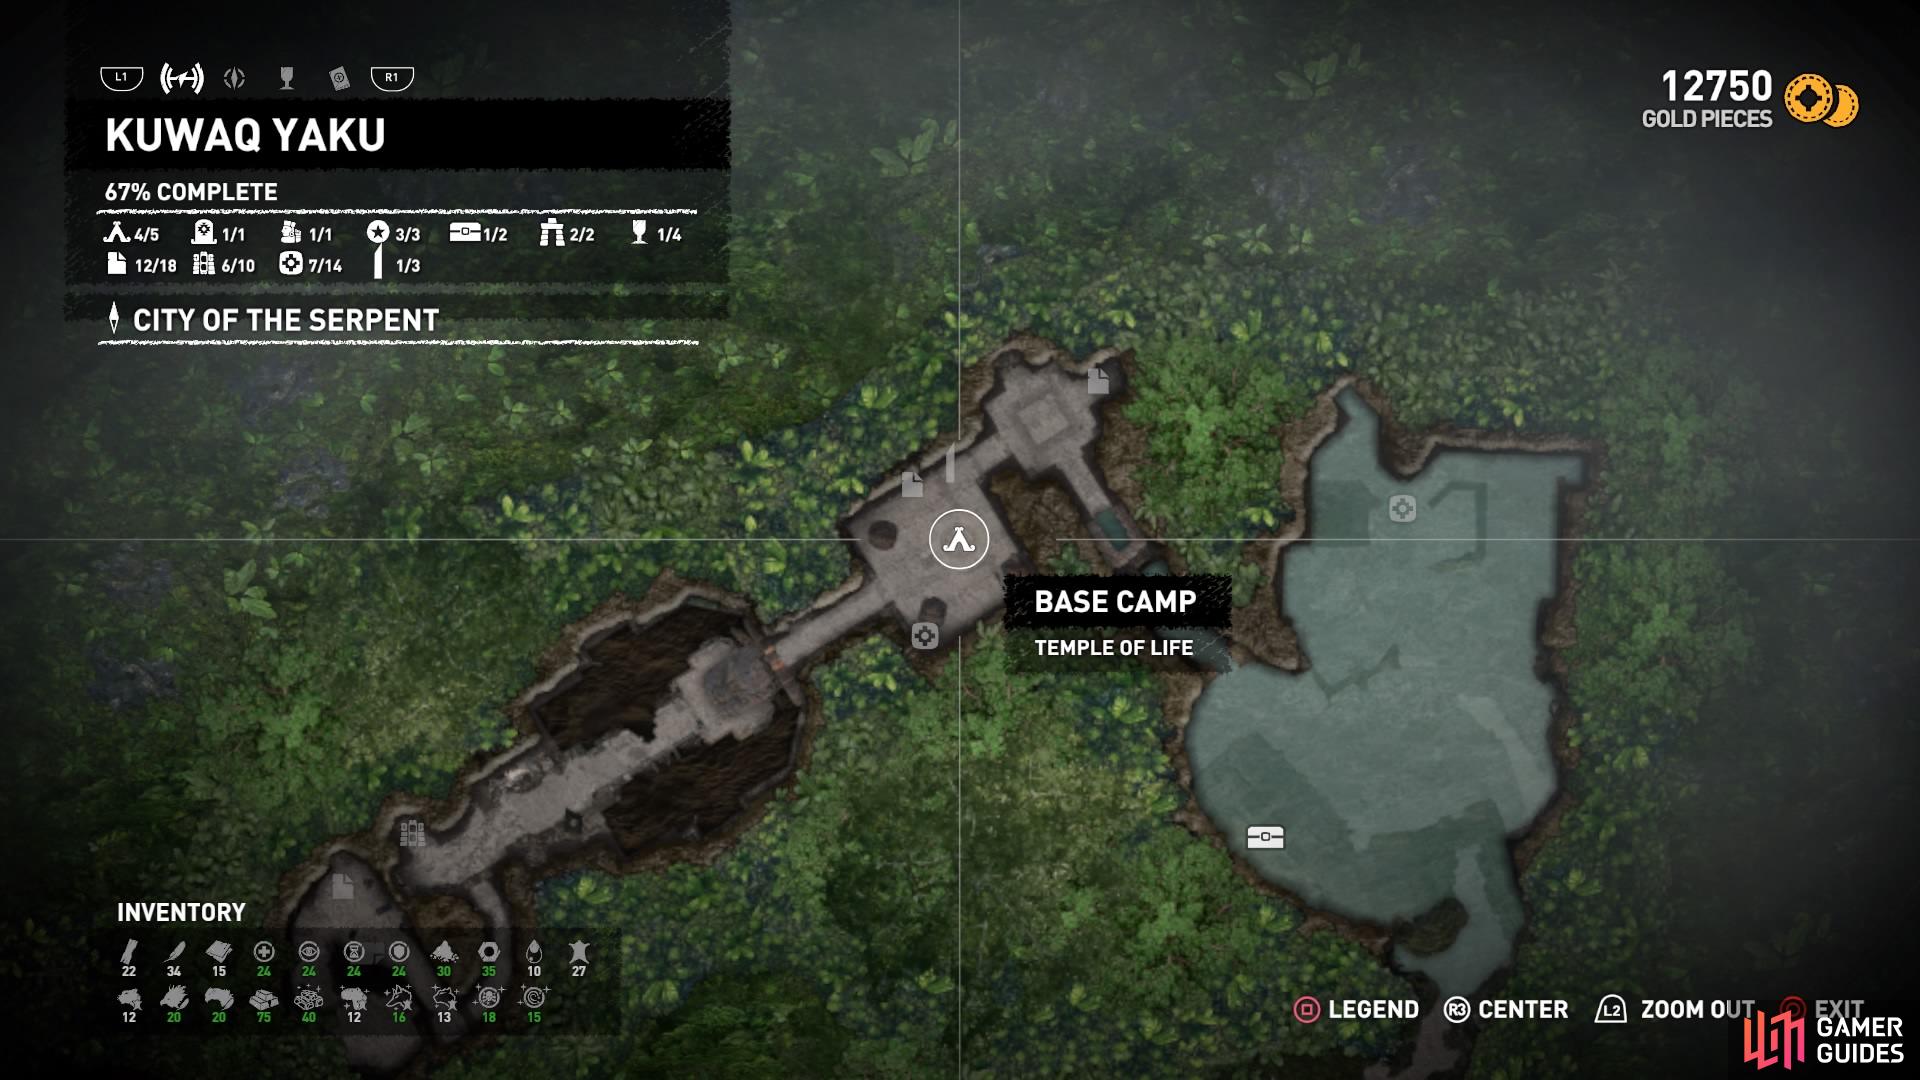
For the second chest, fast travel to the Temple of Life Base Camp and head through the hole in the wall to the room with the stele. Just as you did in the story, head right and dive into the water below.
Now follow the water, while avoiding the piranhas, until you reach a large open area with an air pocket that you can pause at. On the left is the way out, but on the right is a structure that you can swim through, so head there.
Swim up into the opening and go forward and then right. You’ll come to a room with an air pocket, so take a breath. Underneath you is a large hole - swim down to find the chest sitting in the back left corner.
Unfortunately, you’re only way back out is to follow the path the same way as during the story campaign. So get swimming, and don’t let the piranhas catch you!
HIDDEN CITY - TREASURE CHESTS (3)

Begin at the Temple District Base Camp

This should be the very first treasure chest you collect seeing as it’s in Pisco’s house - and Pisco is the man you deal with during the side mission, Skill of the Player. So, really, we don’t need to tell you where it is.
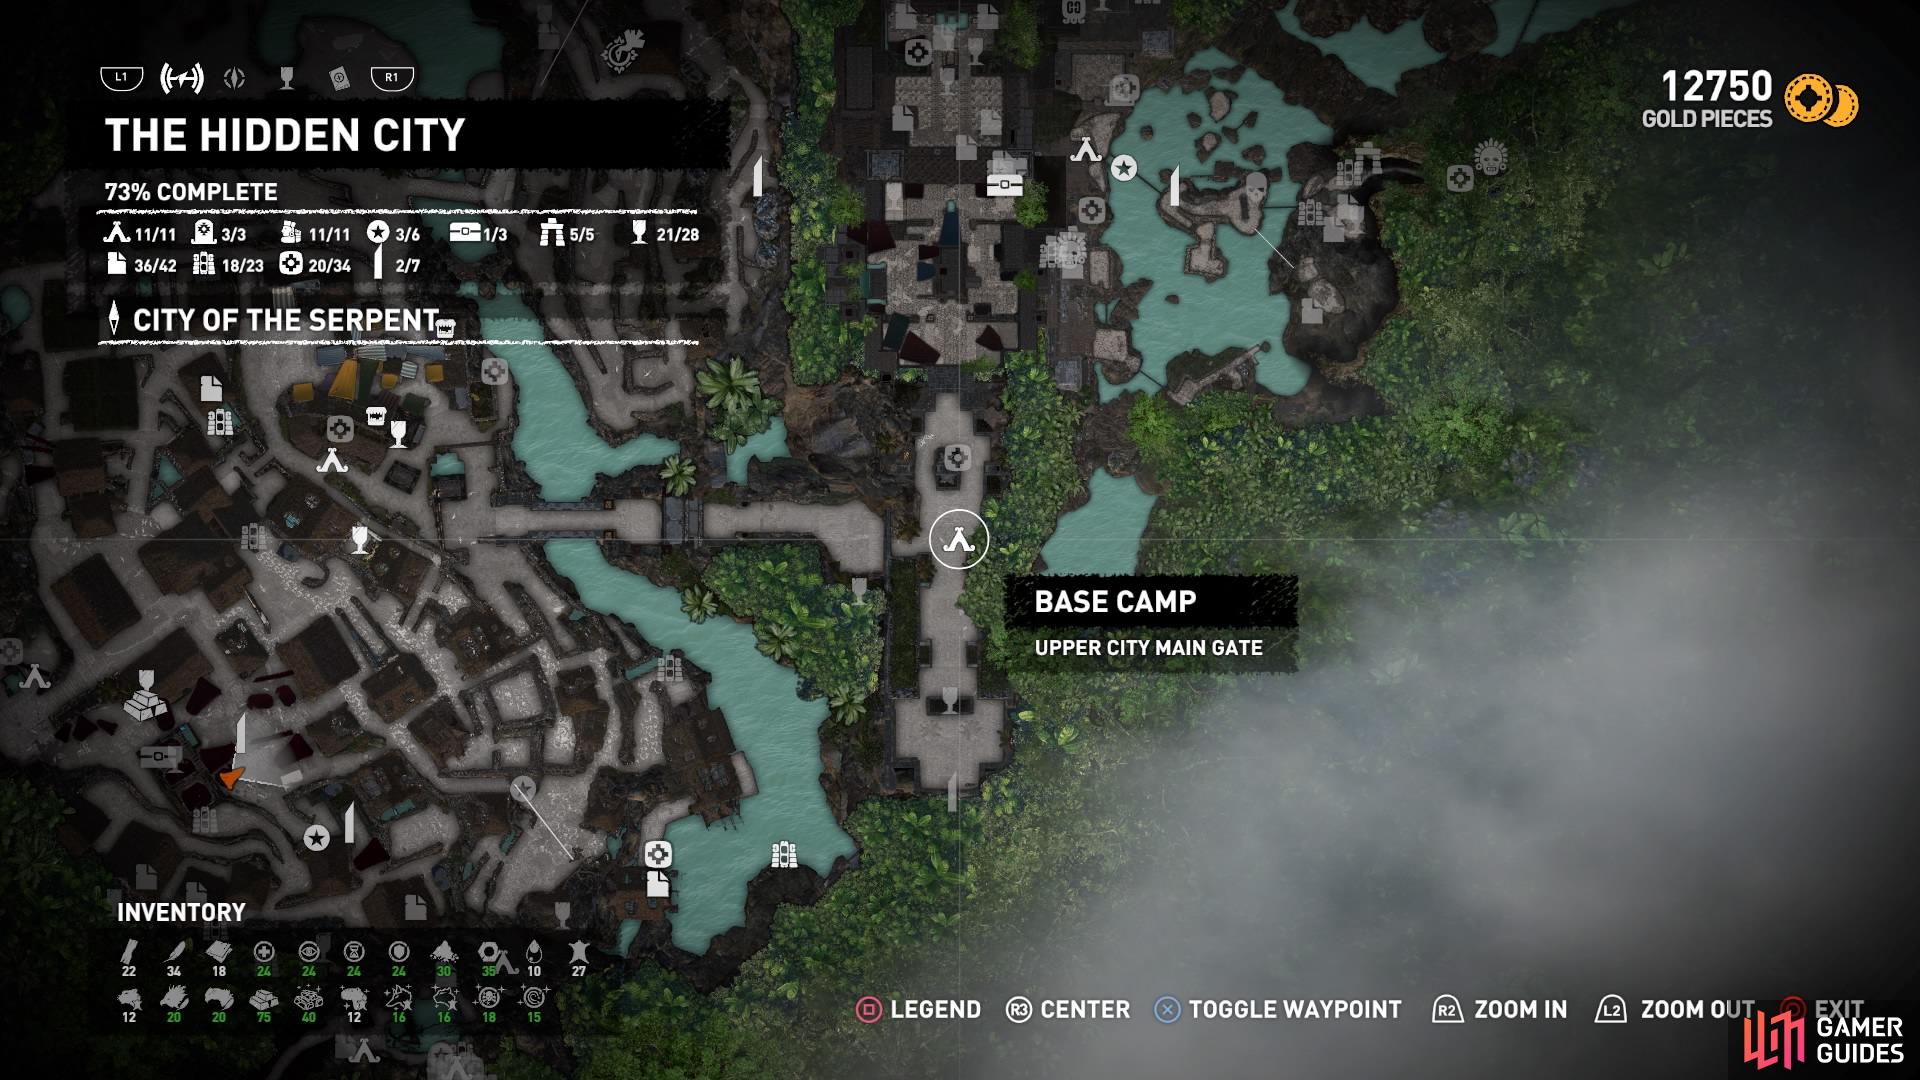
For the second chest head to the Upper City Main Gate Base Camp where you met Etzli and freed Hakan from execution. Go up the steps to enter the market place and stick to the right side until you see a building with a golden roof.
Head inside this building for the chest sitting in the back corner.
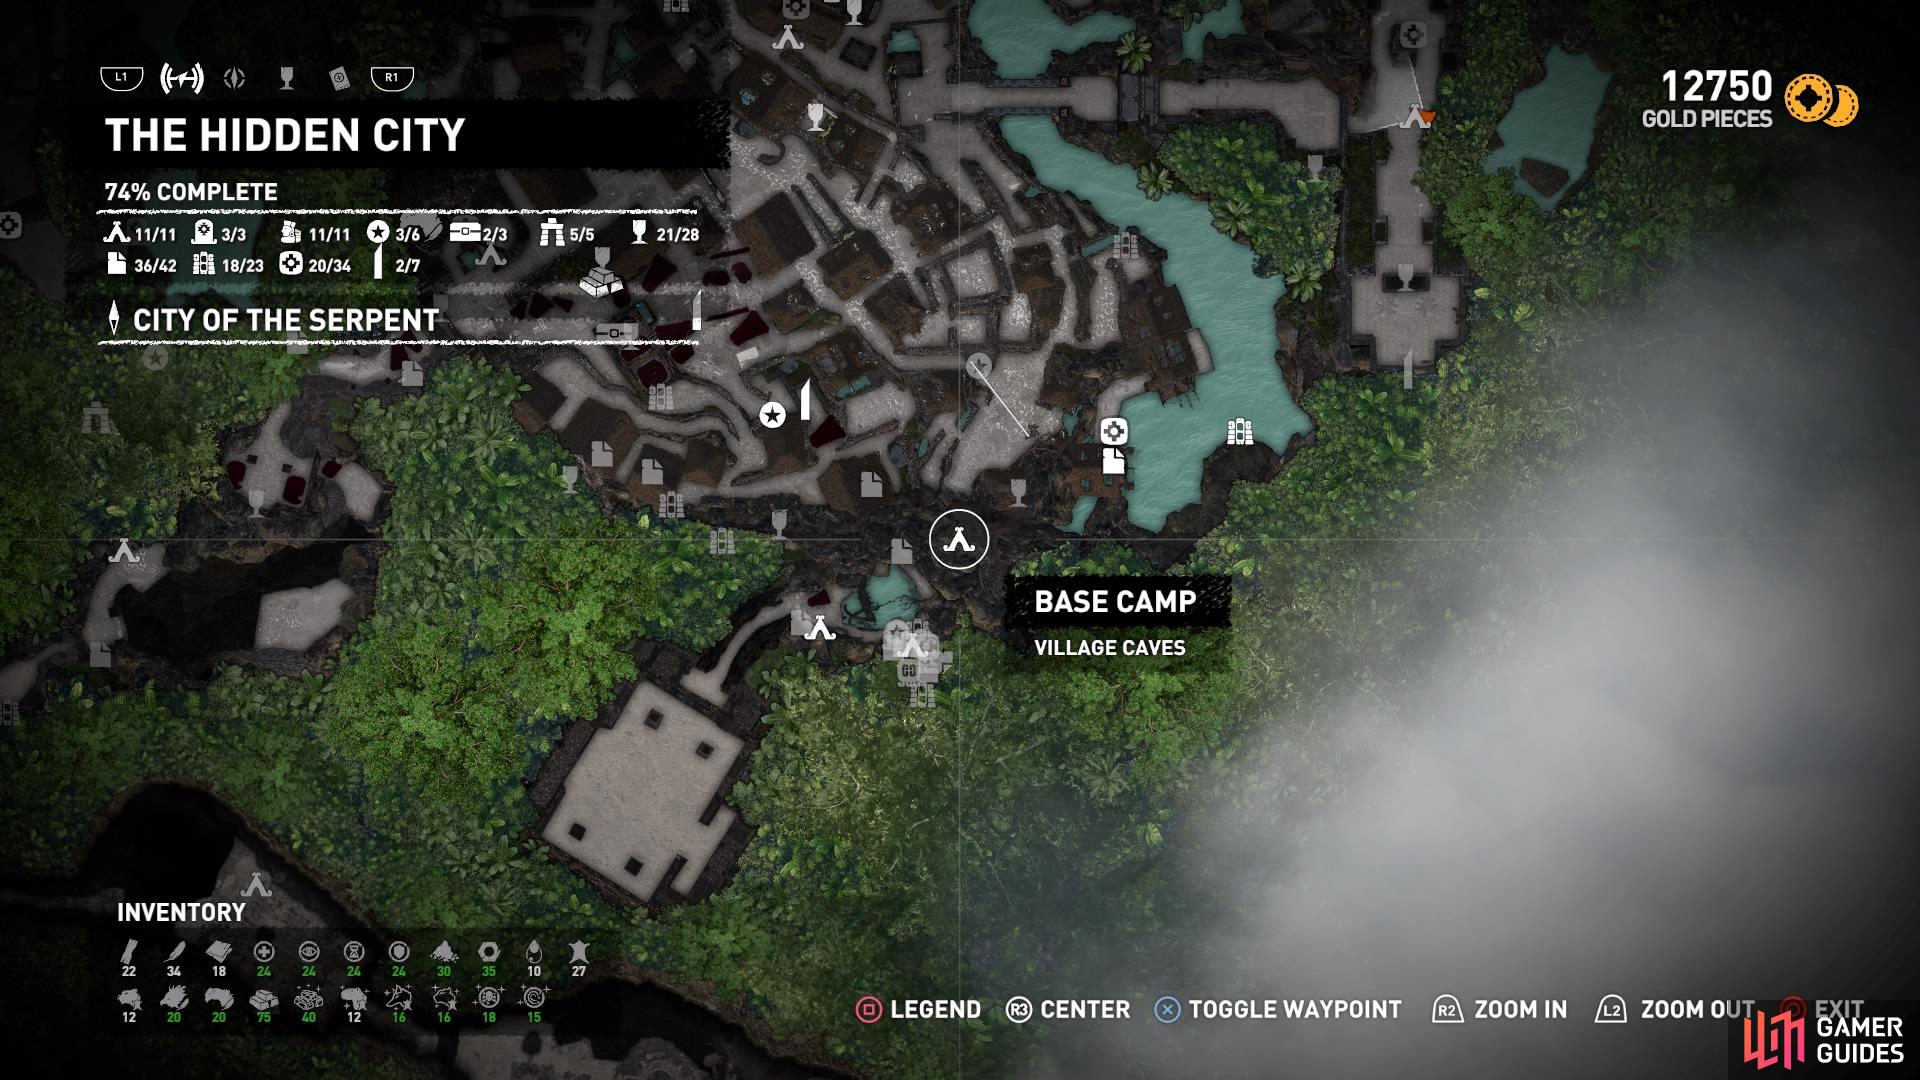
The Village Caves Base Camp is the closest fast travel point for this chest, but we’ve provided a map for reference to where you should be for the chest’s location anyway.
Head to the huts down by the water in the south-east and jump in. Dive under to find a passage beneath the walkways (marked by a glowing survival cache) and swim around to the right until you catch sight of the chest.
It may be wise to have the Caiman’s Breath skills unlocked for this one, just in case. It’s pretty dark down there.
MISSION OF SAN JUAN - TREASURE CHESTS (1)
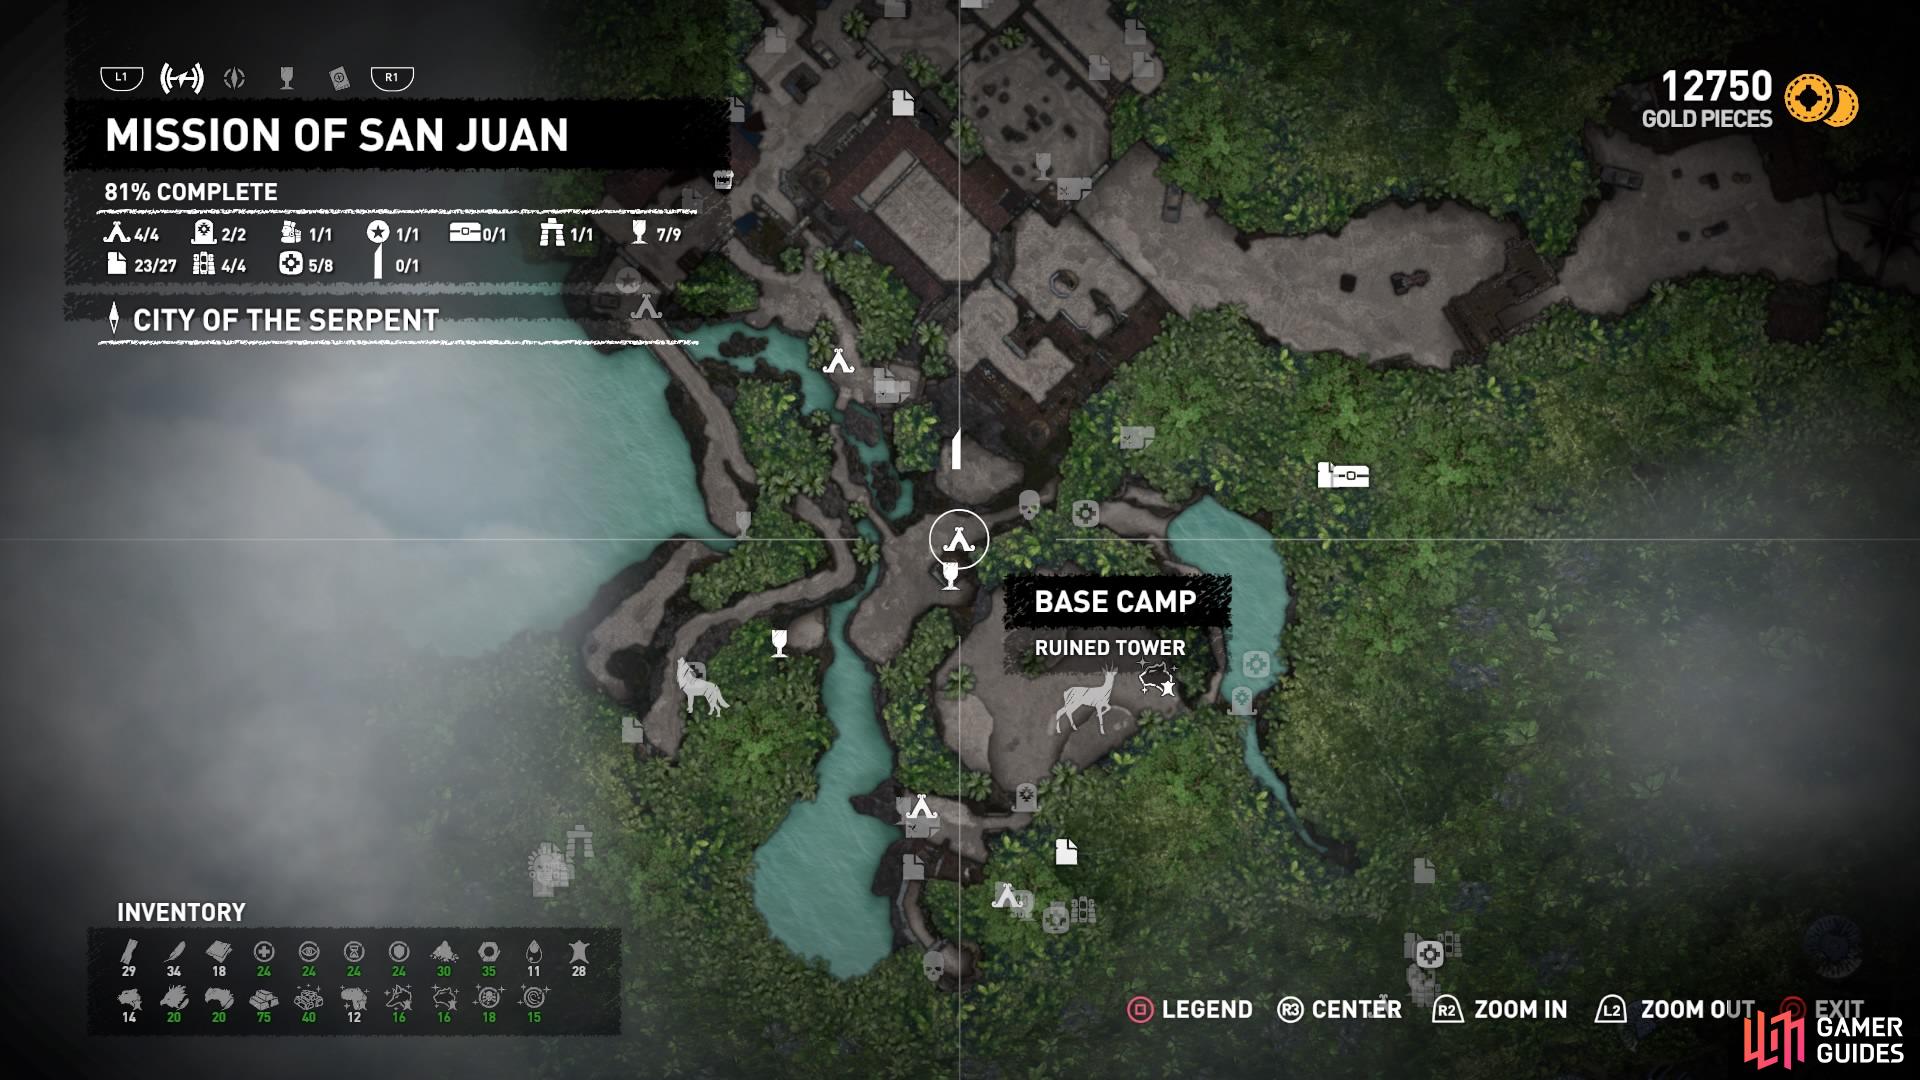
For the final chest in your collection, fast travel to the Ruined Tower Base Camp in San Juan. Head left along the log and run forward to come out over the river. You may remember this from the Thirsty Gods challenge tomb.
Dive off the wooden boards into the water below and stick to the left to keep an eye out for an opening. Swim underneath it to reach a dead end and climb out.
You can unlock the final chest as well as pick up a document while you’re at it!
No Comments