

Head to the Northern Canyon
Take the North Exit out of Raquel and then follow the path along until you enter Languedoc Canyon - North.
- Explore Languedoc Canyon - North

| Enemy | HP | Slash | Thrust | Pierce | Strike | Elemental Efficacy | Item Drop |
|---|---|---|---|---|---|---|---|
| Saber Cougar | 12720 | ☆☆ | ☆☆☆ | ☆ | ☆ | E - 80, WA - 100, F - 160, WN - 120 | Beast Flesh, U-Material |
| Northern Jaeger - Rifle | 37992 | ☆☆ | ☆☆ | ☆☆ | ☆☆ | E - 100, WA - 100, F - 100, WN - 100 | U-Material, EP Charge II |
| Northern Jaeger - Greatsword | 38032 | ☆☆ | ☆☆ | ☆☆ | ☆☆ | E - 100, WA - 100, F - 100, WN - 100 | U-Material, Teara Balm |
Follow the path along and take the first left to find a Chest that contains Celestial Balm EX, then take another left up ahead to find a Chest with All Sepith x50 inside. Proceed onwards and take a right to find a Red Chest with Chrono Break SR inside, this increases SPD by +8 and puts a delay on enemies. Finally, head up the hill to take on the Red Constellation.
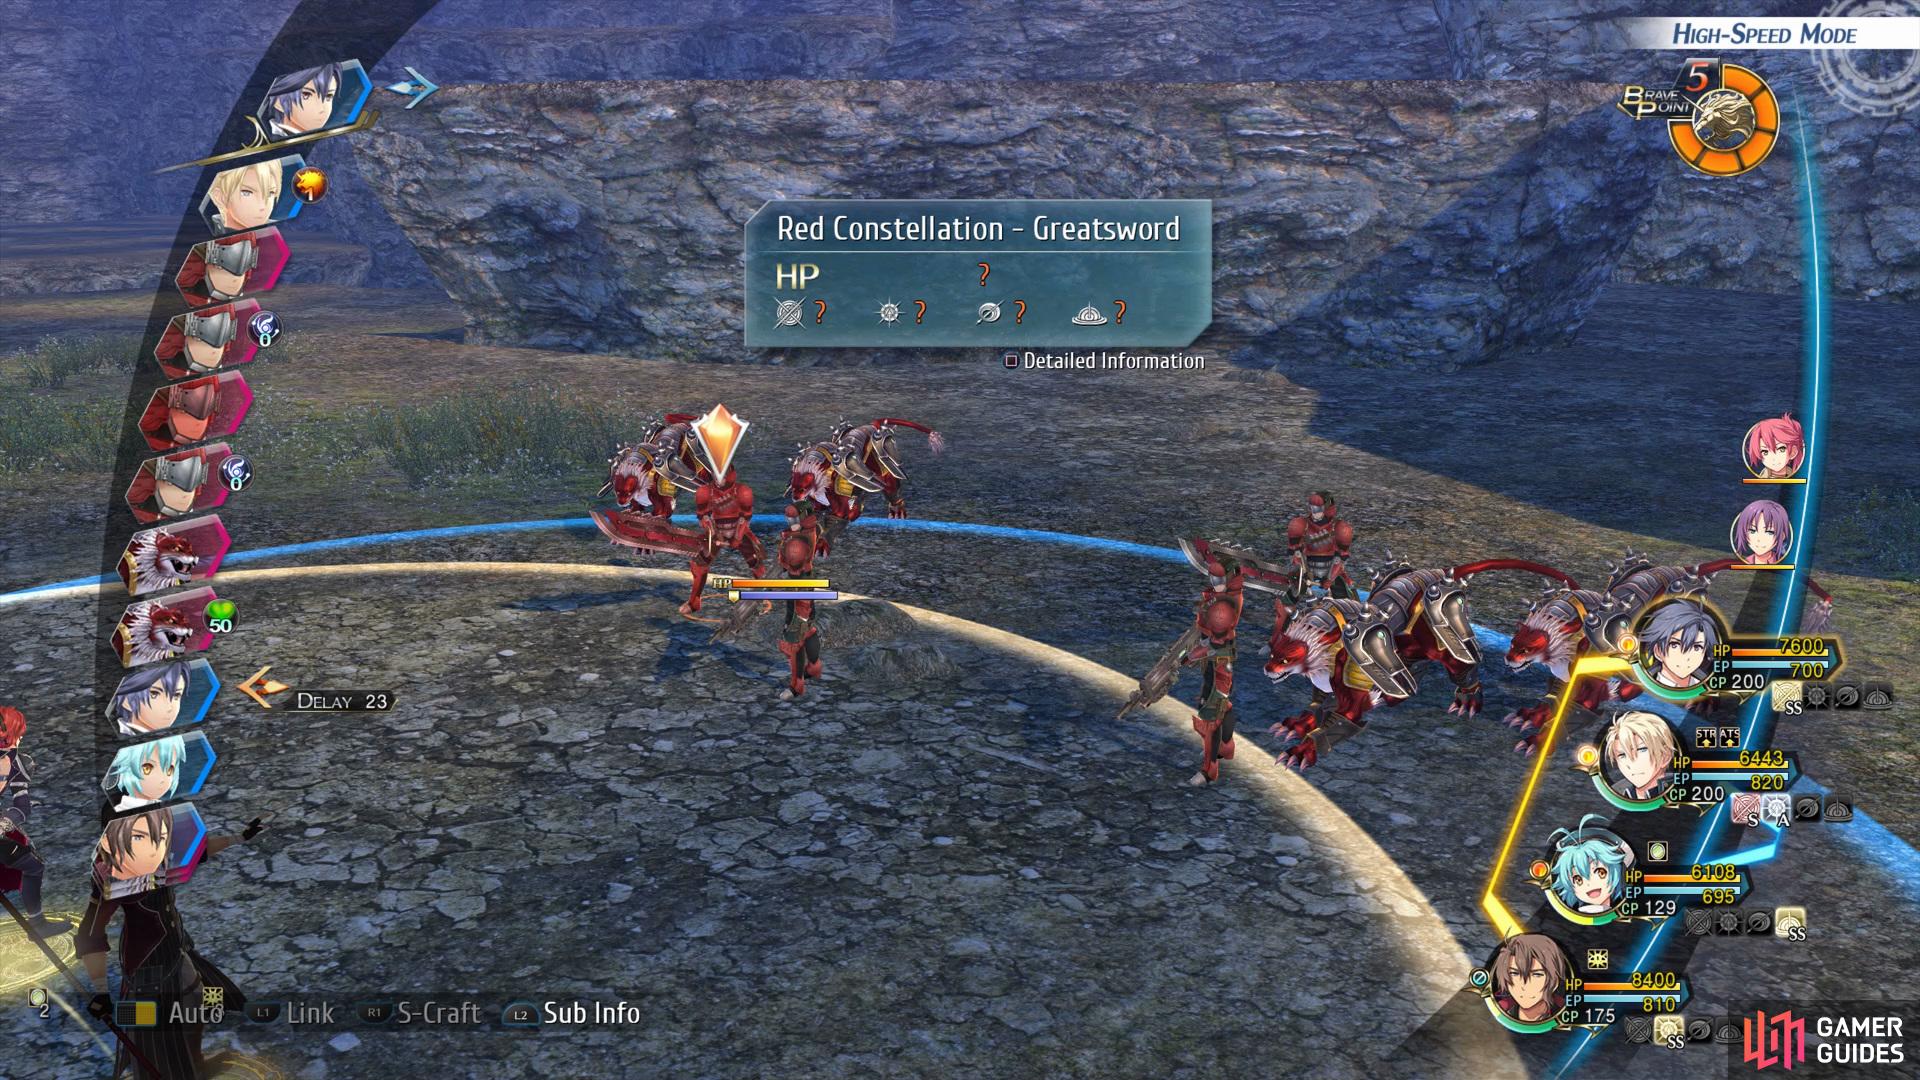
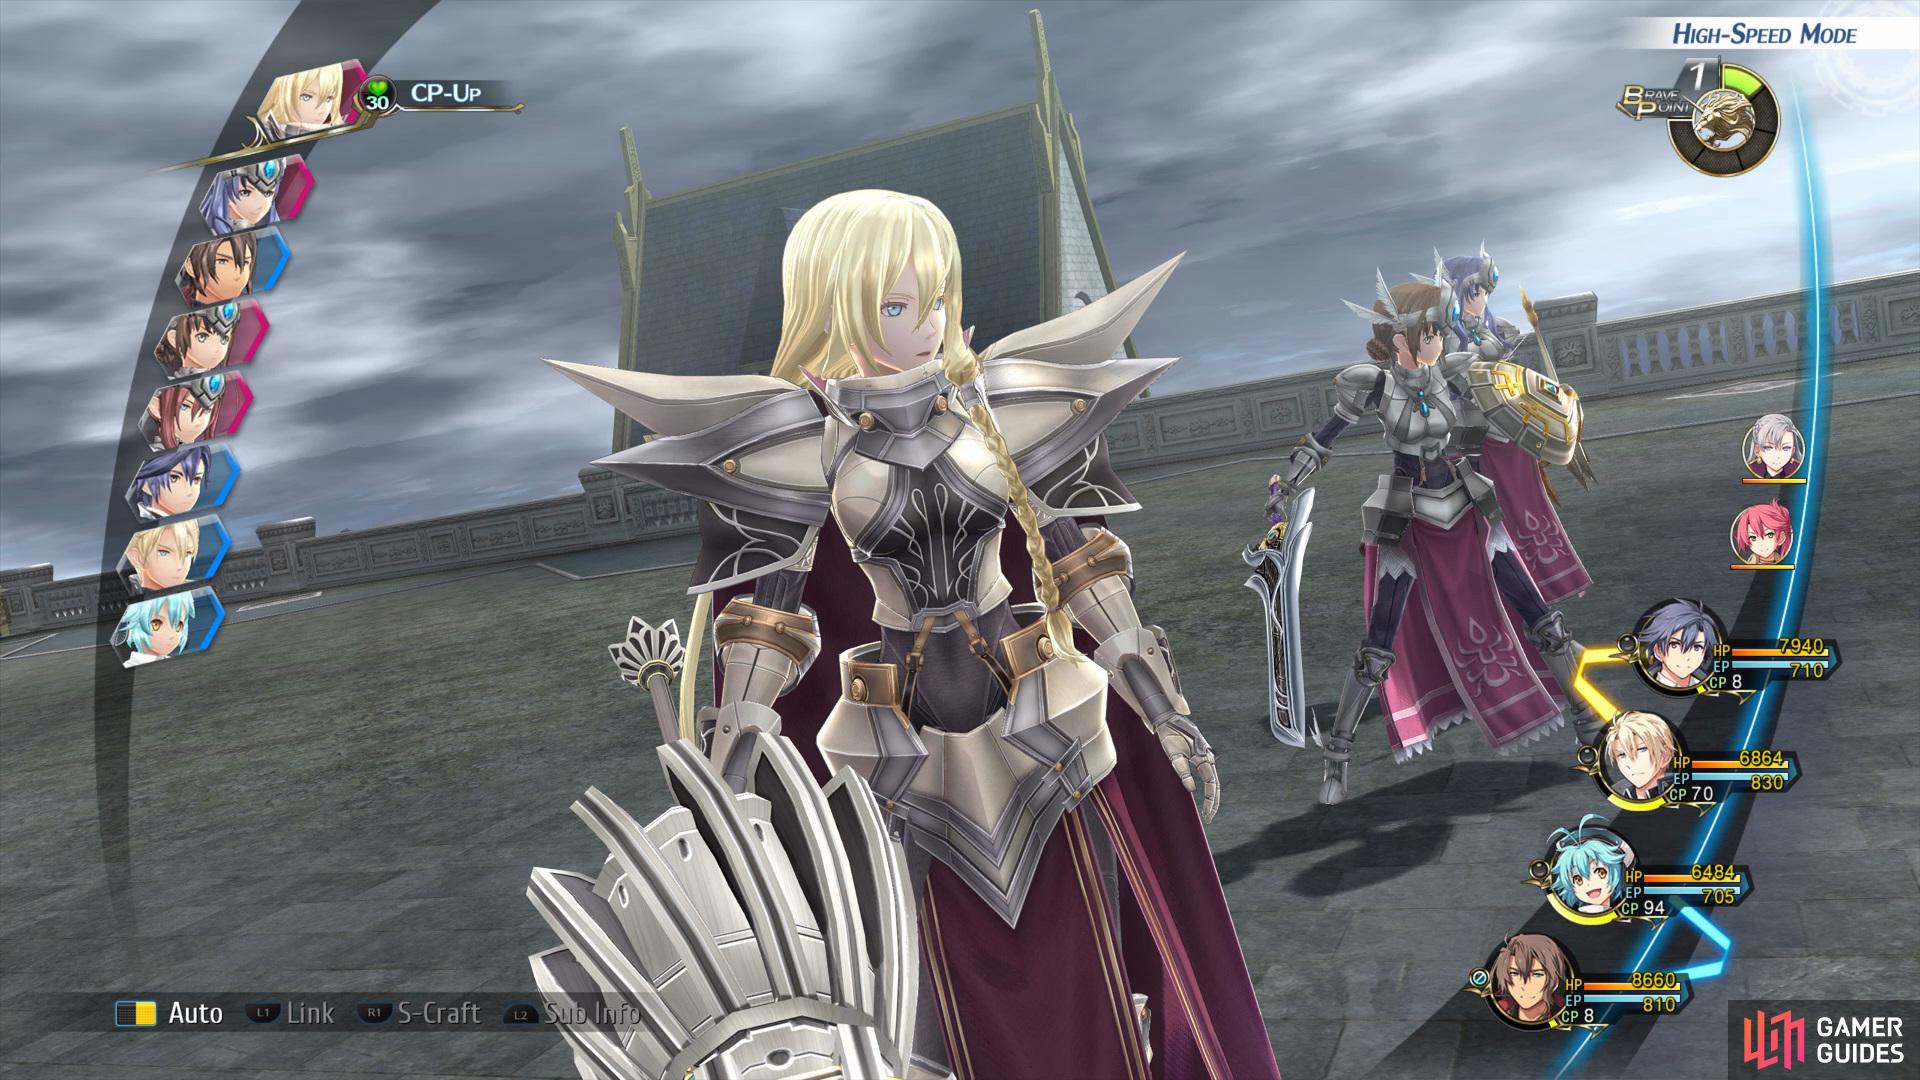
Boss: Red Constellation
| Enemy | HP | Slash | Thrust | Pierce | Strike | Elemental Efficacy | Item Drop |
|---|---|---|---|---|---|---|---|
| Crimson Cougar | 18455 | ☆☆ | ☆☆☆ | ☆ | ☆ | E - 100, WA - 160, F - 120, WN - 80 | Beast Flesh, U-Material |
| Red Constellation - Rifle | 43124 | ☆☆ | ☆☆ | ☆☆ | ☆☆ | E - 100, WA - 100, F - 100, WN - 100 | U-Material, EP Charge III |
| Red Constellation - Greatsword | 43164 | ☆☆ | ☆☆ | ☆☆ | ☆☆ | E - 100, WA - 100, F - 100, WN - 100 | U-Material, Tearal Balm |
Begin this battle by activating Spirit Unification along with Noble Rise to increase STR/ATS/SPF and Damage by 20%, then use any attacks that have an A/S Damage Rating until the buff has expired. Finally, finish the battle off with any available S-Crafts.
Make sure to also Impede any charged attacks and heal up the party if they go below 50% HP.
Take back the Naval Fortress
- Explore Juno N.F. - Main Route 1 (Team A)
| Enemy | HP | Slash | Thrust | Pierce | Strike | Elemental Efficacy | Item Drop |
|---|---|---|---|---|---|---|---|
| Sneak Gunner G | 8322 | ☆☆ | ☆ | ☆☆☆ | ☆☆☆ | E - 80, WA - 100, F - 160, WN - 120 | Tear Balm, U-Material |
| Sneak Gunner R | 8332 | ☆☆ | ☆ | ☆☆☆☆ | ☆☆☆ | E - 120, WA - 80, F - 100, WN - 160 | Reviving Balm, U-Material |
| Sneak Gunner M | 8316 | ☆☆☆ | ☆ | ☆☆ | ☆☆☆☆ | E - 160, WA - 120, F - 80, WN - 100 | Curia Balm, U-Material |
| Phalanx J9 | 13352 | ☆ | ☆ | ☆☆ | ☆☆☆ | E - 100, WA - 160, F - 120, WN - 80 | EP Charge I, U-Material |
| Saber Cougar | 13344 | ☆☆ | ☆☆☆ | ☆ | ☆ | E - 80, WA - 100, F - 160, WN - 120 | Beast Flesh, U-Material |
| Northern - Rifle | 38904 | ☆☆ | ☆☆ | ☆☆ | ☆☆ | E - 100, WA - 100, F - 100, WN - 100 | U-Material, Teara Balm |
| Northern Jaeger - Greatsword | 38944 | ☆☆ | ☆☆ | ☆☆ | ☆☆ | E - 100, WA - 100, F - 100, WN - 100 | U-Material, EP Charge II |
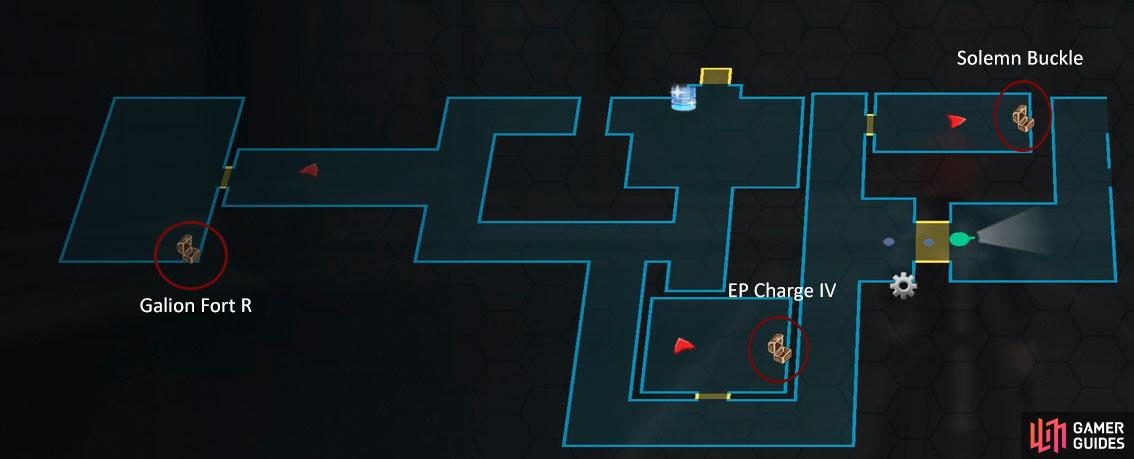
Once you’ve managed to take out the Red Constellation you’ll find yourself fighting through the navel fortress in order to reclaim it. Begin by following the right path along first to find a Red Chest in the room ahead that contains Galion Fort R, then go back and take the next right.
Enter the first room on your left to find a Chest that contains EP Charge IV, then enter the final room in this area to acquire a Solemn Buckle from the Red Chest, this gives you ATS+25/ACC+50% and prevents burn. Head towards the red door to transition over to Team B.
- Explore Juno N.F. - Sub 1 (Team B)
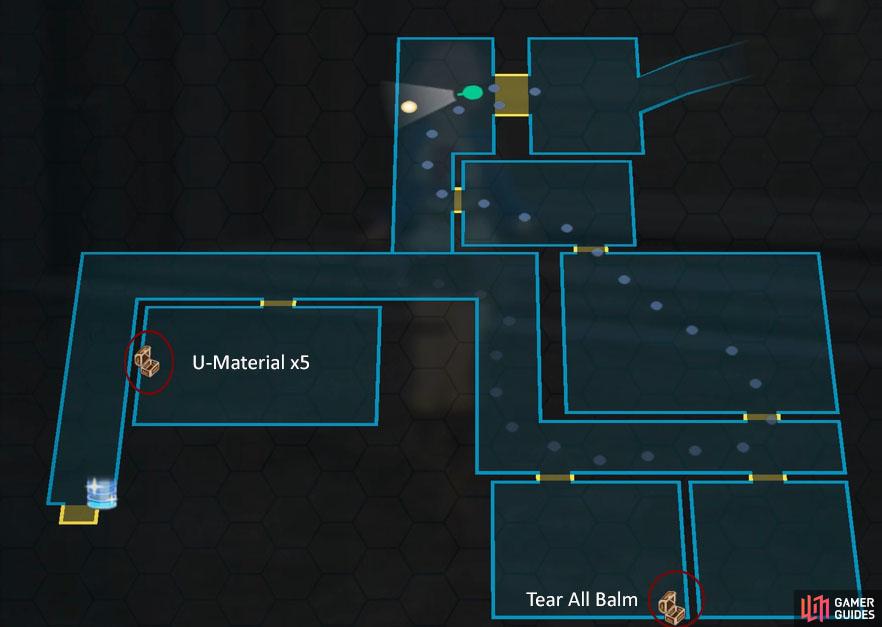
Follow the path along and enter the first room on the right to find a Chest with U-Material x5 inside, then continue along and enter the next room on the right for another Chest that contains Tear All Balm. Go in the final room on the right and interact with the lever to open the door for Team A. Press [L2+Square] to transition back to Team A.
- Explore Juno N.F. - Main Route 1 (Team A)
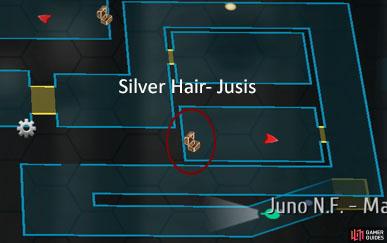
Proceed through the door and enter the second room on the right to find a Chest with Silver Hair- Jusis, then head into the next room on the right and interact with the lever. Finally, go up the stairs at the end of the path to find yourself in Main Route 2.
- Explore Juno N.F. - Main Route 2 (Team A)
Head into the room on the left and climb up the ladder to find a Red Chest with a Zeruel Cannon R inside, this increases STR+15/DEF+10 and has a 100% Burn chance. Climb back down the ladder and enter the room ahead, then go through the vent.
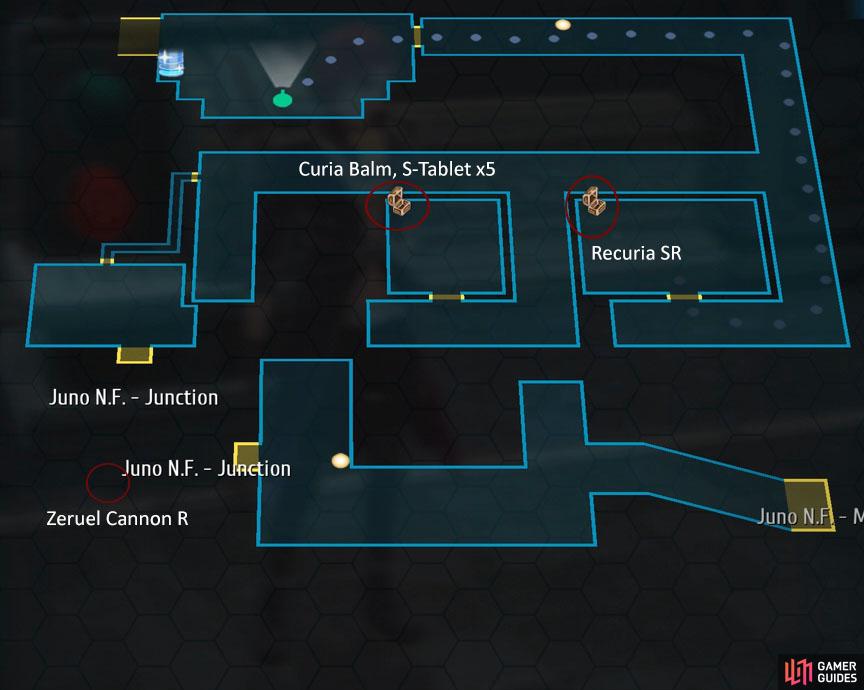
Follow the path along and head into the room on the right to find a Chest with Curia Balm and S-Tablet x5, then take the next right to find another room with a Chest inside that contains Recuria SR, this gives HP+400/EP+40.
Take the left path along until you enter a large room and then switch over to Team B. Head up the stairs and enter Juno N.F. - Sub 2.
- Explore Juno N.F. - Sub 2 (Team B)
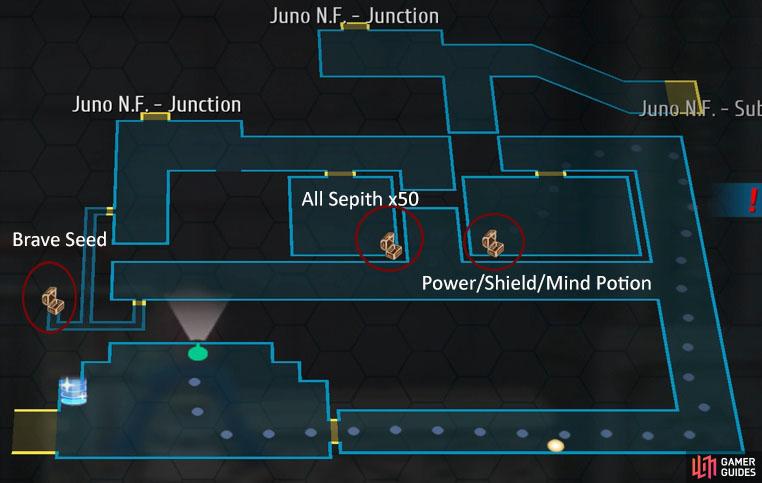
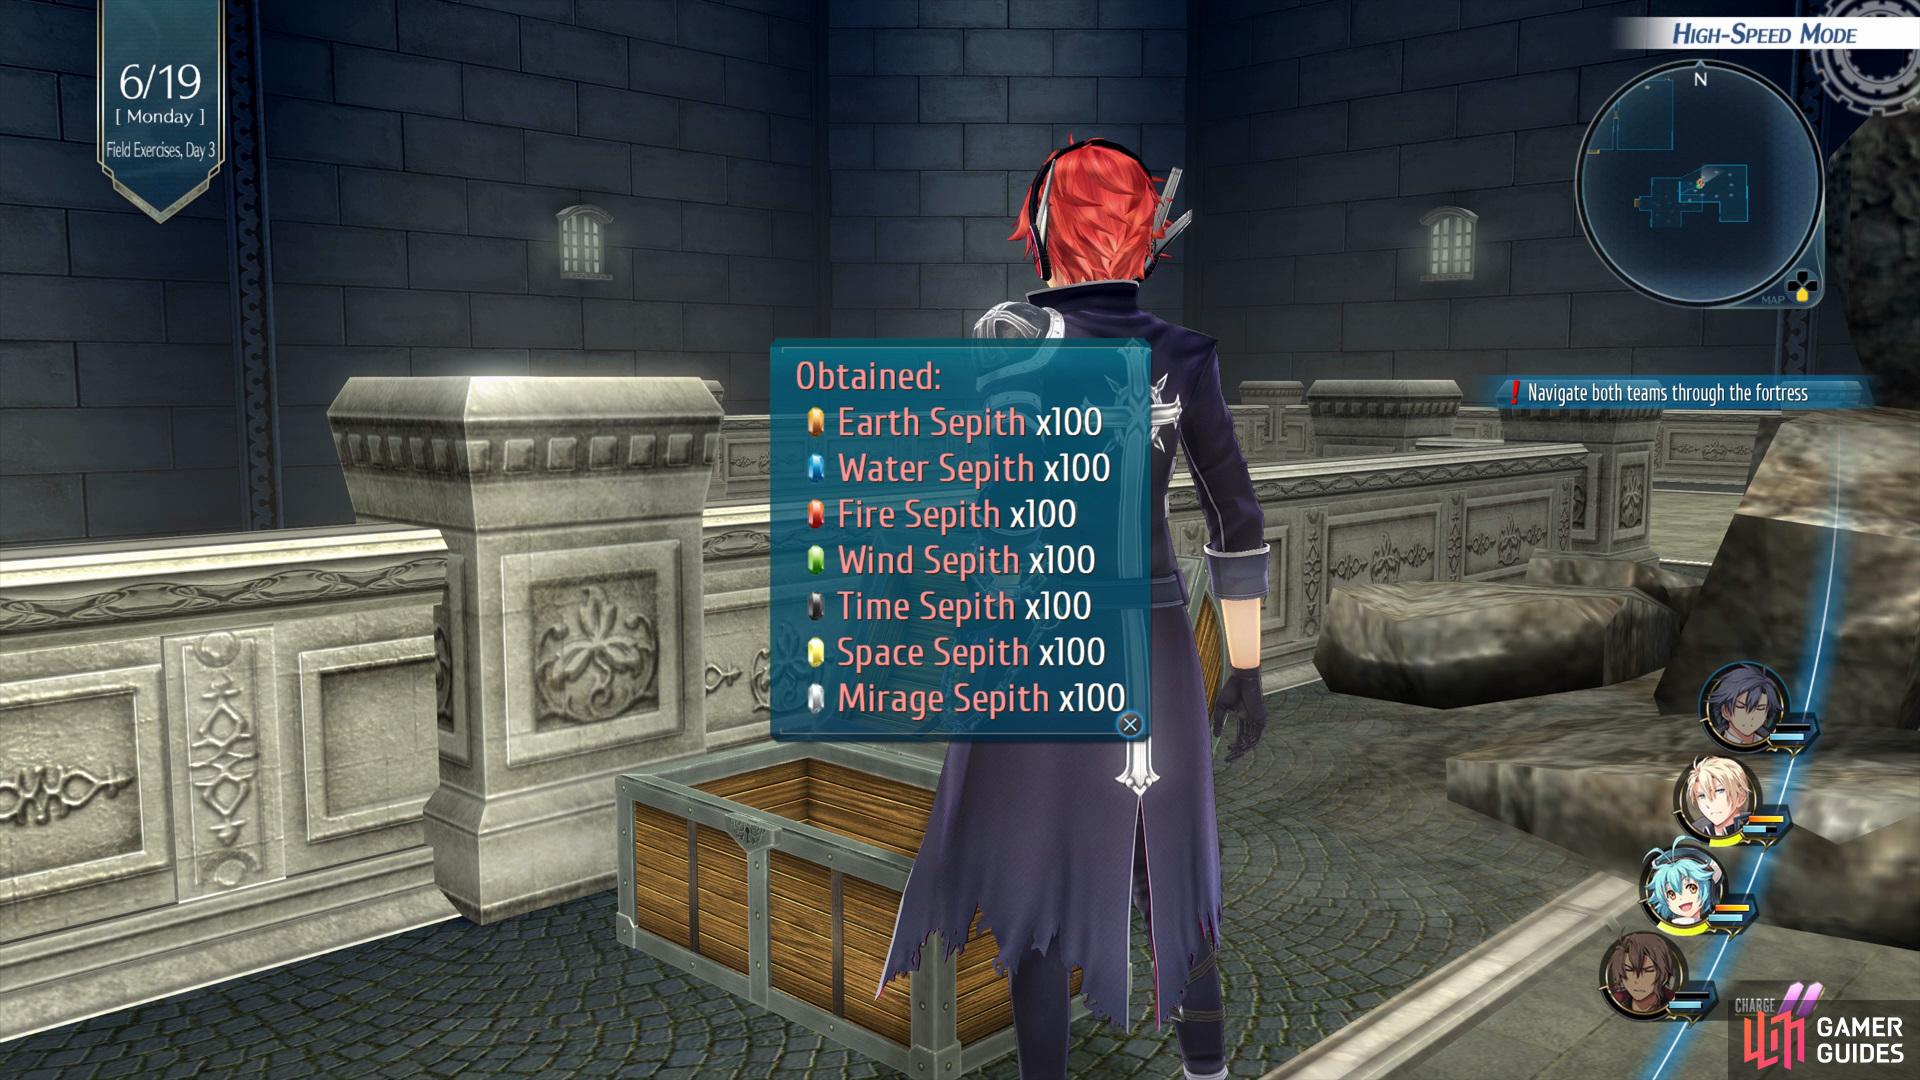
Go through the door on the right and follow the path along and then reenter the building. Begin by heading into the second room on the right to find a Chest that contains All Sepith x50, then go through the vent and take the right route first to find a Chest with a Brave Seed inside. Once you’ve made it out of the vent, take a left at the end of the path to find a Chest that contains a Power/Shield/Mind Potion. Finally, proceed into the open room and interact with the lever to open up the doors.
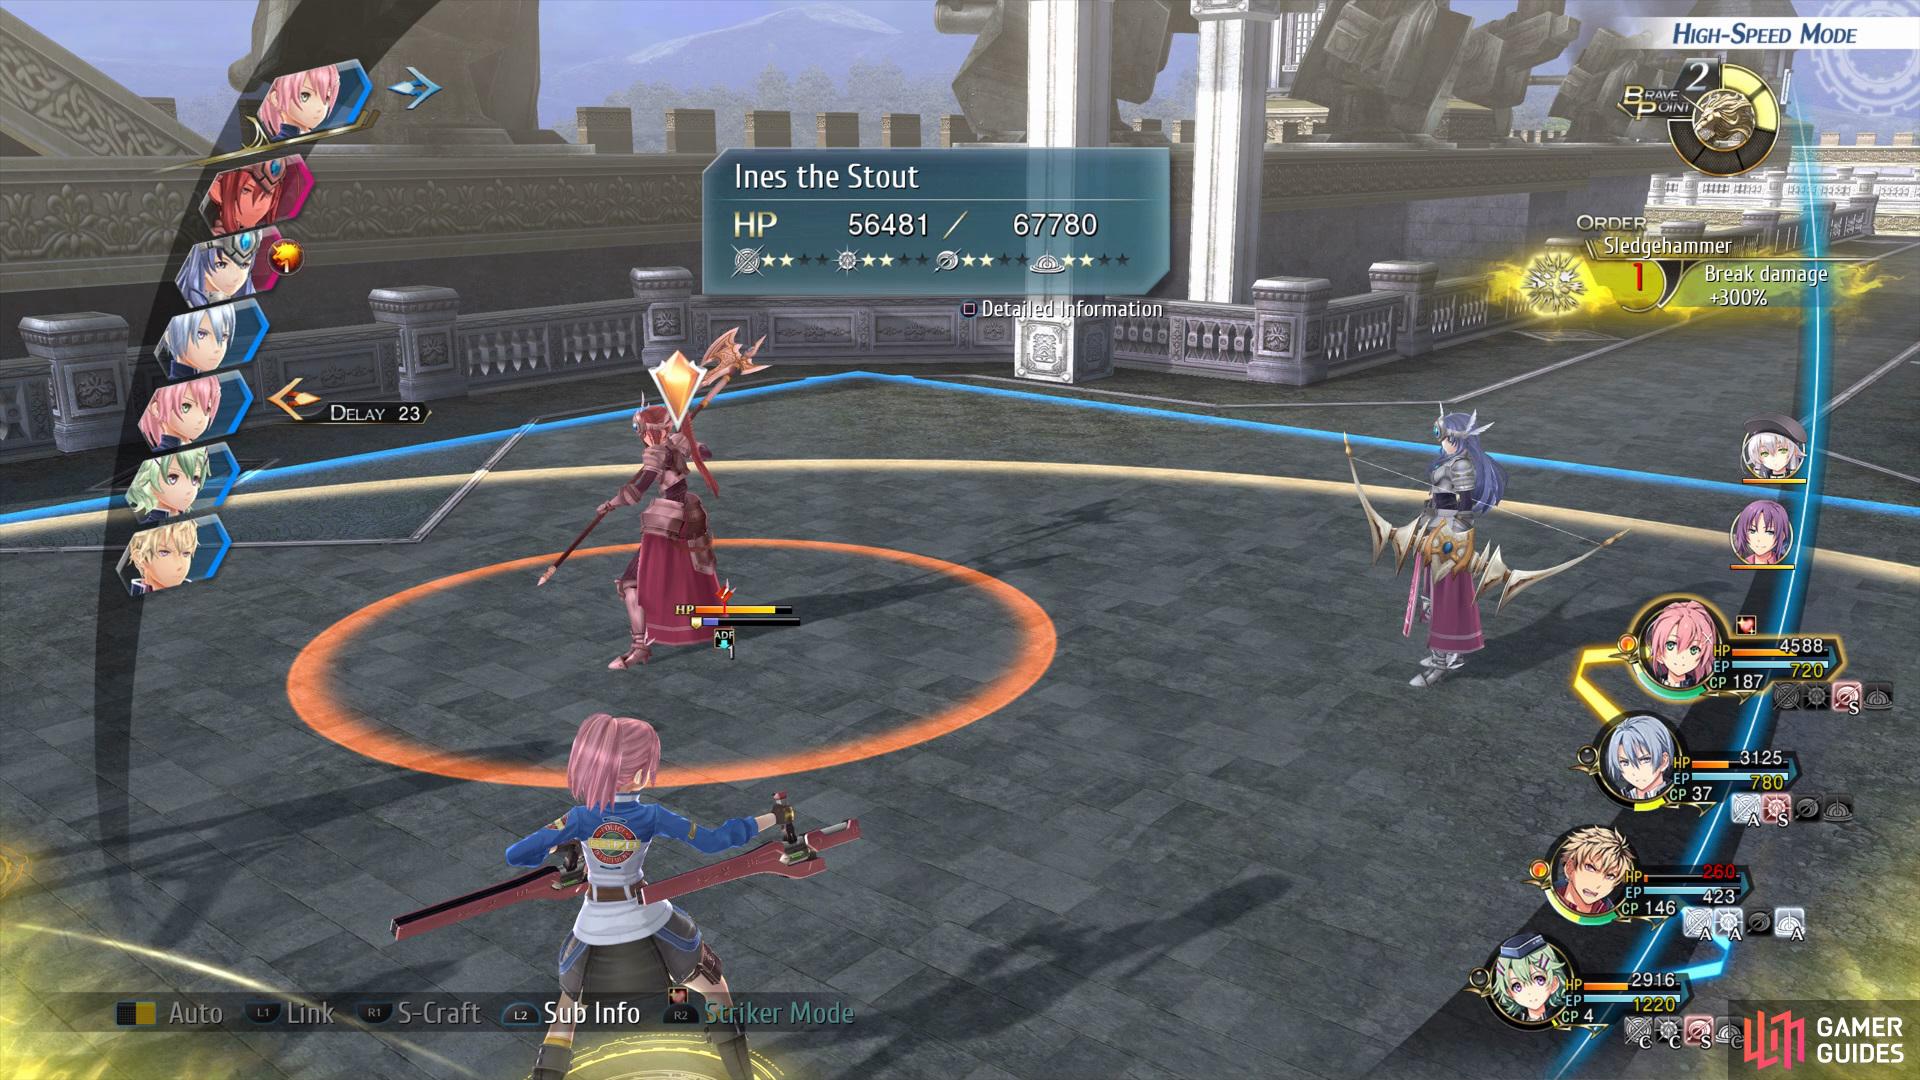
Follow the path along until you initiate a cutscene and then you’ll battle Ines the Stout and Ennea the Sharp.
Boss: Ines the Stout and Ennea the Sharp
| Enemy | HP | Slash | Thrust | Pierce | Strike | Elemental Efficacy | Item Drops |
|---|---|---|---|---|---|---|---|
| Ines the Stout | 67780 | ☆☆ | ☆☆ | ☆☆ | ☆☆ | E - 100, WA - 100, F - 100, WN - 100, TI - 100, SP - 100, MI - 100 | N/A |
| Ennea the Sharp | 67520 | ☆☆ | ☆☆ | ☆☆ | ☆☆ | E - 100, WA - 100, F - 100, WN - 100, TI - 100, SP - 100, MI - 100 | N/A |
For this battle you’ll need to work on getting either Ines or Ennea down to 30% HP. Begin the battle by scanning both of the ladies, then use Sledgehammer and focus on getting them into the break status by using any craft with an A/S rating. Once you’ve achieved this, use Wind Blade and follow up with normal attacks to delay their turn. Activate Ebon Dragon before their next turn and use any available S-Crafts to finish them off.
- Explore Juno N.F. - Junction (Team A/B)
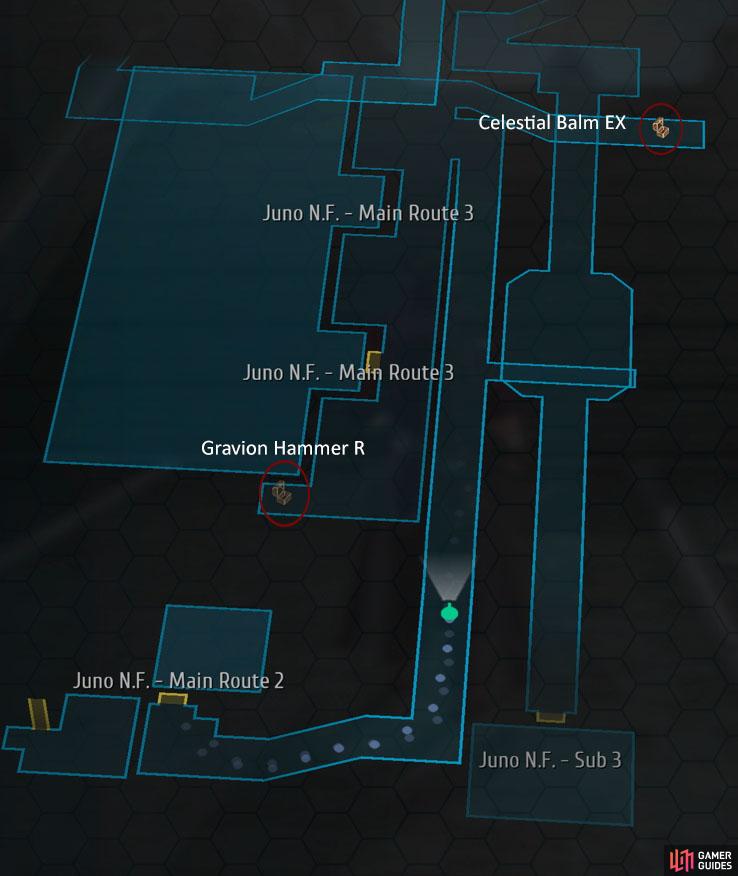
After you’ve finished the battle against Ines the Stout and Ennea the Sharp, you’ll transition over to Team A, here you’ll want to follow the path up to view an event. Once you regain control, head up the path ahead and take a right to find a Chest that contains Celestial Balm EX, then go down the left path to find a Red Chest that contains Gravion Hammer R, this increases STR+10/DEF+20, but lowers MOV/SPD.
- Explore Juno N.F. - Sub 3 (Team B)
Switch over to Team B and continue onwards, take the stairs up and enter the door on the left to find a Red Chest that contains Seiryuu, this increases STR+40 and gives crafts a chance to inflict Mute or Freeze. Climb up the ladder and continue further up the stairs to find a Chest that contains Zeram Powder.
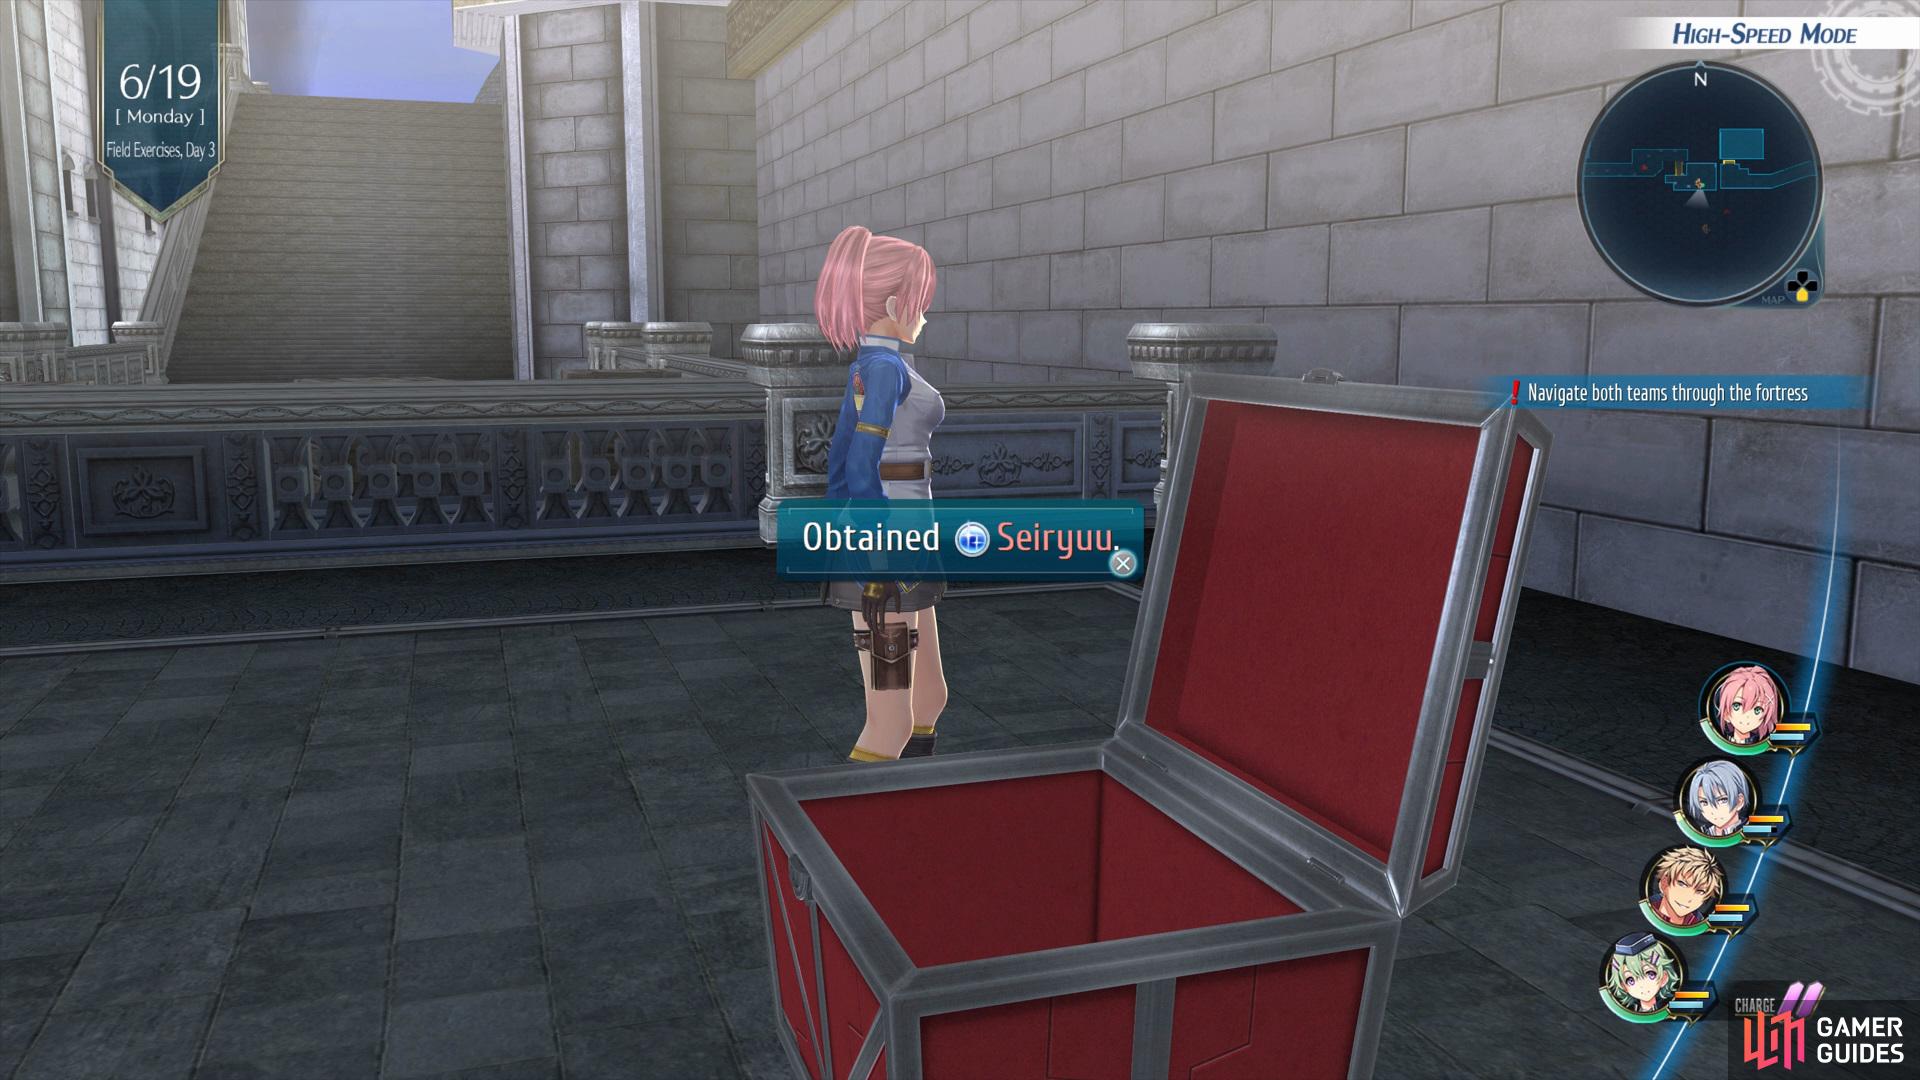
Head into the room on the left to find a Red Chest with Seiryuu inside
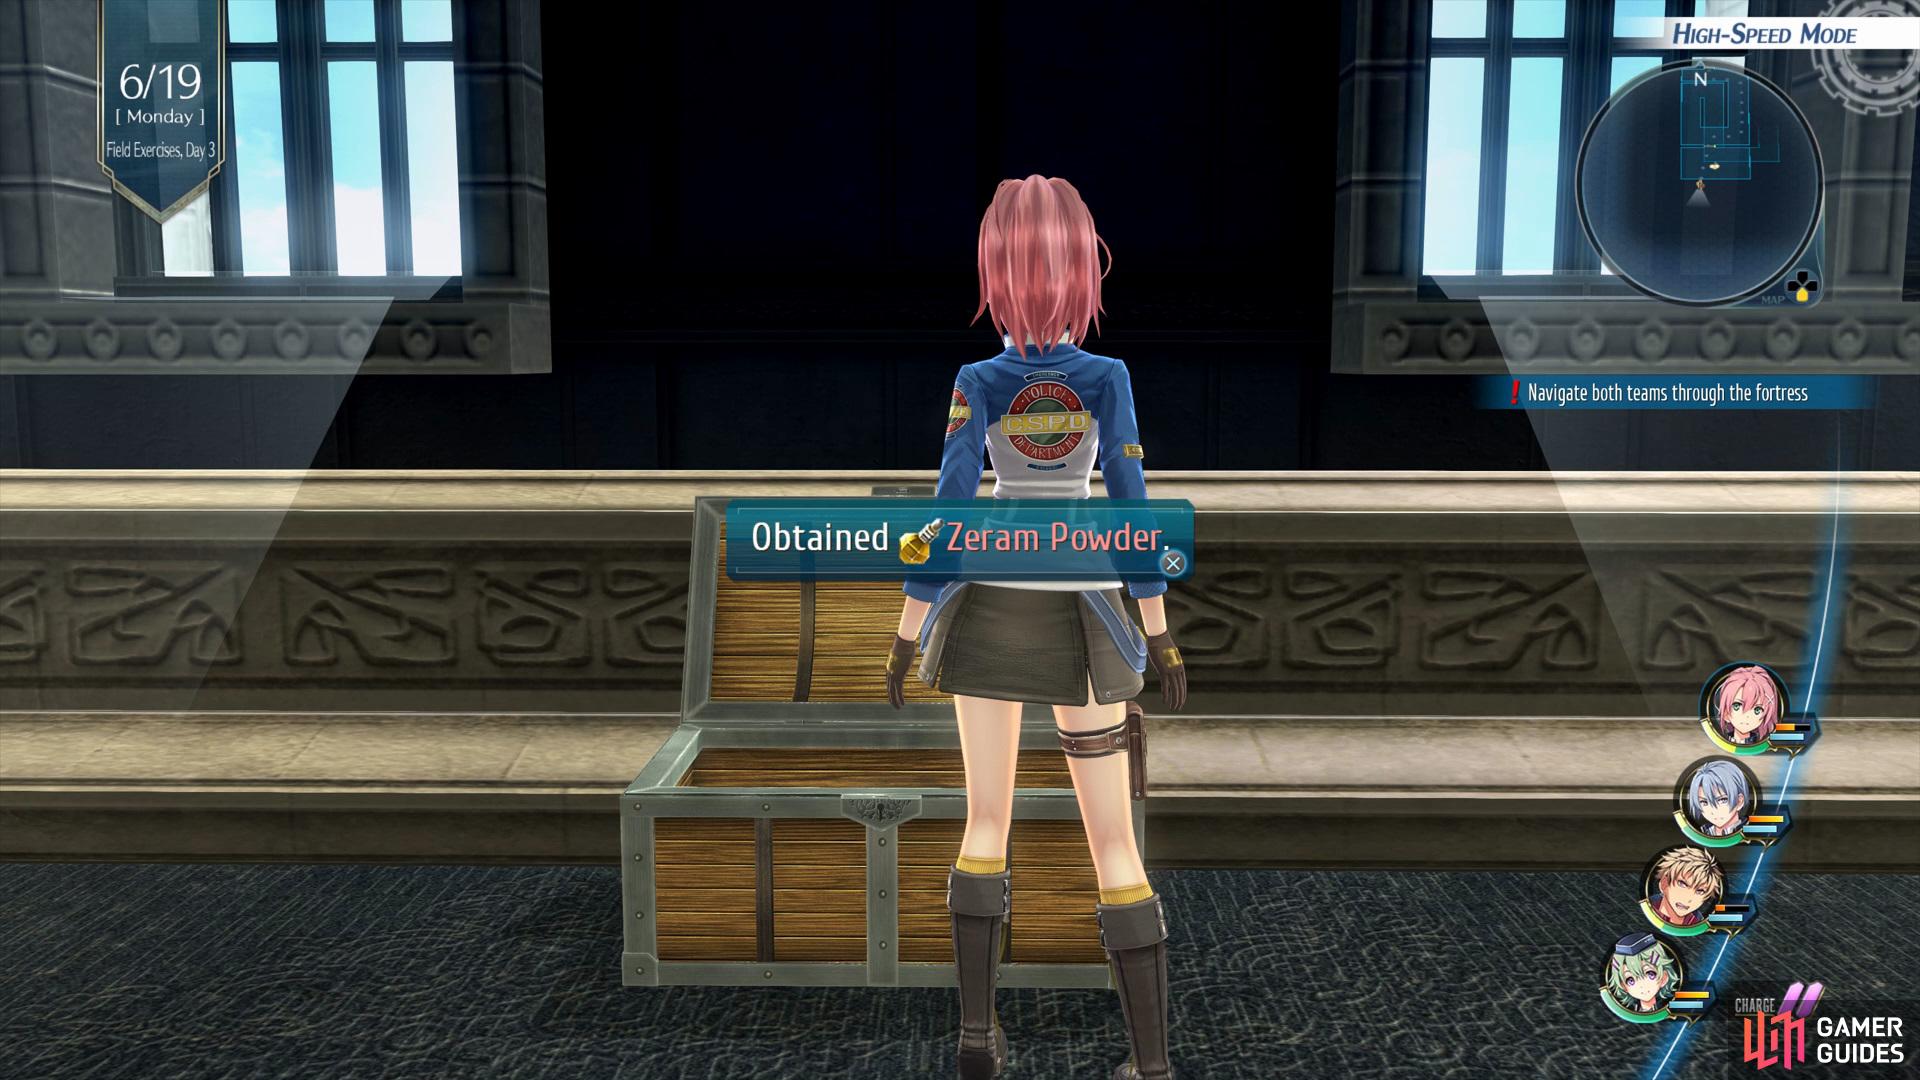
then go back into the building and make your way to the top of the stairs to find a Chest with Zeram Powder.
Finally, proceed up onto the roof and interact with the lever before switching back to Team A.
- Explore Juno N.F. - Main Route 3 (Team A)
Proceed into Main Route 3 and head into the room on the left to find a Chest that contains U-Material x5, then go into the room on the right to find another Chest holds Sprit Incense, now go up the stairs and enter the final room on the left and then go through the vents to find a Chest with Zeram Powder.
Head into the room on the right to find a chest with all sepith x50

them go to the top of the stairs to find another chest with a Seraphic Ring R inside.
Interact with the lever to open the doors, then head up onto the roof and re enter the building. Proceed up the stairs and take a right to find a Chest that contains All Sepith x50 then climb up the ladder. Finally, go to the top of the stairs to find a Red Chest with Seraphic Ring R, this increases HP+500/EP+50% and heals all HP and cures K.O.
Head out onto the roof and interact with the lever alongside the other team to face, Enena the Sharp, Ines the Stout, Duvalie the Swift and Arianrhod the Steel Maiden.
Boss: Enena the Sharp, Ines the Stout. Duvalie the Swift, Arianrhod the Steel Maiden
| Enemy | HP | Slash | Thrust | Pierce | Strike | Elemental Efficacy | Item Drop |
|---|---|---|---|---|---|---|---|
| Arianrhod the Steel Maiden | 109780 | ☆☆ | ☆☆ | ☆☆ | ☆☆ | E - 80, WA - 80, F - 80, WN - 80, TI - 80, SP - 80, MI - 80 | N/A |
| Duvalie the Swift | 67600 | ☆☆ | ☆☆ | ☆☆ | ☆☆ | E - 100, WA - 100, F - 100, WN - 100, TI - 100, SP - 100, MI - 100 | N/A |
| Ennea the Sharp | 67520 | ☆☆ | ☆☆ | ☆☆ | ☆☆ | E - 100, WA - 100, F - 100, WN - 100, TI - 100, SP - 100, MI - 100 | N/A |
| Ines the Stout | 67780 | ☆☆ | ☆☆ | ☆☆ | ☆☆ | E - 100, WA - 100, F - 100, WN - 100, TI - 100, SP - 100, MI - 100 | N/A |
Before you begin this battle, make sure you have at least three BP and 200 CP on all members. Once you begin you’ll face a barrage of attacks, heal up the party and activate Noble Rise which will increase the parties damage by 20%, now use all the four S-Crafts in quick succession to easily take out the group.
Make sure to fully heal up
when they use a combo of attacks on you.
If they manage to survive, heal up again if you need to and activate Spirit Unification to increase your damage, then hit the remaining enemies with one final blow.
Once you’ve defeated the girls you’ll view a cutscene and then face another opponent, Aion Type-a II
Boss: Aion Type-a
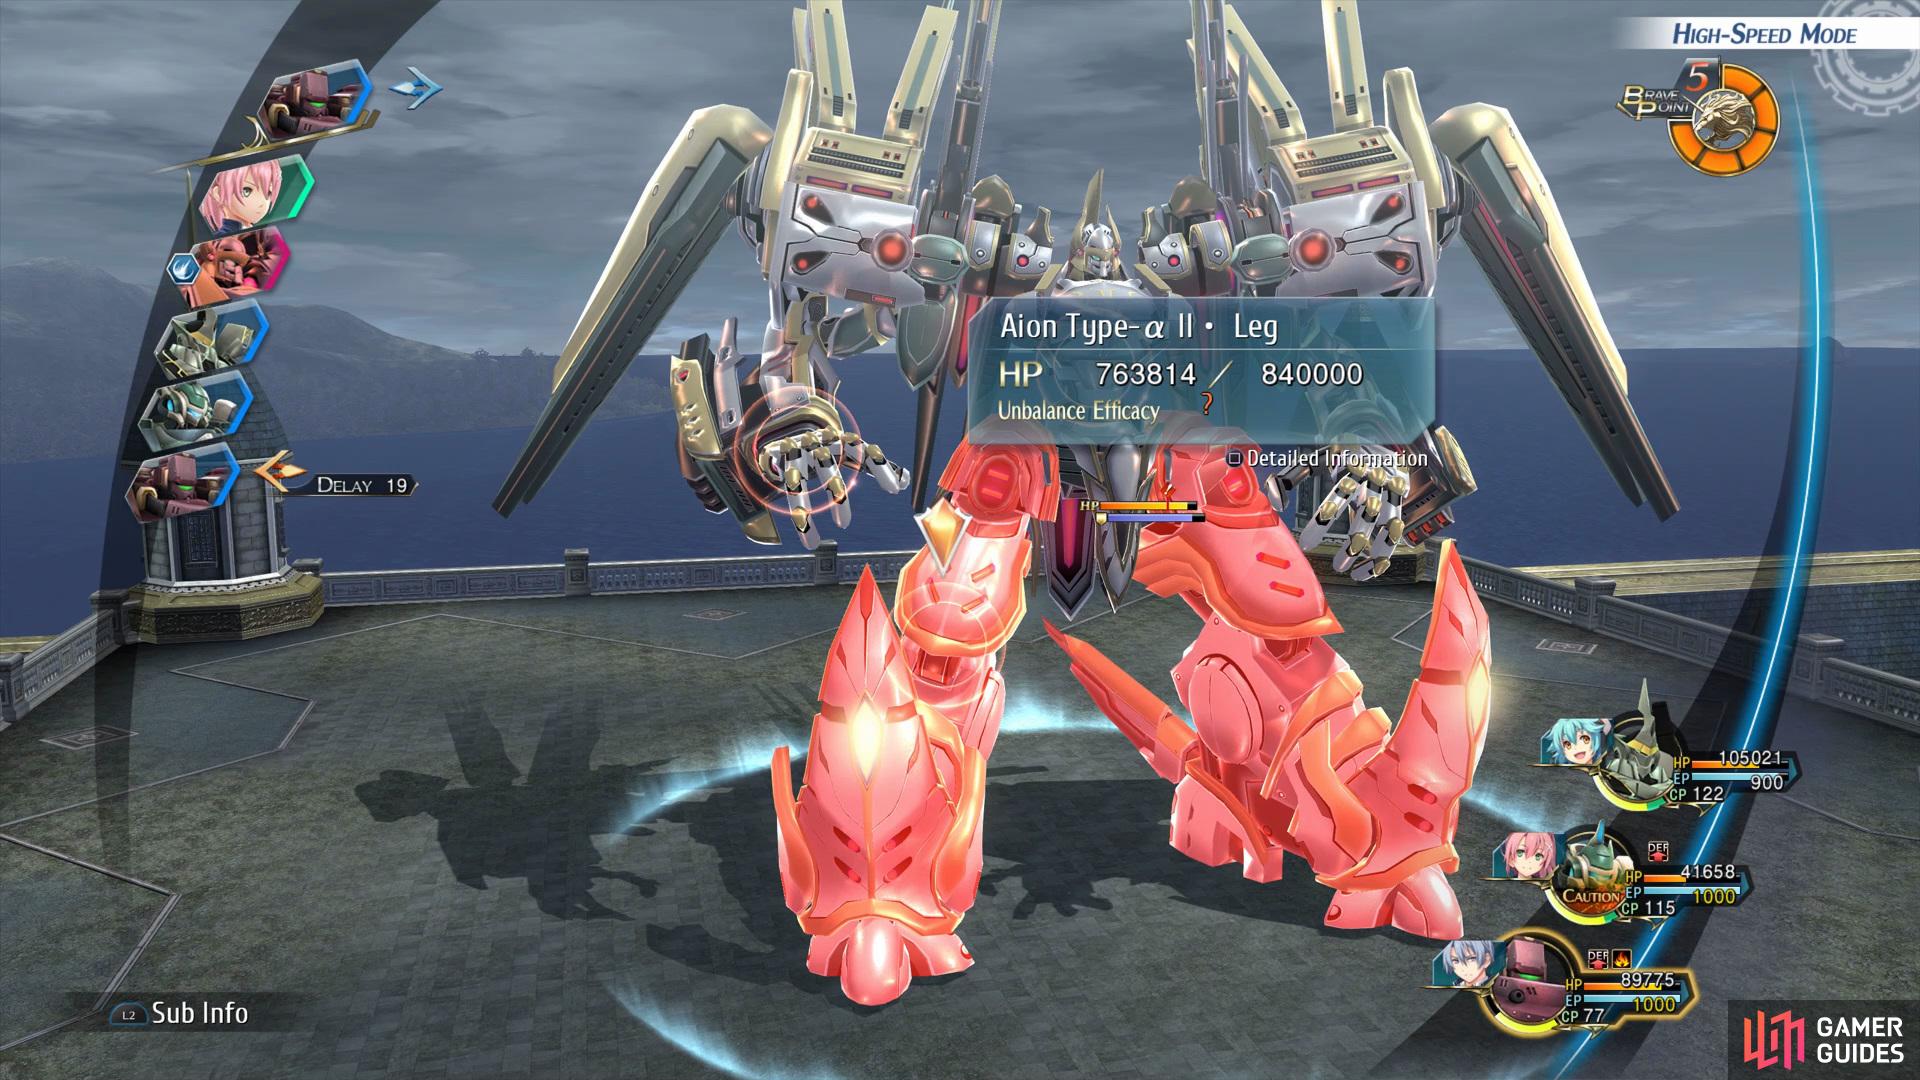
| Enemy | HP | Position | Body | Leg | Arm |
|---|---|---|---|---|---|
| Aion Type-a II | 840000 | Default Stance | ☆ | ☆ | ☆☆☆☆ |
| Charged Stance (Weapon Facing you) | N/A | N/A | ☆☆☆ | ||
| Charged Stance (Right Hand Raised) | ☆☆☆☆ | N/A | N/A | ||
In order to defeat this boss you’ll want to pay close attention to his stances and then attack the correct weak spot in order to deal maximum damage. Your first goal is to get him down to 70% HP, 40% HP, then finally defeat him.
-
Normal Stance: When he is in his Normal Stance you’ll want to focus on to his arms.
-
Charged Stance #1: When he points his gun towards the party you’ll want to focus on to his body.
-
Charged Stance #2: When he raises his right hand a little you’ll want to focus on to his legs.
-
Charged Stance #3 - When he raises both arms you’ll want to focus on to his body.
-
Charged Stance #4 - When he crouches you’ll want to focus on to his arms.
-
Charged Stance #5 - When he starts hovering you’ll want hit to his legs.
Once you’ve defeated him you’ll view a few cutscenes which wrap up Chapter 3.
No Comments