After that climactic scene, we’ll unfortunately be back in the real world again. A scene will ensue from the get go, so endure it until the conversation dries up and then, when you are back in control again, make your way to the elevator. Hit the button for ‘fl.B – servers’ and ride it down.
As you get off the lift, follow the red lights as you work your way down the dark corridor. Note that we now have access for doors locked with level 3 security clearance. Use your new access to enter the door at the end of the hallway and then another soon after.
Make your way towards the glowing red panel ahead and instead of messing around with it; get in the lift on the left. Ride it down and then follow your green objective marker whilst looking amongst the servers along the left hand wall here for another glowing yellow panel representing a computer we can hack. Interact with this.
Finally, the last compulsory hacking mini-game in the game (although there are plenty more if you want to track down all of the computers!)! Remember to solve the puzzle, we need to activate all the core segments by rotating the rings so that each laser is pointing to a different segment on the sphere so that it all lights up in blue. This puzzle does away with the red reflection panels we saw earlier, but has included multiple blue transparent panels to up the difficulty.
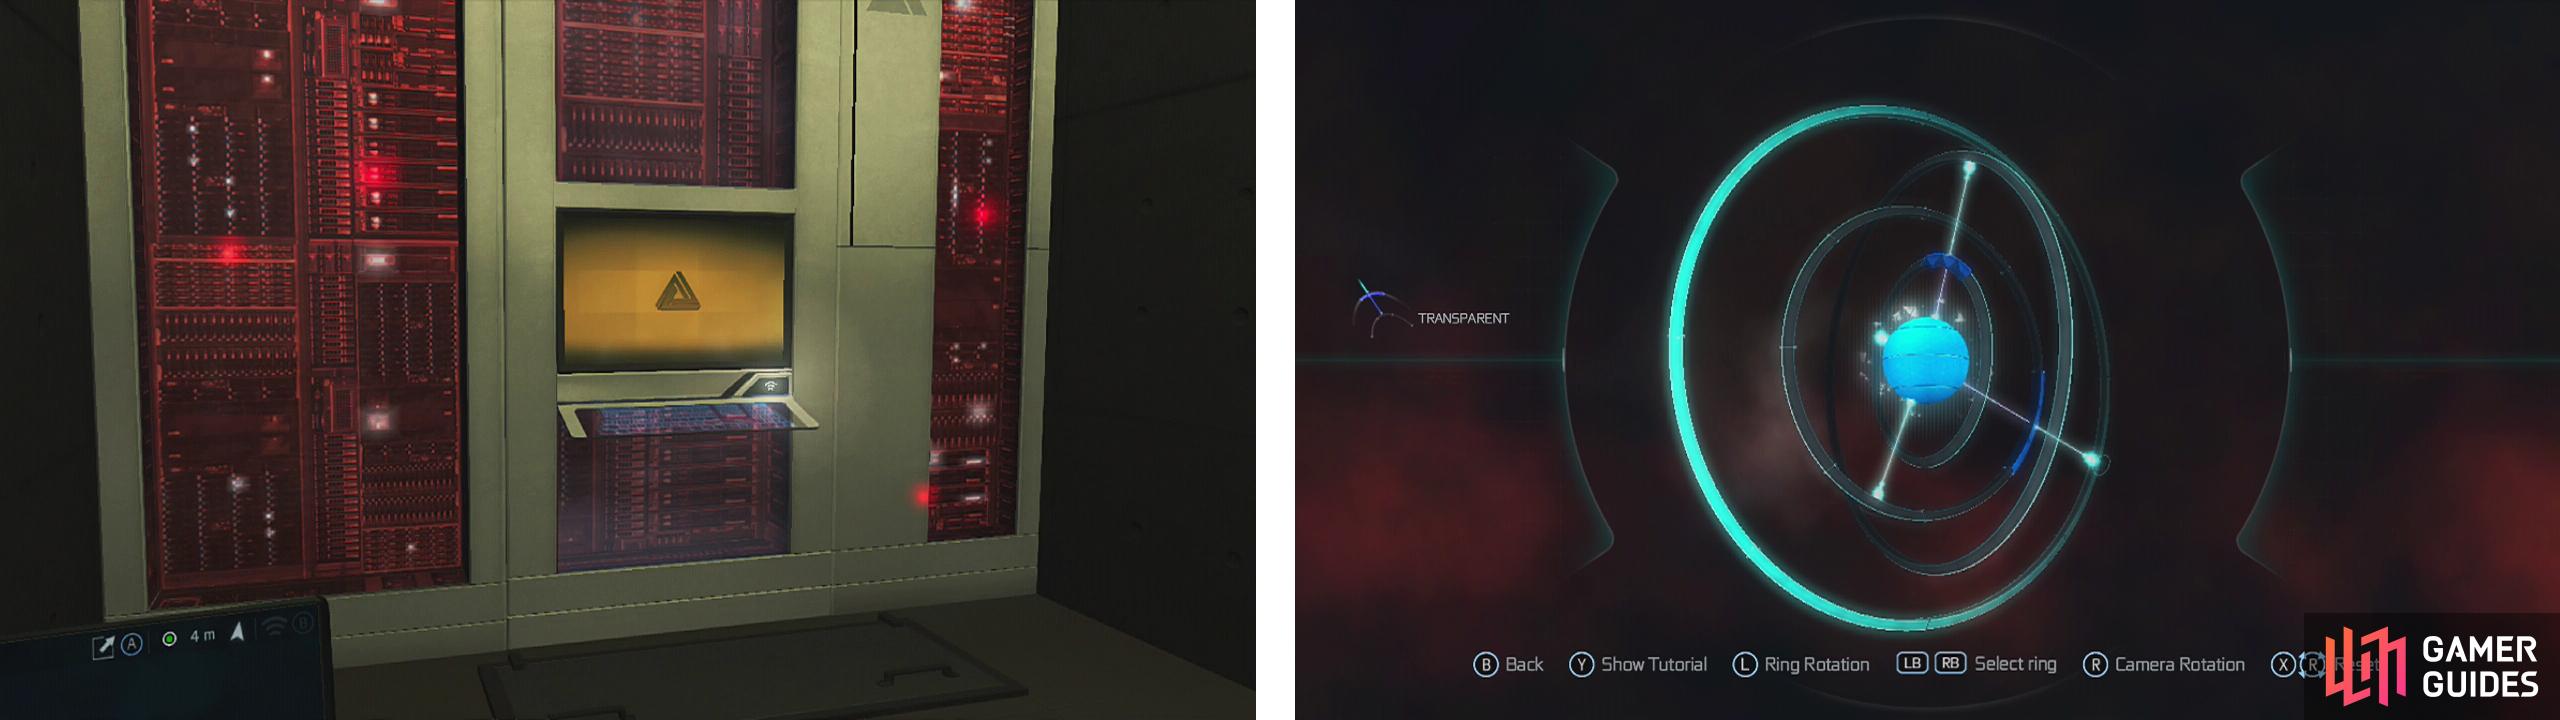
Find the computer in need of repair (left). Organise the rings as such (right) to solve the puzzle.
This core has four segments. To solve this puzzle, follow these simple steps:
- Move the innermost ring’s laser to point at the second segment from the top (its blue panel should be facing directly up).
- Move the second smallest ring’s laser to point at the lowest segment (its blue panel should align on the right)
- Move the second largest ring so that it’s laser targets the top segment.
- Move the largest ring’s laser so that it hits the second lowest segment.
This will unlock the core and a scene will play. After you are done, exit the computer. Return up the lift and now interact with the red panel that we ignored earlier located at the top for a scene.
Once that is all done, return to the Animus.


No Comments