Before proceeding with this memory, you are going to want to upgrade the Morrigan a bit as you’ll be doing a little bit of sea-based attacking and it can be a little difficult. Note that it is most certainly possible to complete this sequence without any upgrades, I would strongly recommend that you get some anyway as it can be frustrating. I would recommend the following upgrades:
- Hull Armour (1200 L + 50 metal + 70 wood)
- Puckle Gun Strength (700 L + 50 metal)
- Mortars (500 L + 20 metal)
- Round Shot Strength (900L + 30 metal)
Part 1: Naval Exploration
Following the introduction, you’ll be behind the wheel of the Morrigan and be making tracks for the green objective marker around the corner in the distance. As we move that way, you’ll come across some floating mines in the water. Slow down when you reach these and use the Puckle gun to take them all out before your ship takes any damage.
Once the route is clear, continue onwards until you reach the French outpost. Dock the ship and move ashore.
Part 2: Outpost Raid
Once you are ashore, run up and synchronise with the waypoint here to unlock a fast travel point (not really necessary, but good to have anyway!). Next we want to carry out our first Outpost Raid. These will become a side task available in the world following this mission and are quite simple.
Essentially, we need to sneak into the restricted zone, find and locate a guard carrying a key using Eagle Vision, kill him and then loot the warehouse door in the outpost. Sounds easy right? The difficulty with this particular raid is that we have an optional objective to hang the key holder using a rope dart. Still, that’s not so tough if you know where to go, so let’s do it!
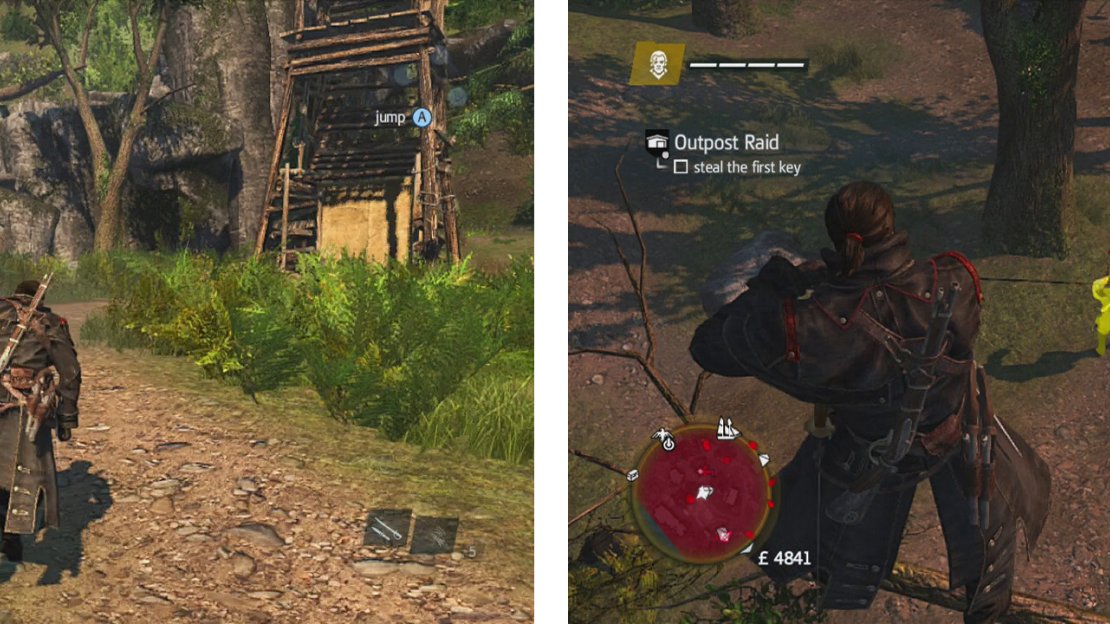
Between the tower with the synchronisation point and the wall of the restricted area, you’ll find a conveniently placed fallen tree leading up to a rocky ledge above. Head on up here. at the top, immediately enter the bushes here to avoid being spotted by the guard in the watch tower by the gate. Move up to the end of the first structure. There is a guard cutting laps of the tents in this area, wait for him to come nearby and whistle him over for a quick kill.
Go to the far end of the camp and next to the ramp leading down, you’ll see another fallen tree. Use this to jump across to the next tree. From here you’ll want to use Eagle Vision to locate the key holder. Now follow the route through the trees until you reach the tree missing its top, with a branch to either side (there is an Animus Fragment above if you haven’t been here before). From here, wait for the key holder to patrol beneath you, pull out your rope darts, target him and hold down the dart button to hang him for the objective and the key.
Use the fallen tree by the guard tower (left) to infiltrate the outpost. Use a rope dart from a branch to kill the key carrier (right).
Doing this is obviously pretty brazen and enemies in the nearby area are going to notice. At this point you can either run away from them and then hide until they lose interest or alternatively, fight them off. Once you are good to go again, make your way over to the door marked with the green objective marker. Kill any remaining guards outside of it and then loot it for a scene.
Afterwards, follow the edge of the restricted area south and use the fallen tree to climb over the wall and exit the outpost. Return to your ship.
Part 3: Naval Combat
The objective of this section is to sail to the nearby French fort, destroy the fort’s defences and then entering the fort and taking out its leader. Once you have completed this mission, you’ll be able to take over the other forts in the world which not only provide you with a bit of an economic boost, they also reveal parts of the map around them, similar to a synchronisation point.
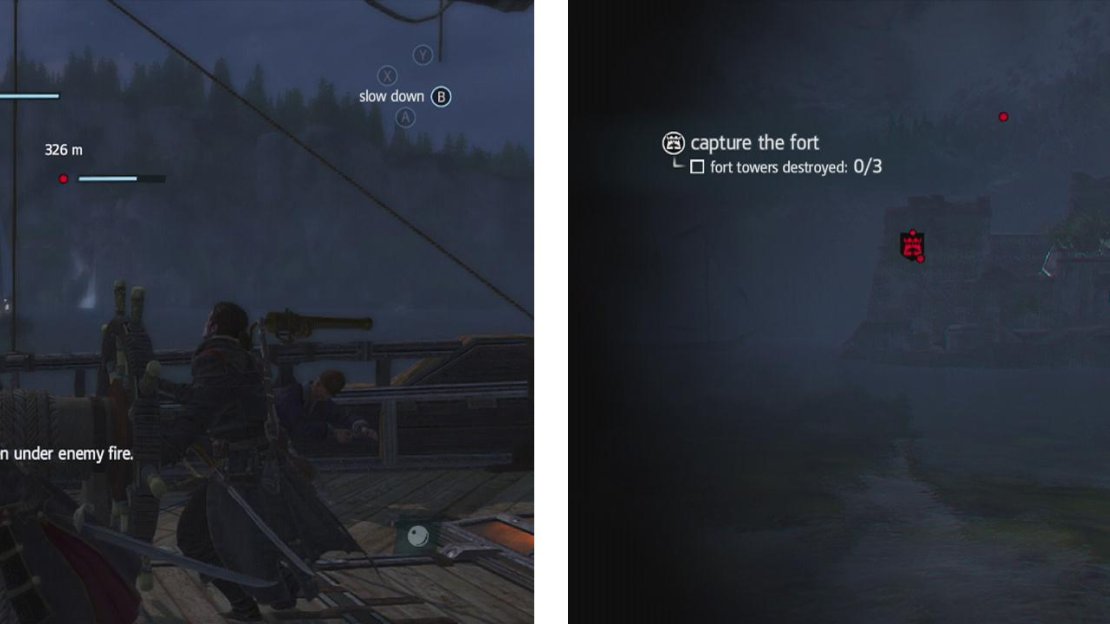
The fort’s defences consist of three cannon towers overlooking them. Fortunately, each of the threats is marked with a red objective marker and hitting them with attacks will display a health bar so that you can track how much damage you have caused. In addition to the towers, the fort will launch mortars into the ocean in a bid to hit you. Remember that mortars and enemy attacks will appear as colours on the water with yellow and red indicating where their weapons are targeting. If you see your ship in the range of the red water, tell your men to brace immediately to avoid taking too much damage or immediately manoeuvre out of the area.
When you attack the fort (left) remember to brace if you can’t avoid an attack and use mortars from a distance (right) to great effect.
There is usually a pair of gunships out in front of the fort as well which you should quickly eliminate first. When you are good to go, use your mortars (if you have some) to damage the fort’s defences and when you run out, I’d recommend sailing back and forth in front of the fort, using your broadside attacks and heavy shots to deal damage over a larger area. Use the Puckle gun to shoot the weak spots when they become visible.
Once all of the defences have been destroyed, a scene will play and green waypoint marker will appear next to the fort allowing you to dock.
Part 4: Fort Liberation
We now need to eliminate two lookouts. Leave the dock and ignore the gate straight ahead (unless you want a fight), instead head past the burning towers to find a passage made of rocks and trees to the right that we can use to scale the wall.
At the top of the wall, jump across to the nearby guard tower and assassinate the first lookout. Look opposite the way you hopped into the tower from to see another path through the trees here. Follow this until you end up on a rooftop, head to the far end and use the next set of trees to access another guard tower and the second lookout. Kill him and your objectives will be updated.
Head over to the next objective marker, clear out the enemies nearby and then interact with the door for a scene.
Part 5: Assassinate
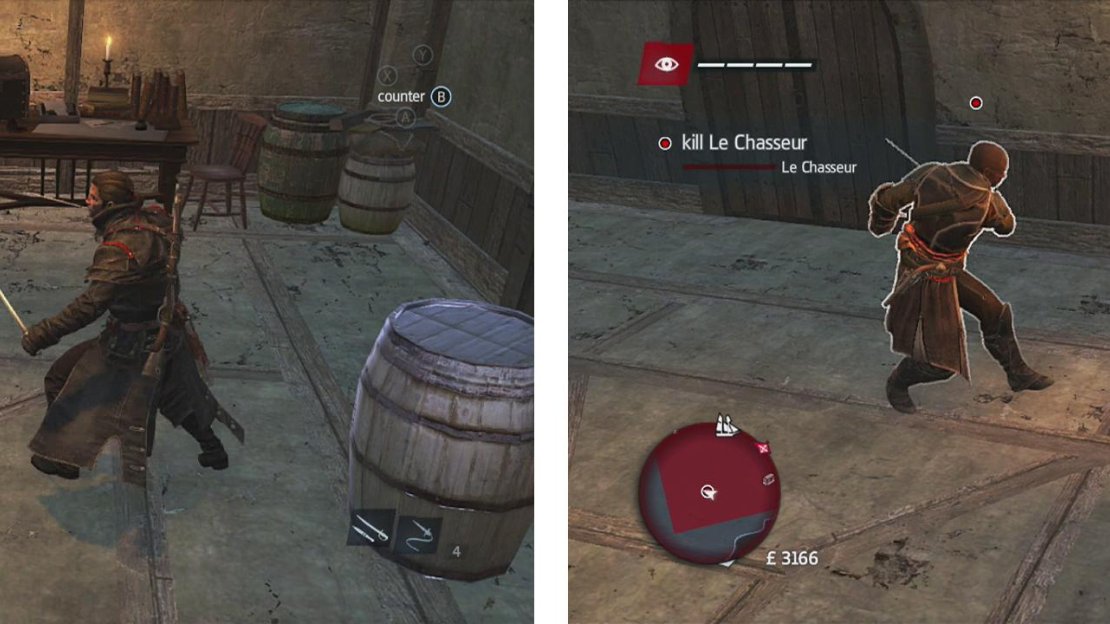
Once the scene is done, you’ll be in a one-on-one fight. Note that there is an optional objective to complete this fight without taking any damage. This can be excruciatingly frustrating as the camera will bounce all over the place and to add to that, the counter icon above the enemy’s head does not always show up in time to be able to counter his attacks, resulting in damage. To further exacerbate the situation there is no real way to damage him to start the fight!
Counter the target in front of barrels in the room (left). When the ‘Hurt’ pop-up appears, hit the button prompt to damage him (right).
To injure him, you need to lure him close to one of the flashing objects (the barrels and table) around the room and counter one of his attacks beside it. A short scene will play and this will damage him. Once you have done this three times, countering will have a button prompt pop up with the word ‘hurt’ – hit the indicated button to stun your opponent and then wail on him with your sword to finish the fight.
This will end the mission.


No Comments