Part 1: Infiltrate
As soon as the mission begins, you are going to want to sail through the burning debris until you reach Albany. Dock the Morrigan here and then head ashore.
Note that at this point, you will have a chance to complete your first optional objective – stay out of combat before reaching the fort. Now if you take a quick look at your map, you’ll see that we need to reach the fort at the far east of the area. Also note that there is a river just to the south of the docks that will lead all the way to it. Perfect for sneaking in!
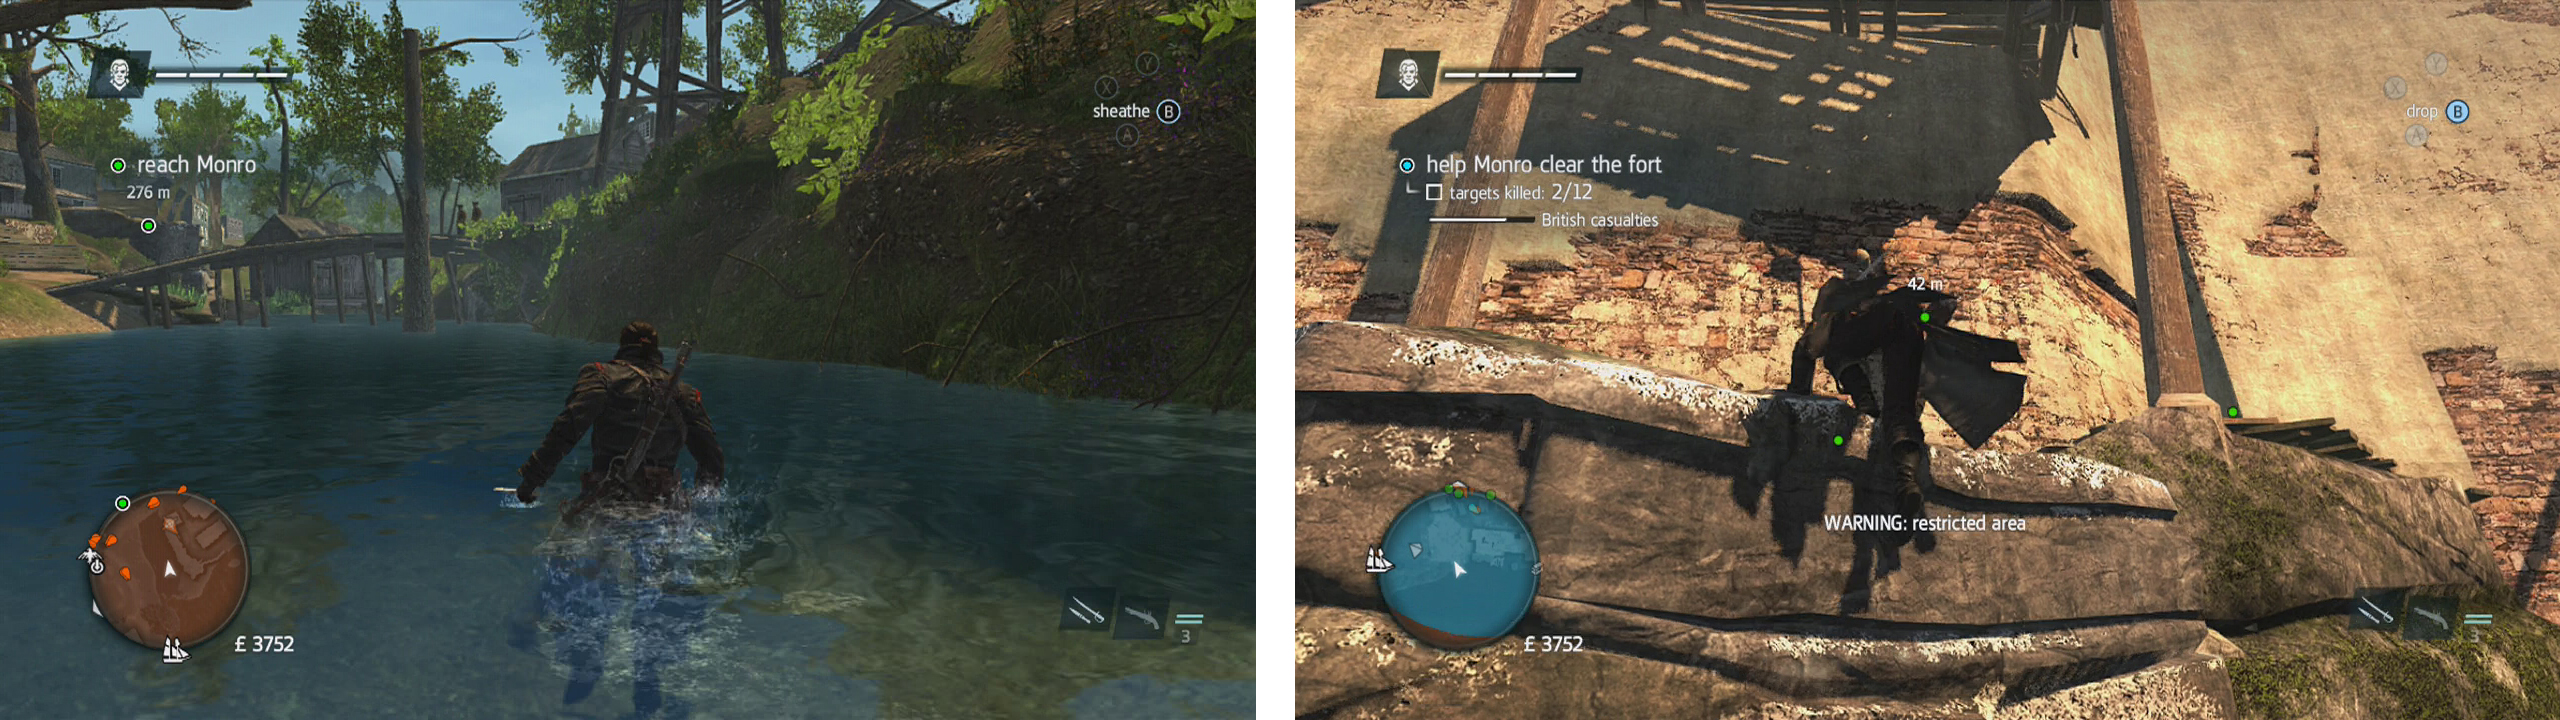
Swim up the river (left) to avoid detection. Climb up to the southern wall of the fort (right) and make your way to the top of the wall to enter.
Swim up the river here. Yes, it is a bit of a hike, but it is definitely easier than trying to make your way through the fighting in town. As you swim inland, make sure that you utilise the stealth swim ability if a guard notices you to break line of sight. Continue paddling upstream until you reach the fort.
Part 2: Attack
As you approach, your objectives will update, a white bar will appear on the left of screen and you’ll need to kill 12 enemies to help them out before all of them perish. Quickly climb up out of the water, up the cliffs and find your way into the fort. Note that there are Puckle guns mounted on the walls that you can use to speed up the killing process.
Once you have killed twelve enemies a scene will play.
Part 3: Assassinate
Following the scene, additional bad guys will have appeared and our main target will also have arrived. The main target is very fast and will cut big laps around the top of the wall, attacking any of your allies that come across his path.
As the second optional objective for this memory requires us to use the Puckle gun to kill our target, we want to make our way as quickly as possible from where we finish the scene up to the Puckle guns on the walls above. Fortunately, most of the enemies will be busy fighting with your allies, so you should be able to reach them fairly easily.
Once you reach a Puckle gun, simply hop aboard and wait for the target to run past before unloading the gun into him. A good 3-4 hits should be sufficient to bring him down.
Once he has taken enough damage, the obligatory post-assassination cut scene will roll.
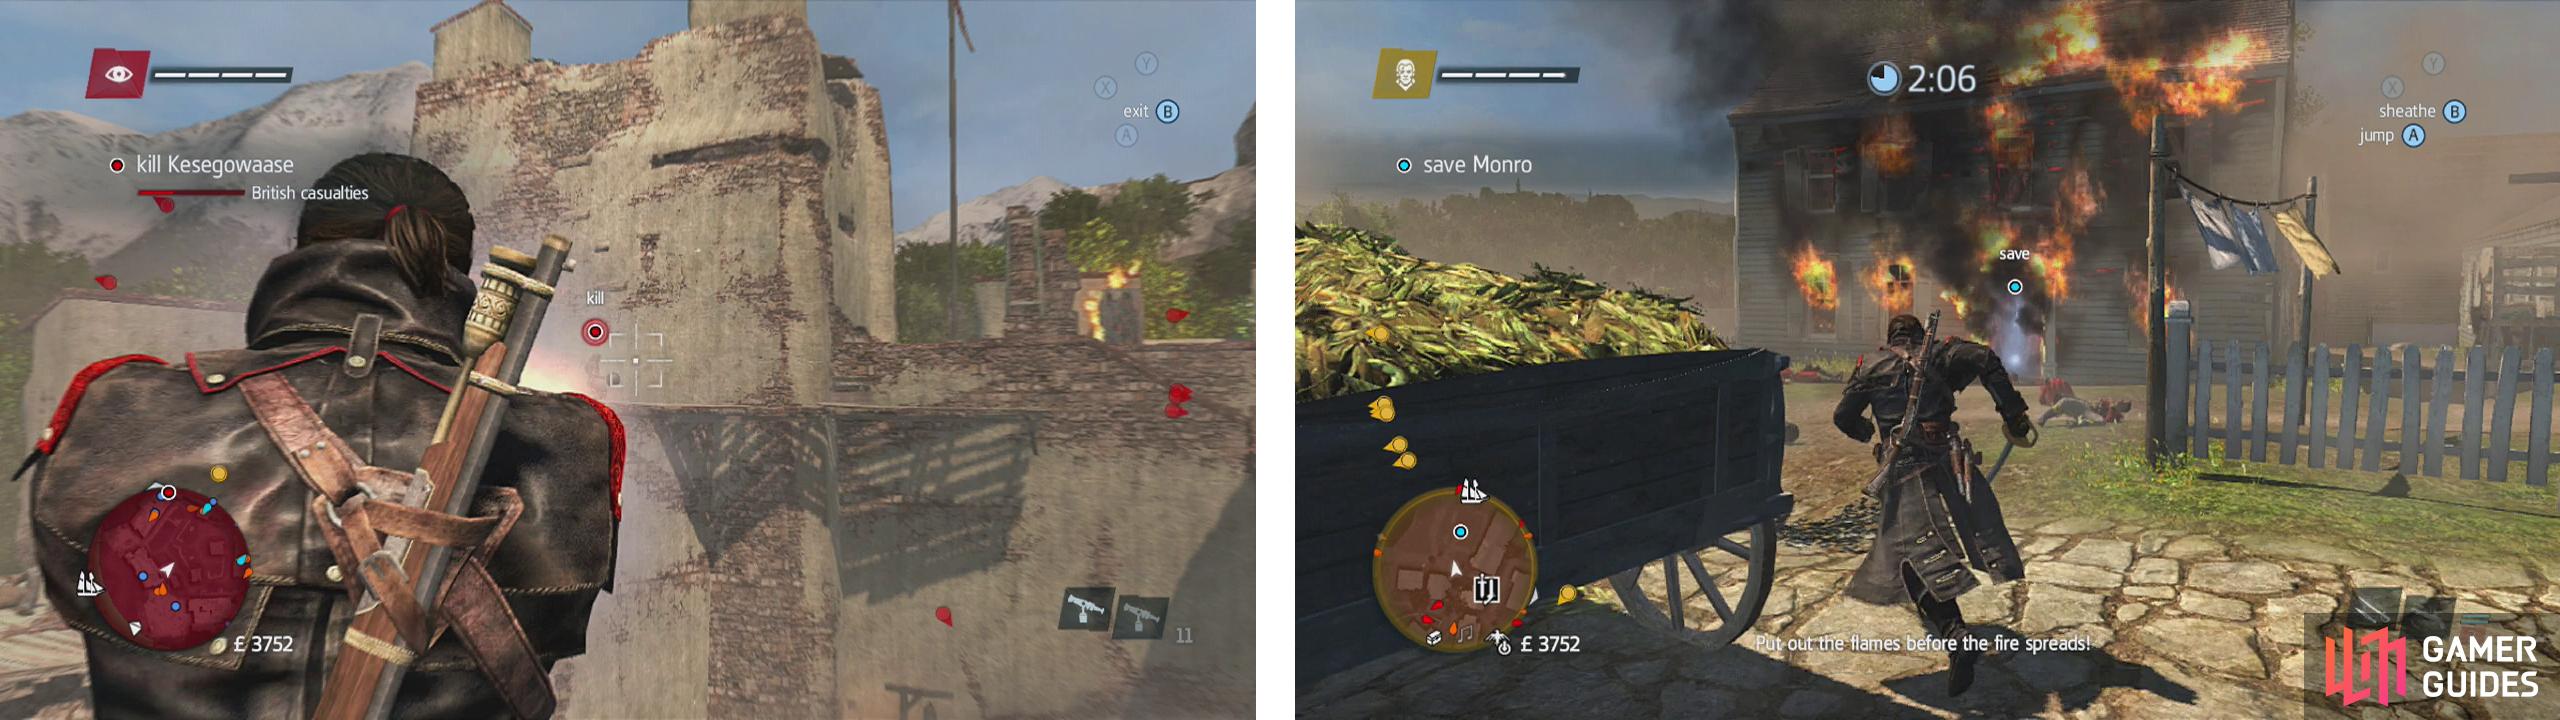
Shoot the target with the Puckle gun (left) for an easy kill. Afterwards, race to the burning building (right) to end the mission.
Part 4: Rescue
When you regain control of Shay, you’ll get a timer pop up on your screen giving us 3 minutes to get our next objective done. We’ll also see a blue objective marker appear in the distance. We need to reach the marker post haste! Make your way over there as quickly as possible, avoiding or running away from any guards or soldiers that may try to stop you in the streets as you go.
You’ll arrive to find a building on fire. We need to run inside, find our friend, interact with him and then carry him back outside for a scene to end the memory and the sequence.


No Comments