Part 1: Rescue
As soon as the introduction ends, you’ll get a timer pop up on your screen. We’ll also see a blue objective marker appear. We need to reach the marker (which happens to be located inside a restricted area) to find a friend of ours being hanged. To get the first optional objective, you’ll have to shoot the rope to save him.
To shoot the rope, you are going to need a moment of privacy which won’t work if you have guards attacking you. As such, stealth is your best option here. To infiltrate the base quietly, from the start of the mission run to the end of the dock directly in front of you. From the boat here, you can swim a short distance across the water to the south to find a nice stack of rocks at the base of the wall, giving you an easy entrance to the fort.
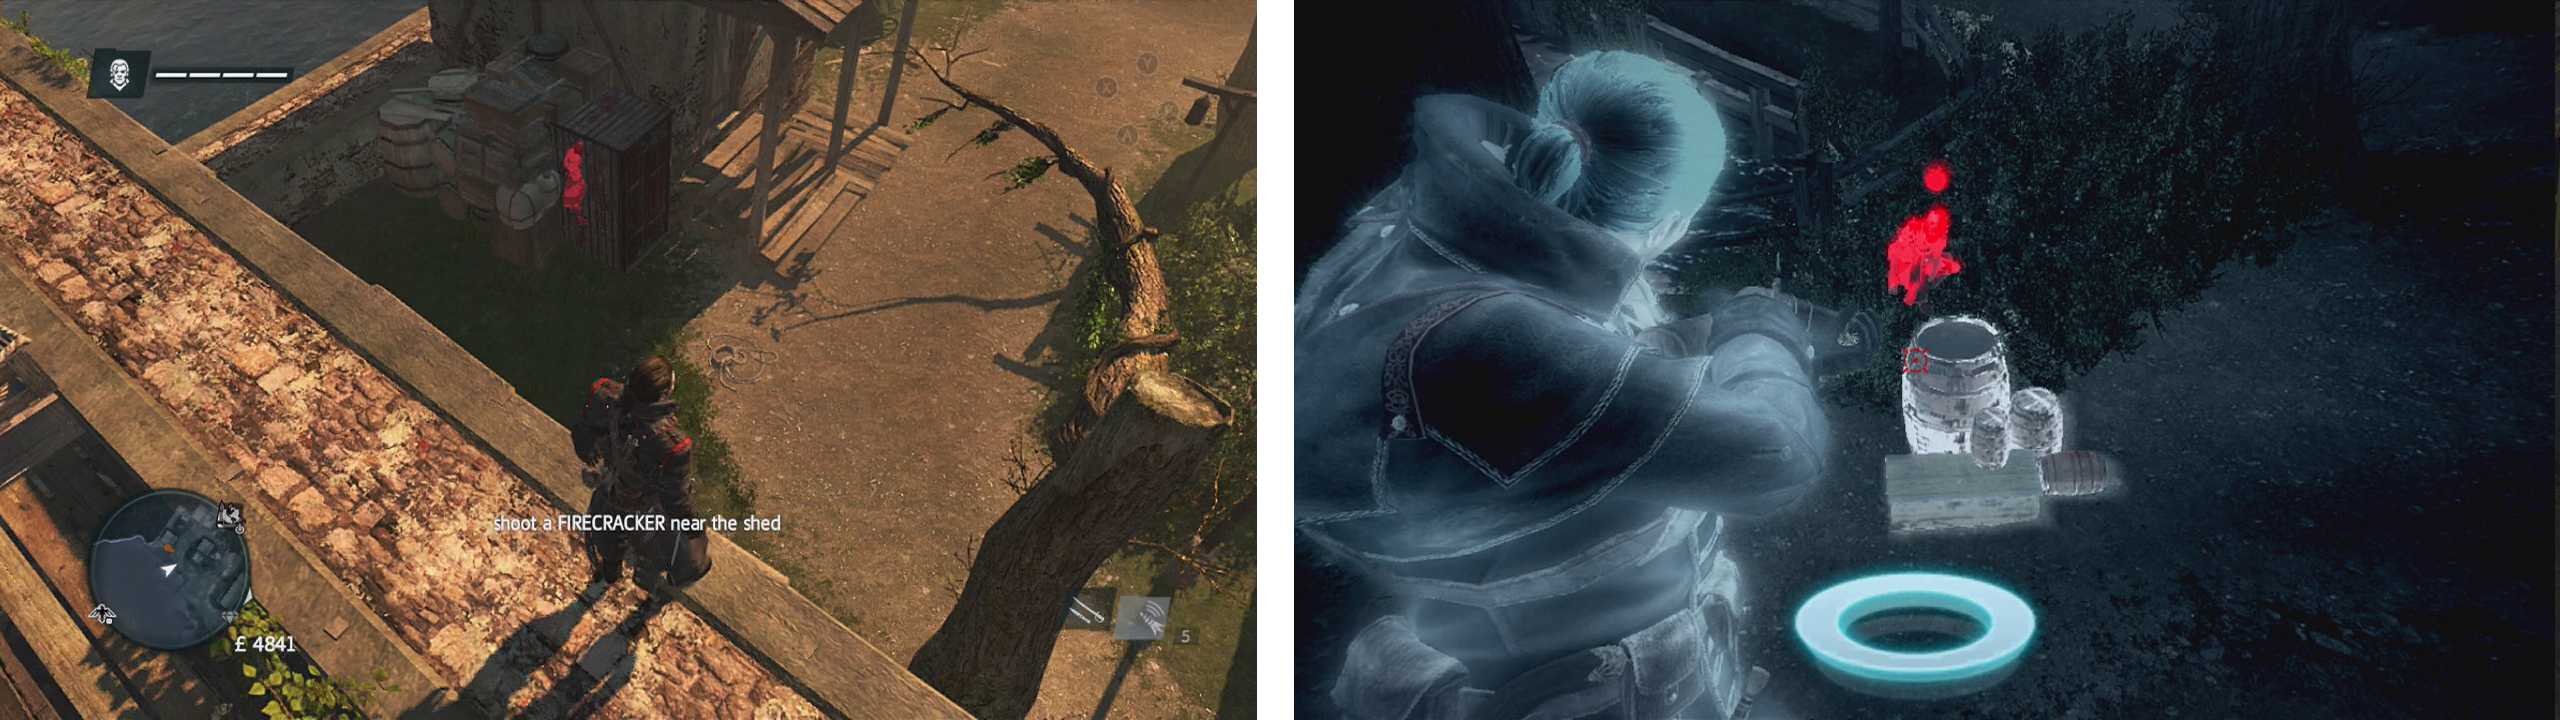
Note that at this point, the game will decide to give you firecrackers – these can be used with your air rifle to create a noisy distraction that will pull guards away from their posts or patrol routes. Handy!
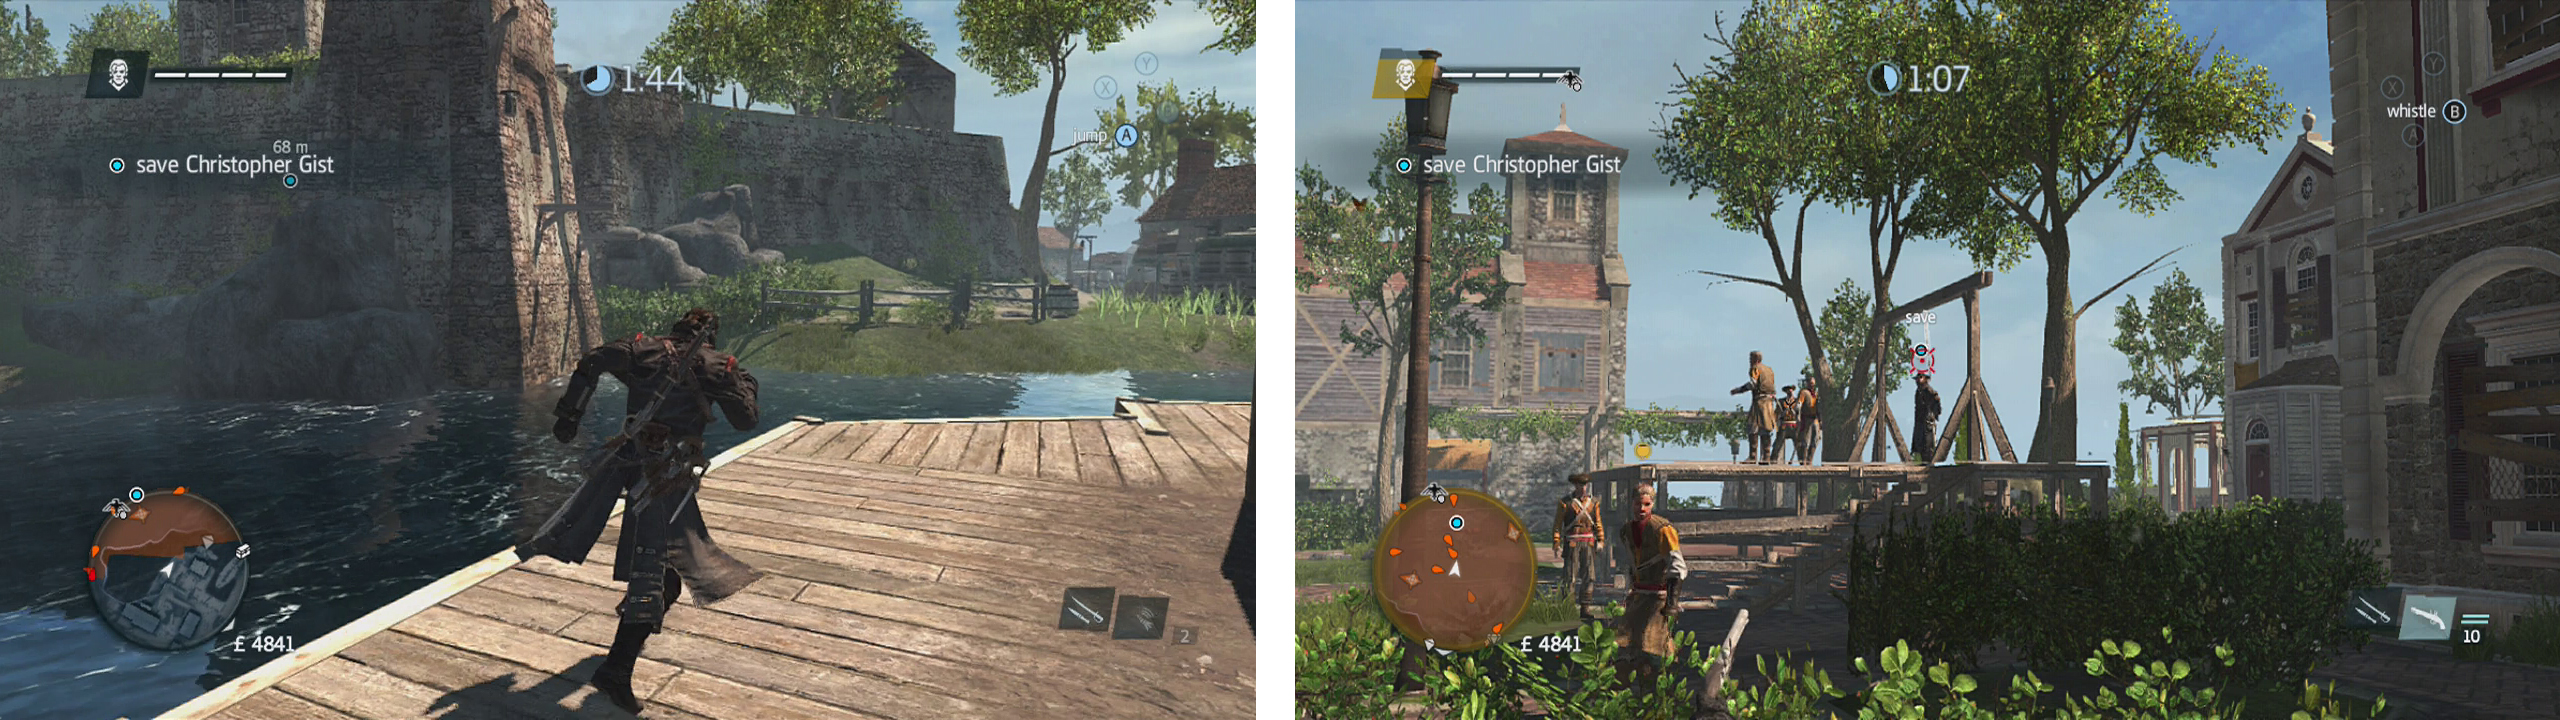
Use the rocks by the wall here to enter the fort (left). Use stalking zones to shoot the rope around the prisoner’s neck undetected (right).
Climb the rocks and drop into the haystack or bushes on the far side (or air assassinate the patrolling guard here if he is in range). Wait for the patrolling guard to walk past and whistle him into a cover assassination. Hop over the short wall directly in front and quickly drop into the bush on the far side. You’ll probably alert a guard here. If this is the case kill him when he comes to investigate. Move up to one of the closer bushes when nobody is looking.
You should now be in range of the rope. Pull out your pistol, be careful that you aim for the rope, and then shoot it.
As soon as the prisoner is freed, the guards will become hostile and attack not only you, but your friend as well. Emerge from cover and eliminate them. Note that there are a couple of barrels of gunpowder around this area that you can shoot with firecrackers to explode and damage multiple enemies at once, whilst simultaneously working towards the second optional mission – blowing up three barrels with firecrackers!
Once all of the enemies are dead, a scene will play.
Part 2: Infiltrate
Once the cut-scene has run its course, follow your new friend until you reach a retaining wall overlooking a dock below – hey look it’s your ship!
Before we can reclaim it, your buddy will introduce you to a new type of enemy at this point – stalkers. These guys will hide in bushes, haystacks and other hiding spots that you usually use and will try to ambush you when you get close. Fortunately, when you get close to a hidden enemy you will hear a whispering noise, when you hear that, stick on your eagle vision and use your danger tracker to hunt them down. Usually, you can sneak up and assassinate them or air assassinate them whilst they are in their cover, however If they are in a location where that is not possible (e.g. a shed) you can draw them out of hiding with firecrackers.
Note that alerting them will have them take a swing at you and run off, where they will hide again, so be sure to use your eagle vision to track them down so you know their location, and don’t make the same mistake twice!
Draw the stalkers out of hiding places (left). Use Eagle vision to locate them (right).
For this next section, we need to track down and kill all 8 stalkers in the dock area. You can find them in the following locations:
- The game will point this one out to you. Throw a firecracker near the shed to draw it out and quickly air assassinate the enemy when you get the chance.
- Climb the building behind the shed and look for the haystack at the far end.. The second stalker is in here – air assassinate away!
- Climb the building north of the haystack and use the chimney to jump to the tree closer to the water. Use eagle vision to spot a third stalker in the bush at the base of the tree.
- Look for the large building to the northeast. The fourth stalker is sitting on a bench along the southern wall.
- On the roof of the large building, at the highest point, on a vantage point looking towards your ship. Approach from behind for a quick stealth kill.
- On the northern side of the large building, you’ll see this stalker in a group with two other NPCs next to a stack of crates along the sea wall.
- The final stalker is in a shed at the base of the large, stone lookout tower next to the Morrigan. There is another patrolling guard here that you should pull away and dispatch before drawing the stalker out with firecrackers and giving his noggin a floggin’.
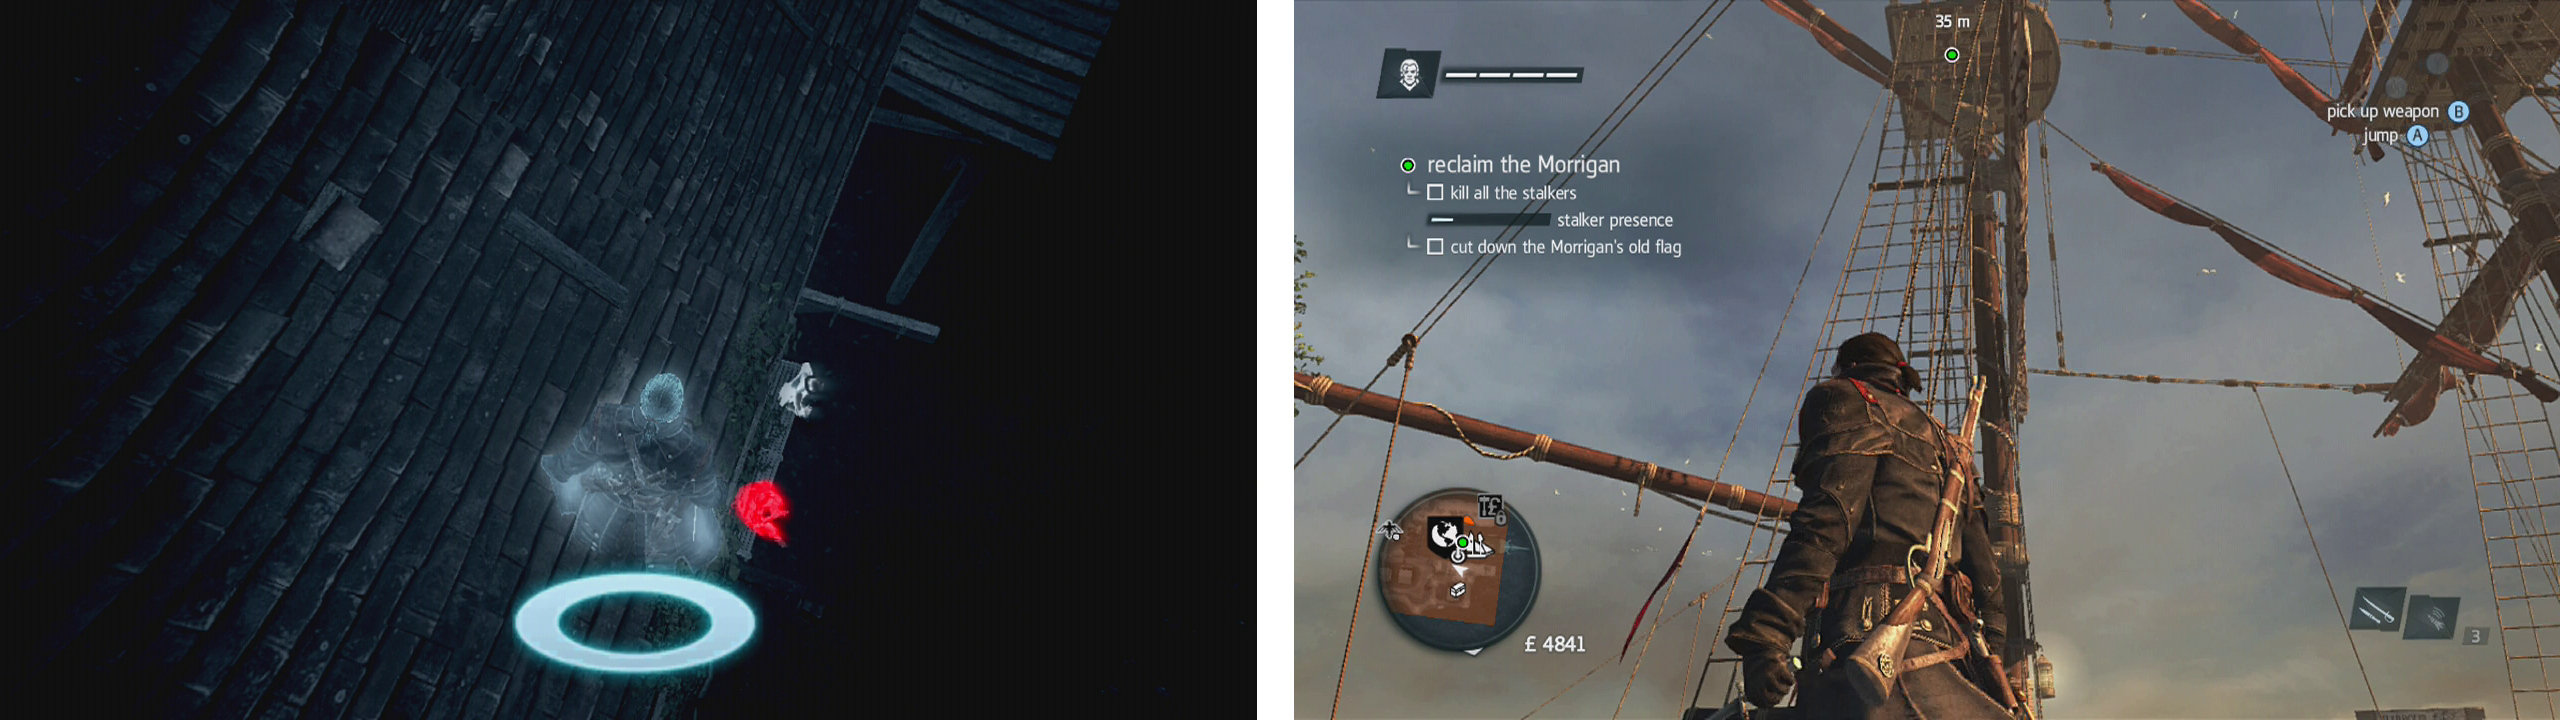
Once all of the stalkers have been dealt with, you need to climb to the very top of the rear mast of the Morrigan and cut down the flag. It is a good idea to tranquilise or climb up and assassinate the guard in the large stone watchtower and a second in the rigging of the Morrigan that you encounter on the way up.
Note that if you have not earned the optional objective for shooting three barrels with the firecrackers, there are more than three lying around the area, so make your way around and shoot as many as you need before continuing.
After climbing the mast and interacting with the flag a scene will play to signal the end of the memory.
No Comments