Part 1: Infiltrate
We’ll begin this mission aboard the Morrigan with a green objective marker off in the distance. Sail over towards this until a short scene plays. Change of plans! Your objective marker will update shortly thereafter and you’ll need to sail around to the back of a nearby island.
As you sail around to the new objective, watch out for mines in the water and use your Puckle gun to deal with them if they get in the way. When you arrive, dock the ship and head ashore.
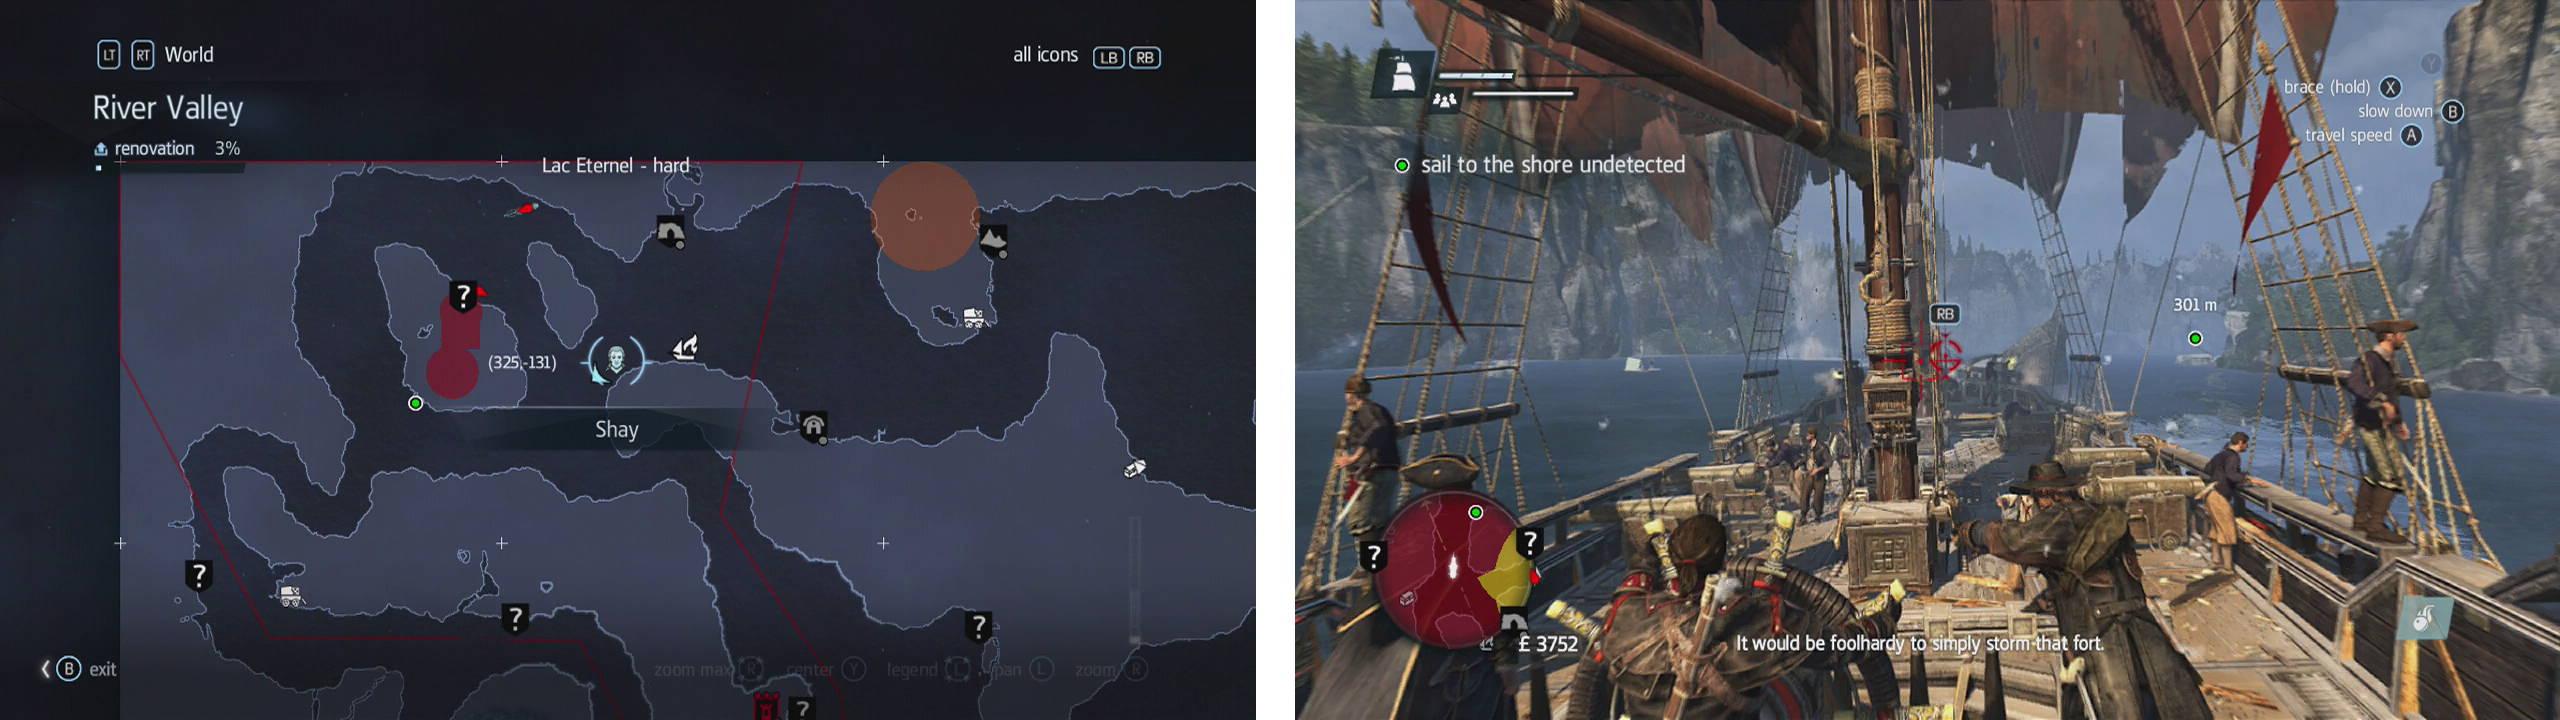
Make your way to the green objective marker (left) and shoot the mines with the puckle gun (right).
Make your way up the path ahead and look out for a small side area on the right with a pool of water and a fallen tree leading to an upper area. Climb up here whilst nobody is looking and sit in the shrubs at the top. Ahead you’ll see a guard patrolling the next platform and we’ll need to get by him – either hit him with a sleep dart/grenade or hop across when he patrols away and use a quick sprint between the bushes whilst hugging the right hand wall to cross the platform undetected.
Continue following the right hand wall across the next few platforms and then use the branch to swing down to a ledge below. If you hop onto the leaning tree directly in front of you, this provides a fairly easy route to the far end of the area where you can climb the cliff to a higher platform.
Once you reach the branch with the viewpoint, synchronise it. Below you’ll see a small town below. At the far end is a watchtower – this is where we need to get to.
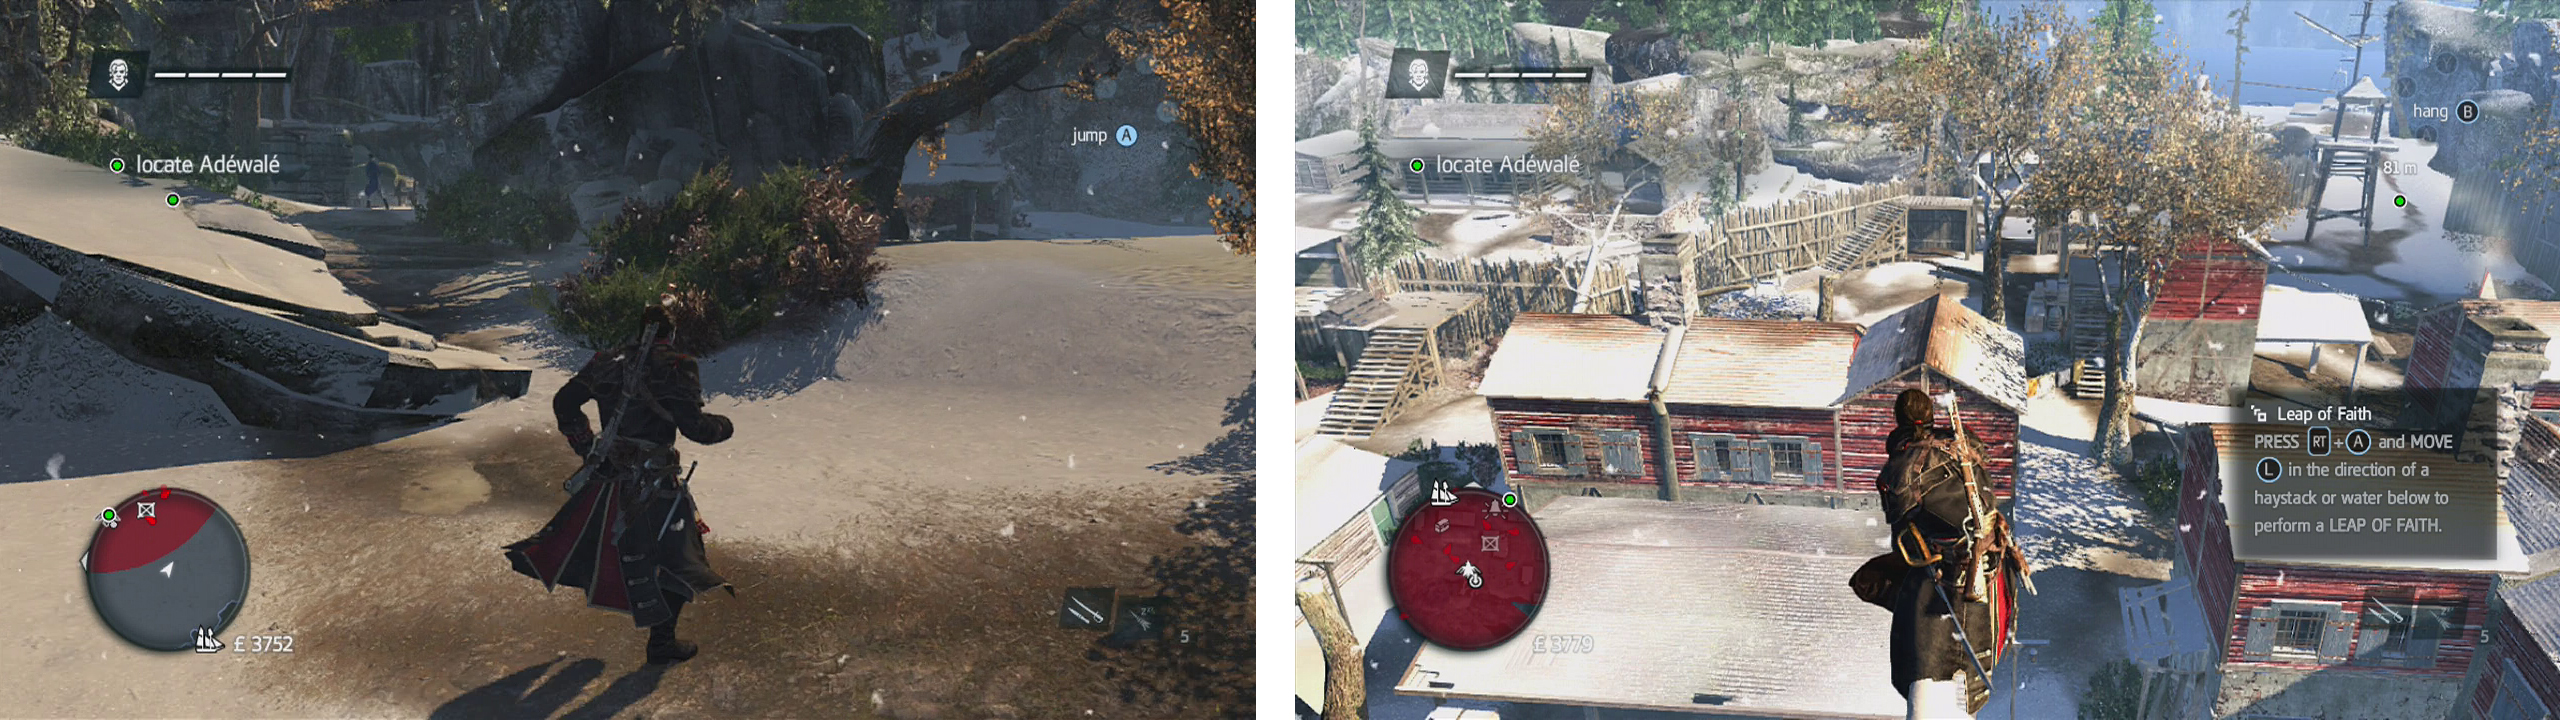
Head up the fallen tree here (left) for a much quieter run into the populated area. We need to make our way to the watchtower in the distance (right).
You have two options here – firstly you can sneak through the buildings here and make your way quietly to the objective marker, or alternatively you can take the more dangerous but much, much quicker route of sprinting through the base to the marker.
Either way, once you arrive, you’ll see your target ahead run off. As you follow him a guard will always run out and tackle you. Shake him off and sprint straight ahead to find a rope that we can use to seeing down to our ship which has now been brought round to this side of the island and is sitting below.
Part 2: Pursuit
Once we are back behind the wheel of the Morrigan we need to chase our target. The problem is that giant ship we saw earlier will be bearing down on us. Quickly put up your sails and pick up speed to go after the target as quickly as possible whilst dodging the large ship’s mortar fire. Avoiding taking any damage from the mortars at this point will earn you completion of the first optional objective for the mission.

Follow the target ship whilst avoiding mortars (left) and when you have it cornered, take the target down (right).
After a short chase, you’ll end up in a large lake and find yourself in a face off against the target ship. Use mortars to target it as it approaches and when they get in close, use the usual heavy shot/broadside combination and follow up with the Puckle gun on the weak spots that appear to make short work of its health. Repeat the process until a scene plays.
Part 3: Assassinate
Once the scene has run its course, Shay will be on solid ground once again and with a new objective - to find and take down our target for good. The second optional objective for the memory can be undertaken at this point, we need to kill the target and the target alone – note that even takedowns whilst unarmed will still count as kills for the purpose of this objective. As such, stealthiness is in order, but don’t worry – I’ve got you covered.
From the beach we start on, turn right to find the target’s crashed ship. We can use the trees here to access this and once on the deck, use the ships bowsprit (the pointy bit at the front) to access a platform higher up on the Cliffside. Enter the bushes immediately as you arrive.
Turn to the left to spot a tree branch that Shay can jump to. Hop across here and follow the tree top pathway over to the snowy ledge ahead. Climb the cliff here and proceed along the narrow ledge, hugging the wall on your left until you reach some rickety wooden buildings. From here, you should be able to look down and see your target patrolling back and forth beneath a sheltered storage area – looks like air assassinations are off the table this time! Fear not, for there is a super easy method to get him.
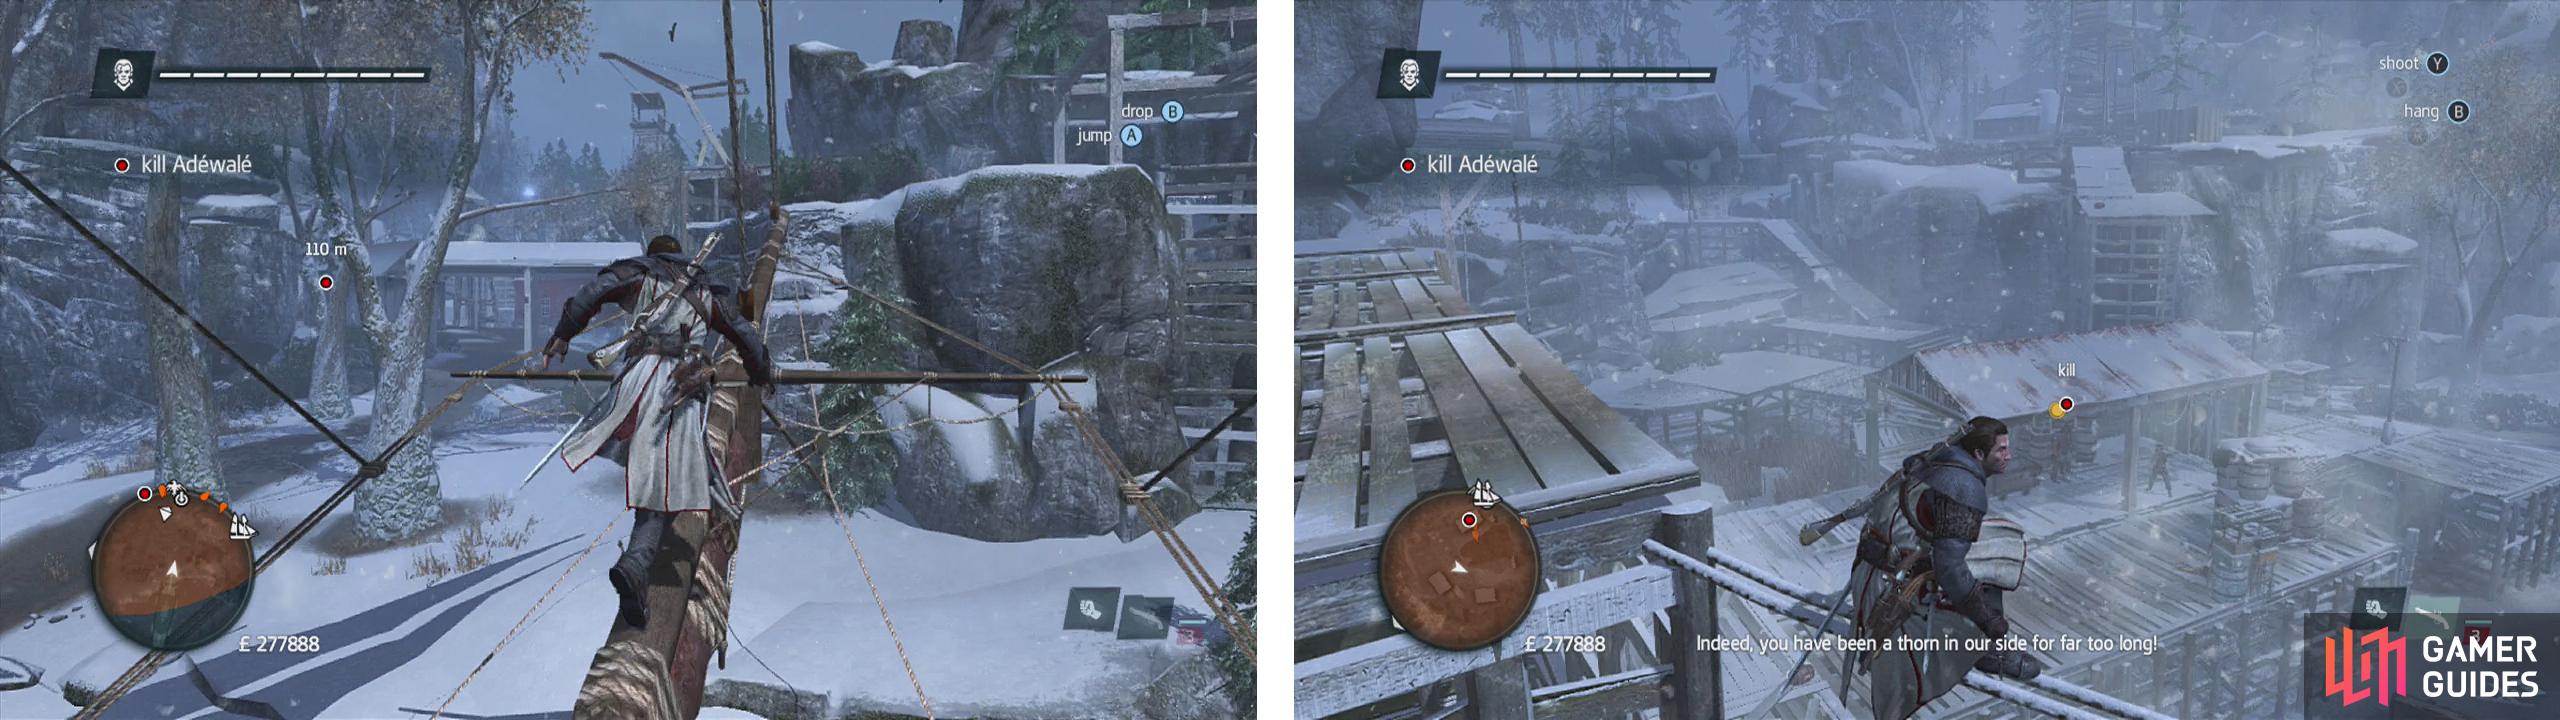
Use the beached ship and the passage through the trees on the left (left) to reach a vantage point (right) from here we can shoot the target.
You’ll notice the ledge you are currently on is obviously not natural, as there is quite a defined ‘L’ shape. Go to the corner of the ‘L’ shape and look for a rope strung across the corner. Hop onto the middle of this rope, pull out your pistols and look down at the target below. Now as he patrols to the left he will pause for a second and at this point, the reticules on your gun should turn red – he is just in range. Shoot him twice to kill him (cheap I know, but hey – you got the optional objective done!).
Once the target has been killed, a scene will play to end the chapter and the memory sequence.


No Comments