Part 1: Infiltrate
Once the memory begins, we’ll need to follow our ally. After heading through a few back alleys and perhaps a brief fight or two, you’ll end up looking at a large mansion with a bit of a battle raging in front. After a short conversation between your ally and the soldiers in the area our objectives will be updated.
When you reach the front of the mansion, you’ll see the main entrance is barricaded with enemies shooting in your general direction; as such we want to avoid that. Continue down the street to the right of the main entrance to find a conveniently placed stack of crates we can climb, from here jump to the tree, follow the branch over the wall and dive into the haystack below.
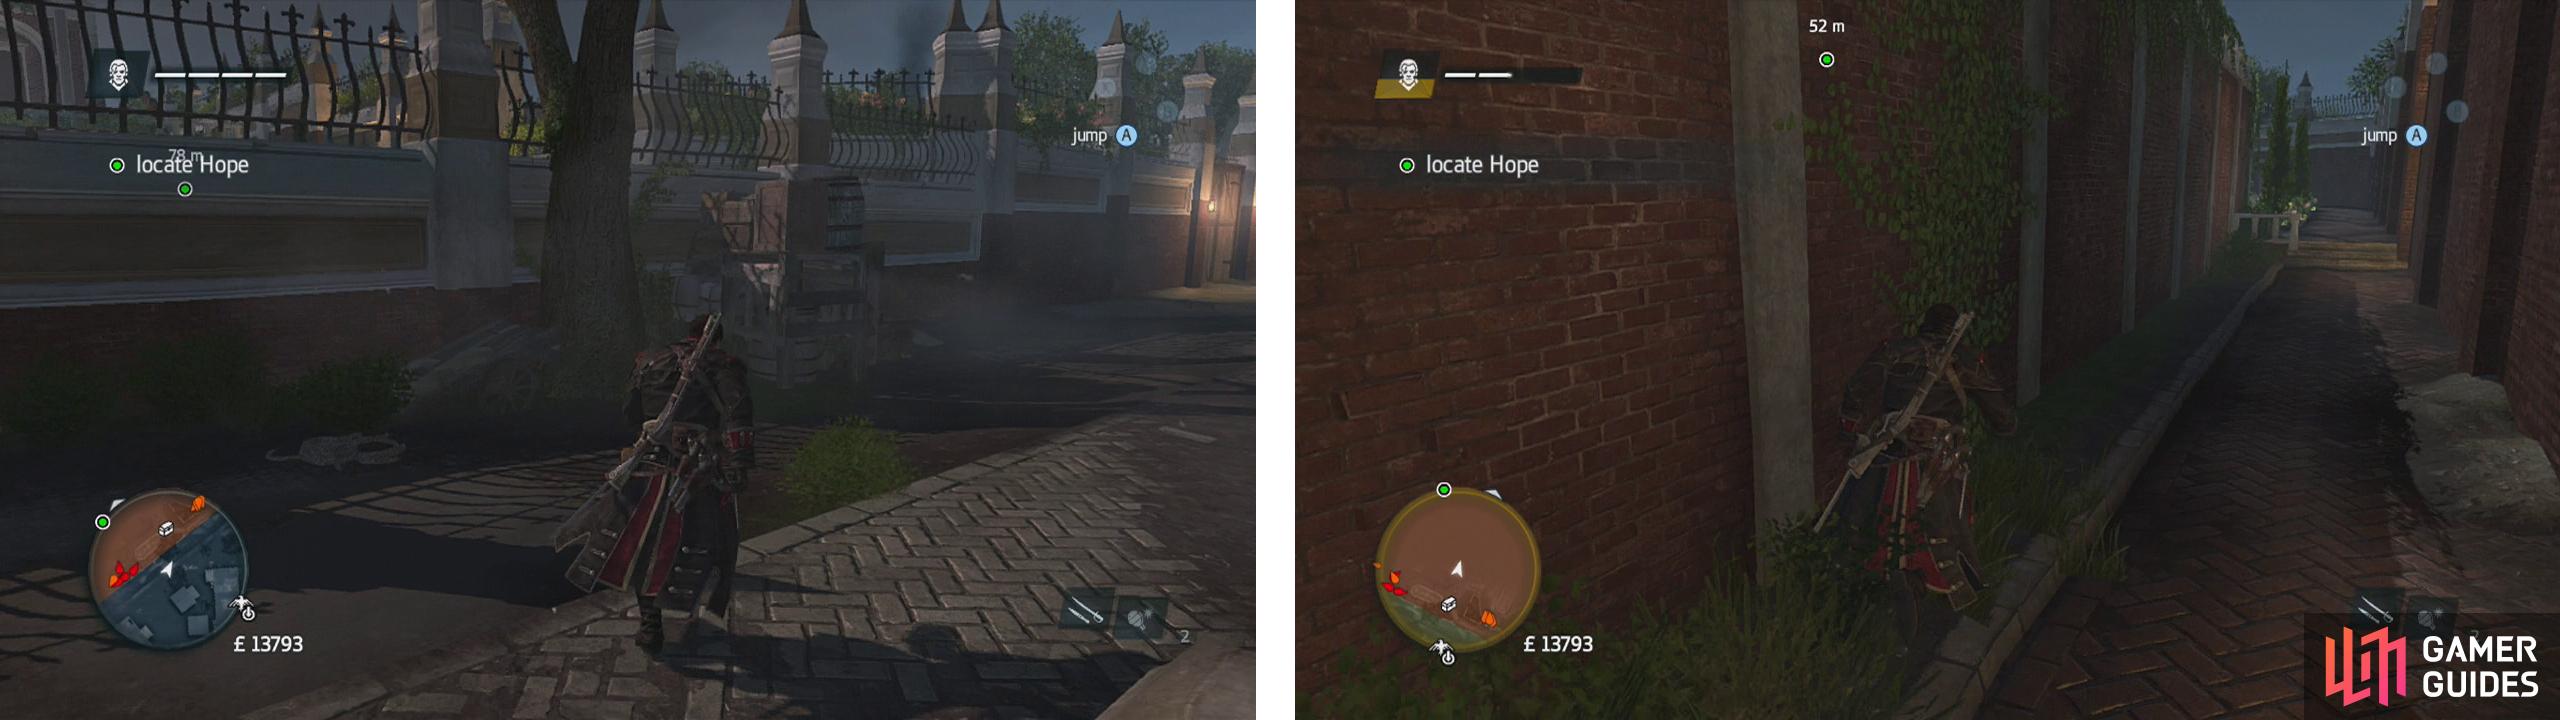
To the right of the main gate and use the boxes and tree here to enter the restricterd area (left). Follow the passage along the wall here to find a safe place to climb to the roof (right).
Note the passage between the house and the wall ahead? We’re going to head down that. As you exit the haystack, watch out for a stalker in the bushes to the left and deal with her and she attacks. Follow the passage down until you can turn left and climb the crates nestled in the corner ahead to reach the platform above. From here, climb onto the low roof on the right and then from here scale the wall towards the objective marker. Approach the skylight here for a scene.
Part 2: Escape
As soon as the cut-scene ends and you are back in control, you’ll find yourself in a room full of poison gas – note that the first optional objective is to escape this area without being damaged by the gas. Fortunately, the poison hangs around at ground level, so as long as you stay elevated you should not have too many issues with avoiding damage.
From the start, turn around and follow the wooden platform to the right. Climb the wall here and use the various platforms, pipes and platforming objects to reach the far end of the room. Climb up to the platform on the left and then use the pipes to reach a crack near the top of the wall that we can jump through to enter the next room. Quickly run up and use the lift shaft here to quickly climb to the balcony. At this point, you should earn completion of the first objective.
A scene will play at this point.
Part 3: Escape
We’ll now have to leave the area, but thanks to the events of the previous cut-scene we will now also be suffering from a poison. The poison will damage you if you stand still, which means you need to keep moving to stay alive (sounds like a movie saw…). To make things a little trickier for you, the mission’s second optional objective is put into circulation at this point as well and it wants us to stay out of combat. The good news is there is a fairly easy way to do this.
As soon as you drop down from the balcony, look to your left to see a small gazebo type area. You can climb this and then hop across to the roof of the main structure behind it. From here, jump across to the right and continue to follow the rooftop around to the left. When you reach the end, climb up to the roof and make your way to the far side. Below you’ll see a large wooden garden platform with a guard on top of it. Move up to the edge close enough to target him and perform an air assassination.
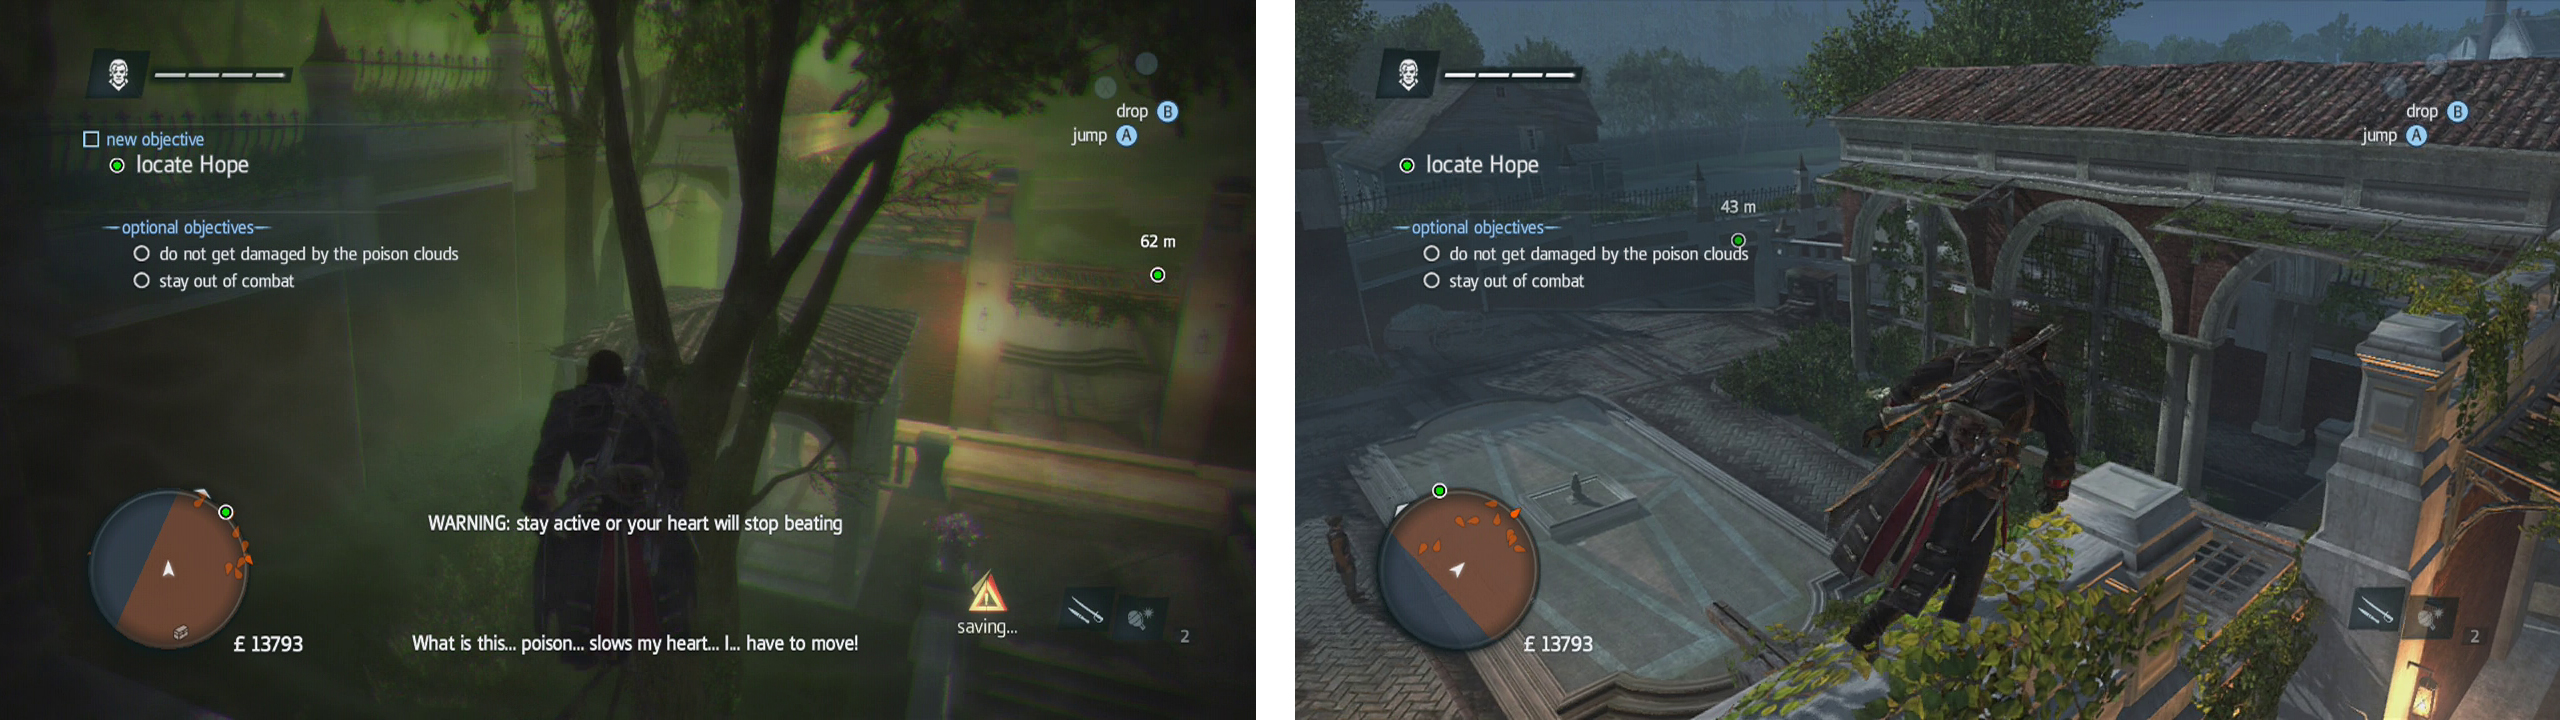
From the balcony, use the trees (left) to reach the roof ahead (right).
Move to the far right corner of the platform and jump to the tree here to reach the building beyond. Sneak up and kill the stalker on the roof here and then hop across to the tree branch nearby. Follow the pathway through the trees until you reach the gate with the lattice roof above it. At this point if you have stayed out of combat, the game will mark you as having completed the second optional objective. Our target will also appear at this point.
Part 4: Pursuit
The target will now be painted with a red objective marker and will take off. At this point, we will need to chase her through the city, mainly across the rooftops. Note that she is equipped with poison grenades which she will frequently drop behind her as she runs away. The gas these grenades release will cause a significant amount of damage as well as stunning Shay for a moment if you run into it, so do your best to find a route around the gas when it appears.
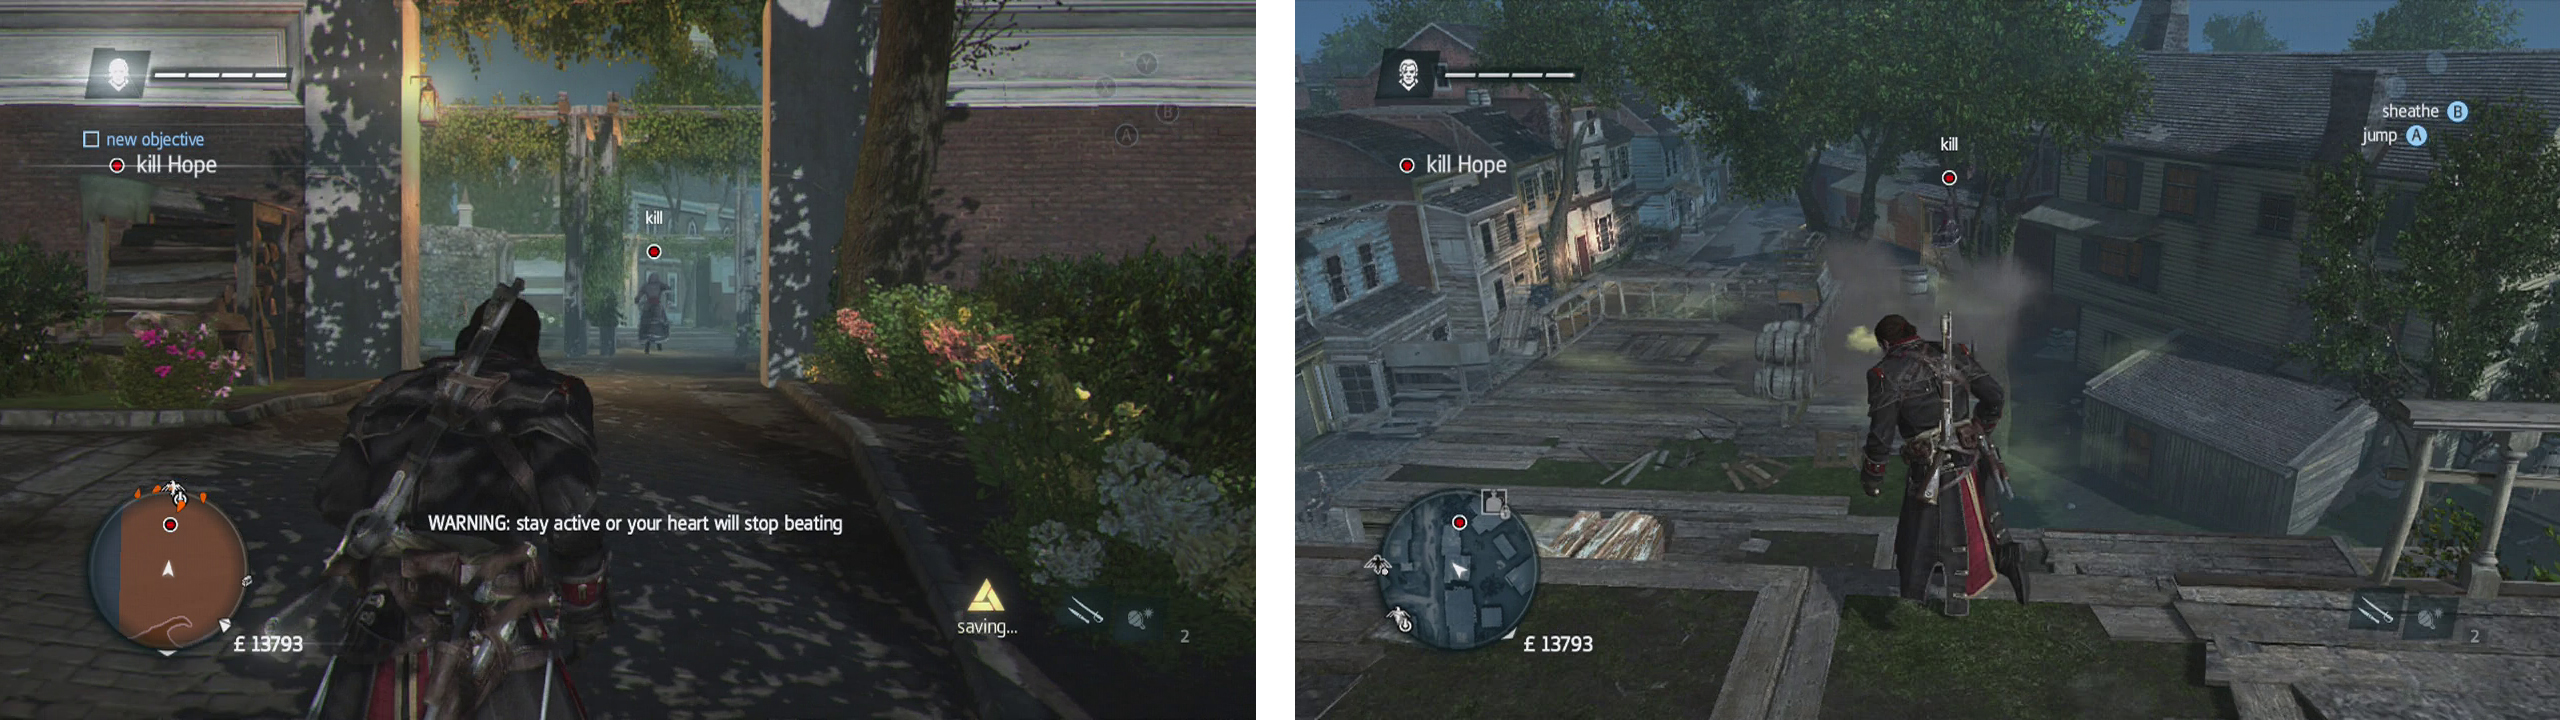
You’ll need to chase down and kill the target (left). Avoid the poison gas clouds as you go (right).
When you catch up with the target, either shoot her or assassinate her when you get into range to complete the mission. If you cannot catch her, after a minute or two she will eventually wind up at a dockside warehouse area packed with guards. At this point, she will drop gas to make the guards hostile for you and then disappear. You’ll need to either fight off the guards or lose them, before using your eagle vision to locate the target and then take her down.
Once you have managed to assassinate the target, a scene will play to end the memory.
No Comments