After infiltrating the Stratford Tower with Markus and his crew, you’ll return to Connor and Hank as they head in to investigate. Choices you made in the previous chapter can heavily affect the way this one plays out.
When you first begin, you’ll be back at the Zen Garden to find Amanda again. She wants an update, and most of your dialogue options have an even chance to increase or decrease in reputation.

Find Amanda in the boat

Talk with her
Talk to Amanda – Head to the centre of the area to find Amanda sitting in a rowboat. Join her and press the button prompts to use the oars.
Amanda asks what you have learned:
– HANK (no effect)
– EDEN CLUB: If you shot the Traci androids at the club then your reputation with Amanda will increase. If you didn’t, it will decrease.
Amanda will say you seem lost:
– SINCERE: You can unlock this option by being friends with Hank (decreases reputation)
– DETERMINED (increases reputation)
– COLD (increases reputation, decreases software instability)
– TROUBLED (decreases reputation, increases software instability)
If you didn’t kill the Traci androids, Amanda will ask why:
– TOO FAR (decreases reputation)
– NO USE (no effect)
– TRUTH (decreases reputation)
And, finally, Amanda will threaten to replace you:
– CONFLICTED (increases software instability)
– CONFIDENT (increases reputation)
– INDIFFERENT (increases reputation, decreases software instability)
This ends this section of the chapter. It’s difficult to know how to approach Amanda, but we recommend trying to land somewhere in the middle with her when providing your answers. Doing this should ensure the availability of a vital choice later in the game.
Analyse and inspect all the yellow markers in the room
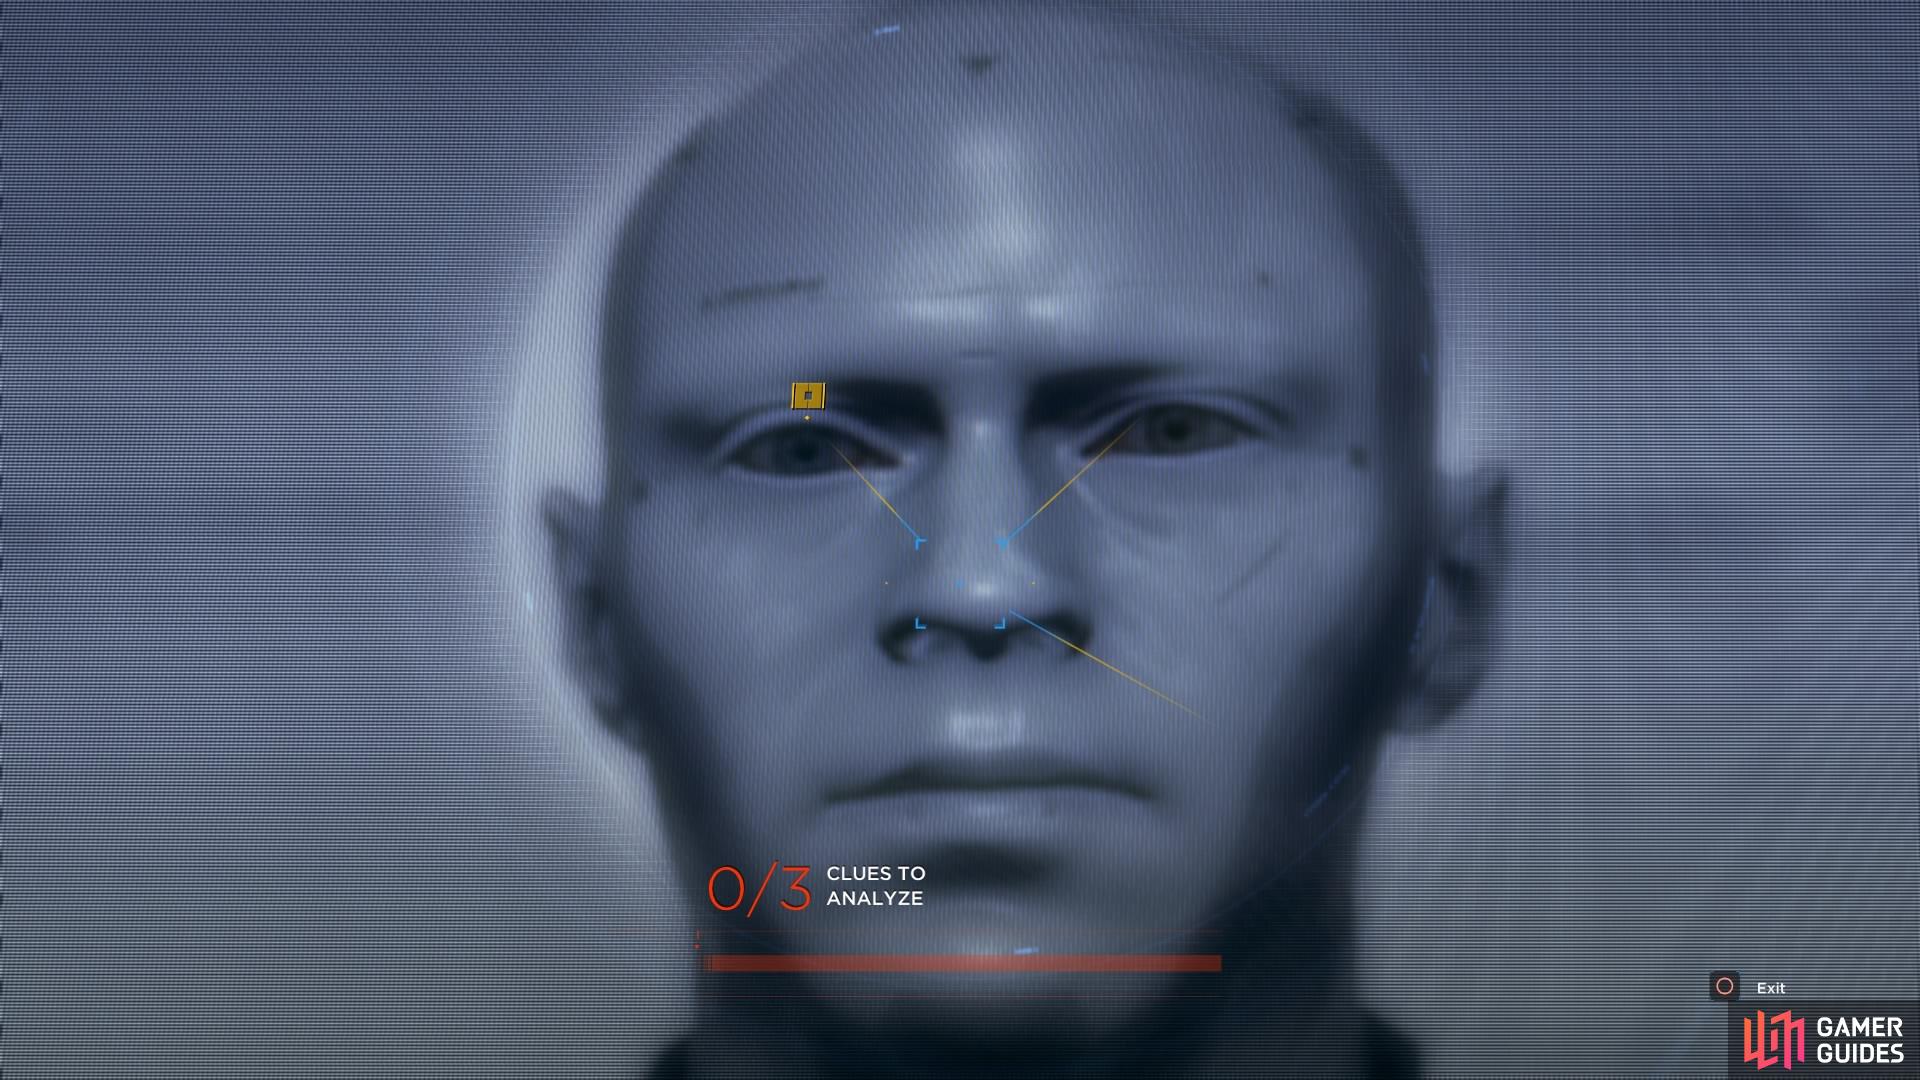
Playing Markus’ broadcast will allow you to analyse his face
Afterward, you’ll move on to the Stratford Tower with Hank. If Connor and Hank are friends at this point, Hank Confiscates Connor’s Coin that he fidgets with all the time. Later, if you watch closely, you can catch Hank practising coin tricks, too.
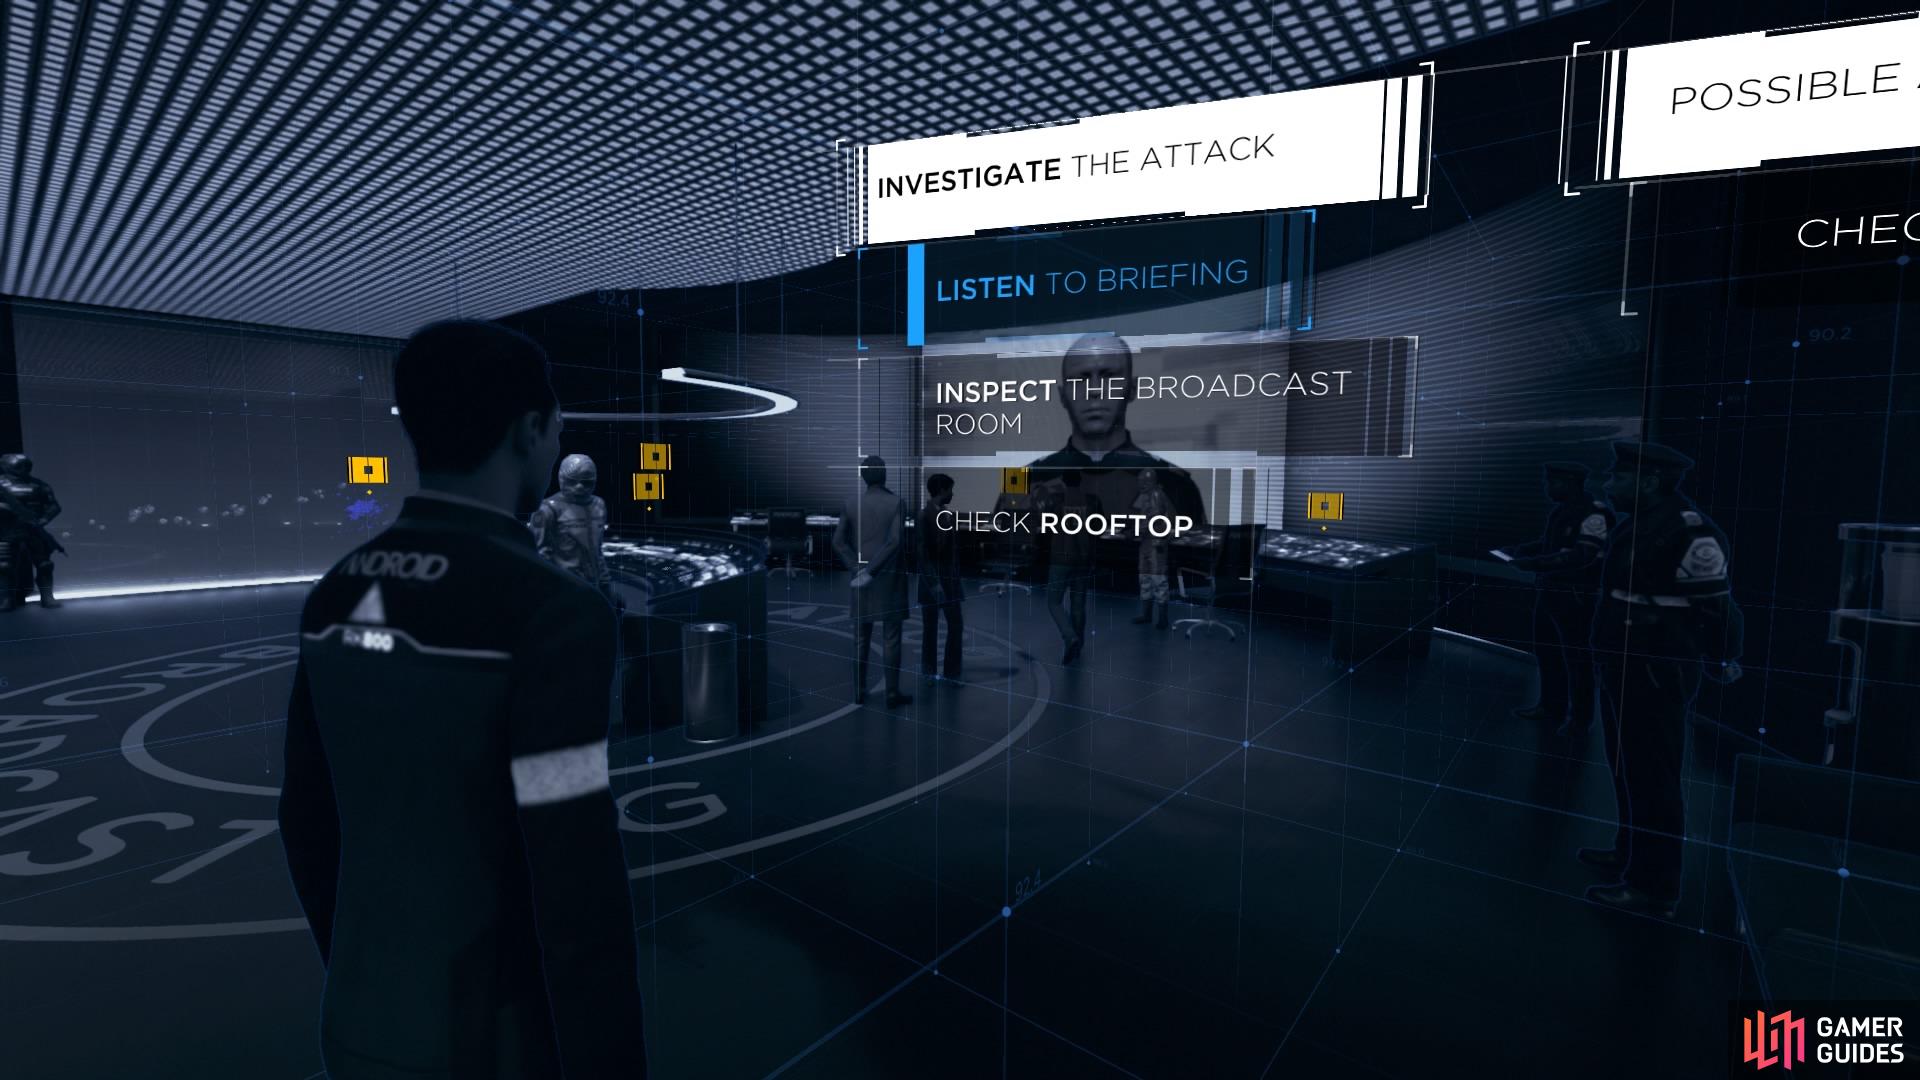
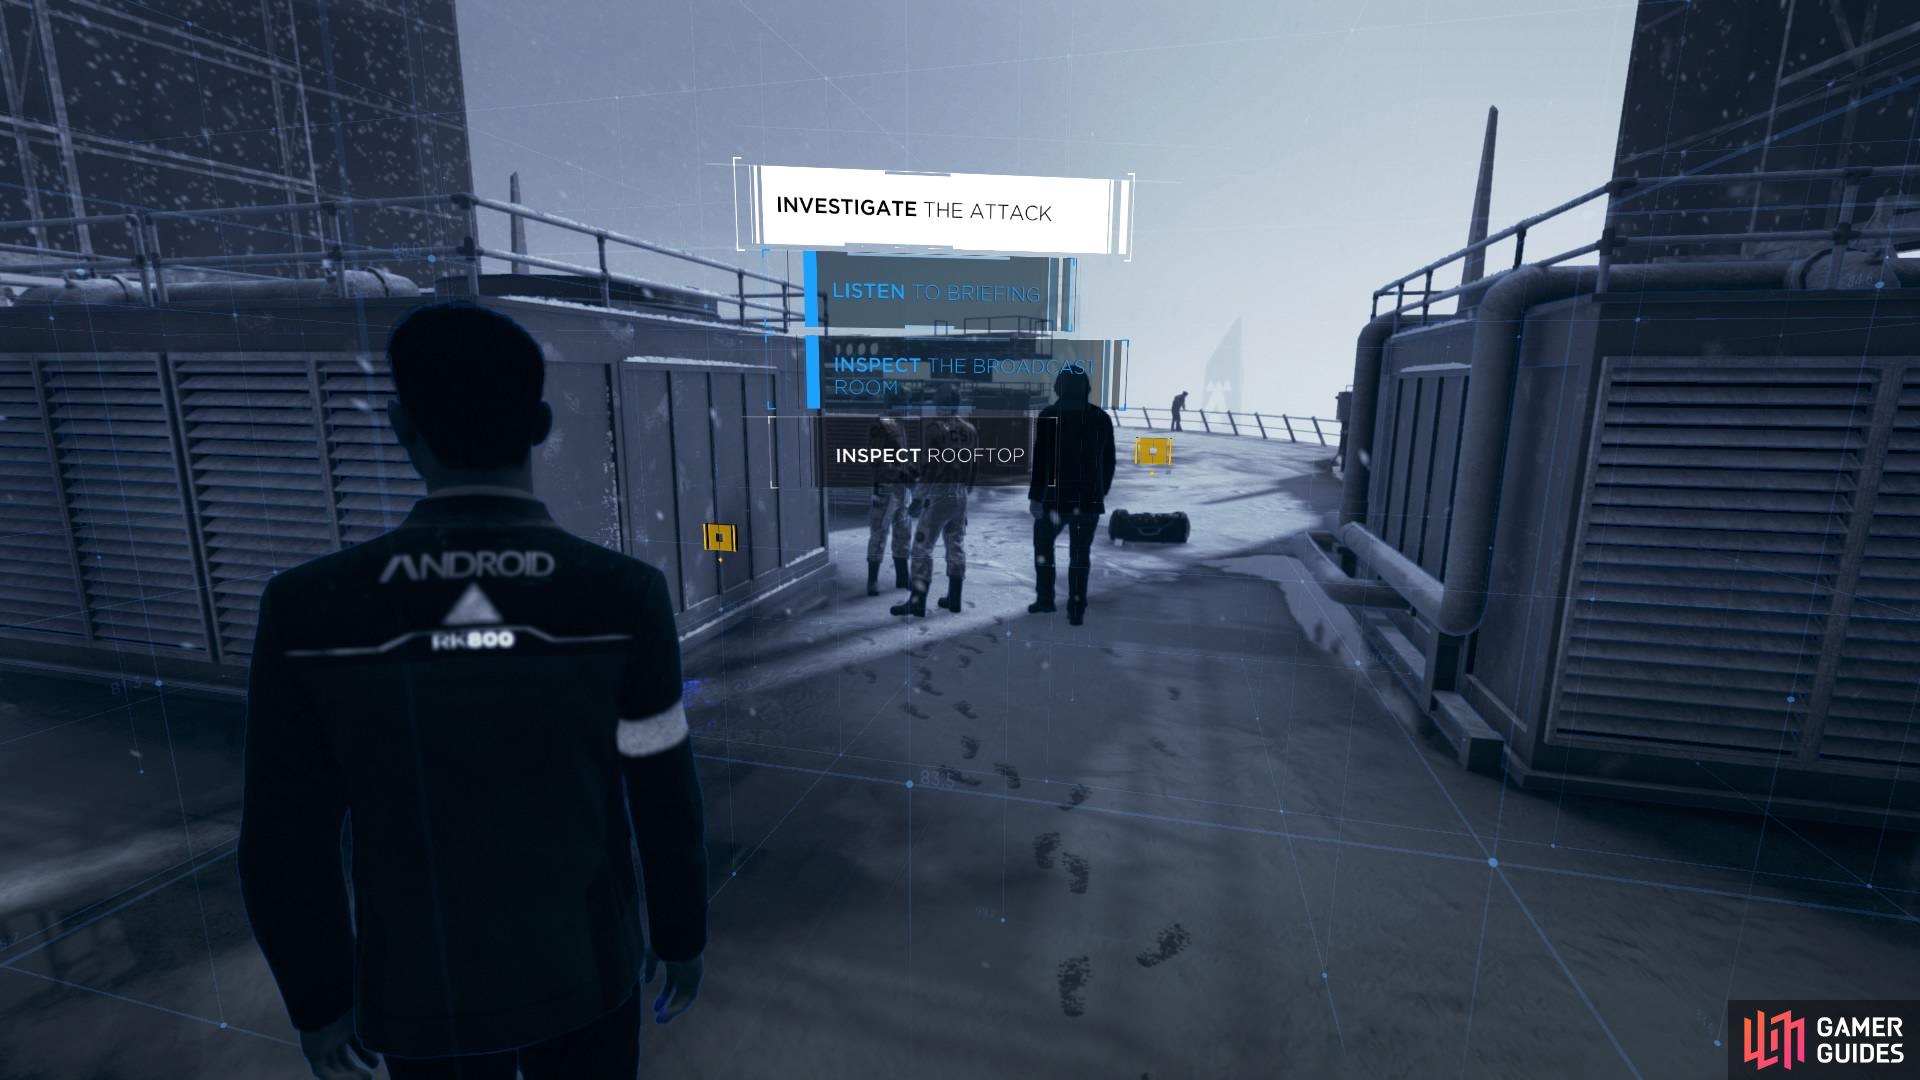
When you reach the 79th floor, you’ll meet up with Chris outside the elevator. When prompted, hold L1 to Listen to Briefing until Chris stops talking. Then you can go back into the corridor you just walked through to Investigate Corridors for clues.
There is a lot to unlock on the flowchart during this chapter, so all the following tasks will depend heavily on what you chose to do with Markus and his crew previously.
Analyse Guard Next to Phone – Go over to the guard’s body and analyse it. If you killed him in the previous chapter, this will unlock Killed During Chapter: ‘The Stratford Tower’.
Analyse Simon’s Blue Blood – Analyse the blue blood where Simon was injured and fell. If Simon was injured here, this will unlock Wounded During Chapter: ‘The Stratford Tower’.
Analyse Dead Employee – Analyse the body in the corridor outside the broadcast room. If you killed the employee that fled to sound the alarm, this will unlock Killed During Chapter: ‘The Stratford Tower’.
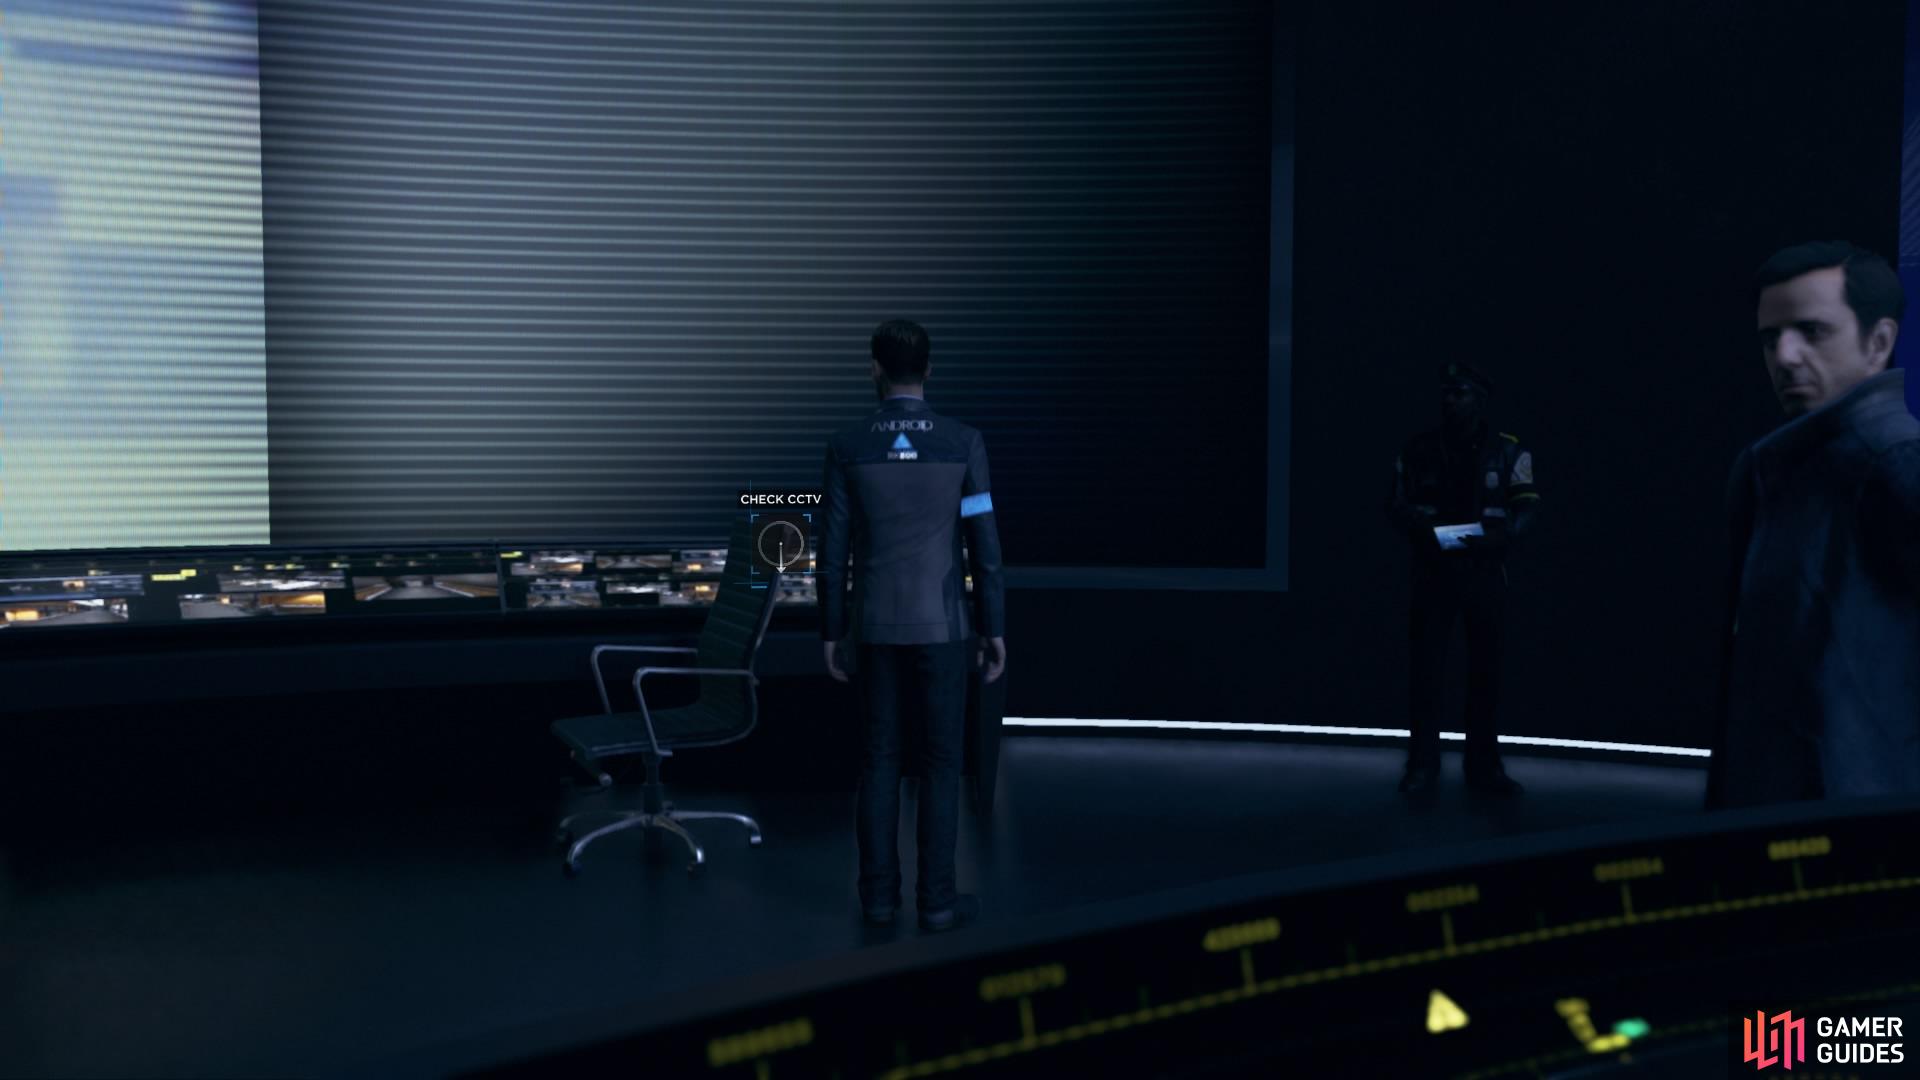
Check CCTV – Above the door to the broadcast room you’ll find the camera.
Analyse Phone – If the guard with the phone was attacked by North during ‘The Stratford Tower’, the phone will be lying on the floor behind the desk.
Analyse Gun – Analyse the guard’s body lying behind the desk. If you killed him in the previous chapter, this will unlock Killed During Chapter: ‘The Stratford Tower’.
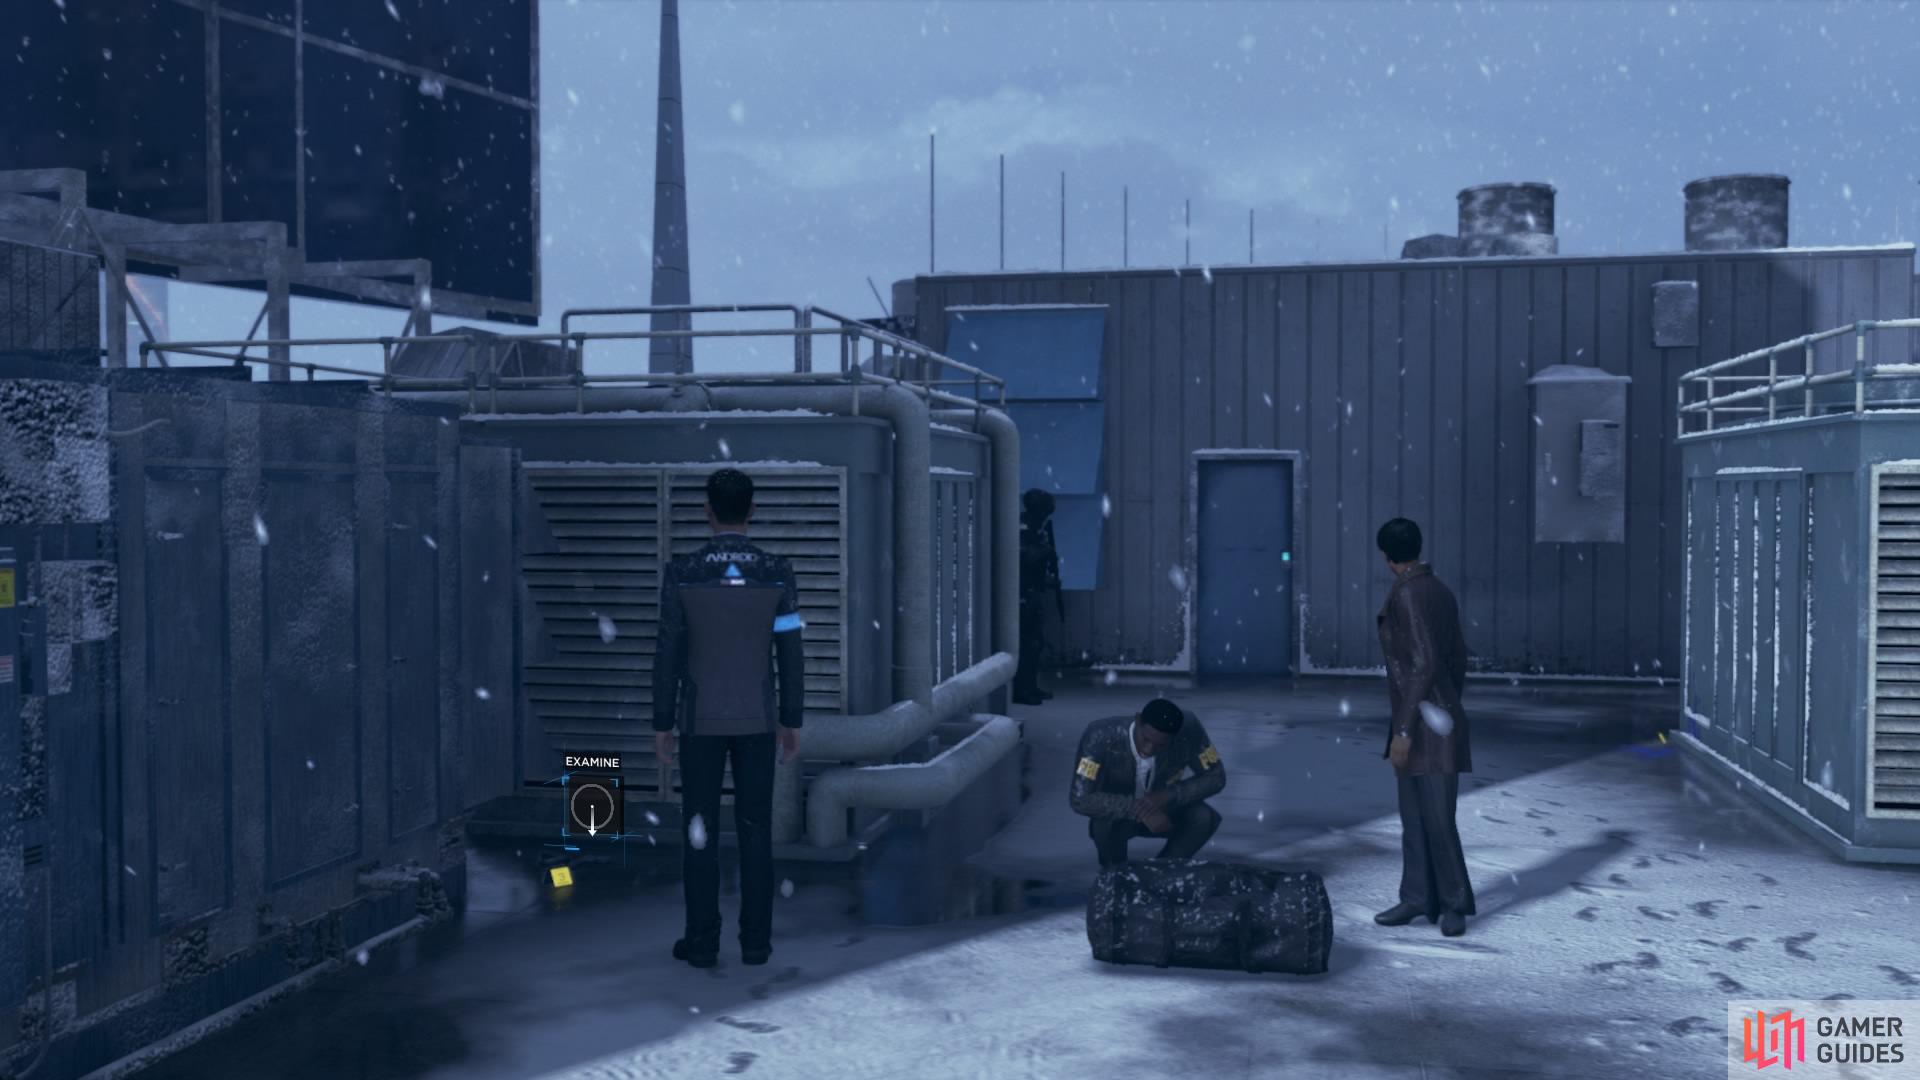
Meet Perkins – As soon as you meet FBI agent Perkins, he will become a constant annoyance from this point forward throughout the game.
Investigate Broadcast Room – There’s a lot to check off the list in this room and, like everything else, it all depends on how you played the previous chapter. These are all the things you can do in the broadcast room.
Meet the Officer from the Hostage Situation – Do you remember the officer lying injured on the floor during the very first chapter? Well, if you chose to help him, you saved his life. You can see him again here by the door and he will thank you. This unlocks Saved During Chapter: ‘The Hostage’.
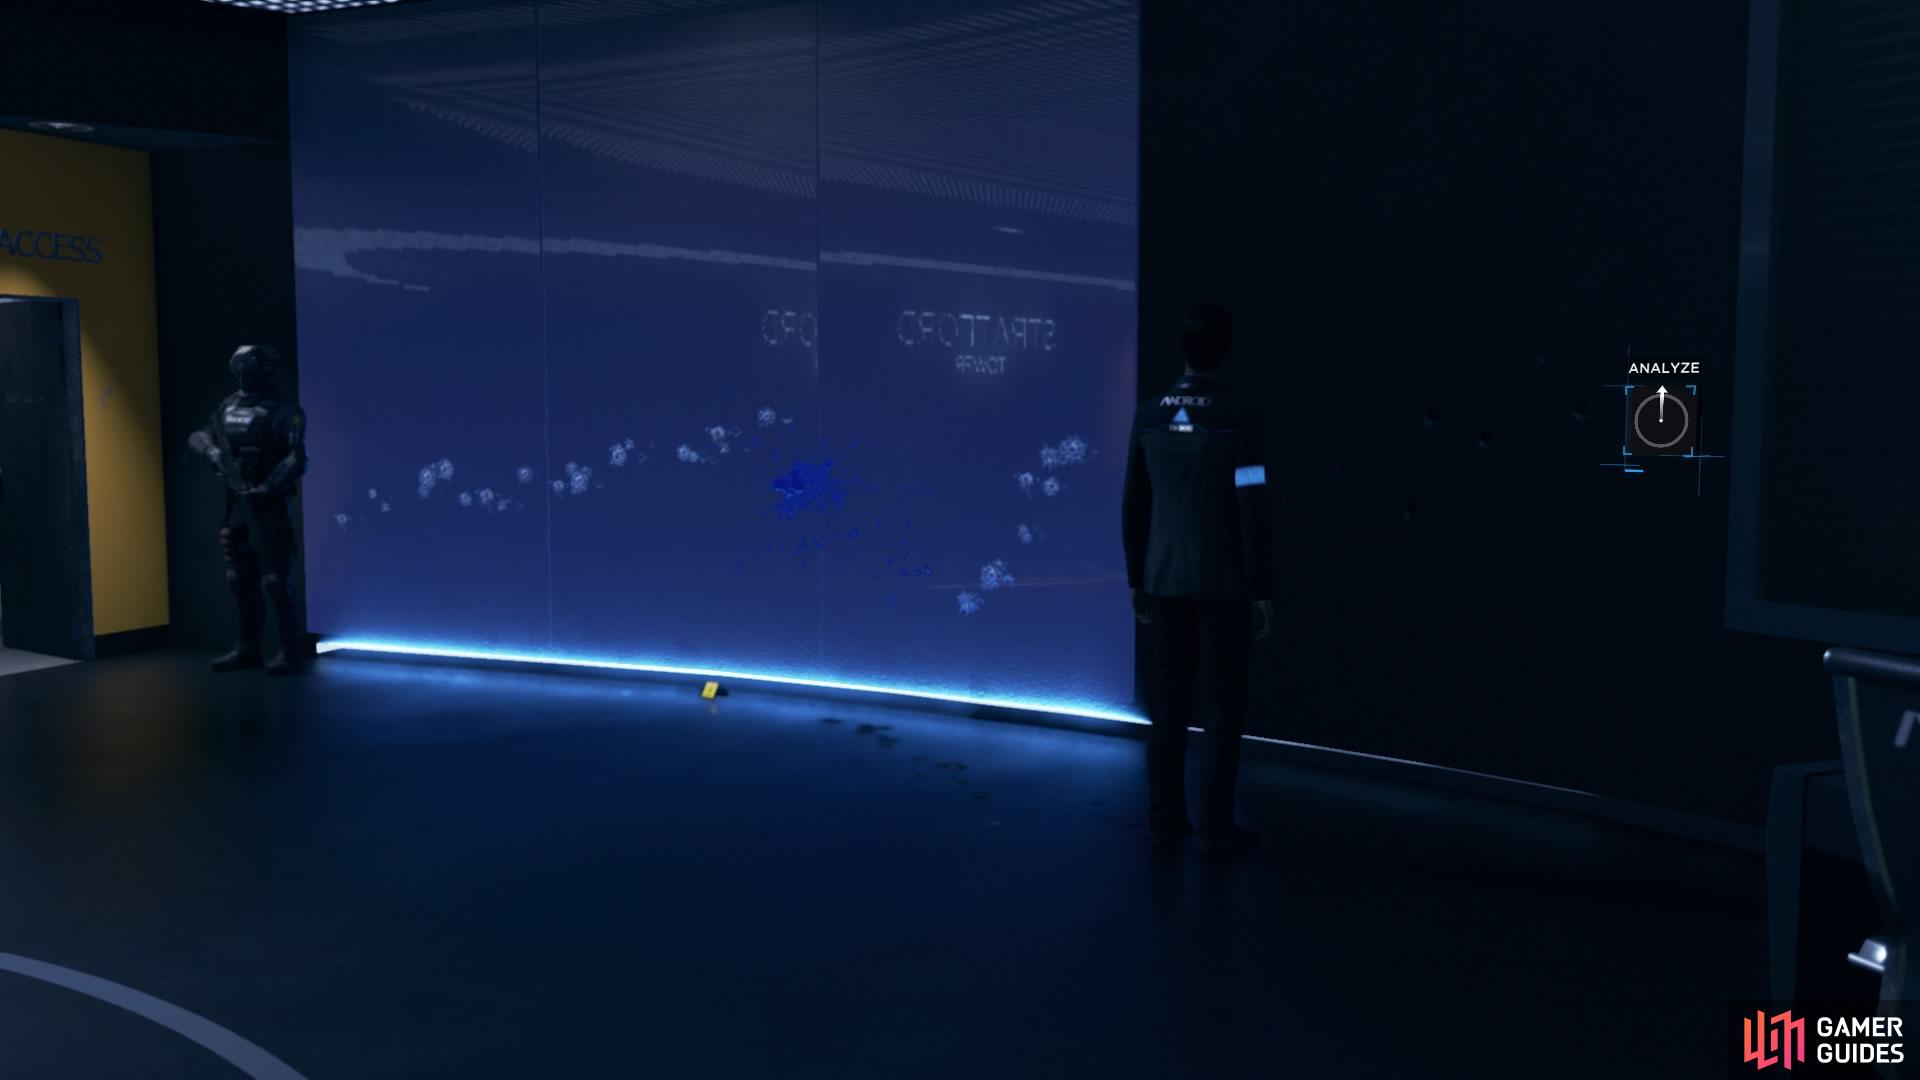
Analyse the bullet holes and blue blood on the far wall

Analyse the cap on the floor
Attacked by SWAT During ‘Stratford Tower’ – This unlocks if you let the employee run from the room to trigger the alarm, which in turn allowed the SWAT team to storm the room and chase you off. You can gather these clues for this node:
– Analyse Corridor Bullet Holes (next to the entrance of the broadcast room)
– Analyse Roof Access Bullet Holes (to the left of the door that leads to the roof.
– Analyse Screen Bullet Holes (in the screen on the far side of the broadcast room)
– Analyse Blue Blood on the Wall: If Simon was shot by the SWAT team but you still managed to get him to the roof, then you can look at his blood smeared on the wall.
Analyse Cap – You’ll find it on the floor by the console in the middle of the room.
Watch Video – Interact with the panel on the left side of the wall console to play the video of Markus. Doing this allows you to identify him by his serial number.
Check the CCTV footage

This will unlock the option to interrogate the androids in the kitchen
Check Camera – Watch the CCTV footage of the corridor outside the broadcast room.
Analyse Destroyed Android – If you left Simon behind instead of taking him with you to the roof, then he will be dead and Connor can analyse his body. This unlocks Died in Broadcast During Chapter: ‘The Stratford Tower’.
Analyse Blue Blood on Console – If Simon was only wounded during the previous chapter, then Connor can analyse his blood. Press L1 when prompted to interact with the blue blood near the giant screen.
When you’ve done all of this, you can head to the rooftop. There’s a section where you can interrogate the androids in the kitchen, but we don’t recommend going there first. If you go ahead with the interrogation before checking out the roof, it will lead to the chapter ending and you will miss that section entirely.
On the other hand, if you head to the roof and left Simon alive in the previous chapter, finding him will also end the chapter early, and you won’t have access to the kitchen.
If you wish to go to both areas in one run, it might be wise to execute Simon on the rooftop in the previous chapter (but this will effect the SURVIVORS trophy). This will allow you to inspect the rooftop and return to the broadcast room after to interrogate the androids in the kitchen. Alternatively, you don’t have to go to the roof at all.
If you complete the roof area and the chapter ends, quit to the main menu and restart the chapter/checkpoint.
Analyse all the yellow markers on the roof
Find the guns to the right of the bag
Investigate the Rooftop – On the far side of the broadcast room, if you remember from the previous chapter, are the stairs leading up to the roof, so let’s go there next.
Analyse Door – Check the door you just came through as soon as you get up there.
Analyse Bag – Straight ahead of you will be a bag that Markus and the crew used to carry their parachutes in the last chapter.
Analyse Destroyed Android – This will be Simon’s body. If you managed to get Simon to the roof but executed him anyway, then his body will be here for you to analyse, unlocking Died on Rooftop During Chapter: ‘The Stratford Tower’.
Analyse Blue Blood – You can analyse more of Simon’s blood on the roof, which can be unlocked if he was wounded in the previous chapter.
Find Footprints – Beyond the bag are some footprints leading to the edge of the roof where Markus and the others jumped off.
Analyse Weapon – You can find the two guns they dropped near the bag, on the right hand side.
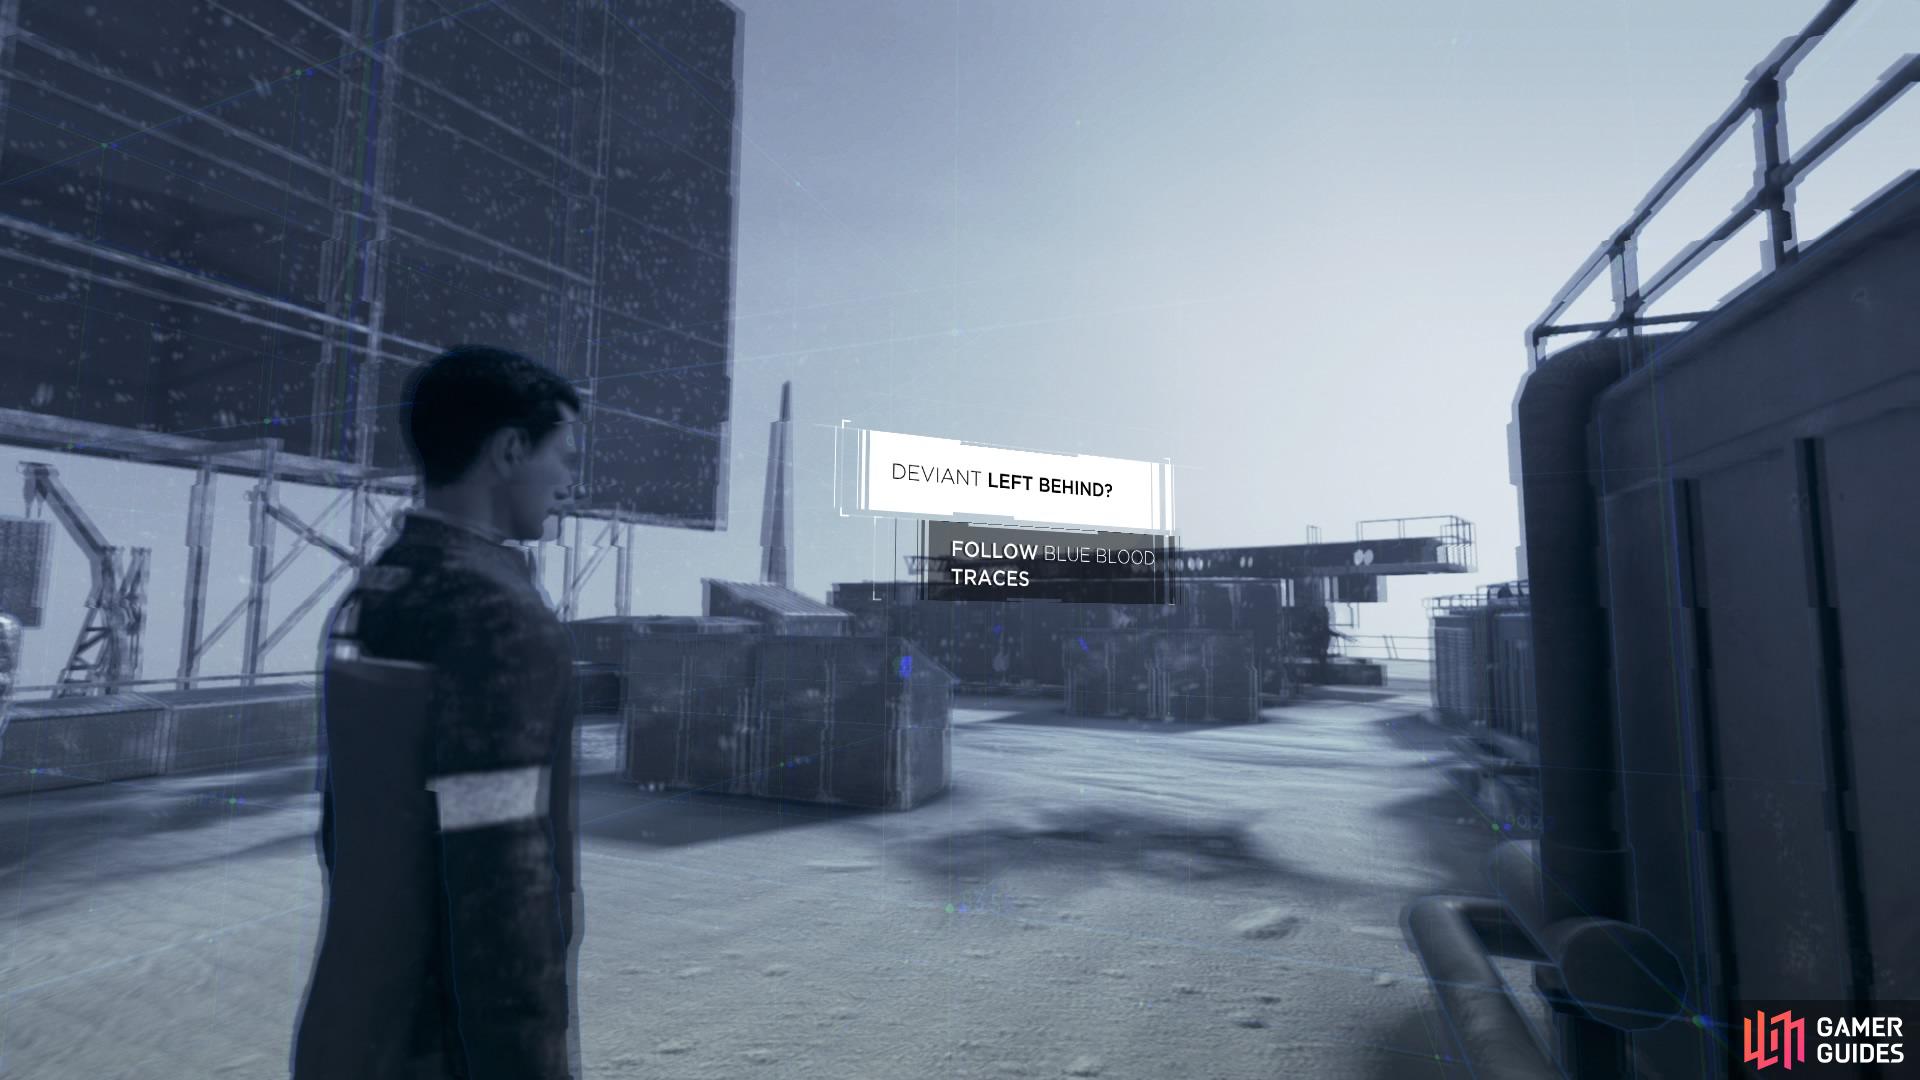
Hold R2 to follow the blue blood trail
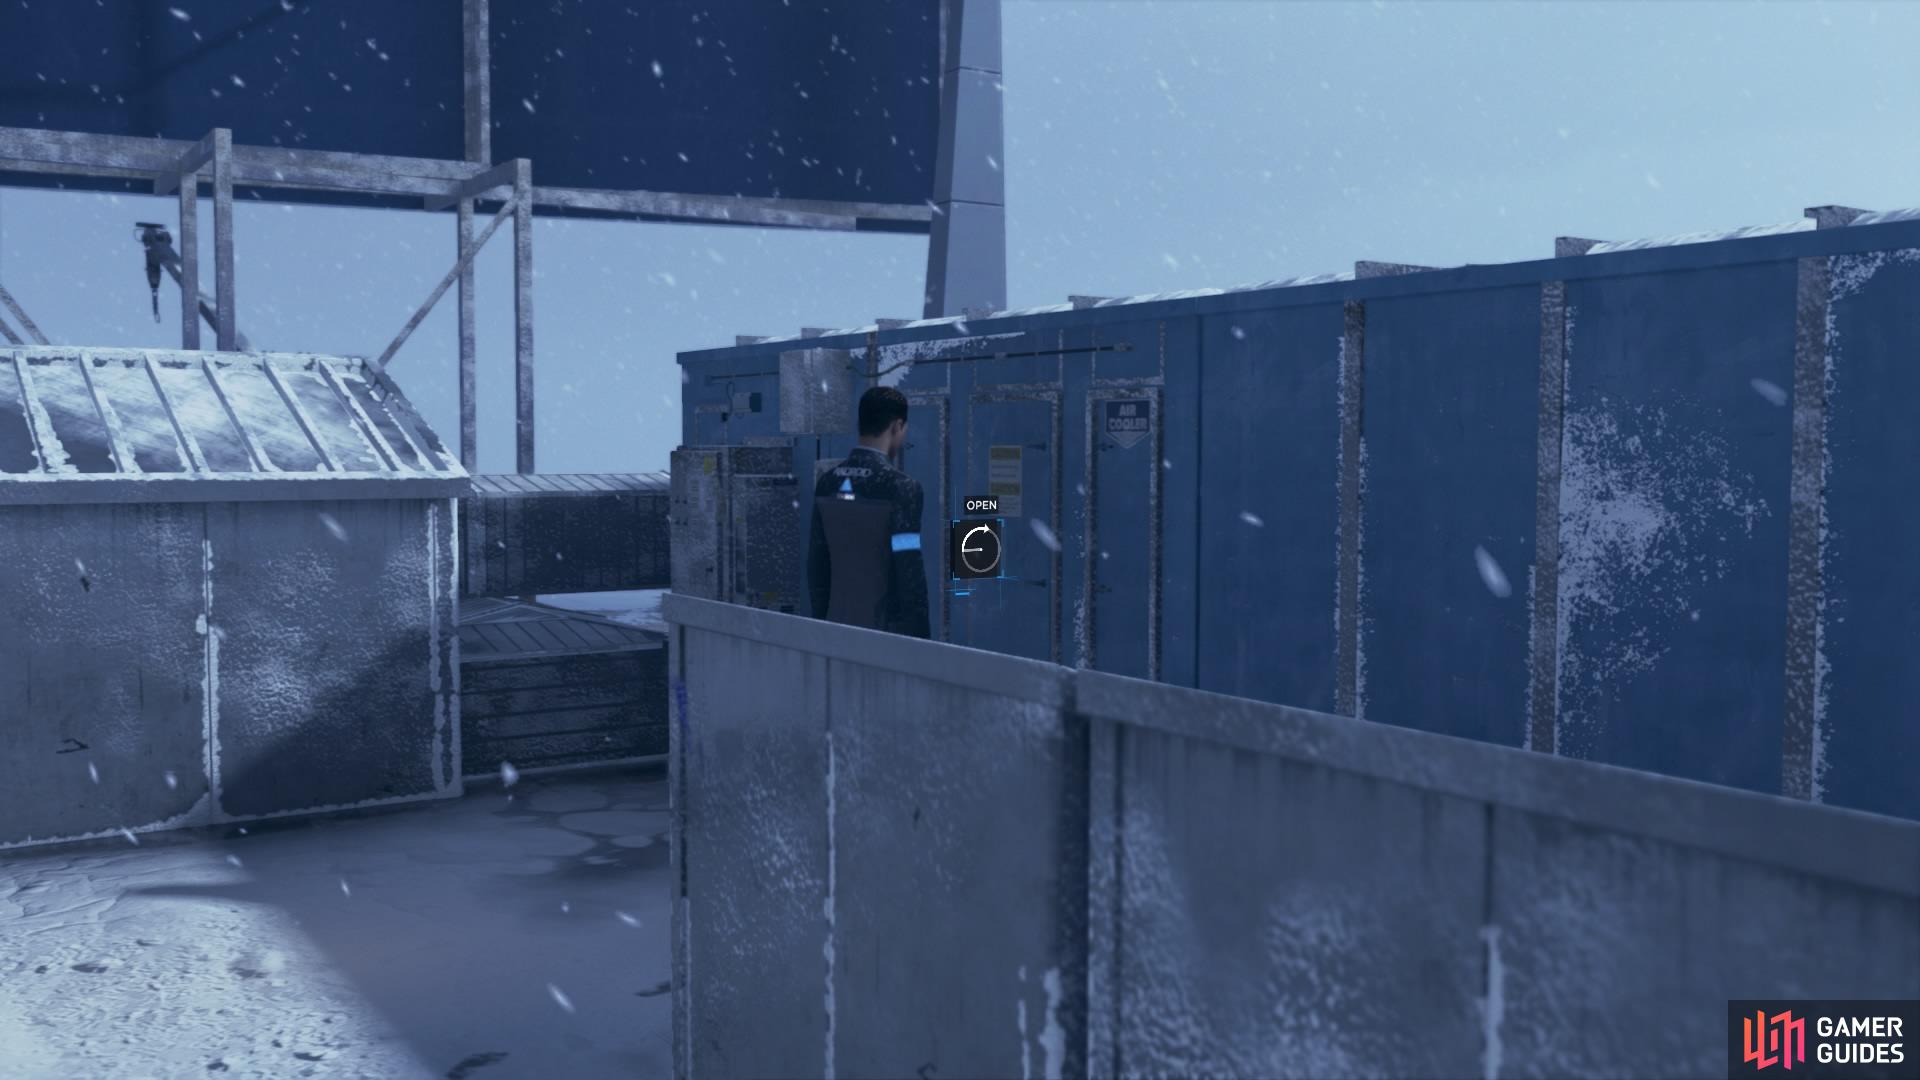
Simon is hiding in a container at the back left side of the roof
This next part occurs if you previously left Simon alive for the cops to find him. Follow the blue blood trail to a container at the back of the roof.
Find Simon – You’ll follow the blood until it leads you to Simon. When you open the door, Simon will shoot Connor, and Hank will pull you away to safety. The SWAT and FBI will both open fire on Simon.
Option 1 – Rush Deviant
To get information out of him, you have to run at him before he gets shot. Gunfire will be coming from all directions, so press all of the button sequences correctly and in time to avoid getting Shot by Simon. The other two outcomes here, if you fail, are Connor Died Running Toward Simon (which will decrease your software instability) and Simon is Destroyed by SWAT. Both of these have cross-chapter impact.
However, you can also Reach Simon by dodging all gunfire, and you can probe Simon’s memory. This unlocks Flash From Simon’s Memory, where you get some information about Jericho, and will increase software instability.
Doing this will also cause Simon to Self-Destruct as he shoots himself in the head, which unlocks Connor Was Traumatised – Connor physically feels Simon die, which leaves him shaken for quite some time after.
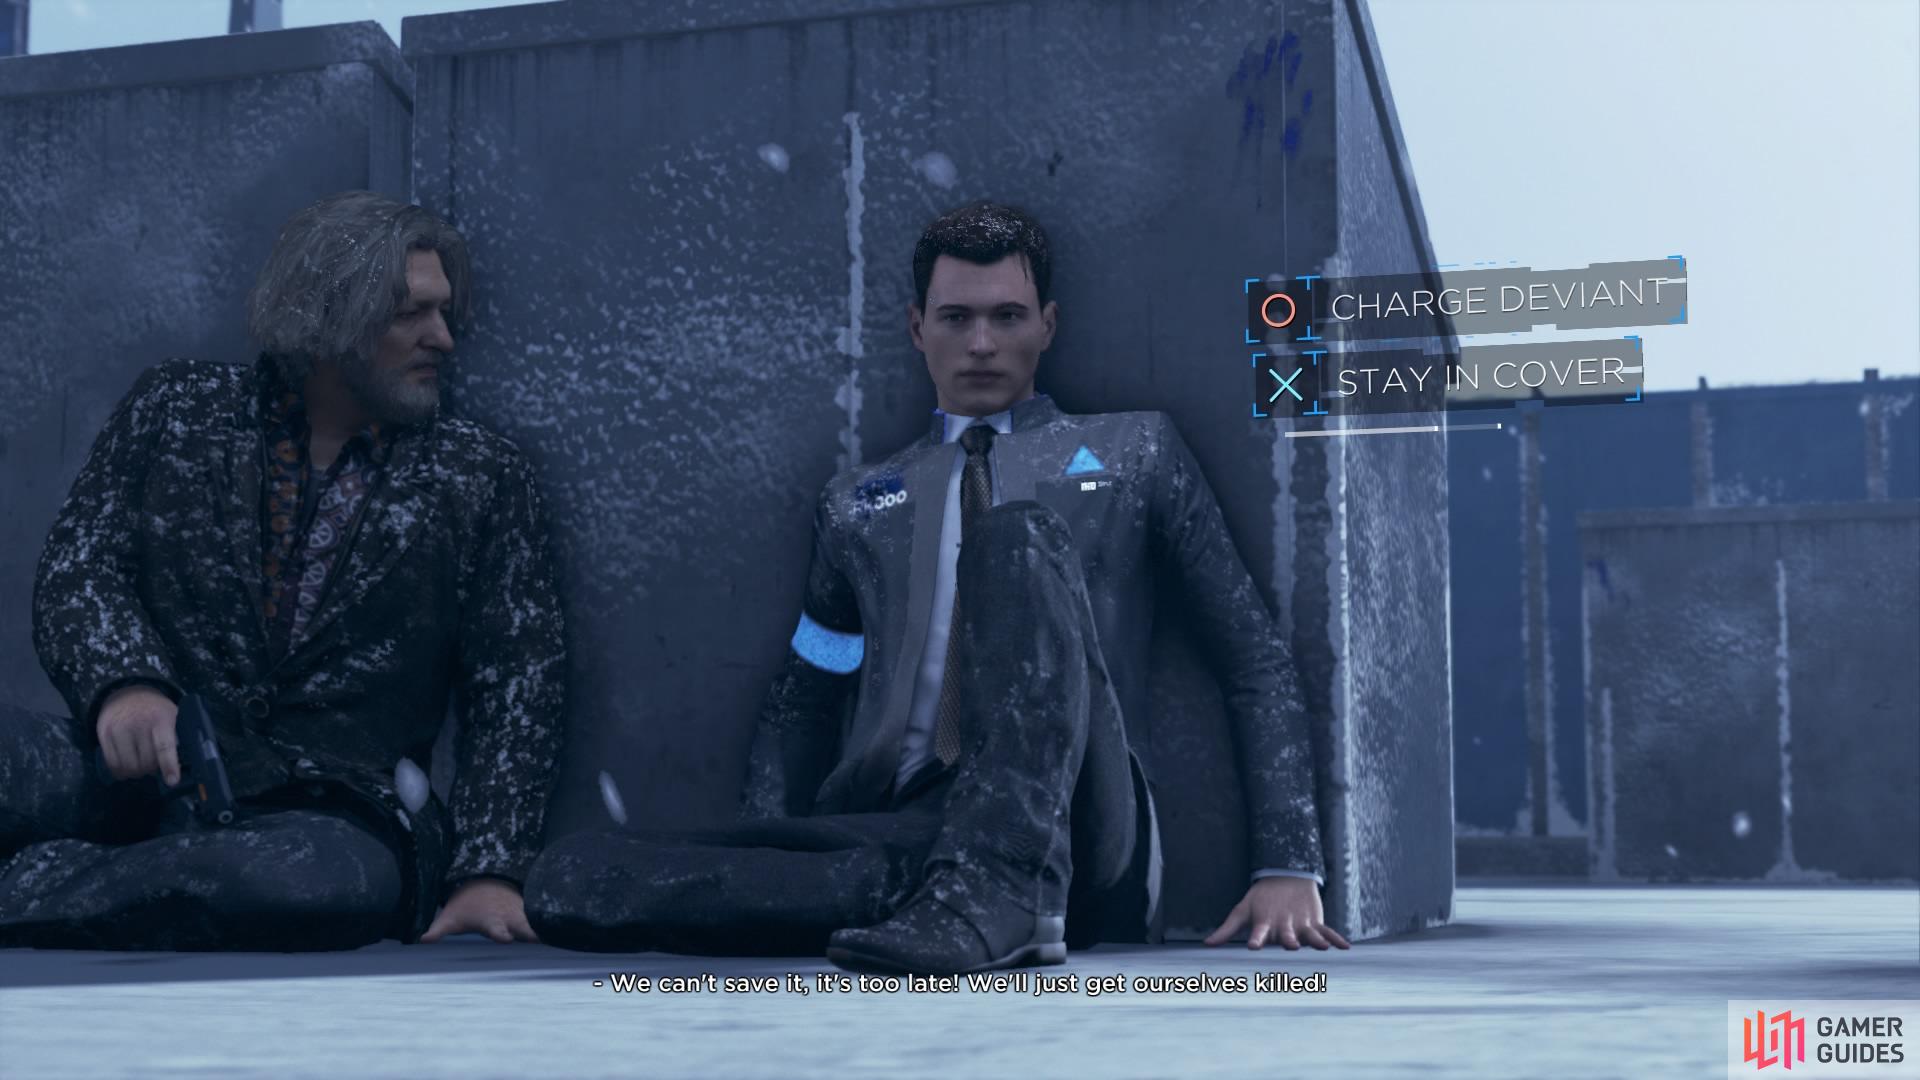
Option 2 – Stay in Cover
This is the simple option. Just stay out of the line of fire and Simon is Destroyed by SWAT, leading to Hank and Connor Survived.
Once you’ve done all this, you can finally head into the kitchen for the next part – it’s situated between the entrance to the broadcast room and the stairs to the roof, just behind the desk in the middle. This next part can get complicated as you try to out a deviant.
Magazine – First things first, pick up the magazine and read both articles to make it register.
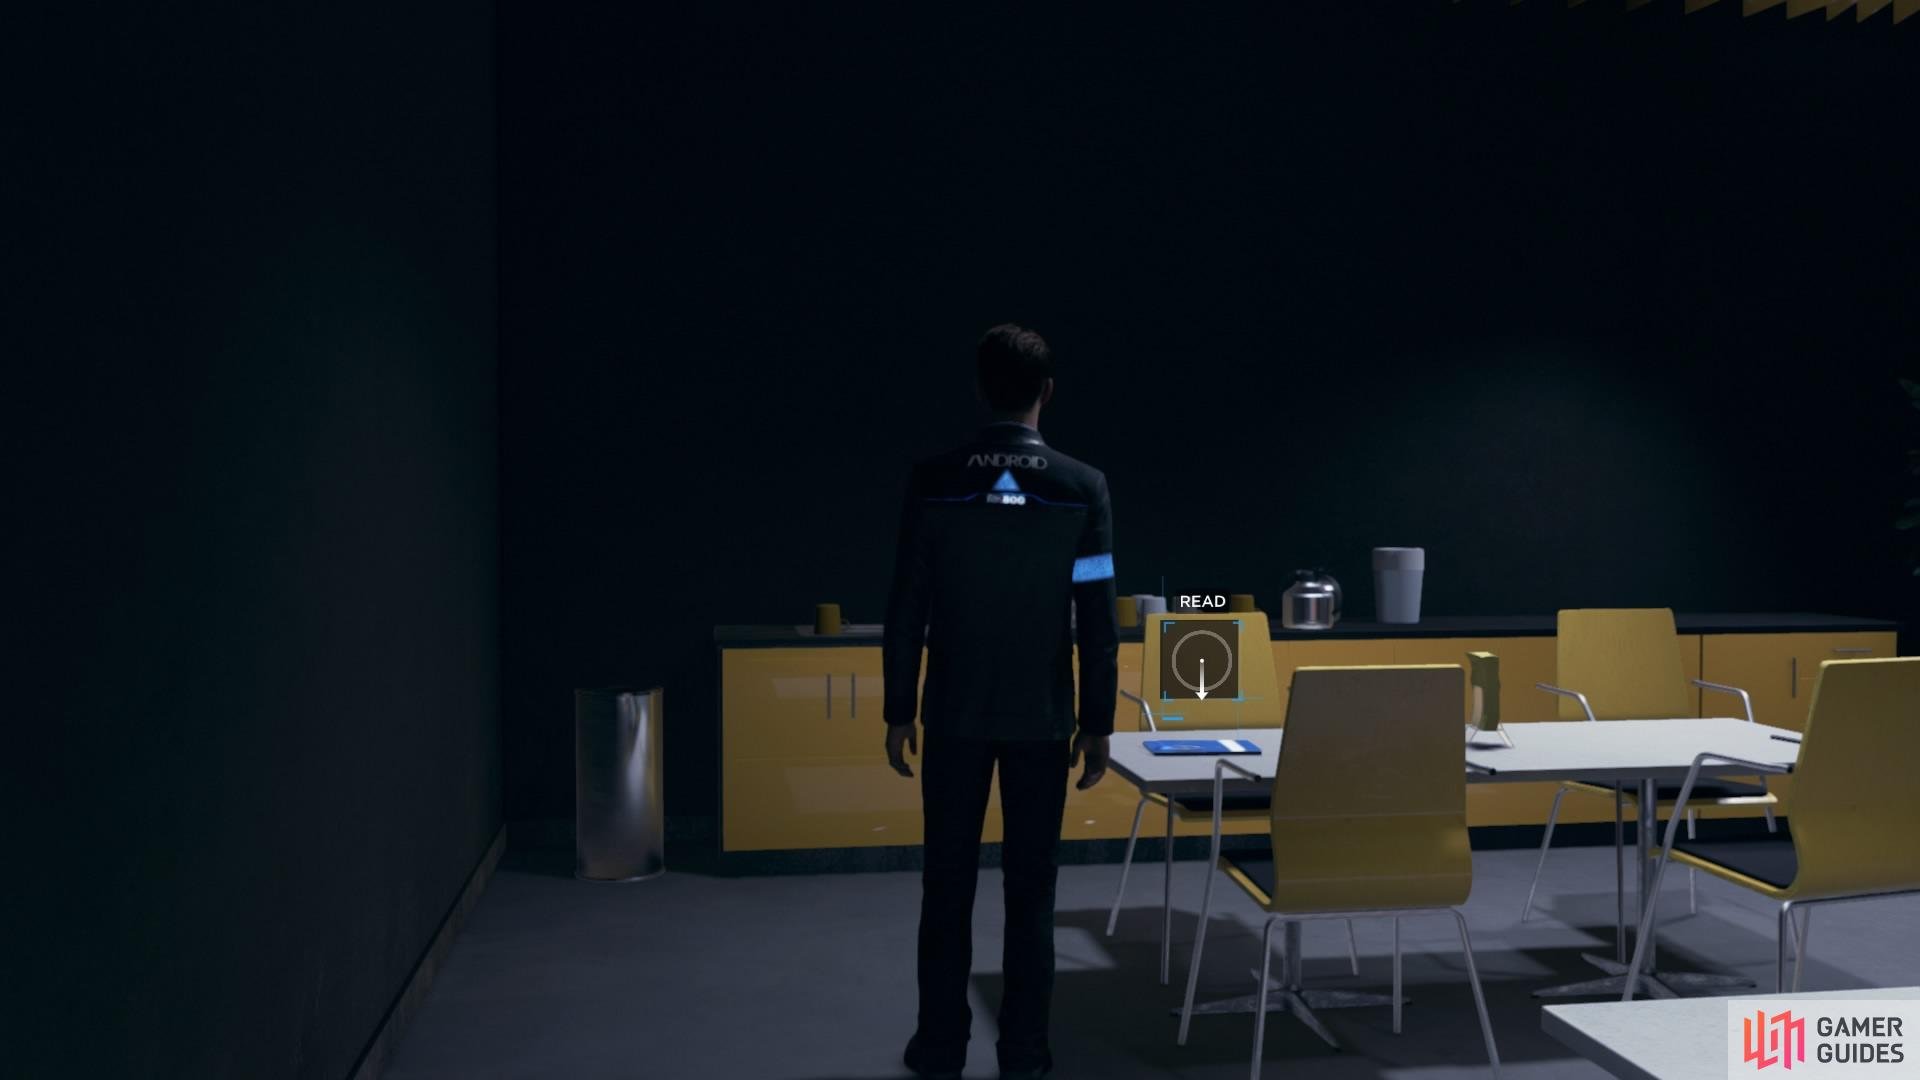
Find the magazine in the kitchen
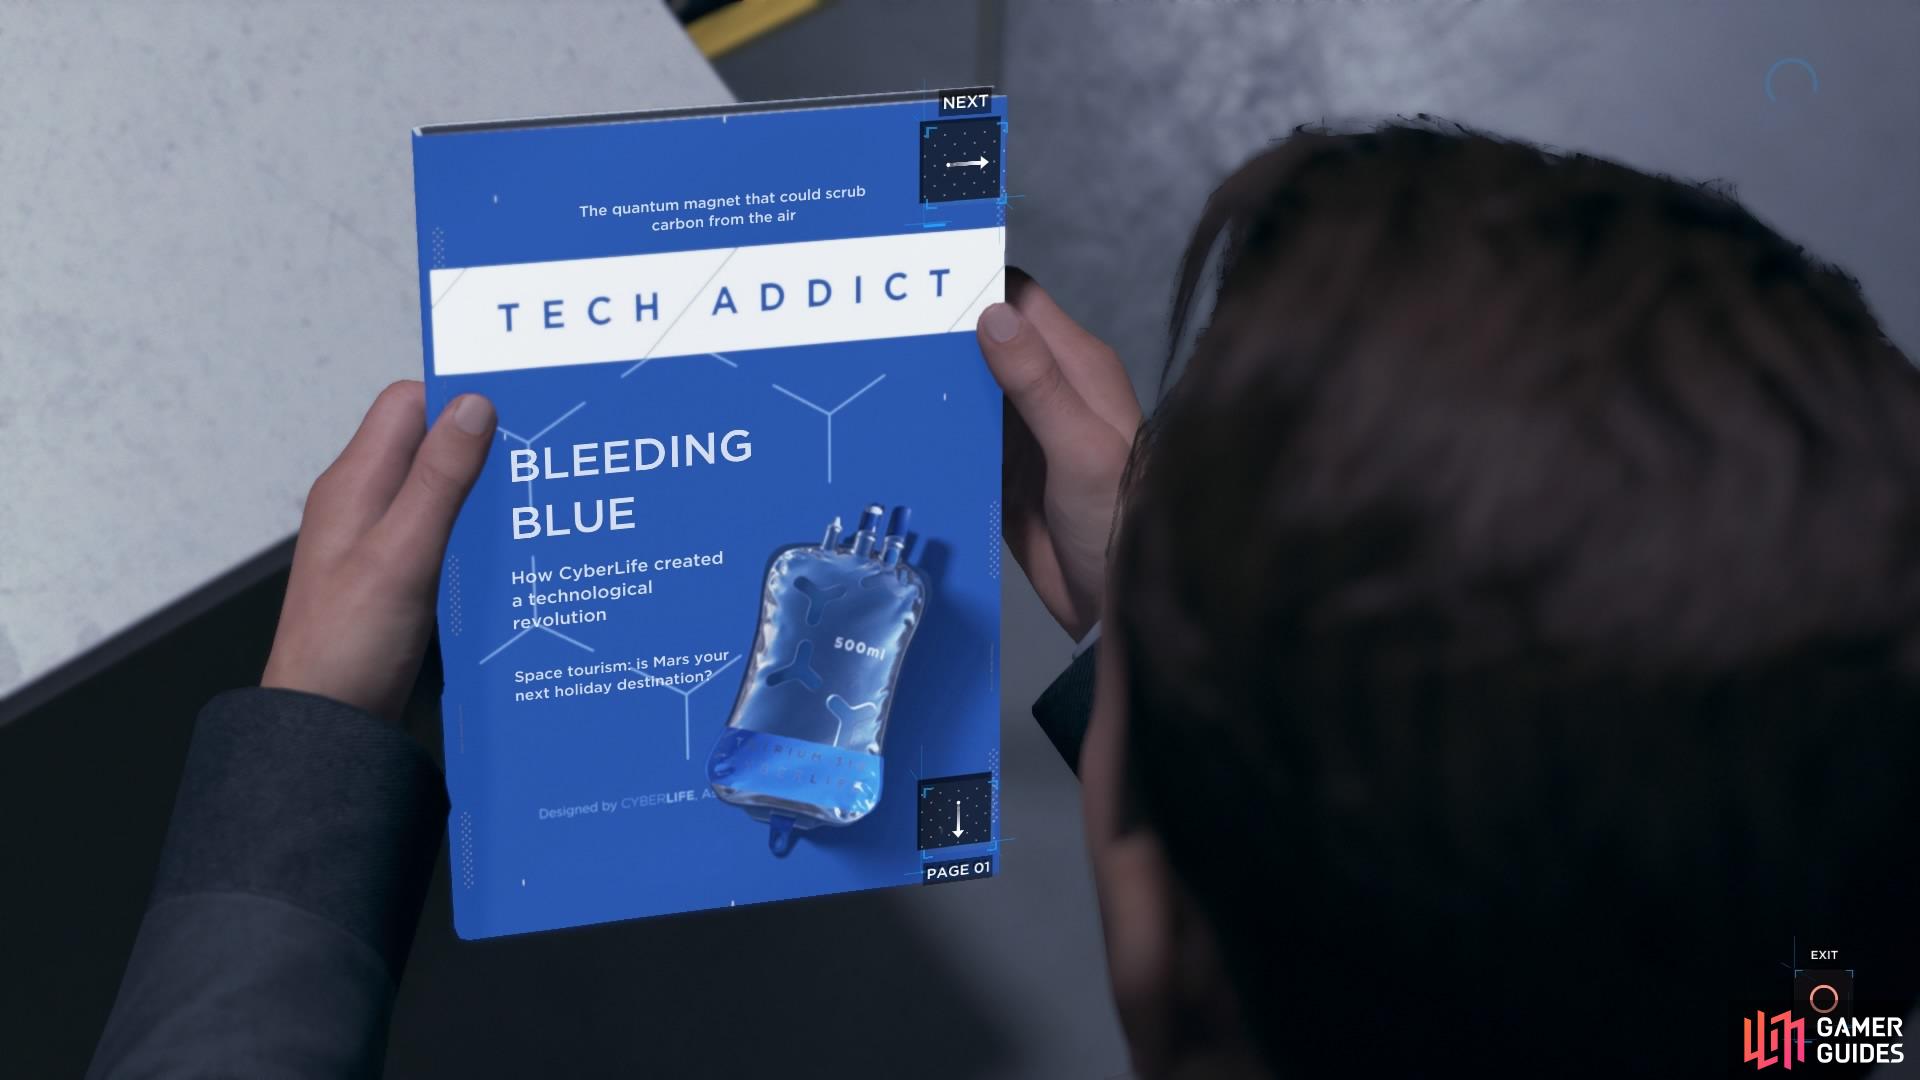
Read both articles
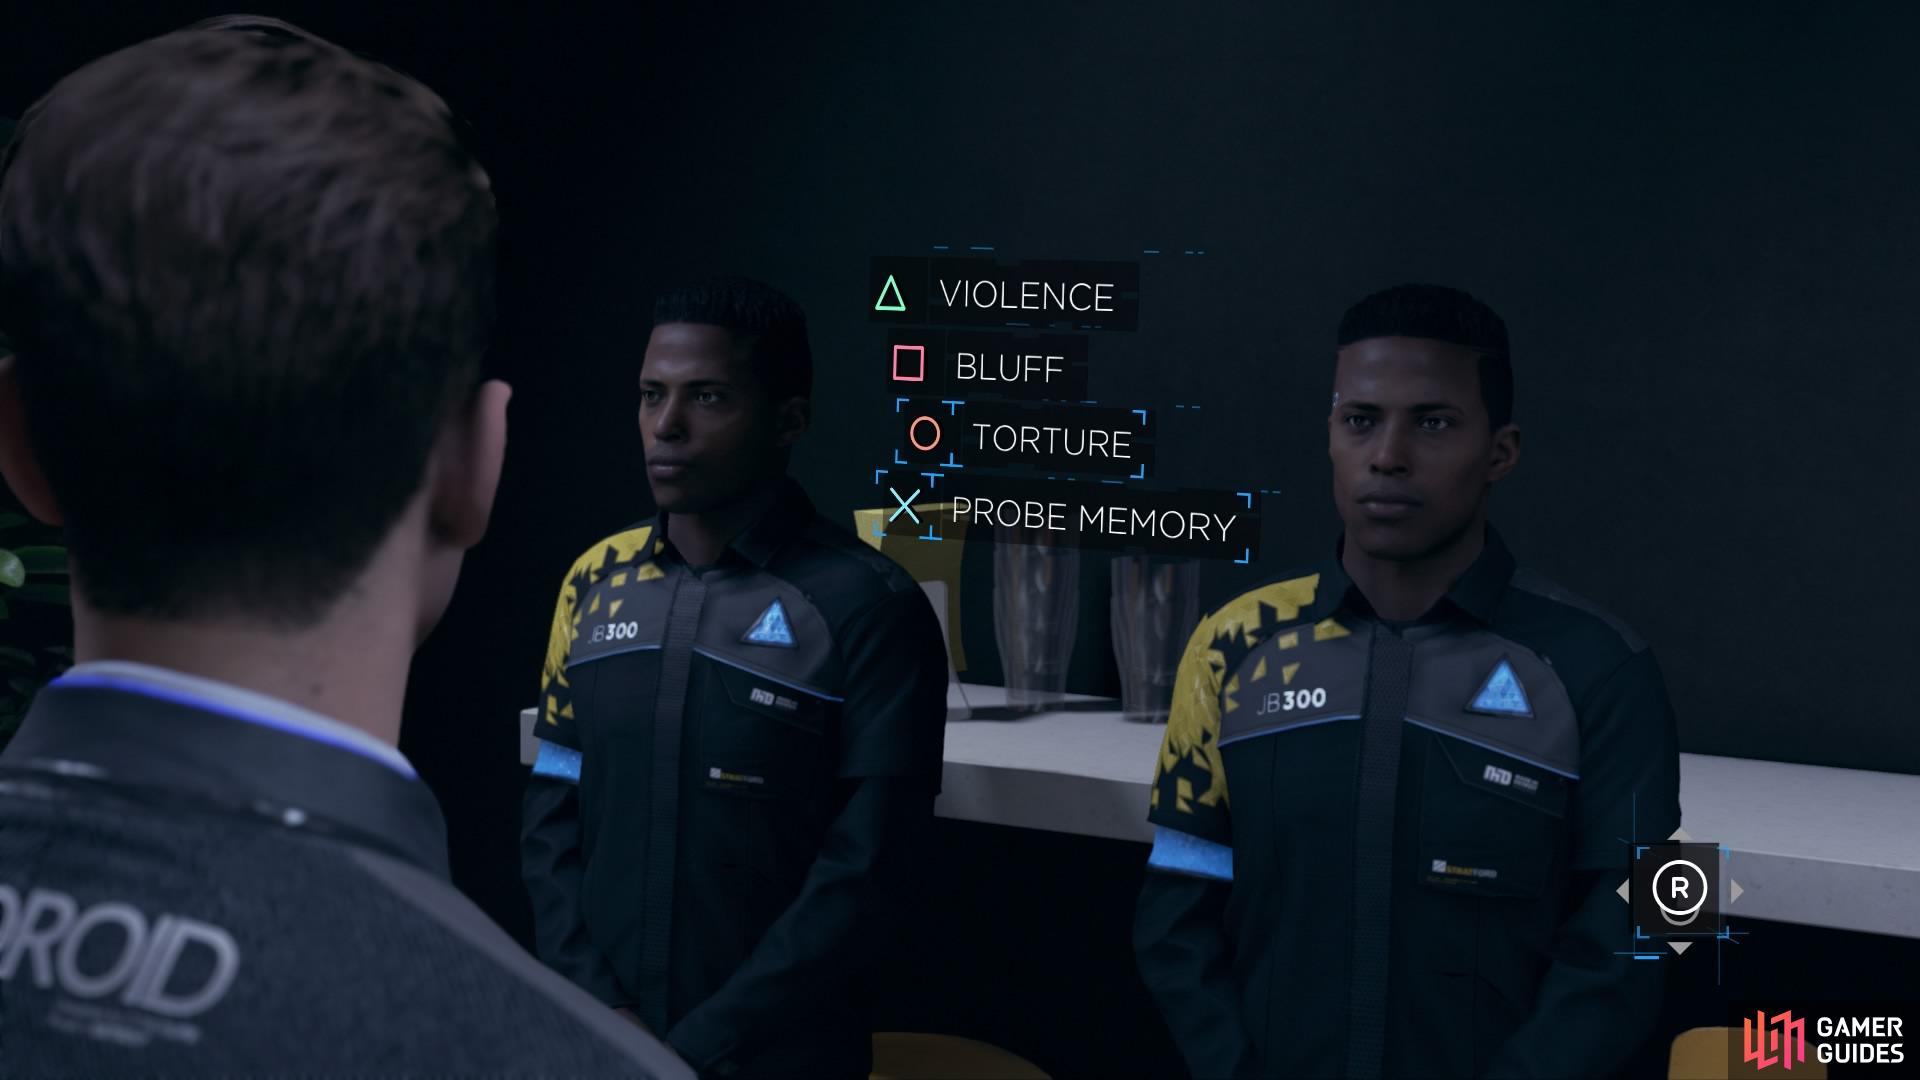
Interrogate Androids – Now get straight to work. The three androids lined up in the kitchen are identical, and it’s your job to figure out which one of them is the deviant. You’ll be clued in by the game to look for anything out of the ordinary – in this case, one of them will continue to glance at you occasionally rather than stare straight ahead like the other two. Eventually, it’ll start turning its head as your accusatory questions make it increasingly uncomfortable.
Deviant Not Found – After a while you’ll be given the options BLUFF, TORTURE, VIOLENCE, and PROBE MEMORY. You can use them on a specific android, but if you haven’t uncovered the deviant yet, you’ll end the interrogation and give up.
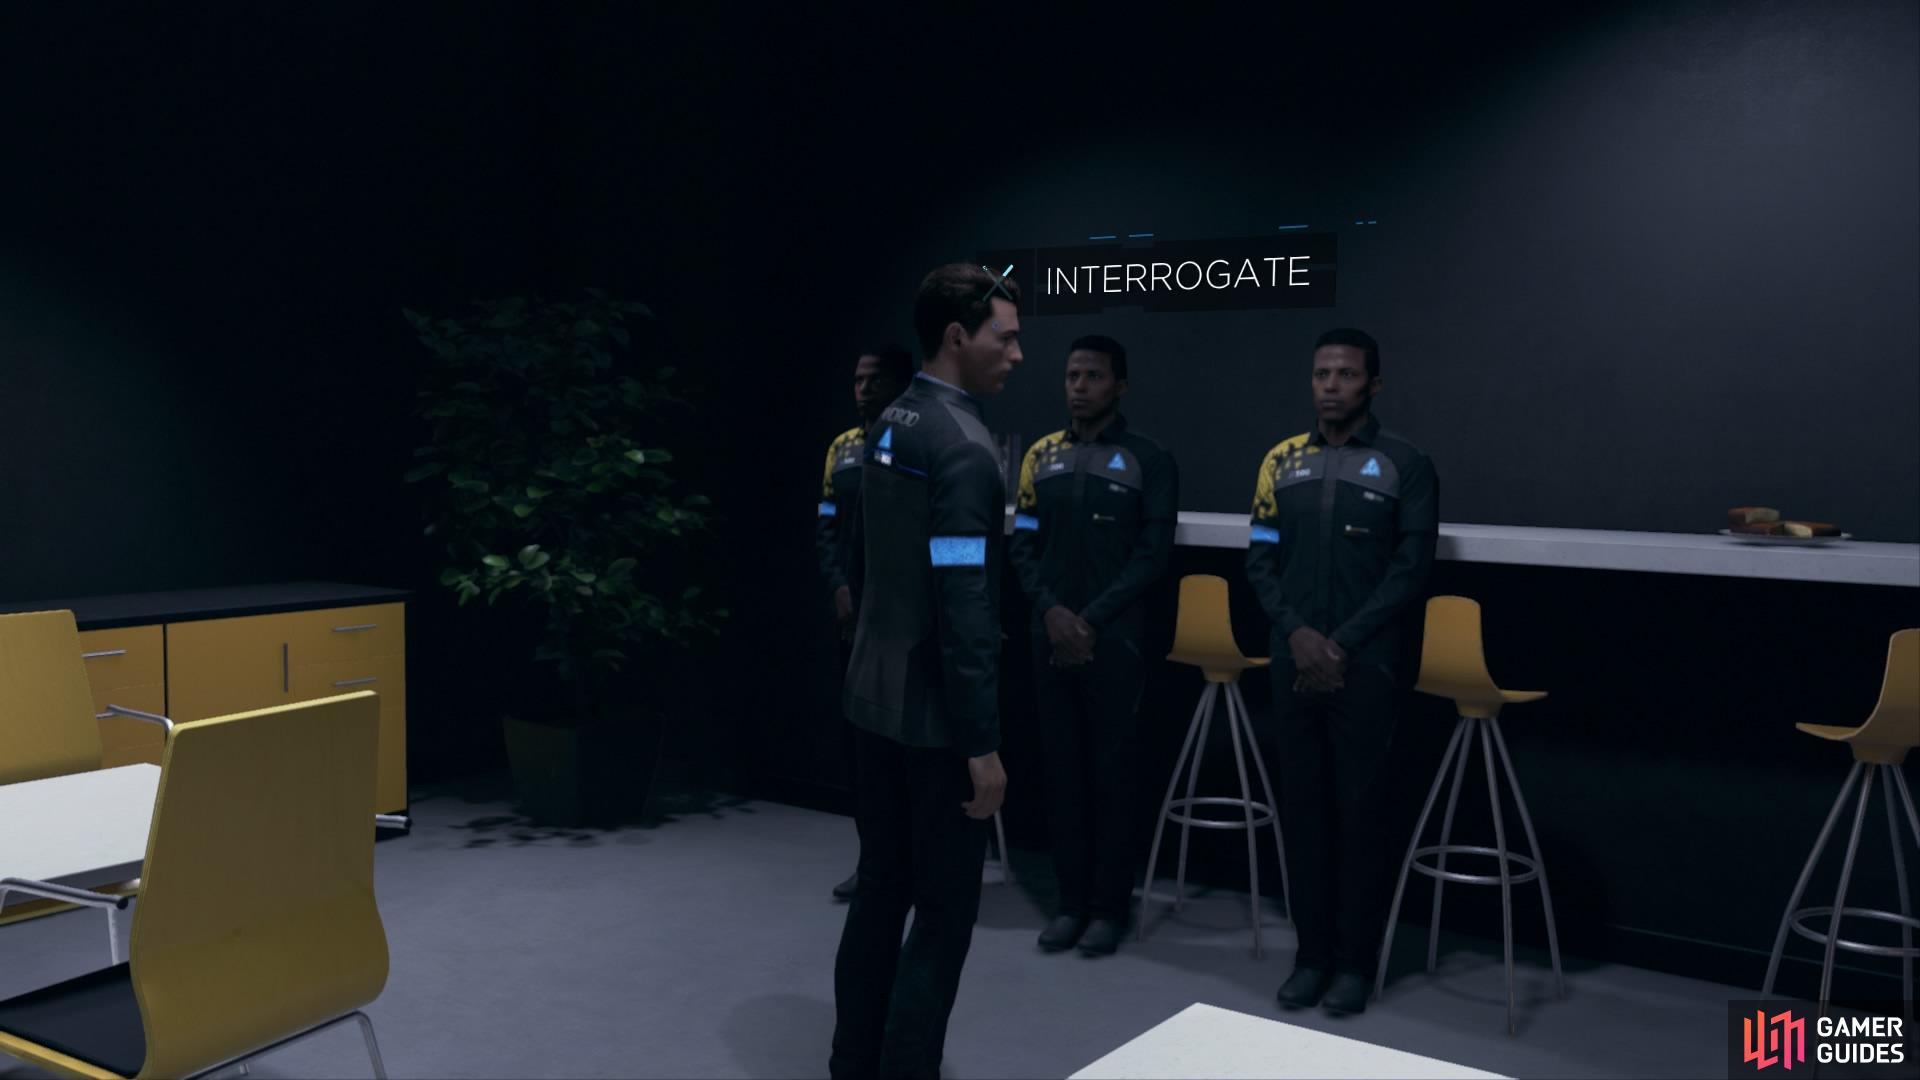
Question the androids
The deviant will always be on the left
Find Deviant – However, using BLUFF, TORTURE, VIOLENCE, or PROBE MEMORY can cause the deviant to reveal itself, which can lead to:
– Deviant Attacks: The deviant will shove you aside and pin you to the counter with a knife, followed by stealing an important component from your chest. You’ll begin to shut down, with only 1:45 to put the component back in.
– Remove Knife: Look to your left to grab the knife and pull it from your hand.
– Recover Component: You’ll have to crawl along the floor by hitting the buttons correctly before the timer runs out.
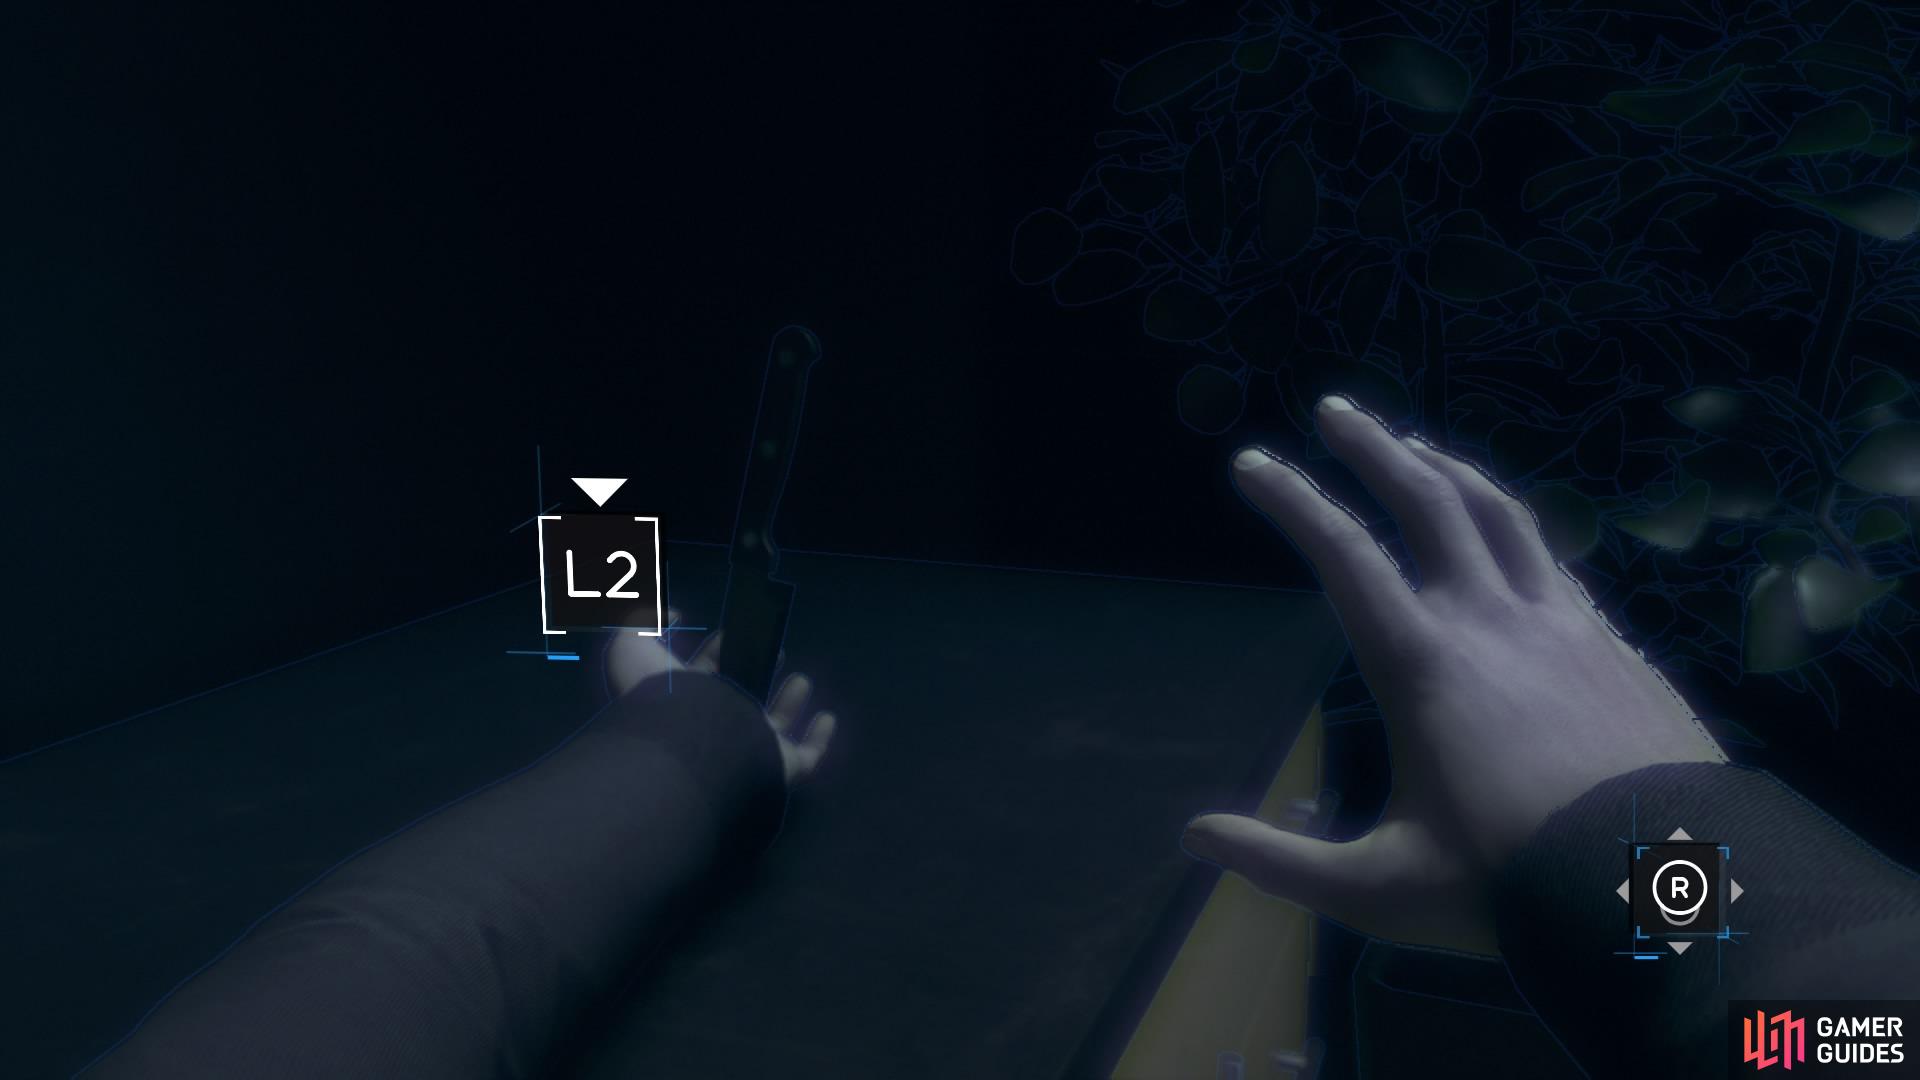
Remove the knife from your hand

Replace the component before time runs out
From here, a few things can happen.
Lose Too Much Time – If you don’t chase after the deviant right away then the following events will play out without you.
– SWAT Destroys the Deviant: This will have a cross-chapter impact later on.
– Deviant Kills Officer from the Hostage Situation: This will decrease public opinion.
– Connor and Hank Survived: Public opinion will decrease, but your software instability will increase.
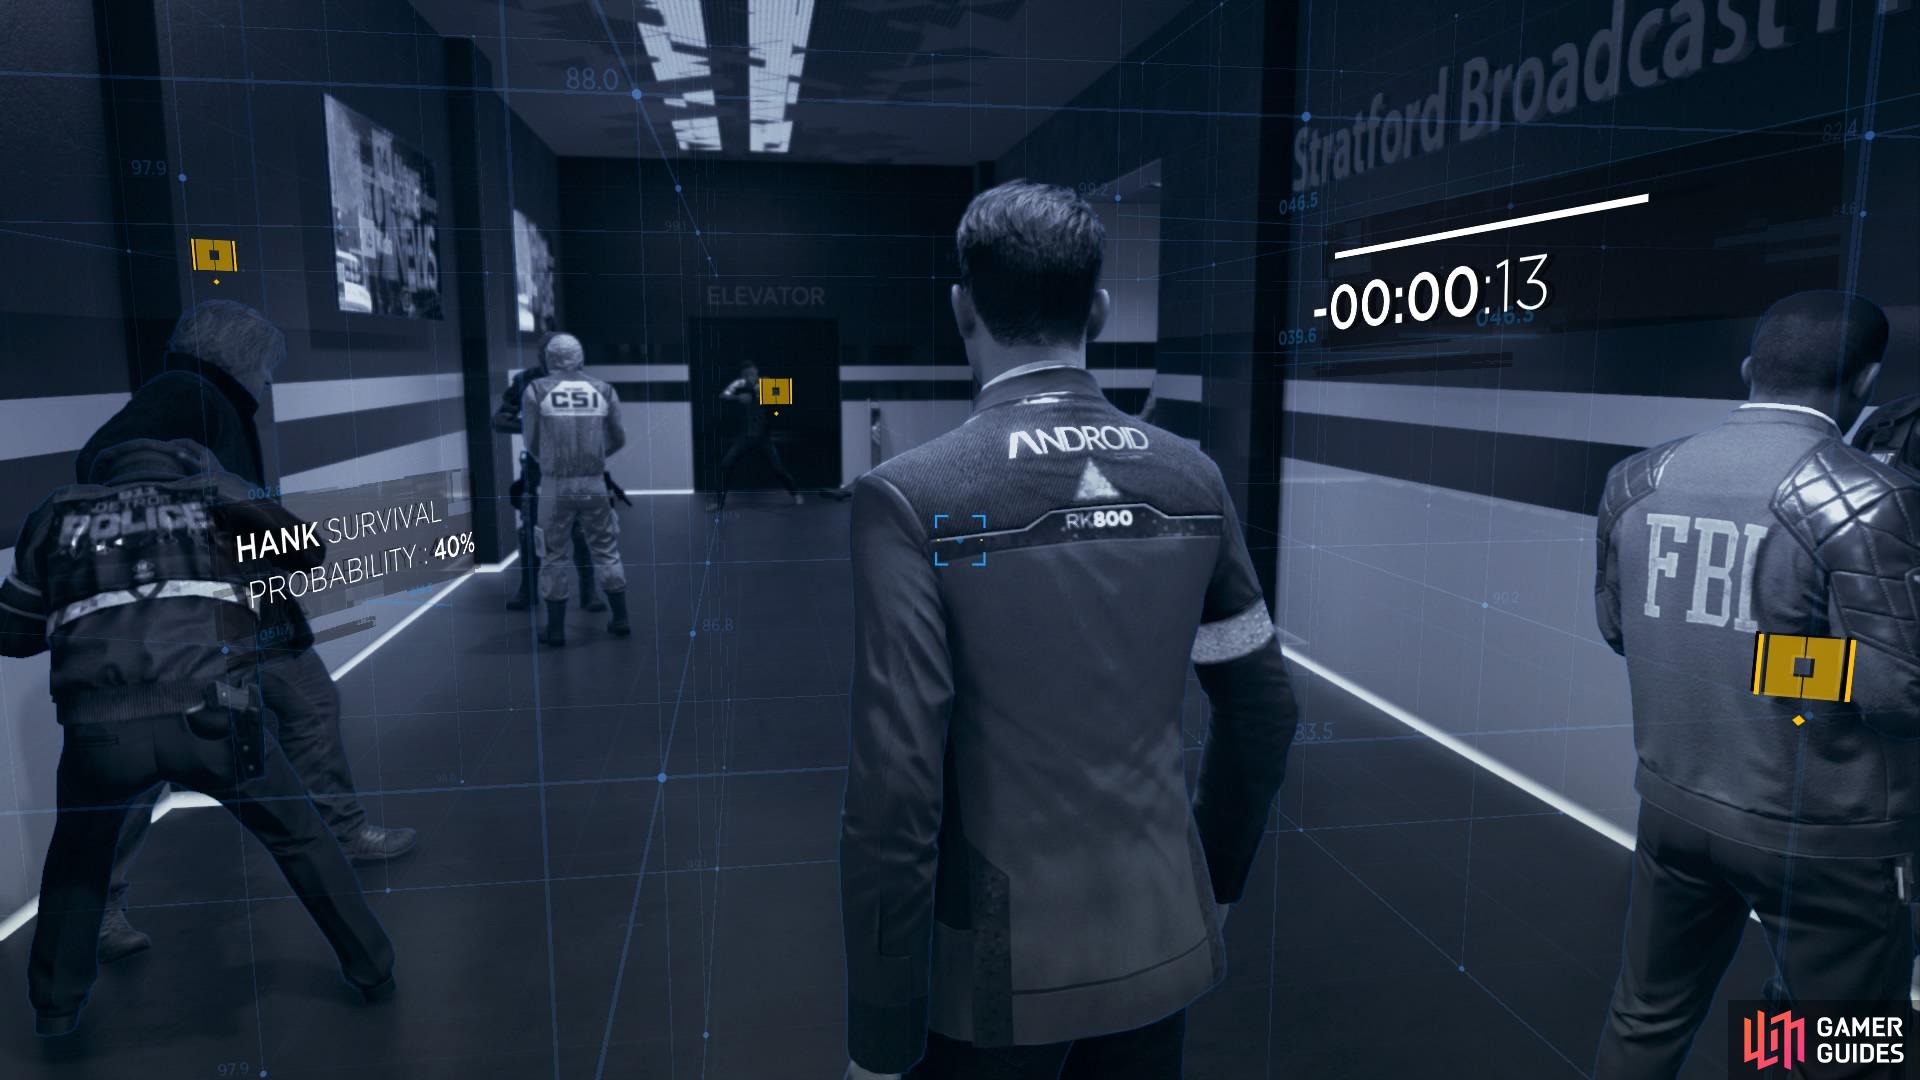
Chase Deviant – You’ll be able to catch up with him in the corridor, but then you will have three options to choose from that will end the chapter.
Option 1 – Rush Deviant
Choose the option to attack him and Connor will rush him. However, this will get several officers killed in the process. Following this, the Deviant Kills the Officer from the Hostage Situation and then the Deviant Self-Destructs.
The up-side to this outcome is that Connor and Hank Survived, so your software instability increases – but the public opinion goes down.
Option 2 – Protect Hank
Looking to your left will provide you with the option to ‘Save Hank’ – do this to shield Hank with your body and throw him to the ground. The Deviant Shoots Connor and then SWAT Destroys the Deviant (which will have a cross-chapter impact).
Unfortunately, the officer from the hostage situation will still die during this outcome, lowering the public opinion. But, since Connor Sacrificed Himself for Hank, your reputation with him will increase, even if it causes your software instability to decrease in the process.
Option 3 – Take Gun
This is a fairly simple outcome. Connor will grab a gun from the officer to his left and Shoot the Deviant before anyone gets killed, and even the officer from the hostage situation gets to live, too! The Massacre is Prevented and your reputation with Hank will increase.
The alternative to all of those options is that you are Out of Time. If you don’t pick up the component that the deviant ripped from your chest in time, then the deviant will get away and Connor Shuts Down. This has a cross-chapter impact and decreases both software instability and your reputation with Hank by default.
We recommend aiming for the third option to ensure that everyone, including yourself, remains alive.
If you complete every single objective that covers the broadcast room, roof, and kitchen, and still don’t trigger a definitive ending to the chapter, you can eventually wander over to Hank who is just idling around and talk to him.
Decide to Leave – Hank will ask if you want to go, so just say yes. This leads to Connor and Hank Left the Crime Scene.
No Comments