
Build information for the Blessed Hammer Paladin (Hammerdin), including suggested skills, stat distribution and gear.
Hammerdin Pros
| Pros |
|---|
| Stupid high damage. |
| Deals non-elemental magic damage, which is rarely resisted. |
| Great survivability. |
| Can use Spirit shields earlier than most other characters. |
| Low gear requirements. |
| Charge is useful for traversal. |
| Concentration aura is a big hit at parties. |
Hammerdin Cons
| Cons |
|---|
| Blessed Hammer can be blocked by terrain, has dead zones, takes time to reach max range. |
| Has to invest a lot of Stat Points into Dexterity for Max Block. |
| Late bloomer - Blessed Hammer and Concentration only unlock at Lv18. |
| Mana-hungry until you get a mercenary with Insight. |
If you’ve paid any attention to Diablo 2 in the past twenty years, you’ve probably heard of Hammerdins. They’re one of the most popular builds in the game, and for good reason. Blessed Hammer hits like a truck, has a large (if irregular) AoE and doesn’t cost a lot of Mana. Better yet, the Paladin (in large part thanks to their class-specific Paladin shields) is an incredibly durable character, and the Hammerdin specifically is hard to kill, as enemies are usually too busy dying to retaliate. A good bosser, good at clearing most areas (provided they’re not too cramped - Hammers are claustrophobic) and best of all, they’re dirt cheap to run and respond very well to gear investment, which they’re pretty darn good at finding.
There’s really not a whole lot to say that’s bad about the Hammerdin, honestly.
That’s not to say there’s nothing bad to say, however. The Hammerdin’s greatest boon is also its most frustrating liability - the Blessed Hammer skill. While it’s relatively inexpensive Mana-wise, deals tremendous damage and has a wide area of effect, it’s also incredibly fickle, meandering, and easily blocked by terrain.
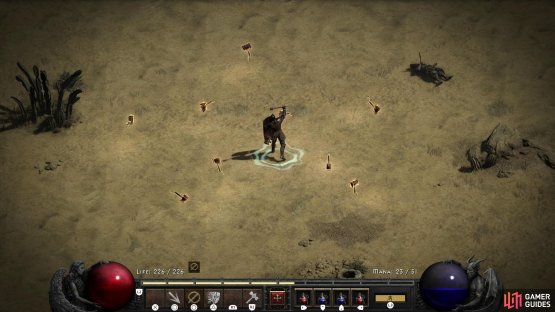
(1 of 2) Blessed Hammer will spiral out from the Paladin, hitting enemies to the right, left and front - everything else is a bit trickier.

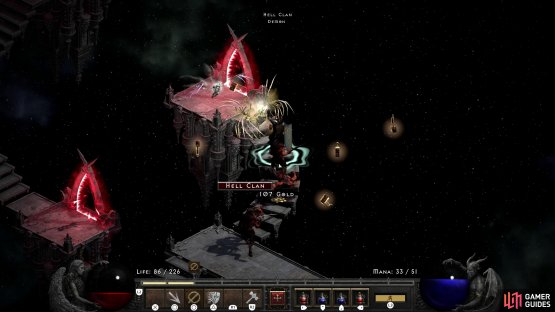
Blessed Hammer will spiral out from the Paladin, hitting enemies to the right, left and front - everything else is a bit trickier. (left), Terrain will frequently get in the Hammerdin’s way, especially when trying to attack enemies below him. (right)
When you cast Blessed Hammer, it’ll spawn to the left of the Paladin, swing around above the Paladin, circle to the right of the Paladin, then continue to spin below him, completing several rotations in an ever-widening spiral before vanishing. While Blessed Hammer will usually hit foes to the right, top and left of the Paladin, enemies below the Paladin will regularly be missed, making it a chore whenever you have to fight enemies below your Paladin Since the layout of dungeons is random, you can often end up being forced to trudge through dungeons full of enemies that are aligned in such a way as to make combat more difficult for the Hammerdin. Worse yet, if a Blessed Hammer comes into contact with a wall, pillar, or other bit of scenery, it’ll vanish, no longer continuing its spiral, which makes any dungeon full of tight, narrow passages and halls incredibly annoying for a Hammerdin to navigate. Running through the Maggot Lair in Act 2 will highlight pretty much all of these faults quite succinctly.
Those aren’t the only downsides of Blessed Hammer, however. While it does eventually expand out to have a decent range, its meandering, spiraling motion means it won’t reach distant enemies particularly quickly. While this isn’t always a bad thing - if you anticipate an enemy advance you can preemptively start tossing hammers, creating a whirling barrier of death your foes will have to pass through - almost every ranged enemy with a direct line of attack will get significantly more shots in than a Hammerdin will. Add to this the gaps in the effect of Blessed Hammer and trying to use Blessed Hammer against a ranged foe can be a hit-or-miss (very usually miss) affair, so you’ll often find yourself having to get adjacent to ranged enemies… and even then, the enemy will have to be to the right/left/above the Paladin to regularly guarantee a hit.
All those gripes aside, the Hammerdin is resilient enough to reposition as necessary, and the damage Blessed Hammer does is enough to make up for its faults. In an ideal world you’ll end up with a suit of [Enigma] armor at some point, which will make it far easier for you to reposition, but that’s a… lofty aspiration. In the meantime, dealing with frustration will be necessary.
The Hammerdin is a close combat caster - get up in an enemy’s face and smash them!
The Hammerdin is a great bosser and area-clearer with survivability to spare. The Sorceress is arguably a better boss-hunter and hence better early gear-farmer due to Teleport, but as far as all-rounders who can kill a wide variety of enemies with minimal concern for immunities, the Hammerdin is the cream of the crop. Just as long as you avoid enclosed spaces.
Despite being a potent end-game character, the Hammerdin is something of a slow starter. Their key skills - Blessed Hammer and Concentration - are not available until Lv18, and while it’s possible to just hoard Skill Points and bash enemies with whatever implements of war you find until you hit Lv18, it’s arguably easier and more enjoyable to start out as a Fire Auradin and let Holy Fire carry you most of the way through Normal difficulty, respeccing when the demons of later acts stop dying with sufficient alacrity.
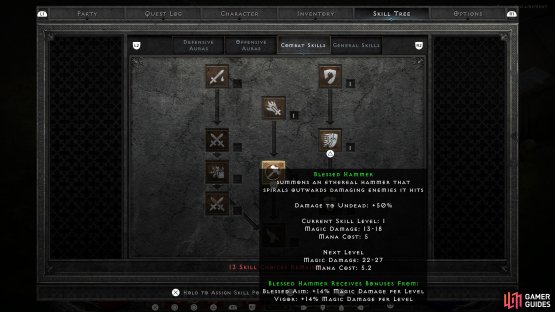
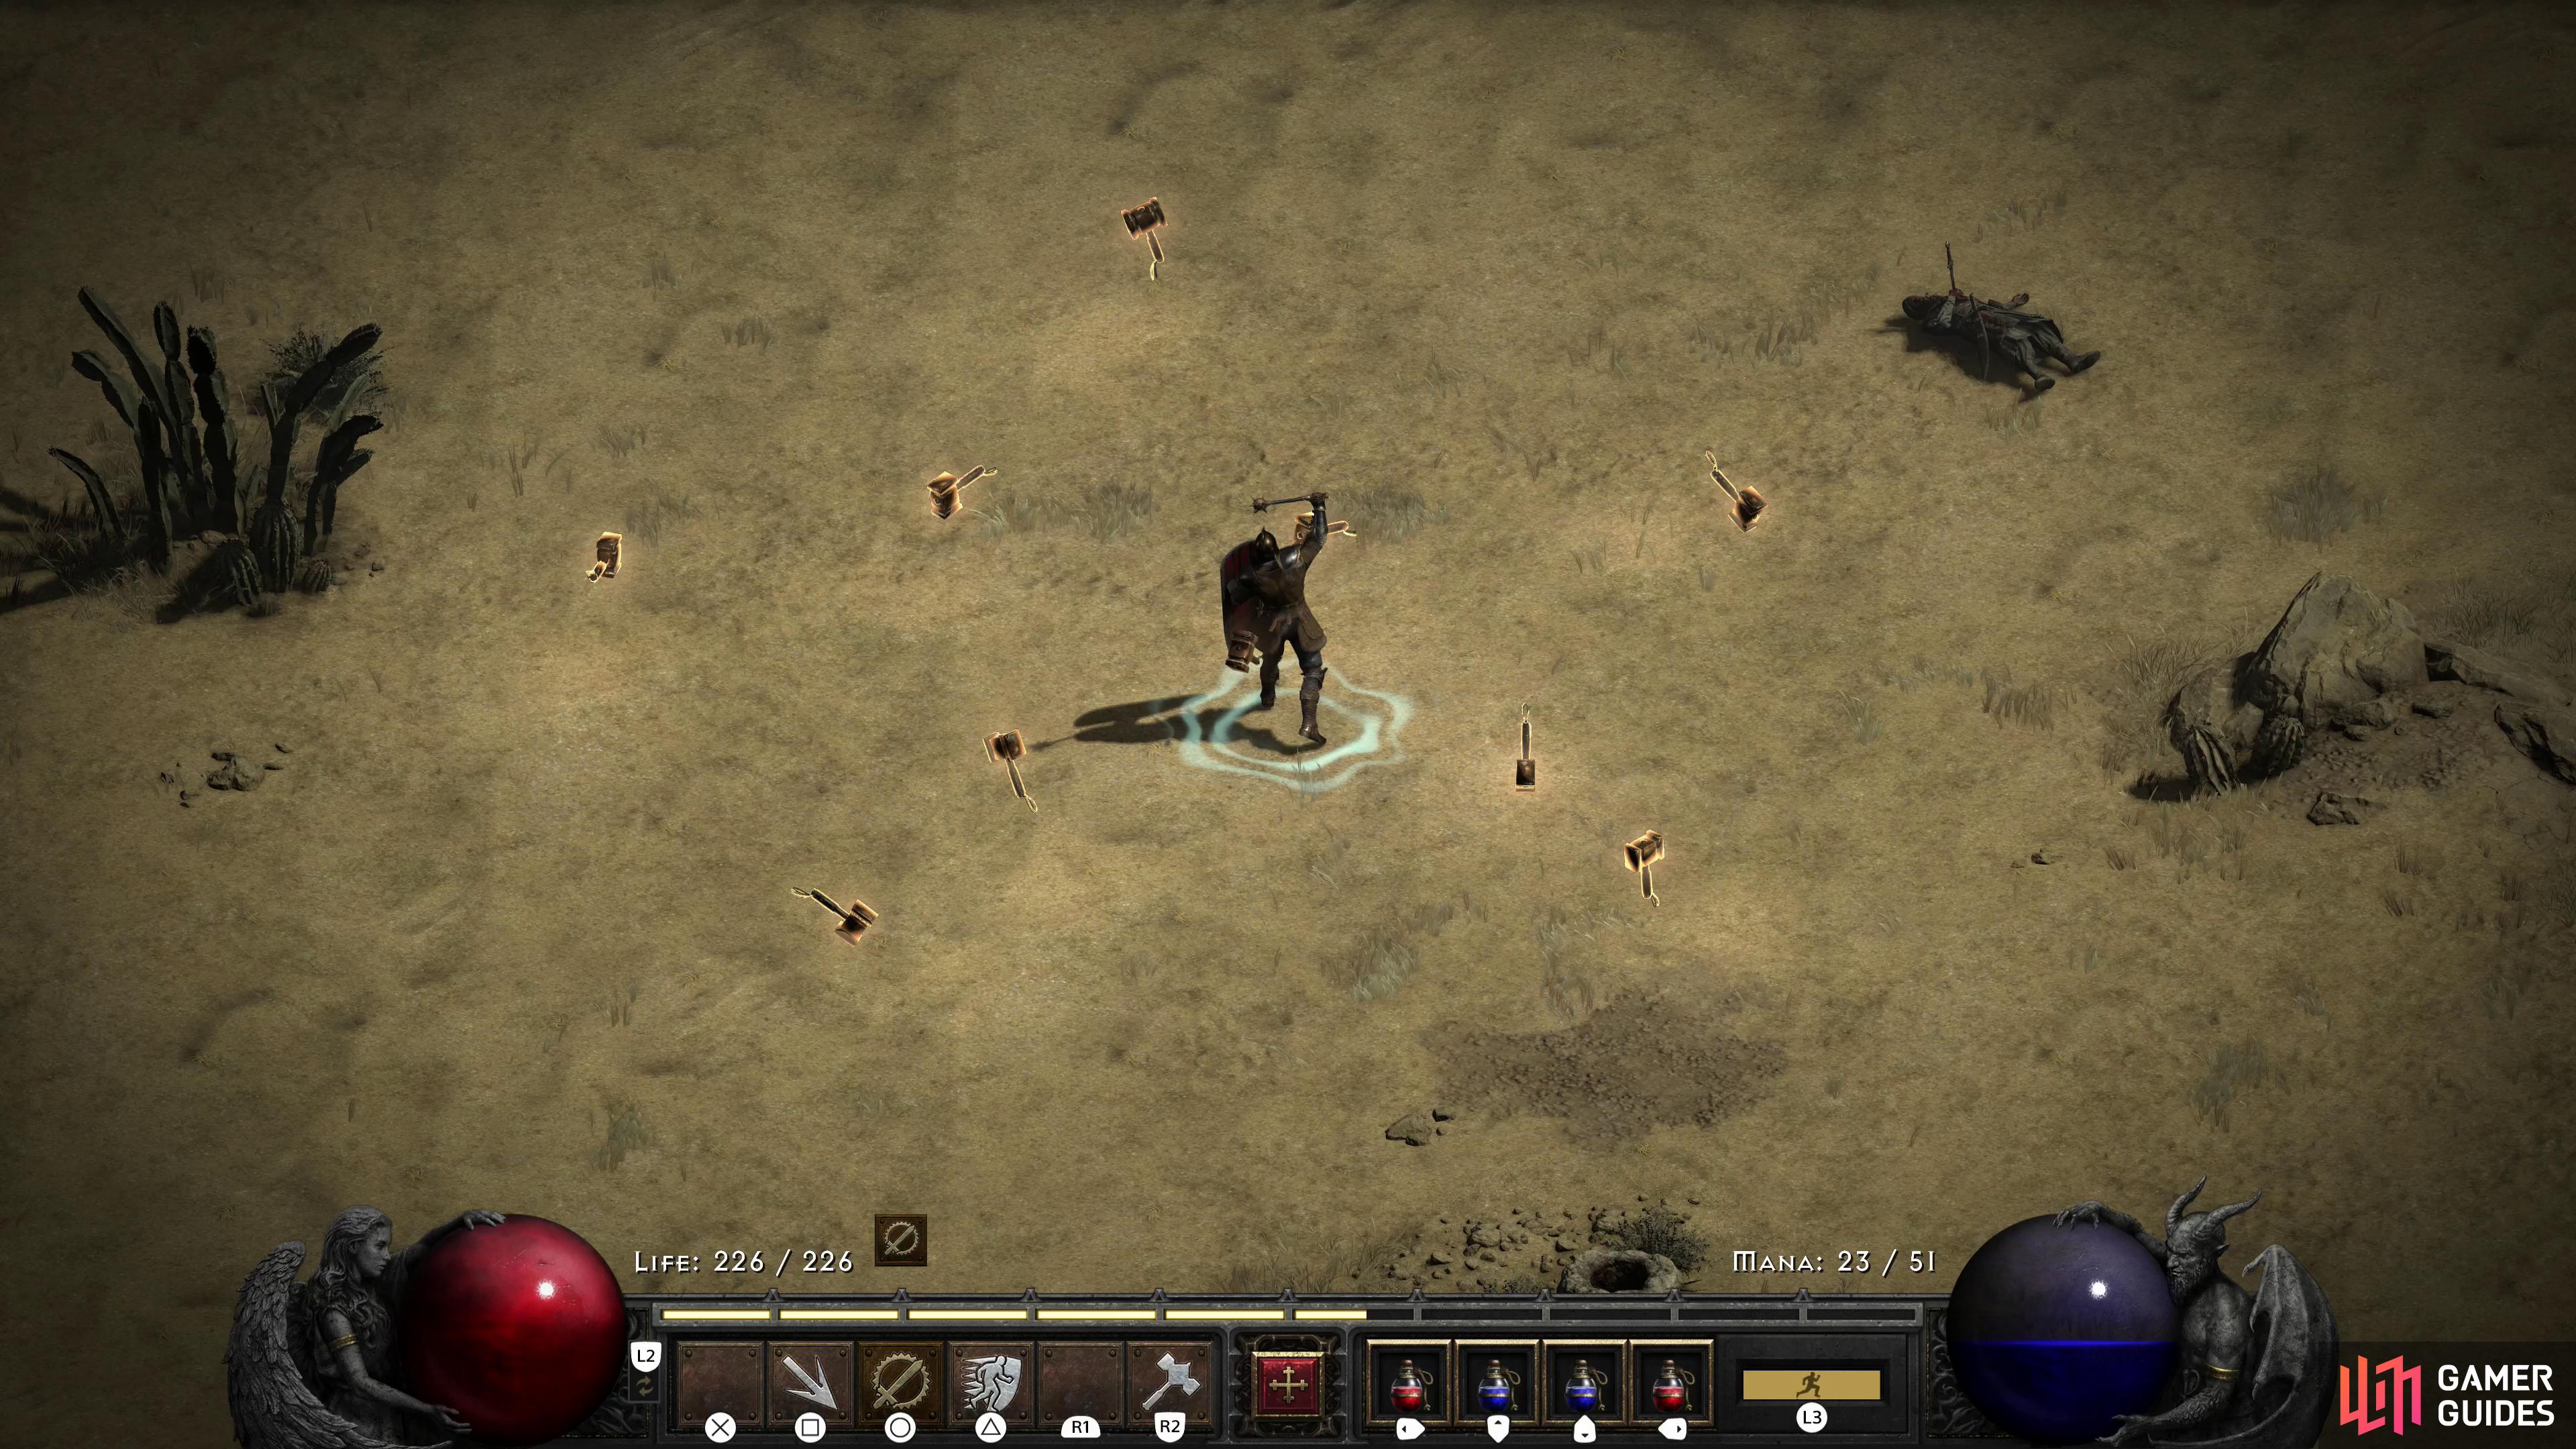
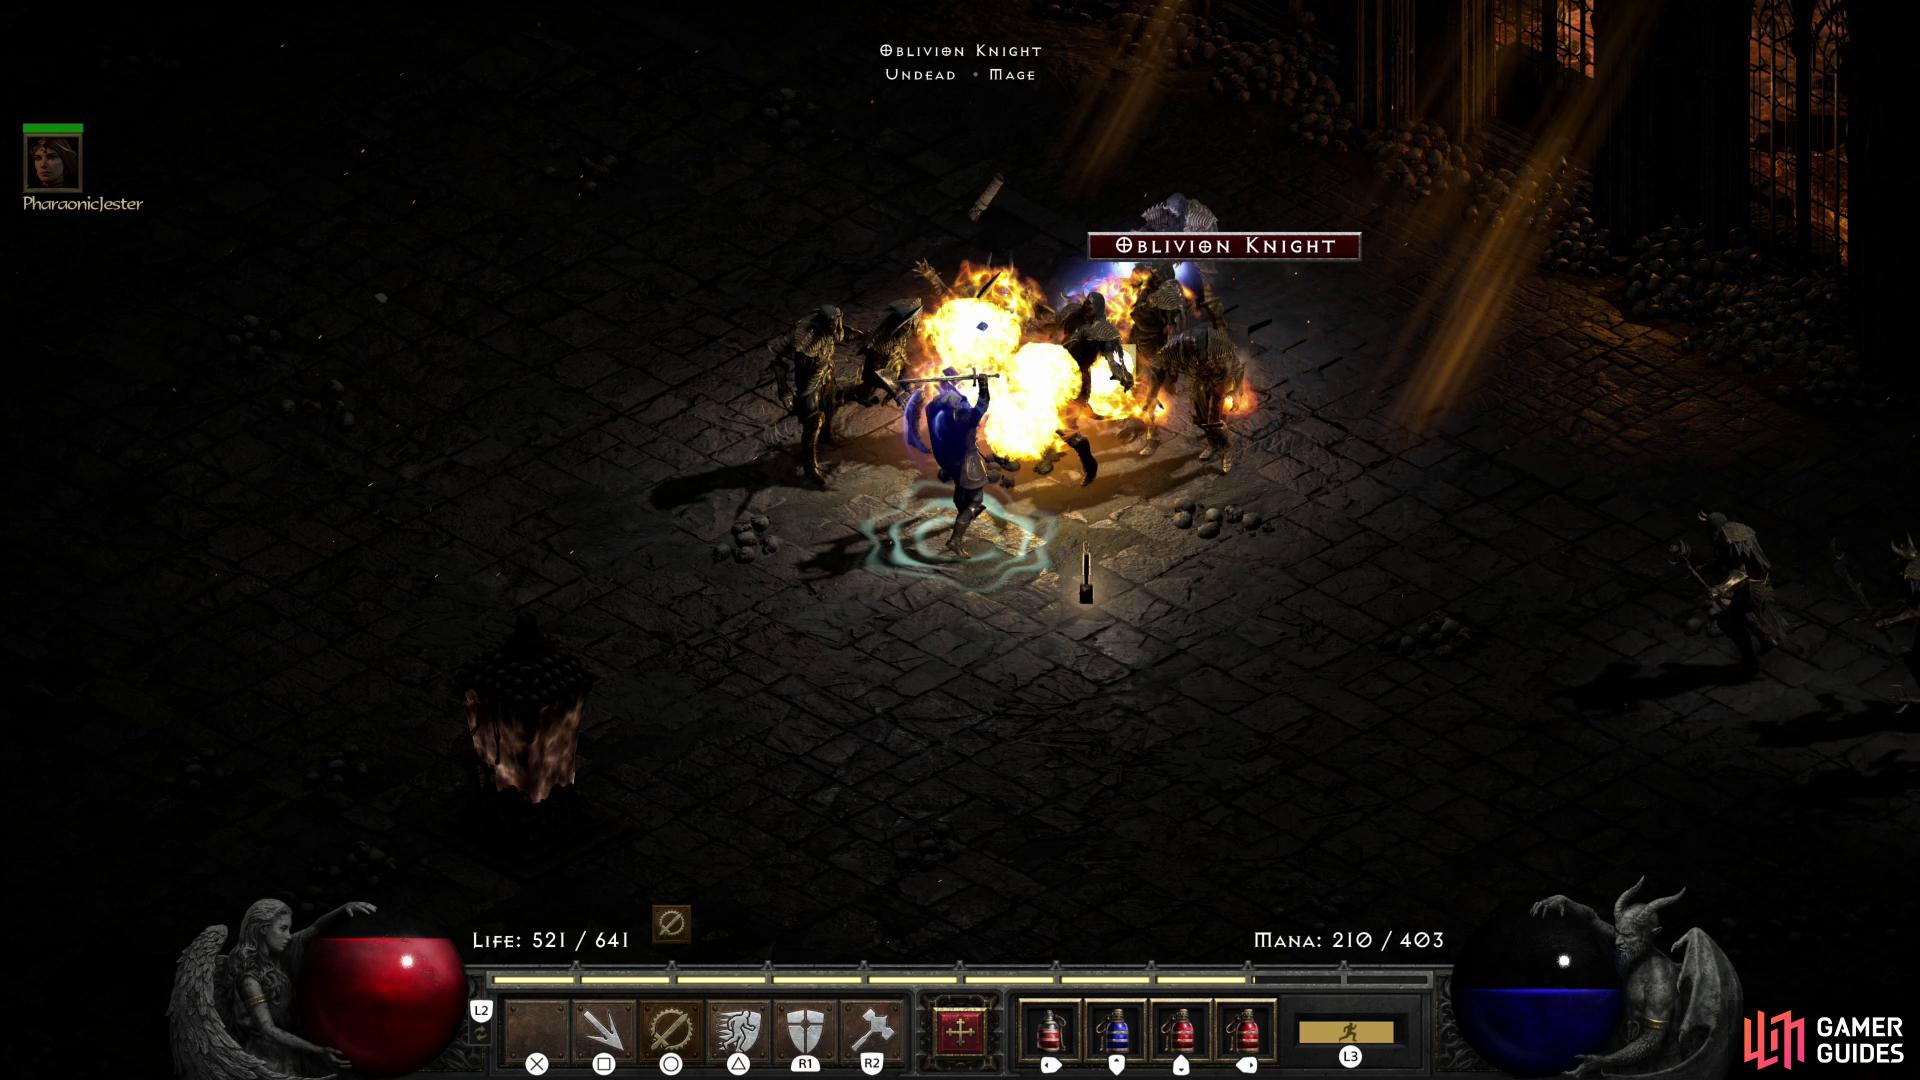
(1 of 2) The Hammerdin is based around two skills - Blessed Hammer, of course,
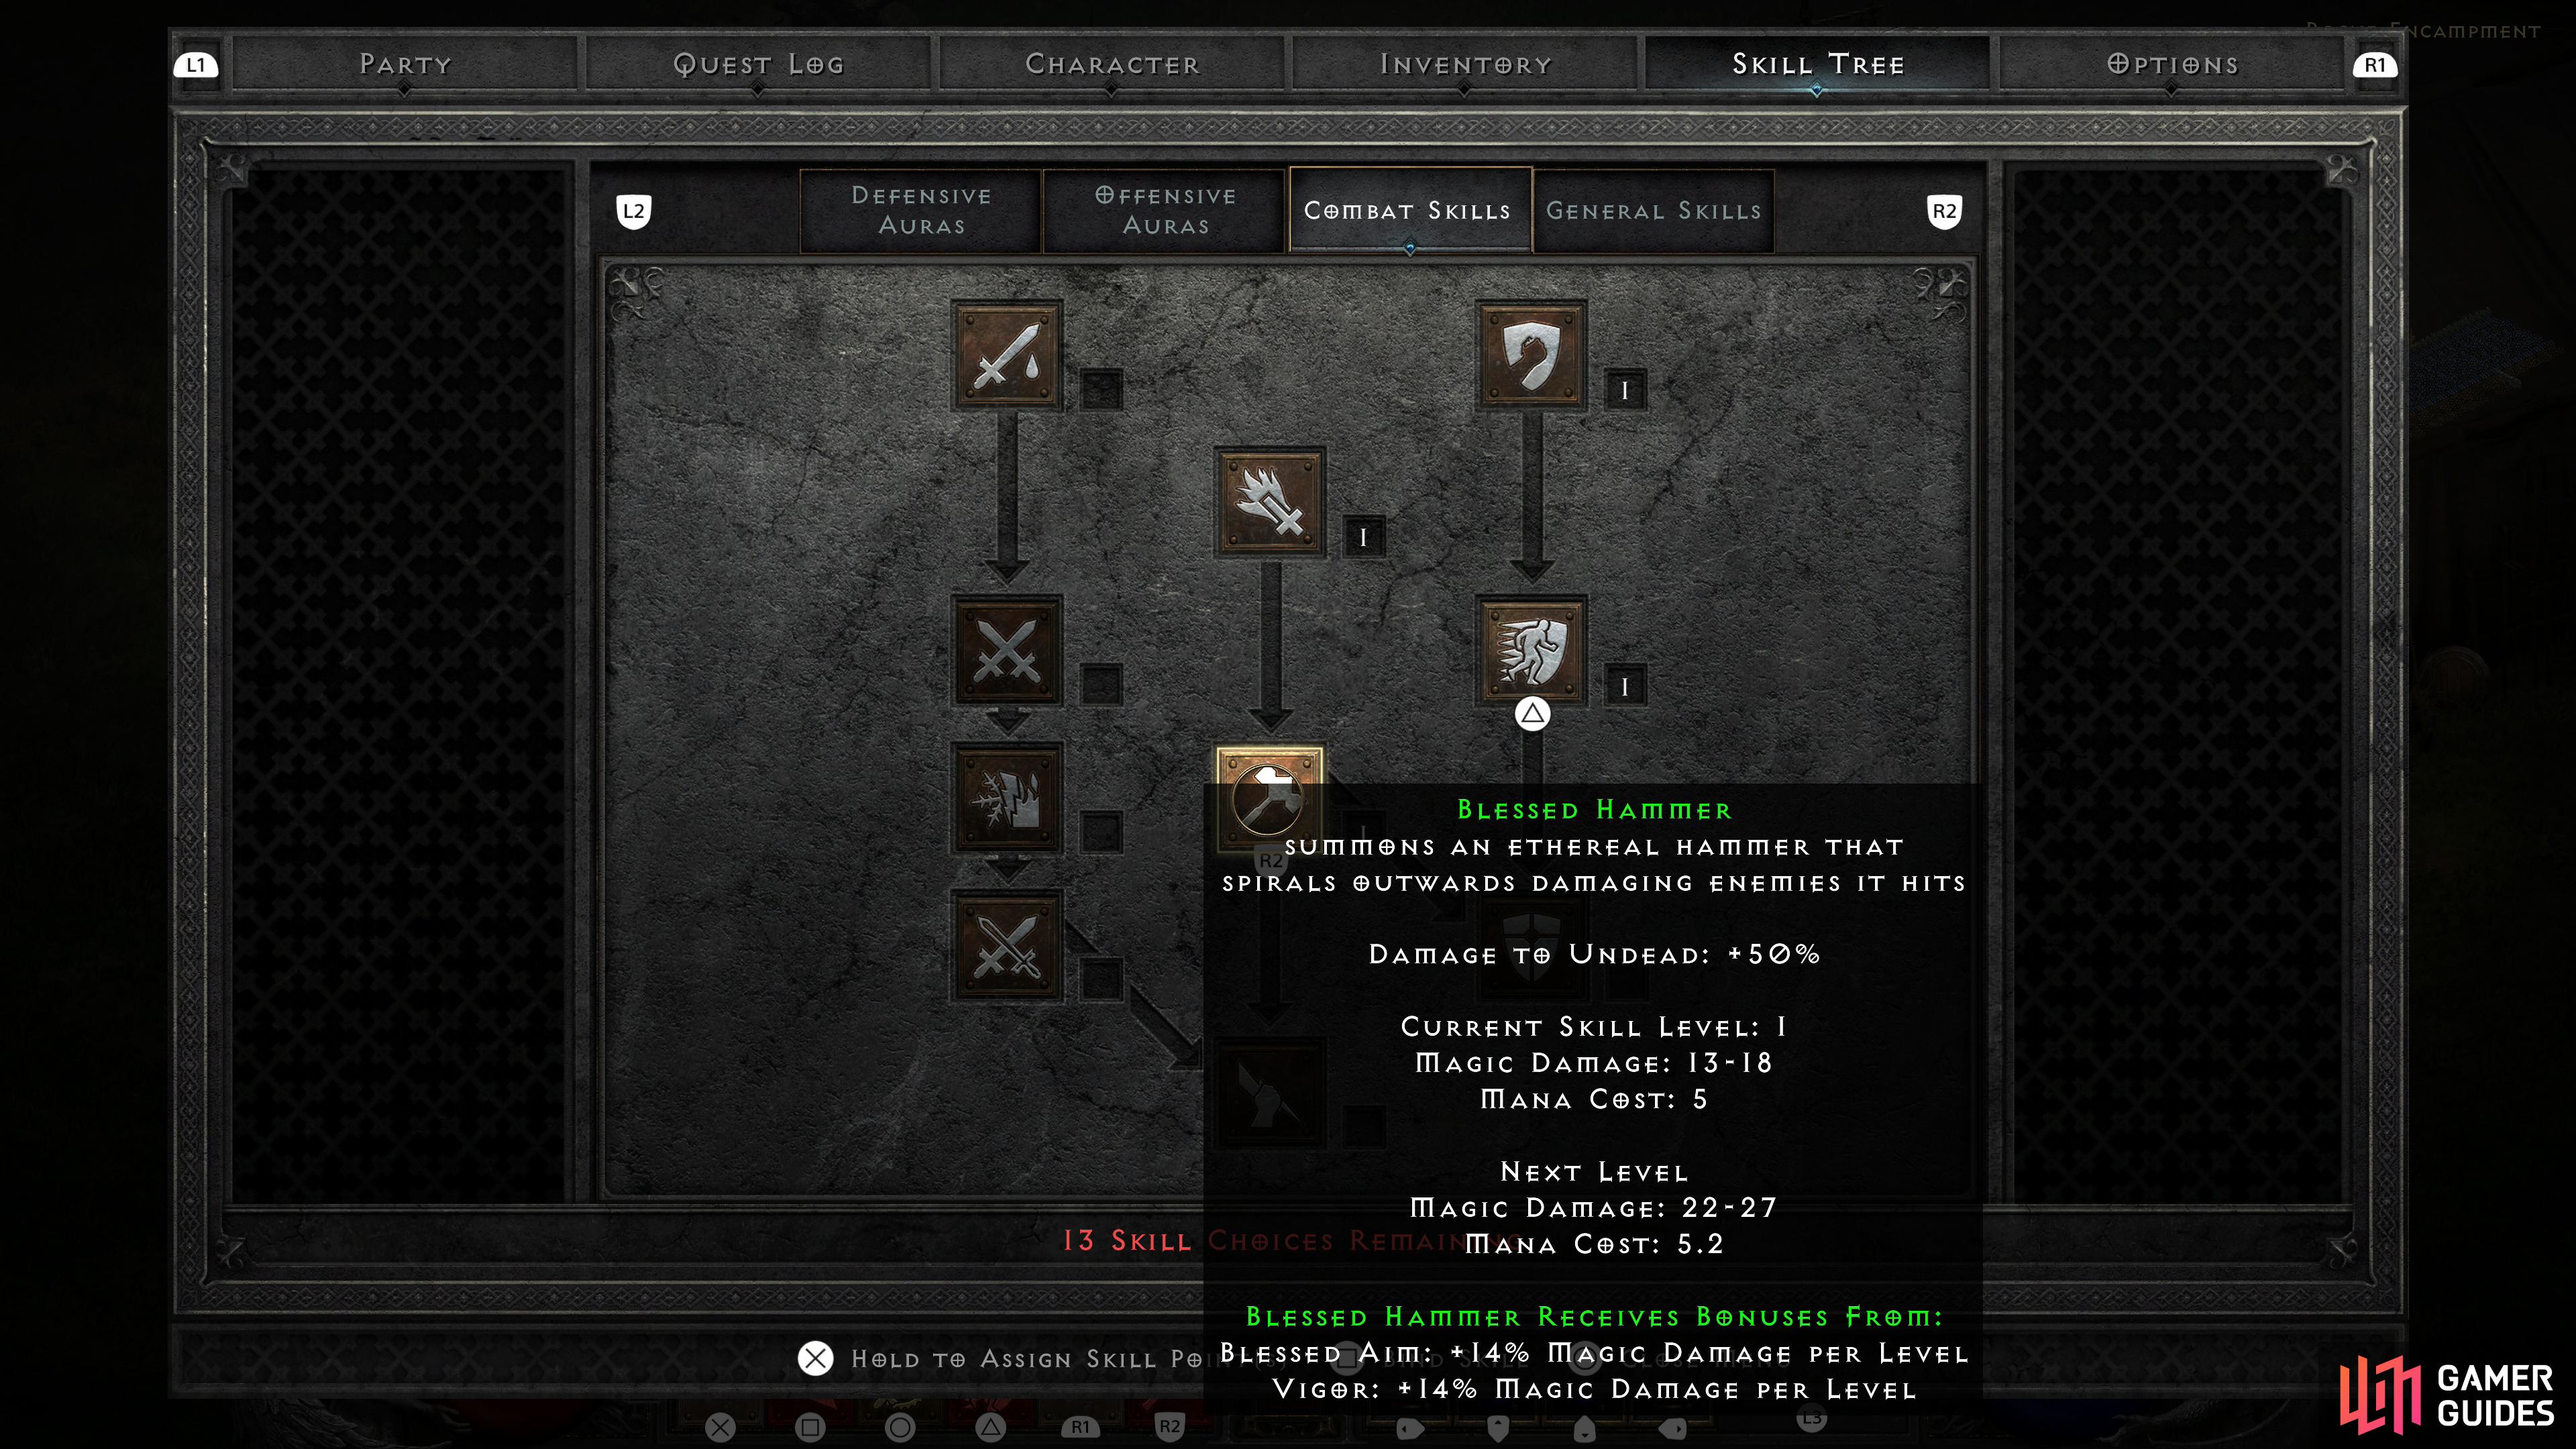
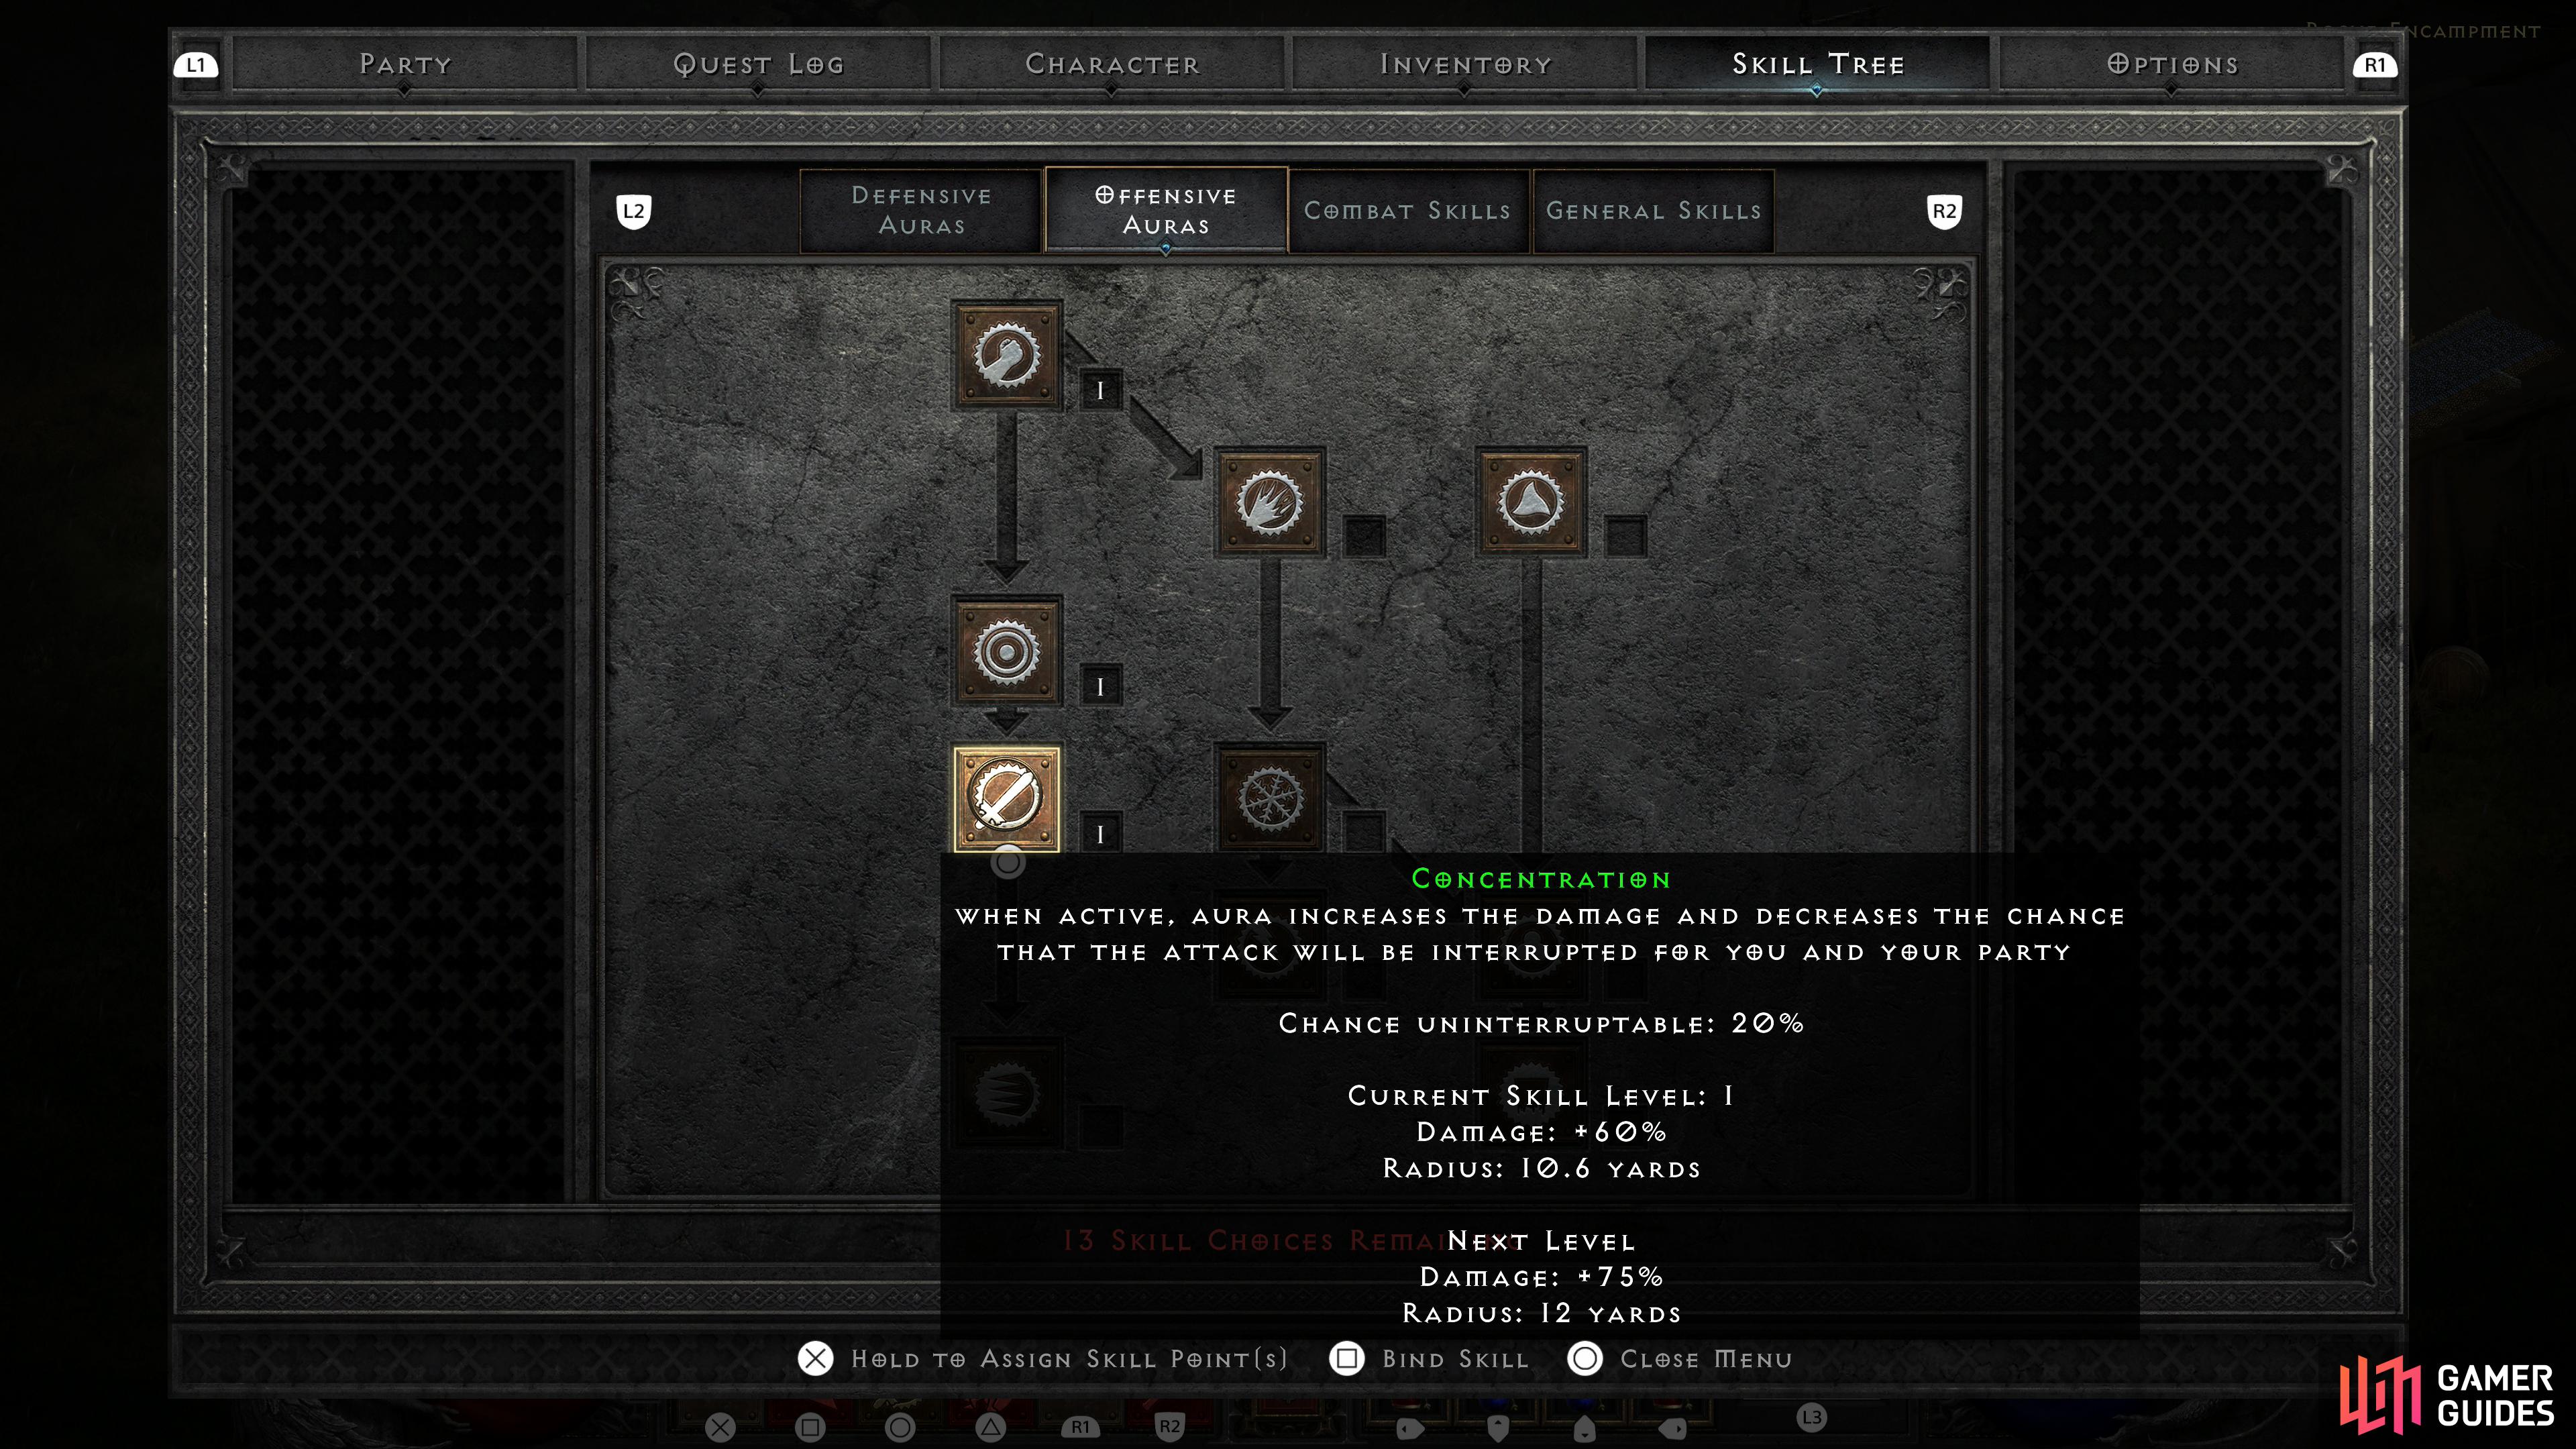
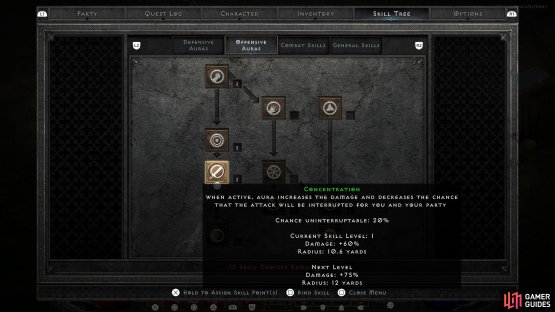
The Hammerdin is based around two skills - Blessed Hammer, of course, (left), and the Concentration aura, which will significantly boost the damage of Blessed Hammer. (right)
Hammerdin - Skills
Almost every skill the Hammerdin has is in service of Blessed Hammer - the aura Concentration will boost your damage and hopefully prevent you from flinching, while Blessed Aim and Vigor are both synergies that will boost Blessed Hammer’s damage. Prayer, Defiance, Cleansing, Might and Holy Bolt are all prereqs for these various skills, and of course, for Blessed Hammer itself. Other than that, the only skill the Hammerdin is terribly interested in is Holy Shield, which will boost their Defense and Block Chance, keeping them alive longer to cast more Blessed Hammers! You’ll need to grab Smite and Charge to reach Holy Shield.
As for playing, you’ll activate Concentration and have Blessed Hammer ready to kill everything that comes near you (and a few things that don’t!). Swap to Holy Shield from time to time to boost your defenses, and if you need to get somewhere fast, use Charge almost exclusively as a traversal skill. Skills-wise, the Hammerdin isn’t terribly complicated.
Hammerdin Suggested Skills
| Skills | Skill Points | Notes |
|---|---|---|
| Prayer | 1 | Prereq for Vigor. |
| Defiance | 1 | Prereq for Vigor. |
| Cleansing | 1 | Prereq for Vigor. |
| Vigor | 20 | Synergy with Blessed Hammer. |
| Might | 1 | Prereq for Concentration. |
| Blessed Aim | 20 | Prereq for and synergy with Blessed Hammer. |
| Concentration | 20 | Primary aura, boosts Blessed Hammer damage. |
| Smite | 1 | Prereq for Holy Shield. |
| Holy Bolt | 1 | Prereq for Blessed Hammer and Holy Shield. |
| Charge | 1 | Prereq for Holy Shield. |
| Blessed Hammer | 20 | Primary - and sole - offensive skill. |
| Holy Shield | 1+ | Boosts Defense and Block Chance. |
| Total | 88~ Skill Points (Lv77~ + Quests |
Hammerdin Level-by-Level Skills
| Lv | Skill |
|---|---|
| 2 | Might (1) |
| 3 | Smite (1) |
| 4 - 5 | Save Skill Points for Lv6+ |
| 6 | Holy Bolt (1) |
| Den of Evil | Save Skill Points for Lv12+ |
| 7 - 11 | Save Skill Points for Lv12+ |
| 12 | Blessed Aim (1), Charge (1) |
| 13 - 17 | Save Skill Points for Lv18+ |
| 18 - 24 | Blessed Hammer (7), Concentration (7) |
| Radament’s Lair | Holy Shield (1) |
| 25 - 30 | Blessed Hammer (13), Concentration (13) |
| The Fallen Angel | Save Skill Points for Lv31-32 |
| 31 | Blessed Hammer (14), Concentration (14) |
| 32 - 37 | Blessed Hammer (20) |
| 38 - 43 | Concentration (20) |
| Nightmare Quests | Blessed Aim (5) |
| 44 - 58 | Blessed Aim (20) |
| 59 | Prayer (1) |
| 60 | Defiance (1) |
| 61 | Cleansing (1) |
| 62 - 81 | Vigor (20) |
| 82+ | Holy Shield (1+) |
| Hell Quests | Holy Shield (1+) |
Hammerdin - Stats
The Hammerdin is a bit odd in terms of stats due largely to the fact that he derives much of his cherished durability from his shield. Without a shield - and more specifically, without a 75% Block Chance - the Hammerdin is worryingly squishy. To keep your Hammerdin alive you’ll want to keep his Block Chance high, and while Holy Shield can help, a significant investment into Dexterity is simply necessary.
With the [Herald of Zakarum], a mid-tier shield that every Hammerdin should shoot for (or failing that, a Spiri Paladin shield of some description) it took around 125 Dexterity to maintain Max Block Chance at Lv84. The amount of Dexterity you need to invest will vary depending on your shield, the sLv of Holy Shield, how much +Dexterity gear you have, and of course the shield you’re using, but in any event you should shoot for 75% Block Chance.
After that, the typical investments are required: Enough Strength to wear your gear (with a Hammerdin, Spirit will require significantly less Strength than with other characters, as numerous Paladin Shields can spawn with four sockets, and considerably earlier than a Monarch shield can) while the rest goes into Vitality. The Strength requirements will vary depending on what you wear; a Hammerdin with a [Hellfire Torch], an Annihilus and a shield with a low Strength requirement, you may not have to add any hard points into it. For players who are moderately well-off, 50~ hard points of Strength may suffice. New players who want to do some serious magic-finding with reasonably obtainable mid-tier gear like Skullder’s Ire and [War Traveler] may go as high as 100~ hard points. The lower the Strength requirements of your gear and the more +Strength you have at your disposal, the more you can boost Vitality. Still, even a high Strength Hammerdin can reasonably be expected to hit 1,500+ Life, so it’s not going to drastically affect the build if you go heavy on Strength.
Hammerdin Level-by-Level Stats
| Lv | Stat |
|---|---|
| 2 - 6 | Strength +25 (50) |
| 7 - 30 | Vitality +120 (145) |
| 31 - 40 | Dexterity +50 (70) |
| 41+ | Strength for gear/Dexterity to keep Block Chance at 75%/Vitality for Life |
| Lam Esen’s Tome | Vitality +15 (150+) |
Hammerdin - Gear
To get you through Normal difficulty, all the Hammerdin (assuming you don’t start out as a Fire Auradin, which needs nothing in terms of gear) really needs is Mana. To this end, sticking as many Tir runes in your gear as possible will suffice, after which you can just twirl hammers to your heart’s content, saving potions for bosses. You can get 3-socket weapons, 2-socket helmets, 3-socket shields and 3-socket armor fairly easily in Normal Difficulty (they can all be bought from Fara in Act 2), while the runes will come from Countess Runs. Other than that, anything that adds +Cast Rate will help spin those hammers out faster.
For Nightmare you want to start looking for 4-socket one-handed swords (Broad Swords, Crystal Swords and Long Swords) and 4-socket Paladin shields, both of which you’ll want to socket with Tal + Thul + Ort + Amn to create a runeword Spirit sword and Spirit shield. With the combined +4 Skills and +50-70 Cast Rate these two items provide (not to mention the near +200 Mana) you should be set for most of Nightmare difficulty.
As with most casters, the Hammerdin wants +Skills gear and +Cast Rate gear, in the latter +75% Cast Rate and +125% are their top casting [breakpoints], which are fine goals to shoot for and easily achievable with decent rolls on your spirit gear. Other good mid-tier items include Peasant Crown or Lore, Skin of the Vipermagi or Skullder’s Ire, [Trang-Oul’s Claws], [Magefist] or [Frostburn], and [Sandstorm Trek] or [War Travelers]. Replacing your Spirit shield with [Herald of Zakarum] is also a matter of preference, and which one is better really depends on the quality of the shield you used to create Spirit.
Later on you’ll want to shoot for a Harlequin Crest, Arachnid Mesh, and a pair of [Stone of Jordan] rings. The Hammerdin would also love to craft themselves a [Heart of the Oak] and an [Enigma], both of which are going to take a lot of work to obtain. Most of this gear satisfies the Hammerdin’s cravings for +Skills and +Cast Rate, but depending on your goals and playstyle,, retooling for more survivability (usually resistances, in this case) or +Magic Find makes sense.
Hammerdin Helmets
| Helmet | Notes |
|---|---|
| Harlequin Crest | +2 Skills, +Life/Mana per Level, Damage Reduced 10%, +50% Magic Find |
| Tarnhelm | +1 Skills, +25-50% Magic Find |
| Peasant Crown | +1 Skills, +Run/Walk Speed, +Vitality/Energy |
| Lore | +1 Skills, +10 Energy, +2 Mana/Kill, +Lightning Resist +30% |
Hammerdin Amulets
| Amulet | Notes |
|---|---|
| Mara’s Kaleidoscope | +2 Skills, All Resistances +20-30%, +5 All Attributes |
| Magic/Rare | +Skills, +Caster Rate, +Life, +Mana, +Strength, +Dexterity, +Resists |
Hammerdin Weapons
| Weapon | Notes |
|---|---|
| Heart of the Oak | +3 Skills, +40% Cast Rate, +10 Dexterity, Max Mana +15%, All Resistances +30%-40% |
| Spirit | +2 Skills, +25-35 Cast Rate, +55% Hit Recovery, +22 Vitality, +89-112 Mana |
Hammerdin Armor
| Armor | Notes |
|---|---|
| Enigma | +2 Skills, +45% Run/Walk Speed, +1 Teleport, +Strength per Level, +5% Max Life, Damage Reduced 8%, +Magic Find per Level |
| Chains of Honor | +2 Skills, +20 Strength, All Resistances +65, Damage Reduced 8%, +25% Magic Find |
| Skin of the Vipermagi | +1 Skills, +30% Cast Rate, All Resistances +20-35 |
| Skullder’s Ire | +1 Skills, +Magic Find per Level |
Hammerdin Shields
| Shield | Notes |
|---|---|
| Spirit | +2 Skills, +25-35 Cast Rate, +55% Hit Recovery, +22 Vitality, +89-112 Mana Cold, Lightning, Poison Resist +35% |
| Herald of Zakarum | +2 Paladin Skills, +2 Combat Skills, +20 Strength, +20 Vitality, All Resistance +50% |
| Lidless Wall | +1 Skills, +20% Cast Rate, +10 Energy, Max Mana 10% |
Hammerdin Gloves
| Gloves | Notes |
|---|---|
| Magefist | +1 Fire Skills, +20% Cast Rate, Regenerate Mana +25% |
| Trang-Oul’s Claws | +20% Cast Rate, Cold Resist +30% |
| Frostburn | Max Mana +40% |
| Chance Guards | +25-40% Magic Find |
Hammerdin Rings
| Rings | Notes |
|---|---|
| Stone of Jordan | +1 Skills, +20 Mana, Max Mana +25% |
| Nagelring | +15-30% Magic Find |
| Magic/Rare | +Caster Rate, +Life, +Mana, +Resists |
Hammerdin Belts
| Belt | Notes |
|---|---|
| Arachnid Mesh | +1 Skills, +20% Cast Rate, Max Mana +5% |
| Verdungo’s Hearty Cord | +30-40 Vitality, Damage Reduced 10-15% |
| String of Ears | Damage Reduced 10-15% |
| Goldwrap | Magic Find +30% |
Hammerdin Boots
| Boots | Notes |
|---|---|
| Sandstorm Trek | +20% Run/Walk, +Strength/Vitality, Poison Reist +40-70% |
| War Travelers | +25% Run/Walk, +Strength/Vitality, +30-50% Magic Find |
| Aldur’s Advance | +40% Run/Walk, +50 Life, Fire Resist +40-50% |
| Silkweave | +30% Run/Walk, Max Mana +10% |
No Comments