
Exit Elgarthe and start heading towards Mistral Gorge, which is located to the east of Hush Grove. As you approach it, there will be a short scene that introduces you to Artifacts. See the little round circular area just above where the scene occured? You can interact with it and upon doing so, you will be able to use some memories to do something. These are memories from the enemies you’ve fought thus far, so if you don’t have enough (you certainly should by now), then return to Ancient Ruins to fight some more. You will need a Ruins Memory, Earth Memory and Tree Memory (one of each), which will get you the Mystic Eye artifact. This will clear the area of the lost and gives you a minimap on the world map. When you’re finished, head to Mistral Gorge for the next dungeon.
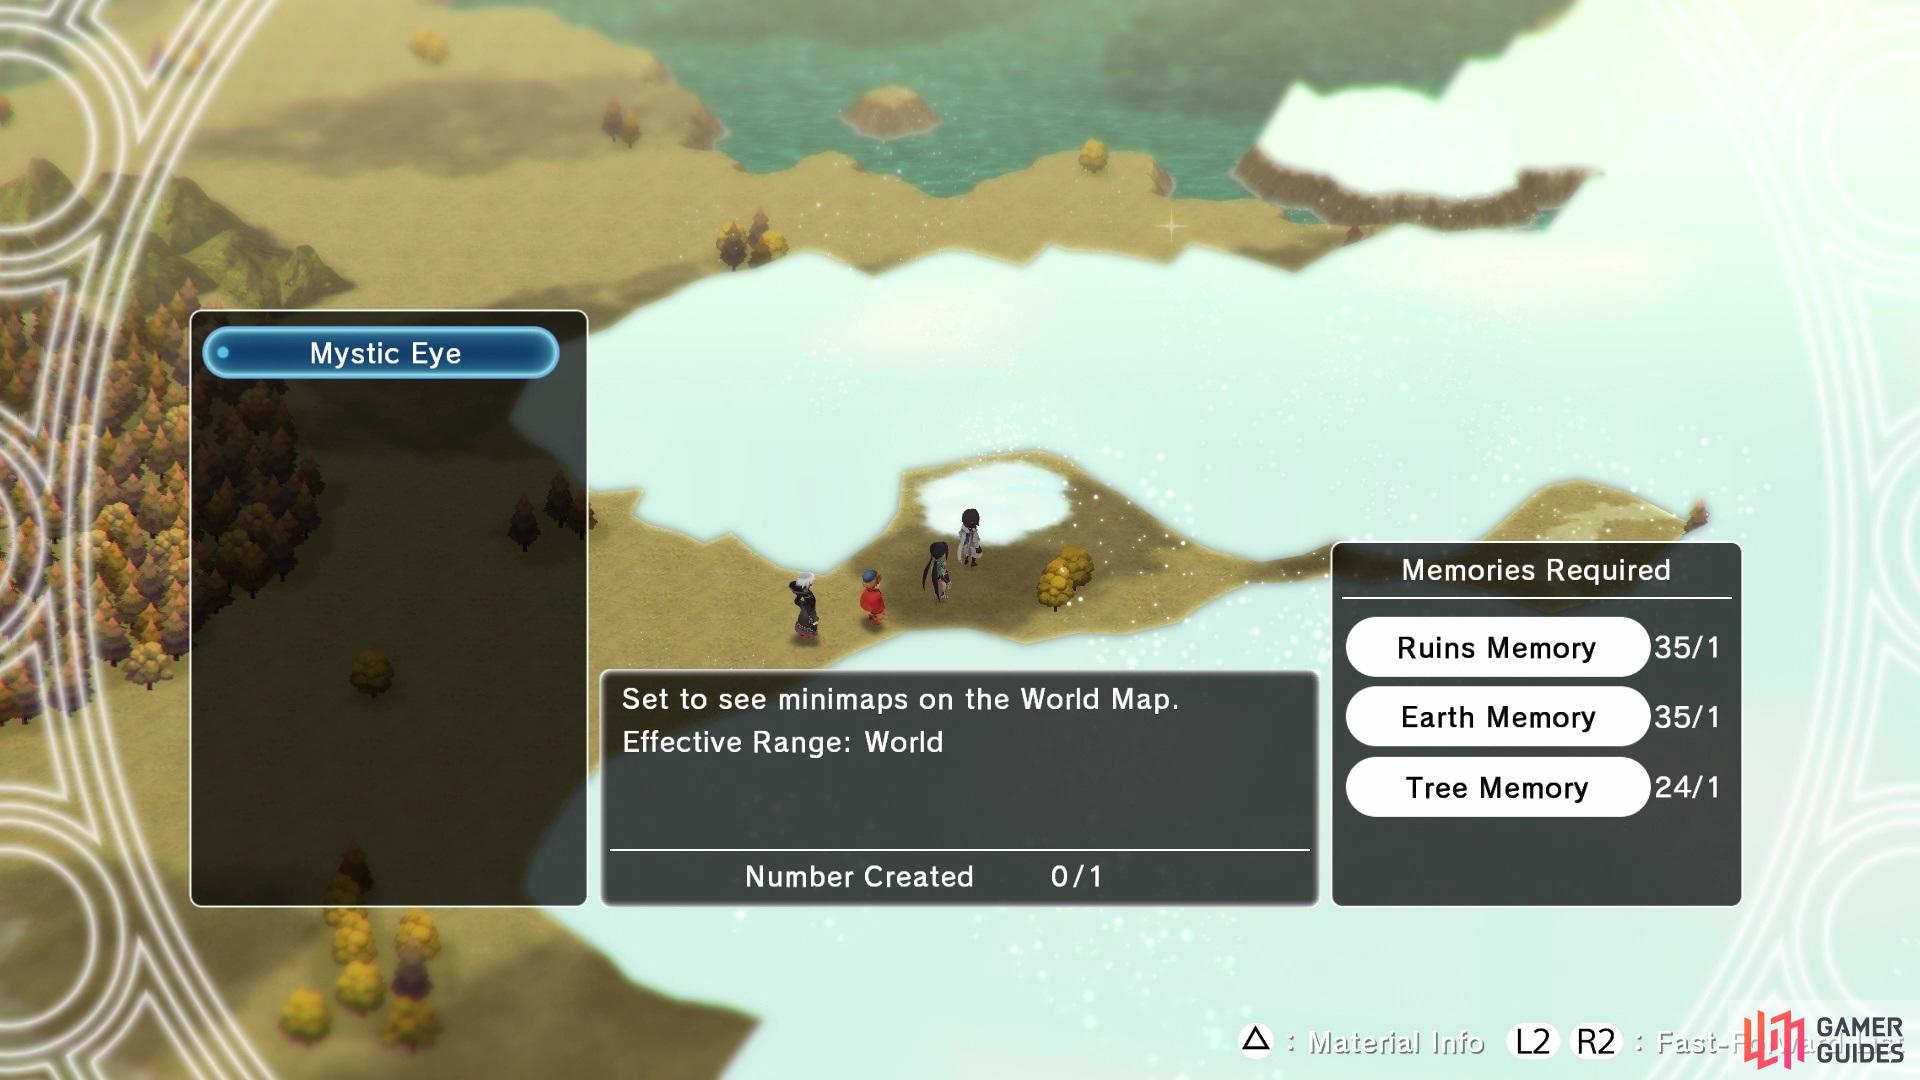
You’ll be able to use memories you gained to create artifacts
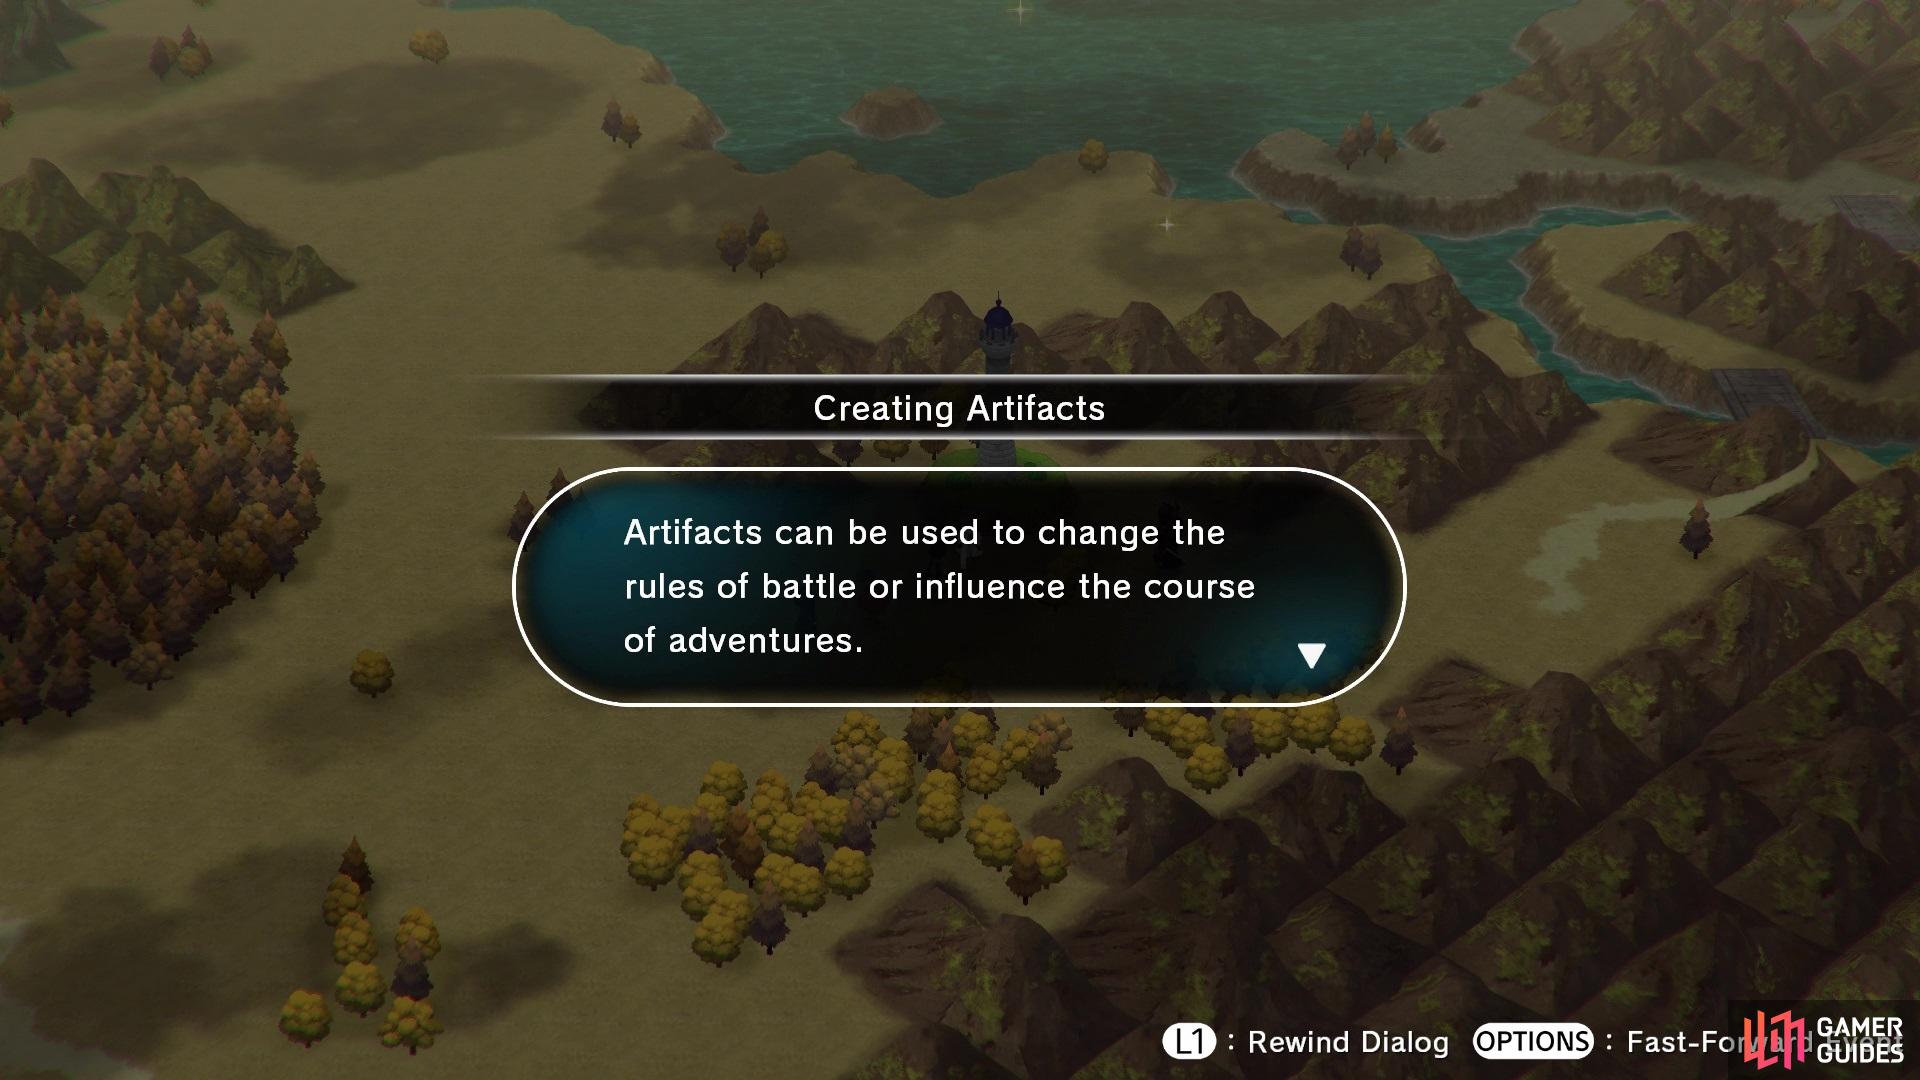
which can help change the rules of battles or even help outside of them
Mistral Gorge
| Enemies | Item Drops |
|---|---|
| Morsyn | ???, Spring Water, Mor Tangerine, Tree Memory, Erosion Memory |
| Mory | Nature Robe, Spring Water, Mor Bark, Earth Memory, Rampart Memory |
| Windeen | Spring Water, Bronze Ore, Stream Memory, Fire Memory, Glorious Memory, Infinite Memory, Providence Memory |
At the beginning of Mistral Gorge, Galdra will hand you a Life Axiom, which is a Momentum Spritnite. These are basically enhancers that can be equipped to a Skill/Counter Spritnite, which you can activate in battle with a Momentum Charge. Life Axiom basically heals your HP whenever you trigger it, which is a good thing to have in the long run. Alright, from where you begin here in the gorge, head east to find a new enemy, the Windeen. These rabbit-like creatures aren’t bad at all, but they have the ability to summon more of their kind in battle with Summon. So, unless you want more enemies in a fight, then it might be a good idea to take them out first.
Just east of them is a bridge that leads north, as well as another path to the east. The eastern path is a dead end that has more enemies and a sparkle item on the ground. Cross the previously mentioned bridge and follow the path, until you come across yet another fork in the road. East will carry on through the dungeon, while north will lead to some more sparkle items (plus more valuable experience fighting monsters). When on the eastern path, right before it curves south, there are some footholds that act as a ladder on the side of the land to your north. Climb it to find a chest that contains 2 S Potions. Keep going and you will eventually happen upon someone named Miner Deek, who is being harassed by some monsters. Defeat them all and he’ll tell you why he’s here.
Deek is looking for a valuable ore called Terromite, and mentions that a place called Rahet is rich with it. He’ll throw out a bad pun, then tell you a huge monster is blocking the way to the imperial capital, as well as mention he “lost” his bag of tools. Once you regain control, check out the sparkle on the ground to the north to gain knowledge about a new artifact (Tach Lab), then resume your journey. There will be a save point to your east, which will prompt Galdra to hand over a Medical Kit. This fabulous item allows you to recover 150 HP/HP and cure all debuffs, but it can only be used at save points and on the world map. Needless to say, a boss can be found to the north, but you can also head south to find a fishing spot and a chest with 3 Ethers.
BOSS - Alpsy
This oversized boar/pig can definitely hit hard and will probably open up with Head Charge, a move where it charges and hits anyone in a straight line for moderate damage. It also has Headbutt, which seems to be a lesser version of Head Charge, as it doesn’t cover the same distance and hits for around half the damage. Fang Bite is a skill it will use up close, in melee range, where it smacks a character twice for lesser damage than the first move. You will find Alpsy use Breathe In quite often, which sucks in all of your characters to try and line them up for a Head Charge. One more skill it has is called Menace, which is a roar that will reduce your ATB to 0, should it hit. When the boss is getting closer to being defeated, it might use Muscle Flex to up both its physical strength and defense.
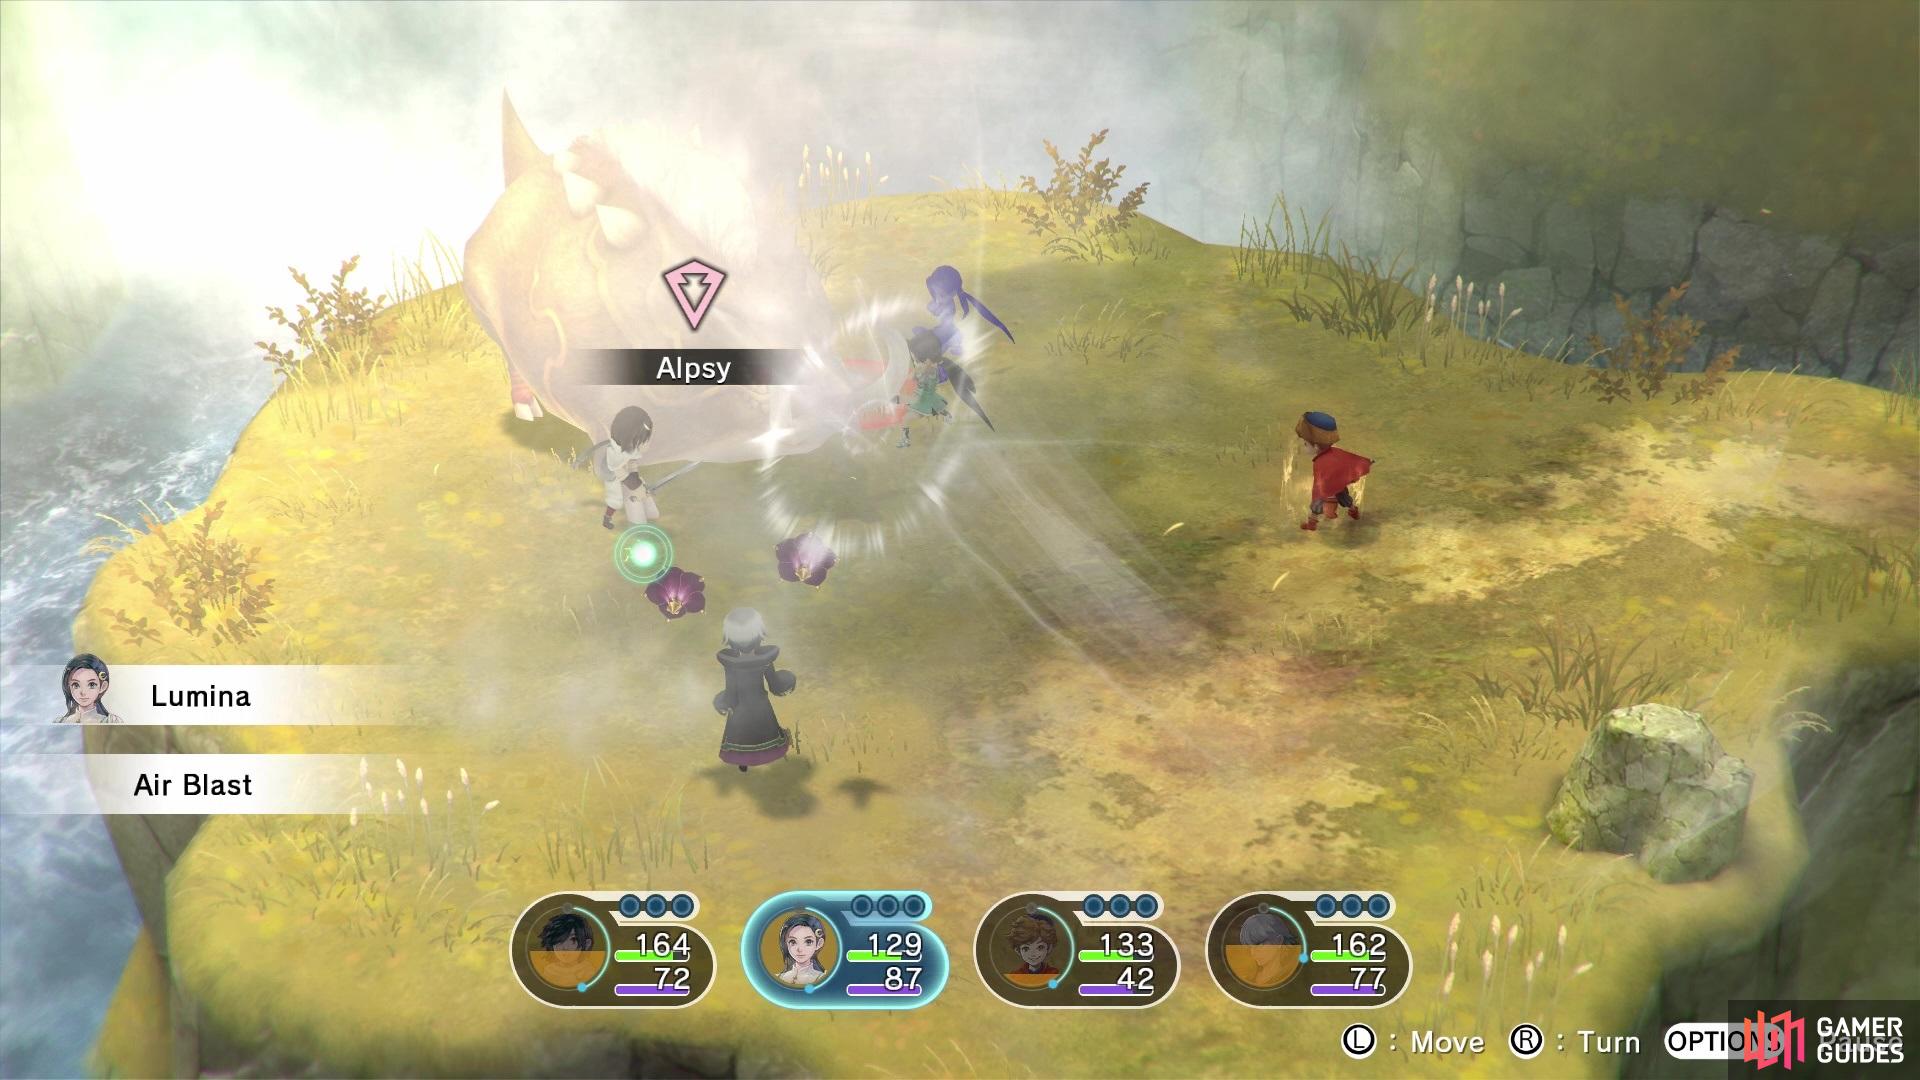
Alpsy will use Breathe In quite often to reposition your characters
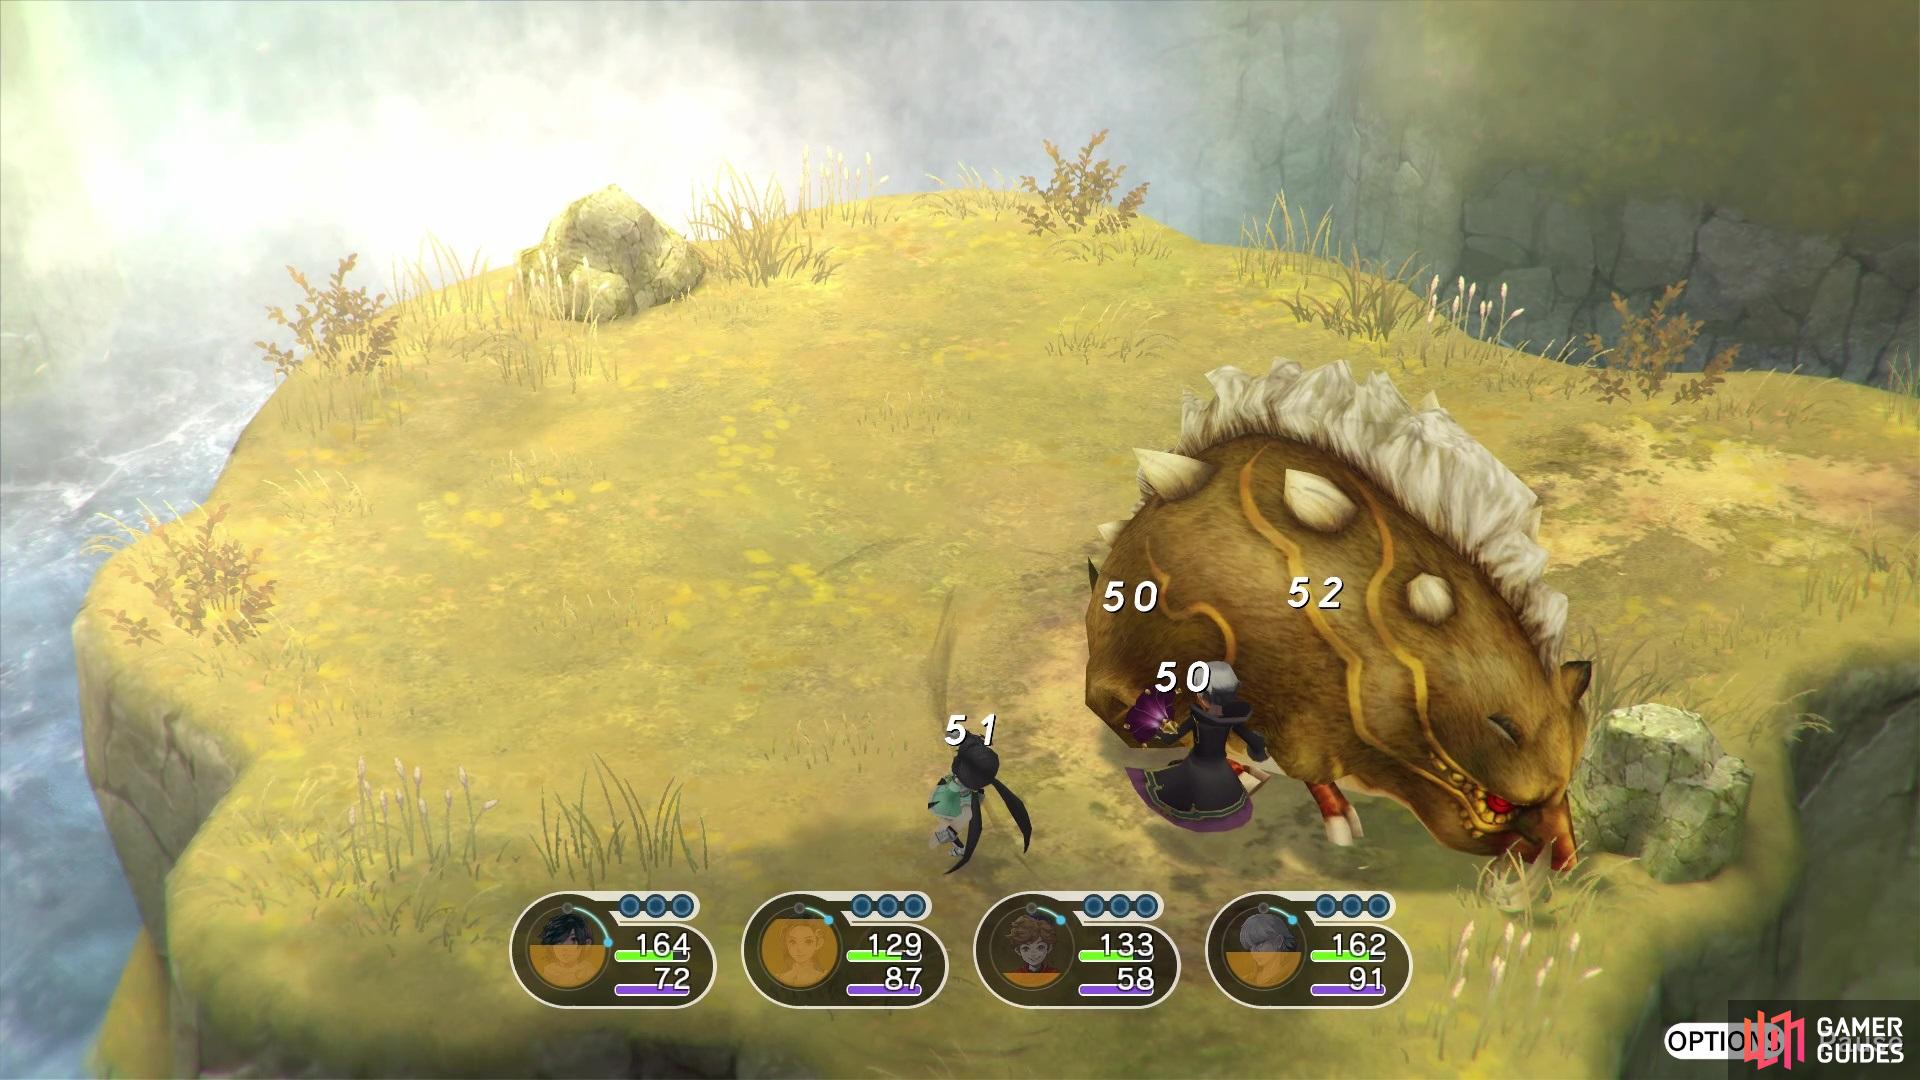
which will allow it to use moves that hit everyone
The key to this battle is to keep your characters separated. Van and Locke should be at a distance, opposite of each other, while Kanata/Lumina should either be behind the boss or on either side. This makes Alpsy waste its time trying to do multiple Breathe In moves to try and position your characters for Headbutt/Head Charge. Remember to not try and needlessly attack, especially since the boss will use Breathe In often. You can also move before using an item, so always reposition your characters.
After the battle is over, you will receive your normal spoils, as well as gain knowledge on new artifacts (Magic Eye, Soul Walk, and Zone Gate). A scene will occur, with Miner Deek giving you some Tiny Terromite for vanquishing the giant pig and allowing him to return home. To the east is another lost item, this one being Deek’s tool bag. Go ahead and do your usual thing (Tree Memory, Artisan Memory, and Iron Memory), but it seems the bag is gone for good, as well as the Terromite Deek gave you! Exit to the west to be back on the world map.
As before, be on the lookout for sparkle items on the ground as you explore, as they will usually contain ingredients and goodies you might be able to sell for money. The capital will be to your east, but before you enter it, venture south and then west to find another lost patch you can use to create an artifact. Unlike the previous one, you should have four options here: Magic Eye, Soul Walk, Tach Lab and Zone Gate. Remember that you can only create one artifact per isolated lost pocket on the map, so you will have to choose which one you want to make.
| Artifact | Description | Memories |
|---|---|---|
| Magic Eye | Shows enemy’s HP/ATB Charge during battle | Ruins (2); Artisan (1); Fire (2) |
| Soul Walk | More distance traveled in a turn, greater the increase of Momentum Charge | Ruins (2); Stream (2); Tree (3) |
| Tach Lab | Increases movement speed on the world map (only affects walking) | Artisan (2); Infinite (4); Providence (5) |
| Zone Gate | Increases critical hit rate when activating Momentum Mode | Ruins (2); Stream (2); Earth (3) |
It’s entirely up to you what you want to make, but once you do, some more of the map will be accessible. There will be a large tower to your southwest, but upon inspecting it, you see it requires some memories you don’t have access to at the time. When you’re done exploring, go ahead and enter Watt, the imperial capital.
No Comments