
Information about how to defeat the Shaelmaar you encounter at the Tourney Grounds in The Witcher 3 Blood and Wine.
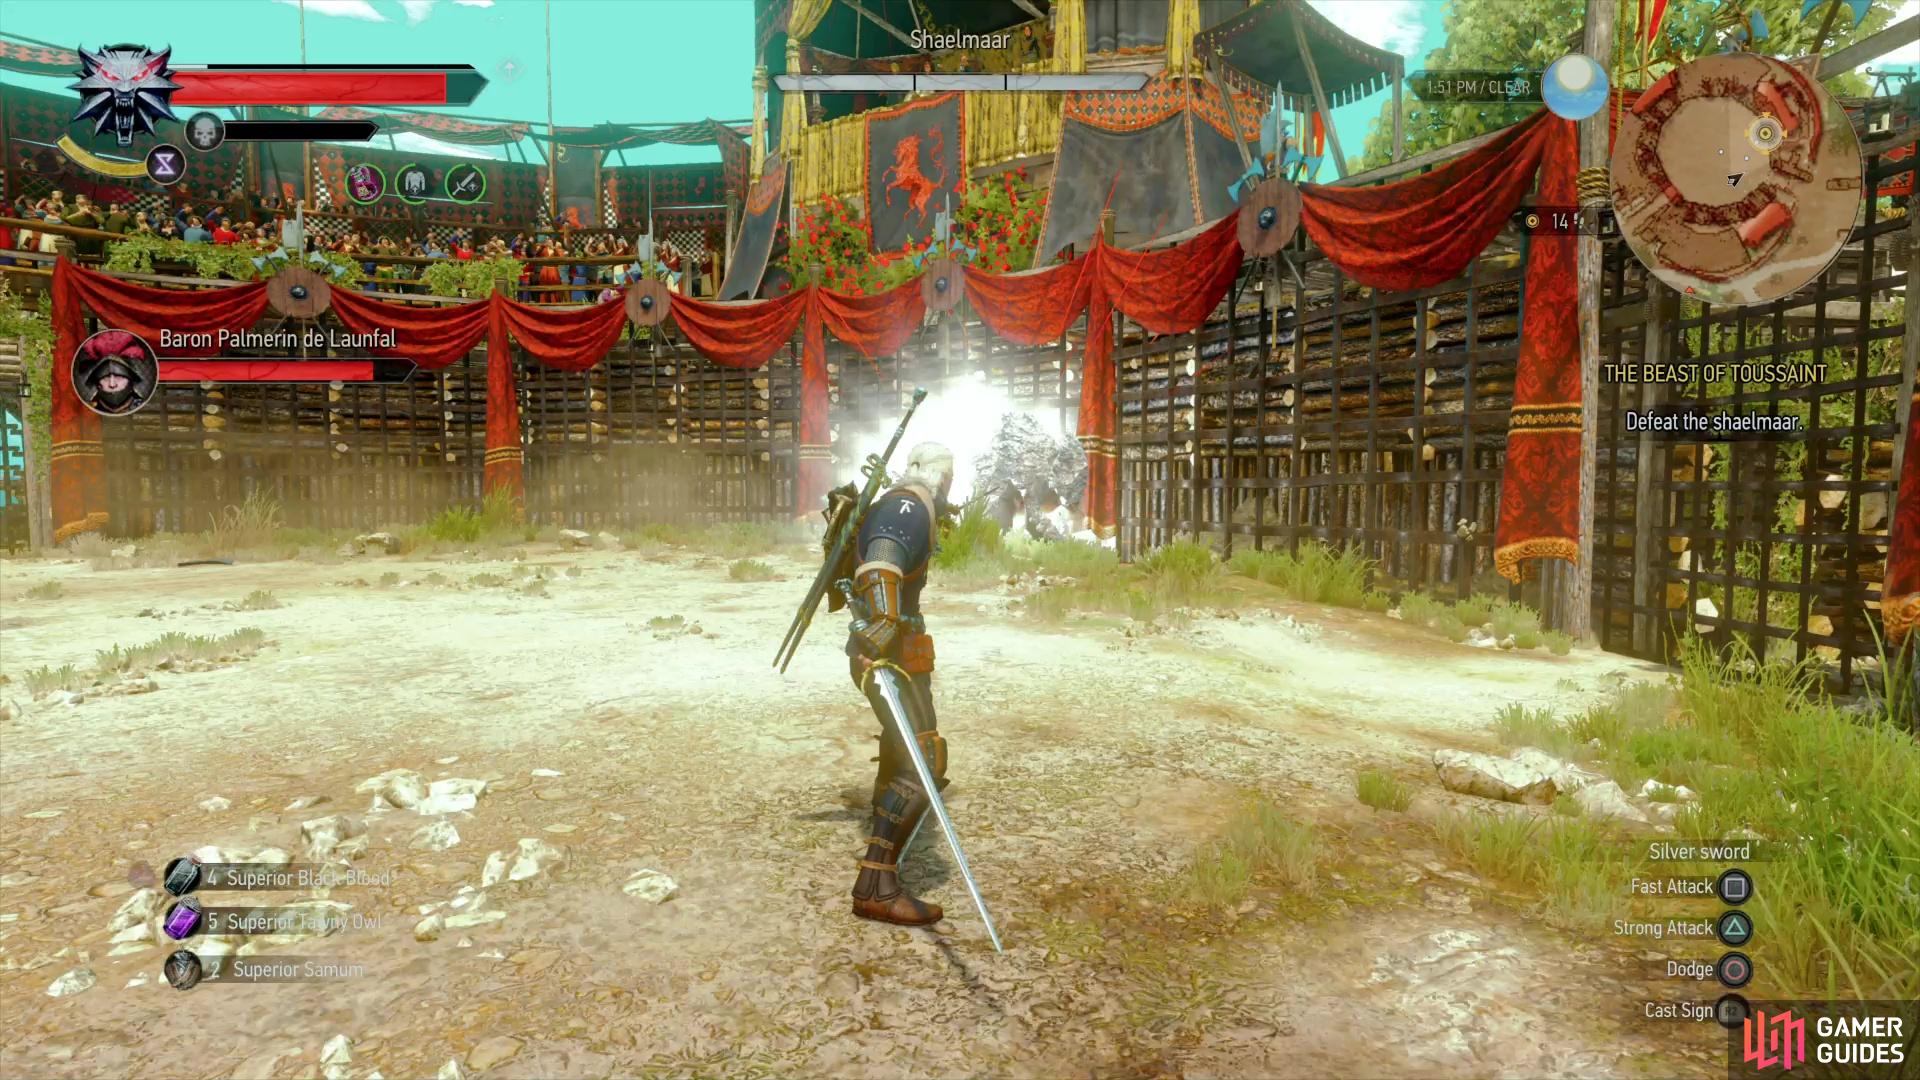
During the Main Quest The Beast of Toussaint you’ll need to head to the Tourney Grounds and rendezvous with Palmerin in order to tell him what you discovered at Corvo Bianco. The Toussaintois - especially Guillaume - seem incapable of keeping out of monster-related trouble, however, and before long you’ll find yourself intervening in a novelty bout gone wrong.
No land needs a witcher more than Toussaint, it seems.
(1 of 4) Samum bombs will confuse the Shaelmaar, but this just makes it more unpredictable.
How to Defeat the Shaelmar
The Shaelmaar is an odd foe in many ways, being nigh invulnerable to frontal assault due to its thick hide. Even a witcher’s silver sword can’t pierce it, and Palmerin - who will assist you during this fight - won’t be much help. Palmerin will at best distract the Shaelmaar, which is a mixed bag. Palmerin has a life bar for this fight, but if he takes too much damage he’ll take a knee to recover and sit out the rest of the fight, so you don’t need to babysit him.
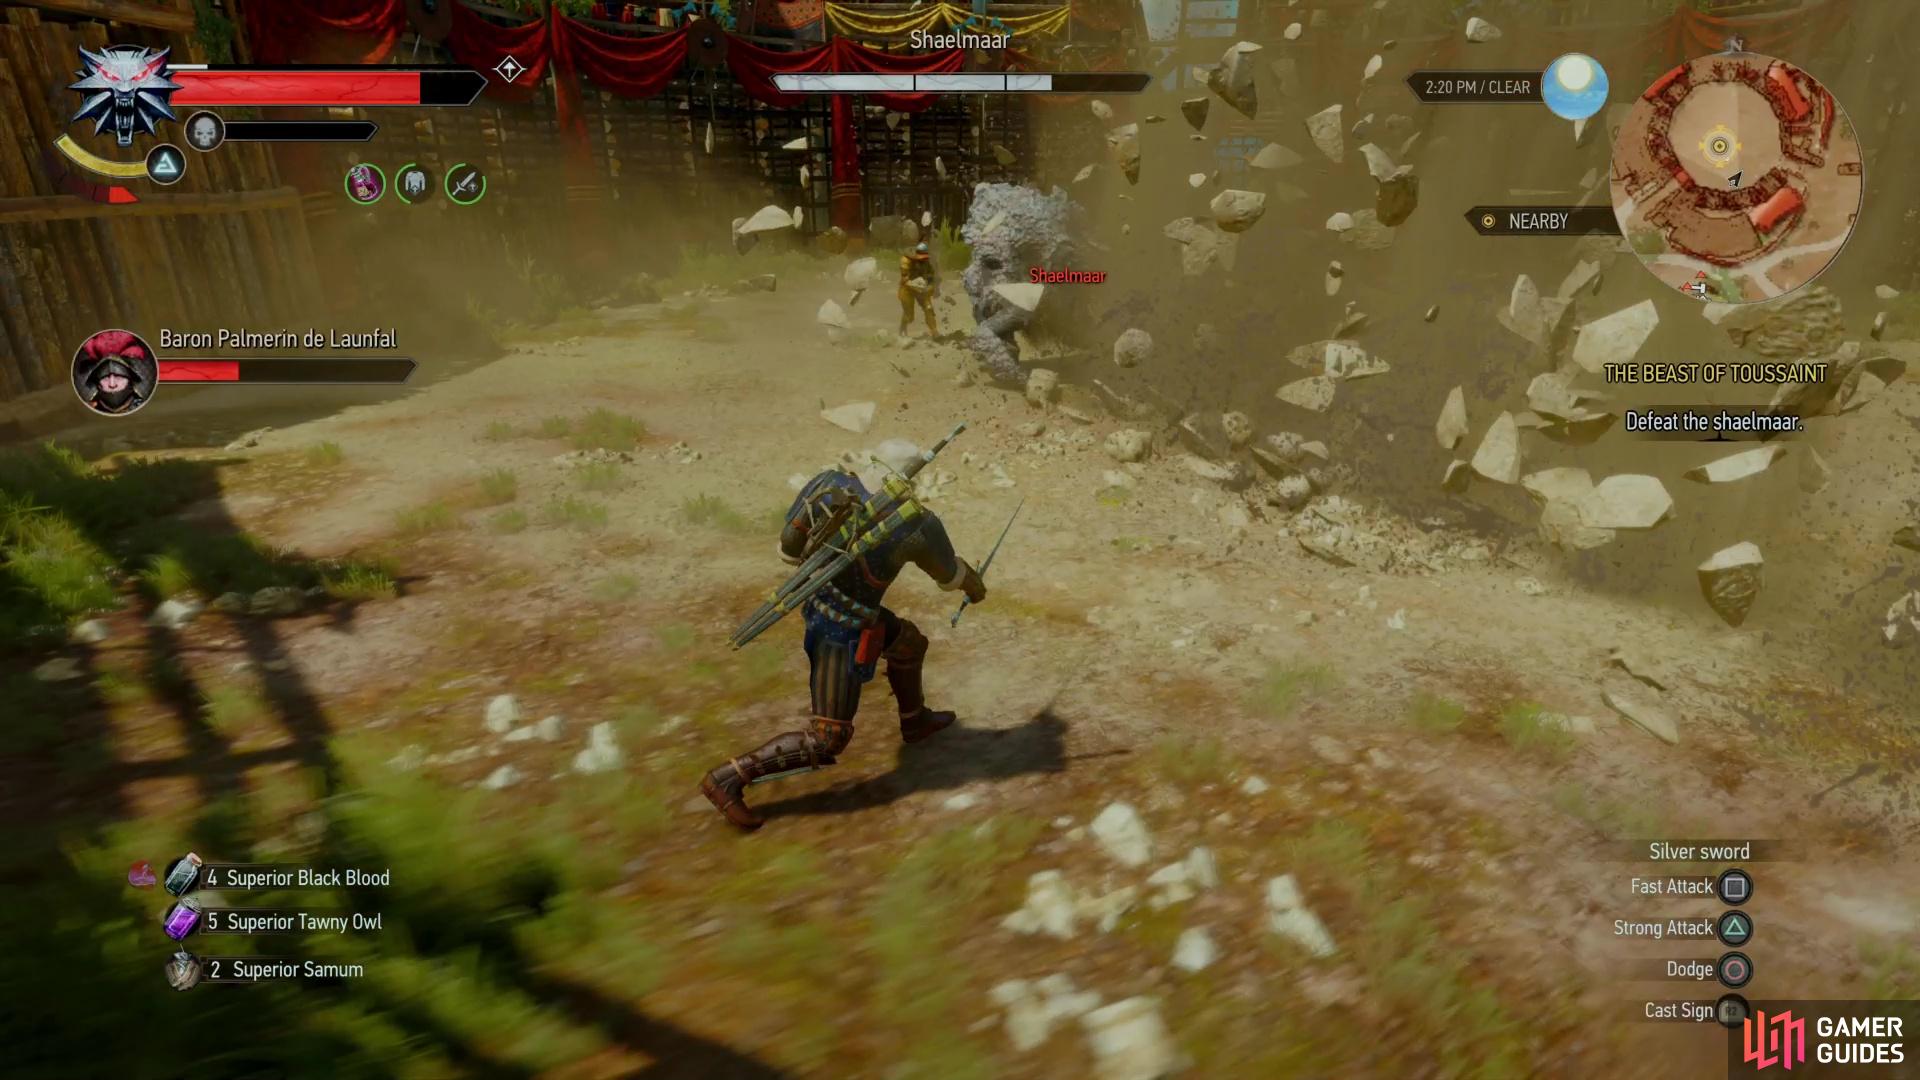
Since frontal assaults won’t work, you’ll need to seek out other solutions, and fortunately the Shaelmaar’s own offense provides an opportunity. Being a subterranean beast by nature, the Shaelmaar detects its foes via echolocation, and this can be exploited. The Shaelmaar has several attacks, including claw swipes - sometimes performed while charging - and a spinning charge attack. Both of these charges can be evaded by rolling, and if the Shaelmaar comes into contact with the arena walls it’ll be knocked prone and stunned for a brief period of time, during which you can attack its vulnerable underbelly, dealing significant damage.
You can, with some practice, defeat the Shaelmaar simply by keeping your distance, rolling out of the way of its charges, and punishing it when it hits the arena wall. If you want more options, however, you can use the Samum bomb to disorient the creature for a significant period of time, but this just makes it more unpredictable and less prone to charge where you want it to. The Aard spell is also interesting, as the force it generates will almost certainly draw the Shaelmaar’s attention. Cast it into a nearby wall and stand clear and the Shaelmaar should knock itself silly. Whether you use Samum, Aard, or just your own reflexes, applying Relict Oil will speed matters up.
(1 of 3) While visually impressive, the Shaelmaar’s shockwave attack can be easily dodged,
While the Shaelmaar’s charges provide opportunities, they’re still dangerous attacks if you fail to dodge them. The rolling spin in particular is one of the few attacks against which Quen’s “Active Shield” is largely ineffective against, as the attack will knock you out of Quen and if you’re unlucky you may be hit multiple times by a single charge. If you want a safety net, use the normal version of Quen, but it’s best to avoid the attacks entirely. In addition to the aforementioned charges, the Shaelmaar can shoot out shockwaves that buckle the ground. These linear attacks are easily dodged, and the Shaelmaar will always commit to three of them. Finally, the Shaelmaar can perform a stationary spinning attack, the best defense against which is simply keeping your distance.
Roll out of the way of the Shaelmaar’s charges so the monster slams into the arena walls, score some cheap hits while the dazed Shaelmaar is incapacitated (using Relict Oil to speed things up) and repeat until you’re victorious.
Kill or Spare the Shaelmar?
Once the fight ends you’ll get the opportunity to finish the Shaelmaar off, or spare it. Sparing the Shaelmaar will prove you have the virtue of COMPASSION for the Side Quest [There Can Be Only One].
Other than that, there’s no other benefits or rewards for the choice, and you complete the quest either way. If you’ve not already got the Compassion virtue, then you can spare it, if not, then do whatever, as the options don’t matter either way.
No Comments