
Patch 4.0 introduce numerous additions and improvements to The Witcher 3: Wild Hunt, some obvious, some more obscure. This page will walk you through one of the hidden Easter Eggs which can now be found near the Destroyed Beacon along the southeastern edge of Velen.
North of the Destroyed Bastion you’ll find some ruins, where a Wyvern protects a Guarded Treasure.
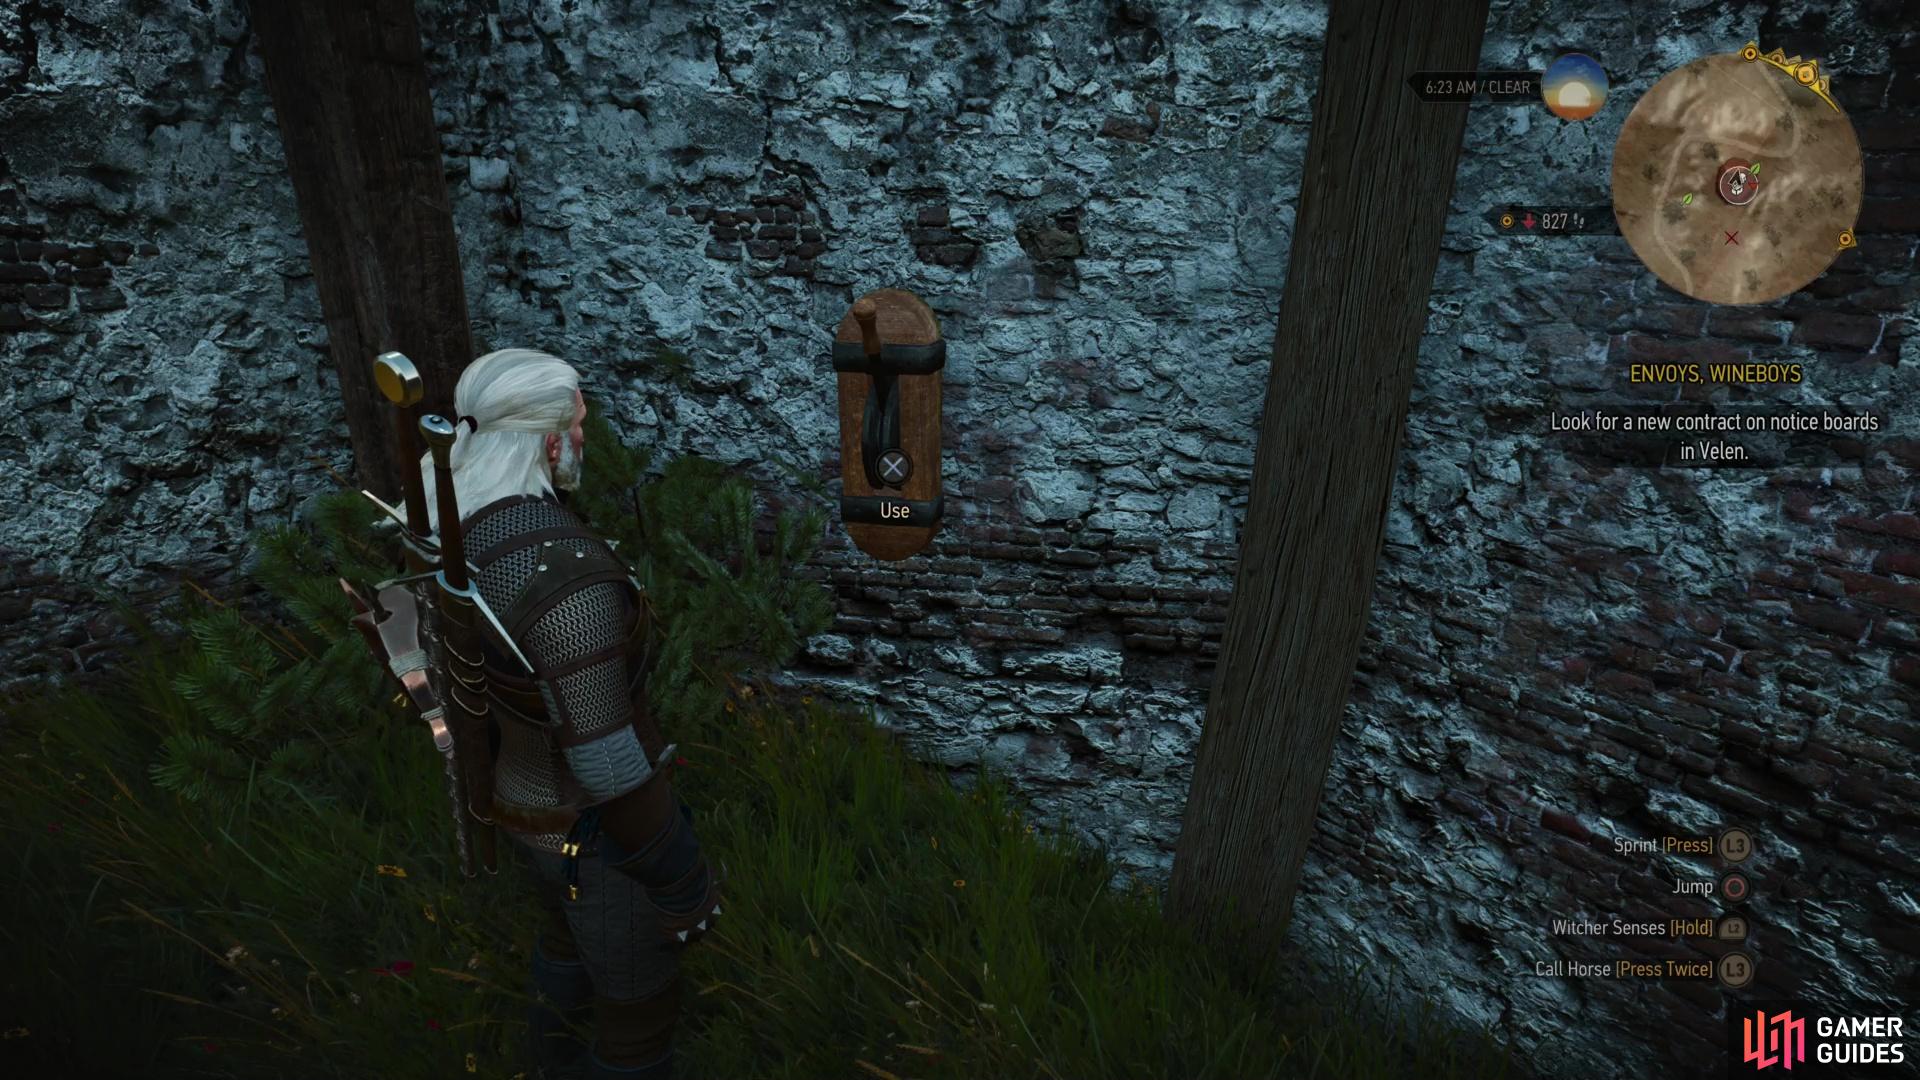
Defeat the beast and pull a lever on the wall of the ruins.
How to Reach the Hidden Dungeon in the Destroyed Bastion
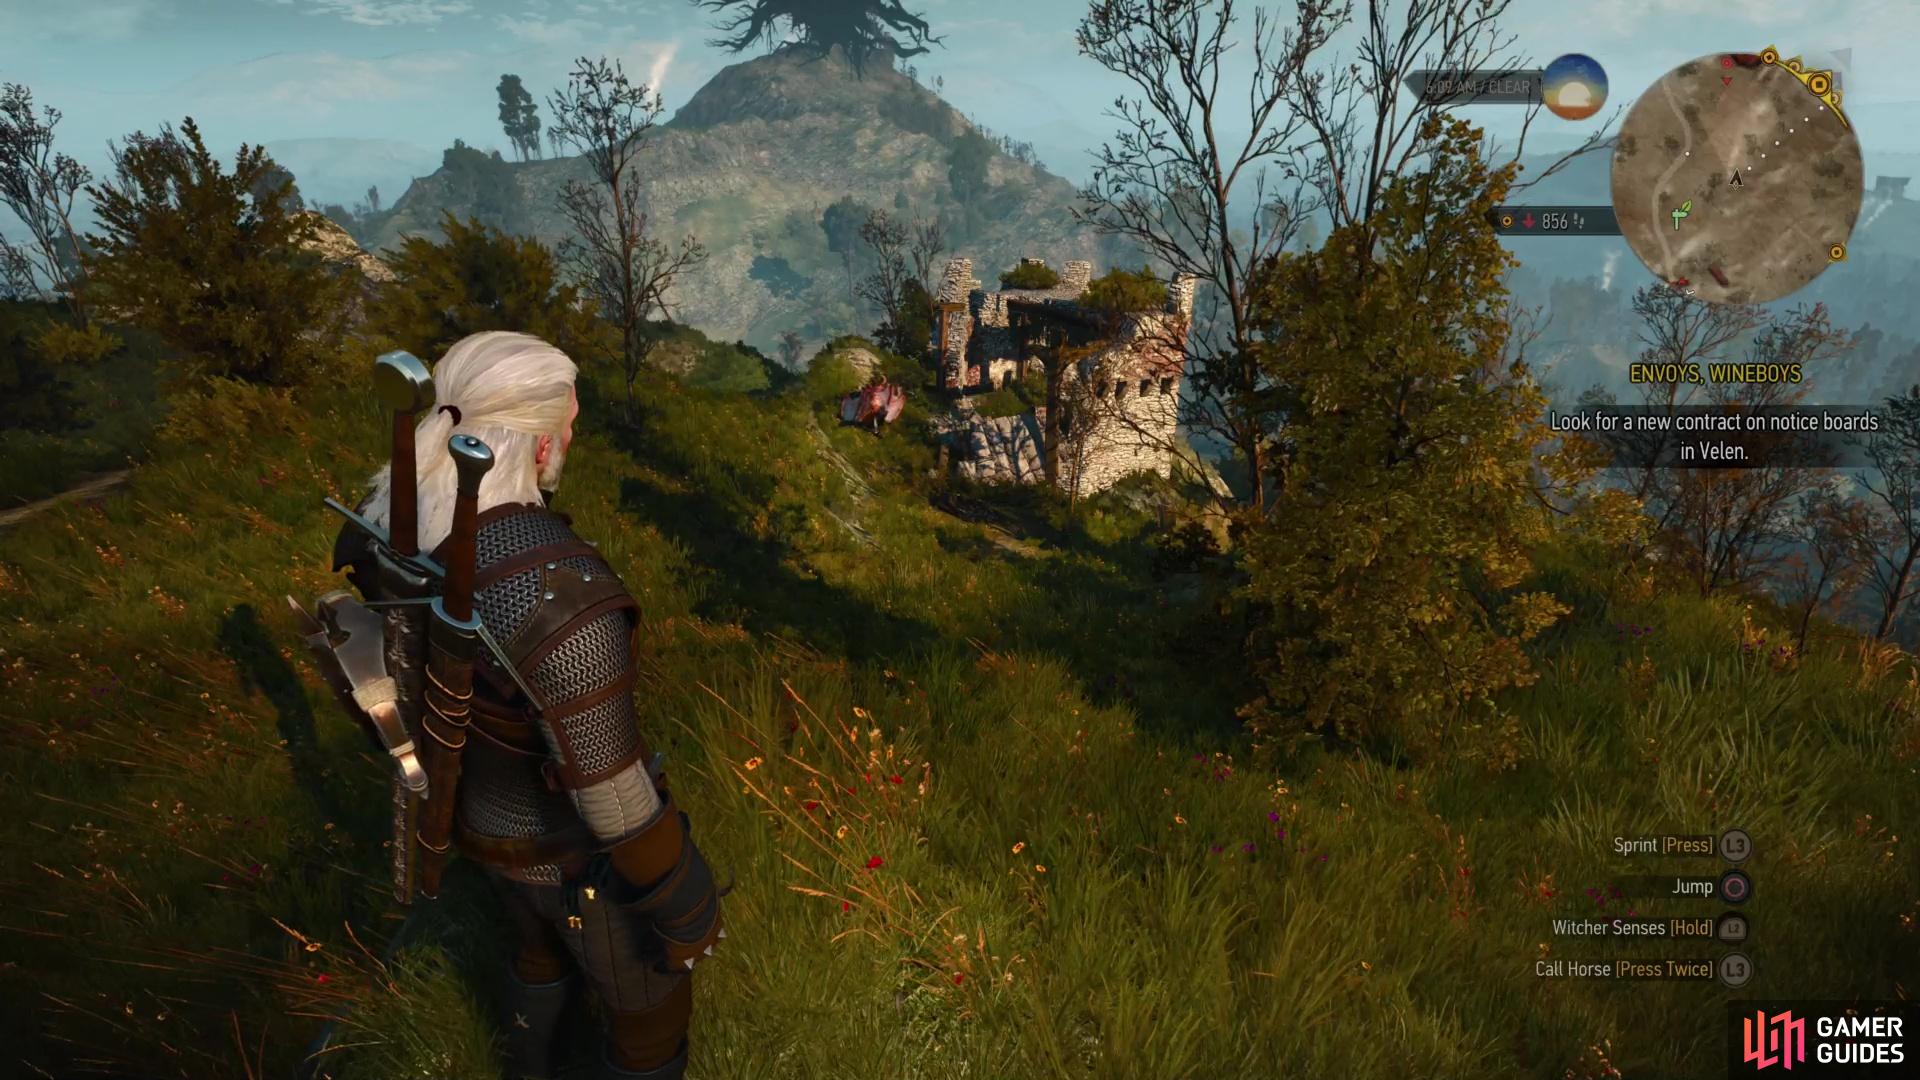
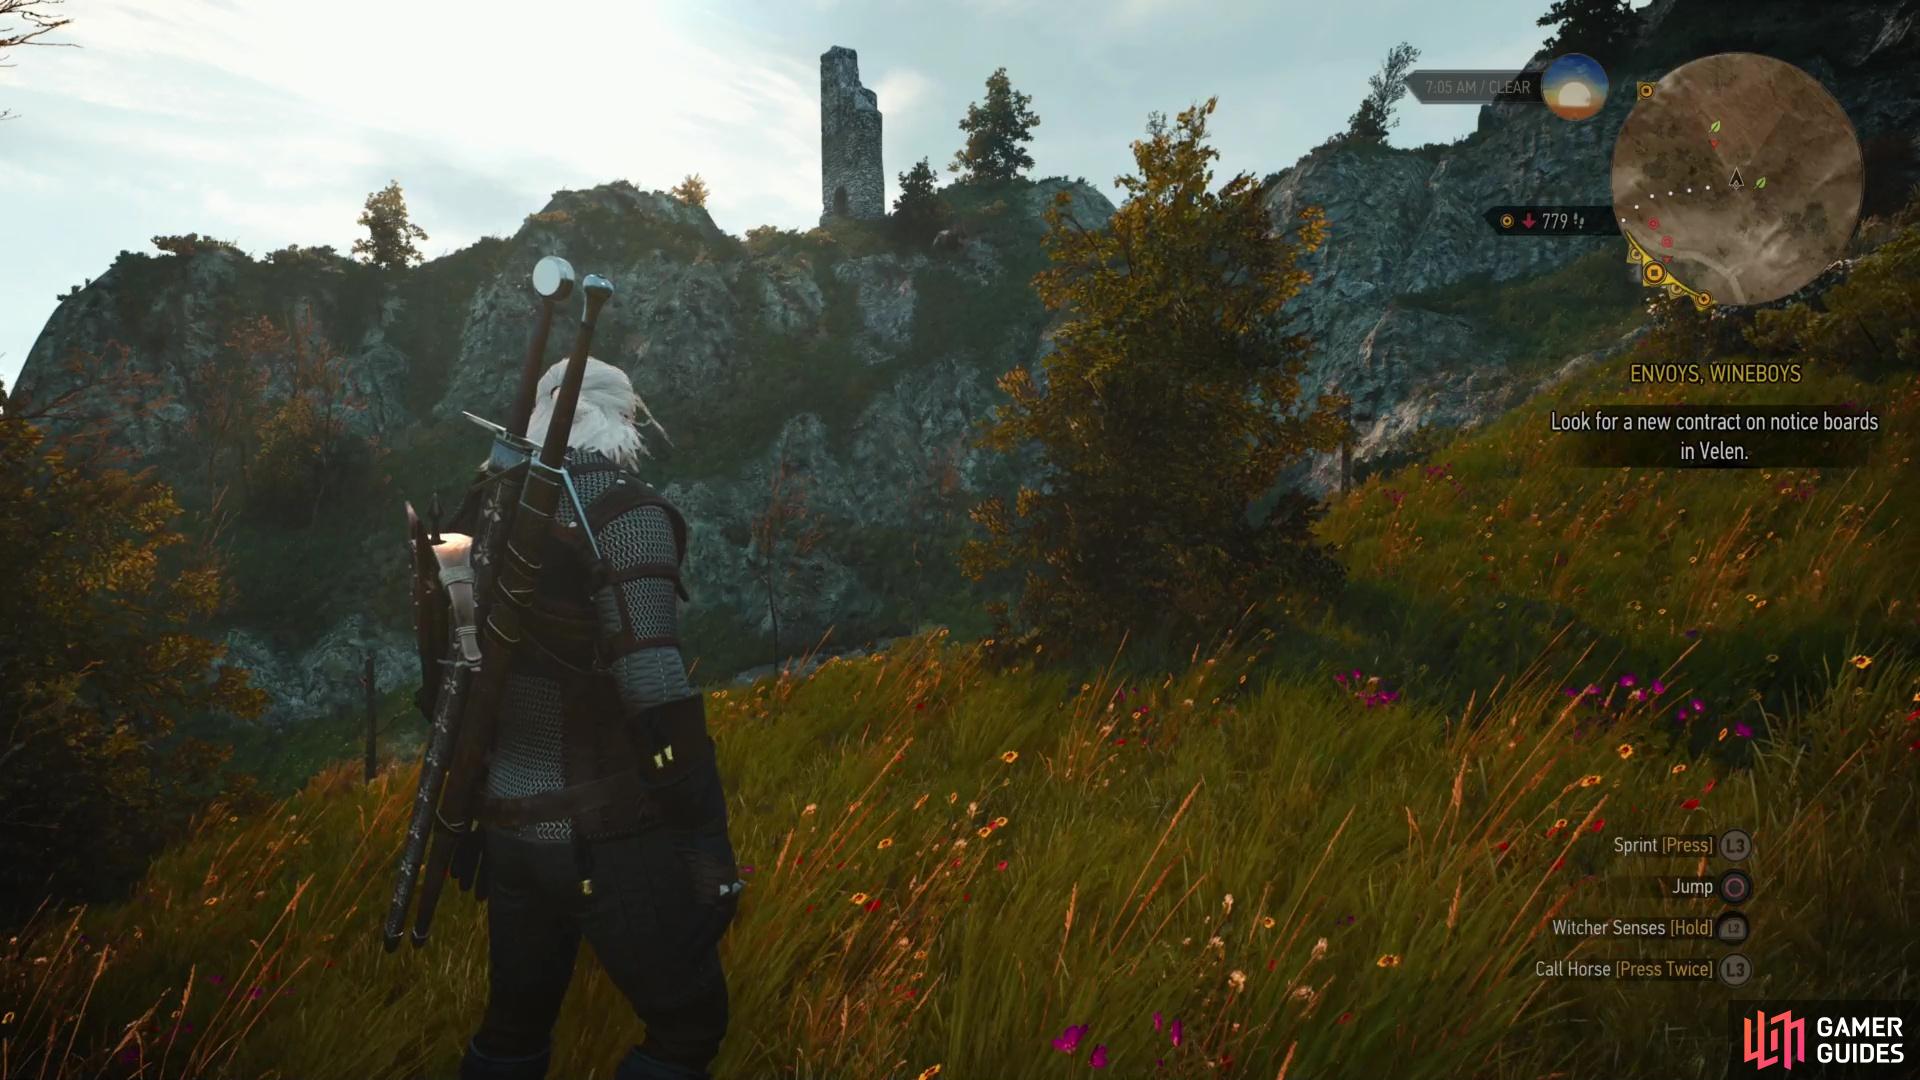
First things first, fast travel to the Destroyed Bastion along the southeastern edge of Velen. There’s a signpost here, and if you played the game normally, you probably traveled here to obtain the Mastercrafted Ursine Diagrams. If you haven’t found it, it’s a good ways south of Downwarren, west of the Nilfgaardian camp.
When you arrive, dispatch a Cyclops (level nineteen) if you haven’t already, then note the eponymous Destroyed Bastion. From these ruins, turn northwest to find another, more humble ruin, where a Guarded Treasure event can be found. Kill the Wyvern (level fourteen) and examine the ruins it was guarding to find a lever on the wall. Flip it and Geralt will suggest having a look around. Will do.
Downhill to the north you should spot some more ruins,
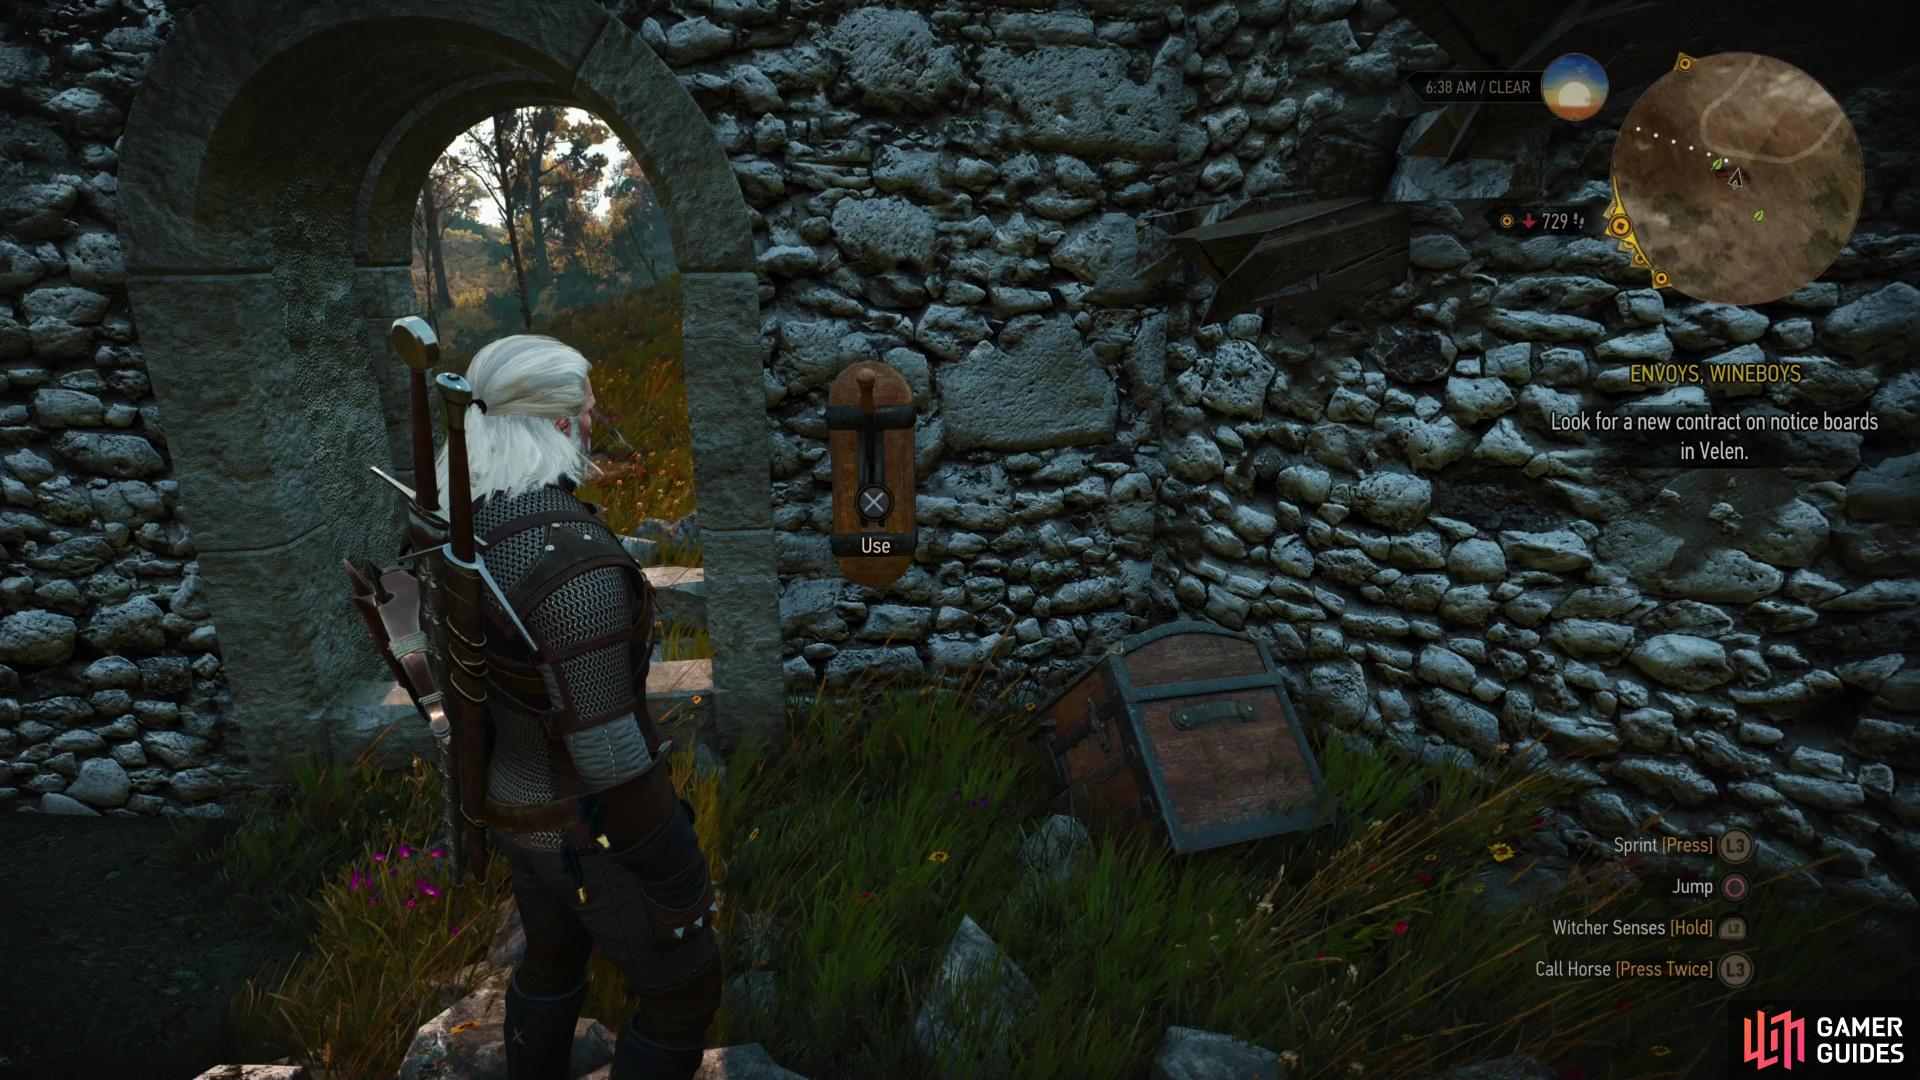
where a second lever can be found on the wall.
Find a trail near these ruins and follow the winding path downhill, ultimately to the north, to find another ruin. If it’s nighttime you may encounter some Wraiths (level fifteen) - dispose of them if necessary, then search the walls of the ruins for a second lever and flip it.
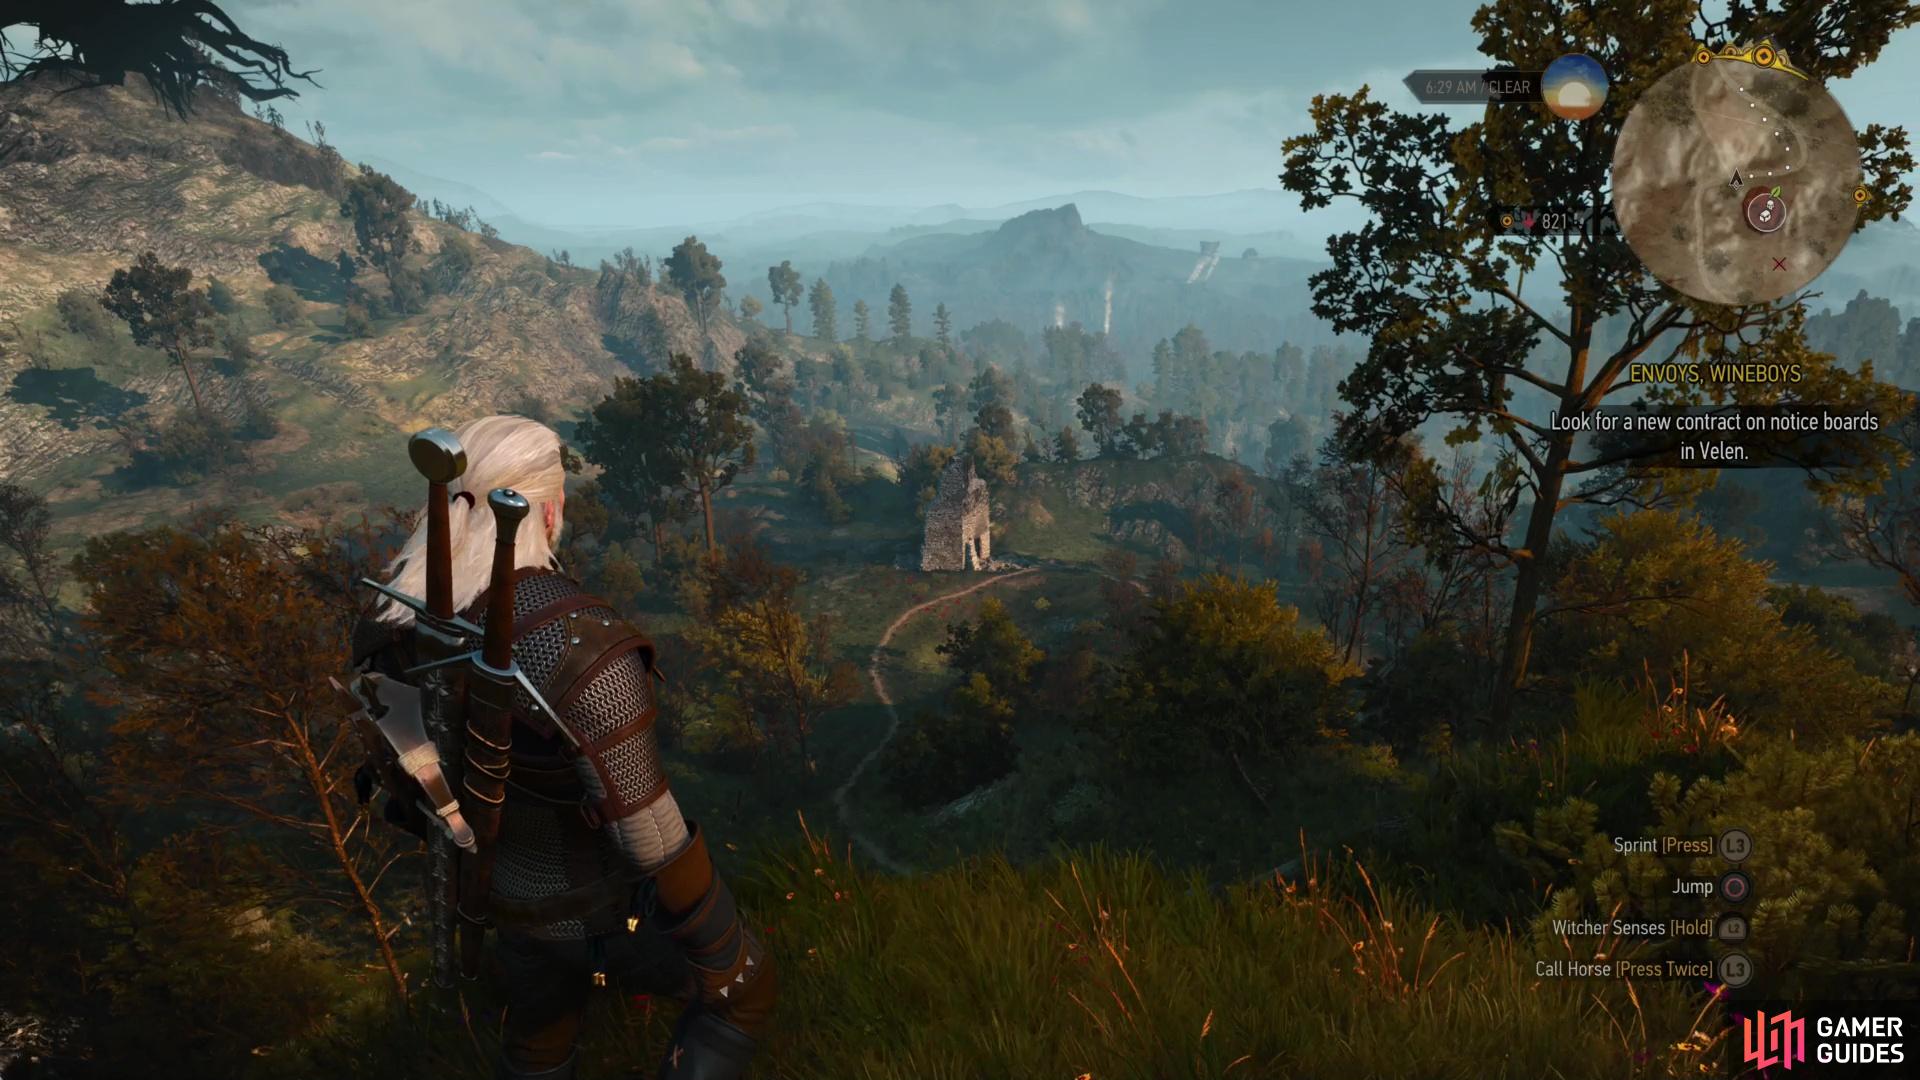
Uphill in the distance to the southeast you’ll find a third ruin,
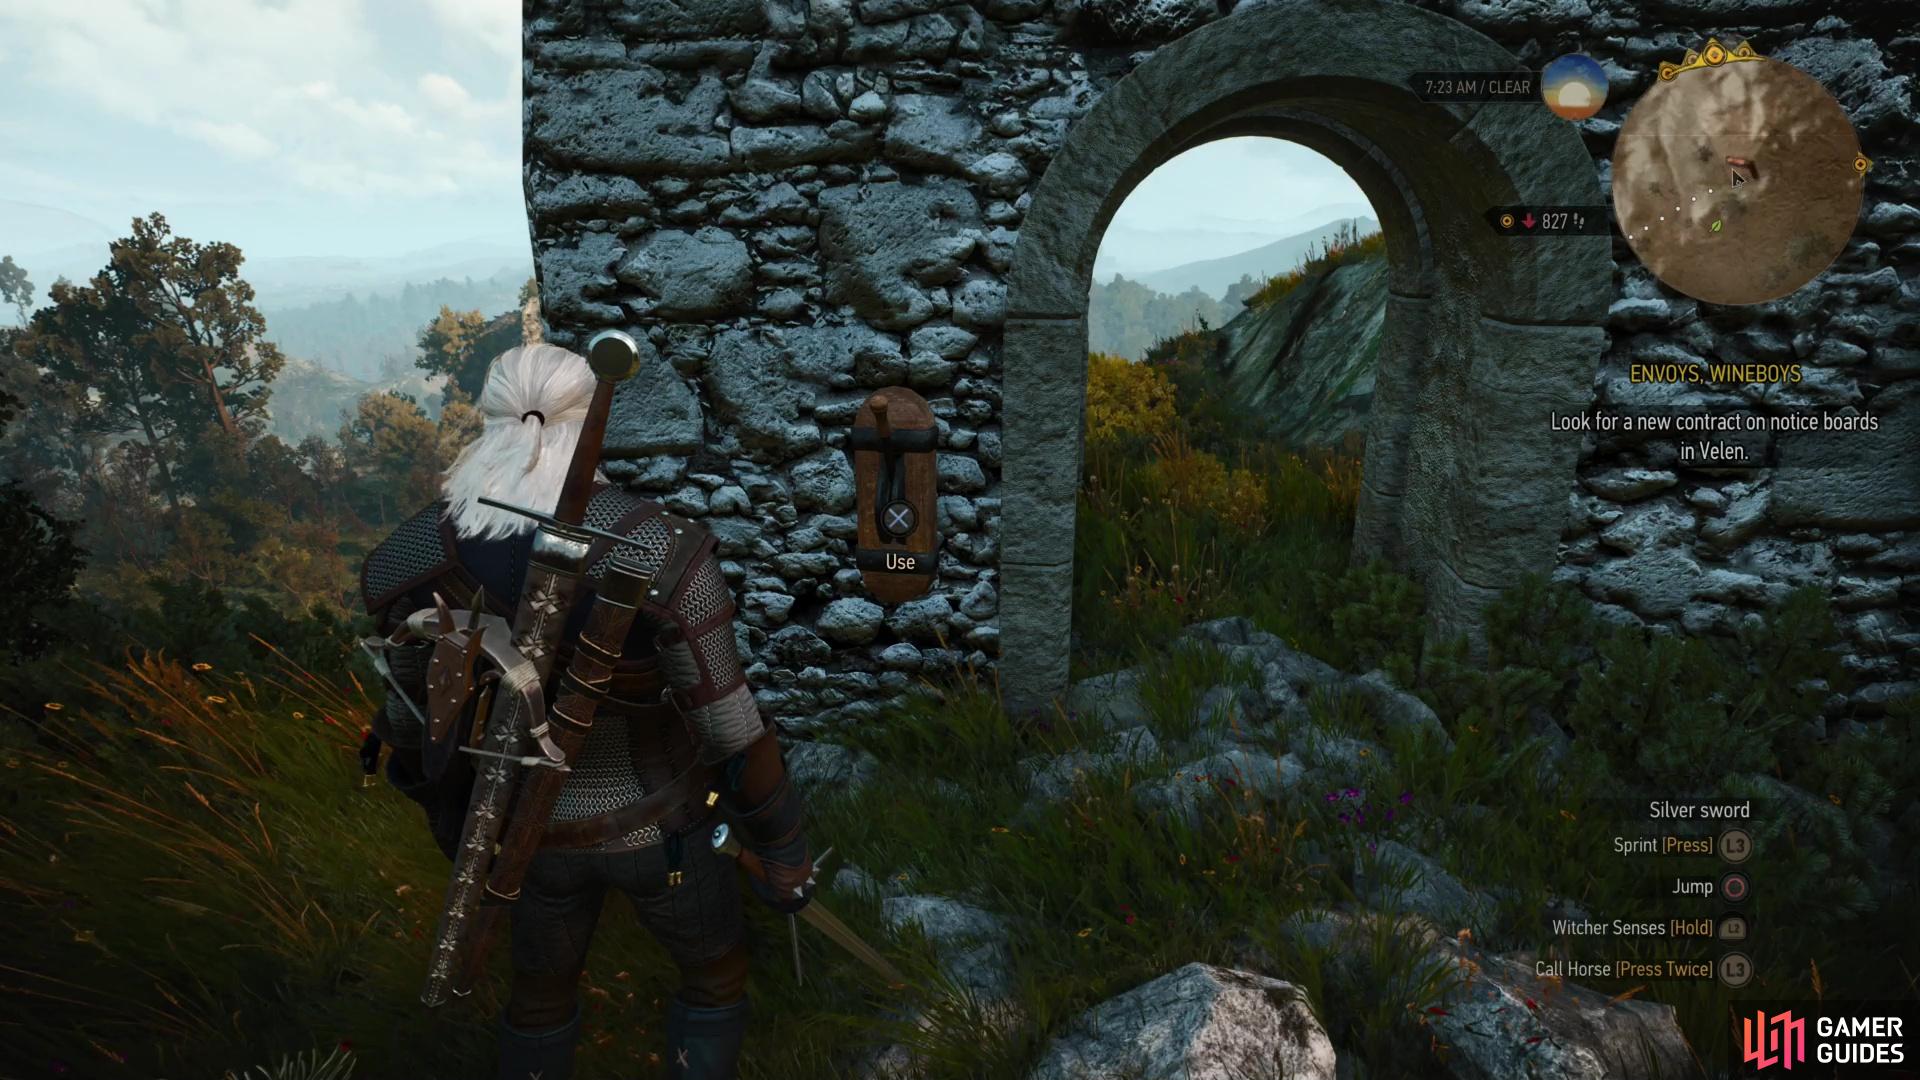
which is adorned with a third lever.
Exit through the now largely ceremonial door of these ruins and look southeast. In the distance you should find another ruin. Head through the wilderness and climb a hill to reach this ruin, where another Wyvern (level fourteen) resides. Kill it, find a third lever, flip it, then head downhill into the valley to the northwest.
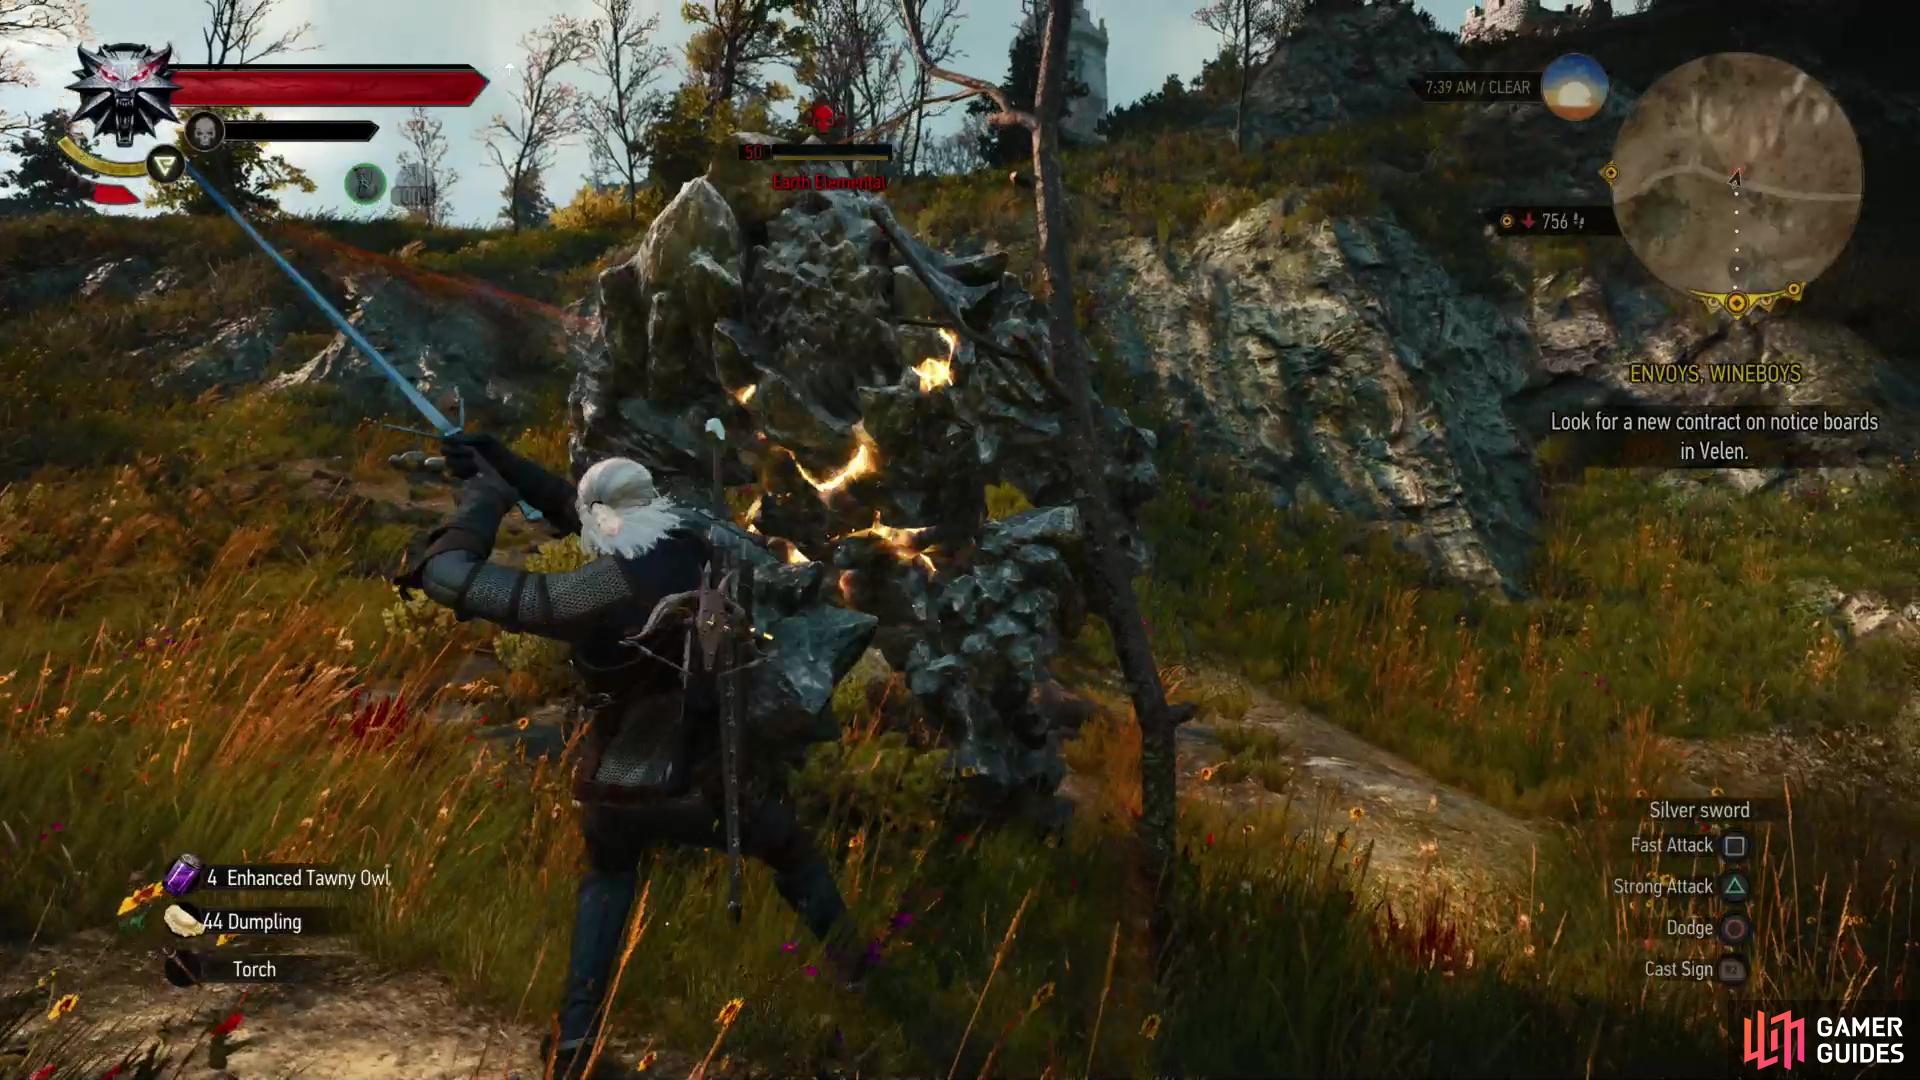
(1 of 3) After pulling all three levers, a powerful Earth Elemental will appear between the ruins.
In the valley in the midst of these ruins you’ll now find an Earth Elemental (level fifty) stomping about. That’s not a typo - unless you’ve beaten Blood and Wine this critter will likely have a skull. If you’re working with a generic, new Blood and Wine save, the situation may seem hopeless, but fortunately Earth Elementals aren’t quite as dangerous as their size and rocky exterior suggests. Apply Elementa Oil, make generous use of Quen, and practice the good old strong attack and dodge routine and you should eventually whittle the animated mud down. Lowering the difficulty will help, obviously, and if you have reservations about cheesing this fight… well, the combat hurdles this Easter Egg throws at you are only going to get sillier, so you may want to swallow your pride.
Dignity or not, once the Earth Elemental is defeated a portal will appear on a hill to the northeast. Head up there and as you approach the empty arch will flare to life. Pass through it and you’ll find yourself on an upper floor of the Destroyed Bastion.
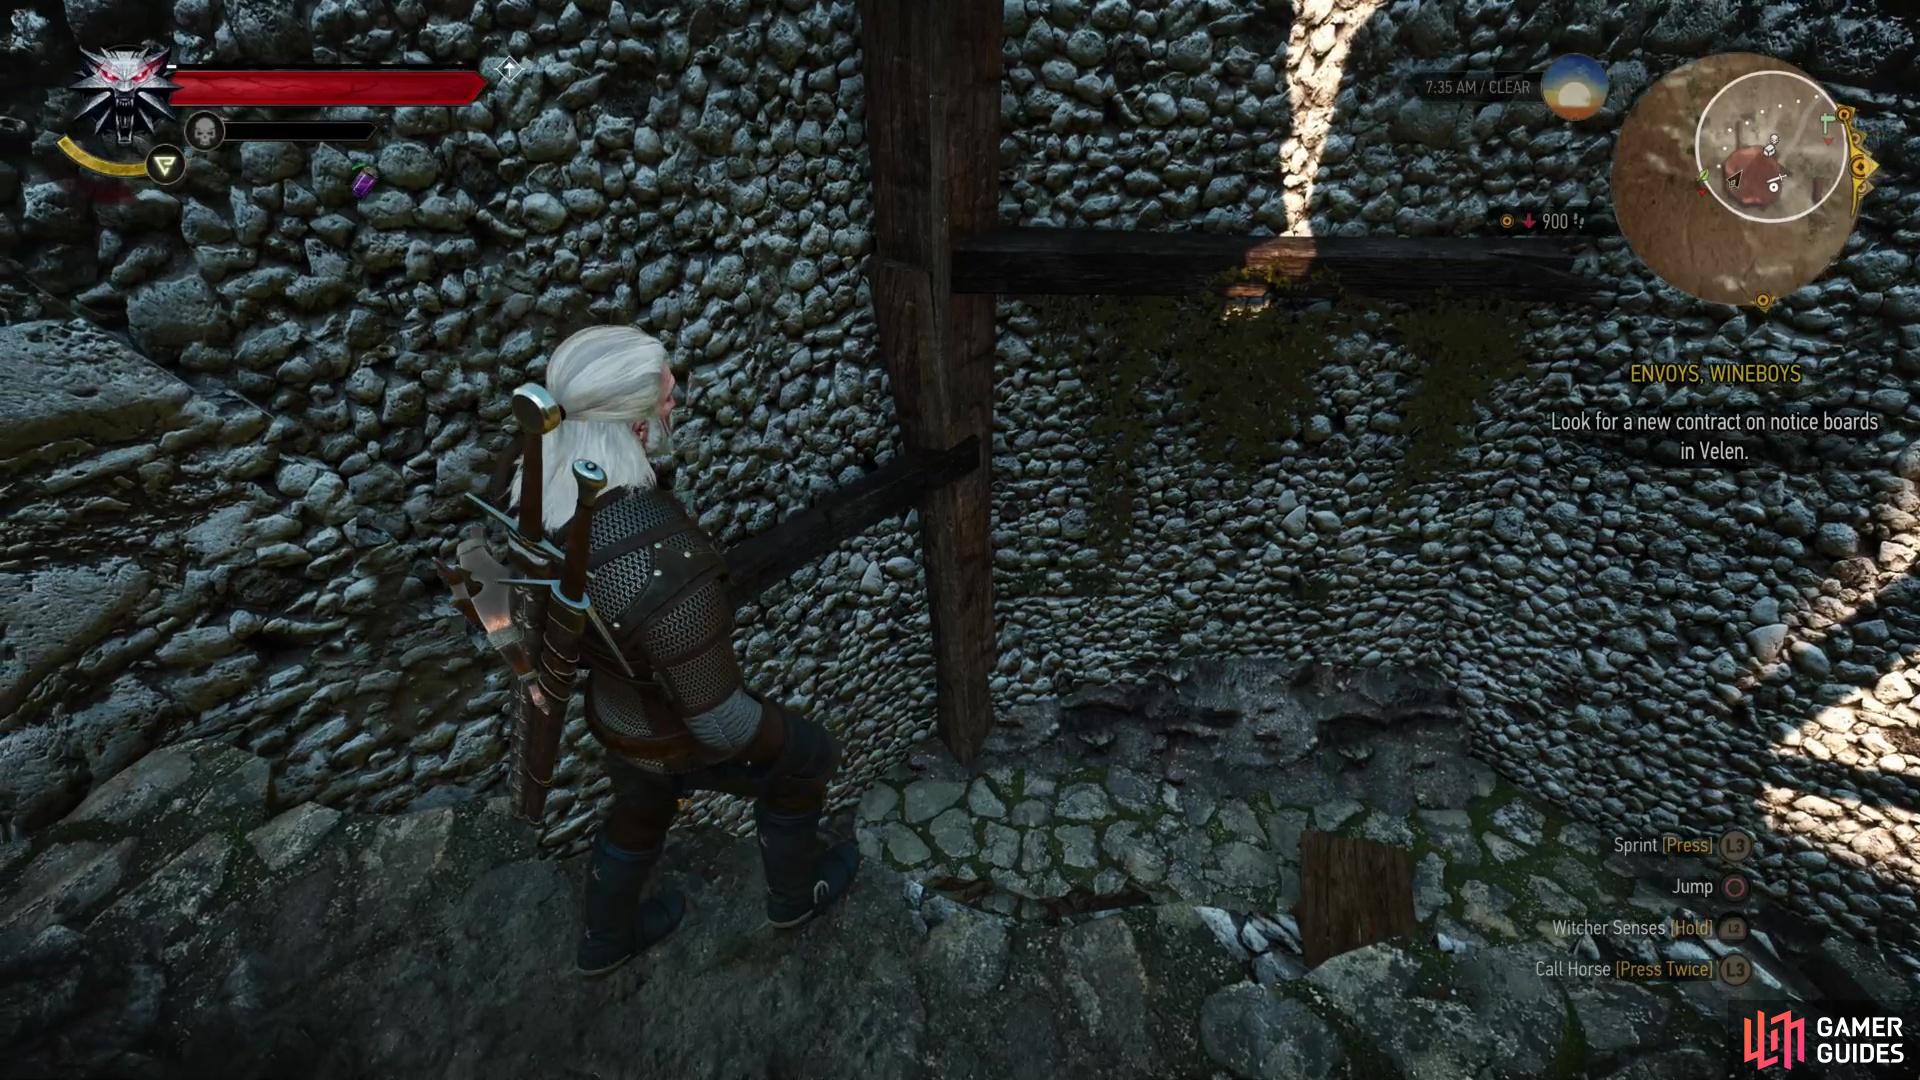
Descend to the bottom of the Destroyed Bastion, dropping off ledges judiciously to avoid fall damage.
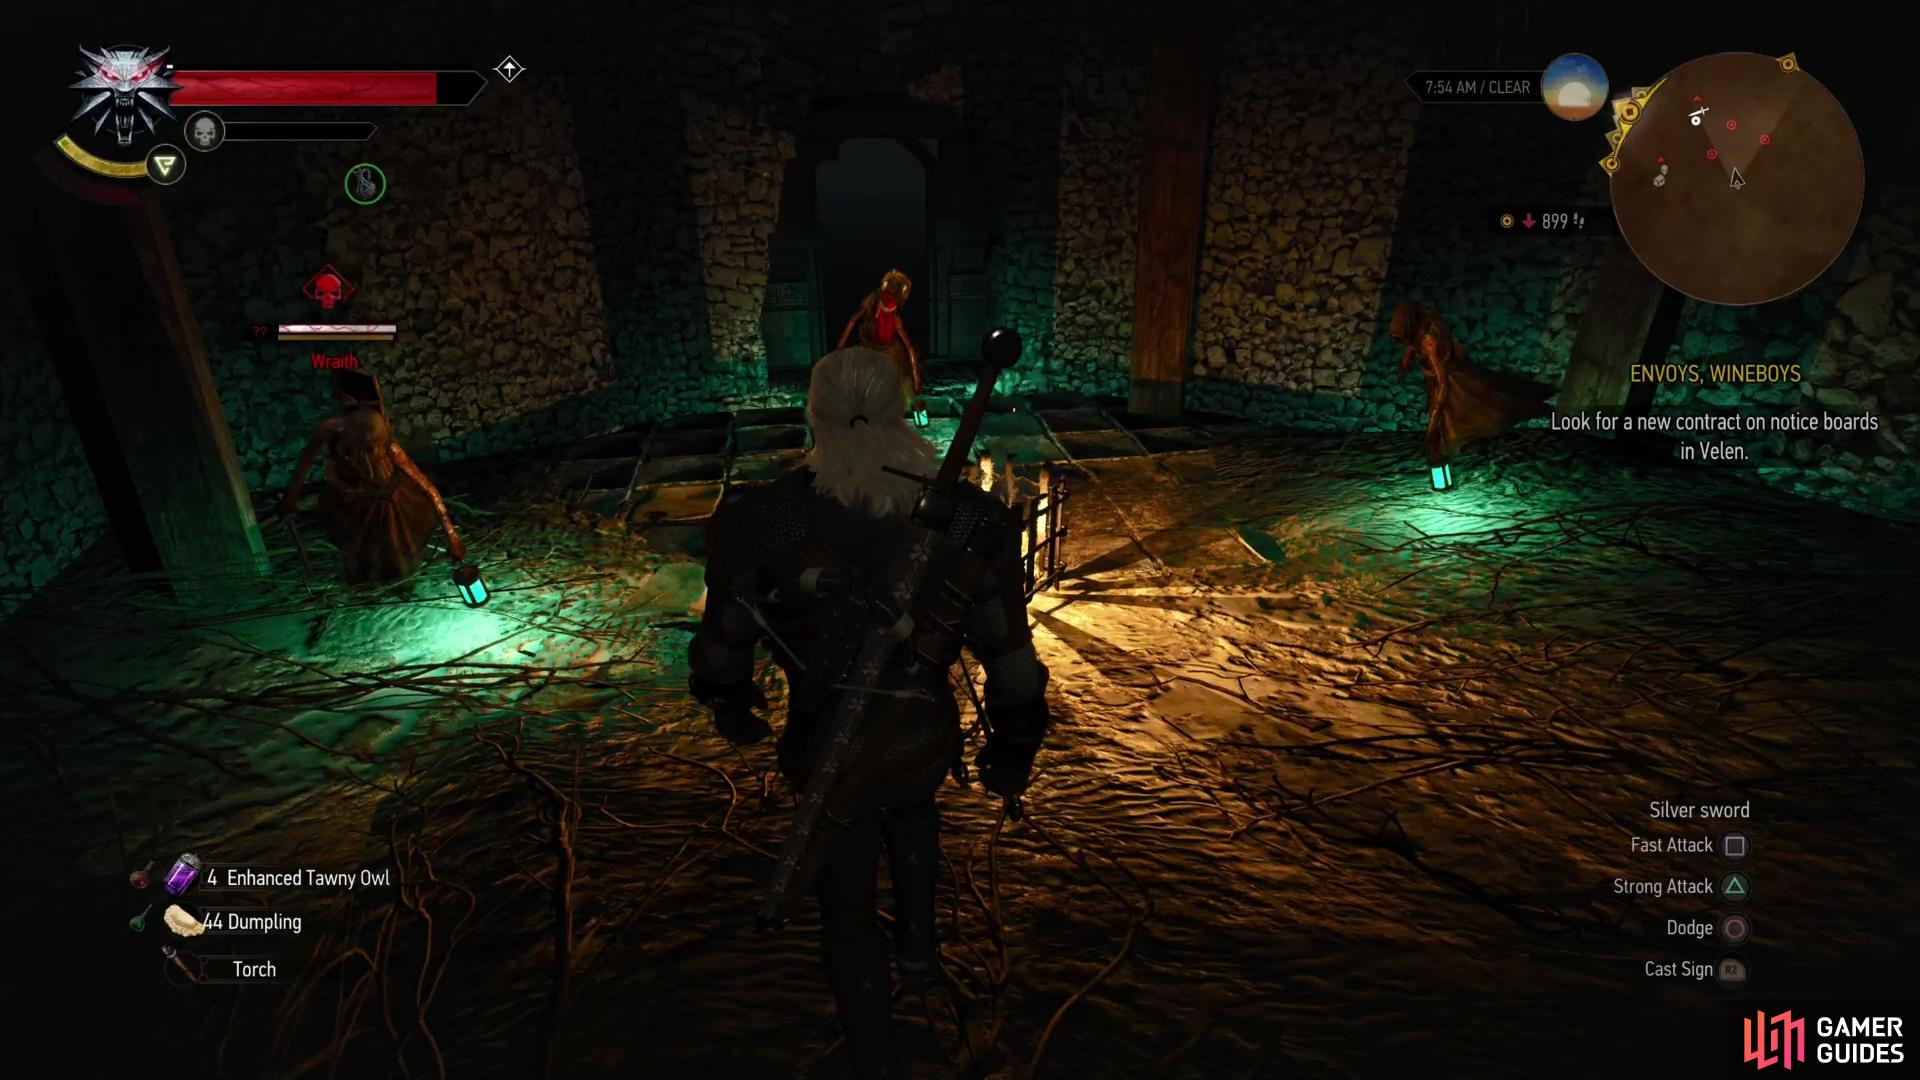
When you reach the bottom, a host of high-level, invulnerable Wraiths will materialize to oppose you.
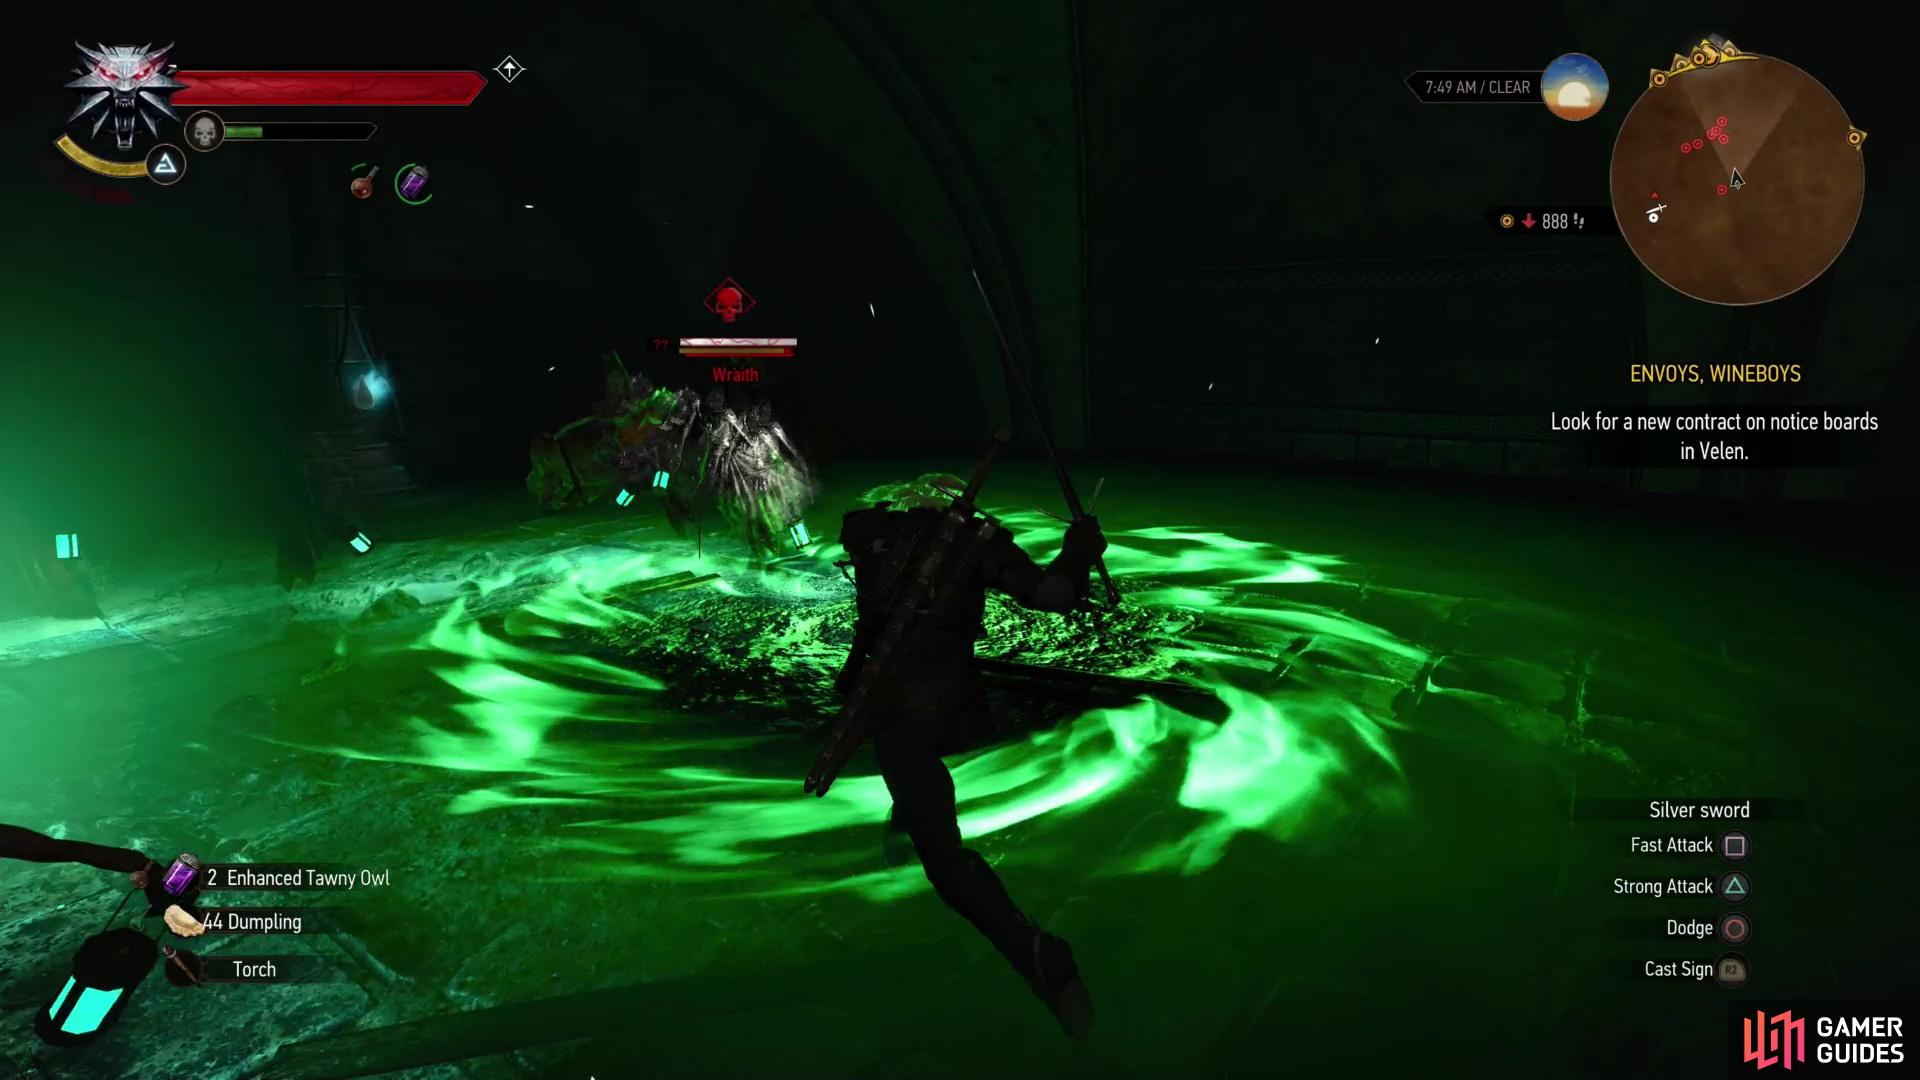
Now you have to descend through the ruins, and your only tools for this endeavor are prudence and gravity. First turn southeast and descend a flight of stairs, which will get you most of the way to the level below, with gravity doing the rest. On the next floor, drop through a hole in the floor to the west, then head east and jump down another hole. Finally, drop down another hole to the west to reach the bottom of this dungeon, but be prepared to dodge as soon as you land, as eight Wraiths will attack you. Their level is unknown (but they have a skull) and regardless of your relative power, they cannot be killed - their health bar will never fully deplete. If you search the wall to the right - difficult as it may be while being mobbed by Wraiths - you’ll see an odd symbol on the wall, which Geralt will comment on.
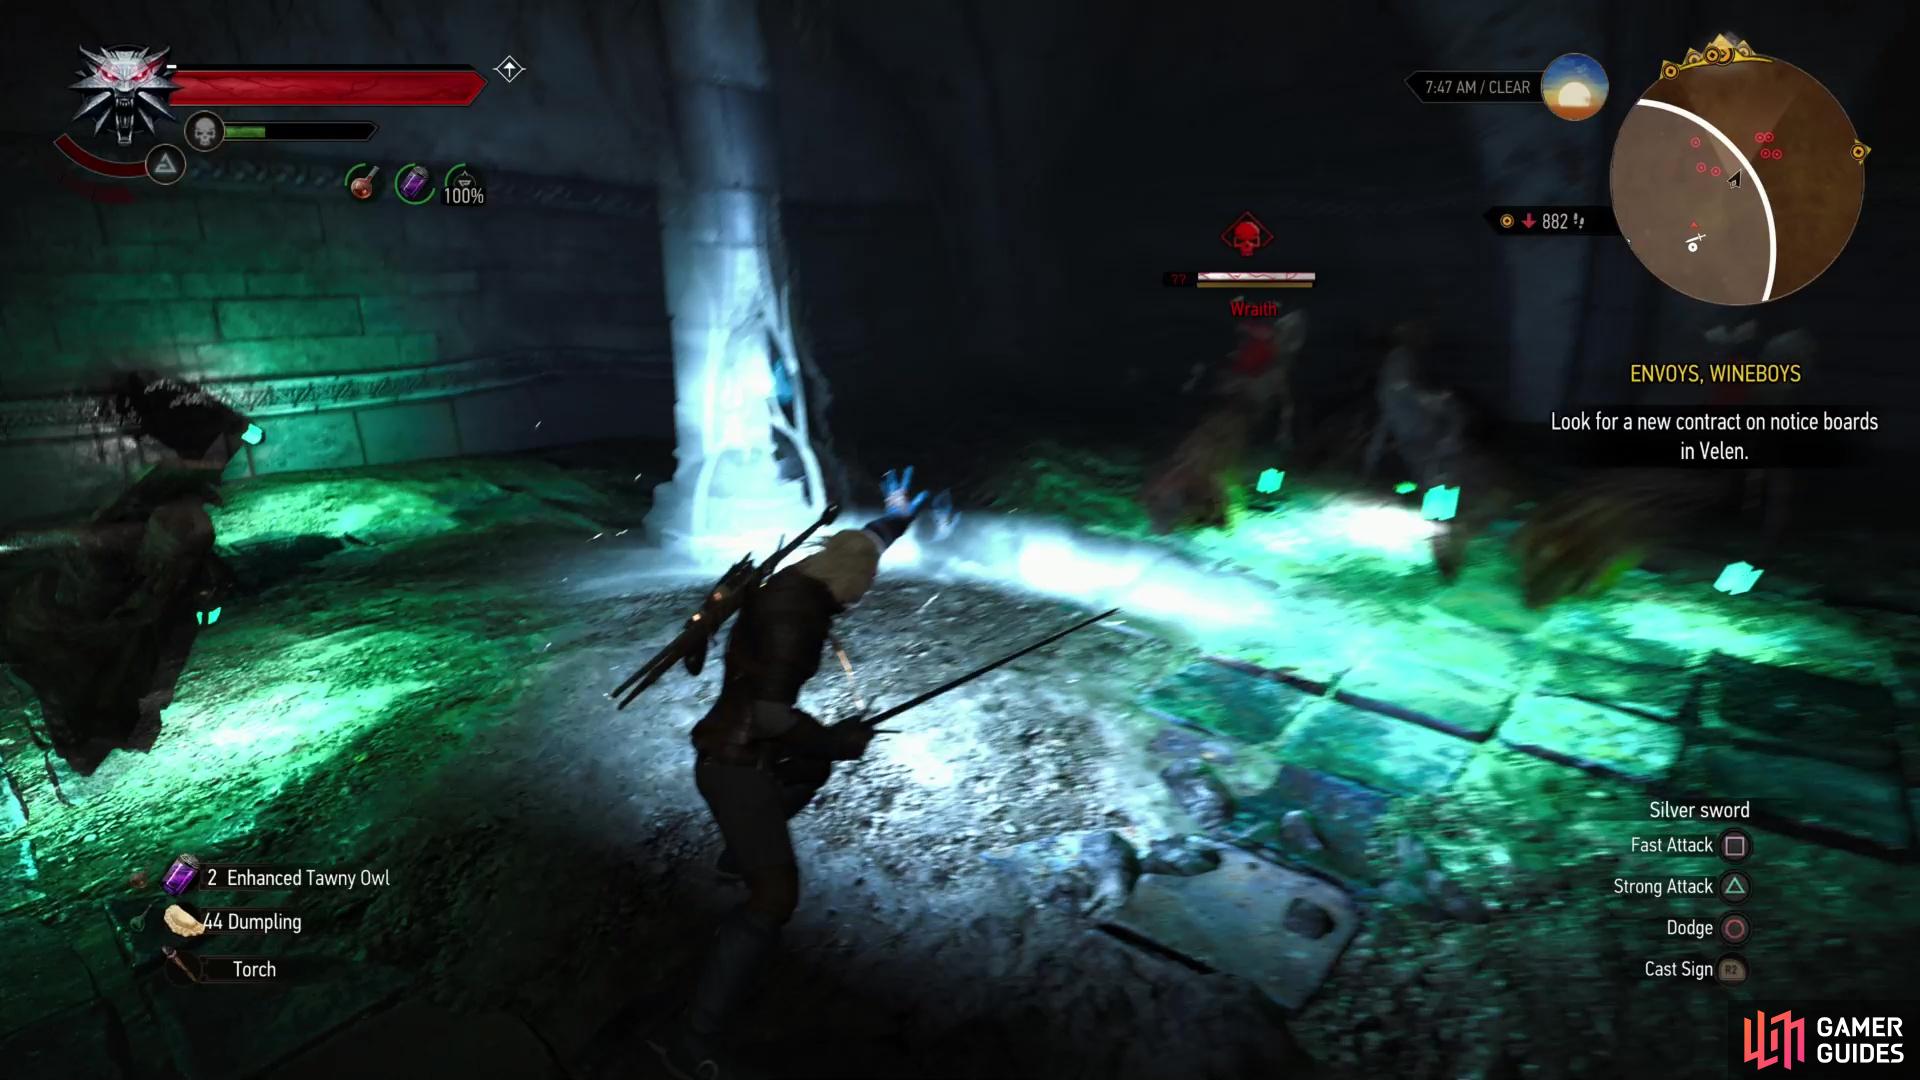
When you’re ready to escape, hit two crystals with Aard,
to conjure a portal you can use to escape.
Speculate on the meaning of this symbol all you please, but when you’re ready to escape the dungeon you’ll need to target two pillars on either side of the room, both of which bear crystals. Charge them with Aard, and when both are lit a portal will appear in the center of the chamber. It can be a nuisance aiming at the pillars with so many Wraiths around, so your best bet is to dodge behind a pillar until the Wraiths chase you there, then slip around to the side bearing the crystal and try to hit it - or rather, the nearby Wraiths - with Aard. With any luck you’ll catch the crystal in the blast and charge it up.
Once you go through the portal you’ll appear on the roof of the ruins north of the Destroyed Bastion, where the Guarded Treasure event was earlier. If you wish to try your luck again, you can head through the portal any time you wish to explore the Destroyed Bastion’s dungeon, but you’ll have to deal with invulnerable Wraiths and charge the crystals with Aard each time, if you wish to escape.
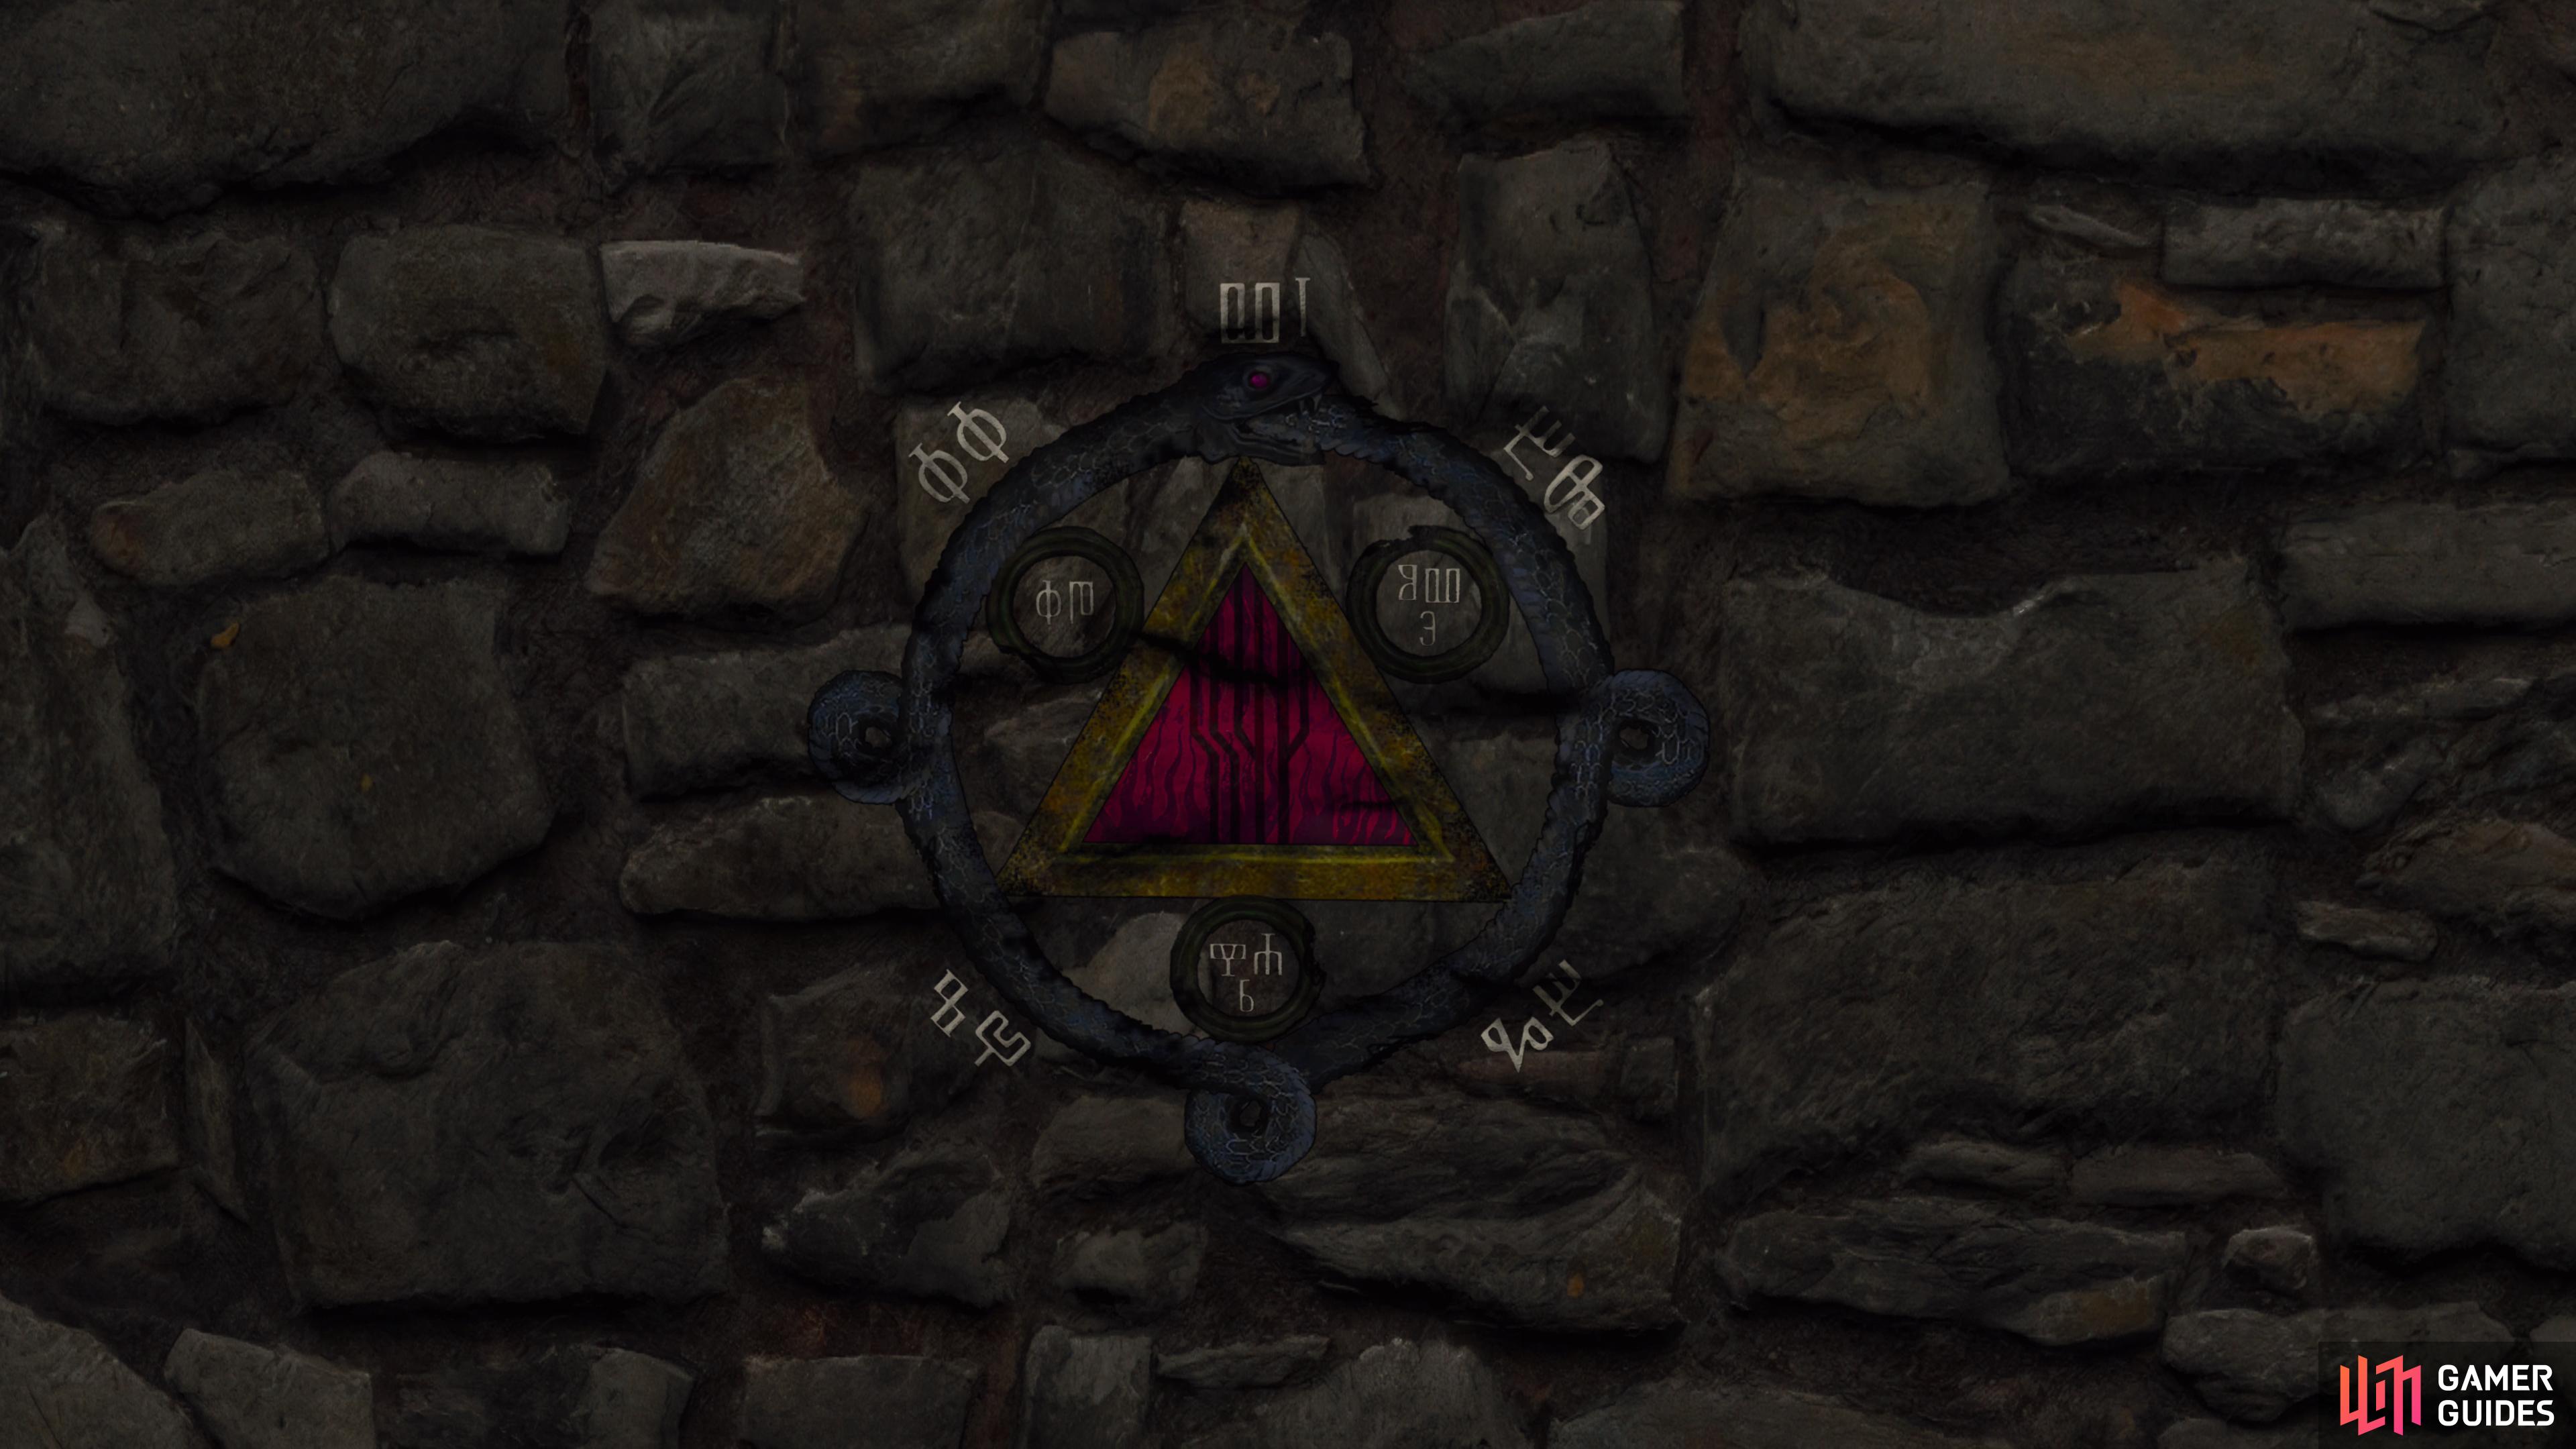
A close up of the Easter Egg at the bottom of the Destroyed Bastion.
No Comments