
When Geralt stumbles upon a villager from ![]() Lurtch wailing about his beloved pig being cooked by bandits, it seems like a normal scene in war-torn Velen. The strong take what they can, and the weak suffer what they must. Should Geralt intervene, however, he’ll discover the entire village is oddly populated by swine, which promises to be more than garden-variety livestock theft. This page will provide a walkthrough for the secondary quest Fool’s Gold in The Witcher 3.
Lurtch wailing about his beloved pig being cooked by bandits, it seems like a normal scene in war-torn Velen. The strong take what they can, and the weak suffer what they must. Should Geralt intervene, however, he’ll discover the entire village is oddly populated by swine, which promises to be more than garden-variety livestock theft. This page will provide a walkthrough for the secondary quest Fool’s Gold in The Witcher 3.
Quest Objectives
| Quick Search |
|---|
| Starting Fool’s Gold |
| Defeat the Bandits and Examine the Pigs |
| Explore the Hog Hut |
| Search the Shrine |
| Bring the Stolen Gold Back to the Hog House |
Starting Fool’s Gold
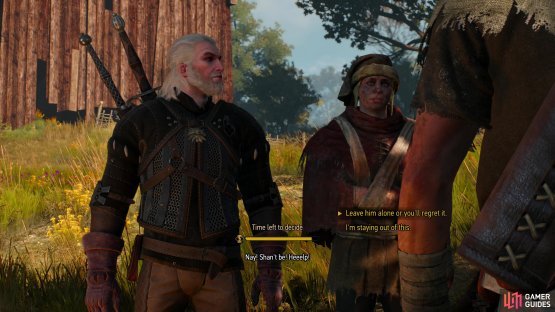
To start this quest, you’ll need to visit the village of Lurtch, which can be found east of Lindevale. When you arrive, a wounded dimwit named Yontek will approach and start wailing that some bandits have taken his Yagoda. Talk to the Bandits and they’ll prove themselves surprisingly friendly, to Geralt, at least, offering him some of the pig they’re cooking. Respond however you wish and the pleasantries will be interrupted by Yontek - this pig is apparently his Yogoda, and these wazzacks roasted her! He’s really attached to this pig, eh? The Bandits, obviously fed up with Yontek’s antics, prepare to attack the peasant, prompting a timed decision. Pick ”I’m staying out of this.” and Yontek will be killed, and this quest will never begin. Pick ”Leave him alone or you’ll regret it.” to pick a fight with the Bandits (Lv5), which starts this quest.
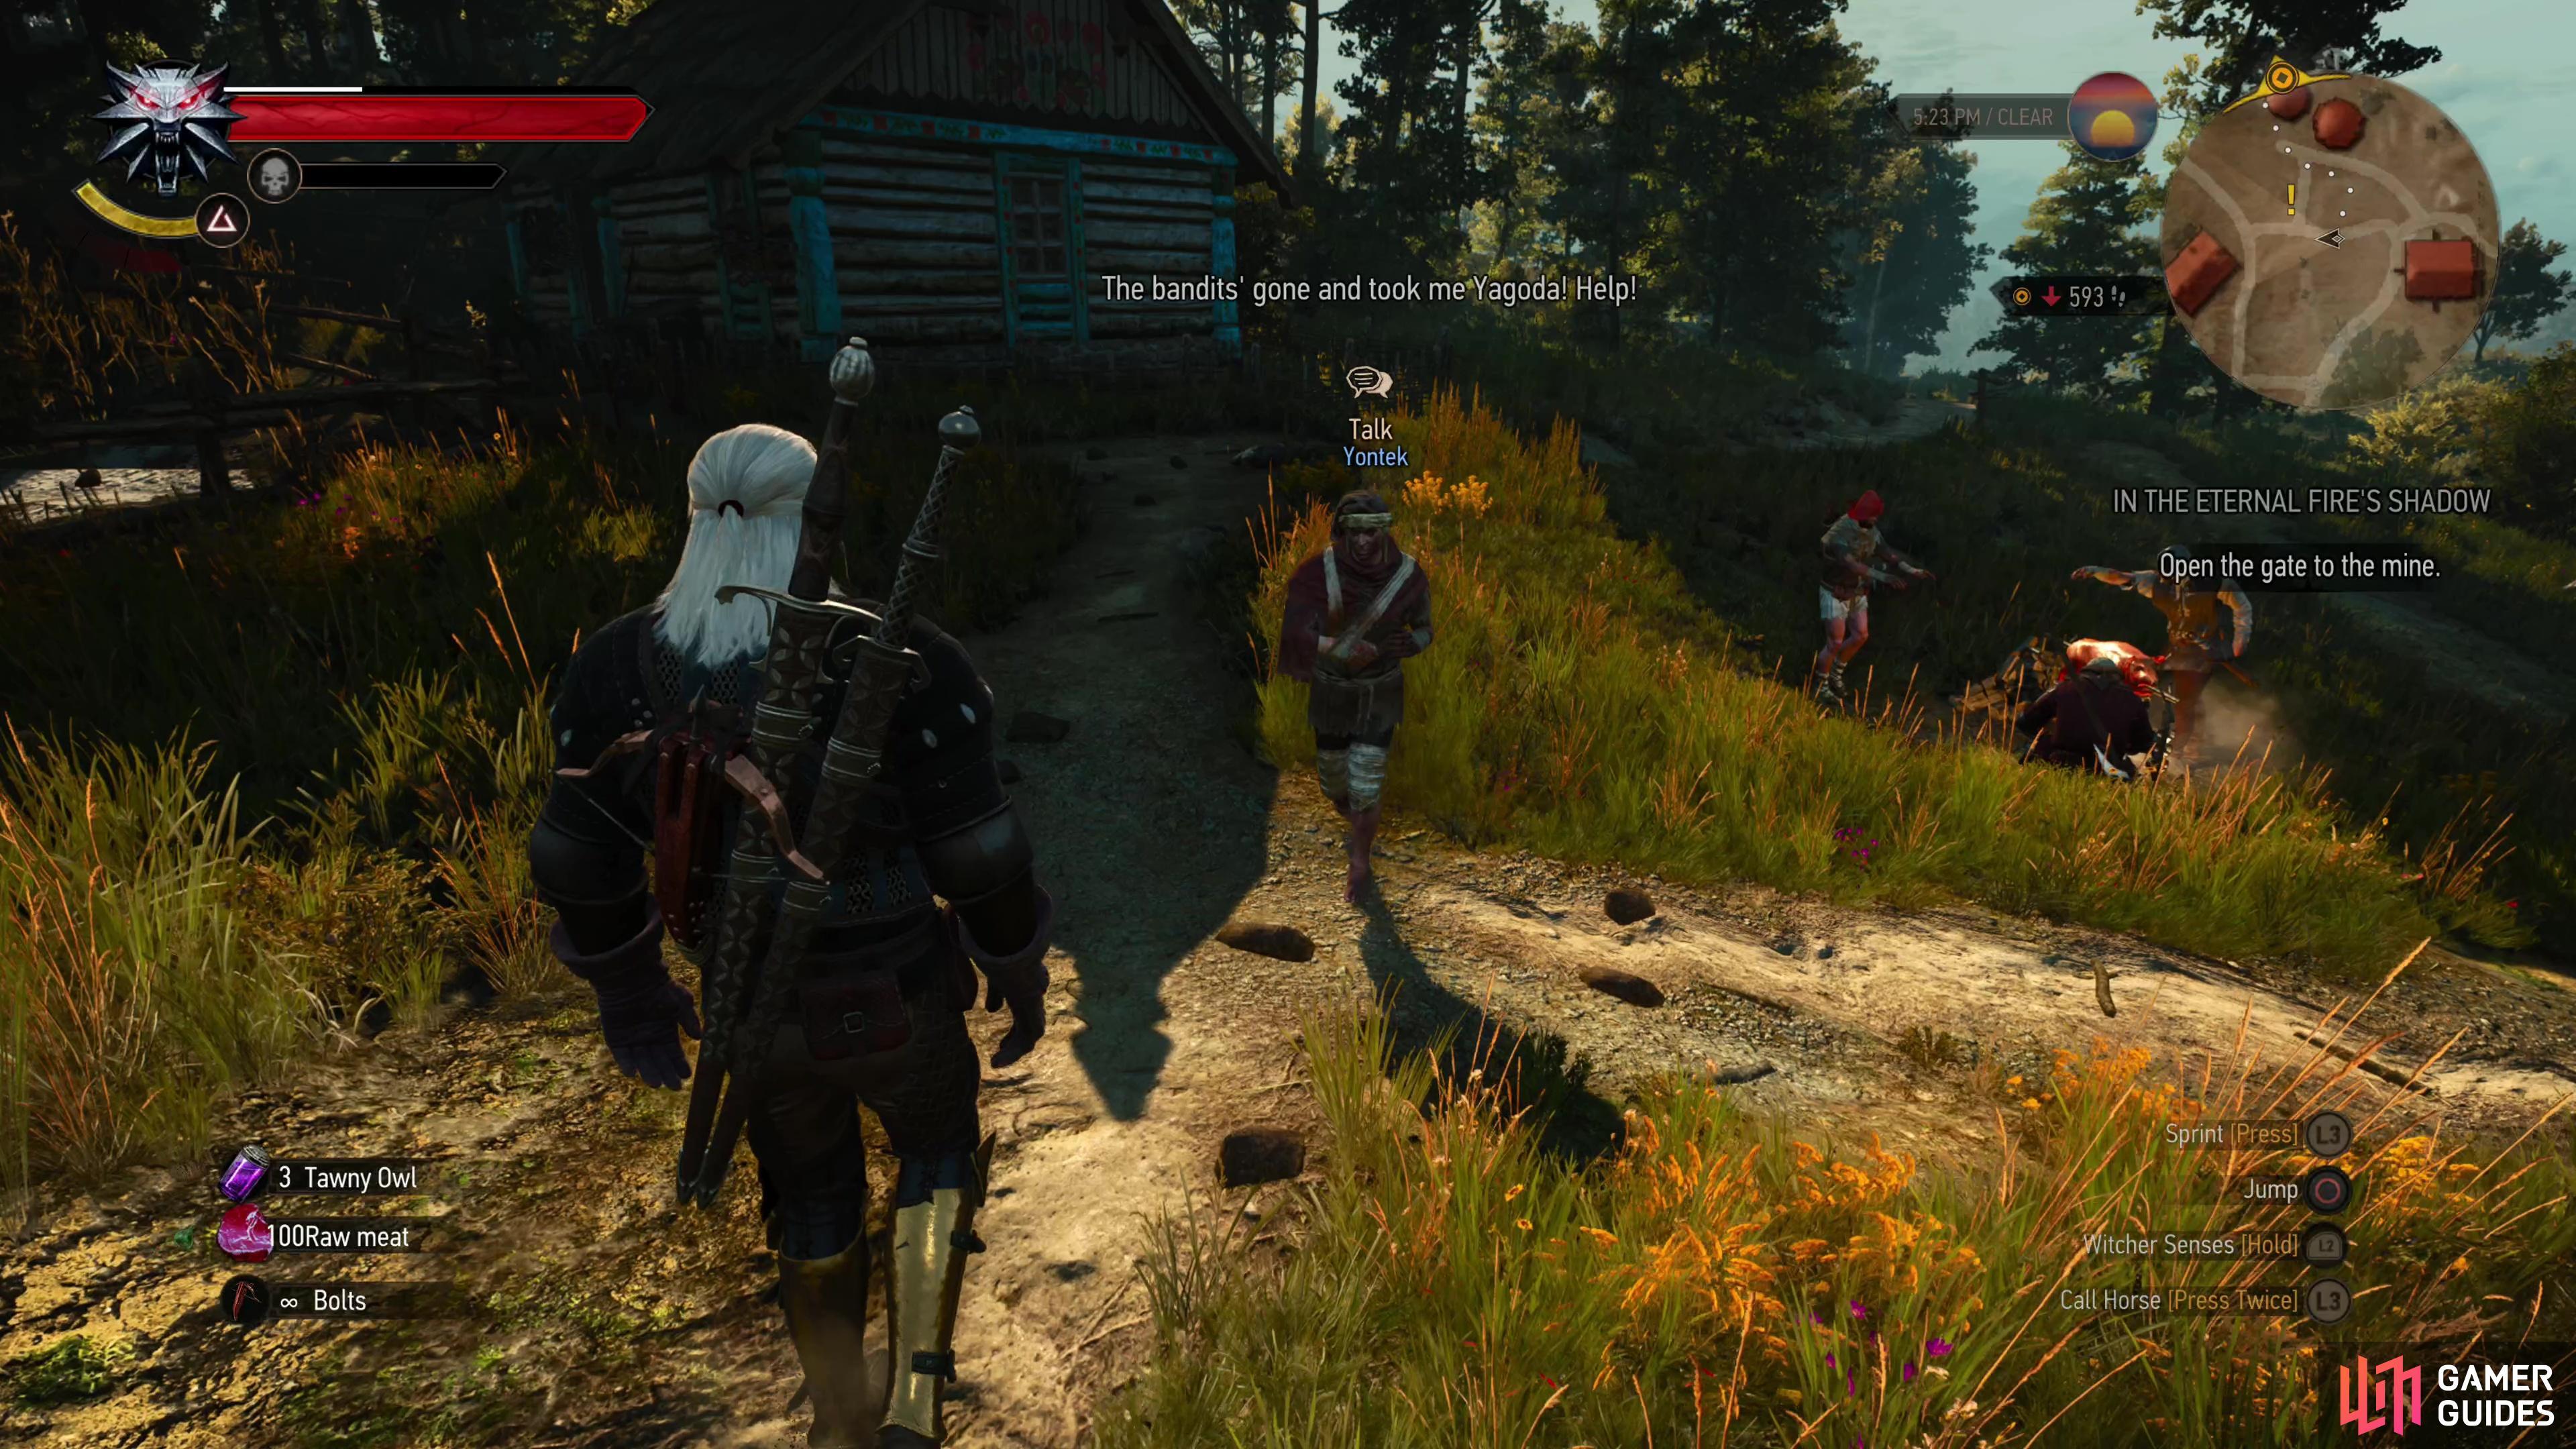

(1 of 2) Explore Lurtch and a villager named Yontek will approach, complaining about his pig, Yagoda.

Explore Lurtch and a villager named Yontek will approach, complaining about his pig, Yagoda. (left), Approach some bandits and pick the option “Leave him alone or you’ll regret it.” to pick a fight and start this quest. (right)
Defeat the Bandits and Examine the Pigs
Kill the Bandits - two are armed with one-handed weapons and another with a two-handed axe - after which Geralt will automatically strike up a conversation with Yontek, who has resumed fussing over Yagoda. The mentally challenged peasant insists the villagers are home, while also insisting they’ve been afflicted with “piggy magic”. Deplete Yontek’s dialog options and Geralt will resolve to investigate these magic pigs… with a tired sigh that indicates this is likely not the first time he’s had to investigate some peasant’s wondrous pig.
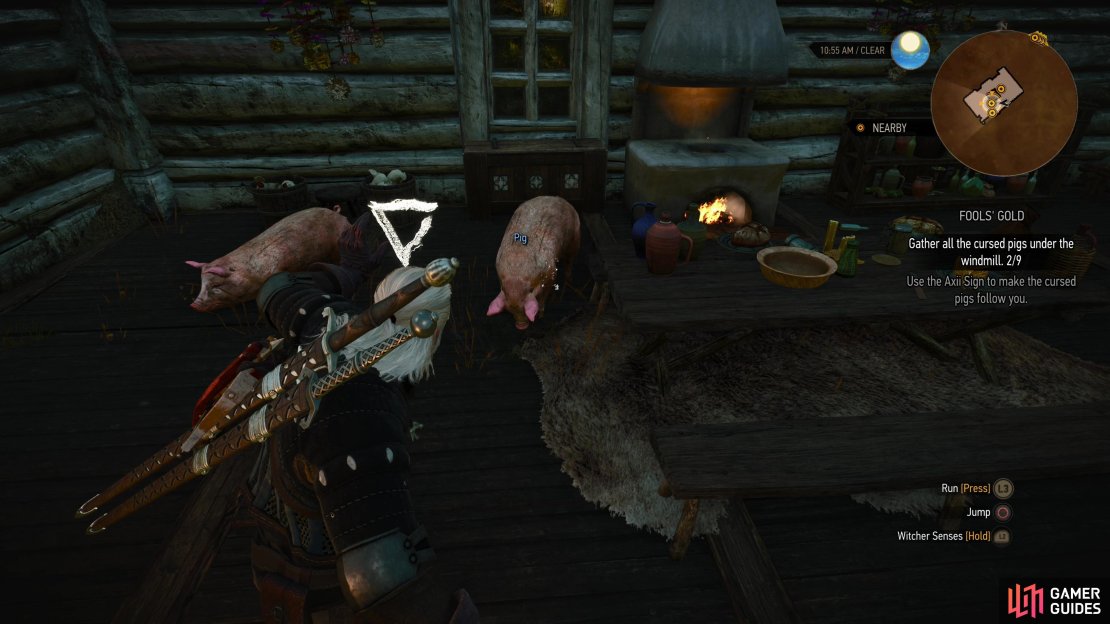
Enter one of the houses and sure enough you’ll find pigs inside. Use your Witcher senses to examine them and Geralt will determine - thanks to his magic-detecting medallion - that the pigs are indeed enchanted. Talk to Yontek again and he’ll give you a key which he claims opens some “hog hut”, finally elaborating crudely that some sorcery turned villagers into swine. Unfortunately his newfound lucidity doesn’t extend to the location of this hog hut, but you’ll get an accurate quest marker nonetheless.
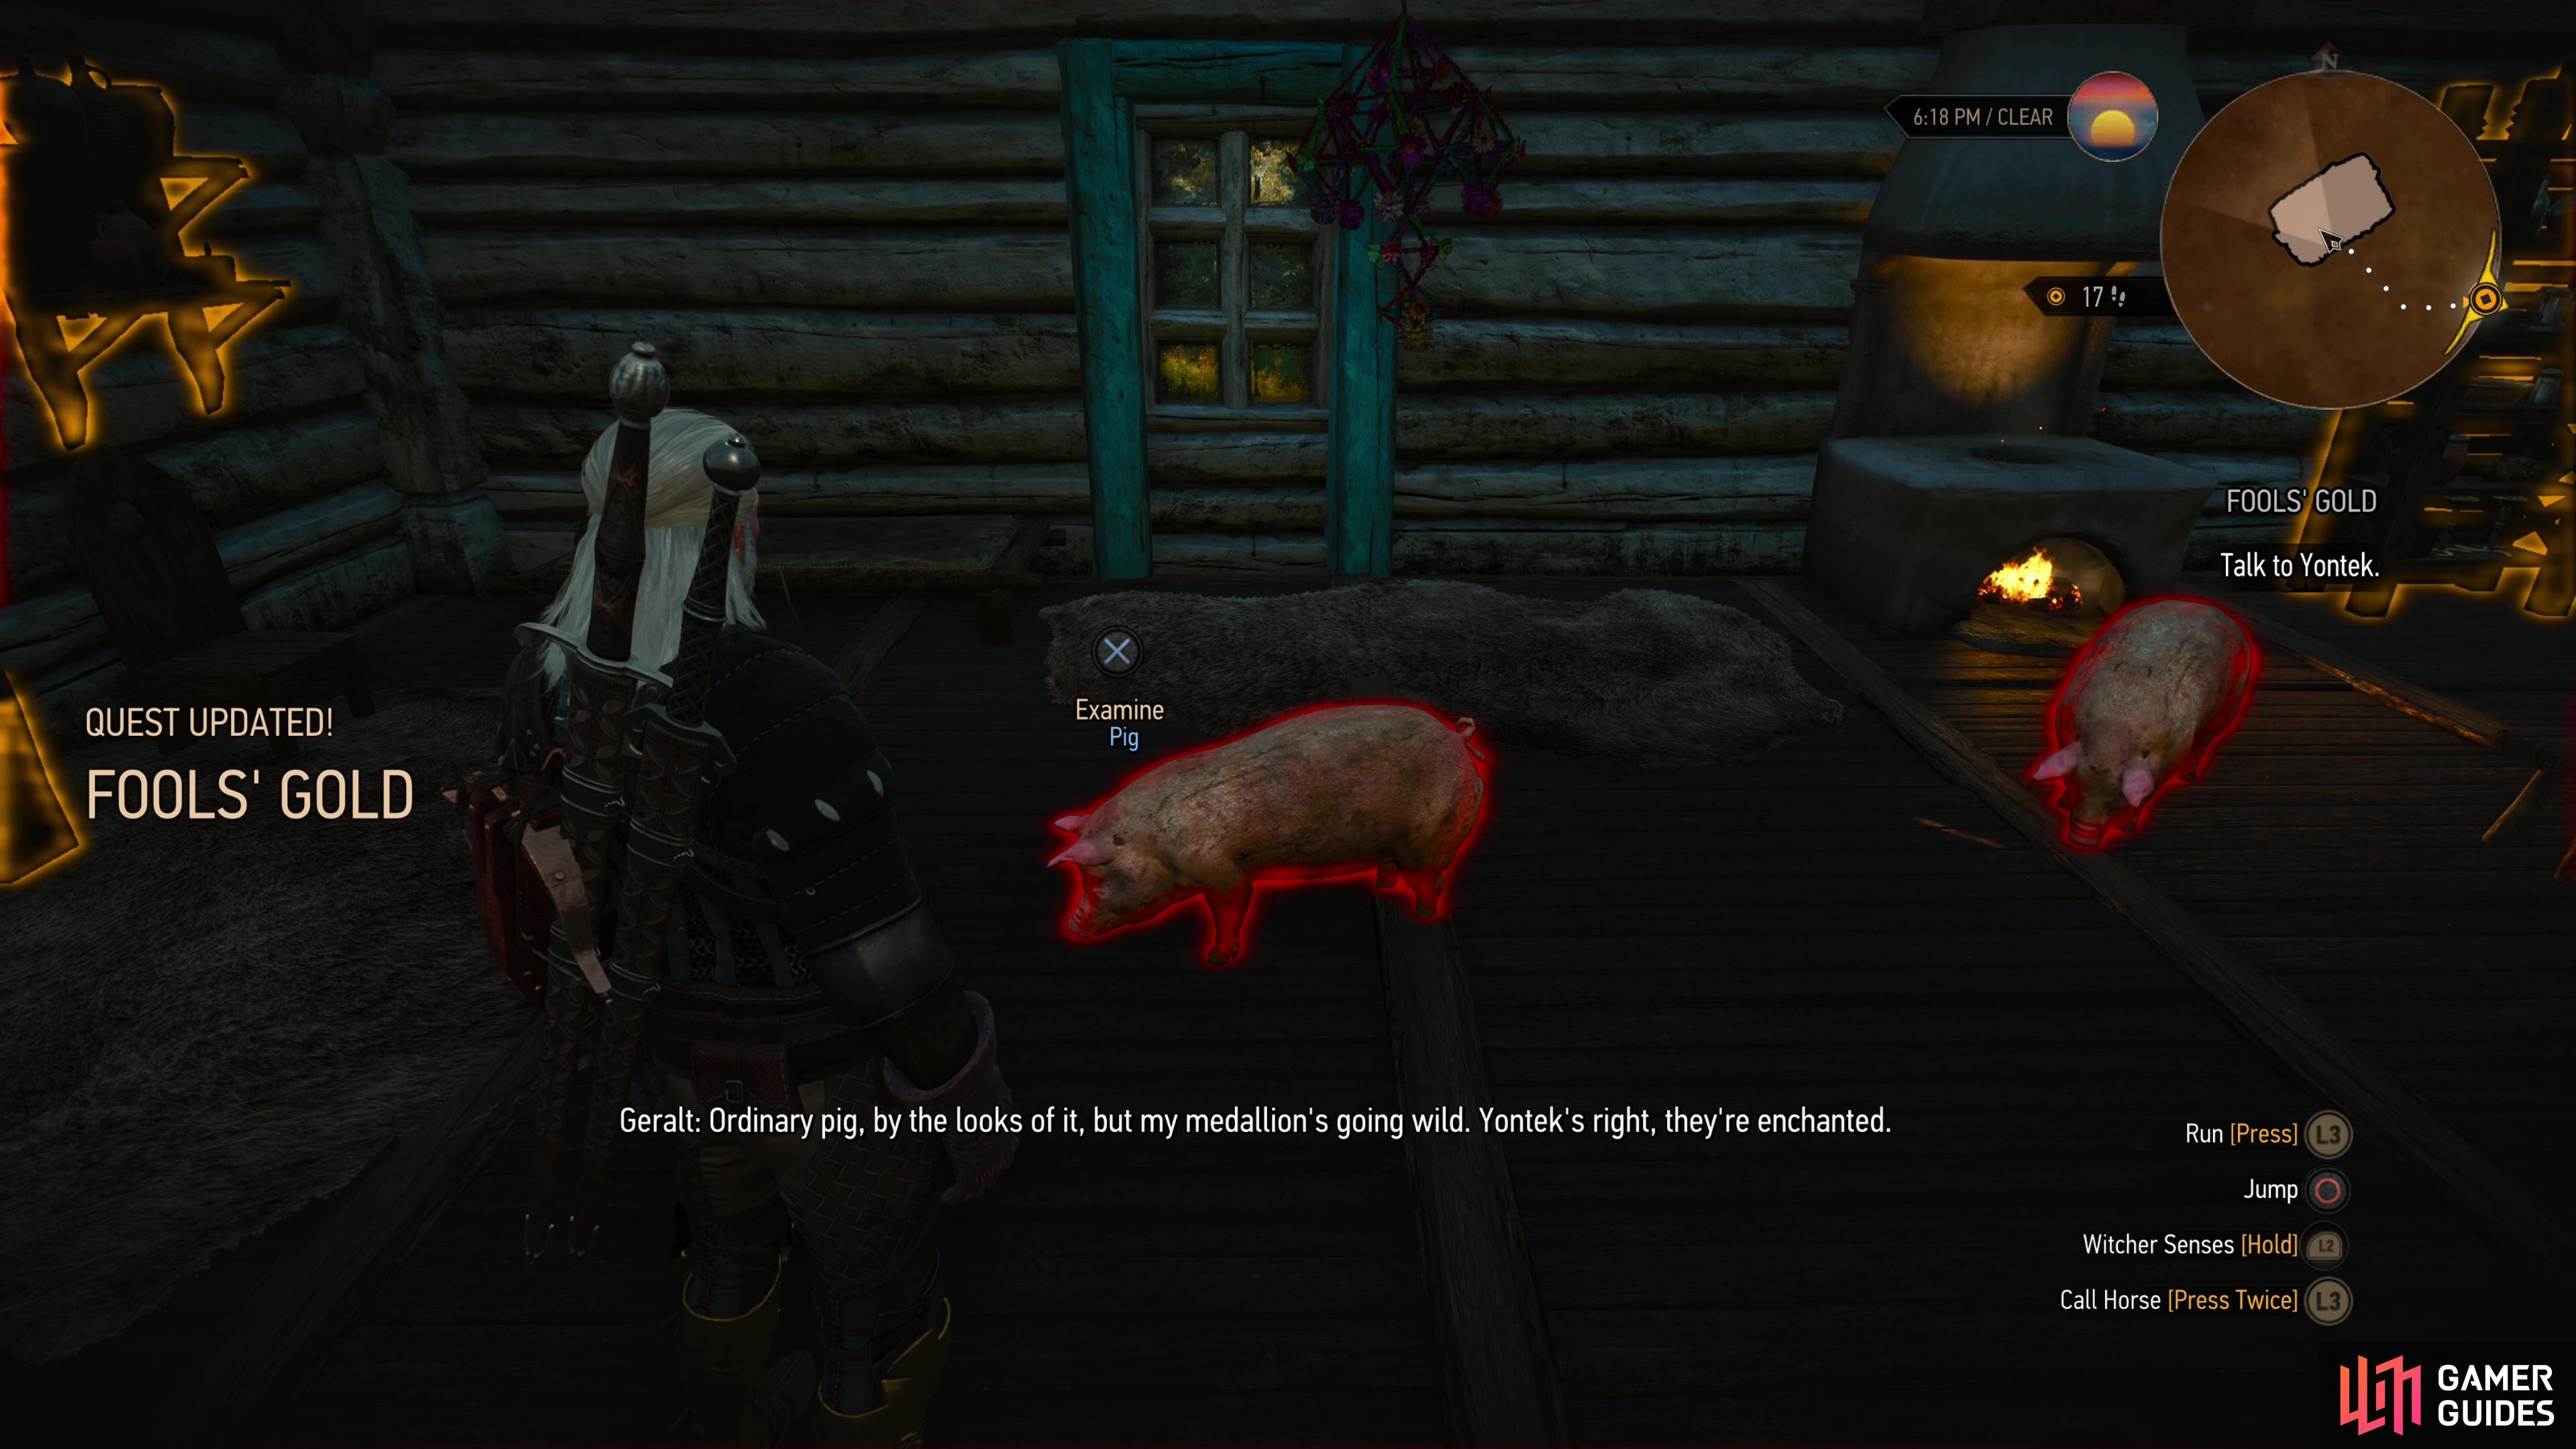


(1 of 2) At Yontek’s prompting, use your Witcher senses and examine the pigs,

At Yontek’s prompting, use your Witcher senses and examine the pigs, (left), then talk to Yontek again and he’ll give you a key to the “hog hut”. (right)
Explore the Hog Hut
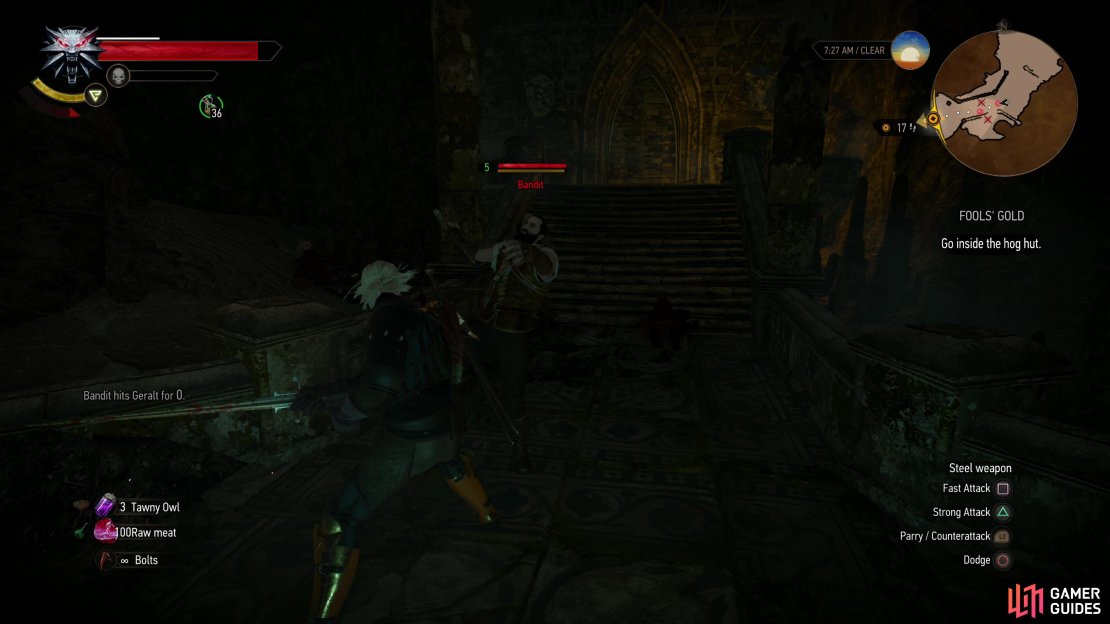
Loot the village if you wish - the ensorcelled pigs are in no condition to stop you - then make your way southeast towards the Hog Hut, which is located between Reardon Manor and Toderas. Be wary of ![]() Nekkers as you go, and when you arrive you’ll need to dispatch several Bandits (Lv6) standing outside a cave, which is apparently the hog hut you’re looking for.
Nekkers as you go, and when you arrive you’ll need to dispatch several Bandits (Lv6) standing outside a cave, which is apparently the hog hut you’re looking for.
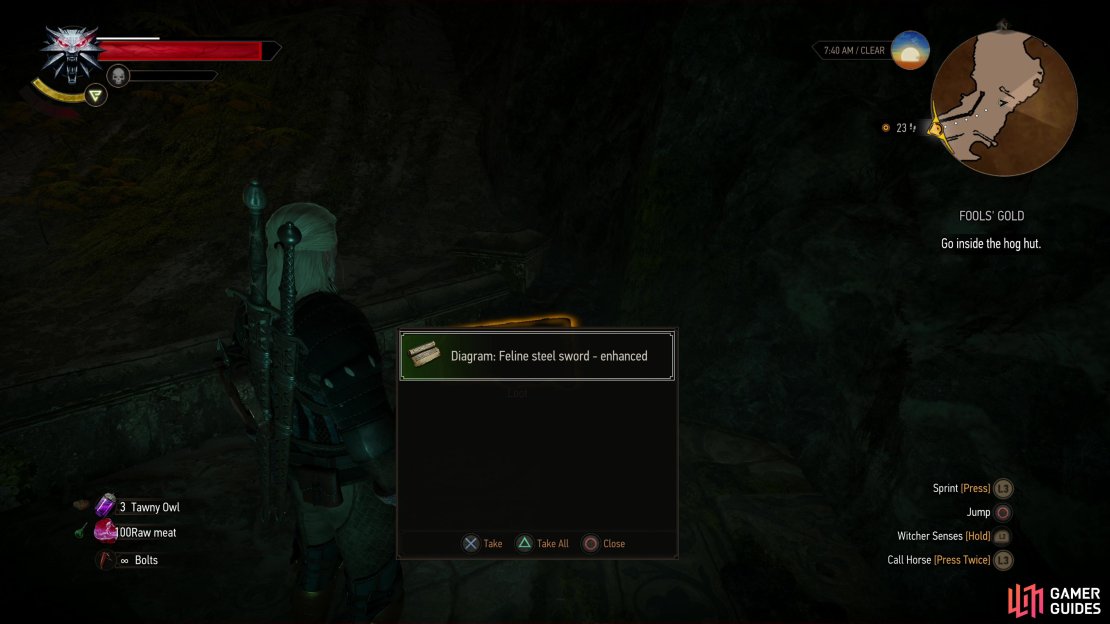
Enter the cave and make your way southwest to the end to find more Bandits (Lv6) futilely fussing over a doorway. Kill them, but before you go up to the doorway they were stumped by, explore to the east to find some chests against the cave wall, one of which contains the ![]() Diagram: Feline Steel Sword - Enhanced. No reason you shouldn’t pick this up now! Once done, head up to the doorway and Geralt will use the key Yontek gave him, and sure enough, it works.
Diagram: Feline Steel Sword - Enhanced. No reason you shouldn’t pick this up now! Once done, head up to the doorway and Geralt will use the key Yontek gave him, and sure enough, it works.


(1 of 4) The “hog hut” can be found southeast of Lurtch,
Search the Shrine
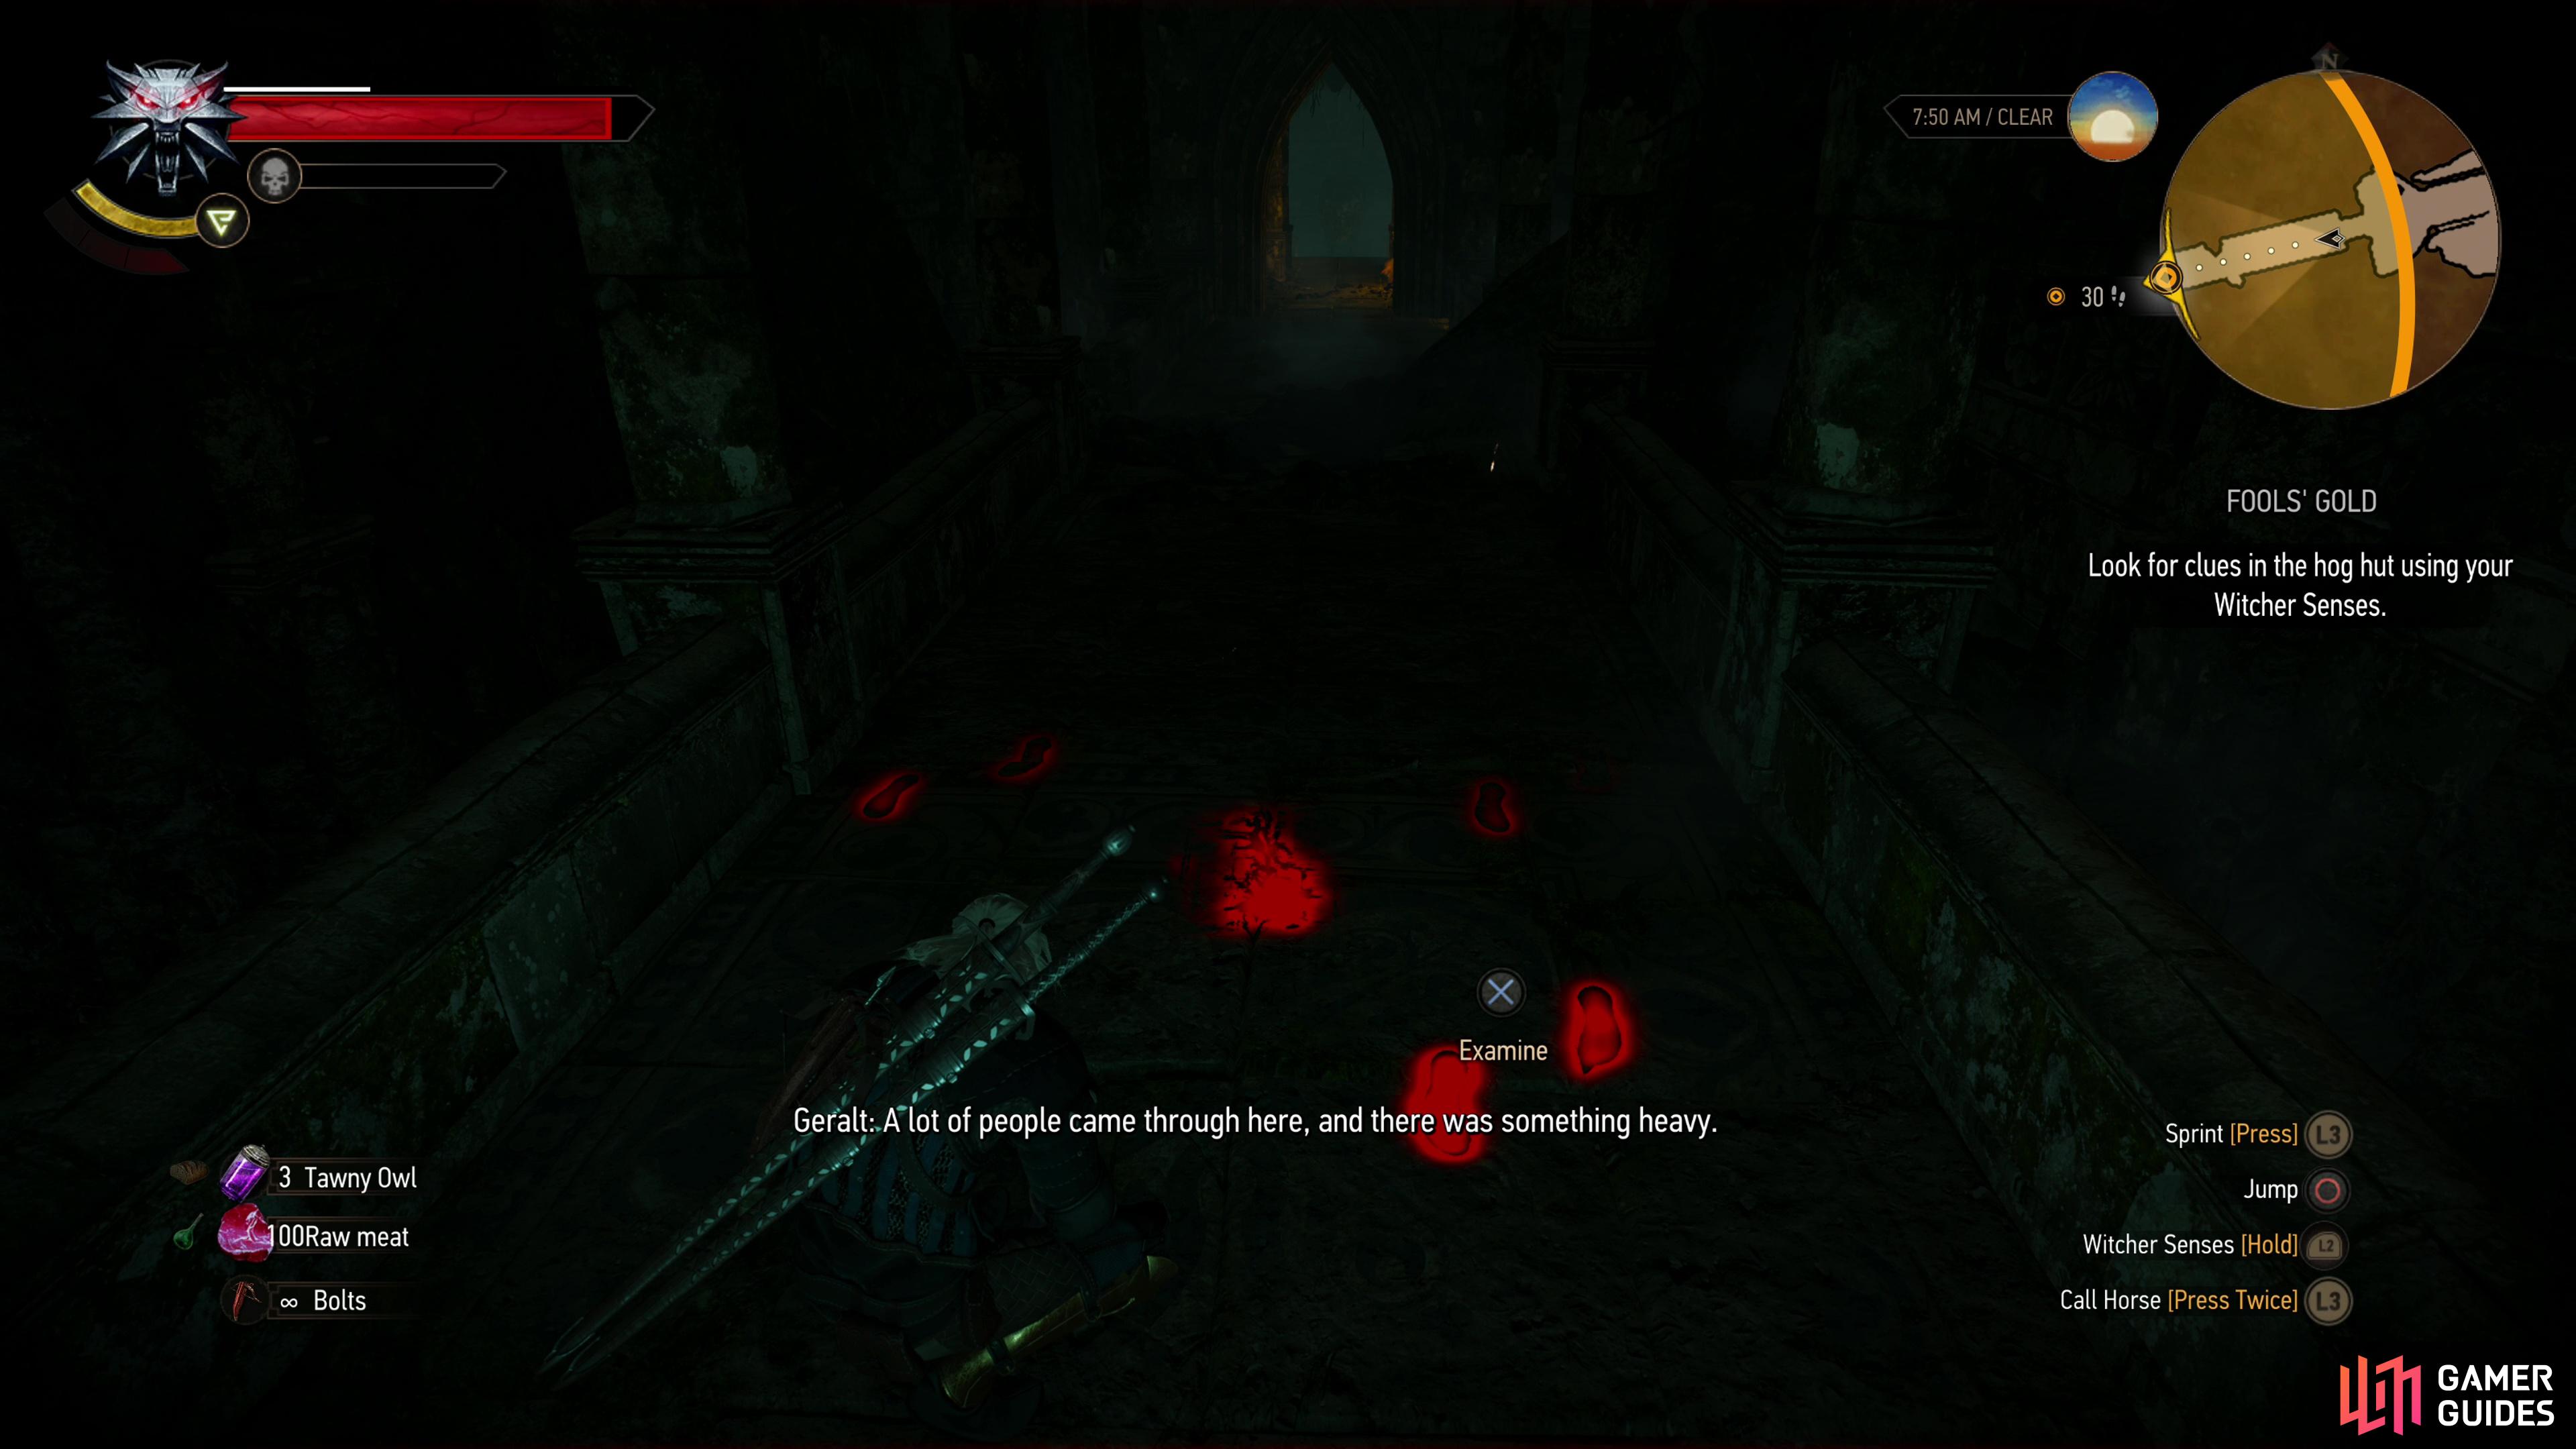
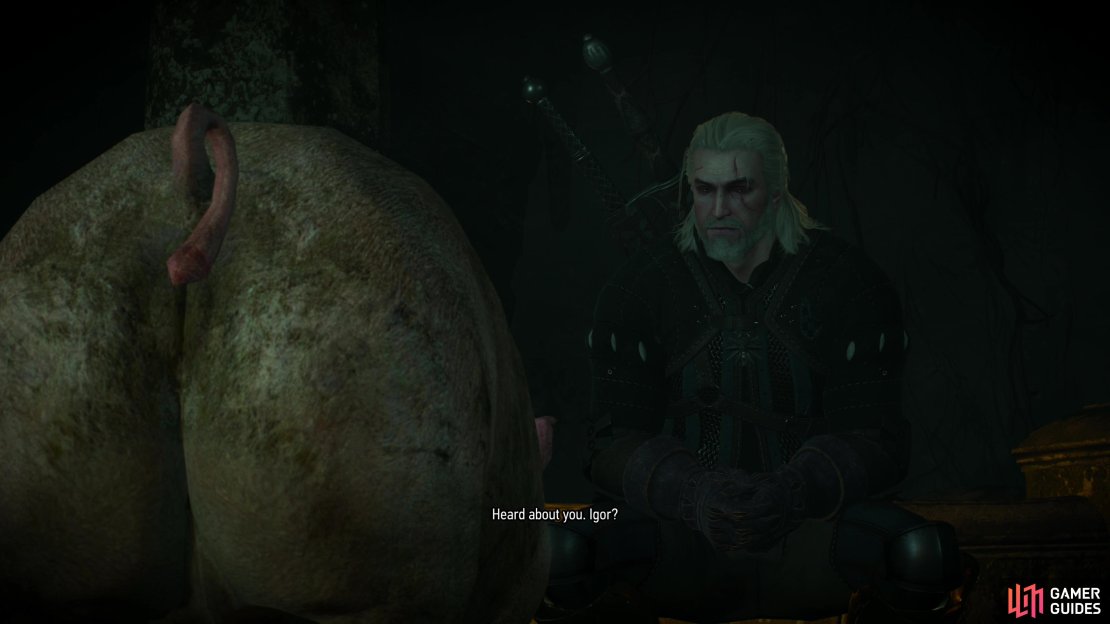
Go through the portal that appeared after using the key and you’ll find yourself in some ruins to the southwest. Apparently this portal, for all its glowing lights and magic, just functions like a door? Whatever, examine the tracks on the floor, then continue southwest until you reach a larger chamber, where you’ll find a pig. Interact with the animal and you’ll find the beast is at least as clever as Yontek, as it understands you and can respond to Geralt’s queries effectively enough to allow Geralt to identify the hog as Igor, the village herbalist.
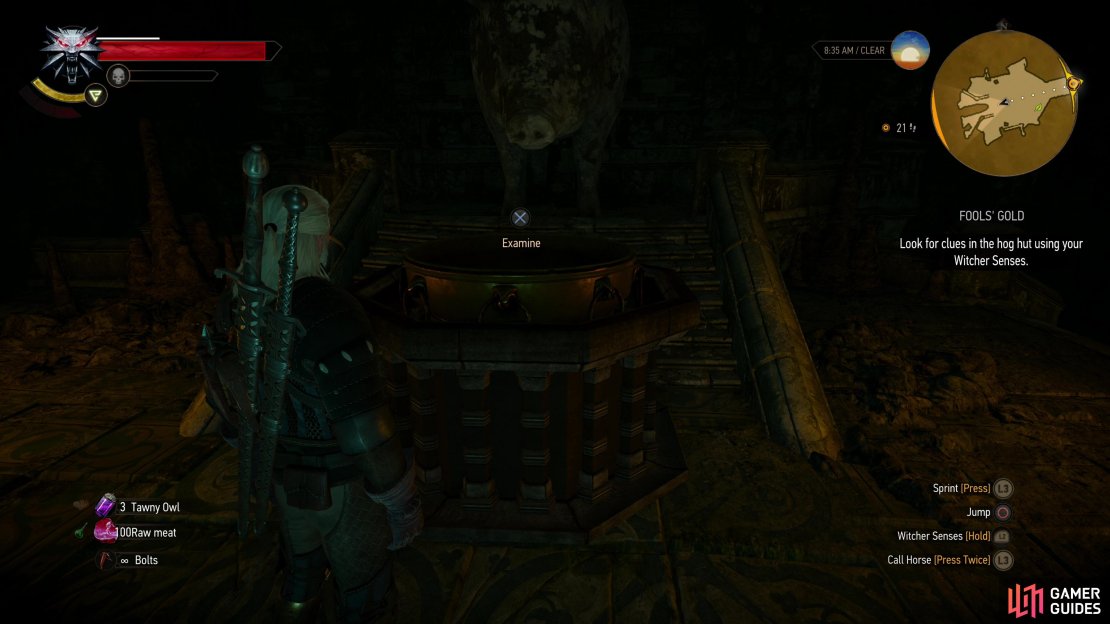
Exhaust the pig’s dialog options (it doesn’t matter if you feed the pig or not), then head deeper into the chamber, where you’ll find a nearly empty offering bowl in front of a pig statue. Examine the offering bowl and it won’t take a genius to piece together what happened, but to be sure, talk to the pig again and Geralt will confirm his suspicions. Before you leave, however, explore the water to the northwest and southeast, as there are submerged chests you can loot. This plundering doesn’t offend whatever piggy-gods cursed the villagers from Lurtch.

(1 of 3) Go through the portal and examine some tracks,
Bring the Stolen Gold Back to the Hog House
Leave the Hog House and return to Lurtch, where you’ll find that a new threat has come snarling out of the wilderness - two ![]() Wolves (Lv5) and a Warg (Lv5) threaten the pig-villagers, while Yontek wails uselessly. Sate the hound’s hunger with some steel, then talk to Yontek, after which he’ll go to fetch the gold while Geralt is left with the task of herding the pigs. To do this, enter the three houses where the pigs dwell and hit one of them with
Wolves (Lv5) and a Warg (Lv5) threaten the pig-villagers, while Yontek wails uselessly. Sate the hound’s hunger with some steel, then talk to Yontek, after which he’ll go to fetch the gold while Geralt is left with the task of herding the pigs. To do this, enter the three houses where the pigs dwell and hit one of them with ![]() Axii to get them moving, then escort them to the windmill. Don’t worry, you don’t have to ring a bell or anything this time - once the swine are Axii’d, they should take care of the rest themselves, even if it takes them a bit to shuffle to the destination.
Axii to get them moving, then escort them to the windmill. Don’t worry, you don’t have to ring a bell or anything this time - once the swine are Axii’d, they should take care of the rest themselves, even if it takes them a bit to shuffle to the destination.


(1 of 3) Discourage some Wolves and a Warg seeking some bacon in Lurtch,
Gather the pigs at the windmill and after a chat with Yontek you will all set out for the hog hut again, with Geralt tasked with guarding the pigs and Yontek with ferrying the treasure. Obviously this wouldn’t need to happen if you weren’t going to get attacked, and sure enough, en route to your destination you’ll be harassed by several ![]() Nekkers (Lv6) led by a Nekker Warrior (Lv12). They won’t focus on the pigs or Yontek at all, so you don’t need to worry about them, just keep yourself alive and once the Nekkers are vanquished you’ll automatically travel the rest of the way back to the pig shrine.
Nekkers (Lv6) led by a Nekker Warrior (Lv12). They won’t focus on the pigs or Yontek at all, so you don’t need to worry about them, just keep yourself alive and once the Nekkers are vanquished you’ll automatically travel the rest of the way back to the pig shrine.
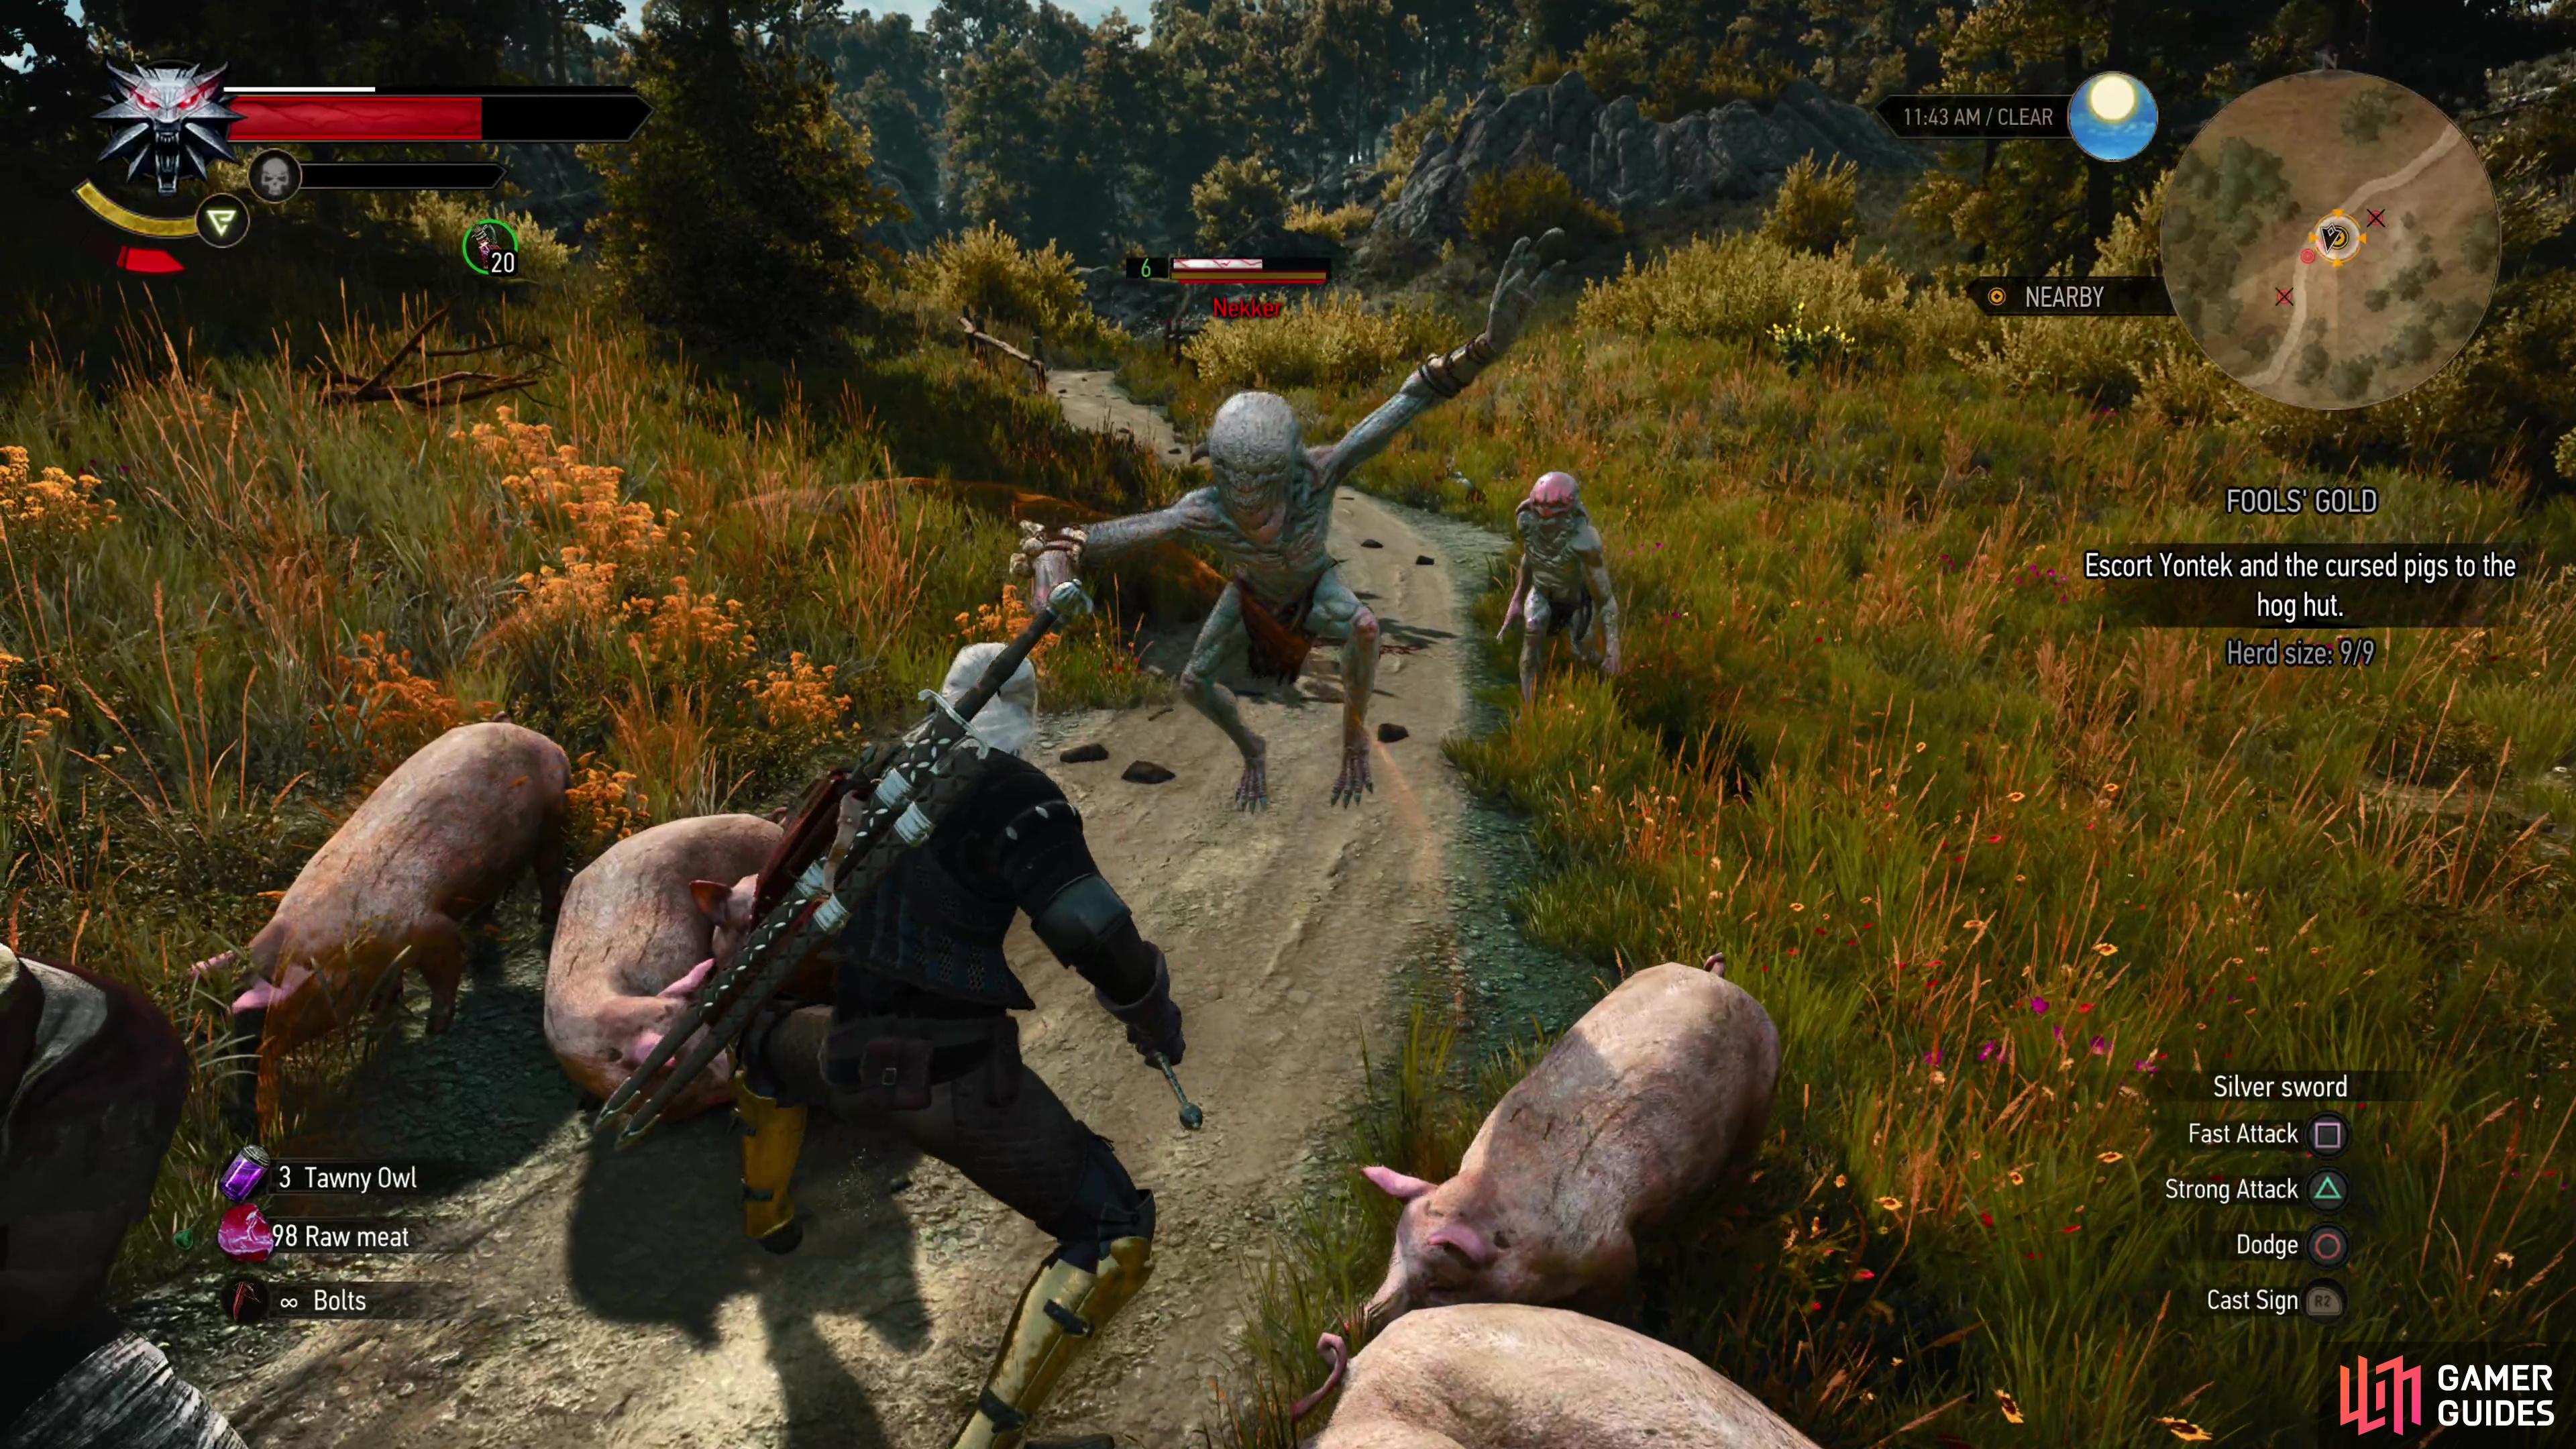


(1 of 2) Defend the pig-villagers from some Nekkers,
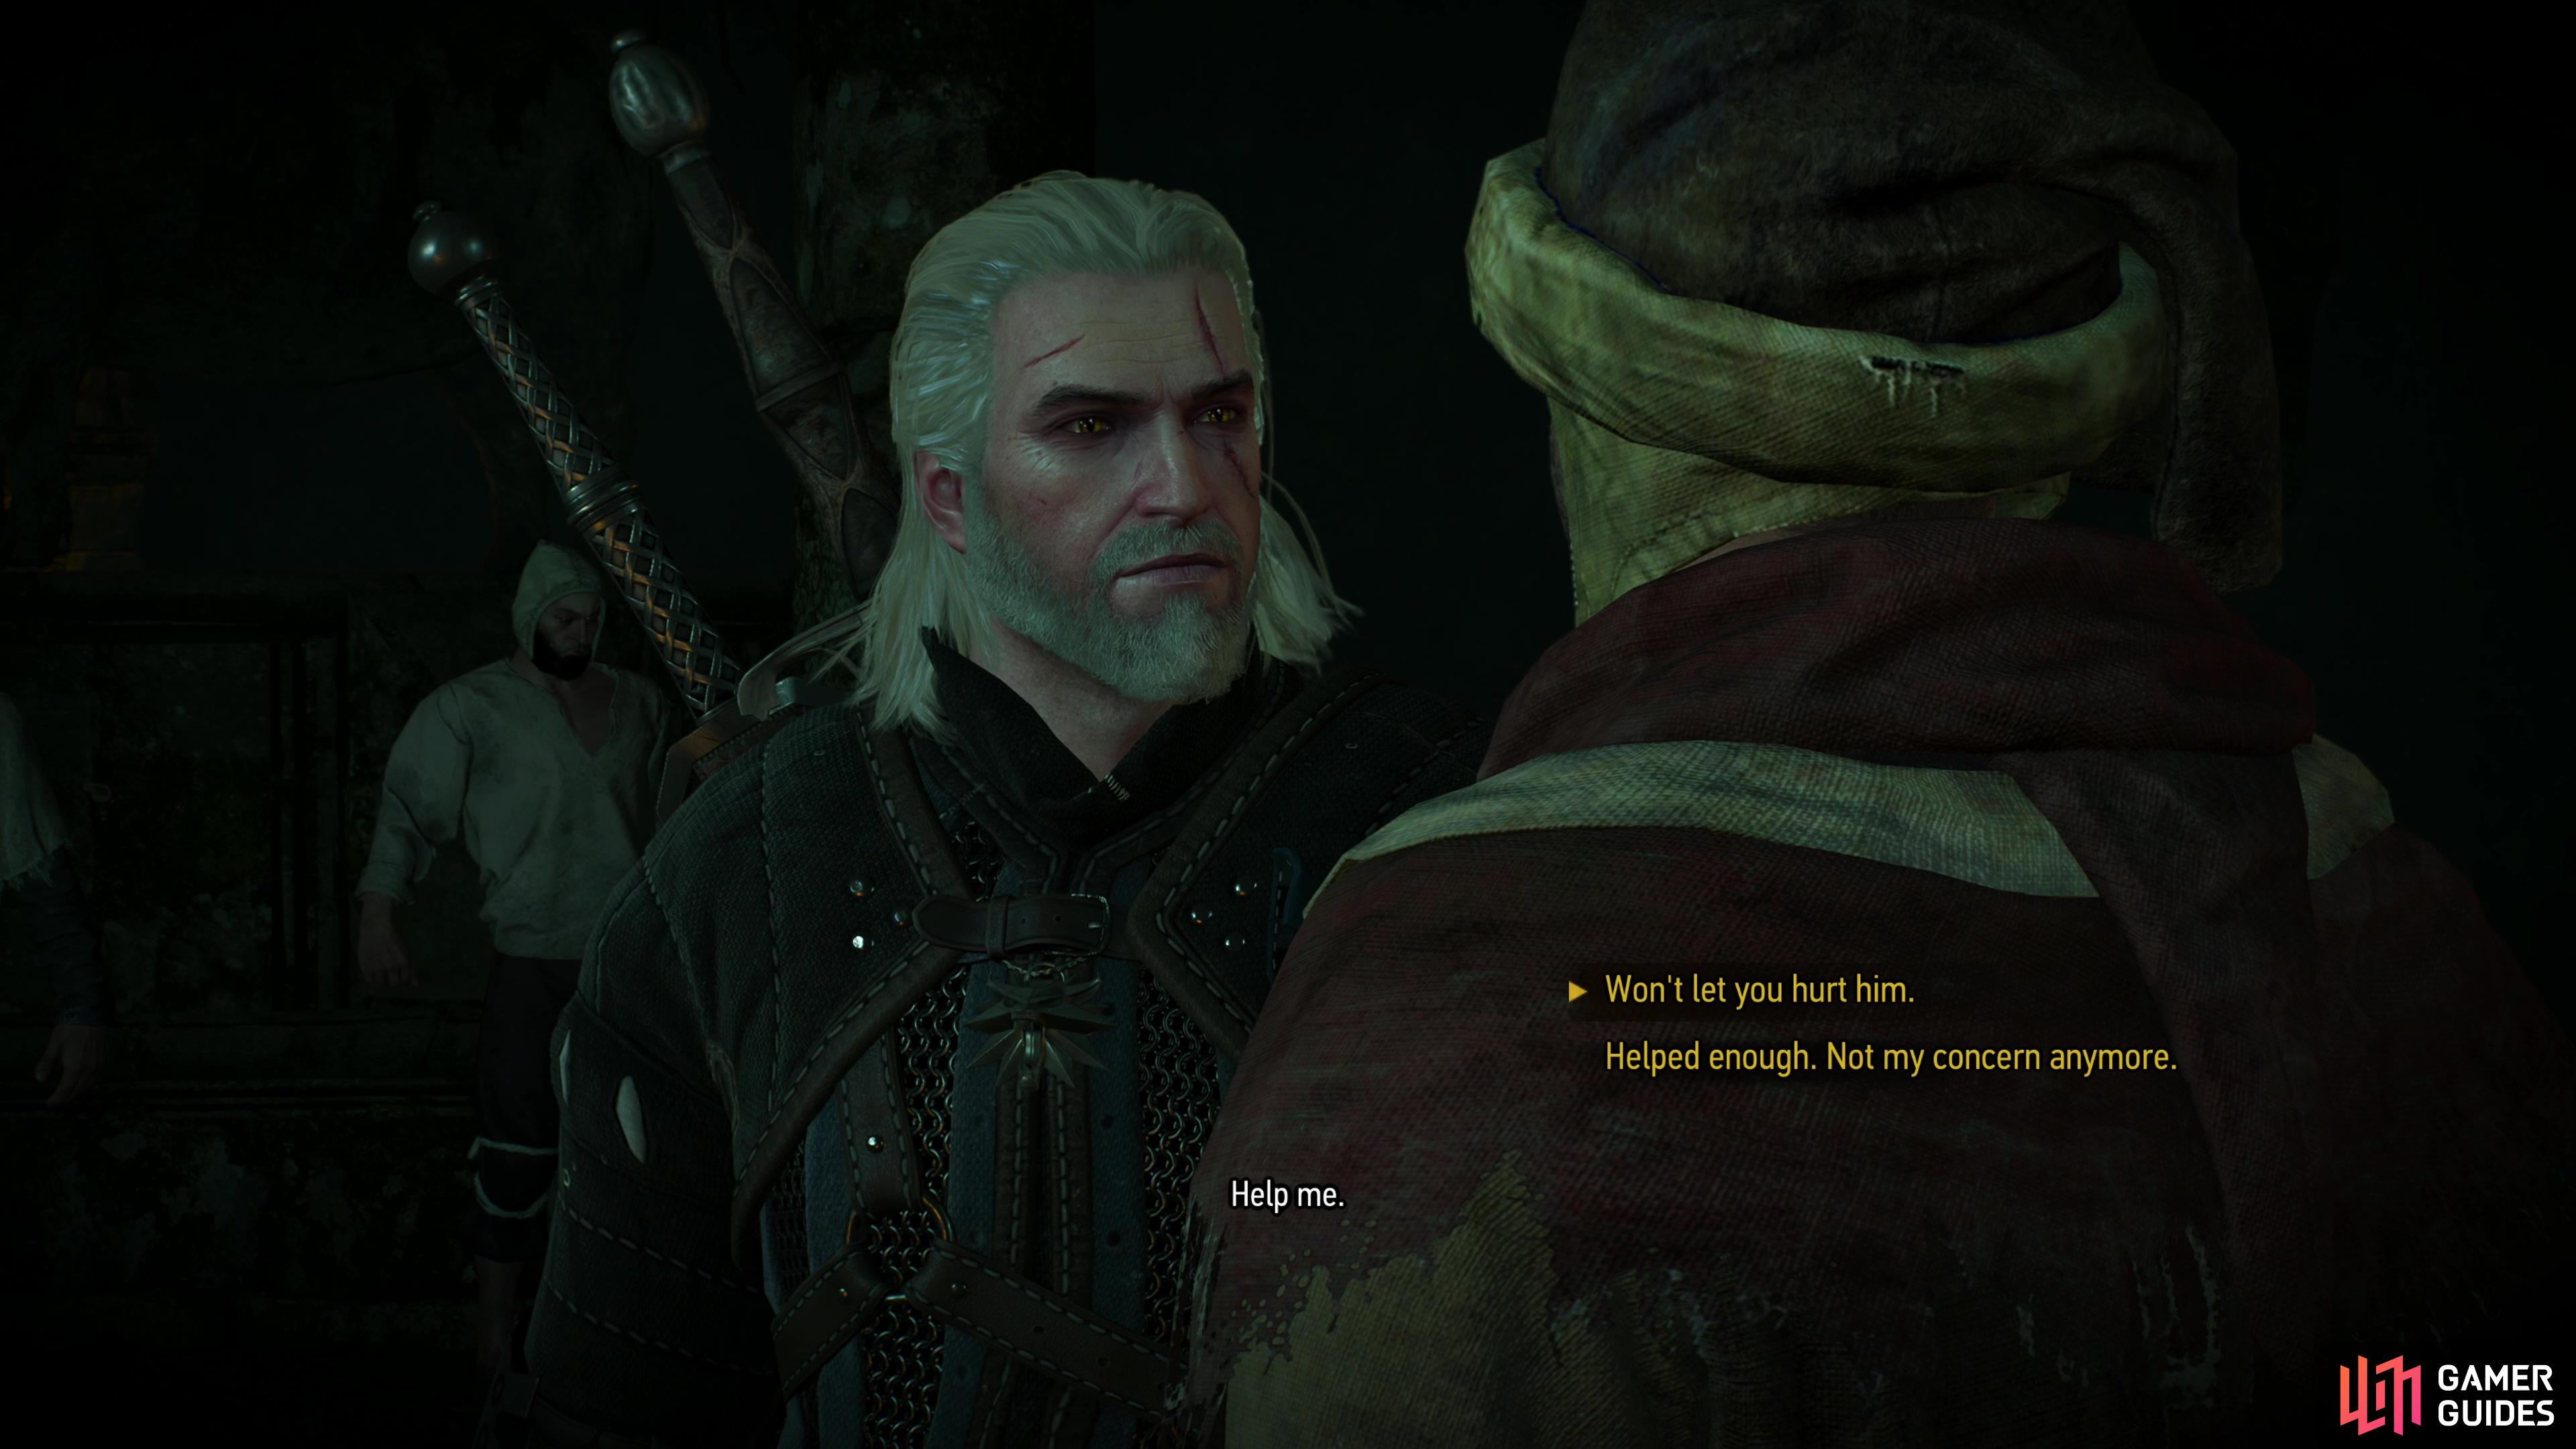
Defend the pig-villagers from some Nekkers, (left), then, once the curse has lifted, either abandon Yontek to his ungrateful fellows, or defend Yontek. (right)
After some scenes, the villagers will be restored, only for it to become obvious that not all of their piggest behavior was caused by the curse - some of it was innate. They’ll immediately begin to blame Yontek for their problems and threaten to lynch him. If you pick the dialog option ”Won’t let you hurt him.” they’ll wisely, but begrudgingly back down, while if you pick ”Helped enough. Not my concern anymore.” they’ll set about lynching their savior. Either way, the quest will end and you’ll get 50 EXP, and if you let the villagers kill Yontek they’ll also give you a reward of 100 ![]() Crowns, something that apparently slips their mind if you force them to back down.
Crowns, something that apparently slips their mind if you force them to back down.
"Down some stairs to the south-west you’ll find a rather porcine statue standing proudly over an altar - a recently looted altar, by the loots of things"
You can loot two chests in the each pool on both sides of the altar for a few diagrams and rune stones.