
Monsters don’t just prowl to encourage peasants to fill a Witcher’s purse - oftentimes a Witcher isn’t wanted or convenient, prompting irritated townsfolk to try and resolve the problem themselves. Not armed with a Witcher’s knowledge, concoctions, silver sword and most of all, superhuman reflexes, these do-it-yourself approaches to dealing with monsters often end in tragedy. Only after such costly mistakes are many contracts posted, and enough grief-laden gold collected to pay for a professional monster slayer. This page will provide a walkthrough for the contract ![]() Contract: Shrieker in The Witcher 3.
Contract: Shrieker in The Witcher 3.
Quest Objectives
Starting Contract: Shrieker
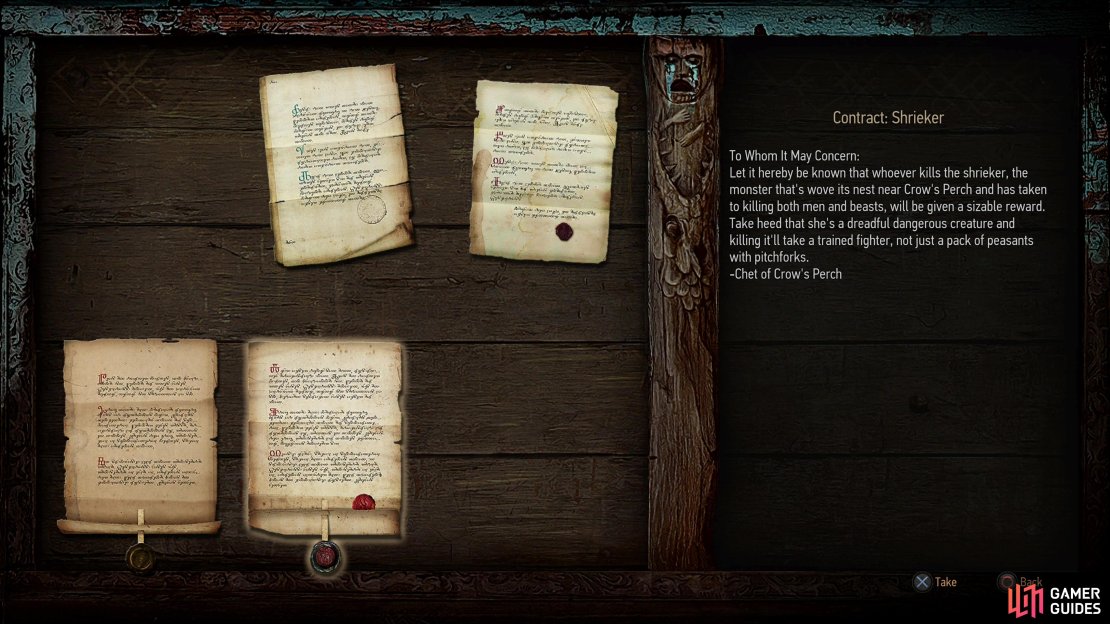
Nothing fancy here, just grab the aptly named Contract: ![]() Shrieker from the notice board in
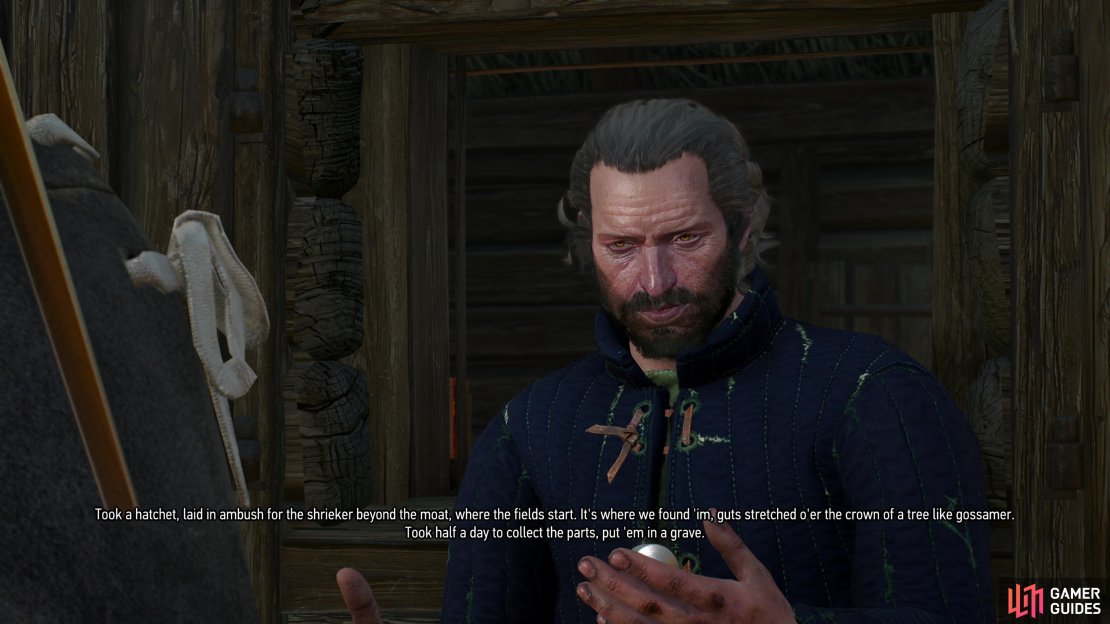
Shrieker from the notice board in ![]() Crow’s Perch and give it a read to start this quest. Once done, head to the southern edge of town to find a man named Chet, who posted the contract. He’ll give you the gruesome details that led to this notice being posted, but besides claiming that the monster “prowls about” and left a man’s guts strewn across the top of a tree, little detail about what the Shrieker actually is will be provided. Haggle for more coin, but bear in mind that if you’re a kind-hearted Witcher, this may be a redundant step, for reasons you’ll see at the end of the contract.
Crow’s Perch and give it a read to start this quest. Once done, head to the southern edge of town to find a man named Chet, who posted the contract. He’ll give you the gruesome details that led to this notice being posted, but besides claiming that the monster “prowls about” and left a man’s guts strewn across the top of a tree, little detail about what the Shrieker actually is will be provided. Haggle for more coin, but bear in mind that if you’re a kind-hearted Witcher, this may be a redundant step, for reasons you’ll see at the end of the contract.
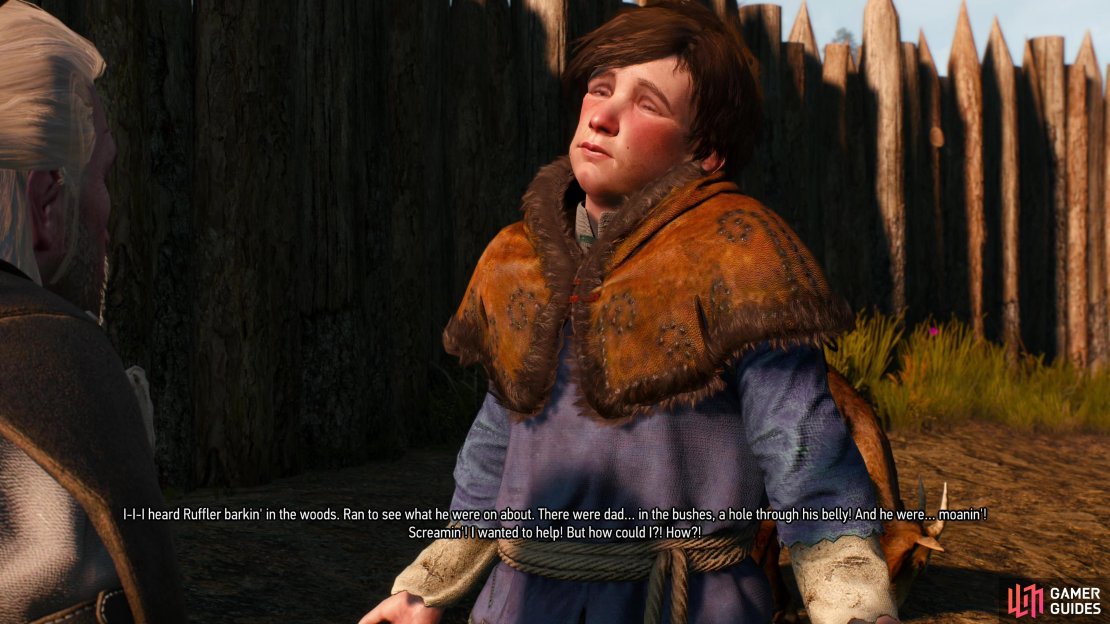
Ask if anybody else knows about the Shrieker and Chet will point you towards Symko, the son of the man who died trying to kill the Shrieker. Head behind the house, talk to Symko and ask about Shrieker and instead of getting any useful information you’ll just reopen fresh wounds… but you can score some cheap EXP by using ![]() Axii to calm Symko down. Don’t worry, you can make it up to the kid later, if you’re feeling generous.
Axii to calm Symko down. Don’t worry, you can make it up to the kid later, if you’re feeling generous.

(1 of 3) Grab the notice “Contract; Shrieker” from the notice board in White Orchard,
Find the Shrieker’s Lair
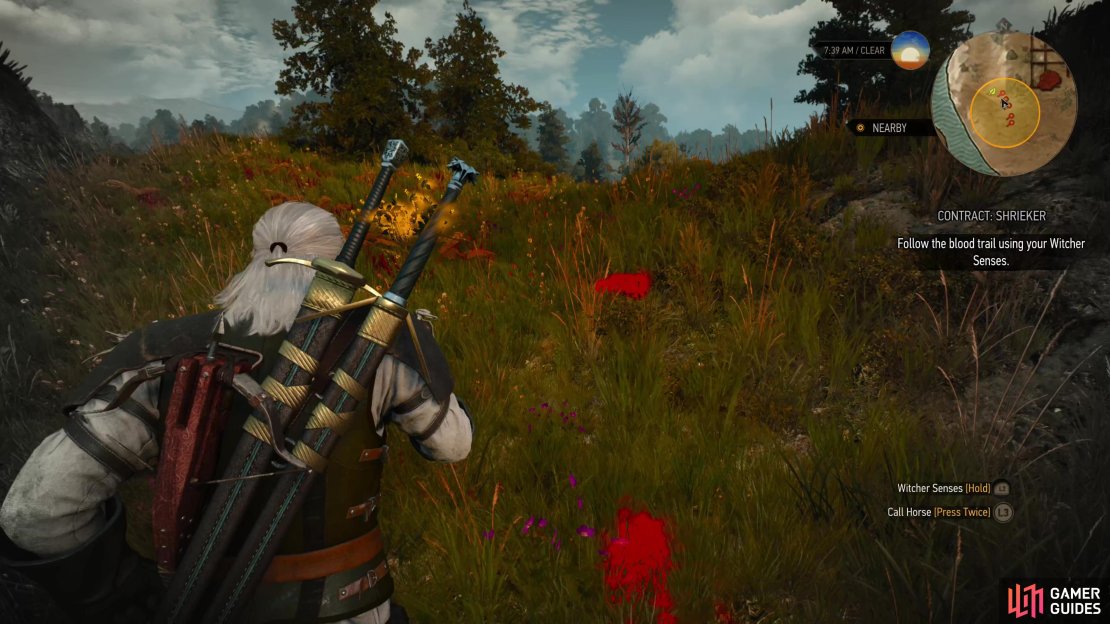
Exit Crow’s Perch and make your way to a search area east of town, and when you arrive search west-of-center of the search area to find a disemboweled dog. Yes, another one. Examine the pooch to find out that this very good boy died fighting, then search northeast of the poor, valiant doggy to find some tracks, and near them, a blood trail. Follow the blood trail to, then along, the moat surrounding Crow’s Perch, heading generally north until you’re near (west of) some ruins. Here you’ll find more tracks, and these are distinct enough to allow Geralt to identify this Shrieker - a ![]() Cockatrice.
Cockatrice.
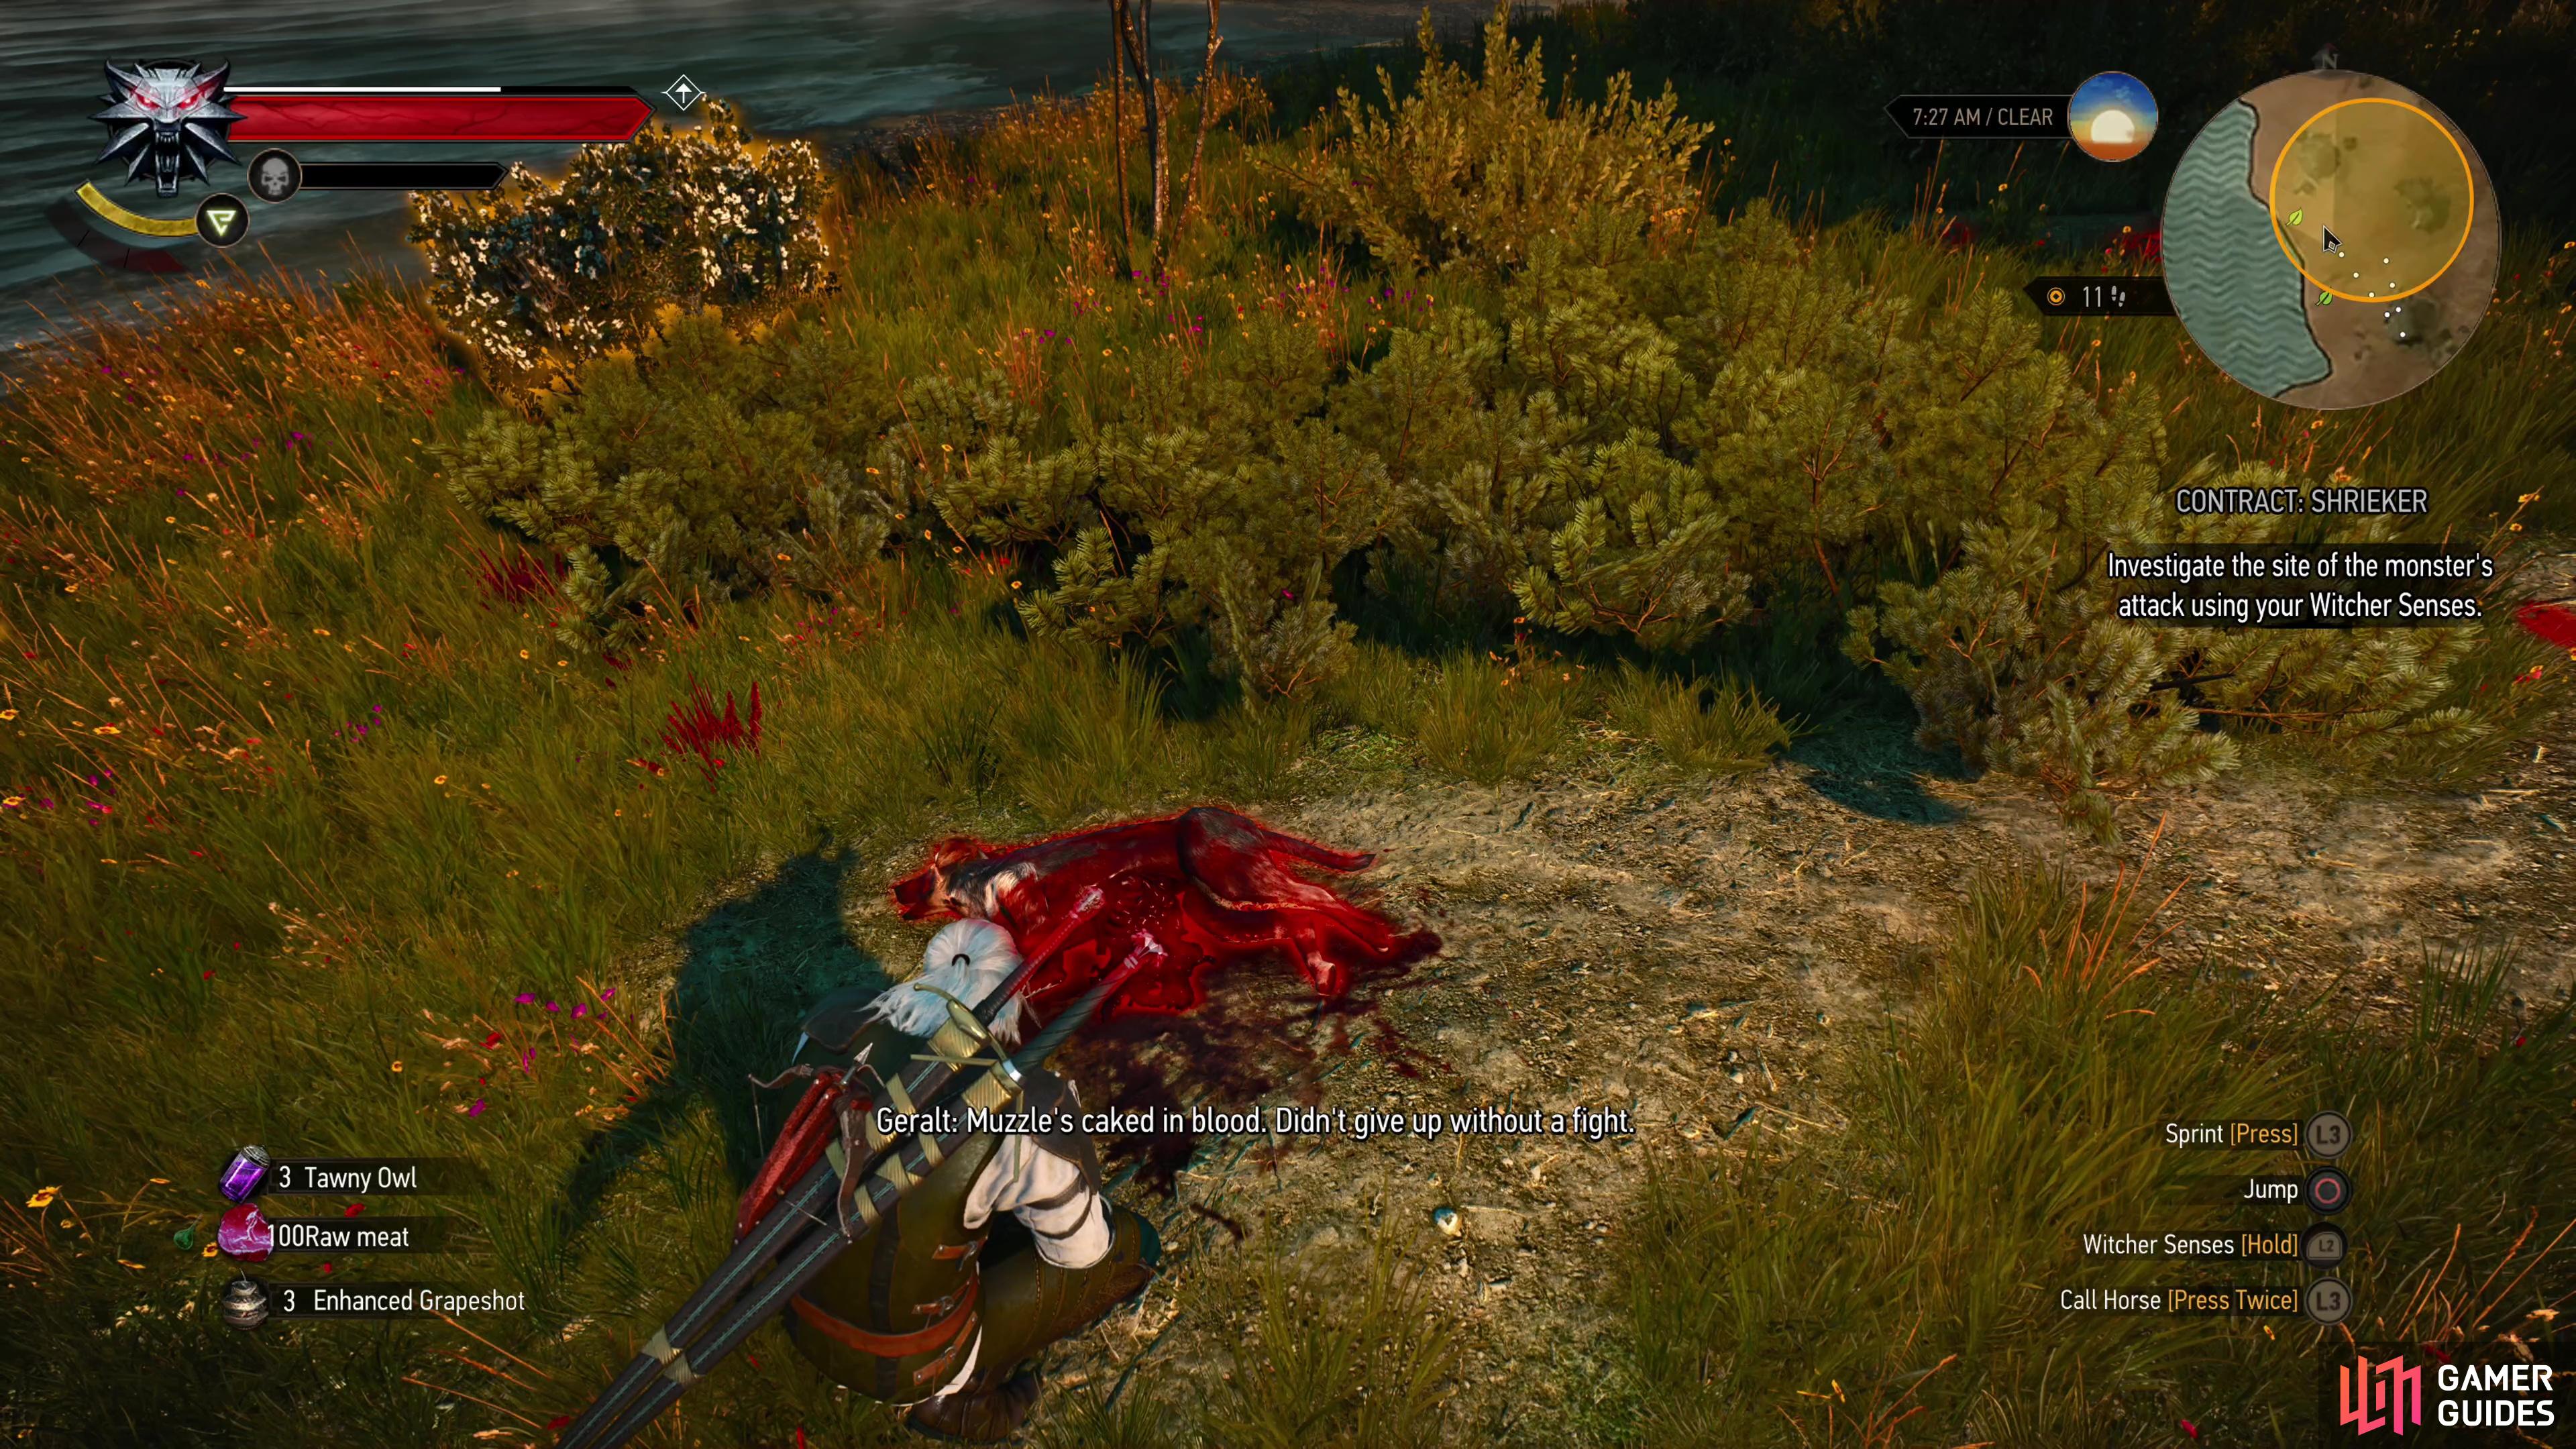
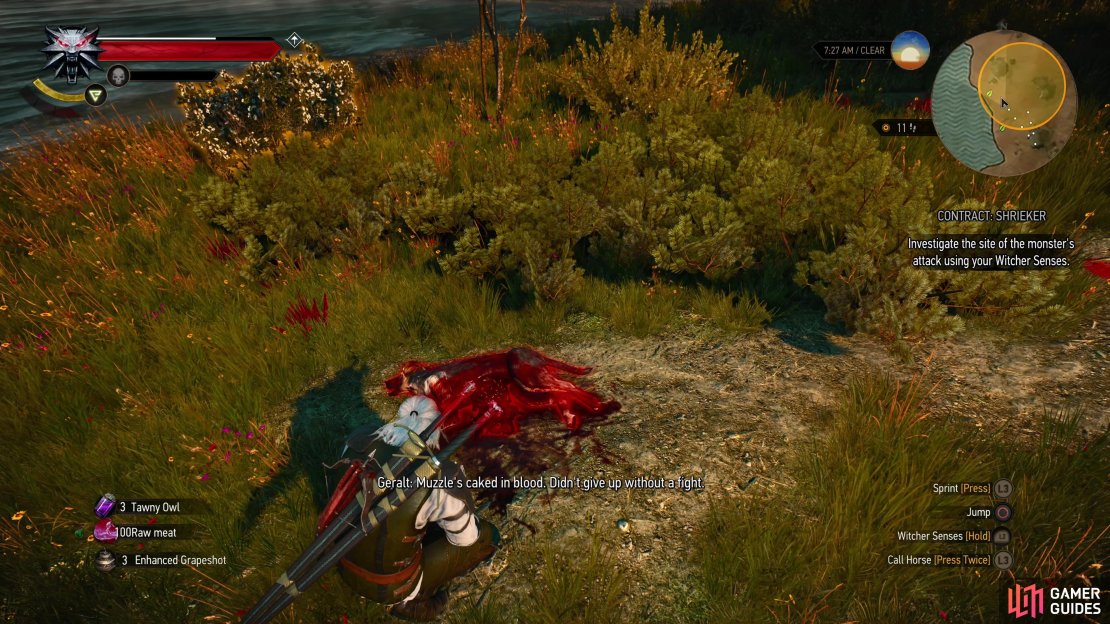
(1 of 3) Examine the corpse of a dog and some nearby tracks,
Search the Ruins for the Diagram: Enhanced Griffin Trousers
The tracks ultimately lead into a cave, where the creature nests, but before you go, note that you can discover the Burned Ruins signpost by exploring just southeast of the aforementioned nearby ruins. More importantly, in the ruins themselves you can find a chest containing the ![]() Diagram Enhanced
Diagram Enhanced ![]() Griffin Trousers. Search the interior of the ruins, east of some fully enclosed, impassable walls - you’ll find a pile of wooden debris, in the midst of which is the chest containing this diagram.
Griffin Trousers. Search the interior of the ruins, east of some fully enclosed, impassable walls - you’ll find a pile of wooden debris, in the midst of which is the chest containing this diagram.
Flush the Shrieker Out of Its Lair
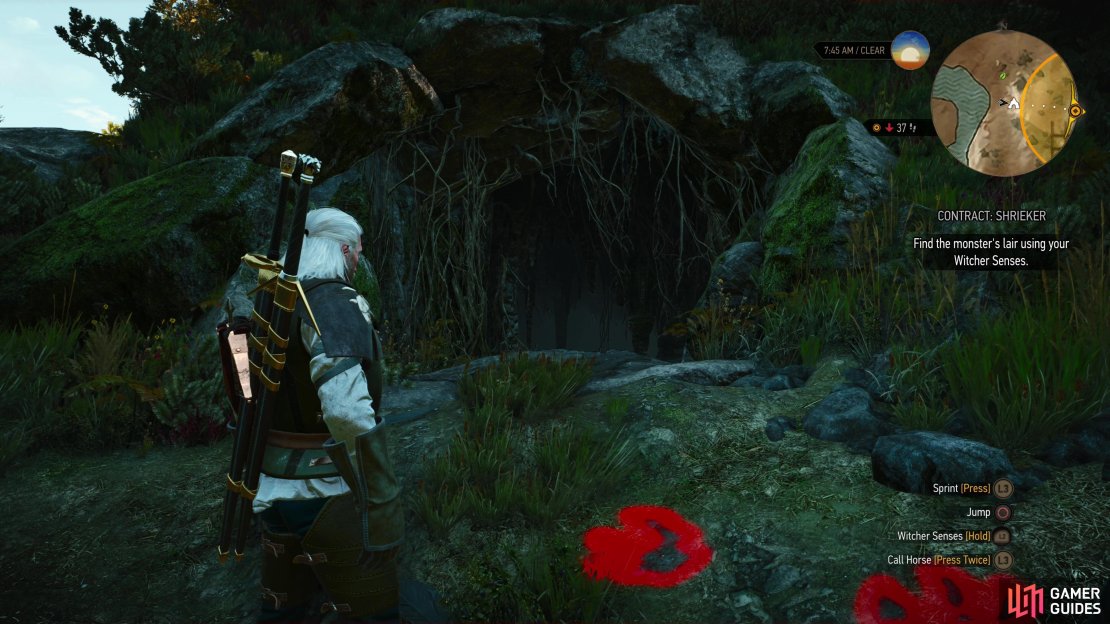
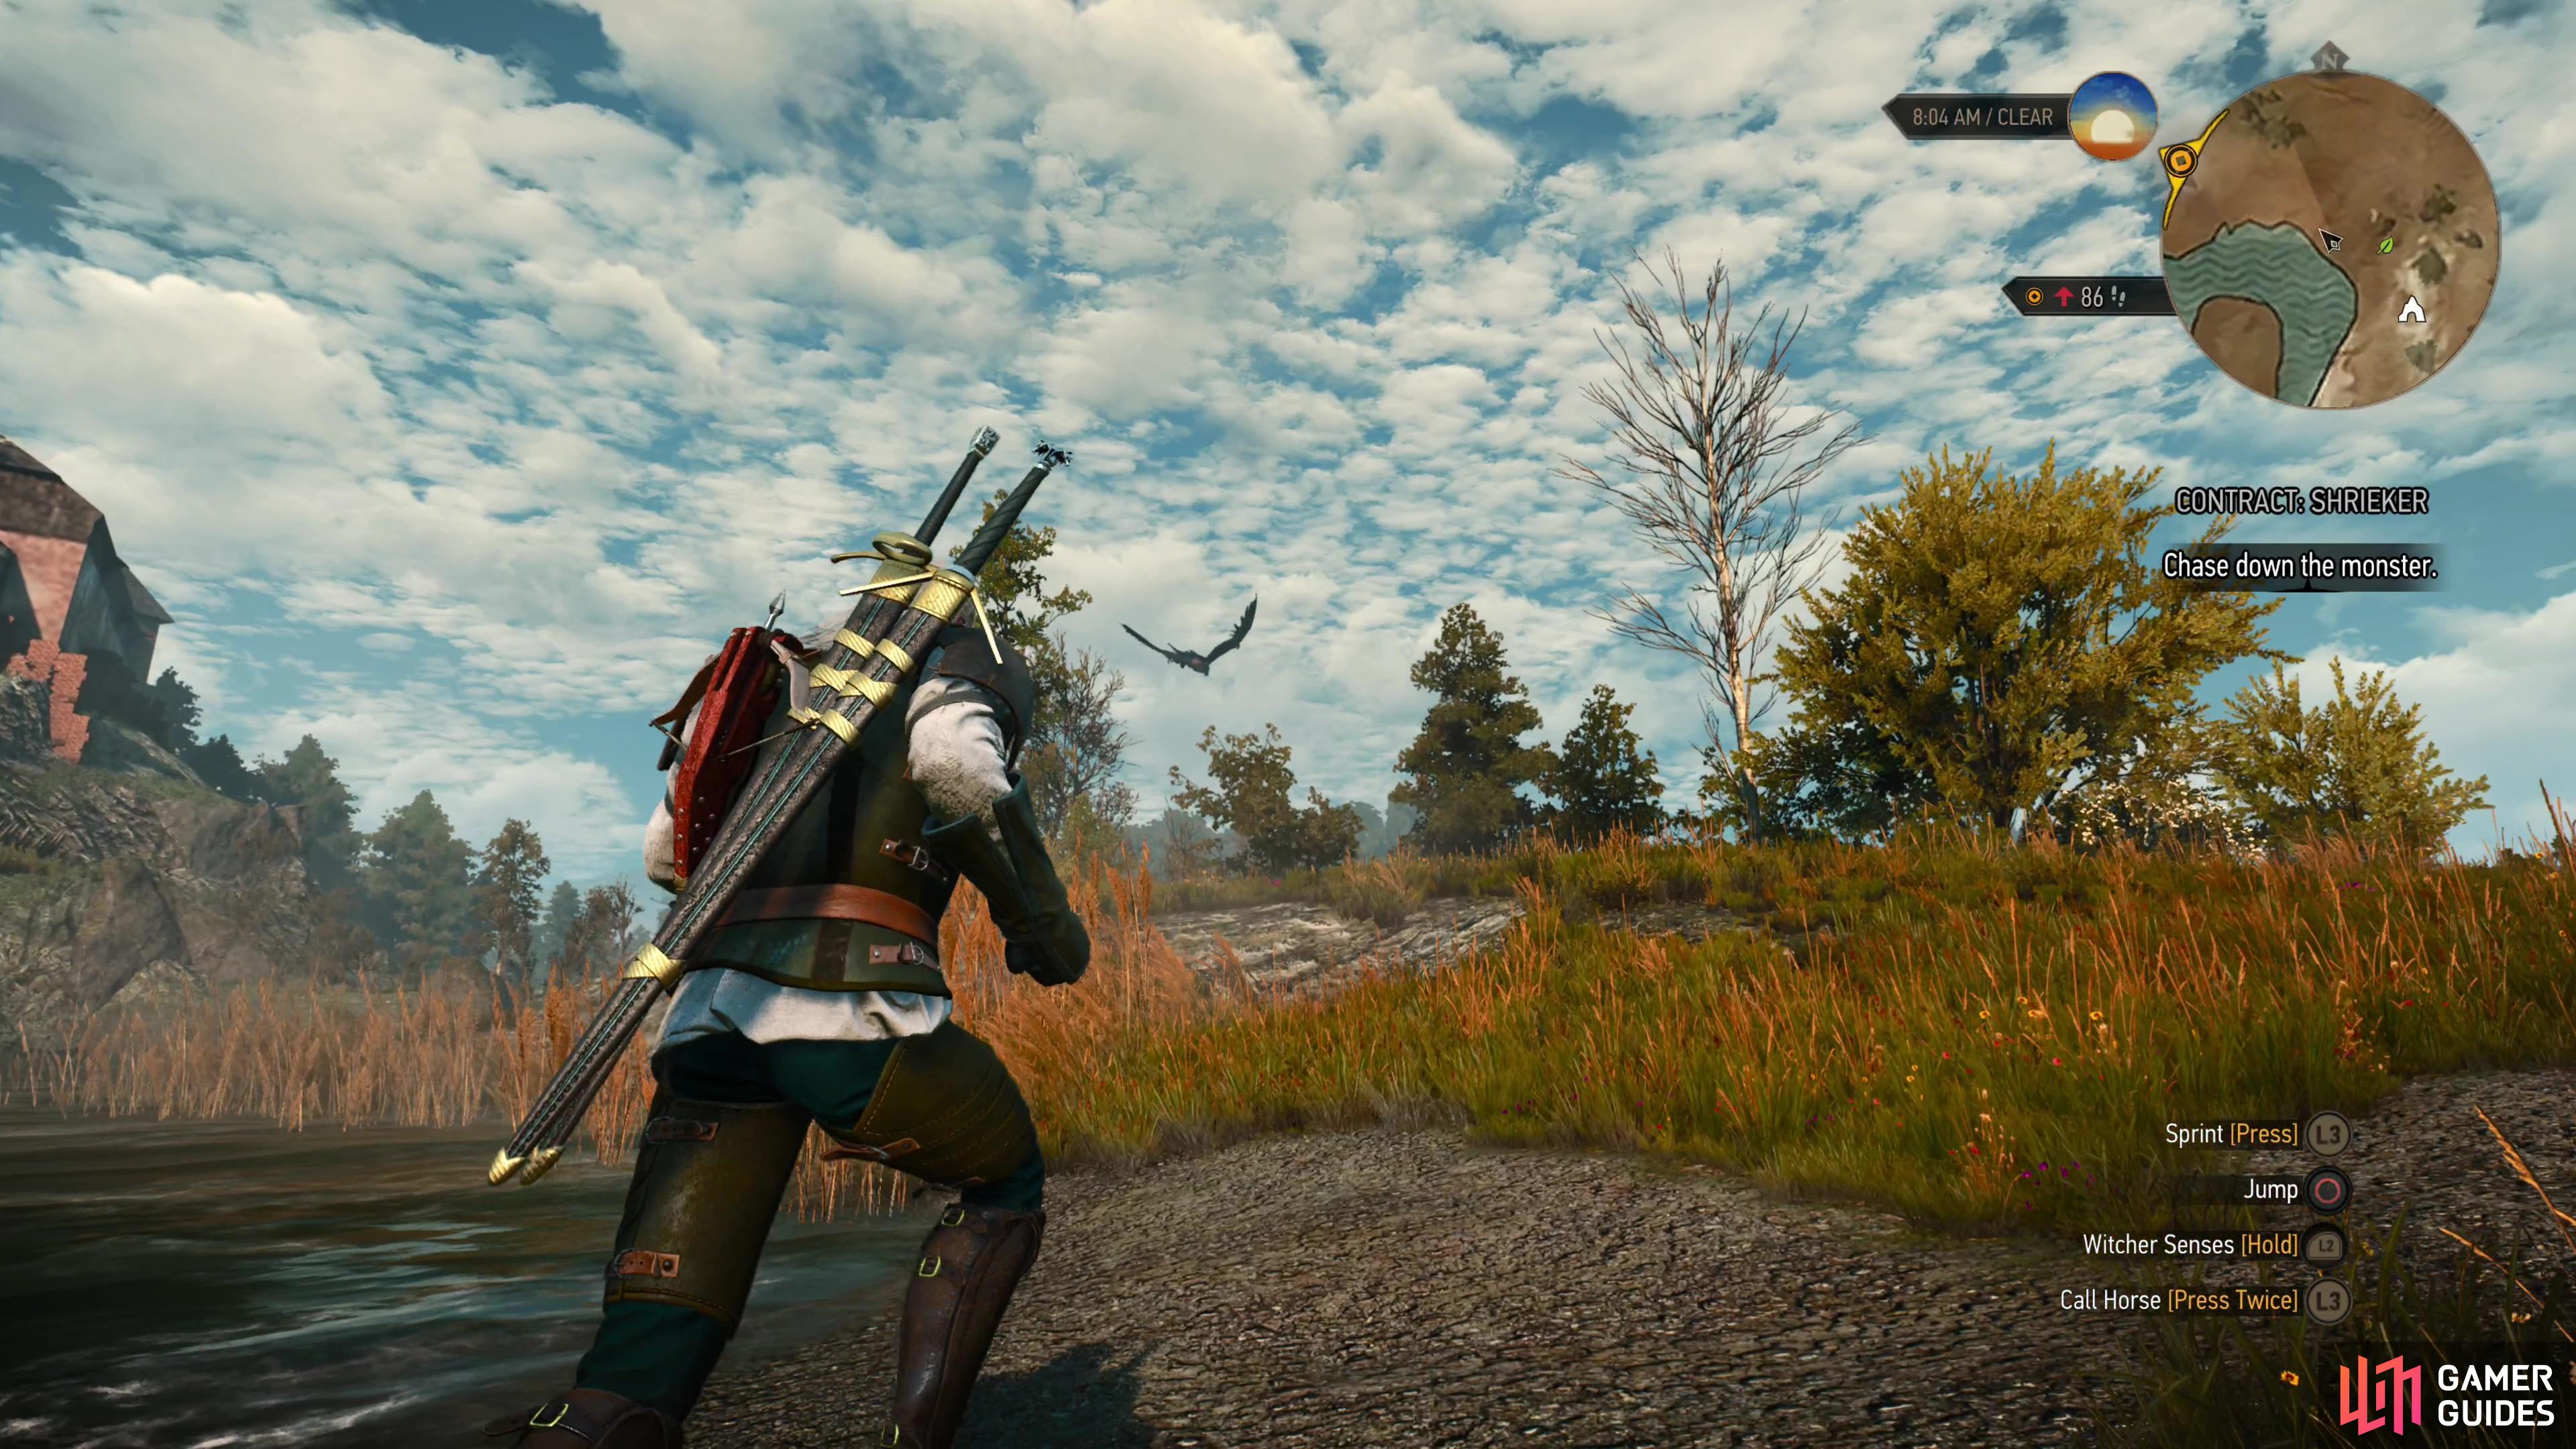
Grab the diagram if you wish, then follow the tracks into the Shrieker’s cave. Inside you’ll find a nest littered with bones, which you can loot for the few things the monster didn’t consume - coins, mostly. It’s quite dark in here, but you won’t be doing anything terribly tricky in here, so you shouldn’t need to consume a ![]() Cat potion, just use your Witcher senses to highlight objects of interest, like the aforementioned skeletons. Your Witcher senses will also mark the location of the Shrieker, which is roosting on a high ledge. The beast was injured - presumably by the dog you found earlier - and it’s content to convalesce on its ledge, safely out of reach. Equip a bomb and throw it up there to spook the Shrieker away, what bomb you use doesn’t really matter, and once the Shrieker leaves, exit the cave and look to the skies to find your foe flying away to the northwest. Follow it until the Shrieker lands, at which point you’ll finally be able to fight the beast.
Cat potion, just use your Witcher senses to highlight objects of interest, like the aforementioned skeletons. Your Witcher senses will also mark the location of the Shrieker, which is roosting on a high ledge. The beast was injured - presumably by the dog you found earlier - and it’s content to convalesce on its ledge, safely out of reach. Equip a bomb and throw it up there to spook the Shrieker away, what bomb you use doesn’t really matter, and once the Shrieker leaves, exit the cave and look to the skies to find your foe flying away to the northwest. Follow it until the Shrieker lands, at which point you’ll finally be able to fight the beast.

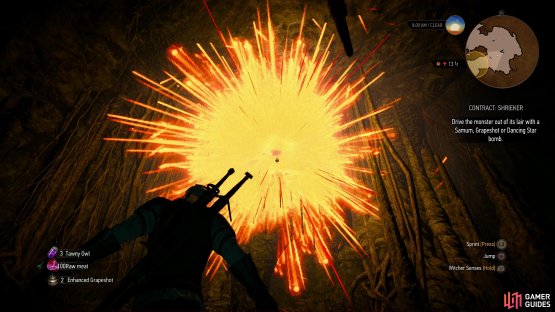

(1 of 2) Toss a bomb at the wounded creature to spook it from its nest,
Toss a bomb at the wounded creature to spook it from its nest, (left), then chase it northwest to force a confrontation. (right)
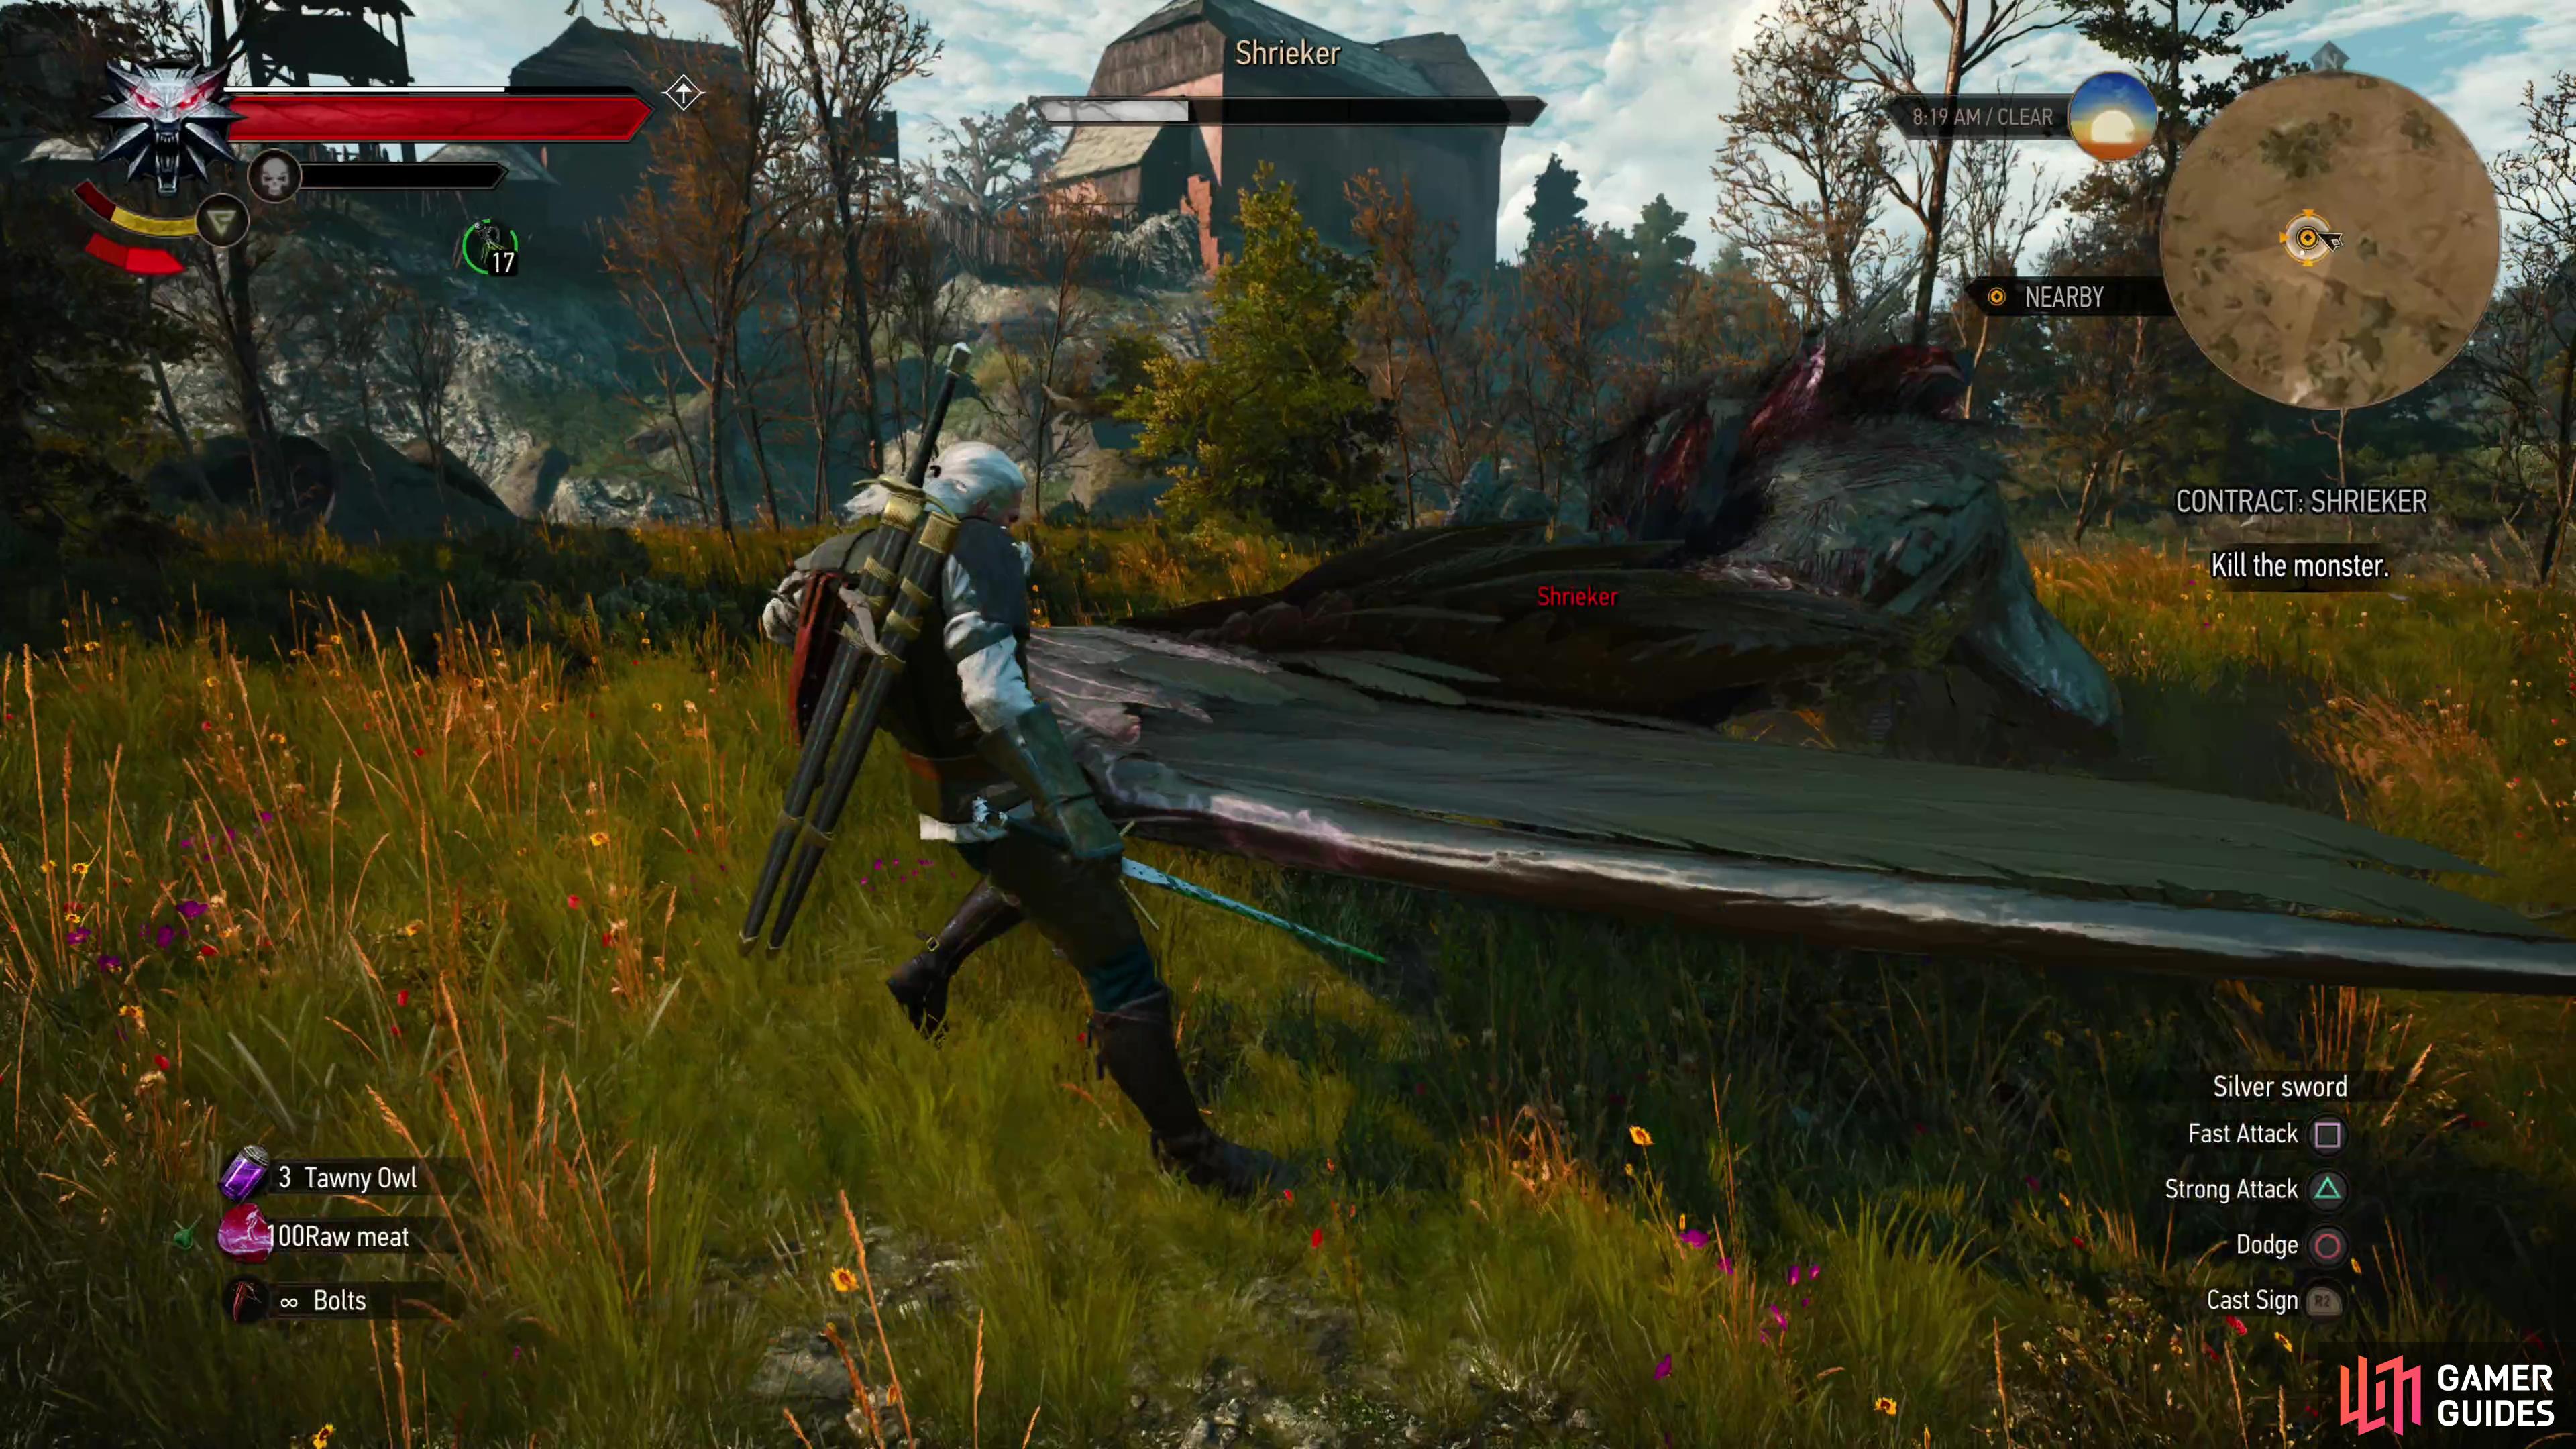
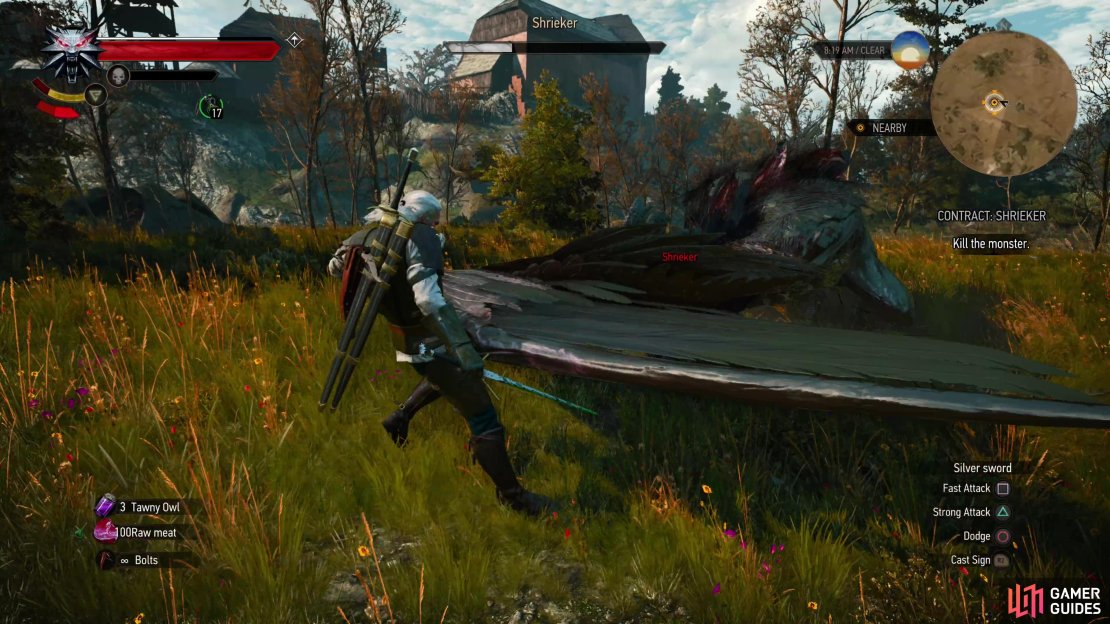
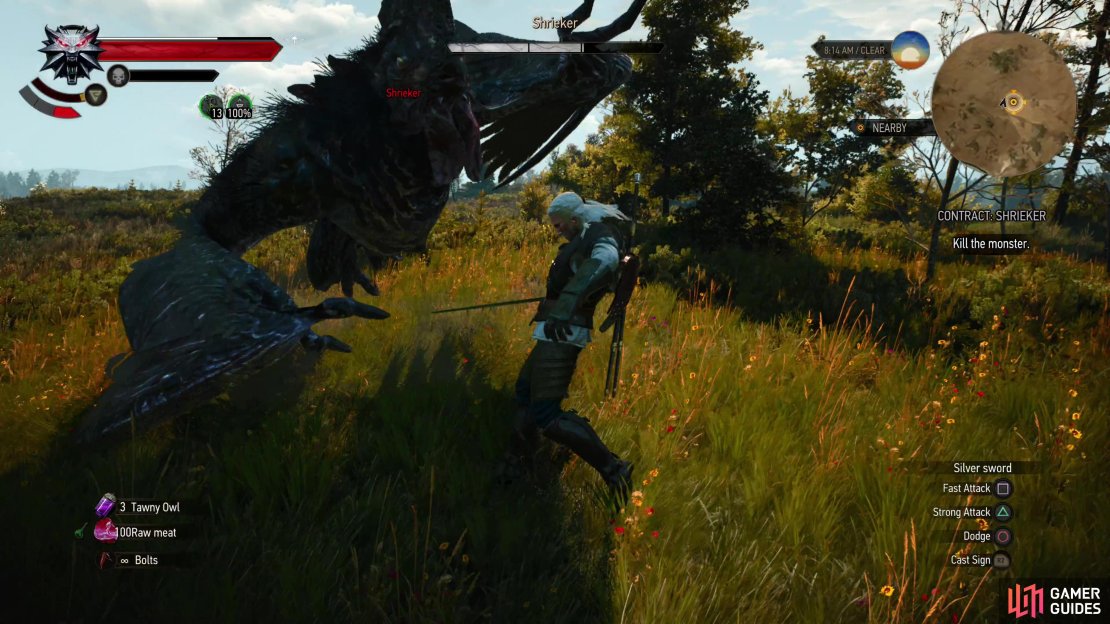
Defeat the Shrieker
The Shrieker is a Cockatrice, and ![]() Cockatrices fight very similarly to
Cockatrices fight very similarly to ![]() Griffins and
Griffins and ![]() Basilisks, save they’re less prone to flight and do not possess a poisonous spit attack (or any other form of poison, for that matter). Instead, Cockatrices prefer to fight it out on the ground, using their clawed wings for both offense and defense. They’re capable of performing various swipes with their wings, some of which can be quite quick with very little warning or windup, making it a good idea to keep
Basilisks, save they’re less prone to flight and do not possess a poisonous spit attack (or any other form of poison, for that matter). Instead, Cockatrices prefer to fight it out on the ground, using their clawed wings for both offense and defense. They’re capable of performing various swipes with their wings, some of which can be quite quick with very little warning or windup, making it a good idea to keep ![]() Quen up and to avoid staying near the Cockatrice as much as possible. Between Quen and the use of the strong attack/dodge combo you should be pretty safe from most of the creature’s attacks, but
Quen up and to avoid staying near the Cockatrice as much as possible. Between Quen and the use of the strong attack/dodge combo you should be pretty safe from most of the creature’s attacks, but ![]() Tawny Owl will help ensure your Stamina regeneration is up to the task.
Tawny Owl will help ensure your Stamina regeneration is up to the task.
Aside from its standard swipes there are some attacks you need to watch out for, including a leaping attack (the Shrieker will rear back before leaping a great distance at you) a flying slam (the Shrieker doesn’t usually take flight often or for long, but it can fly and will try to smash you with its body) and its wing block. The latter isn’t an attack in and of itself, but it can shield its body with one of its wings, blocking incoming attacks and immediately countering with a wing sweep afterwards - another good reason to dodge immediately after attacking, as if the Shrieker starts to block during your attack, you might just avoid the counterattack.
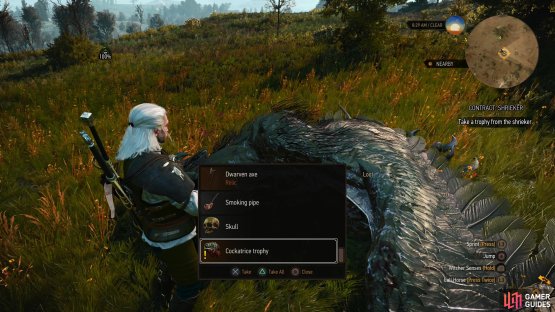
Other than keeping Quen up and not getting greedy with your combos, there’s not a lot to the Shrieker fight. ![]() Aard and crossbow bolts can know the Cockatrice out of the sky if it does take flight, but again, its aerial escapades are likely to be infrequent and brief. Kill the Shrieker and take the Cockatrice Trophy from its corpse, along with Dwarven Axe - presumably the “hatchet” Symko’s father used in his fight with the beast. Its level (and hence, its stats) are random.
Aard and crossbow bolts can know the Cockatrice out of the sky if it does take flight, but again, its aerial escapades are likely to be infrequent and brief. Kill the Shrieker and take the Cockatrice Trophy from its corpse, along with Dwarven Axe - presumably the “hatchet” Symko’s father used in his fight with the beast. Its level (and hence, its stats) are random.
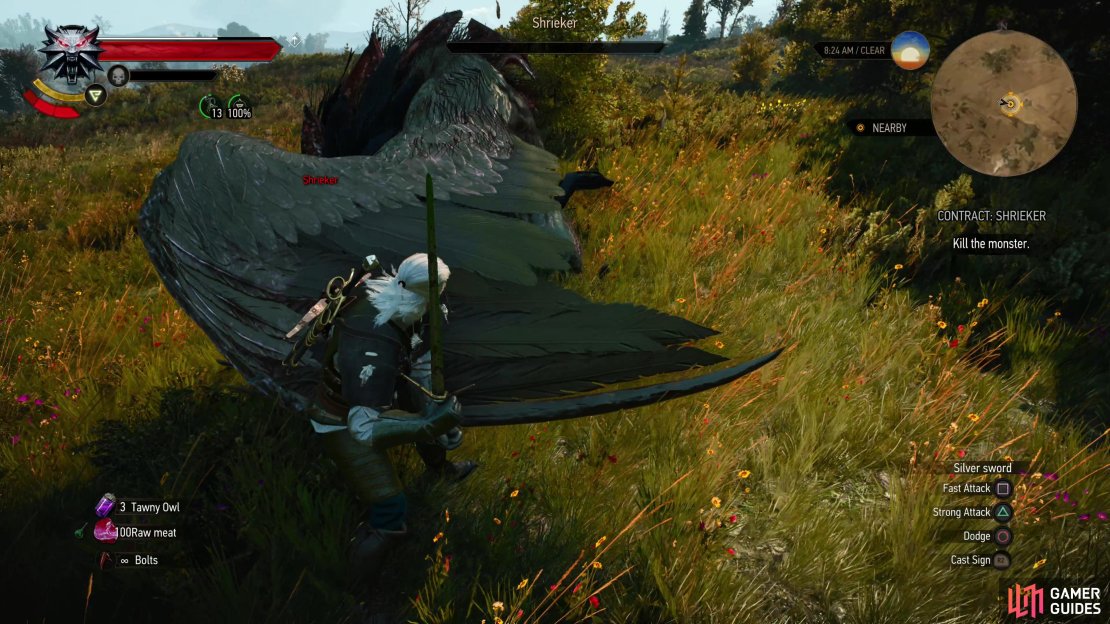
(1 of 3) While the Shrieker - a Cockatrice - fights much like a Griffin or Basilisk, this draconid is decidedly fond of ground melee, using its clawed wings to attack.
Choice: Accept the Reward or Decline
Return to Chet in Crow’s Perch to claim your reward and he’ll pay up, as promised. If you’re a bleeding heart, however, you can pick the option ”Keep the coin - for Symko.” to reward Chet for being a standup guy - both for organizing a contract to kill a monster menacing the town and for taking Symko in after his father was slain. You’ll get marginally more EXP for doing this, but forfeit your entire monetary reward, whatever you haggled it up to. This is in no way an equal trade, so the only real reason to do this is if you want to roleplay being a good guy.


(1 of 2) Kill the Shrieker and cut off its head,
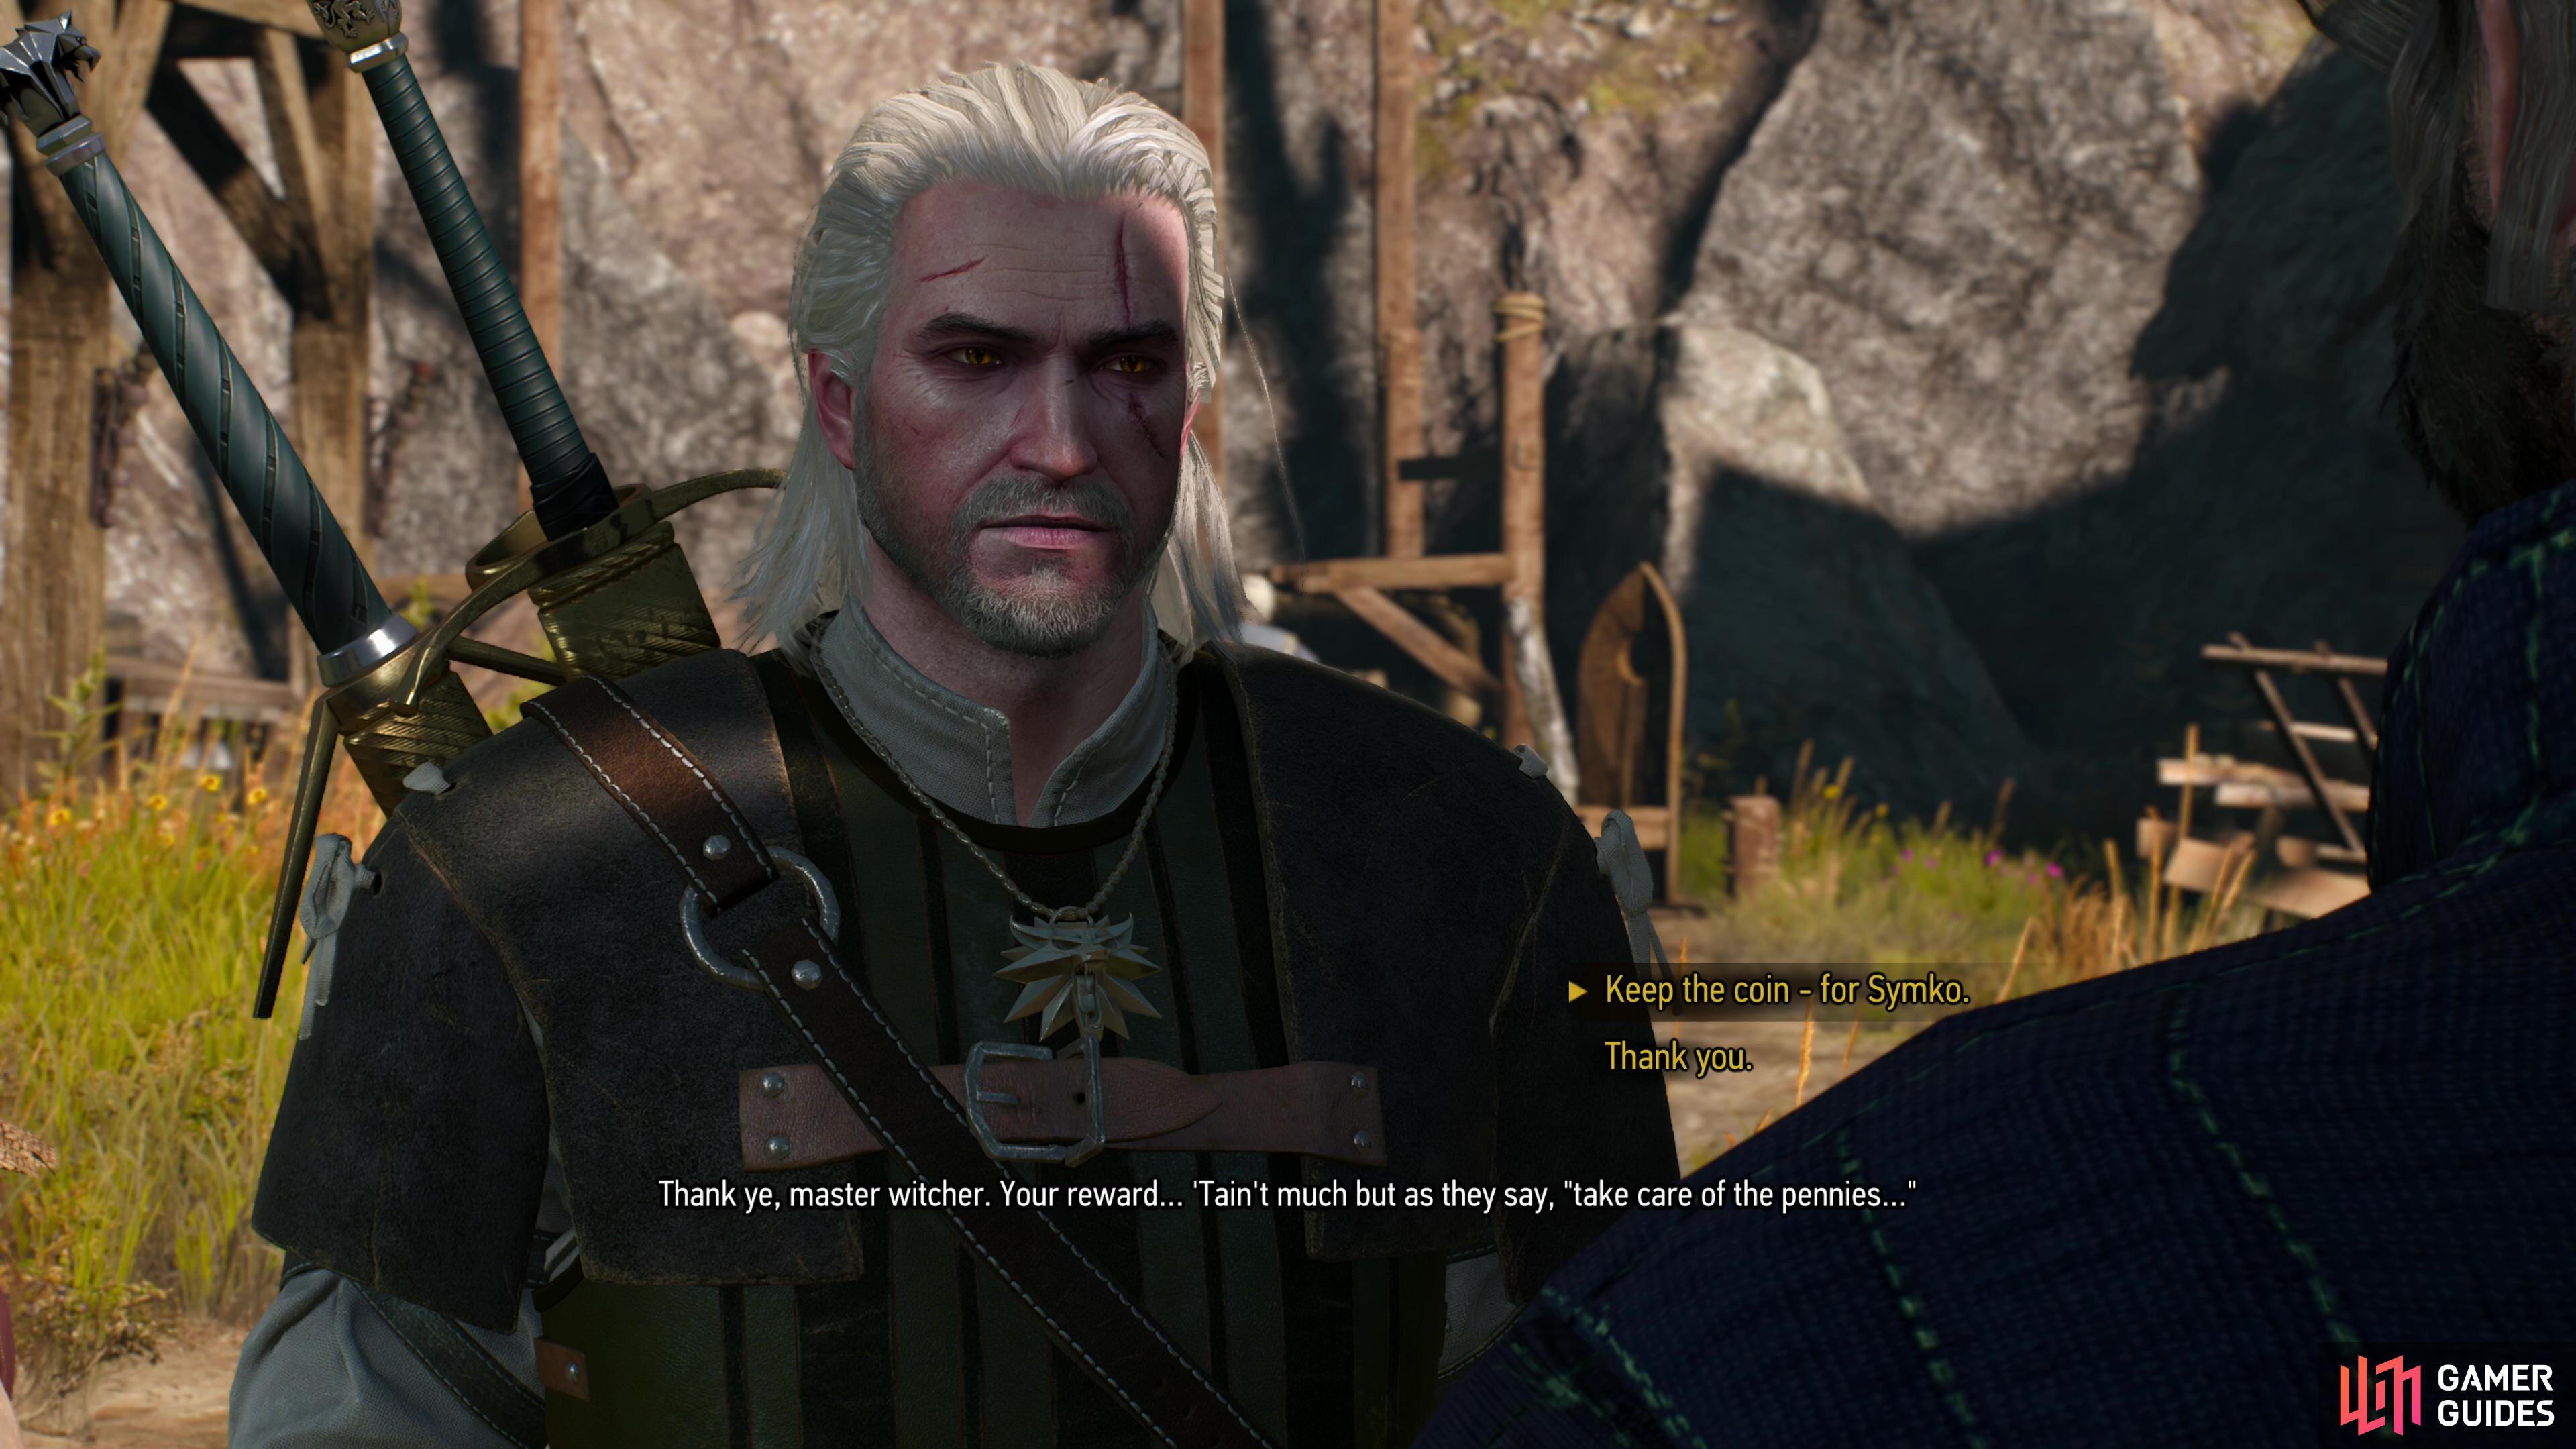
Kill the Shrieker and cut off its head, (left), then return to Chet to get your reward… or decline it for a pittance of EXP, if you’re feeling generous. (right)
"Play Gwent with both the Blacksmith to win a random card"
Both? He is alone here.
"The Blacksmith also sells “Adalbert Kermith’s Fourth Map” and “Slightly Torn Notes by Hieronymus on the Witcher Elgar”"
In my case just "Adalbert Kermith’s Fourth Map". Maybe second item is random?
upd: second note it's from one of the free DLC. So check it, if you cannot by it.